sat nav SKODA SUPERB 2007 1.G / (B5/3U) DX Navigation System Manual
[x] Cancel search | Manufacturer: SKODA, Model Year: 2007, Model line: SUPERB, Model: SKODA SUPERB 2007 1.G / (B5/3U)Pages: 66, PDF Size: 3.45 MB
Page 9 of 66
General comments
8
Navigation
The navigation system is your “ intelligent front passenger”. You can
reach the desired destination quickly, easily and reliably without time-
consuming map searching from the starting point of your trip. In unknown
locations it saves you time by guiding you to the next filling station. You
can make an intermittent stop on the road, in order e.g. to go and eat in a
restaurant or to visit a sight. The system uses the data stored on the navi-
gation CD for the calculation of the trip destination. During the guidance
you will receive via different screen displays information about vehicle
position; notes regarding turns (direction and distance until the turn) and
the arrival time at the trip destination.
Announcement of the ŠkodaAuto radio navigation system
Under certain requirements the system must be announced, as it is
equipped with a radio unit.
How does the radio navigation system function?
The current vehicle position is determined using satellites. The distance
travelled is measured by the ABS. The direction of travel is determined
using a gyroscope. The navigation system is provided with this informa-
tion and compared with the stored data.
Outside the densely populated areas it is possible that this type of locating
does not permit exact position definition. In this case the locating is
performed via satellites. This type of locating is referred to as Global Posi-
tioning System (GPS ) - global satellite locating system.
Important information
Warranty
The same warranty terms apply for the equipment as for new vehicles.
Note
A damage in the sense of the warranty must not be the result from
improper handling of the system or from unprofessional repair attempts.
In addition, no external damage must be present.
Replacement possibility
After the expiration of the warranty, a unit in need of repair will be replaced
inexpensively with a reconditioned, original unit with spare part warranty.
However it is required that there is no housing damage and no unauthor-
ised repair attempts have been made.
Note
In the case of a warranty or a replacement service, the Škoda Service
Partner must be presented with the unit card with code number and serial
number!
Audio/Video units
Other audio units can be connected with an adapter cable to your naviga-
tion system, which then can be activated in the menu “ Select source” with
20.book Page 8 Tuesday, December 6, 2005 2:26 PM
Page 13 of 66
General comments
12
tion. You can select via the map type if e.g. the current vehicle position
should be shown together with the destination. The move mode makes it
possible to view the neighbouring map details. Other symbols can be
selected via the map content. The segment fields change the map scale.
You can change from the map display to the symbol display with menu
field “Symbol ”.
Symbol display
If the guidance is active, you are being offered the option of a symbol
display with turn information or map display.
The show depends on which display was active during the last guidance.
The symbol display shows the number of GPS satellite receptions and the
status of the tailback function, the estimated arrival time or the length of
the trip and the distance to the destination, the display of the direction of
travel, the distance markings to the intersection/junction with the distance
information and the name of the currently driven road. Before a turn proce-
dure, the display of the direction of travel points in the direction you are
turning into. In addition the name of the street you are turning into is
indicated.
You can switch back and forth at any time between both types of
display . The map is called up from the symbol display by pressing the
menu knob . You can then can change back in the symbol display by
pressing the button .
Switching the unit on and off
– The system is switched on or off by pressing the rotary/push knob . – If the key is pulled out of the ignition lock when the system is
switched on, the system sw itches off autmatically.
If the ignition key is withdrawn the system can be switched on for
approx. one hour via the rotary/push knob . Then the unit switches off
automatically. This process can be repeated as often as desired.
If the unit is switched off and the ignition key is withdrawn, a flashing LED
indicates (below the display button ) that this is a unit with an active
anti-theft coding.
First of all the start screen is indicated with the Škoda logo.
After this, a menu or a display (here radio information display) is indicated
on the screen, which was active at the last switching off of the system.
In addition a message appears on the screen: “ The navigation system
is activated. Please follow the StVO! ”
Note
•If the unit remains mute after switching on and “ SAFE” appears in the
display, please pay attention to the instructions for use.
•A non-conclusive entry is not stored when switching off the unit.
A18A9
A10
A10
A8
20.book Page 12 Tuesday, December 6, 2005 2:26 PM
Page 17 of 66
Audio
16
System equipment with DSP
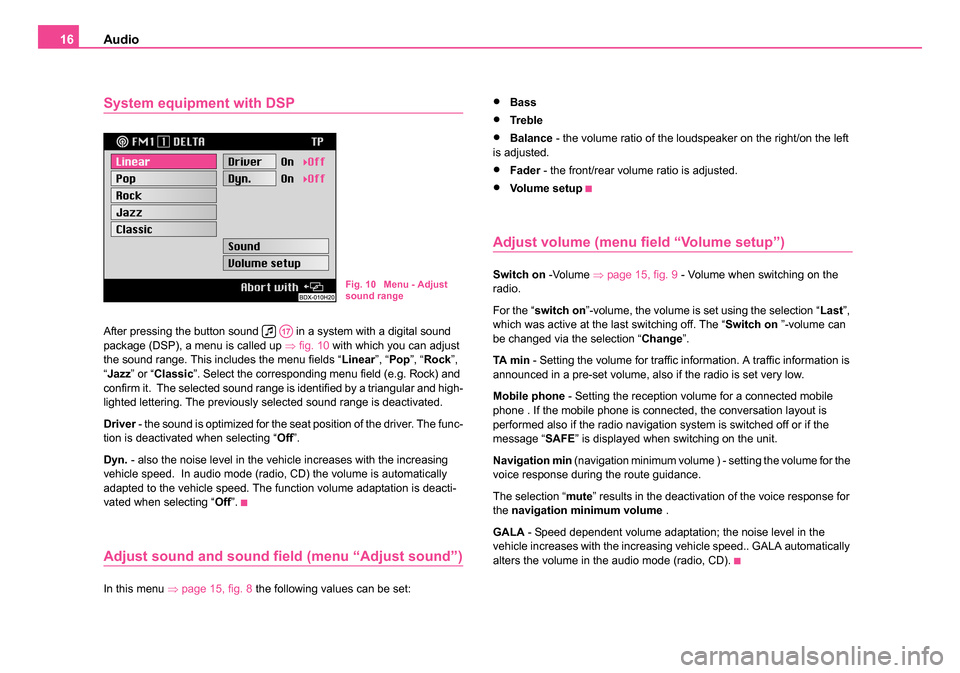
After pressing the button sound in a system with a digital sound
package (DSP), a menu is called up ⇒fig. 10 with which you can adjust
the sound range. This includes the menu fields “ Linear”, “Pop ”, “Rock ”,
“ Jazz ” or “Classic ”. Select the corresponding menu field (e.g. Rock) and
confirm it. The selected sound range is identified by a triangular and high-
lighted lettering. The previously selected sound range is deactivated.
Driver - the sound is optimized for the seat position of the driver. The func-
tion is deactivated when selecting “ Off”.
Dyn. - also the noise level in the vehicle increases with the increasing
vehicle speed. In audio mode (radio, CD) the volume is automatically
adapted to the vehicle speed. The function volume adaptation is deacti-
vated when selecting “ Off”.
Adjust sound and sound field (menu “Adjust sound”)
In this menu ⇒page 15, fig. 8 the following values can be set:
•Bass
•Tre bl e
•Balance - the volume ratio of the loudspeaker on the right/on the left
is adjusted.
•Fader - the front/rear volume ratio is adjusted.
•Vo l u m e s e t u p
Adjust volume (menu field “Volume setup”)
Switch on -Volume ⇒page 15, fig. 9 - Volume when switching on the
radio.
For the “ switch on ”-volume, the volume is set using the selection “ Last”,
which was active at the last switching off. The “ Switch on ”-volume can
be changed via the selection “ Change”.
TA m i n - Setting the volume for traffic information. A traffic information is
announced in a pre-set volume, also if the radio is set very low.
Mobile phone - Setting the reception volume for a connected mobile
phone . If the mobile phone is connected, the conversation layout is
performed also if the radio navigation system is switched off or if the
message “ SAFE” is displayed when switching on the unit.
Navigation min (navigation minimum volume ) - setting the volume for the
voice response during the route guidance.
The selection “ mute” results in the deactivation of the voice response for
the navigation minimum volume .
GALA - Speed dependent volume adaptation; the noise level in the
vehicle increases with the increasing vehicle speed.. GALA automatically
alters the volume in the audio mode (radio, CD).Fig. 10 Menu - Adjust
sound range
A17
20.book Page 16 Tuesday, December 6, 2005 2:26 PM
Page 39 of 66
Navigation
38
Route options
Plan route guidance an d calculate route list
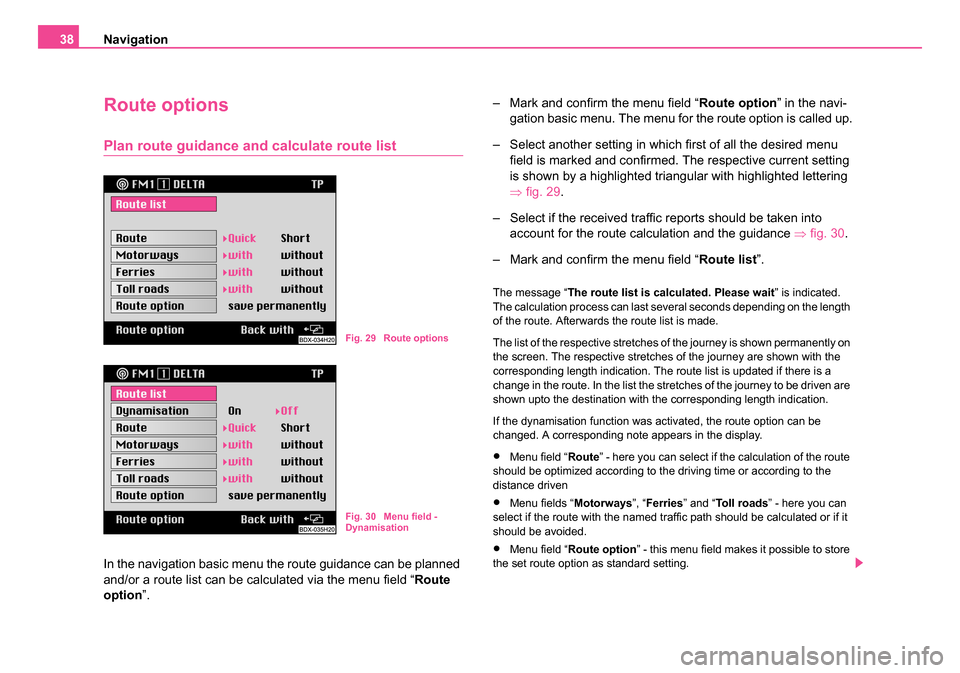
In the navigation basic menu the route guidance can be planned
and/or a route list can be calculated via the menu field “ Route
option ”. – Mark and confirm the menu field “
Route option” in the navi-
gation basic menu. The menu for the route option is called up.
– Select another setting in which first of all the desired menu field is marked and confirmed. The respective current setting
is shown by a highlighted triangular with highlighted lettering
⇒fig. 29.
– Select if the received traffic reports should be taken into account for the route calculation and the guidance ⇒ fig. 30.
– Mark and confirm the menu field “ Route list”.
The message “ The route list is calculated. Please wait ” is indicated.
The calculation process can last several seconds depending on the length
of the route. Afterwards the route list is made.
The list of the respective stretches of the journey is shown permanently on
the screen. The respective stretches of the journey are shown with the
corresponding length indication. The route list is updated if there is a
change in the route. In the list the stretches of the journey to be driven are
shown upto the destination with the corresponding length indication.
If the dynamisation function was activated, the route option can be
changed. A corresponding note appears in the display.
•Menu field “ Route” - here you can select if the calculation of the route
should be optimized according to the driving time or according to the
distance driven
•Menu fields “ Motorways”, “Ferries ” and “To l l r o a d s ” - here you can
select if the route with the named traffic path should be calculated or if it
should be avoided.
•Menu field “ Route option ” - this menu field makes it possible to store
the set route option as standard setting.
Fig. 29 Route options
Fig. 30 Menu field -
Dynamisation
20.book Page 38 Tuesday, December 6, 2005 2:26 PM
Page 40 of 66
Navigation39
Scroll the route list:
•to below - turn menu knob to the left
•to above - turn menu knob to the right
To exit the route list:
Button calls up again the menu “ Route option”.
Note
•The function “Dynamisation ” is at your disposal if your navigation
system is prepared for dynamic navigation. Please do not hesitate to
contact your Škoda Service Partner should you have any further ques-
tions regarding this matter.
•If there is no logical route to the destination, then despite the function
being deactivated there is a route calculation with the motorways, ferries
or toll roads.
•If the set route options are not stored, then they are only valid for the
current guidance.
•As soon as the unit is switched off for more than 30 minutes, the last
stored settings are applicable.
•Street names, which are not digitalized, have the street category
designation (e.g. street category 1 - national highway).
•If no route list can be calculated, then a corresponding message is
indicated.
Start guidance
Begin guidance
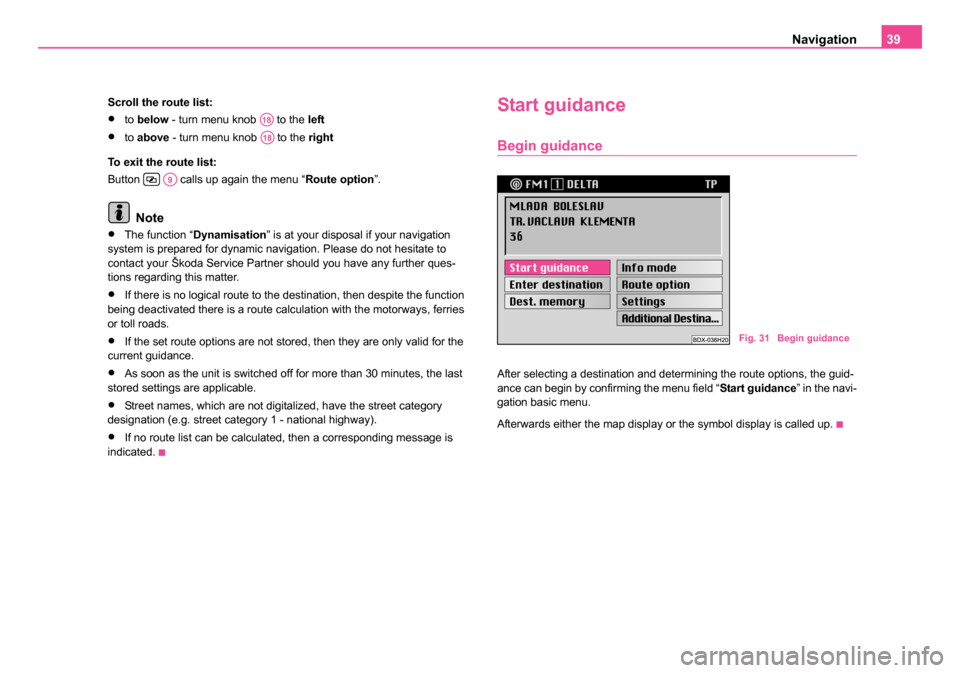
After selecting a destination and determining the route options, the guid-
ance can begin by confirming the menu field “ Start guidance” in the navi-
gation basic menu.
Afterwards either the map display or the symbol display is called up.
A18
A18
A9
Fig. 31 Begin guidance
20.book Page 39 Tuesday, December 6, 2005 2:26 PM
Page 42 of 66
Navigation41
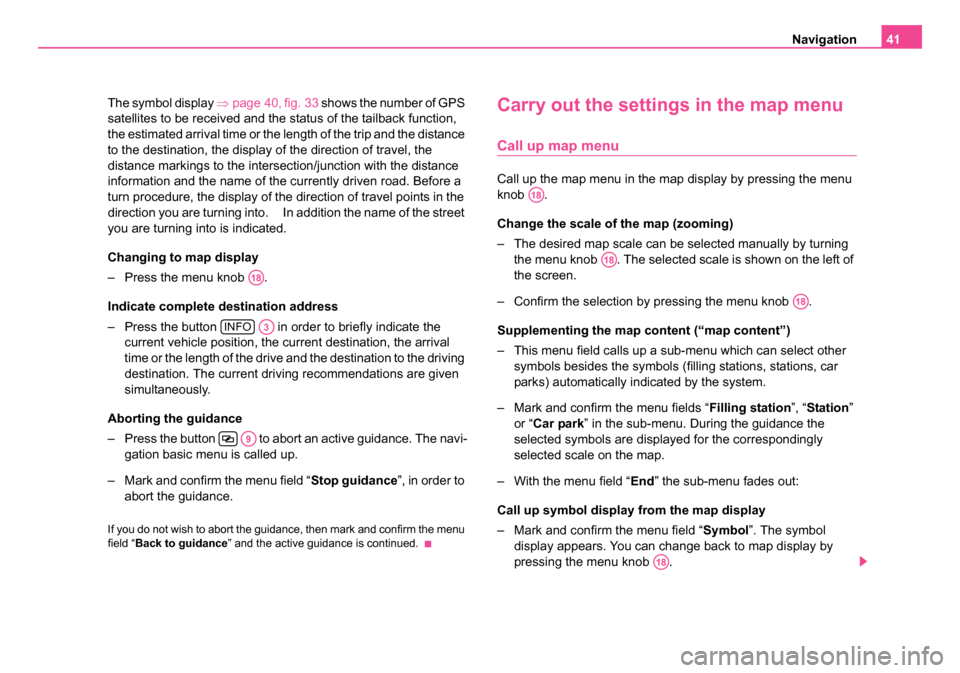
The symbol display ⇒page 40, fig. 33 shows the number of GPS
satellites to be received and the status of the tailback function,
the estimated arrival time or the length of the trip and the distance
to the destination, the display of the direction of travel, the
distance markings to the intersection/junction with the distance
information and the name of the currently driven road. Before a
turn procedure, the display of the direction of travel points in the
direction you are turning into. In addition the name of the street
you are turning into is indicated.
Changing to map display
– Press the menu knob .
Indicate complete destination address
– Press the button in order to briefly indicate the current vehicle position, the current destination, the arrival
time or the length of the drive and the destination to the driving
destination. The current driving recommendations are given
simultaneously.
Aborting the guidance
– Press the button to abort an active guidance. The navi- gation basic menu is called up.
– Mark and confirm the menu field “ Stop guidance”, in order to
abort the guidance.
If you do not wish to abort the guidance, then mark and confirm the menu
field “ Back to guidance” and the active guidance is continued.
Carry out the settings in the map menu
Call up map menu
Call up the map menu in the map display by pressing the menu
knob .
Change the scale of the map (zooming)
– The desired map scale can be selected manually by turning
the menu knob . The selected scale is shown on the left of
the screen.
– Confirm the selection by pressing the menu knob .
Supplementing the map content (“map content”)
– This menu field calls up a sub-menu which can select other symbols besides the symbols (filling stations, stations, car
parks) automatically indicated by the system.
– Mark and confirm the menu fields “ Filling station”, “Station ”
or “ Car park ” in the sub-menu. During the guidance the
selected symbols are displayed for the correspondingly
selected scale on the map.
– With the menu field “ End” the sub-menu fades out:
Call up symbol display from the map display
– Mark and confirm the menu field “ Symbol”. The symbol
display appears. You can change back to map display by
pressing the menu knob .
A18
INFOA3
A9
A18
A18
A18
A18
20.book Page 41 Tuesday, December 6, 2005 2:26 PM
Page 51 of 66
Navigation
50
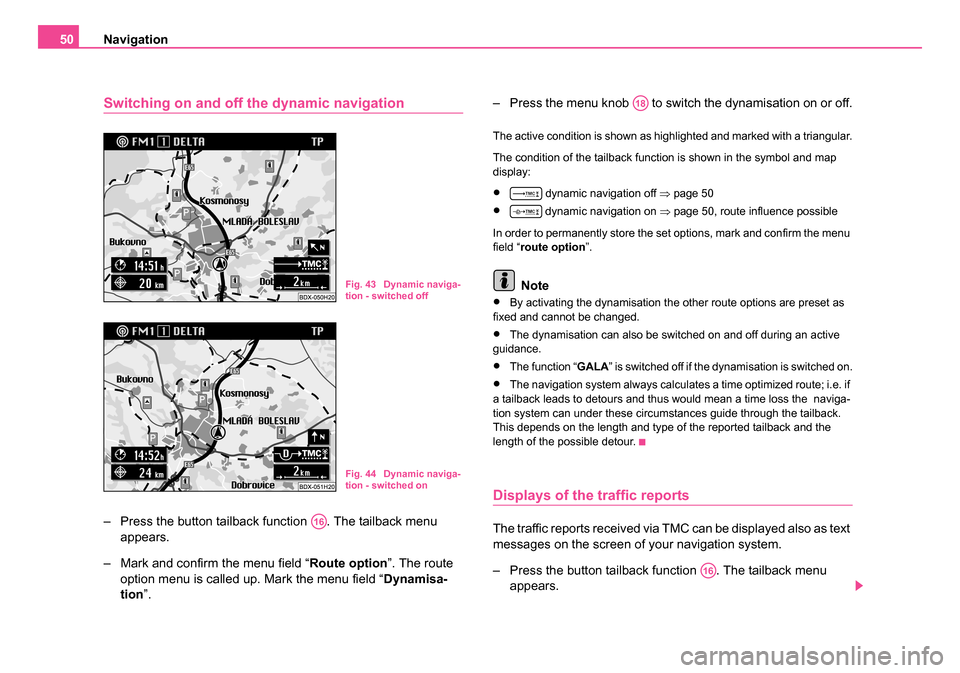
Switching on and off the dynamic navigation
– Press the button tailback function . The tailback menu
appears.
– Mark and confirm the menu field “ Route option”. The route
option menu is called up. Mark the menu field “ Dynamisa-
tion ”. – Press the menu knob to switch the dynamisation on or off.
The active condition is shown as highlighted and marked with a triangular.
The condition of the tailback function is shown in the symbol and map
display:
• dynamic navigation off
⇒page 50
• dynamic navigation on ⇒ page 50, route influence possible
In order to permanently store the set options, mark and confirm the menu
field “ route option ”.
Note
•By activating the dynamisation the other route options are preset as
fixed and cannot be changed.
•The dynamisation can also be switched on and off during an active
guidance.
•The function “GALA ” is switched off if the dynamisation is switched on.
•The navigation system always calculates a time optimized route; i.e. if
a tailback leads to detours and thus would mean a time loss the naviga-
tion system can under these circumstances guide through the tailback.
This depends on the length and type of the reported tailback and the
length of the possible detour.
Displays of the traffic reports
The traffic reports received via TMC can be displayed also as text
messages on the screen of your navigation system.
– Press the button tailback function . The tailback menu appears.
Fig. 43 Dynamic naviga-
tion - switched off
Fig. 44 Dynamic naviga-
tion - switched on
A16
A18
A16
20.book Page 50 Tuesday, December 6, 2005 2:26 PM
Page 54 of 66
Navigation53
In the navigation basic menu you can select various basic settings for the
navigation system via the menu field “ Settings” ⇒ page 52, fig. 45 .
Select between the following possibilties:
Select language
- for the voice response:
•Czech
•German
•English (Imperial; distances are in miles and yards; speed is given in
miles per hour)
•English (Metrical; distances are in kilometres and meters; speed is
given in kilometres per hour)
•Span is h
•French
•Italian
Manual location
•You can manually enter the vehicle position with this function. This is
only necessary if the system cannot be positioned automatically, e.g.
when transporting the vehicle on a ferry or in a car sleeper rail. Perform
the entry via the menu sequence: Town - Street - Intersection.
Vo l u m e s e t u p
•in this menu the volume for the voice response can be set during the
guidance.
Show
•here you can select if the arrival time or the length of the trip to the
destination should be displayed in the map or symbol display.
Contrast
•You can set different contrast values for the day and night display. Setting clock
•the clock is automatically set via the GPS. The GPS system transmits
the universal time UTC This results in a time lag of two hours compared
to the middle european summer time and of one hour compared to the
winter time, which must be manually rectified. This is e.g. important for a
precise information about the arrival time at the destination.
Illumination
•You can select if the illumination of the screen should be performed
manually via the button or automatically when switching on the car
lights.
GPS viewer
•GPS (Global Positioning System, i.e. Global Positioning System) is a
navigation system of the Pentagon. It consists of 25 satellites, which circle
around the earth at an altitude of 21 000 km. Signals from at least three
satellites are received so that the system can determine the current
vehicle position.
The called up information screen gives information about:
•Number of available satellites
•Number of receiveable satellites
•current geographic vehicle position
Note
If less than three satellites are received, then appears the note “ The
geographic position cannot be determined at this moment in time ”.
A8
20.book Page 53 Tuesday, December 6, 2005 2:26 PM