turn signal SKODA SUPERB 2009 Owner´s Manual
[x] Cancel search | Manufacturer: SKODA, Model Year: 2009, Model line: SUPERB, Model: SKODA SUPERB 2009Pages: 252, PDF Size: 16.33 MB
Page 59 of 252
›Opening the bonnet.
› Opening the boot lid.
› Opening the doors.
› Manipulation of the ignition lock.
› Towing the vehicle
» page 56.
› Movement in the vehicle
» page 56.
› Sudden and significant voltage drop of the electrical system.
› Uncoupling the trailer
» page 170, Attaching and detaching trailers .
If the driver's door of a vehicle with a remote control is unlocked and opened
by the lock cylinder, then the alarm is triggered.
Switching off the alarm
The alarm is turned off by pressing the button on the radio remote control
key or switching on the ignition.
CAUTION
Before leaving the vehicle, it must be checked that all of the windows, doors
and the sliding/tilting roof are locked in order to ensure the full functionality of
the anti-theft alarm system.
Note
The working life of the alarm siren is 5 years.
Activating/deactivating
Read and observe
on page 56 first.
Activating
The anti-theft alarm system is activated automatically approximately 30 sec-
onds after the vehicle is locked.
If the vehicle is unlocked and a door or the boot lid not opened within the next
30 seconds, the vehicle will lock again automatically and the SafeLock system
or anti-theft alarm system will be switched back on. This function is intended
to prevent the car being unlocked unintentionally.
Deactivating
The anti-theft alarm system is deactivated automatically after the vehicle is
unlocked. If the vehicle is not opened within 30 seconds, the anti-theft alarm
system is automatically activated again.
The alarm system is also deactivated if you unlock the driver door using the
key within 45 seconds of locking the vehicle.
Note■ If the car is unlocked with the key in the driver door, insert the key into the
ignition and switch the ignition to deactivate the alarm system.■
You can switch the audible signalling of the activation of the warning system
on and off in the MAXI DOT display in the menu item ATA confirm » page 47 .
Interior monitor and towing protection
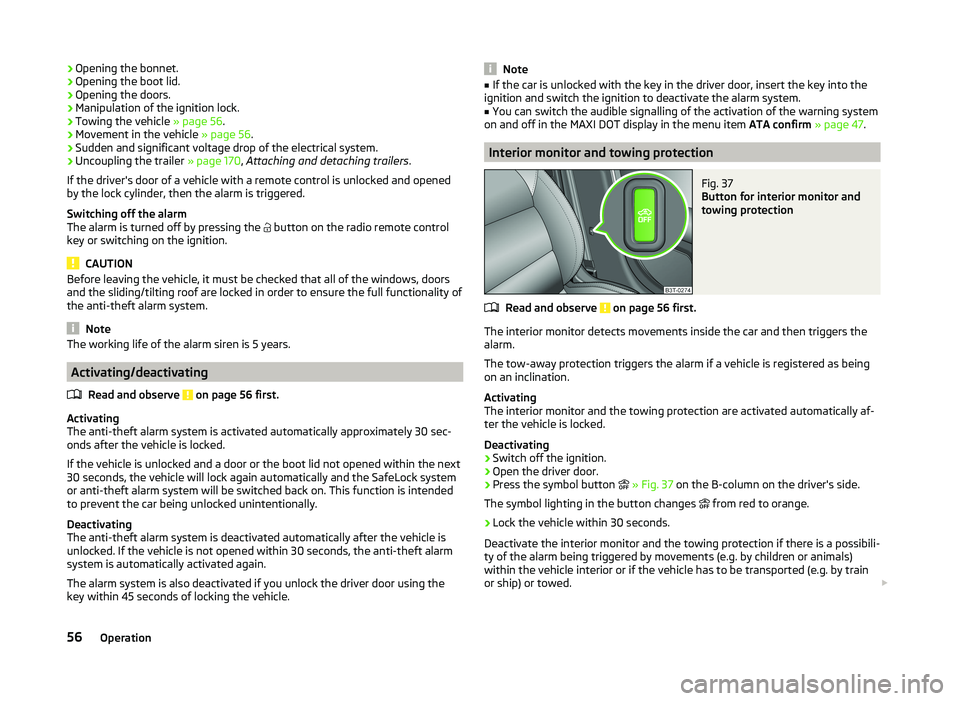
Fig. 37
Button for interior monitor and
towing protection
Read and observe on page 56 first.
The interior monitor detects movements inside the car and then triggers the alarm.
The tow-away protection triggers the alarm if a vehicle is registered as being
on an inclination.
Activating
The interior monitor and the towing protection are activated automatically af-
ter the vehicle is locked.
Deactivating
›
Switch off the ignition.
›
Open the driver door.
›
Press the symbol button
» Fig. 37 on the B-column on the driver's side.
The symbol lighting in the button changes
from red to orange.
›
Lock the vehicle within 30 seconds.
Deactivate the interior monitor and the towing protection if there is a possibili-
ty of the alarm being triggered by movements (e.g. by children or animals)
within the vehicle interior or if the vehicle has to be transported (e.g. by train
or ship) or towed.
56Operation
Page 70 of 252
WARNINGWhen operating the sunshade, proceed with caution to avoid causing
crushing injuries – risk of injury!
Convenience operation of sliding / tilting roof
Read and observe
on page 65 first.
The sliding / tilting roof can be operated by locking or unlocking using the keyor using the KESSY system with the aid of the sensor
A
or
B
» Fig. 34 on
page 53 .
Closing
›
Press and hold the symbol button on the key or hold the key in the locking
cylinder of the driver's door in the lock position, or for the KESSY system,
keep your finger on the sensor
B
» Fig. 34 on page 53 » .
By releasing the lock or lifting your finger off the sensor
B
when using the
KESSY system, the closing process is immediately interrupted.
Tilting roof
›
Press and hold the symbol button on the remote control key.
WARNINGClose the sliding/tilting roof carefully – risk of injury. The force limiter does
not operate with the convenience closing.Lights and visibility
Lights
Introduction
This chapter contains information on the following subjects:
Operating the lights and the instrument illumination
68
Daylight running lights (DAY LIGHT)
69
Turn signal and main beam
69
Automatic driving lamp control
70
Adaptive headlights (AHL)
70
Fog lights
71
Fog lights with the CORNER function
71
Rear fog light
71
COMING HOME / LEAVING HOME
72
Hazard warning light system
72
Parking lights
73
Unless otherwise stated, the lights only work when the ignition is on.
The arrangement of the controls right-hand drive models may differ from the layout shown in » Fig. 49 on page 68 . The symbols which mark the positions
of the controls are identical.
Keep the headlights lenses clean. The following guidelines must be ob-
served » page 179 , Headlight lenses .
WARNING■
The activation of the lights should only be undertaken in accordance with
national legal requirements.■
The driver is always responsible for the correct settings and use of the
lights.
67Lights and visibility
Page 72 of 252
Daylight running lights (DAY LIGHT)Read and observe
on page 67 first.
The daytime running lights (hereafter only function) provide lighting for the
front of the vehicle.
The lights are switched on automatically if the following conditions are met.
The light switch is in the position
or
» Fig. 49 on page 68 .
The ignition is switched on.
The parking aid is activated.
Deactivating the function
›
Switch off the ignition.
›
Pull the turn signal- and main beam lever ( » Fig. 50 on page 69 ) towards
the steering wheel, push down and hold in this position.
›
Switch on the ignition.
›
Hold the lever in this position for at least 3 seconds after switching on the
ignition.
Activating the function
›
Switch off the ignition.
›
Pull the turning signal and main beam lever towards the steering wheel,
push it up and hold it in this position.
›
Switch on the ignition.
›
Hold the lever in this position for at least 3 seconds after switching on the
ignition.
On vehicles with MAXI DOT display, the function can be enabled or disabled in
the menu item Dayl. dri. light » page 47 .
WARNINGWhen the daytime running light is switched on, the parking lights (neither
at the front nor the rear) and the number plate lights are not lit. Therefore
always switch on the low beam when the visibility is poor.Turn signal and main beamFig. 50
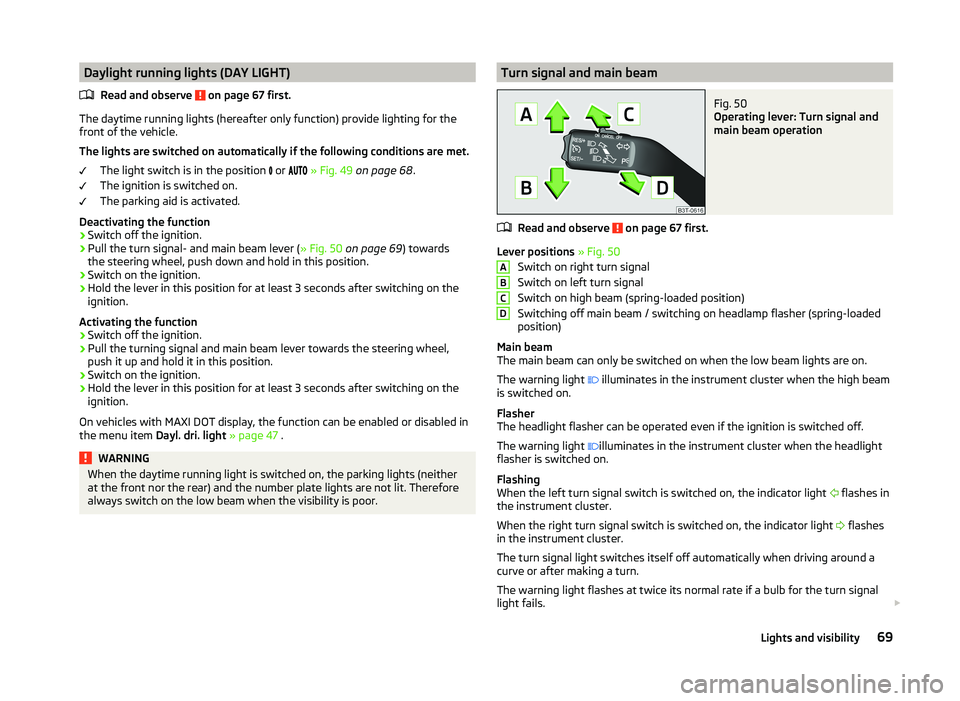
Operating lever: Turn signal and
main beam operation
Read and observe on page 67 first.
Lever positions » Fig. 50
Switch on right turn signal
Switch on left turn signal
Switch on high beam (spring-loaded position)
Switching off main beam / switching on headlamp flasher (spring-loaded
position)
Main beam
The main beam can only be switched on when the low beam lights are on.
The warning light illuminates in the instrument cluster when the high beam
is switched on.
Flasher
The headlight flasher can be operated even if the ignition is switched off.
The warning light illuminates in the instrument cluster when the headlight
flasher is switched on.
Flashing
When the left turn signal switch is switched on, the indicator light flashes in
the instrument cluster.
When the right turn signal switch is switched on, the indicator light flashes
in the instrument cluster.
The turn signal light switches itself off automatically when driving around a
curve or after making a turn.
The warning light flashes at twice its normal rate if a bulb for the turn signal
light fails.
ABCD69Lights and visibility
Page 73 of 252
“Convenience turn signal”
If you wish to flash three times only, briefly push the stalk to the upper or low-
er pressure point and release again.
The “Lane ch. flash” can be activated or deactivated via the MAXI DOT display
in the Lane ch. flash » page 47 menu item.WARNINGOnly turn on the main beam or the headlight flasher if other road users will
not be dazzled.
Automatic driving lamp control
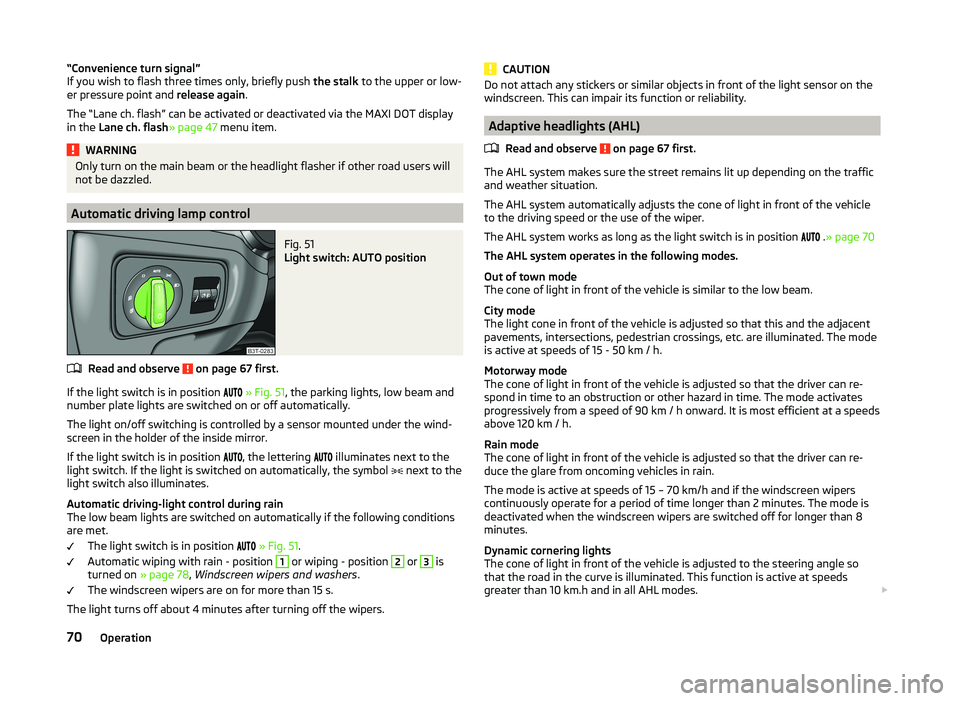
Fig. 51
Light switch: AUTO position
Read and observe on page 67 first.
If the light switch is in position
» Fig. 51 , the parking lights, low beam and
number plate lights are switched on or off automatically.
The light on/off switching is controlled by a sensor mounted under the wind- screen in the holder of the inside mirror.
If the light switch is in position
, the lettering
illuminates next to the
light switch. If the light is switched on automatically, the symbol
next to the
light switch also illuminates.
Automatic driving-light control during rain
The low beam lights are switched on automatically if the following conditions
are met.
The light switch is in position
» Fig. 51 .
Automatic wiping with rain - position
1
or wiping - position
2
or
3
is
turned on » page 78, Windscreen wipers and washers .
The windscreen wipers are on for more than 15 s.
The light turns off about 4 minutes after turning off the wipers.
CAUTIONDo not attach any stickers or similar objects in front of the light sensor on the
windscreen. This can impair its function or reliability.
Adaptive headlights (AHL)
Read and observe
on page 67 first.
The AHL system makes sure the street remains lit up depending on the traffic
and weather situation.
The AHL system automatically adjusts the cone of light in front of the vehicle
to the driving speed or the use of the wiper.
The AHL system works as long as the light switch is in position .
» page 70
The AHL system operates in the following modes.
Out of town mode
The cone of light in front of the vehicle is similar to the low beam.
City mode
The light cone in front of the vehicle is adjusted so that this and the adjacent
pavements, intersections, pedestrian crossings, etc. are illuminated. The mode
is active at speeds of 15 - 50 km / h.
Motorway mode
The cone of light in front of the vehicle is adjusted so that the driver can re-
spond in time to an obstruction or other hazard in time. The mode activates
progressively from a speed of 90 km / h onward. It is most efficient at a speeds
above 120 km / h.
Rain mode
The cone of light in front of the vehicle is adjusted so that the driver can re-
duce the glare from oncoming vehicles in rain.
The mode is active at speeds of 15 – 70 km/h and if the windscreen wipers
continuously operate for a period of time longer than 2 minutes. The mode is
deactivated when the windscreen wipers are switched off for longer than 8
minutes.
Dynamic cornering lights
The cone of light in front of the vehicle is adjusted to the steering angle so
that the road in the curve is illuminated. This function is active at speeds
greater than 10 km.h and in all AHL modes.
70Operation
Page 74 of 252
Tourist lights (Travel mode)
This mode makes it possible to drive in countries with opposing traffic system
(driving on the left/right) without dazzling the oncoming vehicles.
When this mode is active, the above mentioned modes and the side swivel of the headlights are deactivated.
This mode can be enabled or disabled via the MAXI DOT display in the Travel
mode » page 48 , Lights and visibility menu option.WARNINGIf the AHL system is defective, the headlights are automatically lowered to
the emergency position, which prevents a possible dazzling of oncoming
traffic. This reduces the cone of light in front of the vehicle. Drive carefully
and visit a specialist garage as soon as possible.
Note
When the “tourist light” mode is active, the warning light flashes for 10 sec-
onds each time the ignition is switched on.
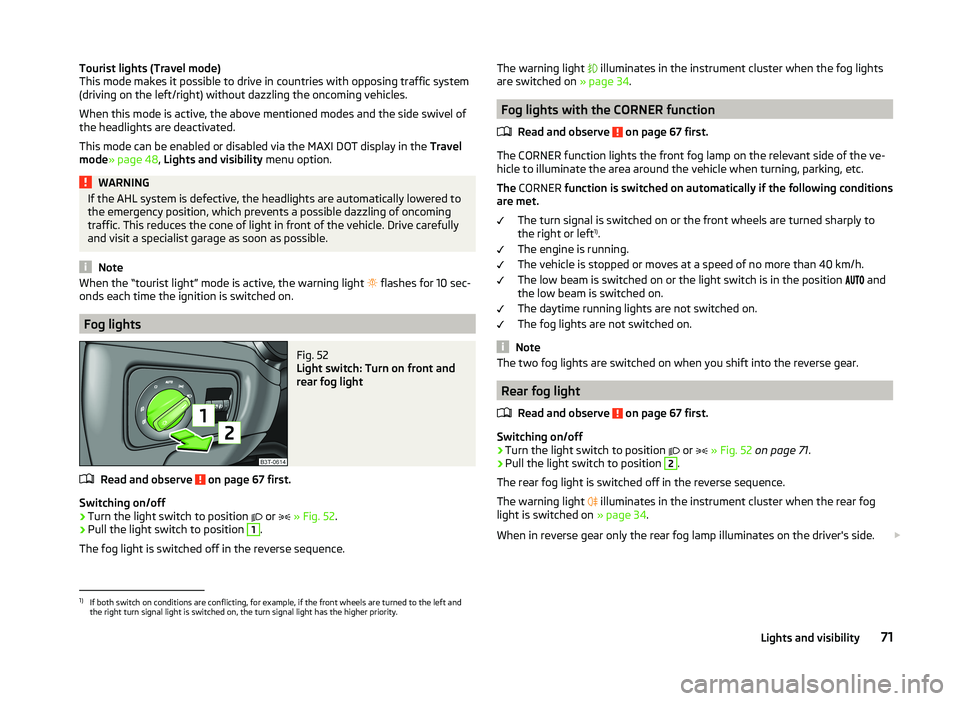
Fog lights
Fig. 52
Light switch: Turn on front and
rear fog light
Read and observe on page 67 first.
Switching on/off
›
Turn the light switch to position or
» Fig. 52 .
›
Pull the light switch to position
1
.
The fog light is switched off in the reverse sequence.
The warning light illuminates in the instrument cluster when the fog lights
are switched on » page 34.
Fog lights with the CORNER function
Read and observe
on page 67 first.
The CORNER function lights the front fog lamp on the relevant side of the ve-
hicle to illuminate the area around the vehicle when turning, parking, etc.
The CORNER function is switched on automatically if the following conditions
are met.
The turn signal is switched on or the front wheels are turned sharply to
the right or left 1)
.
The engine is running.
The vehicle is stopped or moves at a speed of no more than 40 km/h.
The low beam is switched on or the light switch is in the position and
the low beam is switched on.
The daytime running lights are not switched on.
The fog lights are not switched on.
Note
The two fog lights are switched on when you shift into the reverse gear.
Rear fog light
Read and observe
on page 67 first.
Switching on/off
›
Turn the light switch to position or
» Fig. 52 on page 71 .
›
Pull the light switch to position
2
.
The rear fog light is switched off in the reverse sequence.
The warning light illuminates in the instrument cluster when the rear fog
light is switched on » page 34.
When in reverse gear only the rear fog lamp illuminates on the driver's side.
1)
If both switch on conditions are conflicting, for example, if the front wheels are turned to the left and
the right turn signal light is switched on, the turn signal light has the higher priority.
71Lights and visibility
Page 75 of 252
Only the rear fog light on the trailer illuminates if the vehicle has a factory fit-
ted towing device or a towing device from ŠKODA original accessories and it is
driven with a trailer.
COMING HOME / LEAVING HOME
Read and observe
on page 67 first.
COMING HOME (hereinafter referred to only as function) switches the light au-
tomatically for a short time after leaving the vehicle.
LEAVING HOME (hereinafter referred to only as function) switches the light au-
tomatically for a short time when approaching the vehicle.
The lights are switched on automatically if the following conditions are met. The light switch is in position
» Fig. 51 on page 70 .
The visibility in the vehicle environment is reduced.
The ignition is switched off.
The parking aid is activated.
The function is switched on (the driver's door is opened / the car is un-
locked with the remote control).
The function switches on the following light, depending on the equipment
fitted.
› Parking lights
› Low beam
› Entry lighting in the exterior mirrors
› Licence plate light
Poorer visibility is evaluated by sensor mounted in the holder of the interior
mirror.
COMING HOME
The light turns on automatically when you open the driver's door on (within 60
seconds of turning off the ignition).
The light turns off 10 seconds after closing all the doors and the boot lid or af-
ter the pre-set time has expired.
If a door or the boot lid remains open, the light goes out after 60 seconds.
LEAVING HOME
The light turns on automatically after the vehicle is unlocked with the remote
control.
The light turns off after 10 seconds or after a pre-set time or after the vehicle
is locked.
Activate/deactivate the function
The functions and settings of the illumination time can be activated/deactiva-
ted via the MAXI DOT display in the menu items Coming Home or Leaving
Home » page 47 .
CAUTION
■
Do not attach any stickers or similar objects in front of the light sensor on
the windscreen. This can impair its function or reliability.■
If this function is activated constantly, the battery will be heavily discharged
particularly in short-haul travel.
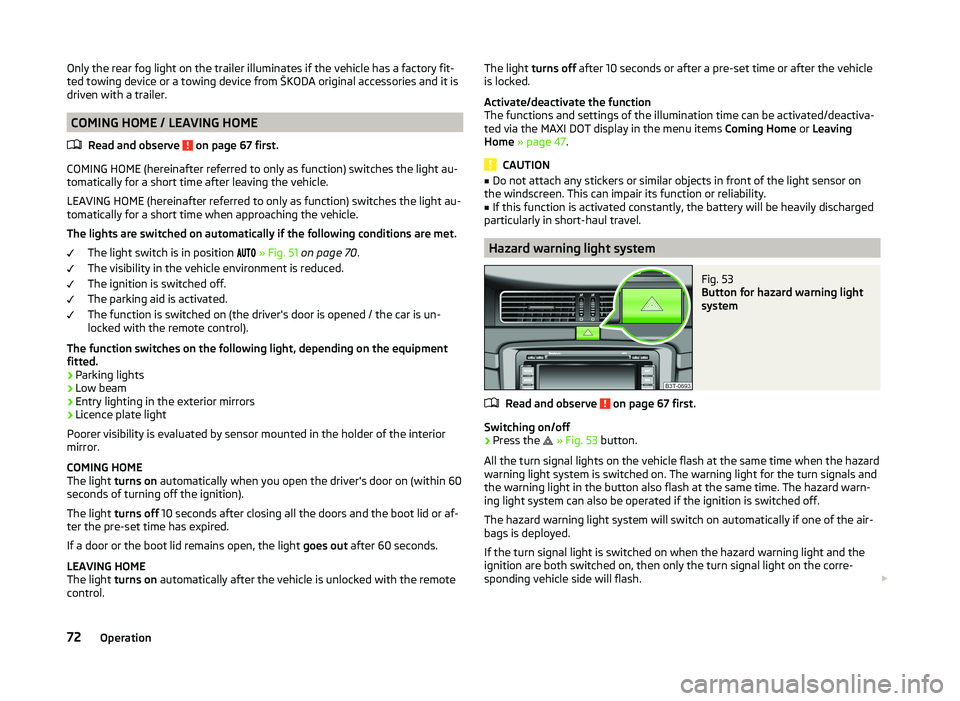
Hazard warning light system
Fig. 53
Button for hazard warning light
system
Read and observe on page 67 first.
Switching on/off
›
Press the
» Fig. 53 button.
All the turn signal lights on the vehicle flash at the same time when the hazard
warning light system is switched on. The warning light for the turn signals and
the warning light in the button also flash at the same time. The hazard warn-
ing light system can also be operated if the ignition is switched off.
The hazard warning light system will switch on automatically if one of the air-
bags is deployed.
If the turn signal light is switched on when the hazard warning light and the
ignition are both switched on, then only the turn signal light on the corre-
sponding vehicle side will flash.
72Operation
Page 76 of 252
WARNINGSwitch on the hazard warning light system if, for example, the following oc-
curs.■
You encounter a traffic jam.
■
The vehicle has broken down.
Parking lights
Read and observe
on page 67 first.
The parking light is designed for temporary lighting of the parked vehicle.
Switching on the parking light
›
Switch off the ignition.
›
Place the control lever into position
A
or
B
as far as it can go » Fig. 50 on
page 69 - the parking light on the right/left-hand side of the vehicle is
switched on.
If the right or left turn signal light has been switched on and the ignition is
switched off, the parking light is not automatically switched on.
Switching on the side lights on both sides
›
Switch off the ignition.
›
Turn the light switch
A
to position
» Fig. 49 on page 68 and lock the ve-
hicle.
After pulling out the ignition key and opening the driver's door, an audible
warning sounds. After a few seconds or after closing the driver's door, the au-
dible alarm is turned off, but the parking lights will remain switched on.
CAUTION
Turning on the parking light means the battery is heavily loaded, especially
over short distances.
Interior lights
Introduction
This chapter contains information on the following subjects:
Front interior light
73
Rear interior light - Variant 1
74
Rear interior light - Variant 2
74Front door warning light74Entry lighting75
Note
With the ignition off, the light turns off automatically after about 10 minutes.
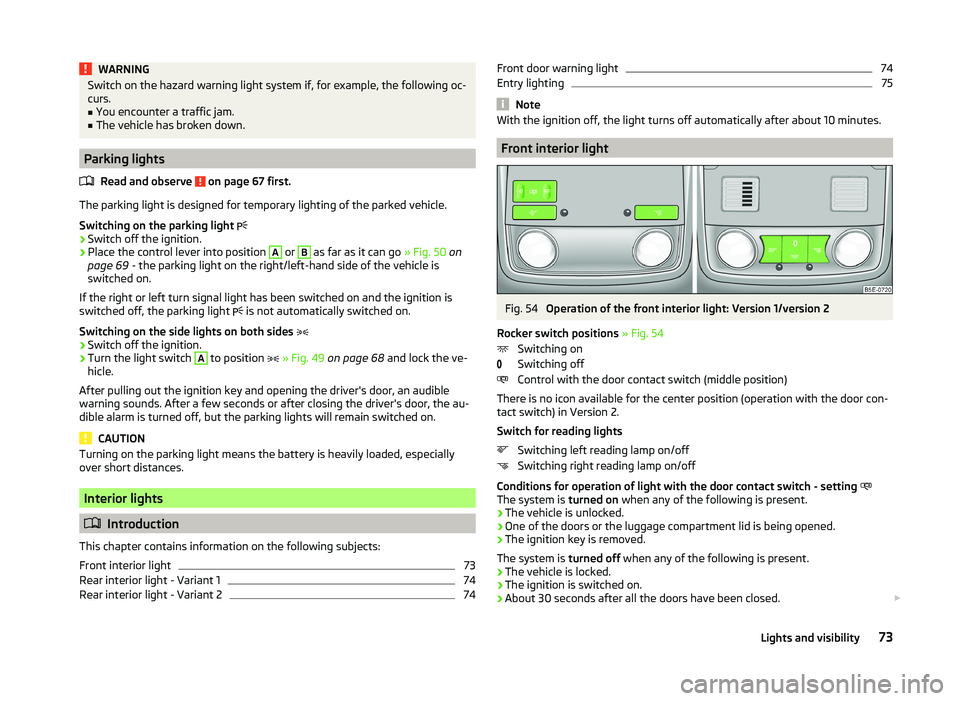
Front interior light
Fig. 54
Operation of the front interior light: Version 1/version 2
Rocker switch positions » Fig. 54
Switching on
Switching off
Control with the door contact switch (middle position)
There is no icon available for the center position (operation with the door con-
tact switch) in Version 2.
Switch for reading lights Switching left reading lamp on/off
Switching right reading lamp on/off
Conditions for operation of light with the door contact switch - setting
The system is turned on when any of the following is present.
› The vehicle is unlocked.
› One of the doors or the luggage compartment lid is being opened.
› The ignition key is removed.
The system is turned off when any of the following is present.
› The vehicle is locked.
› The ignition is switched on.
› About 30 seconds after all the doors have been closed.
73Lights and visibility
Page 87 of 252
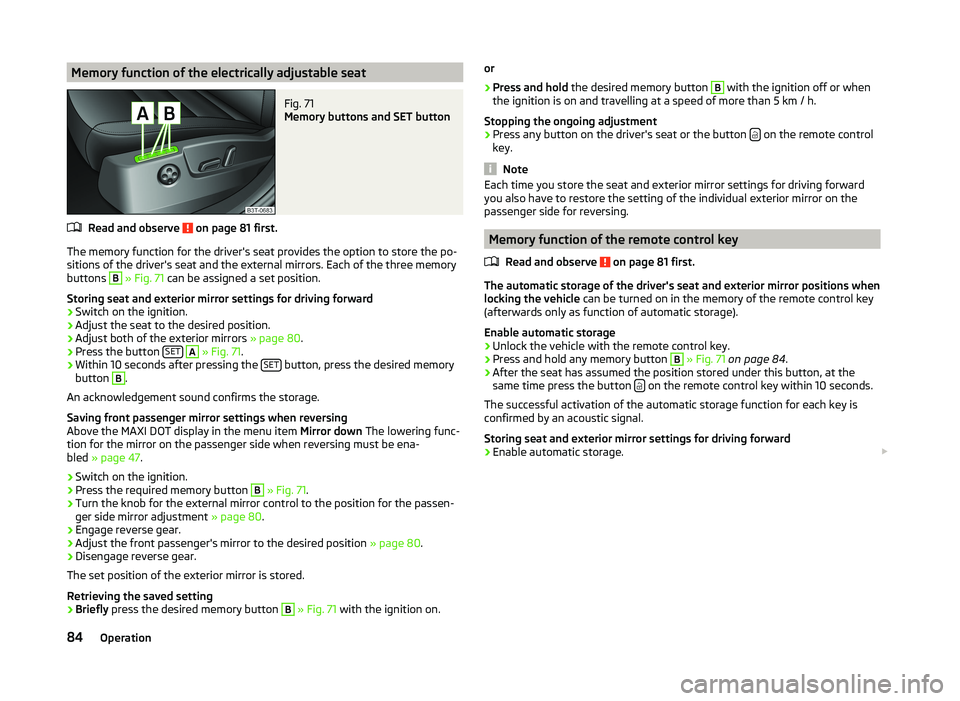
Memory function of the electrically adjustable seatFig. 71
Memory buttons and SET button
Read and observe on page 81 first.
The memory function for the driver's seat provides the option to store the po-
sitions of the driver's seat and the external mirrors. Each of the three memory
buttons
B
» Fig. 71 can be assigned a set position.
Storing seat and exterior mirror settings for driving forward
›
Switch on the ignition.
›
Adjust the seat to the desired position.
›
Adjust both of the exterior mirrors » page 80.
›
Press the button SET
A
» Fig. 71 .
›
Within 10 seconds after pressing the SET button, press the desired memory
button
B
.
An acknowledgement sound confirms the storage.
Saving front passenger mirror settings when reversing
Above the MAXI DOT display in the menu item Mirror down The lowering func-
tion for the mirror on the passenger side when reversing must be ena-
bled » page 47 .
›
Switch on the ignition.
›
Press the required memory button
B
» Fig. 71 .
›
Turn the knob for the external mirror control to the position for the passen-
ger side mirror adjustment » page 80.
›
Engage reverse gear.
›
Adjust the front passenger's mirror to the desired position » page 80.
›
Disengage reverse gear.
The set position of the exterior mirror is stored.
Retrieving the saved setting
›
Briefly press the desired memory button
B
» Fig. 71 with the ignition on.
or›
Press and hold the desired memory button
B
with the ignition off or when
the ignition is on and travelling at a speed of more than 5 km / h.
Stopping the ongoing adjustment
›
Press any button on the driver's seat or the button on the remote control
key.
Note
Each time you store the seat and exterior mirror settings for driving forward
you also have to restore the setting of the individual exterior mirror on the
passenger side for reversing.
Memory function of the remote control key
Read and observe
on page 81 first.
The automatic storage of the driver's seat and exterior mirror positions when
locking the vehicle can be turned on in the memory of the remote control key
(afterwards only as function of automatic storage).
Enable automatic storage
›
Unlock the vehicle with the remote control key.
›
Press and hold any memory button
B
» Fig. 71 on page 84 .
›
After the seat has assumed the position stored under this button, at the
same time press the button on the remote control key within 10 seconds.
The successful activation of the automatic storage function for each key is
confirmed by an acoustic signal.
Storing seat and exterior mirror settings for driving forward
›
Enable automatic storage.
84Operation
Page 88 of 252
When automatic storage is activated, the current positions of the driver's seat
and the external mirrors are saved in the memory of the remote control key
each time the vehicle is locked. When the vehicle is next unlocked using the
same key, the driver's seat and the external mirrors assume the positions stor-
ed in the memory of this key 1)
.
Saving front passenger mirror settings when reversing
Above the MAXI DOT display in the menu item Mirror down The lowering func-
tion for the mirror on the passenger side when reversing must be ena-
bled » page 47 .›
Unlock the vehicle using the respective remote control key.
›
Switch on the ignition.
›
Turn the knob for the external mirror control to the position for the passen-
ger side mirror adjustment » page 80.
›
Engage reverse gear.
›
Adjust the front passenger's mirror to the desired position » page 80.
›
Disengage reverse gear.
The adjusted position of the exterior mirror is stored in the remote control key
memory.
Disable the function of automatic storage
›
Unlock the vehicle with the remote control key.
›
Press and hold the SET button
A
» Fig. 71 on page 84 . At the same time,
press the button on the remote control key within 10 seconds.
The successful deactivation of the automatic storage function for each key is confirmed by an acoustic signal.
Stopping the ongoing adjustment
›
Press any button on the driver's seat or the button on the remote control
key.
Seat features
Introduction
This chapter contains information on the following subjects:
Seat heaters
85
Ventilated front seats
86Convenience features of passenger seat87Front armrest87
Rear armrest
87
Seat backrests
87
Rear seat folded forward (Superb Combi)
88
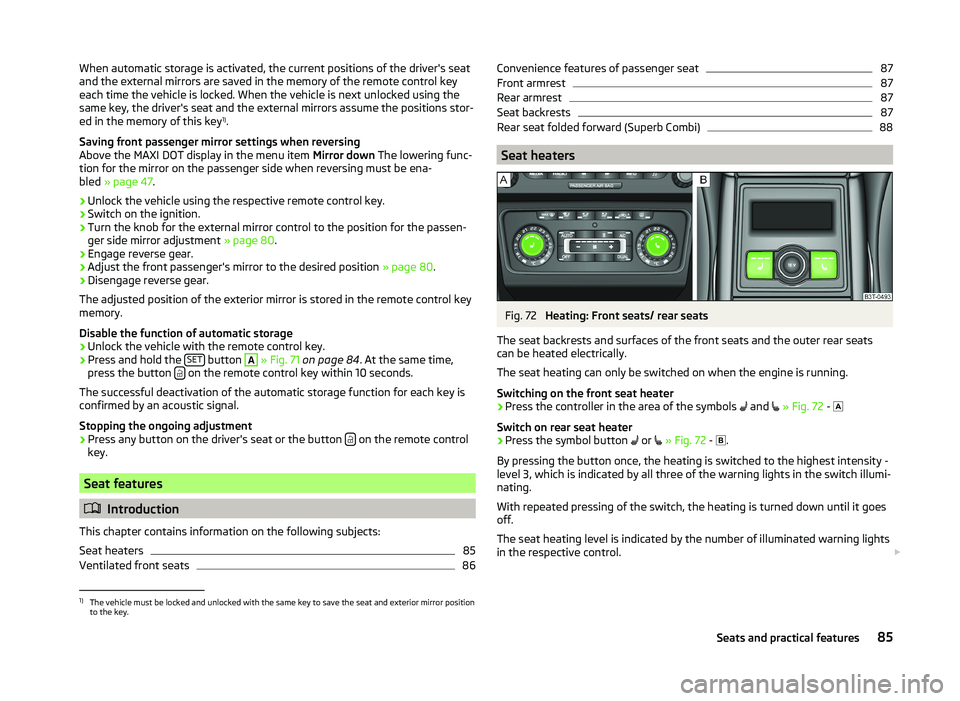
Seat heaters
Fig. 72
Heating: Front seats/ rear seats
The seat backrests and surfaces of the front seats and the outer rear seats
can be heated electrically.
The seat heating can only be switched on when the engine is running.
Switching on the front seat heater
›
Press the controller in the area of the symbols and
» Fig. 72 -
Switch on rear seat heater
›
Press the symbol button or
» Fig. 72 -
.
By pressing the button once, the heating is switched to the highest intensity -
level 3, which is indicated by all three of the warning lights in the switch illumi-
nating.
With repeated pressing of the switch, the heating is turned down until it goes
off.
The seat heating level is indicated by the number of illuminated warning lights
in the respective control.
1)
The vehicle must be locked and unlocked with the same key to save the seat and exterior mirror position
to the key.
85Seats and practical features
Page 123 of 252
■Starting time 1 , Starting time 2 , Starting time 3 - for each pre-set time, the
day and the time (hour and minute) can be set for switching on the auxiliary
heating. An empty position can be found between Sunday and Monday when
selecting the day. If this empty position is selected, the activation is per-
formed without taking into account the day.
■ Activate - Activate pre-set mode;
■ Deactivate - Deactivate pre-set mode;
■ Factory settings - Restore factory settings
■ Back - Return to main menu
Only one programmed pre-set time can be active.
The last programmed pre-set time remains active.
After the auxiliary heating activates automatically at the set time, it is neces-
sary to pre-set a time again.
If the menu item Back is selected or no changes are made on the display for
longer than 10 seconds, the set values are stored, but the pre-set time is not
activated.
The system switches itself off at the end of the running time set under the
menu item Running time .
Note
A warning light on the button » Fig. 127 illuminates when the system is run-
ning.
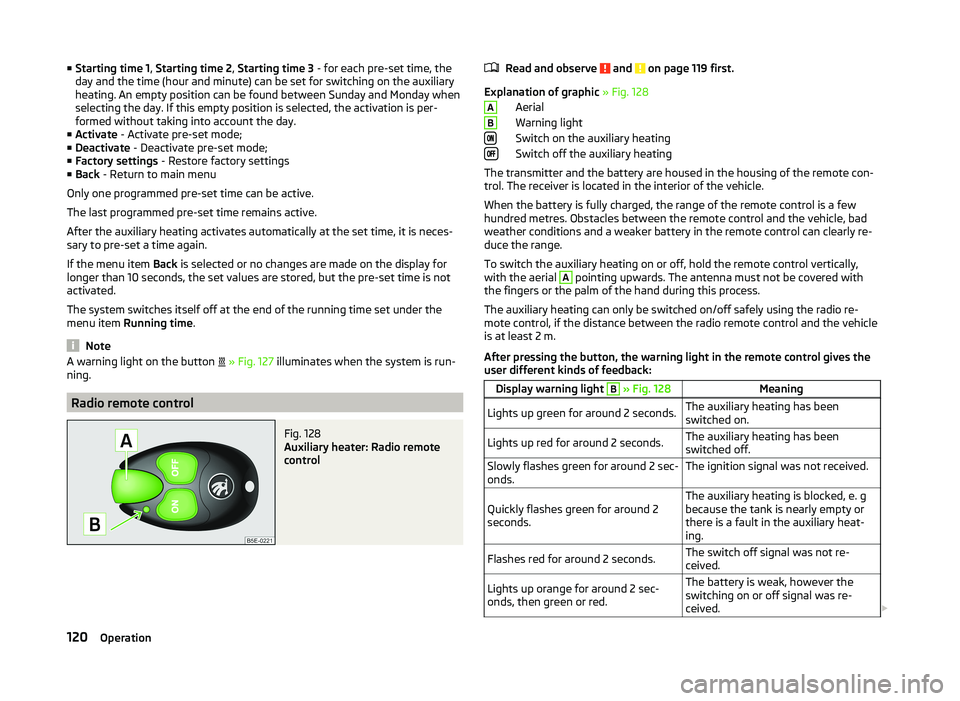
Radio remote control
Fig. 128
Auxiliary heater: Radio remote
control
Read and observe and on page 119 first.
Explanation of graphic » Fig. 128
Aerial
Warning light
Switch on the auxiliary heating
Switch off the auxiliary heating
The transmitter and the battery are housed in the housing of the remote con- trol. The receiver is located in the interior of the vehicle.
When the battery is fully charged, the range of the remote control is a few
hundred metres. Obstacles between the remote control and the vehicle, bad
weather conditions and a weaker battery in the remote control can clearly re-
duce the range.
To switch the auxiliary heating on or off, hold the remote control vertically,
with the aerial
A
pointing upwards. The antenna must not be covered with
the fingers or the palm of the hand during this process.
The auxiliary heating can only be switched on/off safely using the radio re-
mote control, if the distance between the radio remote control and the vehicle
is at least 2 m.
After pressing the button, the warning light in the remote control gives the
user different kinds of feedback:
Display warning light B » Fig. 128MeaningLights up green for around 2 seconds.The auxiliary heating has been
switched on.Lights up red for around 2 seconds.The auxiliary heating has been
switched off.Slowly flashes green for around 2 sec-
onds.The ignition signal was not received.Quickly flashes green for around 2
seconds.The auxiliary heating is blocked, e. g
because the tank is nearly empty or
there is a fault in the auxiliary heat-
ing.Flashes red for around 2 seconds.The switch off signal was not re-
ceived.Lights up orange for around 2 sec-
onds, then green or red.The battery is weak, however the
switching on or off signal was re-
ceived. AB120Operation