ECO mode SKODA SUPERB 2009 Owner´s Manual
[x] Cancel search | Manufacturer: SKODA, Model Year: 2009, Model line: SUPERB, Model: SKODA SUPERB 2009Pages: 252, PDF Size: 16.33 MB
Page 122 of 252

WARNING■The auxiliary heating must never be operated in closed rooms (e.g. garag-
es) – risk of poisoning!■
The auxiliary heating must not be allowed to run during refuelling – risk
of fire.
■
The exhaust pipe of the auxiliary heating is located on the underside of
the vehicle. If you want to use the heater, then the car should not be
parked in places where the exhaust gases can come into contact with flam- mable materials such as dry grass, undergrowth, leaves, spilled fuel or simi-
lar - Risk of fire.
CAUTION
■ The running auxiliary heater consumes fuel from the vehicle tank and auto-
matically controls the filling level. If only a low quantity of fuel is present in the
fuel tank, the auxiliary heating switches off.■
The exhaust pipe of the auxiliary heating, which is located on the underside
of the vehicle, must not be clogged and the exhaust flow must not be blocked.
■
If the auxiliary heating is running, the vehicle battery discharges. If the auxili-
ary heating and ventilation has been operated several times over a longer peri-
od, the vehicle must be driven a few kilometres in order to recharge the vehi-
cle battery.
■
The air inlet in front of the windscreen must be free (e.g. of ice, snow or
leaves) to ensure that the auxiliary heating operates properly.
Note
■ The auxiliary heating switches on the blower B » Fig. 125 on page 112
or » Fig. 126 on page 115 only if it has achieved a coolant temperature of ap-
prox. 50 °C.■
At low outside temperatures, this can result in a formation of water vapour in
the area of the engine compartment. This is quite normal and is not an operat-
ing problem.
■
So that warm air can flow into the vehicle interior after switching on the aux-
iliary heating, you must maintain the comfort temperature normally selected
by you, leave the fan switched on and leave the air outlet vents in an open po-
sition. It is recommended to put the air flow in the position
or
.
Switching on/offFig. 127
Button for switching on/off the system directly on the operating
part of the air conditioning/Climatronic
Read and observe
and on page 119 first.
The auxiliary heating can be switched on/off as follows.
Manually switching on using the button on the operating part of the manual air conditioning/Cli-
matronic. The warning light in the button illuminates » Fig. 127.
by using the radio remote control » page 120.
Manually switching off using the button on the operating part of the manual air conditioning/Cli-
matronic. The warning light in the button goes out » Fig. 127,
by using the radio remote control » page 120.
After switching off the auxiliary heating, the coolant pump still runs for a short period.
Automatic switching on/off
The following menu items can be selected from the Aux. heating menu item in
the information display » page 47 (depending on the vehicle equipment):
■ Day of the week - set the current day of the week;
■ Running time - Set the required running time in 5 minute increments. The
running time can be 10 to 60 minutes.
■ Mode - Set the desired heating/ventilation mode;
119Air conditioning system
Page 123 of 252
■Starting time 1 , Starting time 2 , Starting time 3 - for each pre-set time, the
day and the time (hour and minute) can be set for switching on the auxiliary
heating. An empty position can be found between Sunday and Monday when
selecting the day. If this empty position is selected, the activation is per-
formed without taking into account the day.
■ Activate - Activate pre-set mode;
■ Deactivate - Deactivate pre-set mode;
■ Factory settings - Restore factory settings
■ Back - Return to main menu
Only one programmed pre-set time can be active.
The last programmed pre-set time remains active.
After the auxiliary heating activates automatically at the set time, it is neces-
sary to pre-set a time again.
If the menu item Back is selected or no changes are made on the display for
longer than 10 seconds, the set values are stored, but the pre-set time is not
activated.
The system switches itself off at the end of the running time set under the
menu item Running time .
Note
A warning light on the button » Fig. 127 illuminates when the system is run-
ning.
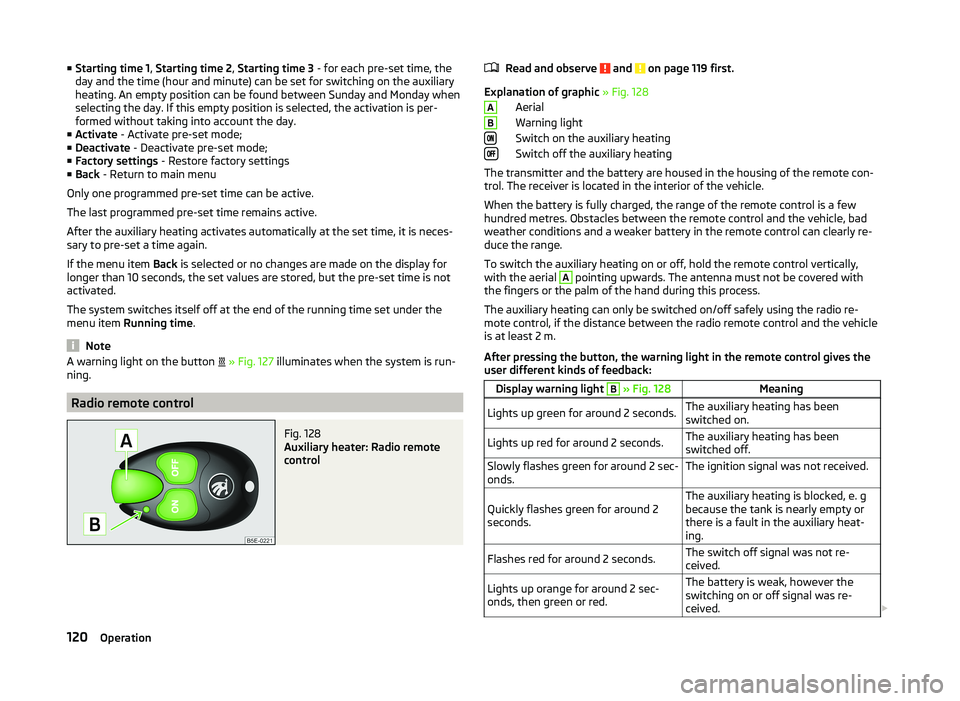
Radio remote control
Fig. 128
Auxiliary heater: Radio remote
control
Read and observe and on page 119 first.
Explanation of graphic » Fig. 128
Aerial
Warning light
Switch on the auxiliary heating
Switch off the auxiliary heating
The transmitter and the battery are housed in the housing of the remote con- trol. The receiver is located in the interior of the vehicle.
When the battery is fully charged, the range of the remote control is a few
hundred metres. Obstacles between the remote control and the vehicle, bad
weather conditions and a weaker battery in the remote control can clearly re-
duce the range.
To switch the auxiliary heating on or off, hold the remote control vertically,
with the aerial
A
pointing upwards. The antenna must not be covered with
the fingers or the palm of the hand during this process.
The auxiliary heating can only be switched on/off safely using the radio re-
mote control, if the distance between the radio remote control and the vehicle
is at least 2 m.
After pressing the button, the warning light in the remote control gives the
user different kinds of feedback:
Display warning light B » Fig. 128MeaningLights up green for around 2 seconds.The auxiliary heating has been
switched on.Lights up red for around 2 seconds.The auxiliary heating has been
switched off.Slowly flashes green for around 2 sec-
onds.The ignition signal was not received.Quickly flashes green for around 2
seconds.The auxiliary heating is blocked, e. g
because the tank is nearly empty or
there is a fault in the auxiliary heat-
ing.Flashes red for around 2 seconds.The switch off signal was not re-
ceived.Lights up orange for around 2 sec-
onds, then green or red.The battery is weak, however the
switching on or off signal was re-
ceived. AB120Operation
Page 125 of 252
WARNING (Continued)■Never leave a mobile phone on a seat, on the dash panel or in any area
where it can become a projectile during a sudden braking manoeuvre, an
accident or a collision — risk of injury.■
Before transport of the vehicle by air, the Bluetooth ®
function must be
switched off by a specialist company.
Universal telephone preinstallation (hands-free)
The universal telephone preinstallation (hands-free system) includes a con-
venience mode for the mobile phone via voice control, the multifunction steer-
ing wheel and the radio or navigation system.
WARNING■ Concentrate fully at all times on your driving! As the driver, you are fully
responsible for the operation of your vehicle.■
Only use the device in such a way that you are in full control of your vehi-
cle in every traffic situation – there is the risk of accidents!
■
The national regulations for using a mobile phone in a vehicle must be
observed.
Note■ We recommend that mobile phones and two-way radio systems be installed
in the vehicle by a specialist workshop.■
Not all mobile phones that enable Bluetooth ®
communication are compatible
with the universal telephone preinstallation GSM II or GSM III. Ask a ŠKODA
Partner whether your phone is compatible with the universal telephone prepa-
ration GSM II or GSM III.
■
The range of the Bluetooth ®
connection to the hands-free system is restric-
ted to the vehicle interior. The range is dependent on local factors, e.g. obsta-
cles between the devices and mutual interferences with other devices. If your
mobile phone is in a jacket pocket, for example, this can lead to difficulties
when establishing a connection with the hands-free-system or transferring
data.
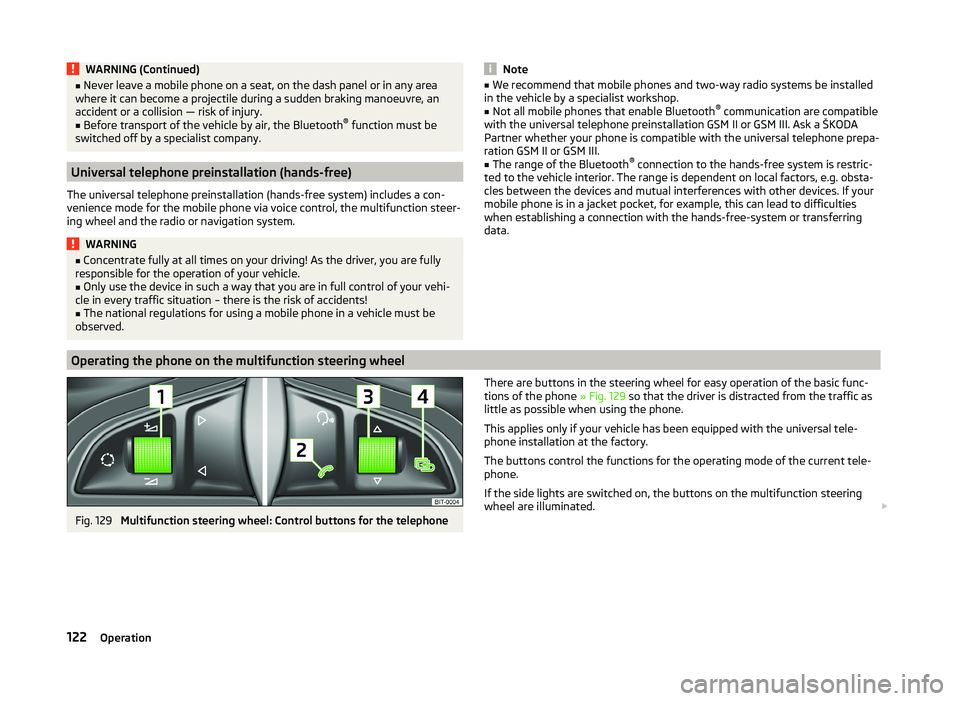
Operating the phone on the multifunction steering wheel
Fig. 129
Multifunction steering wheel: Control buttons for the telephone
There are buttons in the steering wheel for easy operation of the basic func-
tions of the phone » Fig. 129 so that the driver is distracted from the traffic as
little as possible when using the phone.
This applies only if your vehicle has been equipped with the universal tele-
phone installation at the factory.
The buttons control the functions for the operating mode of the current tele-
phone.
If the side lights are switched on, the buttons on the multifunction steering
wheel are illuminated. 122Operation
Page 149 of 252
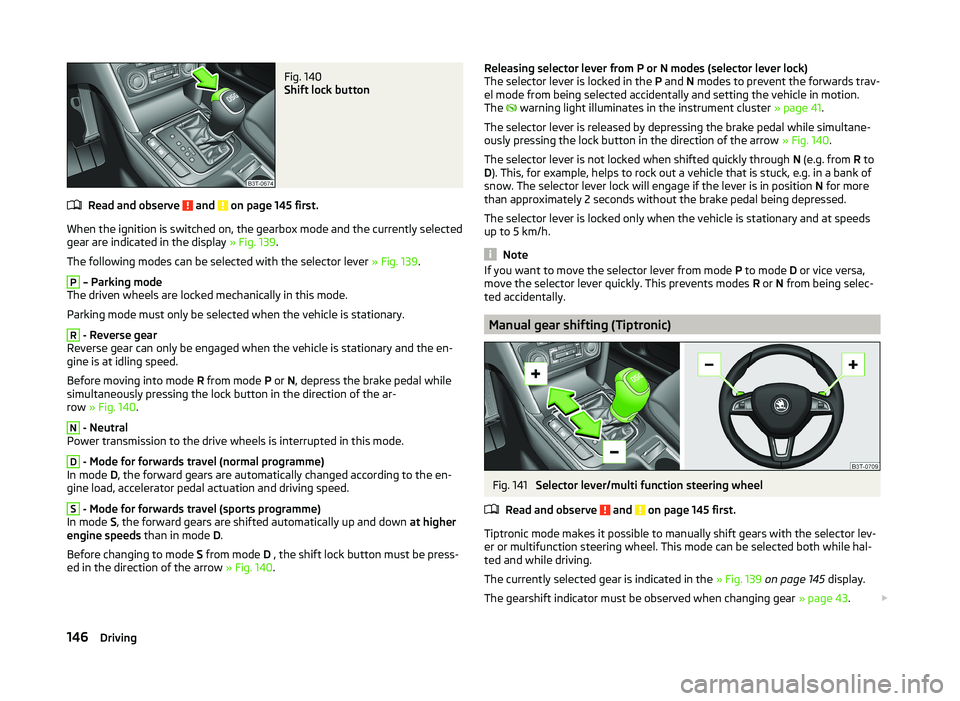
Fig. 140
Shift lock button
Read and observe and on page 145 first.
When the ignition is switched on, the gearbox mode and the currently selectedgear are indicated in the display » Fig. 139.
The following modes can be selected with the selector lever » Fig. 139.
P
– Parking mode
The driven wheels are locked mechanically in this mode.
Parking mode must only be selected when the vehicle is stationary.
R
- Reverse gear
Reverse gear can only be engaged when the vehicle is stationary and the en-
gine is at idling speed.
Before moving into mode R from mode P or N, depress the brake pedal while
simultaneously pressing the lock button in the direction of the ar-
row » Fig. 140 .
N
- Neutral
Power transmission to the drive wheels is interrupted in this mode.
D
- Mode for forwards travel (normal programme)
In mode D, the forward gears are automatically changed according to the en-
gine load, accelerator pedal actuation and driving speed.
S
- Mode for forwards travel (sports programme)
In mode S, the forward gears are shifted automatically up and down at higher
engine speeds than in mode D.
Before changing to mode S from mode D , the shift lock button must be press-
ed in the direction of the arrow » Fig. 140.
Releasing selector lever from P or N modes (selector lever lock)
The selector lever is locked in the P and N modes to prevent the forwards trav-
el mode from being selected accidentally and setting the vehicle in motion.
The
warning light illuminates in the instrument cluster » page 41.
The selector lever is released by depressing the brake pedal while simultane-
ously pressing the lock button in the direction of the arrow » Fig. 140.
The selector lever is not locked when shifted quickly through N (e.g. from R to
D ). This, for example, helps to rock out a vehicle that is stuck, e.g. in a bank of
snow. The selector lever lock will engage if the lever is in position N for more
than approximately 2 seconds without the brake pedal being depressed.
The selector lever is locked only when the vehicle is stationary and at speeds
up to 5 km/h.
Note
If you want to move the selector lever from mode P to mode D or vice versa,
move the selector lever quickly. This prevents modes R or N from being selec-
ted accidentally.
Manual gear shifting (Tiptronic)
Fig. 141
Selector lever/multi function steering wheel
Read and observe
and on page 145 first.
Tiptronic mode makes it possible to manually shift gears with the selector lev-
er or multifunction steering wheel. This mode can be selected both while hal-
ted and while driving.
The currently selected gear is indicated in the » Fig. 139 on page 145 display.
The gearshift indicator must be observed when changing gear » page 43.
146Driving
Page 150 of 252
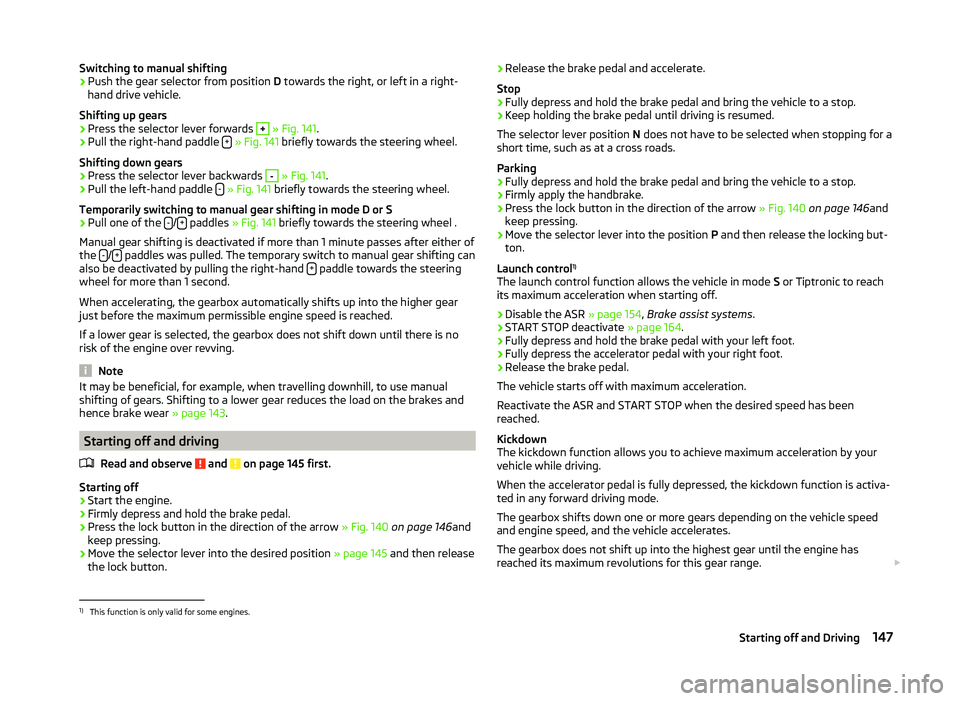
Switching to manual shifting›Push the gear selector from position D towards the right, or left in a right-
hand drive vehicle.
Shifting up gears›
Press the selector lever forwards
+
» Fig. 141 .
›
Pull the right-hand paddle +
» Fig. 141 briefly towards the steering wheel.
Shifting down gears
›
Press the selector lever backwards
-
» Fig. 141 .
›
Pull the left-hand paddle -
» Fig. 141 briefly towards the steering wheel.
Temporarily switching to manual gear shifting in mode D or S
›
Pull one of the -/+ paddles
» Fig. 141 briefly towards the steering wheel .
Manual gear shifting is deactivated if more than 1 minute passes after either of
the -
/+ paddles was pulled. The temporary switch to manual gear shifting can
also be deactivated by pulling the right-hand + paddle towards the steering
wheel for more than 1 second.
When accelerating, the gearbox automatically shifts up into the higher gear
just before the maximum permissible engine speed is reached.
If a lower gear is selected, the gearbox does not shift down until there is no risk of the engine over revving.
Note
It may be beneficial, for example, when travelling downhill, to use manual
shifting of gears. Shifting to a lower gear reduces the load on the brakes and
hence brake wear » page 143.
Starting off and driving
Read and observe
and on page 145 first.
Starting off
›
Start the engine.
›
Firmly depress and hold the brake pedal.
›
Press the lock button in the direction of the arrow » Fig. 140 on page 146 and
keep pressing.
›
Move the selector lever into the desired position » page 145 and then release
the lock button.
› Release the brake pedal and accelerate.
Stop›
Fully depress and hold the brake pedal and bring the vehicle to a stop.
›
Keep holding the brake pedal until driving is resumed.
The selector lever position N does not have to be selected when stopping for a
short time, such as at a cross roads.
Parking
›
Fully depress and hold the brake pedal and bring the vehicle to a stop.
›
Firmly apply the handbrake.
›
Press the lock button in the direction of the arrow » Fig. 140 on page 146 and
keep pressing.
›
Move the selector lever into the position P and then release the locking but-
ton.
Launch control 1)
The launch control function allows the vehicle in mode S or Tiptronic to reach
its maximum acceleration when starting off.
›
Disable the ASR » page 154, Brake assist systems .
›
START STOP deactivate » page 164.
›
Fully depress and hold the brake pedal with your left foot.
›
Fully depress the accelerator pedal with your right foot.
›
Release the brake pedal.
The vehicle starts off with maximum acceleration.
Reactivate the ASR and START STOP when the desired speed has been
reached.
Kickdown
The kickdown function allows you to achieve maximum acceleration by your
vehicle while driving.
When the accelerator pedal is fully depressed, the kickdown function is activa-
ted in any forward driving mode.
The gearbox shifts down one or more gears depending on the vehicle speed
and engine speed, and the vehicle accelerates.
The gearbox does not shift up into the highest gear until the engine has
reached its maximum revolutions for this gear range.
1)
This function is only valid for some engines.
147Starting off and Driving
Page 151 of 252
WARNINGRapid acceleration, particularly on slippery roads, can lead to loss of control
of the vehicle – there is a risk of an accident.
Malfunction
Read and observe
and on page 145 first.
Emergency programme
The transmission switches to the emergency programme if there is a fault in
the automatic gearbox system.
Indications of an activated emergency programme include the following:
› Only certain gears are selected.
› Reverse gear
R cannot be used.
› Shifting gears in Tiptronic mode is not possible.
Gearbox overheating
The gearbox may, for example, become too hot due to frequent repeated
starting or stop-and-go traffic. Overheating is indicated by the warning
light » page 33 ,
Clutches of the automatic DSG gearbox are too hot
.
Defective selector lever lock
If the selector lever lock is defective or its power supply is interrupted (e.g. dis-
charged vehicle battery, faulty fuse), the selector lever can no longer be moved
out of position P in the normal manner, and the vehicle can no longer be driv-
en. The selector lever must be emergency released » page 217.
Note
Visit a specialist workshop if the gearbox has switched to the emergency pro-
gramme.
Running in
Introduction
This chapter contains information on the following subjects:
New engine
148
New tyres
149
New brake pads
149New engine
The engine has to be run in during the first 1 500 kilometres.
Up to 1,000 kilometres›
Do not drive faster than 3/4 of the maximum speed of the gear in use, which
means 3/4 of the maximum permissible engine speed.
›
No full throttle.
›
Avoid high engine speeds.
›
Do not tow a trailer.
From 1,000 up to 1,500 kilometres
Gradually increase the power output of the engine up to the full speed of the
gear engaged, which means up to the maximum permissible engine speed.
The red scale on the rev counter indicates the range in which the system be-
gins to limit the engine speed.
During the first operating hours the engine has higher internal friction than
later until all of the moving parts have harmonized. The driving style which you
adopt during the first approx.1 500 kilometres plays a decisive part in the suc-
cess of running in your car.
Never drive at unnecessarily high engine speeds even after the running in pe-
riod.
On vehicles fitted with a manual gearbox, at the very latest shift up into the
next gear when the red area is reached. Observe the recommended
gear » page 43 , Gear recommendation . Very high engine speeds when acceler-
ating (accelerator) are automatically restricted »
.
In vehicles with manual transmission, do not drive at unnecessarily low engine
speeds. Shift down a gear when the engine is no longer running smoothly. Ob-
serve the recommended gear » page 43, Gear recommendation .
CAUTION
■
The engine is not protected from excessive engine revs caused by shifting
down at the wrong time. This can result in a sudden increase in revs beyond
the permissible maximum rpm and hence engine damage.■
Never rev up a cold engine when the vehicle is stationary or when driving in
individual gears.
For the sake of the environment
Do not drive at unnecessarily high engine speeds. Shifting up sooner helps
save fuel, reduces engine noise and protects the environment.148Driving
Page 162 of 252
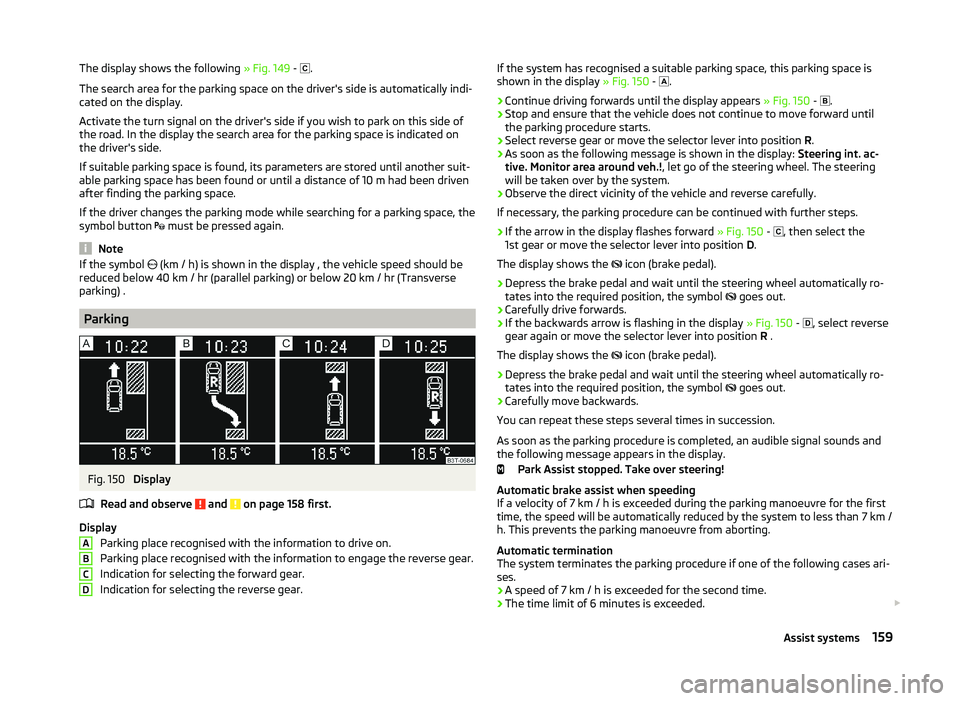
The display shows the following » Fig. 149 - .
The search area for the parking space on the driver's side is automatically indi- cated on the display.
Activate the turn signal on the driver's side if you wish to park on this side of
the road. In the display the search area for the parking space is indicated on
the driver's side.
If suitable parking space is found, its parameters are stored until another suit-
able parking space has been found or until a distance of 10 m had been driven
after finding the parking space.
If the driver changes the parking mode while searching for a parking space, the
symbol button must be pressed again.
Note
If the symbol
(km / h) is shown in the display , the vehicle speed should be
reduced below 40 km / hr (parallel parking) or below 20 km / hr (Transverse
parking) .
Parking
Fig. 150
Display
Read and observe
and on page 158 first.
Display Parking place recognised with the information to drive on.
Parking place recognised with the information to engage the reverse gear.
Indication for selecting the forward gear.
Indication for selecting the reverse gear.
ABCDIf the system has recognised a suitable parking space, this parking space is
shown in the display » Fig. 150 - .›
Continue driving forwards until the display appears » Fig. 150 -
.
›
Stop and ensure that the vehicle does not continue to move forward until
the parking procedure starts.
›
Select reverse gear or move the selector lever into position R.
›
As soon as the following message is shown in the display: Steering int. ac-
tive. Monitor area around veh.! , let go of the steering wheel. The steering
will be taken over by the system.
›
Observe the direct vicinity of the vehicle and reverse carefully.
If necessary, the parking procedure can be continued with further steps.
›
If the arrow in the display flashes forward » Fig. 150 -
, then select the
1st gear or move the selector lever into position D.
The display shows the icon (brake pedal).
›
Depress the brake pedal and wait until the steering wheel automatically ro-
tates into the required position, the symbol goes out.
›
Carefully drive forwards.
›
If the backwards arrow is flashing in the display
» Fig. 150 -
, select reverse
gear again or move the selector lever into position R .
The display shows the icon (brake pedal).
›
Depress the brake pedal and wait until the steering wheel automatically ro-
tates into the required position, the symbol goes out.
›
Carefully move backwards.
You can repeat these steps several times in succession.
As soon as the parking procedure is completed, an audible signal sounds and
the following message appears in the display.
Park Assist stopped. Take over steering!
Automatic brake assist when speeding
If a velocity of 7 km / h is exceeded during the parking manoeuvre for the first time, the speed will be automatically reduced by the system to less than 7 km /
h. This prevents the parking manoeuvre from aborting.
Automatic termination
The system terminates the parking procedure if one of the following cases ari-
ses.
› A speed of 7 km / h is exceeded for the second time.
› The time limit of 6 minutes is exceeded.
159Assist systems
Page 166 of 252
Operating conditions for the systemFig. 152
MAXI DOT display: Engine is au-
tomatically switched off / auto-
matic engine cut off is not possi-
ble
Read and observe on page 162 first.
For system-dependent automatic engine shutdown to work, the following
conditions must be met.
The driver's door is closed.
The driver has fastened the seat belt.
The bonnet is closed.
The driving speed exceeded 4 km/h after the last stop.
No trailer is coupled.
Some additional conditions for the system to function correctly cannot be in-
fluenced or recognised by the driver. Therefore, the system can react differ-
ently in situations which are identical from the driver's perspective.
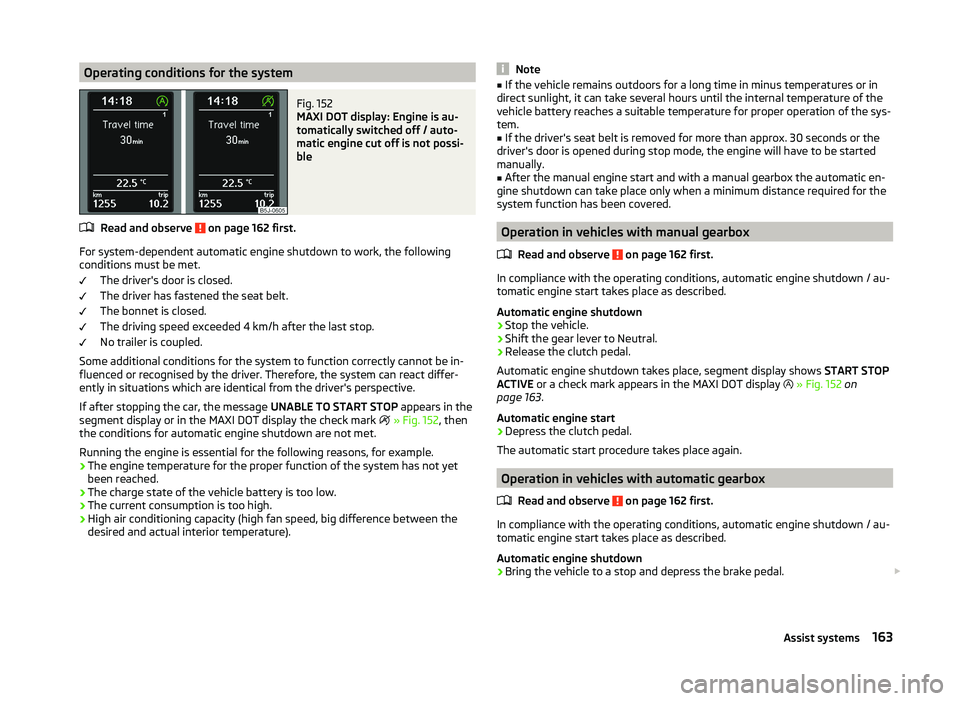
If after stopping the car, the message UNABLE TO START STOP appears in the
segment display or in the MAXI DOT display the check mark
» Fig. 152 , then
the conditions for automatic engine shutdown are not met.
Running the engine is essential for the following reasons, for example.
› The engine temperature for the proper function of the system has not yet
been reached.
› The charge state of the vehicle battery is too low.
› The current consumption is too high.
› High air conditioning capacity (high fan speed, big difference between the
desired and actual interior temperature).
Note■ If the vehicle remains outdoors for a long time in minus temperatures or in
direct sunlight, it can take several hours until the internal temperature of the
vehicle battery reaches a suitable temperature for proper operation of the sys-
tem.■
If the driver's seat belt is removed for more than approx. 30 seconds or the
driver's door is opened during stop mode, the engine will have to be started
manually.
■
After the manual engine start and with a manual gearbox the automatic en-
gine shutdown can take place only when a minimum distance required for the
system function has been covered.
Operation in vehicles with manual gearbox
Read and observe
on page 162 first.
In compliance with the operating conditions, automatic engine shutdown / au-
tomatic engine start takes place as described.
Automatic engine shutdown
›
Stop the vehicle.
›
Shift the gear lever to Neutral.
›
Release the clutch pedal.
Automatic engine shutdown takes place, segment display shows START STOP
ACTIVE or a check mark appears in the MAXI DOT display
» Fig. 152 on
page 163 .
Automatic engine start
›
Depress the clutch pedal.
The automatic start procedure takes place again.
Operation in vehicles with automatic gearbox
Read and observe
on page 162 first.
In compliance with the operating conditions, automatic engine shutdown / au-
tomatic engine start takes place as described.
Automatic engine shutdown
›
Bring the vehicle to a stop and depress the brake pedal.
163Assist systems
Page 167 of 252
Automatic engine shutdown takes place, segment display shows START STOP
ACTIVE or a check mark appears in the MAXI DOT display » Fig. 152 on
page 163 .
Automatic engine start›
Release the brake pedal.
The automatic start procedure takes place again.
Further information on automatic transmission
The automatic engine shut down takes place when the selector lever is in po-
sitions P, D , S and N and in Tiptronic mode.
When the selector lever is in position P, the engine remains shut down even
after you release the brake pedal. The engine starts automatically by pressing
the gas pedal or by moving the selector lever into a different mode and releas-
ing the brake pedal.
If the engine is off due to the automatic and the selector lever is put to the R
position, then the automatic start-up of the engine.
If the gear selector is moved from position R to the position D, S or N, the vehi-
cle must reach a speed of more than 10 km / h before the automatic engine
shutdown starts.
There is no automatic engine shutdown when the system detects a vehicle
moving due to a large steering angle.
No automatic engine shutdown takes place when the vehicle is moving at low
speed (e.g. during a traffic jam or when turning) and remains stationary after
pressing the brake pedal lightly. Automatic engine shutdown takes place if you
press the brake pedal down with more force.
System related automatic start-up
Read and observe
on page 162 first.
When the engine is off, the system can automatically start the engine beforethe desired journey continues. Some possible reasons for this are:
› The vehicle has begun to roll, e.g. on a slope.
› The brake pedal has been actuated several times.
› The current consumption is too high.
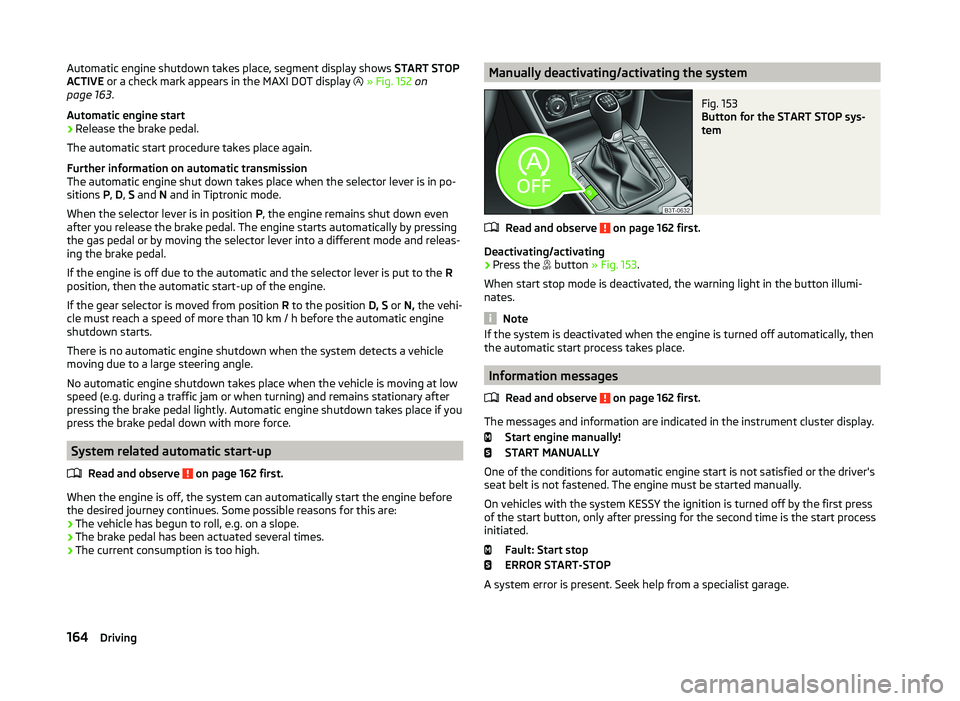
Manually deactivating/activating the systemFig. 153
Button for the START STOP sys-
tem
Read and observe on page 162 first.
Deactivating/activating
›
Press the button
» Fig. 153 .
When start stop mode is deactivated, the warning light in the button illumi-
nates.
Note
If the system is deactivated when the engine is turned off automatically, then
the automatic start process takes place.
Information messages
Read and observe
on page 162 first.
The messages and information are indicated in the instrument cluster display. Start engine manually!
START MANUALLY
One of the conditions for automatic engine start is not satisfied or the driver's
seat belt is not fastened. The engine must be started manually.
On vehicles with the system KESSY the ignition is turned off by the first press
of the start button, only after pressing for the second time is the start process
initiated.
Fault: Start stop
ERROR START-STOP
A system error is present. Seek help from a specialist garage.
164Driving
Page 177 of 252
The ŠKODA Service Partners are up-to-date on the legally required tests and
will prepare the vehicle for the tests as part of a service operation if required,
or will be responsible for carrying out these tests. The specialist garages can
carry out the specified tests directly, if required by the customer, if they are
authorised to do so. This saves you time and money.
Even if you want to take your vehicle to an officially approved test centre for
prior checking in preparation of a legally required test, we recommend that you
consult the service consultant of your ŠKODA Service Partner beforehand.
Based on their appraisal, the service consultant will tell you which areas you
should focus on in order to ensure that your vehicle will pass the technical test
without any problems. This allows you to avoid additional expenses resulting
from a possible subsequent test.
ŠKODA Service Partners
Read and observe
on page 173 first.
ŠKODA Service Partners are equipped with modern, specially developed tools
and equipment. Here, trained specialists have access to a comprehensive
range of ŠKODA Original Parts and ŠKODA Original Accessories for carrying out
modifications, repairs and technical alterations.
All ŠKODA service partners operate according to the latest guidelines and in-
structions from ŠKODA AUTO a.s. All service and repair work is therefore car-
ried out on time and to the appropriate quality. Adhering to these instructions
and guidelines helps ensure road safety and helps keep your vehicle in a good
technical condition.
ŠKODA Service Partners are therefore properly prepared to service your vehicle
and to provide quality work. We therefore advise you to have all modifications,
repairs and technical alterations to your vehicle carried out by a ŠKODA Service
Partner.
ŠKODA Original parts
Read and observe
on page 173 first.
We recommend the use of ŠKODA Genuine Parts for your vehicle, since these
parts are approved by ŠKODA AUTO a.s. They correspond exactly to ŠKODA
AUTO a.s. specifications in respect of design, dimensional accuracy and materi-
al and are identical to the components used in the batch production.
ŠKODA AUTO a.s. can guarantee the safety, suitability, and long life of these
products. We therefore recommend that you only use ŠKODA Genuine Parts.
ŠKODA AUTO a.s. supplies the market with a complete range of ŠKODA Genu-
ine Parts not only while the model is still in production but with wear-and-tear parts for at least 15 years after the end of series production and with all other
vehicle parts for at least 10 years.
ŠKODA service partners are liable for any defects in ŠKODA original parts for a
period of 2 years after sale in accordance with materials defect liability under
the law unless otherwise agreed in the purchase agreement. You should keep
the confirmed warranty certificate and the receipt for these components for
this period, so that the commencement of the warranty term may be verified.
Body repairs
ŠKODA vehicles are designed so that if the body suffers damage, it is only nec-
essary to replace those parts which are in fact damaged.
Before you decide to have damaged body parts replaced, however, you should first contact your specialist garage to determine whether or not such parts can
also be repaired. Repairs to body parts are usually cheaper.
ŠKODA Original accessories
Read and observe
on page 173 first.
If you wish to fit accessories to your vehicle, you should remember the follow-ing:
We recommend that you use ŠKODA Genuine Accessories in your vehicle.
ŠKODA AUTO a.s. offers a warranty on the reliability, safety and suitability for
your particular vehicle of these accessories. Although we constantly monitor
the market, we are not able to assess or offer a warranty on other products
even though in some instances such products may have a type approval or
may have been approved by a nationally recognised approval authority.
All accessory products go through a fastidious process of technical develop-
ment (technical tests) and quality inspection (customer tests), and only if all
tests are positive does the product become a ŠKODA Genuine Accessory.
Our ŠKODA Genuine Accessories service also provides expert advice and pro-
fessional fitting if requested by the customer.
ŠKODA Service Partners are liable for any defects in ŠKODA Genuine Parts for a
period of 2 years after installation or delivery in accordance with materials de-
fect liability legislation, unless otherwise agreed in the purchase contract or in
174General Maintenance