instrument cluster SKODA SUPERB 2010 2.G / (B6/3T) User Guide
[x] Cancel search | Manufacturer: SKODA, Model Year: 2010, Model line: SUPERB, Model: SKODA SUPERB 2010 2.G / (B6/3T)Pages: 287, PDF Size: 16.59 MB
Page 34 of 287
Instruments and warning lights33
Using the system
Safety
Driving Tips
General Maintenance
Breakdown assistance
Technical Data
WARNING
If you must stop for technical reasons, then park the vehicle at a safe
distance from the traffic and switch off the engine and switch on the hazard
warning light system page 66.
Take care when opening the coolant expa nsion bottle. If the engine is hot,
the cooling system is pressurized - risk of scalding! It is best to allow the engine
to cool down before removing the cap.
Do not touch the coolant fan The coolant fan may switch on automatically
even if the ignition is off.
Traction control system (TCS)
The warning light
comes on for a few seconds when the ignition is switched on.
The warning light flashes when a control cycle is activated while driving.
The warning light lights up permanentl y if there is a fault in the system.
The fact that the TCS system operates together with the ABS means that the TCS
warning light will also come on if the ABS system is not operating properly.
If the warning light comes on immediately after starting the engine, the TCS system
can be switched off for technical reasons. In this case, the TCS system can be switched
on again by switching the ignition on and off. If the warning light goes out, the TCS
system is fully functional again.
Further information about the TCS page 188, “Traction control system (TCS)”.
Note
If the battery has been disconnected and reconnected, the warning light
comes on
after switching on the ignition. The warning light must go out after driving a short
distance.
Switch off traction control system (TCS)
The TCS system is switched off by pressing the button page 188, fig. 171 and the
warning light
lights up.
Electronic stability programme (ESP)*
The warning light
comes on for a few seconds when the ignition is switched on.
When the ESP helps to stabilise the vehicle, the warning light
flashes in the informa-
tion display.
The ESP system cannot be switched off, only the TCS system can be switched off by
pressing the button page 187, fig. 170, the warning light
lights up.
The warning light lights up permanently if there is a fault in the ESP system.
The fact that the ESP system operates together with the ABS means that the ESP
warning light will also come on if the ABS system is not operating properly.
If the warning light
comes on immediately after starting the engine, the ESP system
can be switched off for technical reasons. In this case, the ESP system can be switched
on again by switching the igni tion on and off. If the warning light goes out, the ESP
system is fully functional again.
Further information on the ESP page 187, “Electronic stability programme (ESP)*”.
Electronic Differential Lock (EDL)*
The EDL is a part of the ESP. A fault in the ED L is indicated by the lighting up of the ESP
warning light in the instrument cluster. Have the vehicle inspected without delay by an
authorised Škoda Service Partner. Further information on the EDL page 188, “Elec-
tronic Differential Lock (EDL)*”.
Note
If the battery has been disconnected and reconnected, the warning light
comes on
after switching on the ignition. The warning light must go out after driving a short
distance.
Selector lever lock* / St arting (KESSY system)*
If the green warning light
lights up, operate the brake pedal. This is necessary, in
order to be able to move the selector lever out of the position P or N.
Further information about the selector lever lock page 138.
s3fg.2.book Page 33 Friday, April 30, 2010 12:17 PM
Page 42 of 287
Unlocking and locking41
Using the system
Safety
Driving Tips
General Maintenance
Breakdown assistance
Technical Data
Caution
After leaving the vehicle, it does not lock automatically, this is why you should pay
attention to the procedure for locking the vehicle page 40.
Note
If the vehicle battery or the battery in the remote control key is weak or discharged,
perhaps the vehicle cannot be unlocked or locked via KESSY. In such a case, use the
emergency unlocking or locking of the driver's door, see Owner's Manual.Further possibilites of lockingProtection against inadvertently locking the key in the vehicle
If the key, which was used to lock the vehicle, remains in the vehicle in the area
page 40, fig. 26 after locking and closing all of the doors including the boot lid, the
protection against inadvertently locking the key in the vehicle is activated and the
vehicle unlocks itself again.
You are informed about the activation of the protection against inadvertently locking
the key in the vehicle by the turn signal lights flashing and the message Key in vehicle
which appears in the information display* or Key in vehicle which appears in the
display of the instrument cluster. Additiona lly, on vehicles which are fitted with the
anti-theft alarm system*, an audible signal sounds.Messages in the instrument clusterA few warning and information texts of the KESSY system in the information display*
or in the display of the instrument cluster:
Key not found or No Key
This message is displayed when the engine is started and the system cannot detect a
valid key in the vehicle. This can occur if the key is outside the vehicle, the battery in the
key is discharged, the key is defective or the electromagnetic field is strongly disturbed.
This message is also displayed when the ignition is switched on or the engine is
running and the system cannot detect a valid key in the vehicle. Keyless defective or Check Keyless
There is a fault in the KESSY system, contact your specialist garage.
Renew key battery! or Key Battery
Low voltage is present in the battery of th
e remote control key, change the battery.
Parking the vehicleIf the vehicle is not unlocked within 60 hours, the sensors page 40, fig. 26 and
in the handle of the front passenger's d oor are automatically deactivated. For reac-
tivation, one of the following conditions must be met:
Unlocking the driver's door with the aid of the sensor page 40, fig. 26 ,
pressing the handle of the boot lid,
unlocking the vehicle using the button on the remote control key,
emergency unlocking of the driver 's door (see Owner's Manual).
If the vehicle is not unlocked within 90 hour s, the sensors and in the handle of
the driver's door are also automatically deactivated page 40, fig. 26. For reactiva-
tion, one of the following conditions must be met:
unlocking the vehicle using the button on the remote control key,
emergency unlocking of the driver 's door (see Owner's Manual).
Convenience operation of the windowsIf you hold your finger on the sensor page 40, fig. 26 for more than 2 seconds
while locking the vehicle, the opened windows and the panoramic sliding roof are
closed. If you lift your finger off the sens or , the closing process is interrupted. If you
touch the sensor again, the closing process of the windows and the panoramic
sliding roof continues.
If you immediately touch the sensor or pull on the handle during the closing
process of the windows and the panoramic sliding roof initiated by sensor , all of the
windows and the panoramic sliding roof are opened again.
AD
A1
A2
A2A1
A2
A1
A1
A1
A2
A1
s3fg.2.book Page 41 Friday, April 30, 2010 12:17 PM
Page 62 of 287
Lights and Visibility61
Using the system
Safety
Driving Tips
General Maintenance
Breakdown assistance
Technical Data
Daylight driving lightsSwitching on daylight driving lights– Switch on the ignition without turning the light switch out of the position 0.Deactivating the function daylight driving lights– Pull the turn signal light lever towards the steering wheel up to 3 seconds after
switching on the ignition and at the same time, slide it to the bottom and hold it in
this position for at least 3 seconds.Activating the function daylight driving lights– Pull the turn signal light lever towards the steering wheel up to 3 seconds after
switching on the ignition and at the same time, slide it to the top and hold it in this
position for at least 3 seconds.
In some countries, the national legal provisions require that the rear parking lights
come on together with the bulbs for daylight driving lights when activating the function
daylight driving lights.
On vehicles which are fitted with bulbs for daylight driving lights in the fog lights, the
parking lights do not come on when activa ting the function daylight driving lights.
When the daylight driving lights are switched on, the lighting of the instrument cluster
is switched on as well.
On vehicles fitted with an information displa y*, you can also activate or deactivate in
the menu the function da ylight driving lights:
SETUP
Lights & Vision (Lights & Vision)
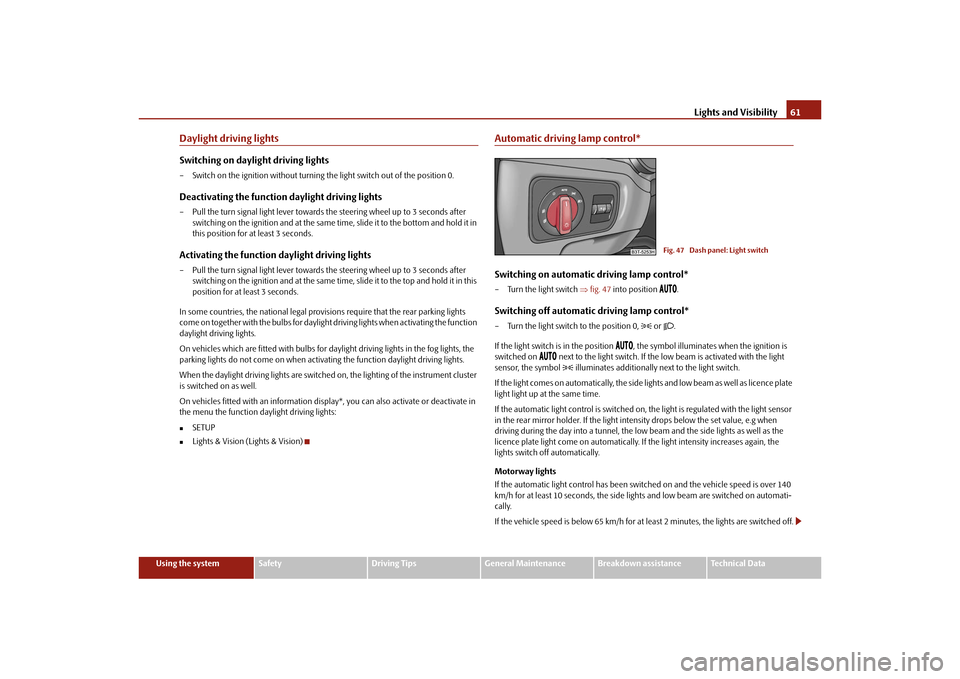
Automatic driving lamp control*Switching on automatic driving lamp control*– Turn the light switch fig. 47 into position
.
Switching off automatic driving lamp control*– Turn the light switch to the position 0,
or .
If the light switch is in the position
, the symbol illuminates when the ignition is
switched on
next to the light switch. If the low beam is activated with the light
sensor, the symbol illuminates additionally next to the light switch.
If the light comes on automatically, the side lights and low beam as well as licence plate
light light up at the same time.
If the automatic light control is switched on, the light is regulated with the light sensor
in the rear mirror holder. If the light intensity drops below the set value, e.g when
driving during the day into a tunnel, the low beam and the side lights as well as the
licence plate light come on automatically. If the light intensity increases again, the
lights switch off automatically.
Motorway lights
If the automatic light control has been swit ched on and the vehicle speed is over 140
km/h for at least 10 seconds, the side ligh ts and low beam are switched on automati-
cally.
If the vehicle speed is below 65 km/h for at least 2 minutes, the lights are switched off.
Fig. 47 Dash panel: Light switch
s3fg.2.book Page 61 Friday, April 30, 2010 12:17 PM
Page 66 of 287
Lights and Visibility65
Using the system
Safety
Driving Tips
General Maintenance
Breakdown assistance
Technical Data
the daylight driving lights are not switched on,
the low beam is switched on or th e light switch is in the position
and the
intensity of the ambient light causes the low beam to be switched on,
the fog lights are not switched on,
no reverse gear is engaged.Note
If you engage the reverse gear during the active function “CORNER”, both fog lights
illuminate.Rear fog light
Switching on the rear fog light– First of all turn the light switch into position
or page 64, fig. 48 .
– Pull the switch into position .
The warning light
lights up in the instrument cluster when the rear fog light is
switched on page 27.
Only the rear fog light of the trailer lights up automatically when you are towing a trailer
using a factory-fitted towing device from Škoda original accessories which is
fitted with the rear fog light.
The rear fog light is located in the rear light array on the driver's side.
Caution
The rear fog light should only be switched on if visibility is particularly poor (conform
with any varying legal provisions) to avoi d dazzling vehicles behind your vehicle.
Instrument lighting
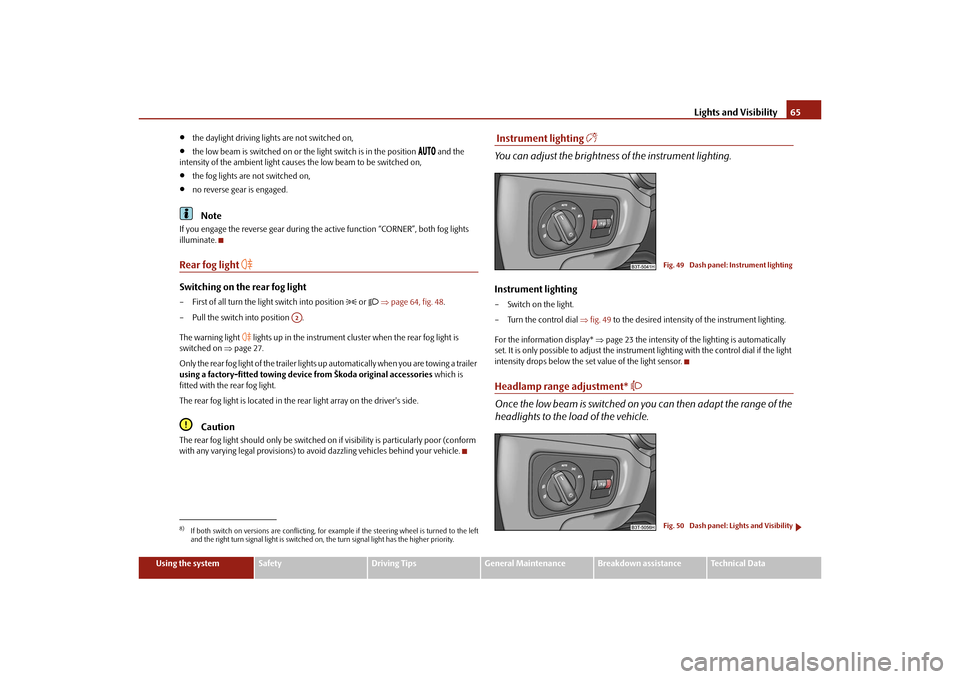
You can adjust the brightness of the instrument lighting.Instrument lighting– Switch on the light.
– Turn the control dial fig. 49 to the desired intensity of the instrument lighting.
For the information display* page 23 the intensity of the lighting is automatically
set. It is only possible to adjust the instrume nt lighting with the control dial if the light
intensity drops below the set value of the light sensor.Headlamp range adjustment*
Once the low beam is switched on you can then adapt the range of the
headlights to the load of the vehicle.
8)If both switch on versions are conflicting, for ex ample if the steering wheel is turned to the left
and the right turn signal light is switched on, the turn signal light has the higher priority.
A2
Fig. 49 Dash panel: Instrument lightingFig. 50 Dash panel: Lights and Visibility
s3fg.2.book Page 65 Friday, April 30, 2010 12:17 PM
Page 68 of 287
Lights and Visibility67
Using the system
Safety
Driving Tips
General Maintenance
Breakdown assistance
Technical Data
– Turn signal for changing lanes - in order to
only flash briefly, move the lever up or
down to the pressure point and hold it in this position.
Main beam
– Switch on the low beam.
– Push the lever forwards in direction of arrow (spring-tensioned position).
– If you push the lever towards the steering wheel in direction of arrow (spring-
tensioned position) the main beam is switched off.Headlight flasher
– Pull the lever towards the steering wheel (spring-tensioned position) in direction
of arrow - the main beam and warning light
in the instrument cluster come
on.
Parking light
– Switch off the ignition.
– Push the lever up or down - the right-hand or left-hand parking light is switched
on.
Information concerning the function of the lights.
The turn signal system only operates when the igniti on is switched on. The corre-
sponding warning light
or in the instrument cluster also flashes.
The turn signal is automatically cancelled after negotiating a curve.
The indicator light flashes at twice its normal rate if a bulb of the turn signal light
fails.
The side light and rear light on the appropriate side of the vehicle are switched on
when the parking light is selected. The parking light only operates if the ignition is
switched off.Caution
Use main beam or the headlight flasher only if this does not risk dazzling other road
users.
Note
If you have switched on the right or left turn signal light and you switch off the igni-
tion, the parking light is not automatically switched on.
Use only in accordance with the legal requirements the described lighting and
signal systems.
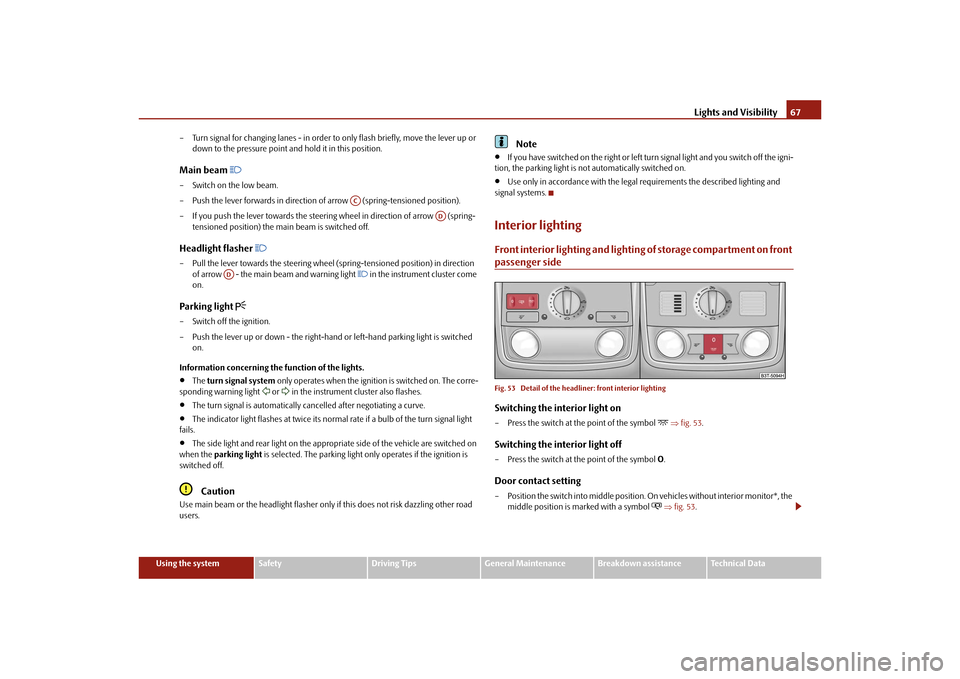
Interior lightingFront interior lighting and lighting of storage compartment on front passenger sideFig. 53 Detail of the headliner: front interior lightingSwitching the interior light on– Press the switch at the point of the symbol
fig. 53 .
Switching the interior light off– Press the switch at the point of the symbol O.Door contact setting– Position the switch into middle position. On vehicles without interior monitor*, the
middle position is marked with a symbol
fig. 53 .
AC
AD
AD
s3fg.2.book Page 67 Friday, April 30, 2010 12:17 PM
Page 123 of 287
Starting-off and Driving
122
You should not switch on any major elec trical components during the heating
period otherwise the vehicle battery will be drained unnecessarily.
- start engine
Applies to all models:
Position
To lock the steering , with the ignition key withdrawn, turn the steering wheel until the
steering locking pin is heard to engage. You should always lock the steering as a general
rule if you leave your vehicle. This acts as a deterrent against possible theft of your
vehicle .
Position
Move the steering wheel back and forward a little if the ignition key cannot, or cannot
easily be turned into this position, in order to release the steering lock.
Position
The engine is started in this position. At th e same time switched on low beam or main
beam or other electrical components wi th major power consumption are briefly
switched off. The ignition key moves back into position when one releases the key.
The ignition key must be turned back into position each time before starting the
engine again. The starter repeat lock in th e ignition lock prevents the starter being
engaged when the engine is r unning and thus getting damaged.
Ignition key withdrawal lock (automatic gearbox)
You can only withdraw the ignition key after switching off the ignition if the selector
lever is in position P.
WARNING
When driving, the ignition key must always be in the position (ignition
switched on) without the engine running. This position is indicated by the
warning lights coming on. If this is not the case, it could result in unexpected
locking of the steering wh eel - risk of accident!
Only remove the ignition key from the ignition lock when the vehicle has
come to a standstill (by applying the handbrake or moving the selector lever
into the position P). The steering lock can engage imme diately - risk of acci-
dent!
Always withdraw the ignition key if you are going to leave the vehicle, even
for a short time. This is particularly important if children are left in the vehicle.
The children might otherwise start the engi ne or switch on electrical equipment
(e.g. power windows) - risk of accident or injury!
Starting the engineGeneral
You can only start the engine only using an original ignition key.
Place the gearshift lever into neutral (or place the selector lever to the position P or
N in the case of an automatic gearbox) and put on the handbrake firmly before starting
the engine.
Before starting, it is necessary to depres s the clutch pedal and to hold it pressed
until the engine starts. If you start the engi ne without depressing the clutch pedal, the
engine does not start and a message is shown in the display of the instrument cluster
to remind you of th e necessity to depress the clutch pedal.
Before starting the engine, on vehicles fitted with automatic gearbox with the
KESSY system*, it is necessary to depress th e brake pedal and to hold it pressed until
the engine starts. If you start the engine without depressing the brake pedal, the engine
does not start and a message is shown in the display of the instrument cluster to
remind you of the necessity to depress the brake pedal.
Let go of the key as soon as the engine starts otherwise there may be damage to
the starter.
The engine running noises may louder at first be louder for a short time after starting
the cold engine until oil pressure can be built up in the hydraulic valve clearance
compensation. This is quite normal and is not an operating problem.
If the engine does not start ...
You can use the battery of anothe r vehicle as a jump-start aid page 241.
It is only possible to tow-start vehicles fi tted with a manual gearbox. The tow-starting
distance must not be more than 50 metres.
A3
A1A2A3
A2
A1
A2
WARNING (continued)
s3fg.2.book Page 122 Friday, April 30, 2010 12:17 PM
Page 126 of 287
Starting-off and Driving125
Using the system
Safety
Driving Tips
General Maintenance
Breakdown assistance
Technical Data
– Hold the button pressed and push the handbrake lever down fully
.
The handbrake warning light
lights up when the handbrak e is applied, provided the
ignition is on.
A warning signal sounds and the following text appears in the display* if you have inad-
vertently driven off with the handbrake applied:
Release parking brake!
The handbrake warning is acti vated if you drive at a speed of more than 6 km/h for
more than 3 seconds.
WARNING
Please note that the handbrake must be fully released. A handbrake which
is only partially released can result in the rear brakes overheating which will
have a negative effect on the operation of the brake system - risk of accident! In
addition this can result in premature wear of the rear brake pads.
Never leave children unattended in the vehicle. The children might, for
example, release the handbrake or take the vehicle out of gear. The vehicle
might then move off - risk of accident!Caution
After the car has come to a stop, always firs t of all apply the handbrake firmly before
then additionally engaging a gear (manual gearbox) or moving the selector lever into
position P (automatic gearbox).KESSY system*IntroductionThe KESSY system makes it possible to switch the ignition on/off and to start/stop the
engine without actively using the key.
Unlocking and locking the steeringIt is necessary that a valid key is in th e vehicle in order to unlock the steering.Unlocking the steering– Open the driver door and enter the vehicle.
– When closing the driver door, the steering is unlocked.Locking the steering– Bring the vehicle to a stop.
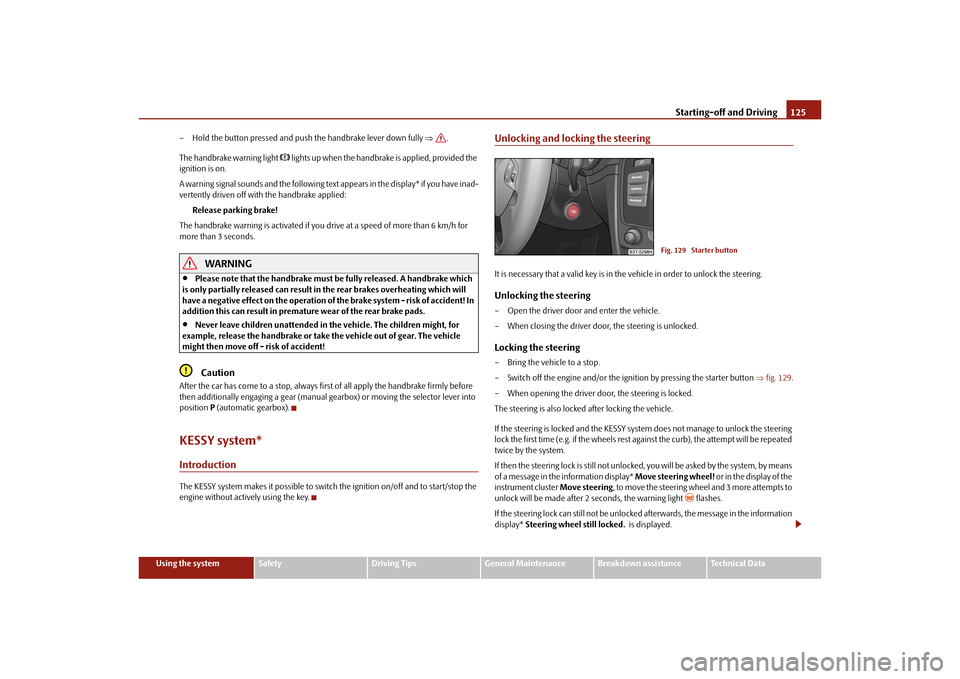
– Switch off the engine and/or the ignition by pressing the starter button fig. 129 .
– When opening the driver door, the steering is locked.
The steering is also locked after locking the vehicle.
If the steering is locked and the KESSY syst em does not manage to unlock the steering
lock the first time (e.g. if the wheels rest against the curb), the attempt will be repeated
twice by the system.
If then the steering lock is still not unlocke d, you will be asked by the system, by means
of a message in the information display* Move steering wheel! or in the display of the
instrument cluster Move steering, to move the steering wheel and 3 more attempts to
unlock will be made after 2 seconds, the warning light
flashes.
If the steering lock can still not be unlocke d afterwards, the message in the information
display* Steering wheel still locked. is displayed.
Fig. 129 Starter button
s3fg.2.book Page 125 Friday, April 30, 2010 12:17 PM
Page 128 of 287

Starting-off and Driving127
Using the system
Safety
Driving Tips
General Maintenance
Breakdown assistance
Technical Data
If in an emergency, the engine must be star
ted quickly (e.g. in a critical situation), you
can start the engine by pressing the starte r button again before the preglow warning
light goes out.
WARNING
Never leave the key in the vehicle in th e area where there are children, because
they can easily start the vehicle - risk of accident!
Note
If the steering is locked while the engine is started, it is unlocked by pressing the starter
button, the electrical components (e.g. radio, navigation system etc.) are activated, the
ignition is switched on and the engine is started.Emergency start-up of engineIf the authorised key is not successfully recognised, Key not found is shown in the
information display* or No Key is shown in the display of the instrument cluster and
the emergency start-up of the engine must be carried out.
– Press the starter button fig. 130 and then hold the key at the starter button or
– press the starter button directly with the key.
Note
During an emergency start-up of the engine, the correct orientation of the key must be
kept fig. 130 .
Switching the engine off– Bring the vehicle to a stop.
– Switch off the engine by pressing the starter button page 125, fig. 129 , doing so
switches off the ignition at the same time.
Note
The KESSY system is protected against inadvertently switching off the engine while
driving, this means that the engine can only be switched off in an emergency
page 126.Messages in the instrument clusterIf a fault is present in the electric steering lock, a message regarding this fault is shown
in the information display* or in the display of the instrument cluster.
Steering column lock: Workshop!
If this message is shown in the information display*, the warning light flashes
and
an acoustic signal sounds, you can continue the trip with extra care. The vehicle must
be immediately taken to a specialist garage.
Steering column lock defective.
If this message is shown in the information display*, the warning light
flashes and a
warning signal sounds, the vehicle must no t be driven and it must be taken to a
specialist garage. After switching off the ignition, it is then no longer possible to lock the
steering, to activate the electrical components (e.g. radio, navigation system), to switch
on the ignition again and to start the engine.
Depress clutch! or CLUTCH
This message is shown if you do not depress the clutch pedal when starting the engine.
Depress brake pedal! or BRAKE
This message is shown if you do not depress the brake pedal when starting the engine,
the warning light
comes on.
Fig. 130 Emergency start-up of vehicle
s3fg.2.book Page 127 Friday, April 30, 2010 12:17 PM
Page 132 of 287

Starting-off and Driving131
Using the system
Safety
Driving Tips
General Maintenance
Breakdown assistance
Technical Data
In order to avoid damaging th e sensors while cleaning with high-pressure cleaners
or steam jets, the sensors must only be directly sprayed for short periods while a
minimum distance of 10 cm must be observed.Note
A component of the park assist is the front and rear parking aid*.
The electronic stability programme (ESP) must always be switched on for the
parking procedure.
Only the front parking aid operates if yo u are towing a trailer (applies only to
models which feature a factory-fitted towing device*). This is why it is not possible to
park backwards with the help of the park assist when towing a trailer.
The sensors must be kept clean and free of ice to enable the parking aid to operate
properly.
Switch on display of the park as sist in the information display*Fig. 133 Switch on display of the park assist in the information display / information display:
Finding a suitable parking spaceSwitch on display of the park assist in the information display*– Press the button fig. 133 .
– Drive past the parking row up to maximum 30 km/h and with a distance of 0.5 m to 1.5 m fig. 133. Operate the turn signal for the driver's side if you wish to park on this side of the road.
In the information display* the search area
for the parking space is indicated on the
driver's side.
If the button is pressed above a speed of 30 km/h, the display appears in the display of
the instrument cluster as soon as you drive slower than 30 km/h.
Note
If the park assist is switched on, a yello w warning light lights up in the button.
The search for suitable parking spaces is automatic after switching on the ignition
at speeds of more than 30 km/h. Searchin g for a parking space is performed at the
same time on the driver and front passenger side.
If the sensors find a suitable parking space, they store its parameters until another
suitable parking space has been found or until a distance of 10 m had been driven after
finding the parking space. This is why it is possible to switch on the park assist after
driving past the parking space, the information on whether this parking space is suit-
able for parking appears in the information display*.
Parking with the help of the park assist and concluding the parking procedureFig. 134 Information display: the determined pa rking space with the information to drive on
and for engaging the reverse gear AA
AB
s3fg.2.book Page 131 Friday, April 30, 2010 12:17 PM
Page 139 of 287
Automatic gearbox DSG*
138WARNING
Never move the selector lever into position R or P when driving - risk of an
accident!
When the engine is running and the vehicle is stationary, it is necessary to
hold the car with the brake pedal in all the positions of the selector lever (except
P and N) since the power transmission is never completely interrupted, also not
when the engine is idling - the vehicle creeps.
You must on no account unintentionally operate the throttle (e.g. by hand
from the engine compartment) if a driv e position is engaged when the car is
stationary. The vehicle would otherwise immediately start off - also when the
handbrake is firmly applied - risk of an accident!
You must move the selector lever into position P and firmly apply the hand-
brake first before you or any other person opens the bonnet and starts working
on the engine when it is running - risk of accident! It is also essential to observe
all warnings page 216.
Selector lever lockAutomatic selector lever lock
With the ignition on, the selector lever is locked when it is in the positions P and N . You
must first of all depress the brake pedal in or der to move the selector lever out of this
position. The warning light
page 27 lights up in the instrument cluster as a
reminder for the driver when the selector lever is in the positions P and N.
A time delay element ensures that the selector lever is not blocked when rapidly
switching over the position N (e.g. from R to D). This does, for example, allow one to
seesaw out a stuck vehicle. The selector lever lo ck will click into place if the lever is in
the N position for more than 2 seconds without the brake pedal being pressed.
The selector lever lock is only active if the vehicle is stationary or moving at speed of
less than 5 km/hour. The lock is swit ched off automatically into position N when the
car is travelling at a higher speed.
Shiftlock button
The Shiftlock button in the hand le of selector lever prevents certain selector lever posi-
tions being engaged inadvertently. The select or lever lock is cancelled when you press
the Shiftlock button. Keylock - Ignition key withdrawal lock
You can only withdraw the ignition key after
switching off the ignition if the selector
lever is in position P. If the ignition key is withdrawn, the selector lever is blocked in
position P.
Kickdown function
The kickdown function provides you with maximum acceleration
power.Fully depressing the accelerato r pedal allows the kickdown function to be activated in
the desired driving program. This function has precedence over the driving
programme and serves for maximum accelerati on of the vehicle when exploiting the
maximum power potential of the engine wi thout taking into account the current
selector lever position ( D, S or Tiptronic). The gearbox shifts down to one or several
gears in line with the driving state and the vehicle accelerates. The gearbox does not
shift up into the highest gear until the en gine has reached its maximum revolutions for
this gear range.
WARNING
Please note that using the kickdown function can result in the driven wheels
spinning on a smooth or slippery road surface - risk of skidding!Dynamic shift programmeThe automatic gearbox of your vehicle is controlled electronically. Shifting up and
down through the gears is performed automati cally on the basis of pre-defined driving
programmes.
Adopting a moderate style of driving will cause the gearbox to select the most
economical driving programme. Shifting up into a higher gear as soon as possible and
shifting down as late as po ssible will have a favourable effect on your fuel consump-
tion.
Adopting a sporty style of driving with rapid movements of the accelerator pedal
combined with sharp acceleration and frequent changes in speed, exploiting the top
speed of the car or depressing the accele rator pedal (kickdown function), will cause
s3fg.2.book Page 138 Friday, April 30, 2010 12:17 PM