service SKODA SUPERB 2010 2.G / (B6/3T) Service Manual
[x] Cancel search | Manufacturer: SKODA, Model Year: 2010, Model line: SUPERB, Model: SKODA SUPERB 2010 2.G / (B6/3T)Pages: 287, PDF Size: 16.59 MB
Page 231 of 287

Wheels and Tyres
230
Changing wheels aroundIf significantly greater wear is present on the front tyres, we recommend changing the
front wheels around with the rear wheels as shown in the diagram fig. 191 . You will
then obtain approximately the same life for all the tyres.
It may be advantageous to swap the tyres ov er “crosswise” when certain types of wear
characteristic arise on the running surface of the tyres (but not in the case of unidirec-
tional tyres). The co-workers of the authorised Škoda Service Partners are extensively
familiar with the combination possibilites.
We recommend that you change the wheels around every 10 000 km in order to
achieve even wear on all wheels and to obtain optimal tyre life.New tyres and wheelsTyres and wheel rims are important design elements. One should therefore use the
tyres and wheel rims which have been releas ed for use by Škoda Auto. They are exactly
matched to the vehicle type and therefore contribute significantly to good road
holding and safe driving characteristics .
Only fit radial tyres of the same type on all 4 wheels, size (rolling circumference) and, if
possible, the same tread pattern on one axle.
The authorised Škoda Service Partners have access to the most current information
about which tyres we have released for use on your vehicle.
We recommend that you have any work relati ng to tyres or wheels carried out by an
authorised Škoda Service Partner . The authorised Škoda Service Partners have all of
the necessary special tools and replacement pa rts available plus the required specialist knowledge and are also in a position to pr
operly dispose of the old tyres. A large
number of authorised Škoda Service Partners also have an attractive range of tyres and
wheels available.
The tyre/wheel combinations which are appr oved for your vehicle are indicated in
your vehicle documents. Approval and licens ing may differ according to the legislation
prevailing in indi vidual countries.
Proper knowledge of the tyre data makes it ea sier for you to select the correct type of
tyre. Tyres do, for example, have the following inscription on their walls:
205 / 55 R 16 94 V
What this means is:
The following speed restrictions apply to tyres:
Fig. 191 Changing wheels around
205
Tyre wi dt h i n mm
55
Height/width ratio in %
R
Code letter for the type of tyre - R adial
16
Diameter of wheel in inches
94
Load index
V
Speed symbol
Speed symbol
Permissible maximum speed
S
180 km/h
T
190 km/h
U
200 km/h
H
210 km/h
V
240 km/h
W
270 km/h
Y
300 km/h
s3fg.2.book Page 230 Friday, April 30, 2010 12:17 PM
Page 232 of 287
Wheels and Tyres231
Using the system
Safety
Driving Tips
General Maintenance
Breakdown assistance
Technical Data
The date of manufacture
is also stated on the tyre wall (possibly only on the inside of
wheel).
DOT ... 20 09...
means, for example, that the tyre was ma nufactured in the 20th week of the year 2009.
Any spare wheel which differs from the tyres fitted to the vehicle (e.g. winter tyres or
low-profile tyres) should only be used for a short time in the event of a puncture and
when adopting an appropriately cautious styl e of driving. It should be replaced as
quickly as possible by a normal wheel.
WARNING
Only use those tyres or wheel rims which have been approved for your
model of Škoda Auto vehicle. Failure to observe this instruction will adversely
affect the road safety of your vehicle - risk of accident! Approval and licencing
of your vehicle on public roads may also become void as a result.
You must on no account drive at a high er speed than is permissible for your
tyres - risk of an accident resulting from tyre damage and loss of control over
your vehicle.
Tyres which are 6 years old or more should only be fitted in exceptional
cases and when adopting an approp riately cautious style of driving.
Never fit tyres which have already been used without having adequate
knowledge of their previous history. Tyre s age even if they have not been used
at all or only very little. A spare tyre must only be used in exceptional cases and
only then when adopting an appropriately cautious style of driving.
Do not, where possible, replace individu al tyres but at least replace them on
both wheels of a given axle at the same time. Always fit the tyres with the
deeper tread depth to the front wheels.For the sake of the environment
Old tyres must be disposed of in conf ormity with the appropriate regulations.
Note
It is not normally possible to fit wheels from other models of cars for technical reasons.
This may also apply in certain circumstances to the wheels of the same type of
vehicle.Wheel boltsWheels and wheel bolts are matched to each other in terms of design. Each time you
fit other wheels - e.g. light alloy wheels or wheels with winter tyres - you must therefore
also use the matching wheel bolts of the corr ect length and shape of spherical cap. This
is essential to ensure that the wheels are tightly fitted and that the brake system oper-
ates properly.
If you retrofit wheel trims (or have this done), please also ensure that an adequate
flow of air remains assured for cooling the brake system.
The authorised Škoda Service Partners are instructed in the technical possibilities
which exist regarding converting or retrofitting tyres, wheels and wheel trims.
WARNING
In case of incorrect treatment of the wheel bolts, the wheel can loosen when
the car is moving - risk of accident!
The wheel bolts must be clean and must turn easily. However, they must
never be treated with grease or oil.
If the wheel bolts are tightened to a too low tightening torque, the rim can
lossen when the car is moving - risk of accident! A tightening torque which is
too high can damage the bolts and threads and this can result in permanent
deformation of the contac t surfaces on the rims.Caution
The prescribed tightening torque of the wh eel bolts for steel and light alloy wheels is
120 Nm.
s3fg.2.book Page 231 Friday, April 30, 2010 12:17 PM
Page 235 of 287
Accessories, changes and replacement of parts
234
Accessories, changes and replacement of partsAccessories and re placement partsŠkoda vehicles have been built according to the latest discoveries in safety engi-
neering. Thus one should not change the co ndition in which the vehicle was delivered
from the manufacturer without some thought.
The following guidelines should be observed when a vehicle is to be retrofitted with
accessories, have technical ch anges made to it or a part has to be replaced at some
time in the future.
Advise should always be obtained from an authorised Škoda Service Partner
before buying any accessories and before making any technical changes .
This is particularly the case when acce ssories are bought in a foreign country.
Škoda Genuine Accessories and Skoda origin al parts can be bought from author-
ised Škoda Service Partners who also professionally undertake the assembly of parts
which were purchased there.
All Škoda original accessories which are listed in the catalogue of original accesso-
ries such as spoilers, transport systems, child seats, etc., are homologized.
Radios, aerials and other electrical accessories should only be installed by author-
ised Škoda Service Partners.
The guidelines issued by Škoda Auto mu st be observed when making technical
changes.
This is to ensure that no technical damage occurs to the vehicle, that travelling and
operating safety are maintained and that the chnages are permissible. The authorised
Škoda Service Partners undertake this work pr ofessionally or refer it to a specialist
company in special cases.
Any damage which is done caused by tech nical changes made without consulting
a Skoda dealer is exclud ed from the guarantee.
WARNING
We advise you, in your own interest, to only use Škoda Genuine Accessories
and Škoda original parts which have been expressly approved for use on your Škoda. Reliability, safety and suitabilii
ty have been established for these Škoda
original parts.
We cannot guarantee suitability of installation into your vehicle of other
products despite keeping a constant eye on market developments (also not in
the case where there is an attestation or permission can be produced).
Technical changesInterference on the electronic components and their software can lead to operational
faults. This interference can also impair no t directly affected systems because of the
networking of the electronic components. This means that the operating safety of your
vehicle can be considerably jeopardized, a greater wear of vehicle parts can occur and
finally the vehicle registration documents expire.
We trust that you will understand that Šk oda Auto cannot be liable for damage
resulting from unprofessional work.
We therefore recommend that you have all work carried out using Škoda original parts
at authorised Škoda Service Partners.
WARNING
Work or modifications on your vehicle, which have been carried out unprofes-
sionally, can cause operational faults - risk of accident.Vehicles of category N1The vehicle of category N1 is a vehicle wh ich is designed and manufactured for trans-
porting loads with a maximum weight of 3.5 tonnes.
WARNING (continued)
s3fg.2.book Page 234 Friday, April 30, 2010 12:17 PM
Page 242 of 287

Breakdown assistance241
Using the system
Safety
Driving Tips
General Maintenance
Breakdown assistance
Technical Data
The safety wheel bolts on vehicles fitted wi
th them (one safety wheel bolt per wheel)
can only be loosened or tighten up by using the adapter provided.
It is meaningful to note the code number hammered into the rear side of the adapter
or the rear side of the safety wheel bolts. You can obtain a replacement adapter from
an authorised Škoda Service Partner, if necessary, by quoting this number.
We recommend that you always carry the adapter for the wheel bolts with you in the
vehicle. It should be stow ed in the vehicle tool kit.
Caution
Damage can occur to the adapter and safety wh eel bolt if the safety wheel bolt is tight-
ened up too much.
Note
The set of safety wheel bolts can be obtained from an authorised Škoda Service
Par tner.Jump-startingInitial stepsYou can use the battery of another vehicle for jump-starting yours if the engine does
not start because the battery on your vehicle is flat. You will require jump-start cables
for this purpose.
Both batteries must have a rated voltage of 12 V. The capacity (Ah) of the battery
supplying the power must not be significantly less than the capacity of the discharged
battery in your vehicle.
Jump-start cables
Only use jump-start cables which have an adequately large cross-section and insu-
lated terminal clamps. Plea se pay attention to the manufacturer's instructions.
Positive cable - colour coding in the majority of cases red.
Negative cable - colour coding in the majority of cases black.
WARNING
A discharged battery may already freeze at temperatures just below 0°C. In
case of frozen battery carry out no jump-starting - risk of explosion!
Please pay attention to the warning instructions relating to working in the
engine compartment page 216, “Working in the engine compartment”.Note
There must not be any contact between the two vehicles otherwise current may
flow as soon as the negati ve terminals are connected.
The discharged battery must be properly connected to the system of the vehicle.
Switch off any mobile phone, pay attention to the instructions for use of the mobile
phone in such a situation.
We recommend that you purchase the jump -starting cable in the specialist shops
of the battery manufacturers.
Start engineIt is important to connect the jump-start cables in the correct order.Connecting positive terminals–Attach one end fig. 201 to the positive terminal of the discharged battery
fig. 201 .
Fig. 201 Jump-starting using the
battery from another vehicle: A - flat
vehicle battery, B - battery providing
current
A1
AA
s3fg.2.book Page 241 Friday, April 30, 2010 12:17 PM
Page 245 of 287

Breakdown assistance
244Caution
The towing eye must always be screwed in fully and firmly tightened, otherwise the
towing eye can tear when to wing in or tow-starting!Rear towing eyeFig. 204 Rear bumper: Removing the cover / installing the towing eye– Press onto the bottom part of the cover in the rear bumper fig. 204 - left and
take it out.
– Screw in the towing eye by hand to the left up to the stop fig. 204 - right and
tighten it as much as possible. For ti ghtening, we recommend that you use for
example the wheel wrench*, the lashing eye of another vehicle or a similar object
which you can push through the eye.
– Put the cover in place after screwing out the towing eye again and press into place.
The cover must engage firmly.
Caution
The towing eye must always be screwed in fully and firmly tightened, otherwise the
towing eye can tear when to wing in or tow-starting!
Tow-starting a vehicleIf the engine does not start, we generally do not recommend to tow-start your vehicle.
One should attempt to start the engine using jump start cables page 241 or call on
the services of the SERVICE mobile.If your vehicle has to be towed– Engage 2nd or 3rd gear with the vehicle stationary.
– Depress the clutch pedal fu lly and keep it depressed.
– Switch on the ignition.
– Wait until both vehicles are moving then release the clutch pedal slowly.
– Depress the clutch pedal fully when the engine fires and take the vehicle out of
gear.
For technical reasons it is not possibl e to tow-start a car fitted with an automatic
gearbox .
WARNING
There is high risk of having an accident when tow-starting a vehicle, when for
example the towed vehicle r uns into the towing vehicle.
Caution
Vehicles which are fitted with a catalytic converter should not be tow-started over a
distance of more than 50 metres. Unburnt fu el may get into the catalytic converter and
damage it.Towing in a vehicle fitted with a manual gearboxPlease refer to the additional instructions page 242.
The vehicle can be towed in with a tow bar or a tow rope or with the front or rear
wheels raised. The maximum towing speed is 50 km/h.
s3fg.2.book Page 244 Friday, April 30, 2010 12:17 PM
Page 252 of 287
Fuses and light bulbs251
Using the system
Safety
Driving Tips
General Maintenance
Breakdown assistance
Technical Data
Electrically adjustable seats are protected by
automatic circuit breakers, which
switch on again automatically after a few seconds after the overload has been
eliminated.
BulbsChanging bulbsThe relevant lamp must always be switch ed off before a light bulb is replaced.
Defect light bulbs should only be replaced with light bulbs of the same type. The desig-
nation is located on the ligh t socket or the glass bulb.
Changing certain bulbs is not something whic h you can do yourself, but requires to be
done by a specialist. Other parts of the vehicle must be removed in order to change the
light bulbs. This applies, in particular, to bulbs which can only be reached from the
engine compartment.
We therefore recommend that you have an y bulbs changed by an authorised Škoda
Service Partner or, in exceptional cases, by calling on other professional assistance.
Please note that the engine compartment is a hazardous area page 216, “Working
in the engine compartment”.
We recommend that you always have a small box of replacement bulbs in your vehicle.
You can purchase replacement bulbs from th e range of the Škoda original accessories 18). A stowage place for the bulbs is located in the box in the spare wheel.
Fitted with a xenon headlight
Change of bulbs on vehicles with Xenon lights (low beam lights, parking lights and
main beam lights) should be undertaken by a specialist garage.
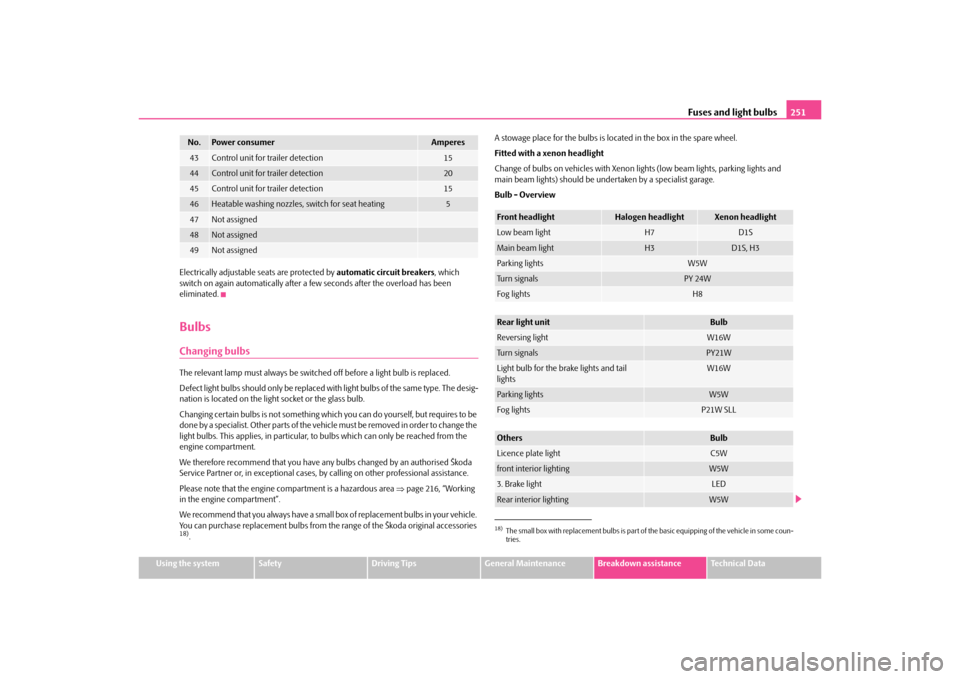
Bulb - Overview43
Control unit for trailer detection
15
44
Control unit for trailer detection
20
45
Control unit for trailer detection
15
46
Heatable washing nozzles, switch for seat heating
5
47
Not assigned
48
Not assigned
49
Not assigned
No.
Power consumer
Amperes
18)The small box with replacement bulbs is part of
the basic equipping of the vehicle in some coun-
tries.Front headlight
Halogen headlight
Xenon headlight
Low beam light
H7
D1S
Main beam light
H3
D1S, H3
Parking lights
W5W
Turn signals
PY 24W
Fog lights
H8
Rear light unit
Bulb
Reversing light
W16W
Turn signals
PY21W
Light bulb for the brake lights and tail
lights
W16W
Parking lights
W5W
Fog lights
P21W SLL
Others
Bulb
Licence plate light
C5W
front interior lighting
W5W
3. Brake light
LED
Rear interior lighting
W5W
s3fg.2.book Page 251 Friday, April 30, 2010 12:17 PM
Page 254 of 287
Fuses and light bulbs253
Using the system
Safety
Driving Tips
General Maintenance
Breakdown assistance
Technical Data
– Remove the socket
page 252, fig. 211.
– Take the faulty bulb out of the fixture and insert a new one.
Removing the light bulb for the main beam light– Switch the ignition and all lights off.
– Open the bonnet.
– Remove the protective cap page 252, fig. 210 .
– Press the sprung wire clamps page 252, fig. 211 together and hang them to
the side.
– Remove the socket page 252, fig. 211.
– Take the faulty bulb out of the fixture and insert a new one.
Installation takes place in the reverse order.
Note
We recommend that you have the headlight setting checked by a Skoda Service
Partner after replacing the light bulb.Low beam light– Switch the ignition and all lights off.
– Open the bonnet.
– Remove the protective cap page 252, fig. 210 . – Turn the connector with the light bulb up
to the stop towards the left and remove
fig. 212 .
– Replace the lamp, insert the connector with the new lamp and turn to the right up to the stop.
– Insert the protective cap.
Note
We recommend that you have the headli ght setting checked by a Skoda Service
Partner after replacing the light bulb.Fog lightsFig. 213 Front bumper: Cover / fog lights with daylight driving lightsReplacing bulbs– Switch the ignition and all lights off.
– Grasp the cover at the points marked with the arrows fig. 213 - left and take it
out.
– Guide your hand into the opening, in which the cover was located, and press the
spring bolt fig. 213 .
– Take out the fog light.
– Turn the socket or with the bulb to the left up to the stop and take it out.
– Replace the lamp, insert the connector with the new lamp and turn to the right up to the stop.
AA
AAAB
AC
Fig. 212 Removing the light bulb for the
low beam light
AB
AC
AA
AB
s3fg.2.book Page 253 Friday, April 30, 2010 12:17 PM
Page 258 of 287
Technical Data257
Using the system
Safety
Driving Tips
General Maintenance
Breakdown assistance
Technical Data
Te c h n i c a l D a t aTechnical DataGeneral informationThe details given in the official vehicle regi stration documents always take precedence
over the details in the Owner's Manual. Please refer to the official vehicle registration
documents or consult an authorised Škoda Service Partner concerning the engine with
which your vehicle is equipped.Used abbreviations
PerformancesThe listed performance values were de termined without performance-reducing
equipment, e.g. air conditioning system.WeightThe loading capacity is reduced in line with the range of the special equipment. The
unloaden weight contains a fuel tank topped up to 90%. A driver with a weight of 75
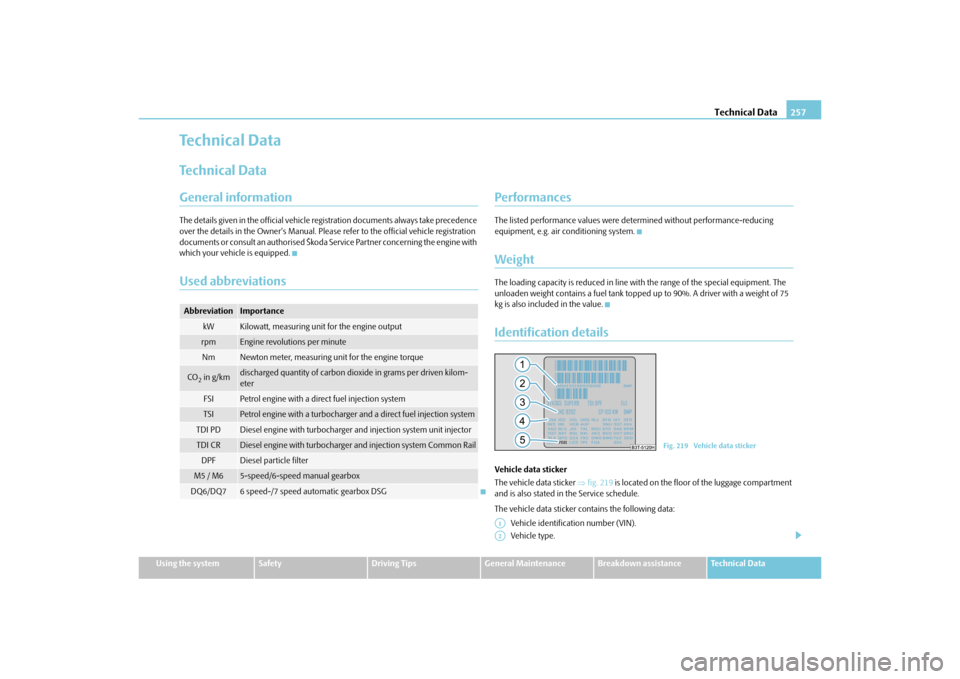
kg is also includ ed in the value.Identification detailsVehicle data sticker
The vehicle data sticker fig. 219 is located on the floor of the luggage compartment
and is also stated in the Service schedule.
The vehicle data sticker co ntains the following data:
Vehicle identification number (VIN).
Vehicle type.
Abbreviation
Importance
kW
Kilowatt, measuring unit for the engine output
rpm
Engine revolutions per minute
Nm
Newton meter, measuring unit for the engine torque
CO2 in g/km
discharged quantity of carbon dioxide in grams per driven kilom-
eter
FSI
Petrol engine with a direct fuel injection system
TSI
Petrol engine with a turbocharger and a direct fuel injection system
TDI PD
Diesel engine with turbocharger and injection system unit injector
TDI CR
Diesel engine with turbocharger and injection system Common Rail
DPF
Diesel particle filter
M5 / M6
5-speed/6-speed manual gearbox
DQ6/DQ7
6 speed-/7 speed automatic gearbox DSG
Fig. 219 Vehicle data sticker
A1A2
s3fg.2.book Page 257 Friday, April 30, 2010 12:17 PM
Page 261 of 287
Technical Data
260
Engine oil specificationsThe engine of your vehicle has been factory-filled with a high-grade oil which you can
use throughout the year - except in extreme climatic regions.
You can mix various oils together with each other when refilling with oil. This does not,
however, apply for models with flexible service intervals (QG1).
Engine oils are, of course, undergoing co ntinuous further development. Thus the
information stated in this Owner's Manual is only correct at the time of publication.
Authorised Škoda Service Partners are inform ed by Škoda Auto about current changes.
This why you should always have engine oi l changed by an authorised Škoda Service
Par tner.
The specifications (VW standards) stated in the following must be indicated separately
or together with other specifications on the bottle.
Engine oil specifications for models with flexible service intervals (QG1) Engine oil specifications for vehicles with fixed service intervals (QG2)
If the oils specified above are not available, oils according to ACEA A3 or ACEA A4 can
be used once for refilling. ACEA A3.
If the oils specified above are not available,
oils according to ACEA B3 or ACEA B4 can
be used once for refilling.
Caution
Only the above-mentioned oils may be used on vehicles with flexible service intervals
(QG1). We recommend always refilling with oi l of the same specification since this will
maintain the properties of the oil. In exce ptional cases, you must top up only once
engine oil complying with Specification VW 50 2 00 (only for petrol engines) or Specifi-
cation VW 505 01 (only for diesel engines) to maximum 0.5 litres. You must not use
other engine oils - risk of engine damage!
Petrol engines
Specification
Content
a)
a)Oil capacity with oil filter change. Inspect oil leve l when filling; do not fill up too much. The oil
level must be between the markings page 217.1.4 ltr./92 kW TSI - EU5
VW 503 00, VW 504 00
3,6
1.8 ltr./118 (112) kW TSI - EU5 / EU2 /
BS4
VW 504 00
4,6
2.0 ltr./147 kW TSI - EU5
VW 504 00
4,6
3.6 ltr./191 kW FSI - EU5 / EU2 / (BS4)
VW 504 00
5,5
Diesel engines
Specification
Content
a)
1.9 ltr./77 kW TDI PD - EU4
VW 506 01, VW 507 00
3,8
1.9 ltr./77 kW TDI PD DPF - EU4
VW 507 00
4,3
2.0 ltr./103 kW TDI CR DPF - EU5
VW 507 00
4,3
2.0 ltr./103 kW TDI CR - EU5 / EU4 / BS4
VW 507 00
4,0
2.0 ltr./125 kW TDI CR DPF - EU5
VW 507 00
4,3
Petrol engines
Specification
Content
a)
a)Oil capacity with oil filter change. Inspect oil le vel when filling; do not fill up too much. The oil
level must be between the markings page 217.1.4 ltr./92 kW TSI - EU5
VW 501 01, VW 502 00
3,6
1.8 ltr./118 (112) kW TSI - EU5 / EU2 /
BS4
VW 502 00
4,6
2.0 ltr./147 kW TSI - EU5
VW 502 00
4,6
3.6 ltr./191 kW FSI - EU5 / EU2 / (BS4)
VW 502 00
5,5
Diesel engines
Specification
Content
a)
1.9 ltr./77 kW TDI PD - EU4
VW 505 01
3,8
1.9 ltr./77 kW TDI PD DPF - EU4
VW 507 00
4,3
2.0 ltr./103 kW TDI CR DPF - EU5
VW 507 00
4,3
2.0 ltr./103 kW TDI CR - EU5 / EU4 / BS4
VW 507 00
4,0
2.0 ltr./125 kW TDI CR DPF - EU5
VW 507 00
4,3
s3fg.2.book Page 260 Friday, April 30, 2010 12:17 PM
Page 262 of 287

Technical Data261
Using the system
Safety
Driving Tips
General Maintenance
Breakdown assistance
Technical Data
Note
Before a long drive we recommend that you purchase and carry with you engine
oil which complies with the specification for your vehicle. Consequently, you will
always have the correct engine oil for refilling.
We recommend using a preservative from the Škoda original accessories offered
by your Škoda dealer.
For further information - see Service shedule.
s3fg.2.book Page 261 Friday, April 30, 2010 12:17 PM