fuel pressure SKODA SUPERB 2010 2.G / (B6/3T) Owner's Manual
[x] Cancel search | Manufacturer: SKODA, Model Year: 2010, Model line: SUPERB, Model: SKODA SUPERB 2010 2.G / (B6/3T)Pages: 287, PDF Size: 16.59 MB
Page 5 of 287
Contents
4
Airbag system
. . . . . . . . . . . . . . . . . . . . . . . . . . . . . . . . .
Description of the airbag system . . . . . . . . . . . . . . .
Front airbags . . . . . . . . . . . . . . . . . . . . . . . . . . . . . . . . .
Driver's knee airbag* . . . . . . . . . . . . . . . . . . . . . . . . .
Side airbags* . . . . . . . . . . . . . . . . . . . . . . . . . . . . . . . . .
Head airbags* . . . . . . . . . . . . . . . . . . . . . . . . . . . . . . . .
Deactivating an airbag . . . . . . . . . . . . . . . . . . . . . . . .
Transporting children safely
. . . . . . . . . . . . . . . . . .
What you should know about transporting children!
Child seat . . . . . . . . . . . . . . . . . . . . . . . . . . . . . . . . . . . .
Attaching a child seat us ing the “ISOFIX” system .
Attaching child seat using the “Top Tether” system
Driving Tips
. . . . . . . . . . . . . . . . . . . . . . . . . . . . . .
Intelligent Technology
. . . . . . . . . . . . . . . . . . . . . . . .
Electronic stability programme (ESP)* . . . . . . . . . .
Brakes . . . . . . . . . . . . . . . . . . . . . . . . . . . . . . . . . . . . . . .
Brake booster . . . . . . . . . . . . . . . . . . . . . . . . . . . . . . . .
Antilock brake system (ABS) . . . . . . . . . . . . . . . . . . .
Brake Assist* . . . . . . . . . . . . . . . . . . . . . . . . . . . . . . . . .
Uphill Start Assist* . . . . . . . . . . . . . . . . . . . . . . . . . . . .
Electromechanical power steering . . . . . . . . . . . . .
Tyre pressure monitoring system* . . . . . . . . . . . . . .
Diesel particle filter* (diesel engine) . . . . . . . . . . . .
Driving and the Environment
. . . . . . . . . . . . . . . . .
The first 1 500 kilometres and then afterwards . .
Catalytic converter . . . . . . . . . . . . . . . . . . . . . . . . . . . .
Driving in an economical and environmentally
conscious manner . . . . . . . . . . . . . . . . . . . . . . . . . . . .
Environmental compatibility . . . . . . . . . . . . . . . . . . .
Motoring abroad . . . . . . . . . . . . . . . . . . . . . . . . . . . . .
Avoiding damage to your vehicle . . . . . . . . . . . . . .
Driving through bodies of water on roads . . . . . . .
Towing a trailer
. . . . . . . . . . . . . . . . . . . . . . . . . . . . . . . .
Towing a trailer . . . . . . . . . . . . . . . . . . . . . . . . . . . . . . .
General Maintenance
. . . . . . . . . . . . . . .
Taking care of your ve hicle and cleaning the
vehicle
. . . . . . . . . . . . . . . . . . . . . . . . . . . . . . . . . . . . . . . . .
General . . . . . . . . . . . . . . . . . . . . . . . . . . . . . . . . . . . . . .
Care of the exterior of vehicle . . . . . . . . . . . . . . . . . .
Care of the interior of vehicle . . . . . . . . . . . . . . . . . .
Fuel
. . . . . . . . . . . . . . . . . . . . . . . . . . . . . . . . . . . . . . . . . . . .
Petrol . . . . . . . . . . . . . . . . . . . . . . . . . . . . . . . . . . . . . . . .
Diesel . . . . . . . . . . . . . . . . . . . . . . . . . . . . . . . . . . . . . . . .
Refuelling . . . . . . . . . . . . . . . . . . . . . . . . . . . . . . . . . . . .
Inspecting and replenishing
. . . . . . . . . . . . . . . . . . .
Engine compartment . . . . . . . . . . . . . . . . . . . . . . . . . .
Engine oil . . . . . . . . . . . . . . . . . . . . . . . . . . . . . . . . . . . . .
Cooling system . . . . . . . . . . . . . . . . . . . . . . . . . . . . . . .
Brake fluid . . . . . . . . . . . . . . . . . . . . . . . . . . . . . . . . . . . .
Battery . . . . . . . . . . . . . . . . . . . . . . . . . . . . . . . . . . . . . . .
Windshield washer system . . . . . . . . . . . . . . . . . . . . .
Wheels and Tyres
. . . . . . . . . . . . . . . . . . . . . . . . . . . . . .
Wheels . . . . . . . . . . . . . . . . . . . . . . . . . . . . . . . . . . . . . . .
Accessories, changes and replacement of partsAccessories and replacement parts . . . . . . . . . . . . .
Technical changes . . . . . . . . . . . . . . . . . . . . . . . . . . . . .
Vehicles of category N1 . . . . . . . . . . . . . . . . . . . . . . . .Breakdown assistance
. . . . . . . . . . . . . .
Breakdown assistance
. . . . . . . . . . . . . . . . . . . . . . . . .
First-aid box* . . . . . . . . . . . . . . . . . . . . . . . . . . . . . . . . .
Warning triangle* . . . . . . . . . . . . . . . . . . . . . . . . . . . . .
Fire extinguisher* . . . . . . . . . . . . . . . . . . . . . . . . . . . . .
Vehicle tool kit . . . . . . . . . . . . . . . . . . . . . . . . . . . . . . . .
Tyre repair kit* . . . . . . . . . . . . . . . . . . . . . . . . . . . . . . . .
Spare wheel* . . . . . . . . . . . . . . . . . . . . . . . . . . . . . . . . .
Changing a wheel . . . . . . . . . . . . . . . . . . . . . . . . . . . . .
Jump-starting . . . . . . . . . . . . . . . . . . . . . . . . . . . . . . . . .
Tow-starting and towing vehicle . . . . . . . . . . . . . . . .
Fuses and light bulbs
. . . . . . . . . . . . . . . . . . . . . . . . .
Electric fuses . . . . . . . . . . . . . . . . . . . . . . . . . . . . . . . . .
Bulbs . . . . . . . . . . . . . . . . . . . . . . . . . . . . . . . . . . . . . . . .
Technical Data
. . . . . . . . . . . . . . . . . . . . . . . . . .
Technical Data
. . . . . . . . . . . . . . . . . . . . . . . . . . . . . . . .
General information . . . . . . . . . . . . . . . . . . . . . . . . . .
Used abbreviations . . . . . . . . . . . . . . . . . . . . . . . . . . .
Performances . . . . . . . . . . . . . . . . . . . . . . . . . . . . . . . .
Weight . . . . . . . . . . . . . . . . . . . . . . . . . . . . . . . . . . . . . . .
Identification details . . . . . . . . . . . . . . . . . . . . . . . . . .
Fuel consumption according to the ECE standards and
EU guidelines . . . . . . . . . . . . . . . . . . . . . . . . . . . . . . . .
Dimensions . . . . . . . . . . . . . . . . . . . . . . . . . . . . . . . . . .
Engine oil specifications . . . . . . . . . . . . . . . . . . . . . . .
1.4 ltr./92 kW TSI - EU5 . . . . . . . . . . . . . . . . . . . . . . . .
1.8 ltr./118 (112) kW TSI - EU5 / EU2 / BS4 . . . . . .
2.0 ltr./147 kW FSI - EU5 . . . . . . . . . . . . . . . . . . . . . . .
3.6 ltr./191 kW FSI - EU5 / EU2 / (BS4) . . . . . . . . . .
1.9 ltr./77 kW TDI PD - EU4 . . . . . . . . . . . . . . . . . . . .
2.0 ltr./103 kW TDI CR DPF - EU5 / (EU4 / BS4) . .
2.0 ltr./125 kW TDI CR DPF - EU5 . . . . . . . . . . . . . . .
Index
. . . . . . . . . . . . . . . . . . . . . . . . . . . . . . . . . . . . . . . .
170170171173174176178180180182185186187187187189190191191192192192193195195196196199200200201202202
205205205205209212212212213215215217219221222226228228234234234234235235235235235236236236237241242
246246251257257257257257257257258259260262264266268270272274277
s3fg.2.book Page 4 Friday, April 30, 2010 12:17 PM
Page 29 of 287
Instruments and warning lights
28
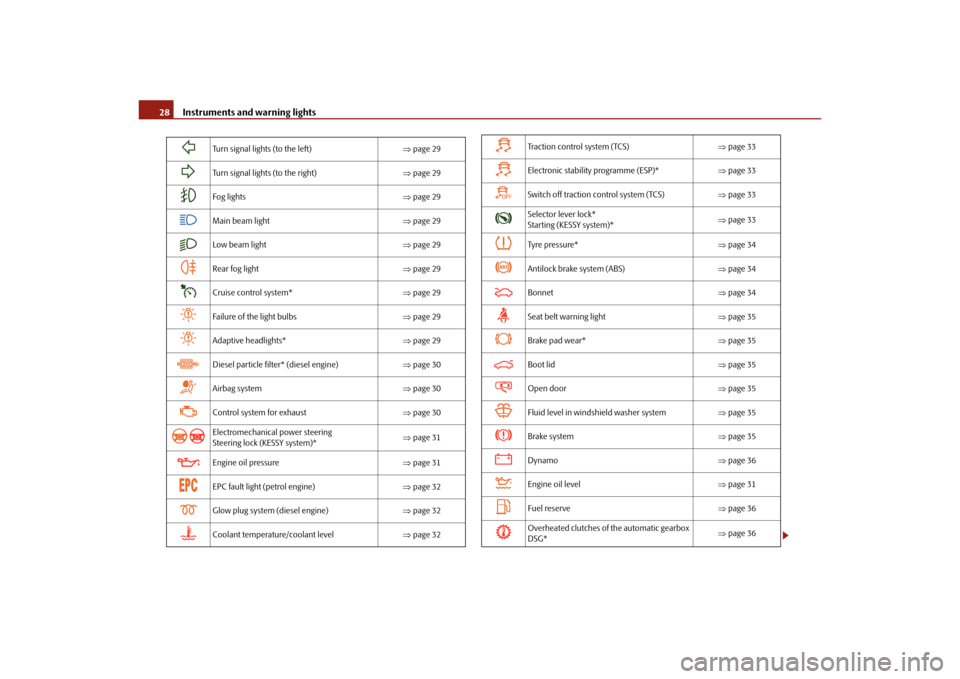
Turn signal lights (to the left) page 29
Turn signal lights (to the right) page 29
Fog lights page 29
Main beam light page 29
Low beam light page 29
Rear fog light page 29
Cruise control system* page 29
Failure of the light bulbs page 29
Adaptive headlights* page 29
Diesel particle filter* (diesel engine) page 30
Airbag system page 30
Control system for exhaust page 30
Electromechanical power steering
Steering lock (KESSY system)*
page 31
Engine oil pressure page 31
EPC fault light (petrol engine) page 32
Glow plug system (diesel engine) page 32
Coolant temperature/coolant level page 32
Tra c t i o n c o n t r o l s y s t e m ( TC S ) page 33
Electronic stability programme (ESP)* page 33
Switch off traction control system (TCS) page 33
Selector lever lock*
Starting (KESSY system)*
page 33
Tyre pressure* page 34
Antilock brake system (ABS) page 34
Bonnet page 34
Seat belt warning light page 35
Brake pad wear* page 35
Boot lid page 35
Open door page 35
Fluid level in windshield washer system page 35
Brake system page 35
Dynamo page 36
Engine oil level page 31
Fuel reserve page 36
Overheated clutches of the automatic gearbox
DSG*
page 36
s3fg.2.book Page 28 Friday, April 30, 2010 12:17 PM
Page 32 of 287
Instruments and warning lights31
Using the system
Safety
Driving Tips
General Maintenance
Breakdown assistance
Technical Data
If the warning light does not go out after starting the engine or it lights up when driving,
a fault exists in an exhaust relevant co
mponent. The engine management system
selects an emergency programme which enables you to drive to the nearest specialist
garage by adopting a gentle style of driving.
Electromechanical power steering / Steering lock (KESSY system)*
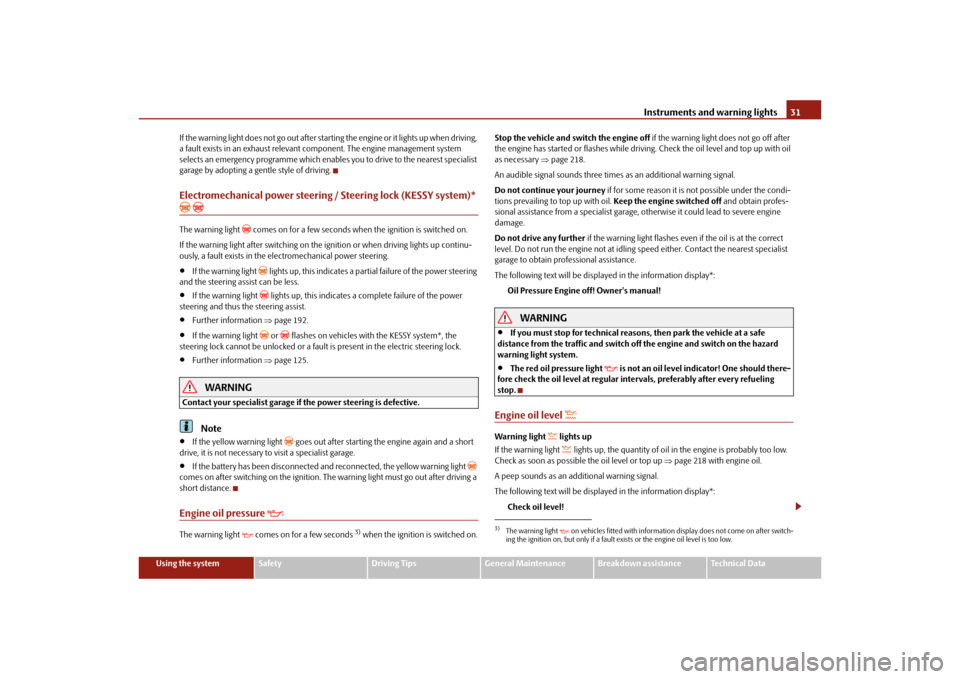
The warning light
comes on for a few seconds when the ignition is switched on.
If the warning light after switching on the ig nition or when driving lights up continu-
ously, a fault exists in the electromechanical power steering.
If the warning light
lights up, this indicates a partial failure of the power steering
and the steering assist can be less.
If the warning light
lights up, this indicates a complete failure of the power
steering and thus the steering assist.
Further information page 192.
If the warning light
or flashes on vehicles with the KESSY system*, the
steering lock cannot be unlocked or a fault is present in the electric steering lock.
Further information page 125.
WARNING
Contact your specialist garage if the power steering is defective.
Note
If the yellow warning light
goes out after starting the engine again and a short
drive, it is not necessary to visit a specialist garage.
If the battery has been di sconnected and reconnected, the yellow warning light
comes on after switching on the ignition. Th e warning light must go out after driving a
short distance.
Engine oil pressure
The warning light comes on for a few seconds
3) when the ignition is switched on. Stop the vehicle and switch the engine off
if the warning light does not go off after
the engine has started or flashes while driving. Check the oil level and top up with oil
as necessary page 218.
An audible signal sounds three times as an additional warning signal.
Do not continue your journey if for some reason it is not possible under the condi-
tions prevailing to top up with oil. Keep the engine switched off and obtain profes-
sional assistance from a specialist garage, otherwise it could lead to severe engine
damage.
Do not drive any further if the warning light flashes even if the oil is at the correct
level. Do not run the engine not at idling speed either. Contact the nearest specialist
garage to obtain professional assistance.
The following text will be displayed in the information display*:
Oil Pressure Engine off! Owner's manual!
WARNING
If you must stop for technical reasons, then park the vehicle at a safe
distance from the traffic and switch of f the engine and switch on the hazard
warning light system.
The red oil pressure light
is not an oil level indicator! One should there-
fore check the oil level at regular inte rvals, preferably after every refueling
stop.
Engine oil level
Warning light
lights up
If the warning light lights up, the quantity of oil in the engine is probably too low.
Check as soon as possible the oil level or top up page 218 with engine oil.
A peep sounds as an additional warning signal.
The following text will be displayed in the information display*: Check oil level!
3)The warning light on vehicles fitted with information display does not come on after switch-
ing the ignition on, but only if a fault exists or the engine oil level is too low.
s3fg.2.book Page 31 Friday, April 30, 2010 12:17 PM
Page 194 of 287
Intelligent Technology193
Using the system
Safety
Driving Tips
General Maintenance
Breakdown assistance
Technical Data
Press button page 192, fig. 172 for more than 2 seconds. While pressing
the button, the warning light
lights up. At the same time the memory of the system
is erased and the new calibration is started, which is confirmed with an audible signal
and then the warning light
goes out.
If the warning light
does not go out after the basic setting, there is a fault in the
system. Have the vehicle inspected by your nearest specialist garage.
Warning light
lights up
If the tyre inflation pressure of at least one wheel is insufficiently inflated in comparison
to the stored basic value, the warning light
lights up.
Warning light
flashes
If the warning light flashes, there is a system fault. Have the vehicle inspected by your
nearest specialist garage.
WARNING
When the warning light
lights up, immediately reduce the speed and
avoid sudden steering and brake manoeuvr es. Please stop the vehicle without
delay at the nearest possible stop and in spect the tyres and their inflation pres-
sures.
The driver is responsible for the correct tyre inflation pressures. For this
reason, the tyre inflation pressu res must be checked regularly.
Under certain circumstances (e.g. sporty style of driving, wintry or unpaved
roads) the warning light
can be delayed or does not light up at all.
The tyre pressure monitoring system does not take away the responsibility
from the driver for the correct tyre inflation pressure.Note
The tyre pressure monitoring system:
does not replace the regular tyre inflatio n pressure control, because the system
cannot detect an even pressure loss;
cannot warn in case of very rapid tyre inflation pressure loss, e.g. in case of sudden
tyre damage. In this case carefully bring the vehicle to a standstill without sudden
steering movements and without sharp braking.
In order to ensure a proper functioning of the tyre inflation pressure-control
system, it is necessary to carry out the ba sic setting again every 10 000 km or 1x a
year.
Diesel particle filter* (diesel engine)In the diesel particle filter the resu lting soot particles are collected and
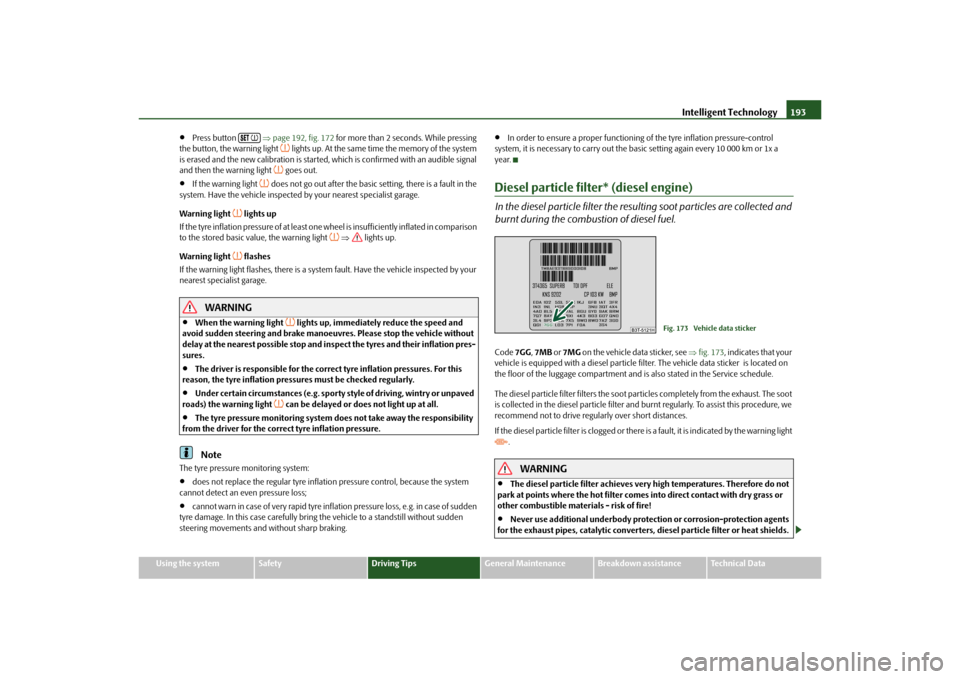
burnt during the combustion of diesel fuel.Code 7GG, 7MB or 7MG on the vehicle data sticker, see fig. 173 , indicates that your
vehicle is equipped with a diesel particle fi lter. The vehicle data sticker is located on
the floor of the luggage compartment and is also stated in the Service schedule.
The diesel particle filter filters the soot particles completely from the exhaust. The soot
is collected in the diesel particle filter and burnt regularly. To assist this procedure, we
recommend not to drive regu larly over short distances.
If the diesel particle filter is clogged or there is a fault, it is indicated by the warning light
.
WARNING
The diesel particle filter achieves very high temp eratures. Therefore do not
park at points where the hot filter comes into direct contact with dry grass or
other combustible materials - risk of fire!
Never use additional underbody protection or corrosion-protection agents
for the exhaust pipes, catalytic converters, diesel particle filter or heat shields.
Fig. 173 Vehicle data sticker
s3fg.2.book Page 193 Friday, April 30, 2010 12:17 PM
Page 200 of 287

Driving and the Environment199
Using the system
Safety
Driving Tips
General Maintenance
Breakdown assistance
Technical Data
Checking tyre inflation pressures
Tyres which are correctly inflated save fuel.Always ensure that your tyres are inflated to the correct pressure at all times. The rolling
resistance will be increased if the tyre filling pressure is too low. This will not only
increase fuel consumption but also tyre we ar and the driving behaviour will worsen.
Always check the inflation pr essure of the tyres when cold.
Do not drive with winter tyres all year round for this costs about 10 % more fuel.
Winter tyres are also louder.No unnecessary ballast
Transporting ballast costs fuel.The fact that every kilogram of extra weight increases your fuel consumption means
that it is worth taking a look in the luggage compartment to avoid transporting any
unnecessary ballast.
It is particularly in town traffic, when one is accelerating quite often, that the vehicle
weight will have a significant effect upon the fuel consumption. A rule of thumb here
is that an increase in weight of 100 kilograms will cause an increase in fuel consump-
tion of about 1 litre/100 kilometres.
You may frequently also leave a roof rack fitted on just out of convenience, although
you no longer need it. The increased aerodyna mic drag of your vehicle causes it to use
about 10% more fuel than normal at a speed of 100 - 120 km/h, even when you are not
carrying a load on the roof.Saving electricity
Generating electricity costs fuel.– Switch off electrical components as soon as you no longer need them.
When the engine is running, the alternator generates and supplies electrical power.
The greater the load on the alternator as a result of having a large number of electrical
components switched on, the more fuel will be consumed for operating the
alternator.
Keeping a log of your fuel consumptionIf you really wish to keep a close check on your fuel consumption, it is best to enter
the figures in a logbook. This does not take much time but is a very worthwhile exer-
cise. It enables you to detect any change (p ositive and negative) at an early stage and
to take any appropriate action.
If you find that your fuel consumption is too high, you should reflect on how, where
and in what conditions you have driven the vehicle since you last refuelled.Environmental compatibilityEnvironmental protection has played a major role in the design, selection of materials
and manufacture of your new Škoda. Particular emphasis has been paid to a number
of aspects, including.
Design measures
joints designed to be easily detached,
simplified disassembly due to the modular structure system,
improved purity of different classes of materials,
Identification of all plastic parts in accordance with VDA Recommendation 260,
Reduced fuel consumption and exhaust emission CO
2,
Minimum fuel leakage during accidents,
Reduced noise.
Choice of materials
extensive use of recyclable material,
Air conditioning filled with CFC-free refrigerant,
no cadmium,
no asbestos,
Reduction in the “vaporisation” of plastics.
Manufacture
solvent-free cavity protection,
s3fg.2.book Page 199 Friday, April 30, 2010 12:17 PM
Page 214 of 287
Fuel213
Using the system
Safety
Driving Tips
General Maintenance
Breakdown assistance
Technical Data
Caution
Therefore, your vehicle can only be operated with diesel fuel which complies with
the standard EN 590 (standard DIN 51628 in Germany, standard ÖNORM C 1590 in
Austria). Filling the tank even only once wi th diesel fuel which does not comply with
the standard, can result in damage to the engine parts, the lubrication system, the fuel
and exhaust system.
If by mistake you have refuelled with a different fuel other than the diesel fuel
which complies to the above mentioned standards (e.g. petrol), do not start the engine
or switch on the ignition! This can result in severe engine damage! Contact a specialist
garage and have the fuel sy stem of the engine cleaned.
Water which has collected in the fuel fi lter can result in engine problems.
Your vehicle is not adapted for use of biofue l (RME), therefore this fuel must not be
refuelled and driven. The use of biofuel (RME) can lead to damage to the engine or the
fuel system.
Operation in winterWinter-grade diesel fuel
A different grade of diesel fuel is available at filling stations in winter than during the
summer. Using “summer-grade diesel fuel” at temperatures below 0°C can result in
operational problems because th e diesel becomes viscous as a result of paraffin sepa-
ration.
It is therefore the case that the standard EN 590 (standard DIN 51628 in Germany,
standard ÖNORM C 1590 in Austria) is the diesel fuel class prescribed for certain
periods of the year which can also be purc hased at the corresponding time during the
year. “Winter-grade diesel fuel” will still operate properly even at a temperature of -
20°C.
It is often the case in countries with different climatic conditions that diesel fuels avail-
able have a different temperature characteristic. The authorised Škoda Service Part-
ners and filling stations in the country concer ned will be able to provide you with infor-
mation regarding the diesel fuels available.
Prewarming fuel
The vehicle is fitted with a fuel filter prewarming system. This secures operation of a
vehicle using diesel fuel down to an environmental temperature of -25°C.
Caution
It is not permitted to add the various fuel additives on the market, including petrol, to
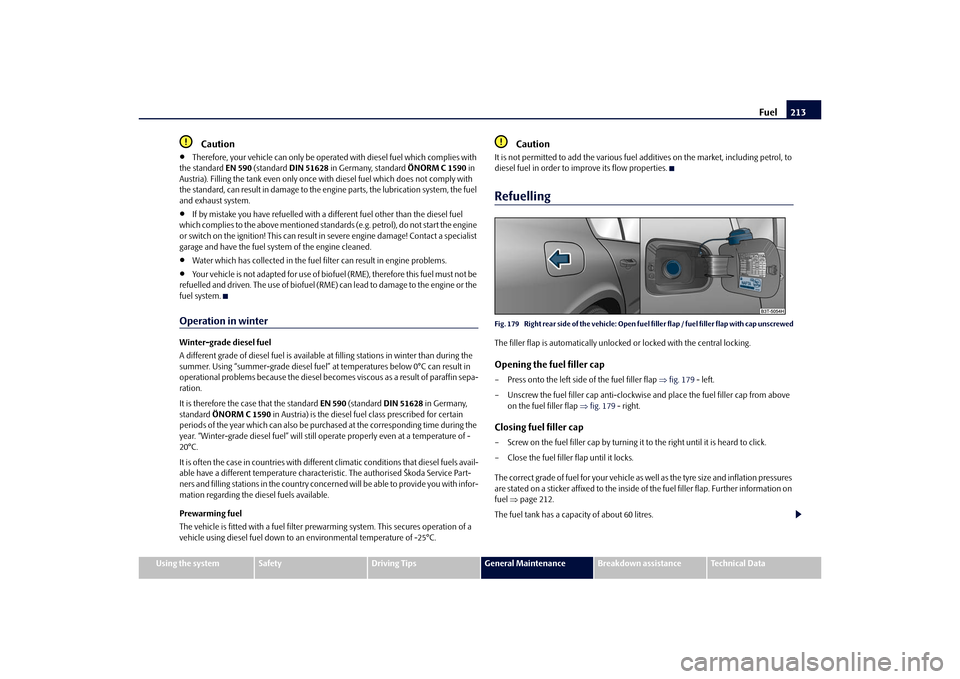
diesel fuel in order to improve its flow properties.RefuellingFig. 179 Right rear side of the ve hicle: Open fuel filler flap / fuel filler flap with cap unscrewedThe filler flap is automatically unlocked or locked with the central locking.Opening the fuel filler cap– Press onto the left side of the fuel filler flap fig. 179 - left.
– Unscrew the fuel filler ca p anti-clockwise and place the fuel filler cap from above
on the fuel filler flap fig. 179 - right.Closing fuel filler cap– Screw on the fuel filler cap by turning it to the right until it is heard to click.
– Close the fuel filler flap until it locks.
The correct grade of fuel for your vehicle as well as the tyre size and inflation pressures
are stated on a sticker affixed to the inside of the fuel filler flap. Further information on
fuel page 212.
The fuel tank has a capacity of about 60 litres.
s3fg.2.book Page 213 Friday, April 30, 2010 12:17 PM
Page 229 of 287
Wheels and Tyres
228
Wheels and TyresWheelsGeneral information
New tyres do not offer optimal grip at first and should therefore be run in for about
500 km at a moderate speed and an appropri ately cautious style of driving. You will
also profit from longer tyre life.
The tread depth of new tyres may differ be cause of design features and the config-
uration of the tread (depending on the type of tyre and the manufacturer).
Drive over curbs on the side of the road and other such obstacles slowly and,
where possible, at a right angle in order to avoid damage to tyres and wheel trims.
Inspect your tyres from time to time for damage (punctures, cuts, splits and
bulges). Remove foreign bodies from the tyre profile.
Damage to tyres and wheels is frequently not visible. Unusual vibrations or pulling
of the vehicle to one side coul d be a sign of tyre damage. Please reduce your speed
immediately and stop if you su spect that a wheel is damaged. Inspect the tyres for
signs of damage (bulges, splits, etc.). If no visible damage is present, please drive at an
appropriately slow speed and carefully to the nearest specialist garage in order to have
your vehicle inspected.
Also protect your tyres from contact with oil, grease and fuel.
Immediately replace any dust caps of the valves which have got lost.
Mark wheels before removing them so that their previous direction of running can
be maintained when mounted them again.
Always store wheels or tyres which been removed in a cool, dry and, where
possible, dark place. Tyres which are not fixed to a wheel trim should be stored upright.
Unidirectional tyres*
The direction of rotation of the tyres is mark ed by arrows on the wall of the tyre. This
indicates the direction of rotation of the tyre, and it is essential that the tyres are fitted
on to run in this direction. Only then are the tyres able to provide the optimal proper-
ties in terms of grip, low nois e, wear-and-tear and aquaplaning.
Further information concerning th e use of unidirectional tyres page 232.
WARNING
New tyres during the first 500 km do not offer optimal grip and should
therefore be run appropriately - risk of accident!
Never drive with damaged tyres - risk of accident!Note
Please observe the various differing legal requirements regarding tyres.Ty re l i feThe life of your tyres very much depends on the following points:
Tyre pressure
The working life of tyres will be shortened considerably if the tyres are insufficiently or
over-inflated and this will have an adverse effect on the handling of your vehicle.
Correctly inflated tyres are of particular importance when travelling at high speeds. It
is therefore good to check the pressure at least once a month and also before setting
off on a long trip. Please do not forget the spare wheel when checking the tyres.
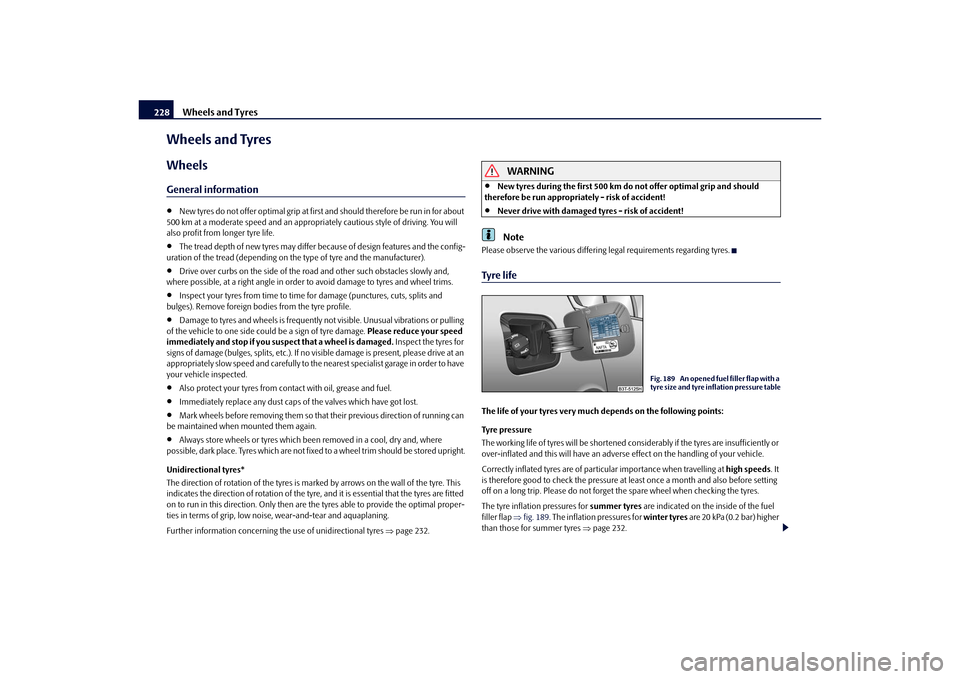
The tyre inflation pressures for summer tyres are indicated on the inside of the fuel
filler flap fig. 189 . The inflation pressures for winter tyres are 20 kPa (0.2 bar) higher
than those for summer tyres page 232.
Fig. 189 An opened fuel filler flap with a
tyre size and tyre inflation pressure table
s3fg.2.book Page 228 Friday, April 30, 2010 12:17 PM
Page 230 of 287
Wheels and Tyres229
Using the system
Safety
Driving Tips
General Maintenance
Breakdown assistance
Technical Data
The tyre inflation pressure for tyres of the tyre size 205/50 R17, which are intended to
be used with snow chains, is identical to the tyre inflation pressure for tyres of the tyre
size 225/45 R17, see
page 228, fig. 189 .
The tyre pressure should be at the highest pressure specified for your vehicle at all
times.
The tyre inflation pressure of the emergency spare wheel R 18 is 420 kPa (4.2 bar).
Always check the inflation pressure of tyres when cold. Do not reduce the higher pres-
sure of warm tyres. Adapt the inflation pressure of the tyres accordingly if your vehicle
is carrying a significantly higher payload.
Driving style
Fast cornering, sharp acceleration and brak ing (squealing tyres) increase wear-and-
tear on your tyres.
Balancing wheels
The wheels of a new vehicle are balanced. There are a wide range of influences when
driving which may result in an imbalance and which makes themselves felt through
vibration in the steering.
You should have the wheels rebalanced si nce any imbalance increases wear-and-tear
on the steering, the suspension and tyres. A wheel must also be rebalanced when a
new tyre is fitted and each time a tyre is repaired.
Wheel alignment errors
Incorrect wheel alignment at the front and re ar will not only increase wear-and-tear on
the tyres but will also has an adverse effect on vehicle safety. Contact your specialist
garage if you notice any unusual tyre wear.
WARNING
If the inflation pressure is too low, the tyre must perform a greater flexing
work. At higher speeds the tyre will warm up as a result of this. This can result
in tread separation and even a tyre blowout.
Immediately replace the damaged rims or tyres.
Tyres which are 6 years old or more should only be fitted in exceptional
cases and when adopting an approp riately cautious style of driving.
For the sake of the environment
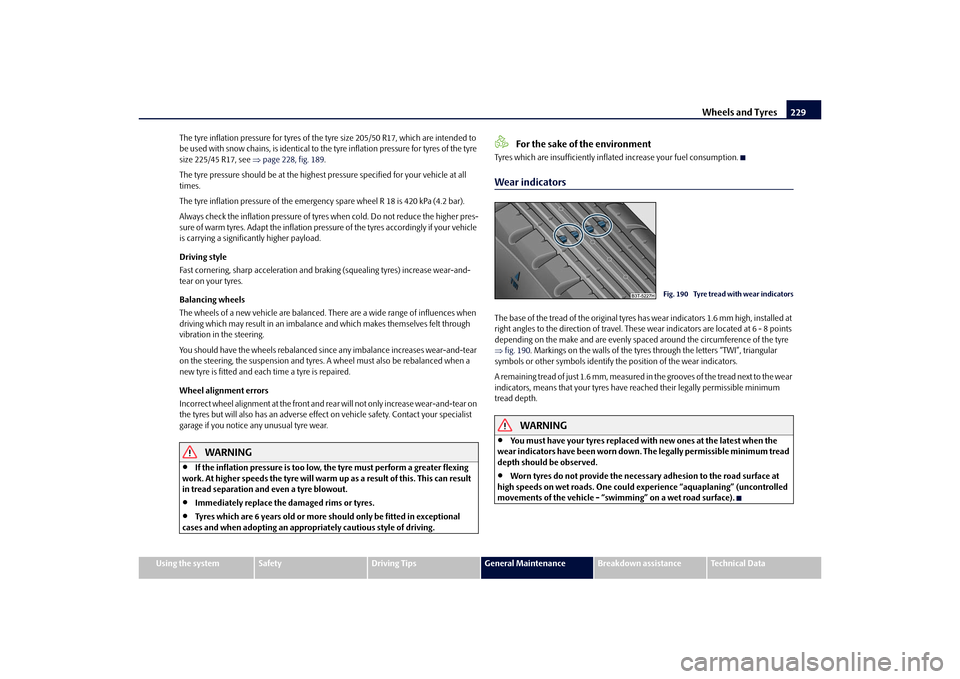
Tyres which are insufficiently inflated increase your fuel consumption.Wear indicatorsThe base of the tread of the original tyres has wear indicators 1.6 mm high, installed at
right angles to the direction of travel. These wear indicators are located at 6 - 8 points
depending on the make and are evenly spaced around the circumference of the tyre
fig. 190 . Markings on the walls of the tyres through the letters “TWI”, triangular
symbols or other symbols identify th e position of the wear indicators.
A remaining tread of just 1.6 mm, measured in the grooves of the tread next to the wear
indicators, means that your tyres have reached their legally permissible minimum
tread depth.
WARNING
You must have your tyres replaced with new ones at the latest when the
wear indicators have been worn down . The legally permissible minimum tread
depth should be observed.
Worn tyres do not provide the necessary adhesion to the road surface at
high speeds on wet roads. One could experience “aquaplaning” (uncontrolled
movements of the vehicle - “swimming” on a wet road surface).
Fig. 190 Tyre tread with wear indicators
s3fg.2.book Page 229 Friday, April 30, 2010 12:17 PM
Page 238 of 287

Breakdown assistance237
Using the system
Safety
Driving Tips
General Maintenance
Breakdown assistance
Technical Data
The spare wheel lies in a well under the floor covering of the luggage compartment and
is fixed in place using special screws
page 236, fig. 195 .
Before removing the spare wheel, you must take out the box with the vehicle tool kit
box page 236, fig. 194.
One should check the inflation pressure in the spare wheel (at best when generally
checking the tyre air pressures - see sign on the fuel filler flap page 228) to ensure
that the spare wheel is always ready to use.
Temporary spare wheel
A warning label displayed on the rim of the temporary spare wheel indicates that your
vehicle is equippe d with a temporary spare wheel.
Please observe the following notes when driving with a temporary spare wheel:
The warning label must not be covered after installing the wheel.
Do not drive faster than 80 km/h with this spare wheel and pay particular attention
while driving. Avoid accelerating at full throttle, sharp braking and fast cornering.
The inflation pressure for this spare wheel is identical to the inflation pressure of
the standard tyres. The temporary spare wheel R 18 must have an inflation pressure of
420 kPa (4.2 bar)!
Use this spare wheel only to reach the nearest specialist garage as it is not intended
for continuous use.
No other summer or winter tyres must be mounted on the rim of the spare wheel
R 18.
Changing a wheelPreliminary workThe following steps should be carried ou t before actually changing the wheel.
– If it is necessary to change a wheel, park the vehicle as far away as possible from
the traffic flow. The place you choose should be level.
–Have all the occupants get out. While changing a wheel, the occupants of the
vehicle should not stand on the road (e.g. behind a crash barrier).
– Apply the handbrake firmly. –Engage
1st gear or if your vehicle is fitted with an automatic gearbox, position the
selector lever into position P .
– If a trailer is coupled, uncouple it.
–Take the vehicle tool kit page 236 and the spare wheel* page 236 out of the
luggage compartment.
WARNING
If you find yourself in flowing traffic switch on the hazard warning lights
system and place the warning triangle on the side of the road at the prescribed
distance from your vehicle while observin g all national legal provisions. In this
way you are protecting not only yourself but also other road users.
Never start the engine with the vehicle si tting on the raised jack - danger of
suffering injury.Caution
If you have to change a wheel on a slope fi rst block the opposite wheel with a stone or
similar object in order to secure the vehicle from unexpectedly rolling away.
Note
Comply with the national legal regulations.Changing a wheelAlways change a wheel on a level surface as far as possible.
– Take off the full wheel trim* page 238 or the wheel trim cap page 239 or the
caps page 239.
– In the case of light alloy wheels remove the wheel trim cap page 239.
– First of all slacken the safety wheel bolt * and afterwards the other wheel bolts page 239.
– Jack up the vehicle until the wheel to be changed is clear of the ground
page 240.
– Unscrew the wheel bolts and place them on a clean surface (cloth, paper etc.).
s3fg.2.book Page 237 Friday, April 30, 2010 12:17 PM
Page 250 of 287
Fuses and light bulbs249
Using the system
Safety
Driving Tips
General Maintenance
Breakdown assistance
Technical Data
Certain electrical components are only standard on certain vehicle model versions or
only suppliable as optional
equipment for certain models.
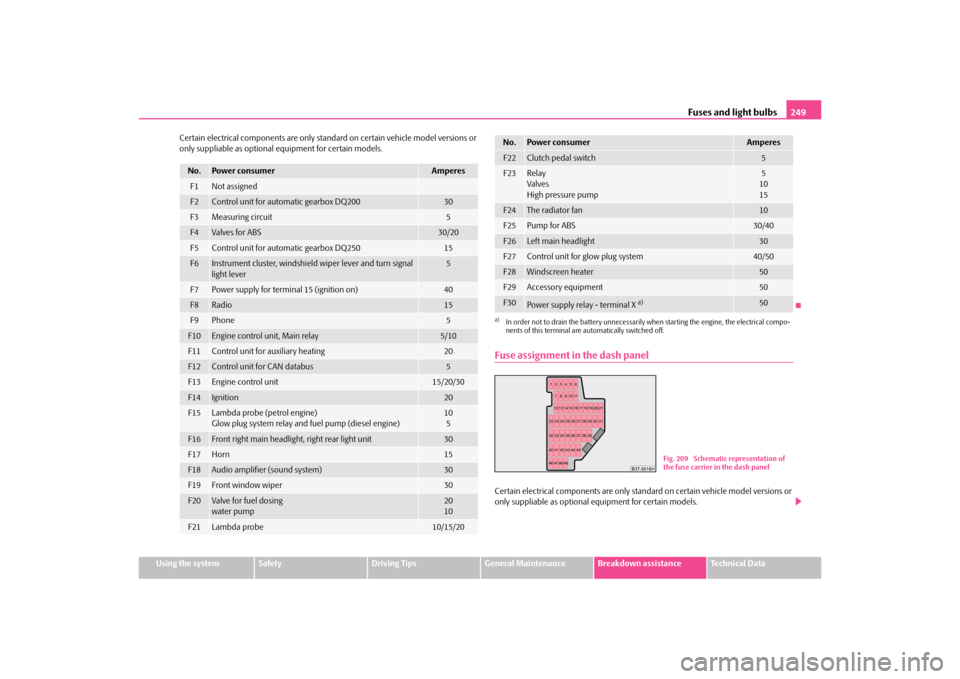
Fuse assignment in the dash panelCertain electrical components are only stan dard on certain vehicle model versions or
only suppliable as optional equipment for certain models.
No.
Power consumer
Amperes
F1
Not assigned
F2
Control unit for automatic gearbox DQ200
30
F3
Measuring circuit
5
F4
Va lve s for AB S
30/20
F5
Control unit for automatic gearbox DQ250
15
F6
Instrument cluster, windshield wiper lever and turn signal
light lever
5
F7
Power supply for terminal 15 (ignition on)
40
F8
Radio
15
F9
Phone
5
F10
Engine control unit, Main relay
5/10
F11
Control unit for auxiliary heating
20
F12
Control unit for CAN databus
5
F13
Engine control unit
15/20/30
F14
Ignition
20
F15
Lambda probe (petrol engine)
Glow plug system relay and fuel pump (diesel engine)
10
5
F16
Front right main headlight, right rear light unit
30
F17
Horn
15
F18
Audio amplifier (sound system)
30
F19
Front window wiper
30
F20
Va lve for f uel d osi ng
water pump
20
10
F21
Lambda probe
10/15/20
F22
Clutch pedal switch
5
F23
Relay
Valves
High pressure pump
5
10
15
F24
The radiator fan
10
F25
Pump for ABS
30/40
F26
Left main headlight
30
F27
Control unit for glow plug system
40/50
F28
Windscreen heater
50
F29
Accessory equipment
50
F30
Power supply relay - terminal X
a)
50
a)In order not to drain the battery unnecessarily wh en starting the engine, the electrical compo-
nents of this terminal are automatically switched off.No.
Power consumer
Amperes
Fig. 209 Schematic representation of
the fuse carrier in the dash panel
s3fg.2.book Page 249 Friday, April 30, 2010 12:17 PM