headlights SKODA SUPERB 2010 2.G / (B6/3T) Owner's Manual
[x] Cancel search | Manufacturer: SKODA, Model Year: 2010, Model line: SUPERB, Model: SKODA SUPERB 2010 2.G / (B6/3T)Pages: 287, PDF Size: 16.59 MB
Page 13 of 287
The brief instruction
12
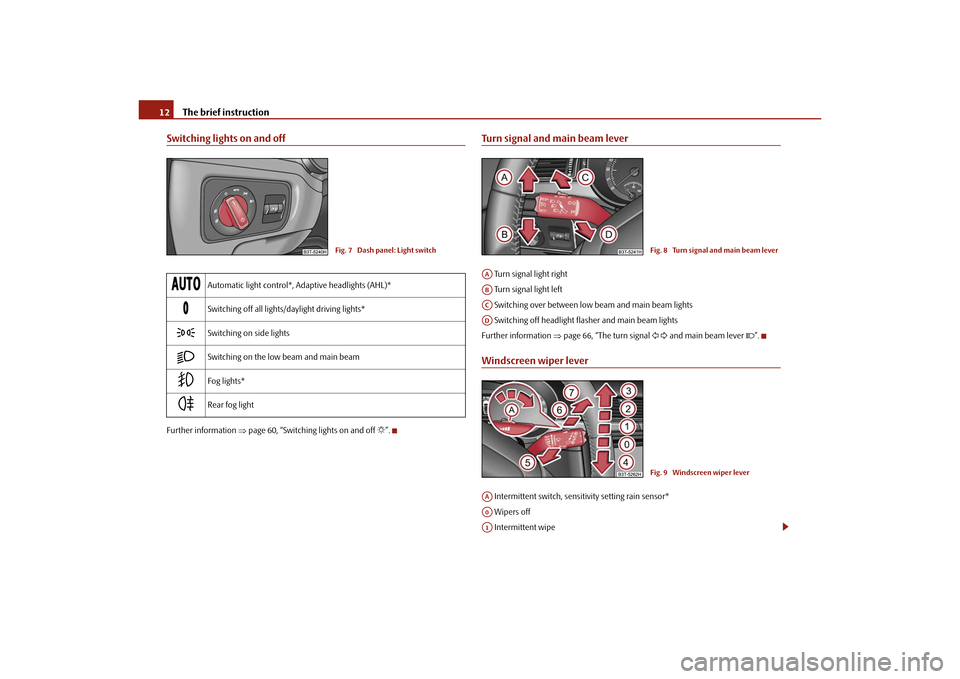
Switching lights on and offFurther information page 60, “Switching lights on and off ”.
Turn signal and main beam lever Turn signal light right
Turn signal light left
Switching over between low beam and main beam lights
Switching off headlight fl asher and main beam lights
Further information page 66, “The turn signal and main beam lever ”.Windscreen wiper lever Intermittent switch, sensitivity setting rain sensor*
Wipers off
Intermittent wipe
Automatic light control*, Adaptive headlights (AHL)*
Switching off all lights/daylight driving lights*
Switching on side lights
Switching on the low beam and main beam
Fog lights*
Rear fog light
Fig. 7 Dash panel: Light switch
Fig. 8 Turn signal and main beam lever
AAABACAD
Fig. 9 Windscreen wiper lever
AAA0A1
s3fg.2.book Page 12 Friday, April 30, 2010 12:17 PM
Page 17 of 287
Instruments and warning lights
16
Shift into the next higher gear or select th e selector lever position D of the automatic
gearbox before reaching the red zone of the rev counter scale.
Avoid high engine speeds du ring the driving time and before the engine has been
warmed up to operating temperature page 195.
For the sake of the environment
Shifting up early helps you sa ve fuel and reduce the operating noise of your vehicle.SpeedometerWarning against excessive speeds*
An acoustic warning signal will sound when the vehicle speed exceeds 120 kilometres
per hour. The acoustic warning signal will switch off again when the vehicle speed goes
below this speed limit.
Note
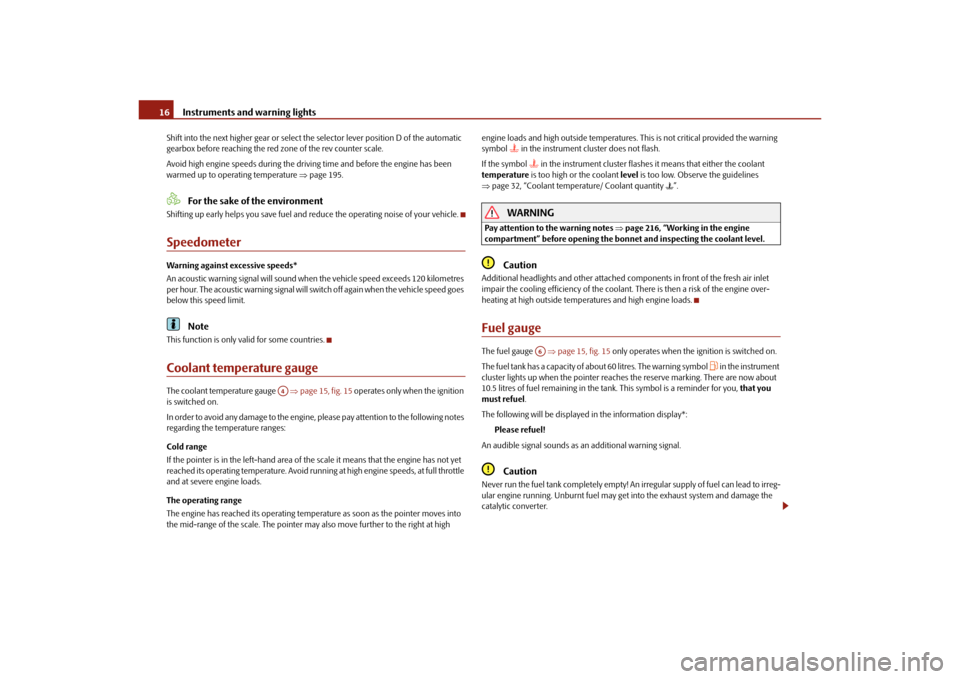
This function is only valid for some countries.Coolant temperature gaugeThe coolant temperature gauge page 15, fig. 15 operates only when the ignition
is switched on.
In order to avoid any damage to the engine, please pay attention to the following notes
regarding the temperature ranges:
Cold range
If the pointer is in the left-hand area of the scale it means that the engine has not yet
reached its operating temperatur e. Avoid running at high engine speeds, at full throttle
and at severe engine loads.
The operating range
The engine has reached its operating temper ature as soon as the pointer moves into
the mid-range of the scale. The pointer may also move further to the right at high engine loads and high outside temperatures. This is not critical provided the warning
symbol
in the instrument cl
uster does not flash.
If the symbol in the instrument cluster flashes it means that either the coolant
temperature is too high or the coolant level is too low. Observe the guidelines
page 32, “Coolant temperature/ Coolant quantity ”.
WARNING
Pay attention to the warning notes page 216, “Working in the engine
compartment” before opening the bonn et and inspecting the coolant level.
Caution
Additional headlights and other attached components in front of the fresh air inlet
impair the cooling efficiency of the coolant. There is then a risk of the engine over-
heating at high outside temper atures and high engine loads.Fuel gaugeThe fuel gauge page 15, fig. 15 only operates when the ignition is switched on.
The fuel tank has a capacity of about 60 litres. The warning symbol
in the instrument
cluster lights up when the pointer reaches the reserve marking. There are now about
10.5 litres of fuel remaining in the ta nk. This symbol is a reminder for you, that you
must refuel .
The following will be displayed in the information display*: Please refuel!
An audible signal sounds as an additional warning signal.
Caution
Never run the fuel tank completely empty! An irregular supply of fuel can lead to irreg-
ular engine running. Unburnt fuel may get into the exhaust system and damage the
catalytic converter.
A4
A6
s3fg.2.book Page 16 Friday, April 30, 2010 12:17 PM
Page 29 of 287
Instruments and warning lights
28
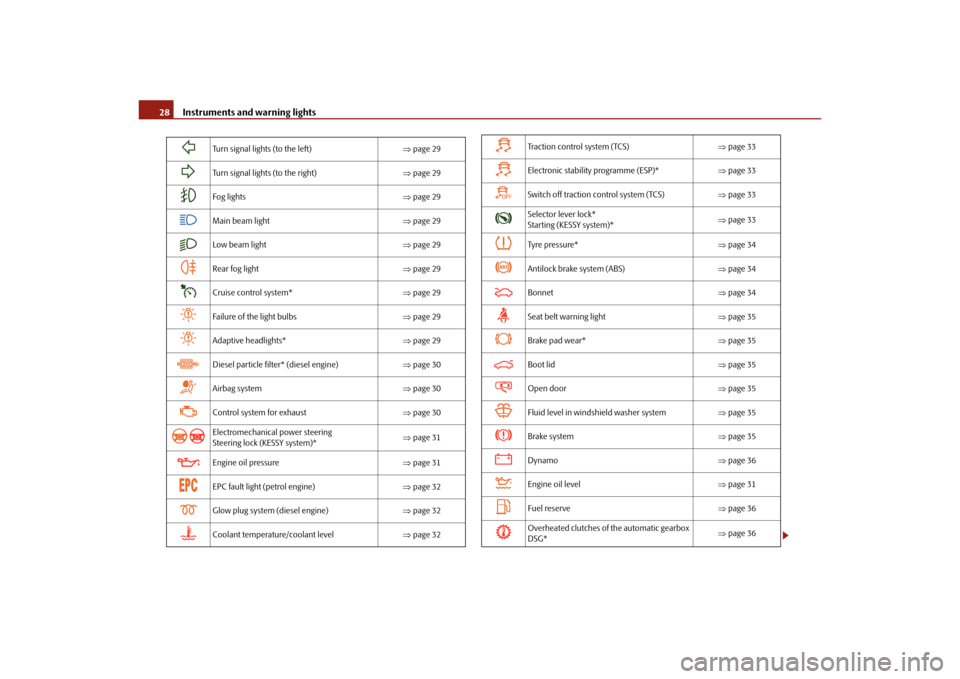
Turn signal lights (to the left) page 29
Turn signal lights (to the right) page 29
Fog lights page 29
Main beam light page 29
Low beam light page 29
Rear fog light page 29
Cruise control system* page 29
Failure of the light bulbs page 29
Adaptive headlights* page 29
Diesel particle filter* (diesel engine) page 30
Airbag system page 30
Control system for exhaust page 30
Electromechanical power steering
Steering lock (KESSY system)*
page 31
Engine oil pressure page 31
EPC fault light (petrol engine) page 32
Glow plug system (diesel engine) page 32
Coolant temperature/coolant level page 32
Tra c t i o n c o n t r o l s y s t e m ( TC S ) page 33
Electronic stability programme (ESP)* page 33
Switch off traction control system (TCS) page 33
Selector lever lock*
Starting (KESSY system)*
page 33
Tyre pressure* page 34
Antilock brake system (ABS) page 34
Bonnet page 34
Seat belt warning light page 35
Brake pad wear* page 35
Boot lid page 35
Open door page 35
Fluid level in windshield washer system page 35
Brake system page 35
Dynamo page 36
Engine oil level page 31
Fuel reserve page 36
Overheated clutches of the automatic gearbox
DSG*
page 36
s3fg.2.book Page 28 Friday, April 30, 2010 12:17 PM
Page 30 of 287
Instruments and warning lights29
Using the system
Safety
Driving Tips
General Maintenance
Breakdown assistance
Technical Data
WARNING
If you do not pay attention to the warning lights coming on and the corre-
sponding descriptions and warning notes, this may result in severe body inju-
ries or major vehicle damage.
The engine compartment of your car is a hazardous area. There is a risk of
injuries, scalding, accident s and fire when working in the engine compartment,
e.g. inspecting and replenishing oil and other fluids. It is also essential to
observe all warnings page 216, “Working in the engine compartment”.Note
The arrangement of the indicator lights depends on the model version. The
symbols shown in the following functional description are to be found as indicator
lights in the instrument cluster.
Operational faults are shown in the instrument cluster as red symbols (priority 1 -
danger) or yellow symbols (priority 2 - warning).
Turn signal system
Either the left
or right
indicator light flashes depending on the position of the turn
signal lever.
The indicator light flashes at twice its normal rate if a turn signal light fails.
Switching off the hazard warning light system is switched on will cause all of the turn
signal lights as well as both indicator lights to flash.
Further information about the turn signal system page 66.
Fog lights
The warning light
comes on when the fog lights are operating page 64.
Main beam
The indicator light
comes on when the main beam is selected or also when the
headlight flasher is operated. Further information about the main beam
page 66.
Low beam
The warning light
comes on when low beam is selected page 60.
Rear fog light
The warning light
comes on when the rear fog lights are operating page 65.
Cruise control system*
The warning light
lights up, when operating the speed regulating system.
Bulb failure
The warning light
comes on if a bulb is faulty:
up to 2 seconds after the ignition is switched on,
when switching on the defective light bulb.
The following text e.g will be displayed in the information display*: Check front right dipped beam!
The rear side lights and the licence plate lighting require several light bulbs. The indi-
cator light
only lights up if all light bulbs of the licence plate lighting or the parking
light (in one rear light unit) are defective. Check regularly the function of the light
bulbs.
Adaptive headlights*
If the warning light
flashes for 1 minute while driving or after switching on the igni-
tion and a warning signal sounds, a fault of the adaptive headlights is confirmed.
Further information page 63.
s3fg.2.book Page 29 Friday, April 30, 2010 12:17 PM
Page 61 of 287
Lights and Visibility
60
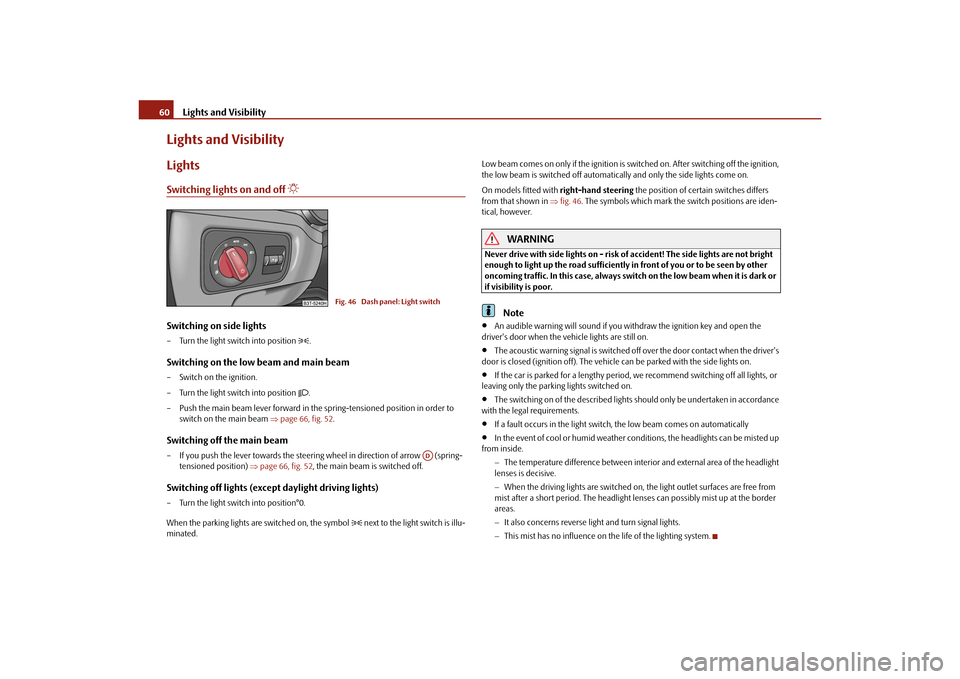
Lights and VisibilityLightsSwitching lights on and off
Switching on side lights– Turn the light switch into position
.
Switching on the low beam and main beam– Switch on the ignition.
– Turn the light switch into position
.
– Push the main beam lever forward in the spring-tensioned position in order to switch on the main beam page 66, fig. 52 .
Switching off the main beam– If you push the lever towards the steering wheel in direction of arrow (spring-
tensioned position) page 66, fig. 52, the main beam is switched off.Switching off lights (except daylight driving lights)– Turn the light switch into position°0.
When the parking lights are switched on, the symbol
next to the light switch is illu-
minated. Low beam comes on only if the ignition is switched on. After switching off the ignition,
the low beam is switched off automatica
lly and only the side lights come on.
On models fitted with right-hand steering the position of certain switches differs
from that shown in fig. 46 . The symbols which mark the switch positions are iden-
tical, however.
WARNING
Never drive with side lights on - risk of accident! The side lights are not bright
enough to light up the road sufficiently in front of you or to be seen by other
oncoming traffic. In this case, always switch on the low beam when it is dark or
if visibility is poor.
Note
An audible warning will sound if you wi thdraw the ignition key and open the
driver's door when the vehicle lights are still on.
The acoustic warning signal is switched off over the door contact when the driver's
door is closed (ignition off). The vehicle can be parked with the side lights on.
If the car is parked for a lengthy period, we recommend switching off all lights, or
leaving only the parking lights switched on.
The switching on of the described lights should only be undertaken in accordance
with the legal requirements.
If a fault occurs in the light switch , the low beam comes on automatically
In the event of cool or humid weather conditions, the headlights can be misted up
from inside.
The temperature difference between interior and external area of the headlight
lenses is decisive.
When the driving lights are switched on, the light outlet surfaces are free from
mist after a short period. The headlight lens es can possibly mist up at the border
areas.
It also concerns reverse light and turn signal lights.
This mist has no influence on th e life of the lighting system.
Fig. 46 Dash panel: Light switch
AD
s3fg.2.book Page 60 Friday, April 30, 2010 12:17 PM
Page 64 of 287
Lights and Visibility63
Using the system
Safety
Driving Tips
General Maintenance
Breakdown assistance
Technical Data
Switching on Leaving Home Function– After leaving the vehicle, the light switch is in the position automatic driving lamp
control
.
– Unlock the vehicle with the radio remote control - the lights come on.
Depending on equipment fitted the function Leaving Home switches on the following
lights:
Parking lights,
Low beam,
Entry lighting in the exterior mirrors,
Licence plate light.
Leaving Home Function
The function Leaving Home is controlled with the light sensor in the mount of the inte-
rior rear mirror. If the light intensity is higher than the set value of the light sensor, the
Leaving Home Function is not switched on after unlocking the vehicle with the radio
remote control.
After unlocking the vehicle wi th the radio remote control, the lights come on for 10
seconds. The Leaving Home Function is also switched off after the ignition is switched
on and after locking the vehicle.
If no door is opened within 30 seconds, the lights go out and the vehicle is locked auto-
matically.Note
If the Leaving Home Function is switched on constantly, the battery will be heavily
discharged particularly in short-haul traffic.
The switching on of the described lights should only be undertaken in accordance
with the legal requirements.
You can change the illumination period for the Leaving Home Function by means
of the information display*.
Adaptive headlights (AHL)*Switch on Adaptive headlights (AHL)*– Turn the light switch page 61, fig. 47 into position
.
The AHL system* is activated if:
the light sensor recognizes the low light intensity,
no reverse gear is engaged,
the operation “tourist light” is not switched on.
The light sensor switches on the full outer illumination at low light intensity.
System AHL* makes it possible to change th e length and width of illumination of the
headlight. The length and width of illuminati on changes automatically in relation to the
vehicle speed and the use of the windscreen wiper.
System AHL* operates in the following modes.
Mode out of town
The mode “out of town” is a basic mode. The di spersion of the cone of light in front of
the vehicle is similar to the low beam. The mode is active if none of the following
modes are active.
Mode rain
In the mode “rain” the dispersion of the cone of light in front of the vehicle is wider and
the width of illumination is shorter, so th at during bad weather (rain) the dazzling of
the oncoming drivers can be reduced. The mode is activated at speeds of 15 - 70 km/h
and if the windscreen wipers continuously operate for a peri od of time longer than 2
minutes. The mode is deactivated when dr opping below or exceeding the set speed
limit or if the windscreen wipers have been switched off for a period of time longer
than 8 minutes.
Mode city
In the mode “city”, the dispersion of the cone of light in front of the vehicle is wider and
the width of illumination is sh orter. It has as an aim to illuminate the adjacent foot-
paths, crossings, pedestrian crossings etc. The mode is active at speeds of 15 - 50 km/h.
s3fg.2.book Page 63 Friday, April 30, 2010 12:17 PM
Page 65 of 287
Lights and Visibility
64
Mode motorway
In the mode “motorway” the dispersion of the co ne of light is so widespread, that it illu-
minates also the left (and right)
7) lane of the motorway, so that the driver can react in
time to an obstacle or any other danger. The mode is activated stepwise as of a speed
of 90 km/h. It gains its greatest effectiveness at speeds above 120 km/h.
Tourist light
This mode makes it possible to drive in countries with opposing traffic system, driving
on the left/right, without dazzling the oncoming vehicles. When the mode “tourist
light” is active, the above mentioned modes and the side to side swivel of the headlight
is deactivated.
The mode “tourist light” is activated / deac tivated via the information display* in the
menu:
SETUP
Tr a v e l m o d e
Off
On
Cornering lights
The cornering lights are used to illuminate the curves by means of the cone of light
swiveling together with the front headlight with Xenon lights*. This function is active
when the speed of the car increases to more than 10km/h.
The swiveling function of the headlights ca n be switched off / on via the menu point
Assistants in the main menu of the information display* page 23.WARNING
If the cornering ligh ts are defective, the headlights are automatically lowered to
the emergency position, whic h prevents a possible dazzling of oncoming traffic.
Thus the illuminated length of the road is shortened. Drive carefully and have
the car inspected immediatel y by a specialist garage.
Note
The AHL system* complements the functions of the fog lights with the function
“CORNER” page 64 and the function of the dy namic headlamp beam adjustment*.
The System AHL* is solely delivered with Bi-Xenon gas discharge bulbs for low
beam and main beam lights.
Fog lights
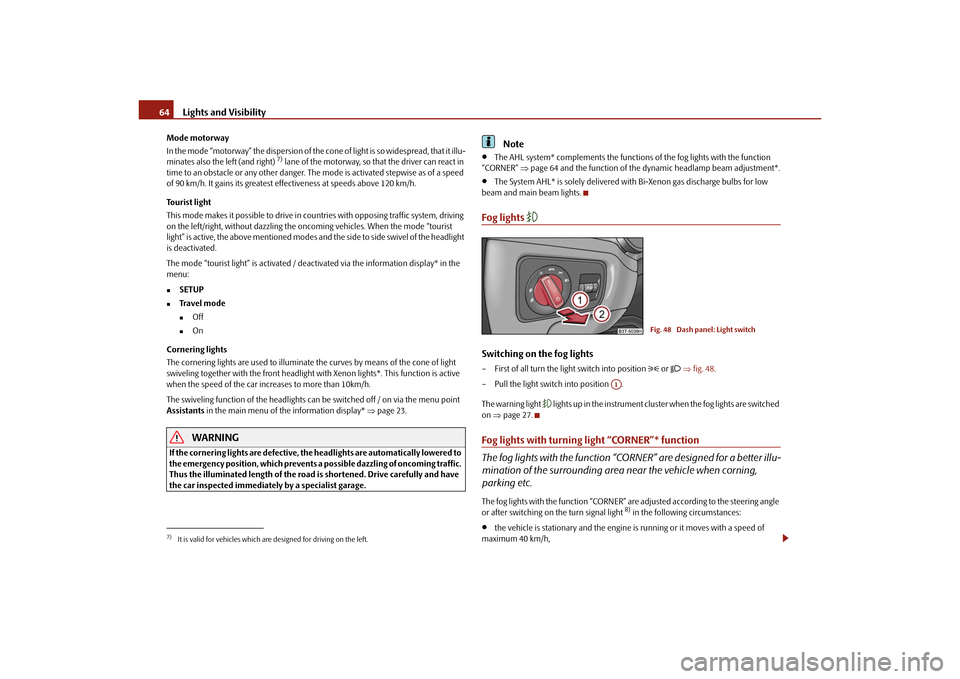
Switching on the fog lights– First of all turn the light switch into position
or fig. 48 .
– Pull the light switch into position .
The warning light
lights up in the instrument cluste r when the fog lights are switched
on page 27.
Fog lights with turning light “CORNER”* function
The fog lights with the function “CORNER” are designed for a better illu-
mination of the surrounding area near the vehicle when corning,
parking etc.The fog lights with the function “CORNER” ar e adjusted according to the steering angle
or after switching on the turn signal light
8) in the following circumstances:
the vehicle is stationary and the engine is running or it moves with a speed of
maximum 40 km/h,
7)It is valid for vehicles which are designed for driving on the left.
Fig. 48 Dash panel: Light switch
A1
s3fg.2.book Page 64 Friday, April 30, 2010 12:17 PM
Page 66 of 287
Lights and Visibility65
Using the system
Safety
Driving Tips
General Maintenance
Breakdown assistance
Technical Data
the daylight driving lights are not switched on,
the low beam is switched on or th e light switch is in the position
and the
intensity of the ambient light causes the low beam to be switched on,
the fog lights are not switched on,
no reverse gear is engaged.Note
If you engage the reverse gear during the active function “CORNER”, both fog lights
illuminate.Rear fog light
Switching on the rear fog light– First of all turn the light switch into position
or page 64, fig. 48 .
– Pull the switch into position .
The warning light
lights up in the instrument cluster when the rear fog light is
switched on page 27.
Only the rear fog light of the trailer lights up automatically when you are towing a trailer
using a factory-fitted towing device from Škoda original accessories which is
fitted with the rear fog light.
The rear fog light is located in the rear light array on the driver's side.
Caution
The rear fog light should only be switched on if visibility is particularly poor (conform
with any varying legal provisions) to avoi d dazzling vehicles behind your vehicle.
Instrument lighting
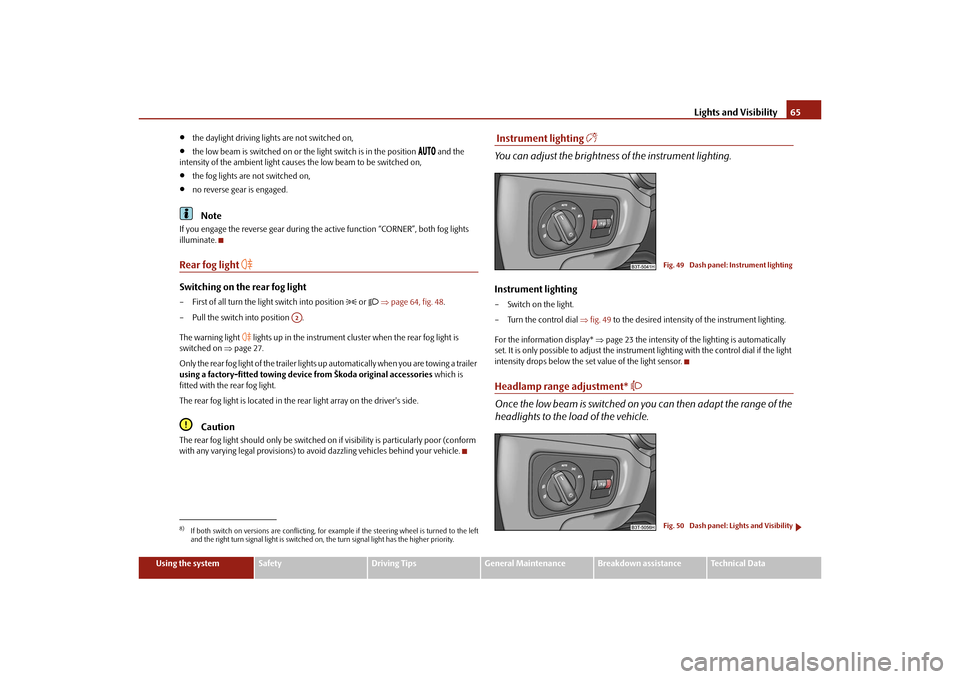
You can adjust the brightness of the instrument lighting.Instrument lighting– Switch on the light.
– Turn the control dial fig. 49 to the desired intensity of the instrument lighting.
For the information display* page 23 the intensity of the lighting is automatically
set. It is only possible to adjust the instrume nt lighting with the control dial if the light
intensity drops below the set value of the light sensor.Headlamp range adjustment*
Once the low beam is switched on you can then adapt the range of the
headlights to the load of the vehicle.
8)If both switch on versions are conflicting, for ex ample if the steering wheel is turned to the left
and the right turn signal light is switched on, the turn signal light has the higher priority.
A2
Fig. 49 Dash panel: Instrument lightingFig. 50 Dash panel: Lights and Visibility
s3fg.2.book Page 65 Friday, April 30, 2010 12:17 PM
Page 76 of 287
Lights and Visibility75
Using the system
Safety
Driving Tips
General Maintenance
Breakdown assistance
Technical Data
Caution
In frosty weather, please firs t of all check whether the windscreen wiper blades are not
frozen to the windscreen before switching them on. Switching on windscreen wipers
when the blades are frozen to the windscreen may result in damage both to the blades
and the motor of the windscreen wipers!
Note
If the slower page 73, fig. 63 or the faster wiper setting is switched on and
the vehicle speed decreases to below 4 km/h, the lower wiper step is switched on
automatically. At a speed increase of more than 8 km/h the previous wiper setting is
established again.
If there is an obstacle on the windscreen, the wiper will try to push away the
obstacle. If the obstacle continues to bloc k the wiper, the wiper stops automatically
after 5 attempts to eliminate the obstacle, in order to avoid a damage to the wiper.
Remove the obstacle and and switch on the wiper again.
The content of the windscreen washer fluid reservoir is 3 litres. On vehicles which
are equipped with a headlight cleaning syst em*, the content of the reservoir is 5.5
litres.
Automatic rear window wiper* (Combi)If the windshield wiper lever is in the position page 73, fig. 63 or , the rear
window wiper carries out a wiping process ev ery 30 seconds or 10 seconds at a speed
above 5 km/h.
When the rain sensor* is active (the lever is in the position ) the function is only
active if the front window wipers continue to operate (no break between each wiping
process).
Activation/deactivation
The function of the automatic rear window wiper is activated/deactivated in the infor-
mation display* in the menu:
Setup
Lights & Vision (Lights & Vision)
Rear wiper
Note
The function of the automatic rear window wi per is only valid for Combi vehicles which
are equipped with the information display*. The function is activated in the factory.Position of the rear window wiper (Combi)Each second time the ignition is switched off, the wiper blade is tilted. Thus, the life of
the wiper blade is prolonged. As standard this function is activated and it can be deac-
tivated as follows:Deactivating– Switch on the ignition.
– Push the operating level into the position page 73, fig. 63 five times in
succession within 5 seconds.
– Switch off the ignition. After switching on th e ignition again, the position of the rear
window wiper is deactivated.
The activation of the position of the rear window wiper is carried out in the same way
as the deactivation.Headlight cleaning system*The headlights are being cleaned after the windscreen has been sprayed for the first
time and fifth time, the low beam or main beam are switched on and the windscreen
wiper lever was held in the position page 73, fig. 63 for about 1 second.
The headlight washer nozzles are moved forward out of the bumper by the water pres-
sure for cleaning the headlights.
You should remove stubborn dirt (such as in sect residues) from the headlight lenses at
regular intervals, for example when refuelling . Please refer to the following guidelines.
You should remove any snow from the fixtur es of the washer nozzles and clear ice in
winter with a de-icing spray in order to ensure proper operation of the cleaning
system.
A2
A3
A2
A3
A1
A6
A5
s3fg.2.book Page 75 Friday, April 30, 2010 12:17 PM
Page 201 of 287
Driving and the Environment
200
solvent-free protection of the vehicle for transportation from the production plant
to the customer,
The use of solvent-free adhesives,
No CFCs used in the production process,
without use of mercury,
Use of water-soluble paints.
Trade-in and recycling of old cars
Škoda Auto meets the requirements of the brand and its products regarding environ-
ment and ressource protection. All new Škoda vehicles can be utilized up to 95% and
always
14) be returned. In a lot of countries sufficient trade-in networks have been
created, where you can trade-in your vehicle. After you trade-in your vehicle, you will
receive a confirmation stating the recycling in accordance with environmental regula-
tions.
Vehicles with special built-on types
Technical documents regarding changes carried out on the vehicle must be kept by the
vehicle user, in order to hand over later to the old car user. This ensures the recycling
in accordance with en vironmental regulations.
Note
Detailed information about the trade-in and recycling of old cars is available from a
Škoda Service Partner.Motoring abroadGeneral
Other circumstances may exist abroad.It is also possible, in certai n countries, that the Škoda Service Partner network is limited
or has not been established yet. This is the reason why obtaining certain spare parts
may be somewhat complicated and specialist garage personnel may only be able to
make limited repairs. Škoda Auto in the Czech Republic and relevant importers are happy to provide information about technical
aspects of the vehicle, required mainte-
nance work and possibilities for getting repairs done.
Unleaded petrolA vehicle fitted with a petrol engine must always be refuelled with unleaded petrol
page 196. The automobile associations can provide you with information regarding
the locations of filling stations which offer unleaded petrol.HeadlightThe low beam of your headligh ts is set asymmetrically. It illuminates the side of the
road on which you are driving to a greater ex tent. If you drive abroad on the other side
of the road, you will da zzle oncoming traffic.
In order to prevent the dazzling of oncoming tr affic, it is necessary that an adjustment
of the headlights is carried out by your auth orised Škoda Service Partner.
The adaptation of the headlights with Xe non lights* (applies to vehicles which are
designed for driving on the left and on the right) is performed in the menu Setup -
Tra v e l m o d e in the main menu of the information display* page 64, “Tourist
light”.Avoiding damage to your vehicleWhen driving on poor roads and lanes or when driving over kerbstones, steep ramps
etc., you must pay particular attention to ensuring that any low-slung parts of the
vehicle, such as spoiler and exhaust, do not touch the ground and get damaged.
This particularly applies to models with a lowered suspension (sport suspension) and
also when your vehicle is fully laden.
14)Subject to fulfilment of the national legal requirements.s3fg.2.book Page 200 Friday, April 30, 2010 12:17 PM