service indicator SKODA SUPERB 2010 Owner´s Manual
[x] Cancel search | Manufacturer: SKODA, Model Year: 2010, Model line: SUPERB, Model: SKODA SUPERB 2010Pages: 252, PDF Size: 16.33 MB
Page 5 of 252
Table of Contents
Board literature4
Notes
5
Structure and more information about the
Operating Instructions
6
Abbreviations
Safety
Passive Safety
8
General information
8
Correct and safe seated position
9
Seat belts
12
Using seat belts
12
Inertia reels and belt tensioners
15
Airbag system
16
Description of the airbag system
16
Airbag overview
17
Deactivating airbags
20
Transporting children safely
22
Child seat
22
Fastening systems
25
Operation
Cockpit
29
Overview
28
Instruments and Indicator Lights
30
Instrument cluster
30
Warning lights
34
Information system
42
Driver information system
42
Multifunction display (MFD)
44MAXI DOT display46Service interval display48
Unlocking and opening
50
Unlocking and locking
50
Anti-theft alarm system
55
Luggage compartment lid
57
Electric boot lid (Superb Combi)
59
Electrical power windows
61
Electric sliding/tilting roof
64
Panoramic sliding/tilting roof (Superb Estate)
65
Lights and visibility
67
Lights
67
Interior lights
73
Visibility
75
Windscreen wipers and washers
77
Rear mirror
79
Seats and practical features
81
Adjusting the seats
81
Seat features
85
Practical features
88
Luggage compartment
97
Removable light (Superb Combi)
103
Variable loading floor in the luggage
compartment (Estate)
104
Extending variable loading floor with
integrated aluminium rails and fastening
elements (Superb Combi)
105
Net partition (Superb Combi)
107
Roof rack
108
Air conditioning system
110
Heating, ventilation, cooling
110
Air conditioning system (manual air
conditioning system)
112Climatronic (automatic air conditioning
system)115
Auxiliary heating (auxiliary heating and
ventilation)
118
Communication and multimedia
121
General information
121
Universal telephone preinstallation GSM II
124
Universal telephone preinstallation GSM IIl
126
Wi-Fi
130
Voice control
131
Multimedia
134
Driving
Starting off and Driving
138
Starting and stopping the engine using the
key
138
Starting and stopping the engine - KESSY
140
Brakes
143
Manual gear changing and pedals
144
Automatic transmission
145
Running in
148
Economical driving and environmental
sustainability
149
Avoiding damage to your vehicle
152
Driving abroad
153
Assist systems
154
Brake assist systems
154
Parking aid
156
Park assist
157
Cruise Control System
161
START STOP
162
Fatigue detection (break recommendation)
165
Tyre pressure monitoring
165
Hitch and trailer
166
Hitch
166
Trailer
1702Table of Contents
Page 33 of 252
Instruments and Indicator Lights
Instrument cluster
Introduction
This chapter contains information on the following subjects:
Overview
30
Revolution counter
31
Speedometer
31
Coolant temperature gauge
31
Display
31
Fuel gauge
32
Counter for distance driven
32
32
Display of the second speed
33
Display in rear centre console
33
Auto Check Control
33
Fault display
The Error message will appear in the display if there is a fault in the instru-
ment cluster. Ensure that the fault is rectified as soon as possible by a special-
ist workshop.
WARNING■ Concentrate fully at all times on your driving! As the driver you are fully
responsible for road safety.■
Never operate the controls in the instrument cluster while driving - risk of
accident. Operate the controls only when the vehicle is at a standstill.
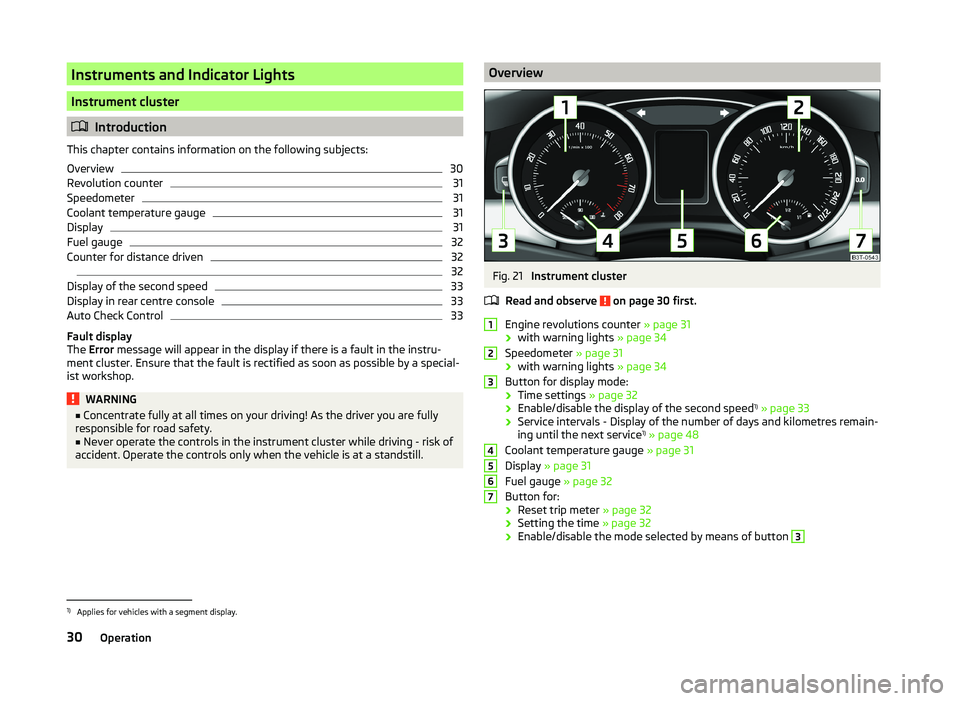
OverviewFig. 21
Instrument cluster
Read and observe
on page 30 first.
Engine revolutions counter » page 31
› with warning lights
» page 34
Speedometer » page 31
› with warning lights
» page 34
Button for display mode:
› Time settings
» page 32
› Enable/disable the display of the second speed 1)
» page 33
› Service intervals - Display of the number of days and kilometres remain-
ing until the next service 1)
» page 48
Coolant temperature gauge » page 31
Display » page 31
Fuel gauge » page 32
Button for: › Reset trip meter
» page 32
› Setting the time
» page 32
› Enable/disable the mode selected by means of button
312345671)
Applies for vehicles with a segment display.
30Operation
Page 34 of 252
Revolution counterRead and observe
on page 30 first.
The red scale of the revolution counter
1
» Fig. 21 on page 30 indicates the
range in which the system begins to limit the engine speed. The system auto-
matically restricts the engine speed to a steady limit.
You should shift into the next highest gear before the red scale of the revolu-
tion counter is reached or select mode D on the automatic gearbox.
Follow the recommended gear to prevent engine speeds that are too high or
too low » page 43 .
Speedometer
Read and observe
on page 30 first.
Warning against speeding
An audible warning will sound when the vehicle speed exceeds 120 km/h 1)
. The
audible warning is switched off once the vehicle speed falls below 120 km/h.
Coolant temperature gauge
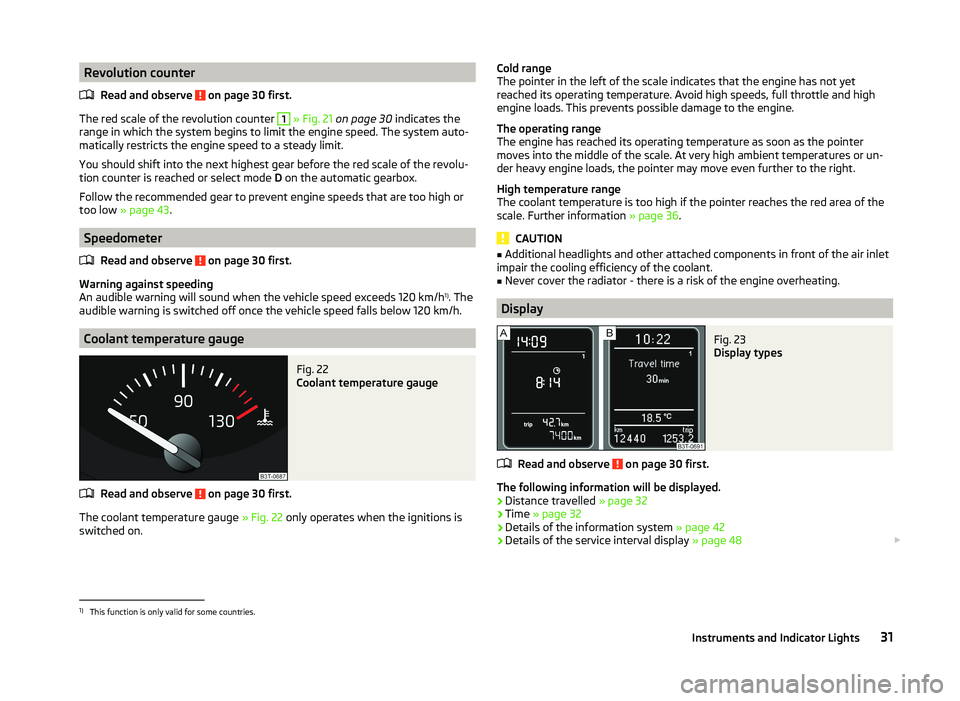
Fig. 22
Coolant temperature gauge
Read and observe on page 30 first.
The coolant temperature gauge » Fig. 22 only operates when the ignitions is
switched on.
Cold range
The pointer in the left of the scale indicates that the engine has not yet
reached its operating temperature. Avoid high speeds, full throttle and high
engine loads. This prevents possible damage to the engine.
The operating range
The engine has reached its operating temperature as soon as the pointer
moves into the middle of the scale. At very high ambient temperatures or un-
der heavy engine loads, the pointer may move even further to the right.
High temperature range
The coolant temperature is too high if the pointer reaches the red area of the
scale. Further information » page 36.
CAUTION
■
Additional headlights and other attached components in front of the air inlet
impair the cooling efficiency of the coolant.■
Never cover the radiator - there is a risk of the engine overheating.
Display
Fig. 23
Display types
Read and observe on page 30 first.
The following information will be displayed.
› Distance travelled
» page 32
› Time
» page 32
› Details of the information system
» page 42
› Details of the service interval display
» page 48
1)
This function is only valid for some countries.
31Instruments and Indicator Lights
Page 42 of 252
Seek assistance from a specialist garage immediately.
Engine performance check (petrol engine)Read and observe
on page 35 first.
If the warning light
illuminates , there is a fault in the engine control. The
system allows the vehicle to run in emergency mode.
Seek assistance from a specialist garage immediately.
Diesel particulate filter (diesel engine)
Read and observe
on page 35 first.
The diesel particulate filter separates the soot particles from the exhaust. The soot particles collect in the diesel particulate filter where they are burnt on a
regular basis.
If the warning light
illuminates , rust has accumulated in the filter.
To clean the filter, and where traffic conditions permit »
, drive as follows for
at least 15 minutes or until the warning light goes out.
4th or 5th is selected (automatic transmission: position S).
Vehicle speed at least 70 km/h.
Engine speed between 1,800 - 2,500 rpm.
If the filter is properly cleaned, the warning light
goes out .
If the filter is not properly cleaned, the warning light does
not go out and
the warning light begins to
flash.
The following message is shown in the MAXI DOT display. Diesel particulate filter: Owner's manual!
The system allows the vehicle to run in emergency mode. After switching the
ignition off and on again the warning light, also
illuminates .
Seek assistance from a specialist garage immediately.
WARNING■ The diesel particulate filter reaches very high temperatures - there is a
fire hazard and serious injury could be caused. Therefore, never stop the
vehicle at places where the underside of your vehicle can come into contact
with flammable materials such as dry grass, undergrowth, leaves, spilled
fuel or such like.■
Always adjust your speed to suit weather, road, region and traffic condi-
tions. The recommendations indicated by the warning light must not tempt
you to disregard the national regulations for road traffic.
CAUTION
■ As long as the warning light illuminates, one must take into account an
increased fuel consumption and in certain circumstances a power reduction of
the engine.■
Using diesel fuel with increased sulphur content can significantly reduce the
service life of the diesel particle filter. A ŠKODA Partner will be able to tell you
which countries use diesel fuel with increased sulphur content.
Note
■ We recommend avoiding regularly driving short distances to assist the com-
bustion process of the soot particles in the filter.■
If the engine is turned off during the filter cleaning process or shortly after-
wards, the cooling fan may turn on automatically for a few minutes.
Fuel reserve
Read and observe
on page 35 first.
The warning light
illuminates , if the fuel level is less than approx. 10.5 litres.
The following message is shown in the MAXI DOT display. Please refuel. Range: ... km
CAUTION
Never drive until the fuel tank is completely empty! The irregular supply of fuel
can cause misfiring. This can result in considerable damage to parts of the en-
gine and the exhaust system.
Note
The text in the display goes out only after refuelling and driving a short dis-
tance.39Instruments and Indicator Lights
Page 51 of 252
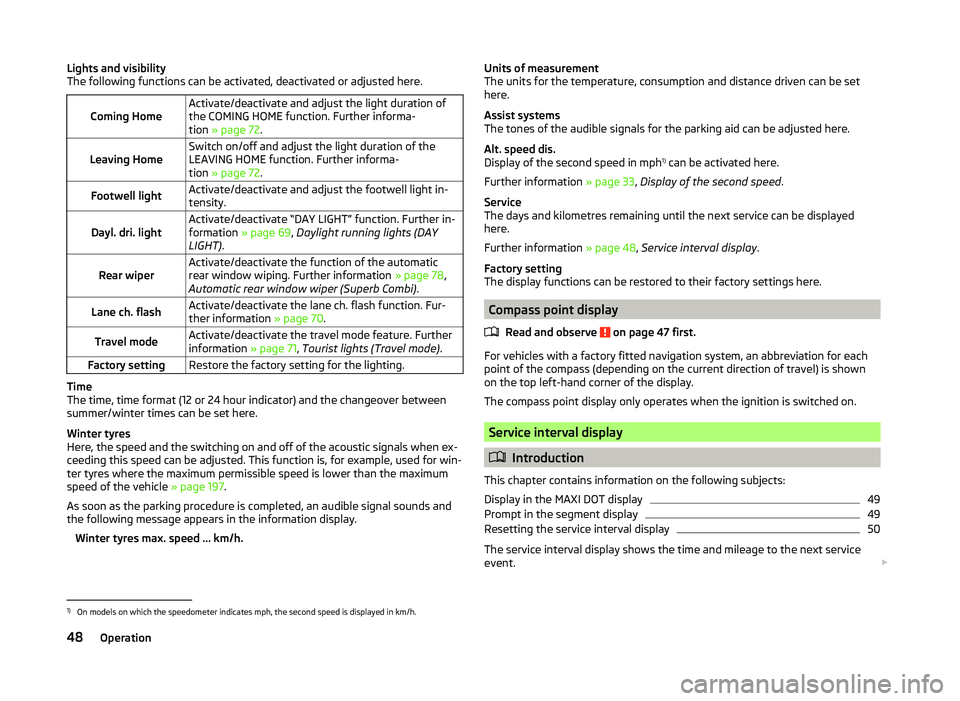
Lights and visibility
The following functions can be activated, deactivated or adjusted here.
Coming HomeActivate/deactivate and adjust the light duration of
the COMING HOME function. Further informa-
tion » page 72 .Leaving HomeSwitch on/off and adjust the light duration of the
LEAVING HOME function. Further informa-
tion » page 72 .Footwell lightActivate/deactivate and adjust the footwell light in-
tensity.Dayl. dri. lightActivate/deactivate “DAY LIGHT” function. Further in-
formation » page 69, Daylight running lights (DAY
LIGHT) .Rear wiperActivate/deactivate the function of the automatic
rear window wiping. Further information » page 78,
Automatic rear window wiper (Superb Combi) .Lane ch. flashActivate/deactivate the lane ch. flash function. Fur-
ther information » page 70.Travel modeActivate/deactivate the travel mode feature. Further
information » page 71, Tourist lights (Travel mode) .Factory settingRestore the factory setting for the lighting.
Time
The time, time format (12 or 24 hour indicator) and the changeover between
summer/winter times can be set here.
Winter tyres
Here, the speed and the switching on and off of the acoustic signals when ex-
ceeding this speed can be adjusted. This function is, for example, used for win-
ter tyres where the maximum permissible speed is lower than the maximum
speed of the vehicle » page 197.
As soon as the parking procedure is completed, an audible signal sounds and
the following message appears in the information display.
Winter tyres max. speed ... km/h.
Units of measurement
The units for the temperature, consumption and distance driven can be set
here.
Assist systems
The tones of the audible signals for the parking aid can be adjusted here.
Alt. speed dis.
Display of the second speed in mph 1)
can be activated here.
Further information » page 33, Display of the second speed .
Service
The days and kilometres remaining until the next service can be displayed
here.
Further information » page 48, Service interval display .
Factory setting
The display functions can be restored to their factory settings here.
Compass point display
Read and observe
on page 47 first.
For vehicles with a factory fitted navigation system, an abbreviation for each
point of the compass (depending on the current direction of travel) is shown
on the top left-hand corner of the display.
The compass point display only operates when the ignition is switched on.
Service interval display
Introduction
This chapter contains information on the following subjects:
Display in the MAXI DOT display
49
Prompt in the segment display
49
Resetting the service interval display
50
The service interval display shows the time and mileage to the next service
event.
1)
On models on which the speedometer indicates mph, the second speed is displayed in km/h.
48Operation
Page 52 of 252
The service due date is automatically displayed on the display and this infor-
mation can be displayed manually if necessary.
The kilometre indicator or the days indicator reduces in steps of 100 km or
days until the service due date is reached.
The information regarding the service intervals can be found in the service
schedule.
Note
Information is retained in the Service Interval Display even after the vehicle
battery is disconnected.
Display in the MAXI DOT display
Oil change service
If an oil change service is due, the following message appears: Oil change in ...
km or ... days.
As soon as the service interval date has been reached, the message Oil
change now! appears once the ignition has been switched on.
Inspection
If an inspection is due, the following message appears: Inspection in ... km
or ... days.
As soon as the service interval date has been reached, the message Inspec-
tion now! appears once the ignition has been switched on.
Displaying the distance and days until the next service interval
You can view the remaining distance and days until the next service appoint- ment at any time when the ignition is switched on by going to the Service
menu item » page 47, Settings or from the Vehicle status in the main menu of
the MAXI DOTdisplay. » page 47, Main menu .
The following message is displayed for 10 seconds. Oil change ... km / ... days
Inspection ... km / ... days
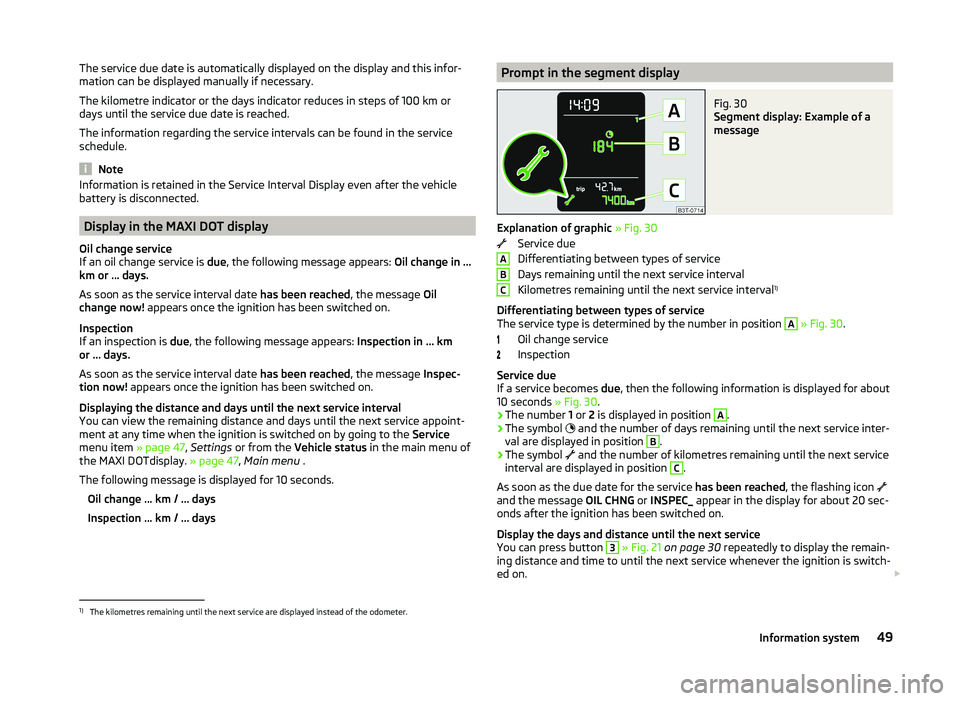
Prompt in the segment displayFig. 30
Segment display: Example of a
message
Explanation of graphic » Fig. 30
Service due
Differentiating between types of service
Days remaining until the next service interval
Kilometres remaining until the next service interval 1)
Differentiating between types of service
The service type is determined by the number in position
A
» Fig. 30 .
Oil change service
Inspection
Service due
If a service becomes due, then the following information is displayed for about
10 seconds » Fig. 30.
› The number
1 or 2 is displayed in position
A
.
› The symbol
and the number of days remaining until the next service inter-
val are displayed in position
B
.
› The symbol
and the number of kilometres remaining until the next service
interval are displayed in position
C
.
As soon as the due date for the service has been reached, the flashing icon
and the message OIL CHNG or INSPEC_ appear in the display for about 20 sec-
onds after the ignition has been switched on.
Display the days and distance until the next service
You can press button
3
» Fig. 21 on page 30 repeatedly to display the remain-
ing distance and time to until the next service whenever the ignition is switch-
ed on.
ABC1)
The kilometres remaining until the next service are displayed instead of the odometer.
49Information system
Page 201 of 252
WARNING (Continued)■You must have your tyres replaced with new ones at the latest when the
wear indicators have been worn down.■
Worn tyres impair necessary adhesion to the road surface, particularly at
high speeds on wet roads. This could lead to “aquaplaning” (uncontrolled
vehicle movement – “swimming” on a wet road surface).
WARNING■ Having the correct tyre inflation pressure is always the driver's responsi-
bility.■
Too low or too high inflation pressure impairs handling.
■
If the inflation pressure is too low, the tyre will have to overcome a higher
rolling resistance. This will cause a significant increase in the temperature
of the tyre, especially at higher speeds. This can result in tread separation
and a tyre blowout.
■
In the event of very fast tyre inflation pressure loss, such as a sudden tyre
failure, an attempt should be made to bring the vehicle carefully to a stop
without sudden steering movements and without any hard braking.
CAUTION
■ If a spare wheel is used that is not identical to the fitted tyres, the following
must be observed » page 200, Spare and temporary spare wheel .■
The tyres must be protected from contact with substances such as oil,
grease and fuel, which could damage them. If the tyres come into contact with
these substances, then we recommend you have this checked out in a special-
ist workshop.
■
If, in the case of puncture occurring, the spare tyre with a non-bound direc-
tion or an opposite direction of rotation must be mounted, then drive carefully.
The best properties of the tyre are no longer present in this situation.
For the sake of the environment
■ Old and unserviceable tyres are classified in a special environmentally haz-
ardous category. These must be disposed of in accordance with national legis-
lation.■
Tyres that are insufficiently inflated increase your fuel consumption.
Note
■ We recommend that any work on the wheels or tyres be carried out by a spe-
cialist garage.■
We recommend that you use wheel rims, tyres, full wheel trims and snow
chains from ŠKODA Original Accessories.
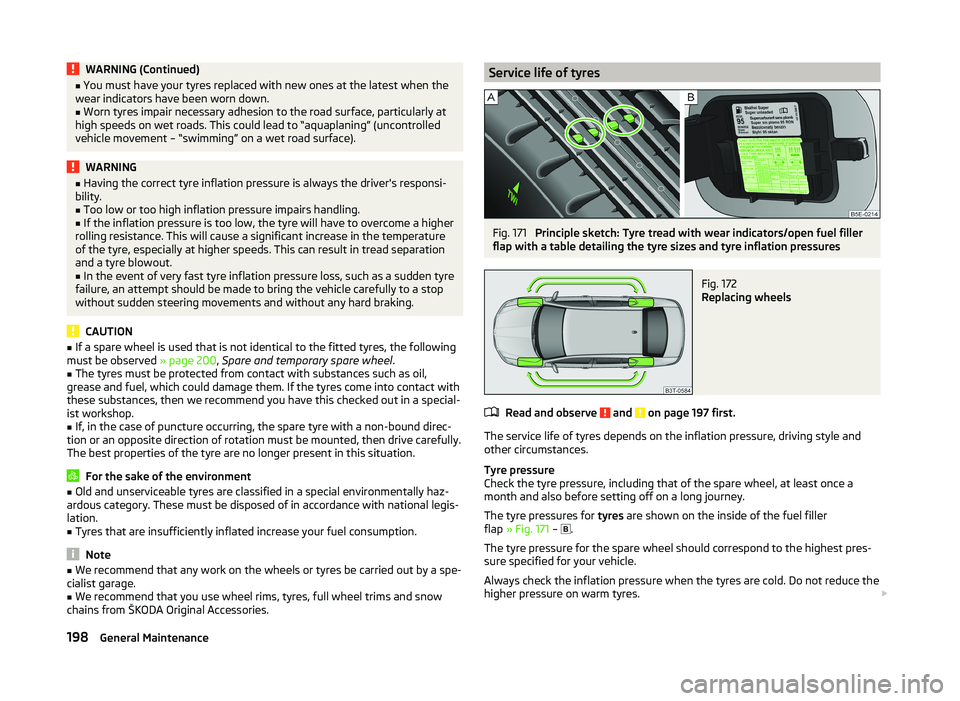
Service life of tyresFig. 171
Principle sketch: Tyre tread with wear indicators/open fuel filler
flap with a table detailing the tyre sizes and tyre inflation pressures
Fig. 172
Replacing wheels
Read and observe and on page 197 first.
The service life of tyres depends on the inflation pressure, driving style and
other circumstances.
Tyre pressure
Check the tyre pressure, including that of the spare wheel, at least once a
month and also before setting off on a long journey.
The tyre pressures for tyres are shown on the inside of the fuel filler
flap » Fig. 171 –
.
The tyre pressure for the spare wheel should correspond to the highest pres-
sure specified for your vehicle.
Always check the inflation pressure when the tyres are cold. Do not reduce the
higher pressure on warm tyres.
198General Maintenance
Page 202 of 252

In vehicles with tyre pressure monitoring, tyre pressure values are to be stor-
ed » page 166 .
With greater additional load, adjust the tyre inflation pressure accordingly.
Driving style
Fast cornering, sharp acceleration and braking increase the wear of your tyres.
Wheel balance
The wheels of a new vehicle are balanced. When driving, however, there are a
range of factors that may result in an imbalance. This may become apparent by
“vibration” in the steering. If this is the case, have the wheels checked by a
specialist garage.
Have the wheels likewise rebalanced after replacing the tyres.
Setting the vehicle geometry
Incorrect wheel alignment at the front or rear leads to excess wear on the
tyres and impairs driving safety. With a distinctive tyre wear, we recommend
that you check the setting of the vehicle geometry in a specialist workshop.
Tyre damage
We recommend checking your tyres and wheel rims for damage (punctures,
cuts, splits and bulges, etc.) on a regular basis. Remove foreign bodies (e.g.
small stones) from the tyre tread immediately.
Drive over kerbs and other such obstacles slowly and at right angles wherever
possible in order to avoid damage to tyres and wheel trims.
Immediately replace damaged wheel rims or tyres.
Exchanging the wheels
For uniform wear on all tyres, we recommend that you change the wheels ev-
ery 10 000 km according to schedule » Fig. 172. You will then obtain approxi-
mately the same life for all the tyres.
After a wheel has been replaced, the tyre pressure has to be adjusted.
In vehicles with tyre pressure monitoring, tyre pressure values are to be stor-
ed » page 166 .
Tyre storage
Identify disassembled tyres so that the previous direction of rotation can be
maintained if the tyres are reassembled.
Always store wheels or tyres in a cool, dry place that is as dark as possible.
Tyres which are not fixed to a wheel trim should be stored upright.Wear indicators
The base of the tread of the tyres contains has a 1.6 mm high wear indica-
tor » Fig. 171 -
. In some countries, different tyre wear rates may apply.
Markings on the walls of the tyres through the letters “TWI”, triangular sym-
bols or other symbols identify the position of the wear indicators.
Tyre age
Tyres age and lose their original characteristics, even if they are not being
used. The service life of the tyres is 6 years. Therefore, we recommend not us-
ing tyres that are older than 6 years.
Wheel bolts
Wheels and wheel bolts are matched to each other in terms of design. We rec-
ommend that you use wheel rims and wheel bolts from ŠKODA Original Acces-
sories.
Note
In some countries, the vehicles have a sticker with tyre inflation pressure val-
ues without pictograms.
Unidirectional tyres
Read and observe
and on page 197 first.
The direction of rotation of the tyres is marked by arrows on the wall of the
tyre .
The indicated direction of rotation must be adhered to in order to ensure the
optimal characteristics of these tyres.
These characteristics mainly relate to the following: › Increased driving stability.
› Reduced risk of aquaplaning.
› Reduced tyre noise and tyre wear.
199Wheels
Page 248 of 252
Operation in winter195
Replacing196
Safety instructions193
Vehicle care Alcantara
182
Fabrics182
Synthetic leather182
washing176
Vehicle Condition see Auto Check Control
33
Vehicle data sticker228
Vehicle dimensions230
Vehicle height230
Vehicle Identification Number (VIN)228
Vehicle key lock
51
unlock51
Vehicle length230
Vehicle tool kit205
Vehicle width230
Visibility75
Visors see Sun screen
76
see Sun visors76
W
Warning at excessive speeds
46
Warning lights34
warning messages Diesel particulate filter
39
Warning symbols see Warning lights
34
Warning triangle204
Washing Automatic car wash system
177
by hand176
Chrome parts178
High-pressure cleaner177
Washing vehicles176
Water Driving through152
Wax treatment See Taking care of your vehicle
178
Weather conditions173
Wheel bolts Anti-theft wheel bolts
208
Caps201
Loosening and tightening207
Wheel rims197
Wheels Changing
205
Full trim200
General information197
Load index201
Replacing wheels198
Service life of tyres198
Snow chains203
Spare wheel200
Speed symbol202
Storing wheels198
Temporary spare wheel200
Tyre pressure198
Tyre size201
Tyre sizes198
Tyre wear indicator198
Unidirectional tyres199
Winter tyres203
Wi-Fi130
Windows179
De-icing179
See Electrical power windows61
Windscreen De-icing
179
Heater75
Windscreen washer fluid Checking
188
Replenishing188
Warning light40
Winter188
Windscreen washers Windscreen washers78
Windscreen washer system188
Windscreen wiper Replacing the rear window wiper blade
219
Windscreen wipers Operating
78
Replacing the windscreen wiper blades219
Windscreen washer fluid188
Windscreen wipers and washers77
Winter De-icing windows
179
Winter operation203
Snow chains203
Winter tyres203
Winter tyres See Wheels
203
WLAN130
MAXI DOT131
Network connection130
Switching off130
Switching on130
245Index