manual radio set SKODA SUPERB 2012 2.G / (B6/3T) Amundsen Navigation System Manual
[x] Cancel search | Manufacturer: SKODA, Model Year: 2012, Model line: SUPERB, Model: SKODA SUPERB 2012 2.G / (B6/3T)Pages: 31, PDF Size: 2.89 MB
Page 6 of 31
After a four-digit order has been entered, the group of digits will turn grey (inac-tive) and no further digits can be accepted in the entry line.›
To delete the digits in the entry line from right to left, press the function key Delete.
›
When the correct code is displayed in the entry line, press the function key OK.
Incorrect code number
If an incorrect code is confirmed after entry of the code, the procedure can be re- peated twice. The number of attempts is shown in the bottom screen line.
If the code is entered incorrectly for the third time, the unit will be blocked for ap-
prox. one hour. It is not possible to enter the safety code again until after one
hour, while the unit and the ignition were switched on.
If three invalid attempts are then made again, the radio navigation system will be
blocked again for an hour.
Note
The code is normally saved in the instrument cluster memory. This ensures that it
is automatically decoded (convenience coding). Manual input of the code is nor-
mally not necessary.Ð
Screen display
The screen of the unit displays information such as from the Climatronic, the vehi-
cle distance to an obstacle if the “parking aid” has been activated, etc.
Personalisation
Your vehicle can be equipped with up to four keys. Individual settings of the radio navigation system area always assigned to the key currently in use. Up to 4 dif-
ferent setting variants can be stored for the radio navigation system. When using
the key for the first time, the factory setting on the radio navigation system is val-
id.
Ð
4General information
Page 7 of 31
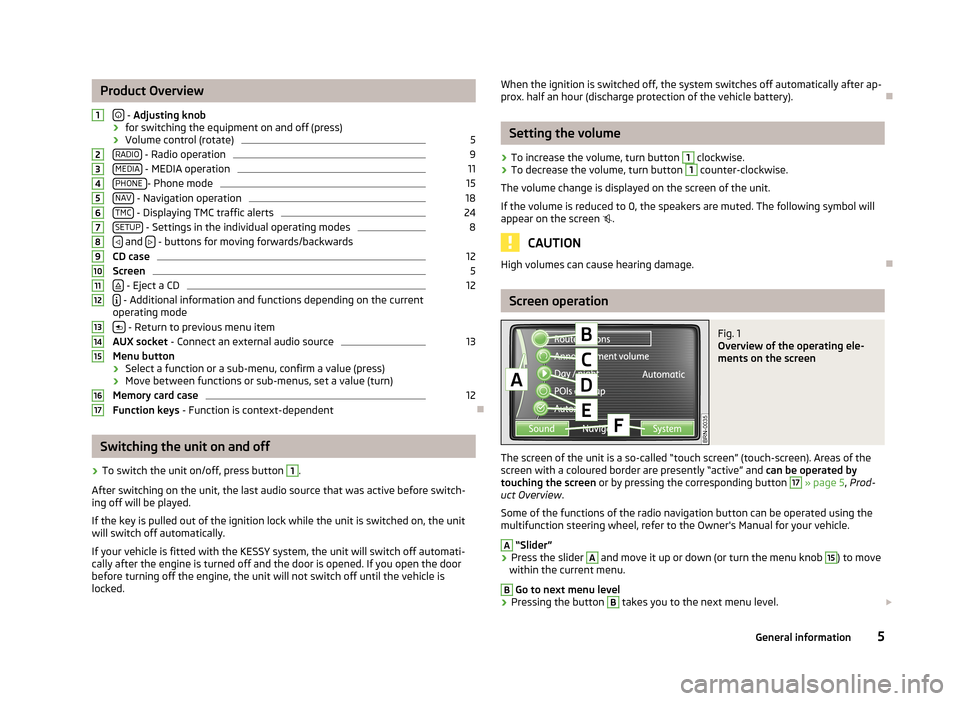
Product Overview
- Adjusting knob
› for switching the equipment on and off (press)
› Volume control (rotate)
5
RADIO - Radio operation
9
MEDIA - MEDIA operation
11
PHONE - Phone mode
15
NAV - Navigation operation
18
TMC - Displaying TMC traffic alerts
24
SETUP - Settings in the individual operating modes
8
and
- buttons for moving forwards/backwards
CD case
12
Screen
5
- Eject a CD
12
- Additional information and functions depending on the current
operating mode
- Return to previous menu item
AUX socket - Connect an external audio source
13
Menu button
› Select a function or a sub-menu, confirm a value (press)
› Move between functions or sub-menus, set a value (turn)
Memory card case
12
Function keys - Function is context-dependent
Ð
Switching the unit on and off
›
To switch the unit on/off, press button
1
.
After switching on the unit, the last audio source that was active before switch- ing off will be played.
If the key is pulled out of the ignition lock while the unit is switched on, the unit
will switch off automatically.
If your vehicle is fitted with the KESSY system, the unit will switch off automati-
cally after the engine is turned off and the door is opened. If you open the door
before turning off the engine, the unit will not switch off until the vehicle is
locked.
1234567891011121314151617When the ignition is switched off, the system switches off automatically after ap-
prox. half an hour (discharge protection of the vehicle battery).Ð
Setting the volume
›
To increase the volume, turn button
1
clockwise.
›
To decrease the volume, turn button
1
counter-clockwise.
The volume change is displayed on the screen of the unit.
If the volume is reduced to 0, the speakers are muted. The following symbol will appear on the screen .
CAUTION
High volumes can cause hearing damage.Ð
Screen operation
Fig. 1
Overview of the operating ele-
ments on the screen
The screen of the unit is a so-called “touch screen” (touch-screen). Areas of the
screen with a coloured border are presently “active” and can be operated by
touching the screen or by pressing the corresponding button
17
» page 5 , Prod-
uct Overview .
Some of the functions of the radio navigation button can be operated using the
multifunction steering wheel, refer to the Owner's Manual for your vehicle.
A
“Slider”
›
Press the slider
A
and move it up or down (or turn the menu knob
15
) to move
within the current menu.
B
Go to next menu level
›
Pressing the button
B
takes you to the next menu level.
5General information
Page 8 of 31
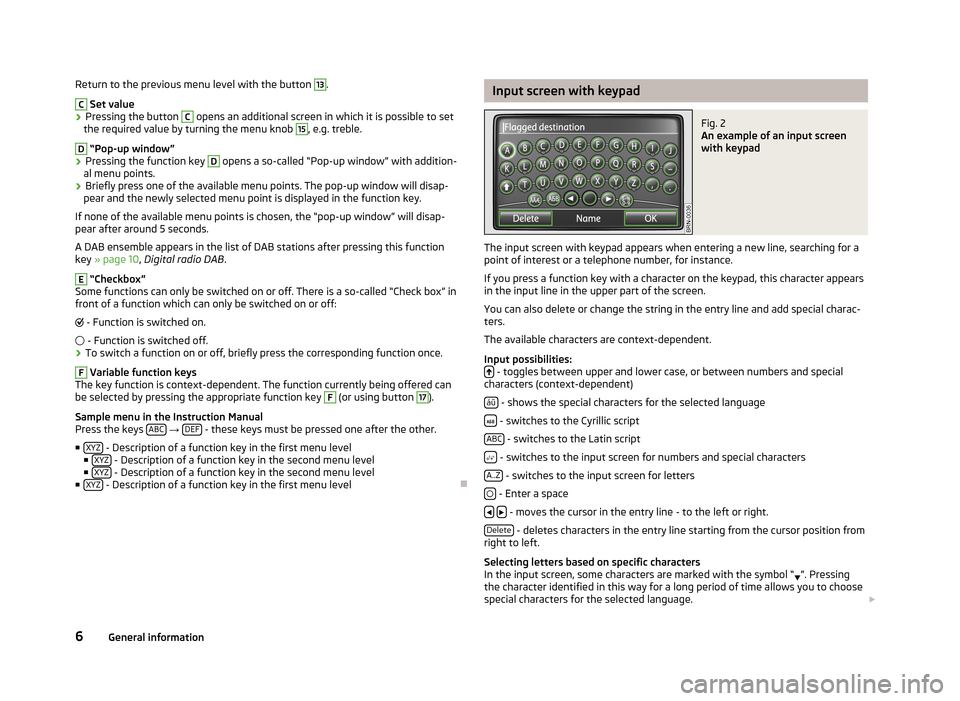
Return to the previous menu level with the button 13.C
Set value
›
Pressing the button
C
opens an additional screen in which it is possible to set
the required value by turning the menu knob
15
, e.g. treble.
D
“Pop-up window”
›
Pressing the function key
D
opens a so-called “Pop-up window” with addition-
al menu points.
›
Briefly press one of the available menu points. The pop-up window will disap-
pear and the newly selected menu point is displayed in the function key.
If none of the available menu points is chosen, the “pop-up window” will disap-
pear after around 5 seconds.
A DAB ensemble appears in the list of DAB stations after pressing this function
key » page 10 , Digital radio DAB .
E
“Checkbox”
Some functions can only be switched on or off. There is a so-called “Check box” in front of a function which can only be switched on or off:
- Function is switched on.
- Function is switched off.
›
To switch a function on or off, briefly press the corresponding function once.
F
Variable function keys
The key function is context-dependent. The function currently being offered can
be selected by pressing the appropriate function key
F
(or using button
17
).
Sample menu in the Instruction Manual
Press the keys ABC
→ DEF - these keys must be pressed one after the other.
■ XYZ
- Description of a function key in the first menu level
■ XYZ - Description of a function key in the second menu level
■ XYZ - Description of a function key in the second menu level
■ XYZ - Description of a function key in the first menu level
Ð
Input screen with keypadFig. 2
An example of an input screen
with keypad
The input screen with keypad appears when entering a new line, searching for a
point of interest or a telephone number, for instance.
If you press a function key with a character on the keypad, this character appears
in the input line in the upper part of the screen.
You can also delete or change the string in the entry line and add special charac-ters.
The available characters are context-dependent.
Input possibilities:
- toggles between upper and lower case, or between numbers and special
characters (context-dependent)
áü
- shows the special characters for the selected language
- switches to the Cyrillic script
ABC
- switches to the Latin script
- switches to the input screen for numbers and special characters
A..Z
- switches to the input screen for letters
- Enter a space
- moves the cursor in the entry line - to the left or right.
Delete
- deletes characters in the entry line starting from the cursor position from
right to left.
Selecting letters based on specific characters
In the input screen, some characters are marked with the symbol “ ”. Pressing
the character identified in this way for a long period of time allows you to choose
special characters for the selected language.
6General information
Page 11 of 31
RADIO mode
Main menu RADIO
Press the button RADIO.
Repeated pressing of the button RADIO - change frequency band.
Function keys Extras■Extras - opens a list of additional functions■Presets - switches on/off the display of station presets 1 to 24■Manual - manual station search by turning the menu knob
15
■Scan - auto--play all stations in the current frequency band, each station foraround five seconds■TP - switches traffic programme on/off » page 10, Traffic Programme TP
Function key Band■Band - opens the list of frequency bands■DAB/List -opens the list of DAB stations » page 10, Digital radio DAB■Update - Update list of DAB stations■Store - stores the current station to the selected memory button■FM/List - opens the list of all FM stations currently in range■Store - stores the current station to the selected memory button■AM - switches to the AM band; list of stations not available
Function keys 1 to 24Direct selection of the stored station.
1 to 24 until a signal sounds- stores the current station to the selected memorybutton.
Changing the station or - depending on the setting of the “arrow keys” - changes the saved sta-tion or all stations currently within range in this area
RDS display settingPress the button - switches on/off the Radio Data Service RDS.
RDS (“Radio Data System”) serves to transmit program identification and addi-tional services therefore also enabling automatic tracking of stations.
Ð
Settings in RADIO mode
Press the button RADIO → SETUP.
■Traffic program (TP) - switches traffic programme on/off■Arrow buttons - Setting the function of the station selection in RADIO mode usingthe arrow buttons
8
■Station list - Switches all stations currently in range for the selected frequencyband■Presets - Switches to the stored stations (the following symbol appears in thedisplay )■RDS Regional - switches on/off automatic station tracking with RDS■Adaptive - auto-selects station with the best reception at the moment■Fixed - the selected regional station remains set for as long as possible■DAB settings - DAB radio settings■DAB announcement - switches on/off DAB announcements■DAB station tracking - switches on/off DAB announcements■Auto. DAB-FM switching - switches on/off auto-switching from DAB to the FM fre-quency band if the DAB signal is lost■Delete presets - deletes the preset stations■Single - deletes a single station■All - deletes all stored stations■Alternative freq. (AF) - switches on/off the search for alternative frequencies of thestation currently being listened to
Note
■RDS (Radio Data System) is used to transmit programme IDs and additionalservices, thus enabling automatic station tracking, for example. In the event ofsufficiently satisfactory reception, the suitable RDS radio stations will display thestation name instead of the station frequency.
■
TMC (Traffic Message Channel) is a digital radio data service for continuoustransmission of traffic information.
■
DAB (Digital Audio Broadcasting) is the digital transmission of radio pro-grammes based on the DAB, DAB+ or DMB standards » page 10, Digital radioDAB.
Ð
9RADIO mode
Page 15 of 31
Memory card empty or data not readableIf a memory card is inserted, on which no data or no legible data has been stored,it will not be switched over into the memory card mode after the loading proce-dure.
Ð
External sources
AUX and MDI input
AUX inputPress the button MEDIA → AUX.
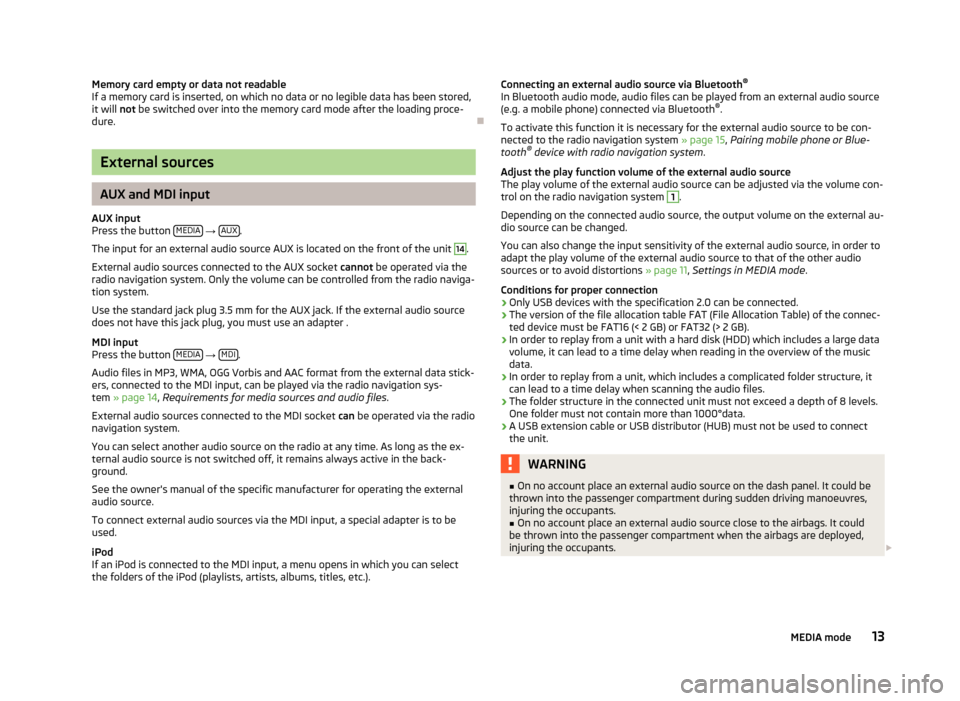
The input for an external audio source AUX is located on the front of the unit
14
.
External audio sources connected to the AUX socket cannot be operated via theradio navigation system. Only the volume can be controlled from the radio naviga-tion system.
Use the standard jack plug 3.5 mm for the AUX jack. If the external audio sourcedoes not have this jack plug, you must use an adapter .
MDI inputPress the button MEDIA → MDI.
Audio files in MP3, WMA, OGG Vorbis and AAC format from the external data stick-ers, connected to the MDI input, can be played via the radio navigation sys-tem » page 14, Requirements for media sources and audio files.
External audio sources connected to the MDI socket can be operated via the radionavigation system.
You can select another audio source on the radio at any time. As long as the ex-ternal audio source is not switched off, it remains always active in the back-ground.
See the owner's manual of the specific manufacturer for operating the externalaudio source.
To connect external audio sources via the MDI input, a special adapter is to beused.
iPodIf an iPod is connected to the MDI input, a menu opens in which you can selectthe folders of the iPod (playlists, artists, albums, titles, etc.).
Connecting an external audio source via Bluetooth®
In Bluetooth audio mode, audio files can be played from an external audio source(e.g. a mobile phone) connected via Bluetooth®.
To activate this function it is necessary for the external audio source to be con-nected to the radio navigation system » page 15, Pairing mobile phone or Blue-tooth® device with radio navigation system.
Adjust the play function volume of the external audio sourceThe play volume of the external audio source can be adjusted via the volume con-trol on the radio navigation system
1
.
Depending on the connected audio source, the output volume on the external au-dio source can be changed.
You can also change the input sensitivity of the external audio source, in order toadapt the play volume of the external audio source to that of the other audiosources or to avoid distortions » page 11, Settings in MEDIA mode.
Conditions for proper connection›Only USB devices with the specification 2.0 can be connected.›The version of the file allocation table FAT (File Allocation Table) of the connec-ted device must be FAT16 (< 2 GB) or FAT32 (> 2 GB).›In order to replay from a unit with a hard disk (HDD) which includes a large datavolume, it can lead to a time delay when reading in the overview of the musicdata.›In order to replay from a unit, which includes a complicated folder structure, itcan lead to a time delay when scanning the audio files.›The folder structure in the connected unit must not exceed a depth of 8 levels.One folder must not contain more than 1000°data.›A USB extension cable or USB distributor (HUB) must not be used to connectthe unit.
WARNING■On no account place an external audio source on the dash panel. It could bethrown into the passenger compartment during sudden driving manoeuvres,injuring the occupants.
■
On no account place an external audio source close to the airbags. It couldbe thrown into the passenger compartment when the airbags are deployed,injuring the occupants.
13MEDIA mode
Page 17 of 31
PHONE mode
Pairing mobile phone or Bluetooth® device with radio
navigation system
To operate a mobile phone or other Bluetooth® device from the radio navigationsystem, a one-off connection of both devices is required.
Active connectionWhen the connection is active, the device search is launched from the radio navi-gation system.
Enable Bluetooth® on your mobile phone.
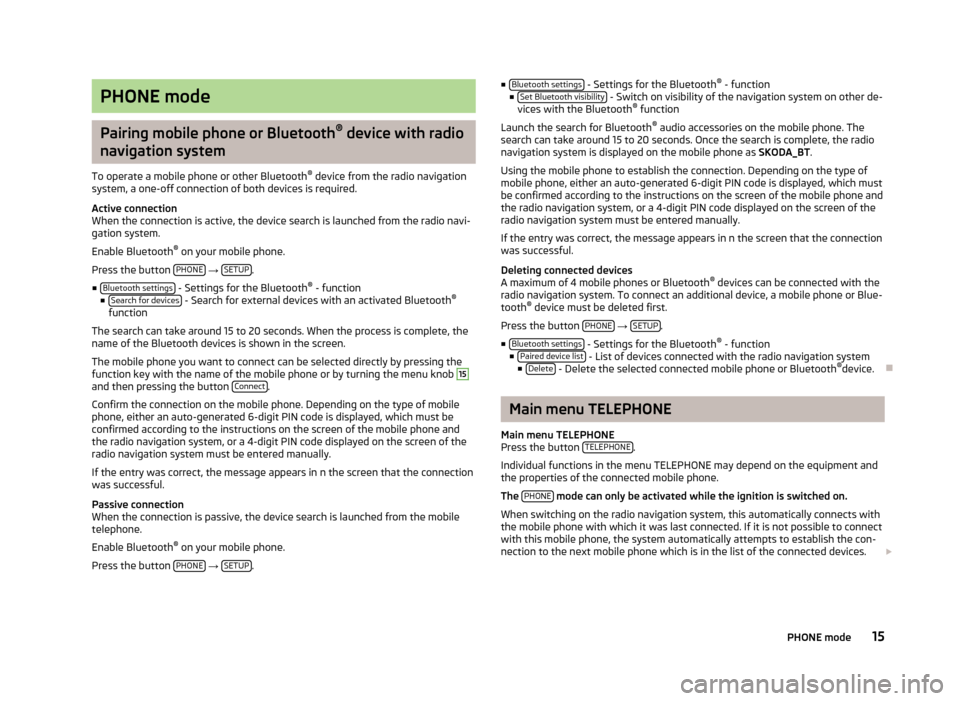
Press the button PHONE → SETUP.
■Bluetooth settings - Settings for the Bluetooth® - function■Search for devices - Search for external devices with an activated Bluetooth®
function
The search can take around 15 to 20 seconds. When the process is complete, thename of the Bluetooth devices is shown in the screen.
The mobile phone you want to connect can be selected directly by pressing thefunction key with the name of the mobile phone or by turning the menu knob
15
and then pressing the button Connect.
Confirm the connection on the mobile phone. Depending on the type of mobilephone, either an auto-generated 6-digit PIN code is displayed, which must beconfirmed according to the instructions on the screen of the mobile phone andthe radio navigation system, or a 4-digit PIN code displayed on the screen of theradio navigation system must be entered manually.
If the entry was correct, the message appears in n the screen that the connectionwas successful.
Passive connectionWhen the connection is passive, the device search is launched from the mobiletelephone.
Enable Bluetooth® on your mobile phone.
Press the button PHONE → SETUP.
■Bluetooth settings - Settings for the Bluetooth® - function■Set Bluetooth visibility - Switch on visibility of the navigation system on other de-vices with the Bluetooth® function
Launch the search for Bluetooth® audio accessories on the mobile phone. Thesearch can take around 15 to 20 seconds. Once the search is complete, the radionavigation system is displayed on the mobile phone as SKODA_BT.
Using the mobile phone to establish the connection. Depending on the type ofmobile phone, either an auto-generated 6-digit PIN code is displayed, which mustbe confirmed according to the instructions on the screen of the mobile phone andthe radio navigation system, or a 4-digit PIN code displayed on the screen of theradio navigation system must be entered manually.
If the entry was correct, the message appears in n the screen that the connectionwas successful.
Deleting connected devicesA maximum of 4 mobile phones or Bluetooth® devices can be connected with theradio navigation system. To connect an additional device, a mobile phone or Blue-tooth® device must be deleted first.
Press the button PHONE → SETUP.
■Bluetooth settings - Settings for the Bluetooth® - function■Paired device list - List of devices connected with the radio navigation system■Delete - Delete the selected connected mobile phone or Bluetooth®device.
Ð
Main menu TELEPHONE
Main menu TELEPHONEPress the button TELEPHONE.
Individual functions in the menu TELEPHONE may depend on the equipment andthe properties of the connected mobile phone.
The PHONE mode can only be activated while the ignition is switched on.
When switching on the radio navigation system, this automatically connects withthe mobile phone with which it was last connected. If it is not possible to connectwith this mobile phone, the system automatically attempts to establish the con-nection to the next mobile phone which is in the list of the connected devices.
15PHONE mode
Page 19 of 31
If a DTMF key tone has to be entered during a conversation, open the keypadfield by pressing the function key Extras
→ Enter numbers and follow the instruc-
tions (for example: “For a private conversation with one of our co-workers, please
press 3
”).
Ð
Settings in PHONE mode
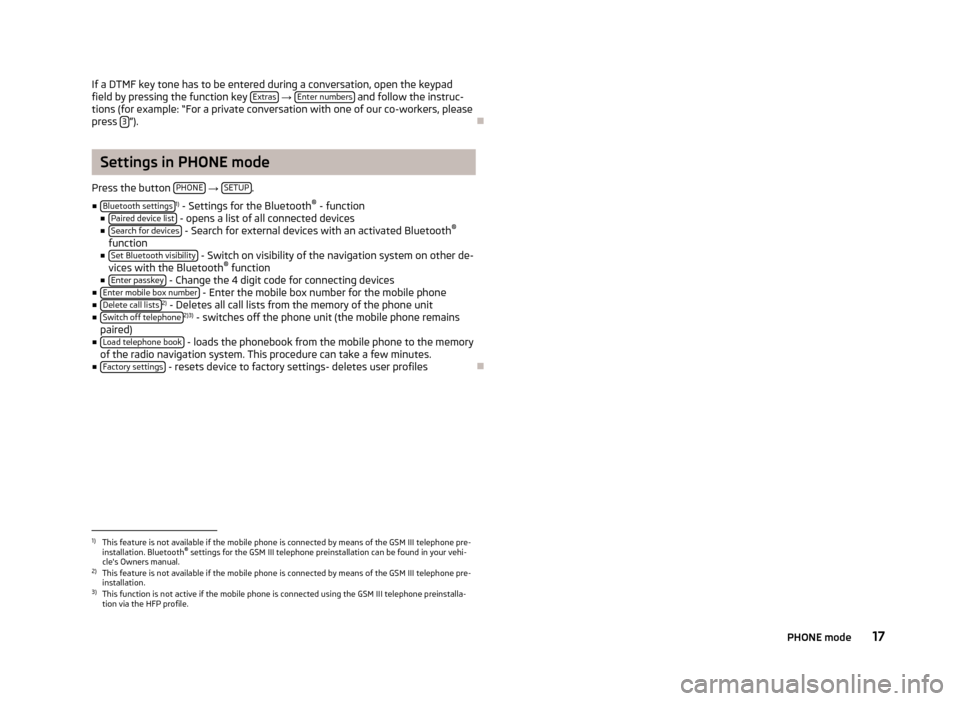
Press the button PHONE
→ SETUP.
■ Bluetooth settings
1)
- Settings for the Bluetooth ®
- function
■ Paired device list
- opens a list of all connected devices
■ Search for devices - Search for external devices with an activated Bluetooth ®
function
■ Set Bluetooth visibility
- Switch on visibility of the navigation system on other de-
vices with the Bluetooth ®
function
■ Enter passkey
- Change the 4 digit code for connecting devices
■ Enter mobile box number - Enter the mobile box number for the mobile phone
■ Delete call lists2)
- Deletes all call lists from the memory of the phone unit
■ Switch off telephone2)3)
- switches off the phone unit (the mobile phone remains
paired)
■ Load telephone book
- loads the phonebook from the mobile phone to the memory
of the radio navigation system. This procedure can take a few minutes.
■ Factory settings
- resets device to factory settings- deletes user profiles
Ð1)
This feature is not available if the mobile phone is connected by means of the GSM III telephone pre-
installation. Bluetooth ®
settings for the GSM III telephone preinstallation can be found in your vehi-
cle's Owners manual.
2)
This feature is not available if the mobile phone is connected by means of the GSM III telephone pre-
installation.
3)
This function is not active if the mobile phone is connected using the GSM III telephone preinstalla-
tion via the HFP profile.
17PHONE mode
Page 21 of 31
The following appears automatically after you insert the memory card: Assign -
assigns the memory card to the radio navigation system. For licensing reasons,
the memory card is assigned to your radio navigation system and cannot be used
in a different radio navigation system.
■ Use SD
- use the navigation data directly from the memory card. If you want to
use navigation data from other regions which differs from the data stored in the memory of the radio navigation system, you can also use data directly from the
memory card for guidance. This means you have two different sets of naviga-
tion data at your disposal. This means it is not necessary to copy the navigation
data from the memory card to the memory of the radio navigation system.
■ Install
- copies the navigation data from the memory card to the internal memo-
ry of the radio navigation system. The “old” navigation data in the internal mem-
ory of the radio navigation system are deleted. Data cannot be recovered once deleted »
.
No navigation data is available during copying. The copy process takes around 2
hours.
Do not remove the memory card during the process of copying data from the
memory card to the internal memory of the radio navigation system! You can
damage the memory card!
Manual copying
If you insert the memory card with valid navigation data but the copy process
does notstart automatically, you can start it manually.
Press the button NAV
→ SETUP.
■ Navigation data basis
- displays the options for the navigation data
■ Install/use SD data - installs/uses the navigation data from the memory card
CAUTION
If the navigation data of the radio navigation data is overwritten by a different
version, these data can not be restored !
Note
You can obtain a memory card with the latest navigation data or data for other
countries from ŠKODA Original Accessories.Ð
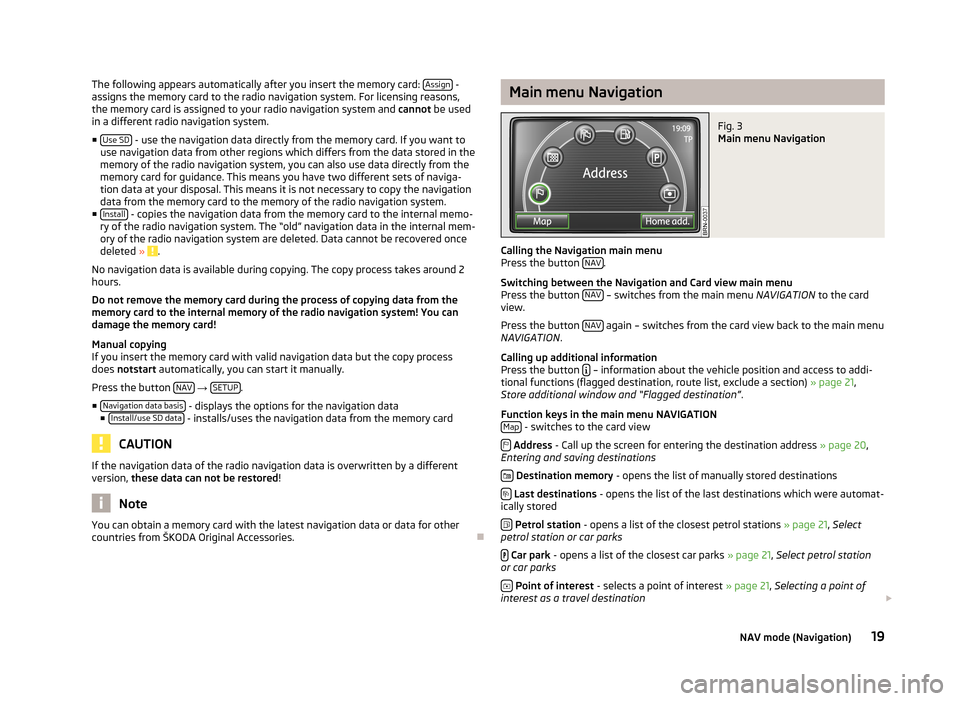
Main menu NavigationFig. 3
Main menu Navigation
Calling the Navigation main menu
Press the button NAV.
Switching between the Navigation and Card view main menu
Press the button NAV
– switches from the main menu
NAVIGATION to the card
view.
Press the button NAV
again – switches from the card view back to the main menu
NAVIGATION .
Calling up additional information
Press the button
– information about the vehicle position and access to addi-
tional functions (flagged destination, route list, exclude a section) » page 21,
Store additional window and “Flagged destination” .
Function keys in the main menu NAVIGATION Map
- switches to the card view
Address - Call up the screen for entering the destination address » page 20,
Entering and saving destinations
Destination memory - opens the list of manually stored destinations
Last destinations - opens the list of the last destinations which were automat-
ically stored
Petrol station - opens a list of the closest petrol stations » page 21, Select
petrol station or car parks
Car park - opens a list of the closest car parks » page 21, Select petrol station
or car parks
Point of interest - selects a point of interest » page 21, Selecting a point of
interest as a travel destination
19NAV mode (Navigation)
Page 22 of 31
Home add. - Starting a route guidance to a stored Home address. During routeguidance, the function key Stop appears here.
SD destinationsBy using a web application that can be found on ŠKODA's web site, it is possibleto create destinations as visiting cards or pictures. These destinations can theneasily be imported via the SD card into the radio navigation system.
Ð
Settings in the (NAV) Navigation mode
Press the button NAV → SETUP.
Function keys in the menu°-°Navigation■Route options - setting for route options■Route criteria - specify the criteria for calculating the route■Fast - calculates the fastest route to the destination, even if a detour is nec-essary.■Economical - calculates the quickest route possible over the shortest route■Short - shortest route to the destination even if a longer driving time is re-quired. The route guidance may include unusual sections, such as dirt roads.■Dynamic route - switches on/off the usage of TMC traffic notifications for routeguidance » page 23, Dynamic route guidance with TMC use■Avoid motorways - switches on/off the use of motorways in the route calcula-tion■Avoid toll roads - switches on/off the use of toll roads in the route calculation■Avoid ferries - switches on/off the use of ferries in the route calculation If noother route is available (e.g. an island can only reached by a ferry), this routetype is included in the route calculation despite being excluded before.■Avoid toll Avoid toll sticker routes - opens a list of countries where toll stickers aremandatory. A check means that all streets in the selected country for which atoll sticker is mandatory are excluded.■Announcement volume - Setting the volume of the navigation announcements.■Day/Night - switches between the day/night and auto map display modes. Auto-matic display depends on switching the low beam on or off.■POIs on map -shows points of interest in the map view (car parks, petrol stations,and Škoda workshops only)■Autozoom - changes the map scale automatically depending on the speed andthe driven route (Motorway trip: small map scale - City centre: large map scale)■Traffic sign display - switches on/off the speed restrictions in the current routesection (top left on the screen)
■Time display - switches between the following information during route guidance■ETA - displays the expected time to destination■Travel time - displays the expected remaining trip time to the destination■Time display to - switch to the arrival time at:■destination - displays the expected arrival time at the final destination■stopover - displays the expected arrival time at the stopover destina-tion » page 21, Entering a stopover destination■Enter home address - Enter home address■Position - saves the current position as a home address■Address - enter or change an address as your home address■Demo mode - switches on/off the demo mode. If the demo mode is selected, youcan specify at the start of route guidance whether route guidance should becarried out in normal mode (“real” route guidance) or in Demo mode (virtualroute guidance). For the route guidance in the Demo mode, you only travelalong the route virtually. Virtual route guidance will be repeated after reachingthe fictitious travel destination.■Demo mode starting point - Entering a fictive (invented) starting point in the demomode.■Delete destination memory - Deleting the destination memory or the list of the lastdestinations.■All - deletes all destinations from the memory■Last destins. - deletes all destinations from the list of last destinations■Navigation data basis - displays information about the navigation data stored inthe radio navigation system or on the memory card or when using navigationdata directly from the memory card » page 18, Navigation data and the memorycard.
Ð
Destinations
Entering and saving destinations
Manually entering and saving destinationsPress the button NAV → .
When entering the address, first choose the country, then the city or the postalcode. Afterwards it is possible to specify the address in more detail by enteringthe street and house number or an intersection. This address information isspecified in the following input screens.
If the entries are sufficient for the route guidance, the function key Status will ap-pear. You can now begin route guidance or you can enter additional details forthe destination.
20NAV mode (Navigation)
Page 25 of 31
■Congestion ahead - turn the menu button 15 to select the length of the stretch to
be blocked from the current position. The length of the currently blocked stretch of the journey is shown in the lower line of the screen. When reachingthe maximum blockable length, the word “ (Max)” will appear next to the length
entry.
■ OK
- confirms the length of the blocked stretch
To cancel the blocking of the stretch ahead, press the button
→ Route.
■ Lift cong. excl.
- manually remove blocked stretch
Blocking stretches of the journey using the route list
Press the button
→ Route.
■ Route list
- List of route sections
■ Exclude - select the start of the stretch to be blocked
■ Exclude to - select the end of the stretch to be blocked
To cancel the blocking of the stretch ahead, press the button
→ Route.
■ Lift cong. excl.
- remove the blocked stretch
Ð
Displaying stretches of the journey
Pop-ups during route guidance
Press the button
→ Route.
■ The list of the points (street names, street descriptions and stretches of the
road) still to be driven, is displayed in the Route list
.
■ Details - show details of the selected stretch of the journey.
Ð
Dynamic route guidance with TMC use
Requirements for a dynamic route guidance
TMC (Traffic Message Channel) is a digital radio data service for continuous trans-
mission of traffic information.
If a TMC traffic radio station is available for current location, the TMC traffic re-
ports are updated continuously in the background. Received TMC traffic reports are shown in a list » page 24, Displaying TMC traffic reports .
The quality of the transmitted traffic reports depends on the traffic editing car- ried out by the radio station. The reception of the TMC traffic reports cannot be
switched on or off.
The station you are listening to does not have to be a TMC station.
When the function Dynamic Route » page 20
, Settings in the (NAV) Navigation
mode is activated and the radio navigation system calculates a time advantage
for driving around the traffic disruption along the route, an alternative route is
calculated automatically.
TMC traffic reports can only be evaluated and displayed by the unit if the naviga-
tion data for the currently driven area is stored in the unit's memory or can be re-
trieved from an inserted navigation DVD.
The current TMC traffic reports can be displayed by pressing the range selectorkey TMC
.
Traffic problems received via TMC which affect the route are displayed in the map
by means of a coloured symbol. Traffic problems, which do not affect the route,
are displayed in the map by means of a grey symbol. The positioning of the TMC
symbol shows the beginning of a traffic disruption and the direction, when the
TMC traffic report is able to clearly define both.
When the function Dynamic Route » page 20, Settings in the (NAV) Navigation
mode is activated and the radio navigation system calculates a time advantage
for driving around the traffic disruption along the route, an alternative route is
calculated automatically.
When recalculating the route, a corresponding navigation announcement is out-
put. The same announcement is made when there was a traffic disruption in the
original route calculation which has since been removed.
Note
■ Making a diversion from a traffic jam based on TMC traffic reports may not al-
ways offer a time advantage, e.g. if the diversion route is also congested.■
If a traffic disruption was not yet entered via the TMC traffic reports, route dis-
ruptions can also be entered manually » page 22, Manually blocking a stretch of
the route .
Ð
23NAV mode (Navigation)