instrument cluster SKODA SUPERB 2014 2.G / (B6/3T) User Guide
[x] Cancel search | Manufacturer: SKODA, Model Year: 2014, Model line: SUPERB, Model: SKODA SUPERB 2014 2.G / (B6/3T)Pages: 246, PDF Size: 17.16 MB
Page 69 of 246
Daylight running lights (DAY LIGHT)Read and observe
on page 65 first.
The daytime running lights (the only function) provides the lighting of the frontvehicle range.
The daytime running lights are switched on automatically if the following
conditions are met:
The light switch is in the position
or
» Fig. 48 on page 66 .
The ignition is switched on.
The parking aid is activated.
Deactivating the function
›
Switch off the ignition.
›
Pull the turning signal and main beam lever ( » Fig. 49 on page 67 ) towards
the steering wheel, push down and hold in this position.
›
Switch on the ignition.
›
Hold the lever in this position for at least 3 seconds after switching on the
ignition.
Activating the function
›
Switch off the ignition.
›
Pull the turning signal and main beam lever towards the steering wheel,
push it up and hold it in this position.
›
Switch on the ignition.
›
Hold the lever in this position for at least 3 seconds after switching on the
ignition.
On vehicles with MAXI DOT display, the function can be enabled or disabled in
the menu item Dayl. dri. light » page 45 .
WARNINGWhen the daytime running light is switched on, the side lights (neither at
the front or rear) and the number plate lights are not lit. Therefore always
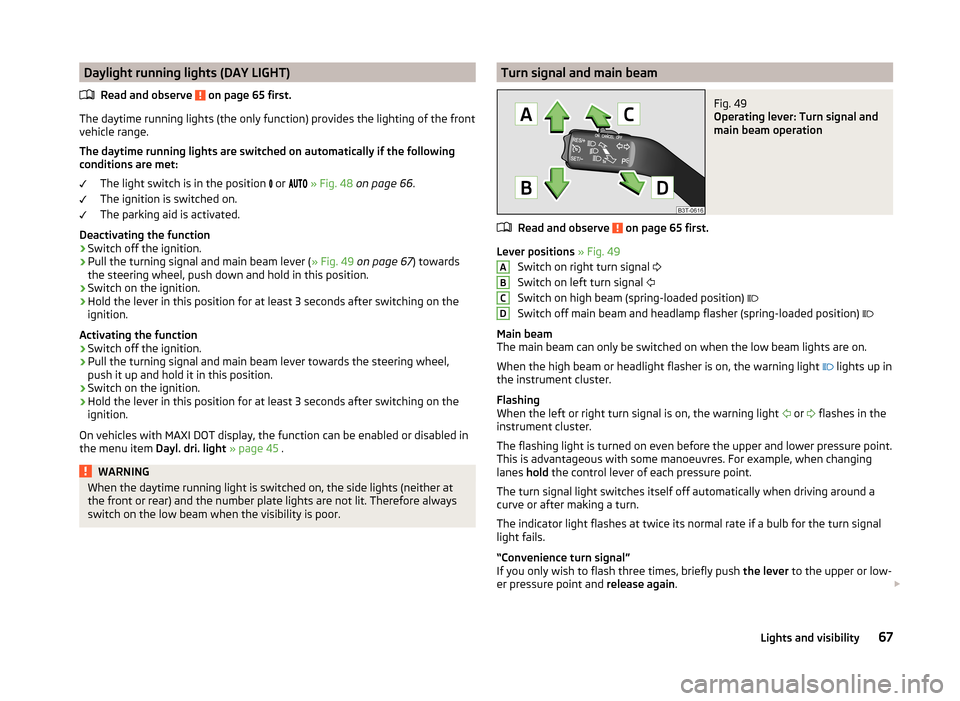
switch on the low beam when the visibility is poor.Turn signal and main beamFig. 49
Operating lever: Turn signal and
main beam operation
Read and observe on page 65 first.
Lever positions » Fig. 49
Switch on right turn signal
Switch on left turn signal
Switch on high beam (spring-loaded position)
Switch off main beam and headlamp flasher (spring-loaded position)
Main beam
The main beam can only be switched on when the low beam lights are on.
When the high beam or headlight flasher is on, the warning light lights up in
the instrument cluster.
Flashing
When the left or right turn signal is on, the warning light or
flashes in the
instrument cluster.
The flashing light is turned on even before the upper and lower pressure point.
This is advantageous with some manoeuvres. For example, when changing
lanes hold the control lever of each pressure point.
The turn signal light switches itself off automatically when driving around a
curve or after making a turn.
The indicator light flashes at twice its normal rate if a bulb for the turn signal
light fails.
“Convenience turn signal”
If you only wish to flash three times, briefly push the lever to the upper or low-
er pressure point and release again.
ABCD67Lights and visibility
Page 71 of 246
Dynamic cornering lights
The cone of light in front of the vehicle is adjusted to the steering angle so
that the road in the curve is illuminated. This function is active at speeds
greater than 10 km.h and in all AFS modes.
Tourist lights (Travel mode)
This mode makes it possible to drive in countries with opposing traffic system
(driving on the left/right) without dazzling the oncoming vehicles.
When this mode is active, the above-mentioned modes and the side swivel of
the headlights is deactivated.
This mode can be enabled or disabled via the Maxi DOT display in the Travel
mode » page 45 , Lights and Visibility menu option.WARNINGIf the AFS system is defective, the headlights are automatically lowered to
the emergency position, which prevents a possible dazzling of oncoming
traffic. This reduces the cone of light in front of the vehicle. Drive carefully
and visit a specialist garage as soon as possible.
Note
When the “tourist light” mode is active, the warning light flashes for 10 sec-
onds each time the ignition is switched on.
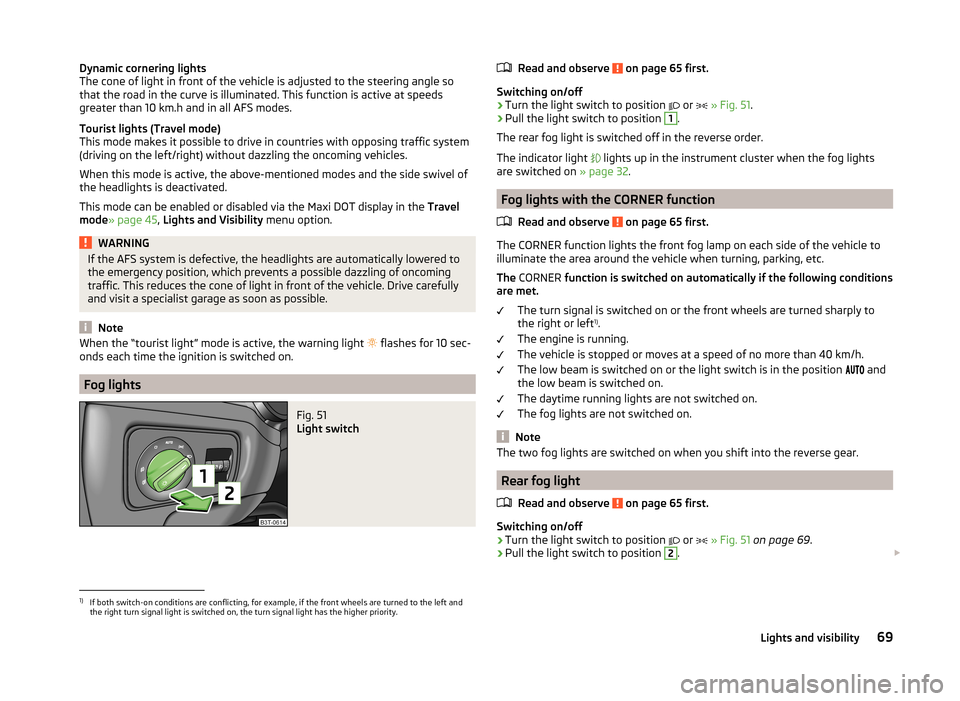
Fog lights
Fig. 51
Light switch
Read and observe on page 65 first.
Switching on/off
›
Turn the light switch to position
or
» Fig. 51 .
›
Pull the light switch to position
1
.
The rear fog light is switched off in the reverse order.
The indicator light
lights up in the instrument cluster when the fog lights
are switched on » page 32.
Fog lights with the CORNER function
Read and observe
on page 65 first.
The CORNER function lights the front fog lamp on each side of the vehicle to
illuminate the area around the vehicle when turning, parking, etc.
The CORNER function is switched on automatically if the following conditions
are met.
The turn signal is switched on or the front wheels are turned sharply to
the right or left 1)
.
The engine is running.
The vehicle is stopped or moves at a speed of no more than 40 km/h.
The low beam is switched on or the light switch is in the position and
the low beam is switched on.
The daytime running lights are not switched on.
The fog lights are not switched on.
Note
The two fog lights are switched on when you shift into the reverse gear.
Rear fog light
Read and observe
on page 65 first.
Switching on/off
›
Turn the light switch to position or
» Fig. 51 on page 69 .
›
Pull the light switch to position
2
.
1)
If both switch-on conditions are conflicting, for example, if the front wheels are turned to the left and
the right turn signal light is switched on, the turn signal light has the higher priority.
69Lights and visibility
Page 72 of 246
The rear fog light is switched off in the reverse order.
The warning light
lights up in the instrument cluster when the rear fog light
is switched on » page 32.
When in reverse gear only the rear fog lamp illuminates on the driver's side.
Only the rear fog light on the trailer lights up if the vehicle has a factory-fitted
towing device or a towing device from ŠKODA original accessories and it is
driven with a trailer.
COMING HOME / LEAVING HOME
Read and observe
on page 65 first.
COMING HOME/LEAVING HOME (hereafter referred to only as function)
switches on the lights for a short time after leaving the vehicle or when ap-
proaching the vehicle.
The daytime running lights are switched on automatically if the following
conditions are met:
The light switch is in the position » Fig. 50
on page 68 .
The visibility in the vehicle environment is reduced.
The ignition is switched off.
The parking aid is activated.
The function switches on the following light, depending on the equipment
fitted.
› Parking lights
› Low beam
› Entry lighting in the exterior mirrors
› Licence plate light
The light is controlled on the basis of information that is collected from the
holder mounted in the rear-view mirror sensor » page 68 .
COMING HOME
The light turns on automatically when you open the driver's door on (within 60
seconds of turning off the ignition).
The light turns off 10 seconds after closing all the doors and the boot lid or af-
ter the pre-set time has expired.
If a door or the boot lid remains open, the light goes out after 60 seconds.
LEAVING HOME
The light turns on automatically after the vehicle is unlocked with the remote
control.
The light turns off after 10 seconds or after a pre-set time or after the vehicle
is locked.
Activate/deactivate the function
The functions and settings of the illumination time can be activated/deactiva- ted via the MAXI DOT display in the menu items Coming Home or Leaving
Home » page 45 .
CAUTION
■
Do not attach any stickers or similar objects in front of the light sensor on
the windscreen to avoid impairing the function or its reliability.■
If this function is activated constantly, the battery will be heavily discharged
particularly in short-haul traffic.
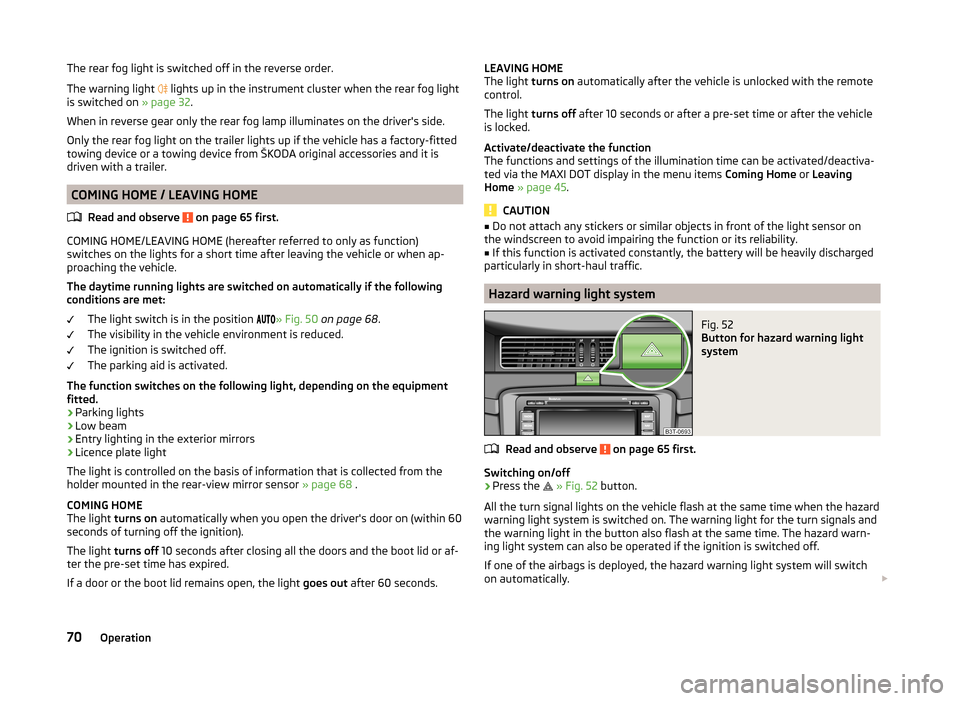
Hazard warning light system
Fig. 52
Button for hazard warning light
system
Read and observe on page 65 first.
Switching on/off
›
Press the
» Fig. 52 button.
All the turn signal lights on the vehicle flash at the same time when the hazard
warning light system is switched on. The warning light for the turn signals and
the warning light in the button also flash at the same time. The hazard warn-
ing light system can also be operated if the ignition is switched off.
If one of the airbags is deployed, the hazard warning light system will switch
on automatically.
70Operation
Page 118 of 246
NoteIf the windscreen mists up, press the symbol button . Press the button
once the windscreen has demisted.
Controlling blower
The Climatronic system controls the blower stages automatically in line with
the interior temperature.
However, the blower stages can be manually adapted to suit your particular
needs.
›
Repeatedly pressing the symbol button on the left or right reduces or in-
creases blower speed.
If the blower is switched off, the Climatronic system is switched off.
The set blower speed is displayed above the symbol button when the re-
spective number of indicator lights come on.
WARNING■ “Stale air” may result in fatigue in the driver and occupants, reduce atten-
tion levels and also cause the windows to mist up. The risk of having an ac-
cident increases.■
Do not switch off the Climatronic system for longer than necessary.
■
Switch on the Climatronic system as soon as the windows mist up.
Defrosting windscreen
Switching on
›
Press the
button » Fig. 125 on page 113 .
›
Press the
button » Fig. 125 on page 113 .
Switching off
›
Press the symbol button
again or press the symbol button
.
›
Press the symbol button
again.
More air flows out of the air outlet vents 1 » Fig. 122 on page 108 . The temper-
ature control is controlled automatically.
Auxiliary heating (auxiliary heating and ventilation)
Introduction
This chapter contains information on the following subjects:
Switching on/off
117
Radio remote control
118
Conditions for the functioning of auxiliary heating (Aux. heating and ventila-
tion), hereinafter referred to only as auxiliary heating (Aux. heating).
The charge state of the vehicle battery is sufficient.
The fuel supply is adequate (the warning icon is not lit in the display of
the instrument cluster).
Auxiliary ventilation
The auxiliary ventilation enables fresh air to flow into the vehicle interior by
switching off the engine, whereby the interior temperature is effectively de-
creased (e.g. with the vehicle parked in the sun).
Auxiliary heating (aux. heating)
The auxiliary heating (aux. heating) can be used when stationary, when the
engine is switched off to preheat the vehicle and while driving (e.g. during the
heating phase of the engine).
The auxiliary heating (auxiliary heating) functions in connection with the air-
conditioning system or Climatronic.
The auxiliary heating (aux. heating) also warms up the engine. This is not valid
for vehicles with the 3.6 l/191 kW FSI engine.
The auxiliary heating (parking heating) warms up the coolant by combusting
fuel from the vehicle tank. The coolant heats air flowing into the passenger
compartment (as long as the blower fan speed
B
» Fig. 124 on page 110
or » Fig. 125 on page 113 is not set to zero).
116Operation
Page 130 of 246
Using a mobile phone connected with the universal telephone preparation
GSM III via the rSAP profile, it is possible to establish a Wi-Fi network in the ve-
hicle and to enable passengers with compatible devices to connect to this net-
work.
Switching Wi-Fi network on/off
Switching on
›
Connect the mobile phone with the universal telephone preparation GSM III
via the rSAP profile » page 124.
›
Select the Wi-Fi menu item in the Mobile phone menu.
The display shows the message Switch on WLAN?
›
Select the Yes menu item.
If no access point 1)
is assigned automatically, then this must be entered man-
ually as per the instructions from the mobile network operator, e.g. “Internet”.
If the Wi-Fi network is switched on, the display will show the following mes-
sage, for example: WLAN SK_WLAN 1234 switched on.
The display then shows a password for the Wi-Fi network connection. The
password can subsequently be found in the Mobile phone - Wi-Fi - Password -
Show menu.
If no data connection via WLAN is available, the display will show the message
Data connection not available. . This can be caused by a weak GSM signal, for
example. Try to establish the connection again at a location with stronger sig-
nal reception.
Switching off
›
Select the Wi-Fi - Off menu item in the Mobile phone menu.
The display shows the message Switch off WLAN ?
›
Select the OK menu item.
The display shows the message WLAN switched off.
Connecting an external device to the WLAN network
Connecting using the Wi-Fi network search
›
Switch on the Wi-Fi network » page 128, Switching Wi-Fi network on/off .
›On the device to be connected, search for available Wi-Fi networks (Wi-Fi) -
see operating instructions for the device to be connected.›
Select the appropriate Wi-Fi network connection in the menu of the net-
works found (e.g. Wi-Fi SK_WLAN 1234 ).
If menu item WPA2 is set in the Mobile phone - Wi-Fi - Settings - Encryption
menu, then the password displayed when the Wi-Fi is switched on must be en-
tered in the device to be connected. The password can be found in the Mobile
phone - Wi-Fi - Password - Show menu.
If menu item Open is set in the Mobile phone - Wi-Fi - Settings - Encryption
menu, the connection is made automatically.
Connecting using WPS (service for easy connection)
›
Switch on the Wi-Fi network » page 128, Switching Wi-Fi network on/off .
›
Open the Mobile phone - Wi-Fi - WPS config. menu in the instrument cluster.
›
In the device to be connected, select the connection using WPS function -
see operating instructions for the device to be connected.
If the Pushbutton menu item is selected in the instrument cluster, the Wi-Fi
connection is made automatically.
If the WPS PIN menu item is selected in the instrument cluster, then a PIN
must be entered in the device to be connected and the instrument cluster.
Use WLAN network in MAXI DOT display
When a Wi-Fi network is switched on, the following menu items are displayed
when the Wi-Fi menu item is selected.
■ Off - Switch off the WLAN network (depending on the context)
■ Device list - Display a list of external devices
■ Active device - Display a list of active devices
■ Block - Block device connections
■ Known devices - Display a list of known devices
■ Rename - Rename the device
■ Block - Block device connections
■ Device blocked - Display of a list of blocked devices
■ Unblock - Remove the connection block
1)
The name of the access point is defined by the mobile operator.
128Operation
Page 140 of 246
CAUTION■Avoid high engine revolutions, full throttle and high engine loads before the
engine has reached its operating temperature – risk of damaging the engine!■
Do not switch the engine off immediately at the end of your journey after the
engine has been operated over a prolonged period at high loads but leave it to
run at an idling speed for about 1 minute. This prevents any possible accumula-
tion of heat when the engine is switched off.
For the sake of the environment
Do not warm up the engine while the vehicle is stationary. If possible, start
your journey as soon as the engine has started. Through this the engine rea-
ches its operating temperature more rapidly and the pollutant emissions are
lower.
Note
■ The system is protected against inadvertently switching off the engine while
driving, this means that the engine can only be switched off in an emergen-
cy » page 140 .■
After switching off the ignition, the radiator fan may intermittently continue
to operate for approx. 10 minutes.
■
Under certain circumstances (e.g. after switching off the ignition and opening
the driver's door), the steering is enabled only when the ignition is switched on
or the engine is started.
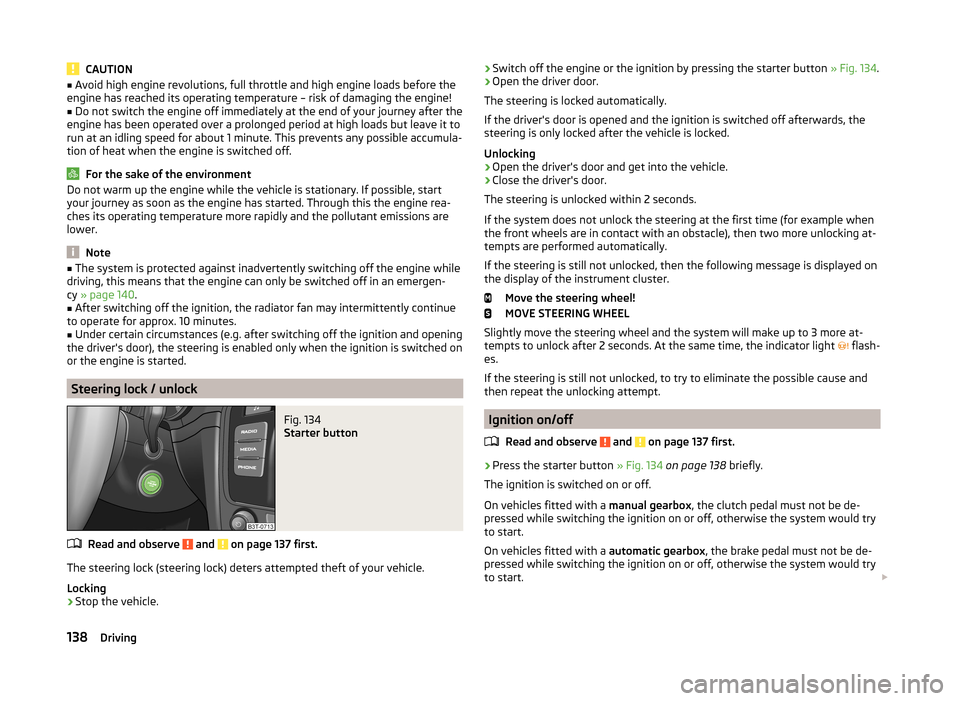
Steering lock / unlock
Fig. 134
Starter button
Read and observe and on page 137 first.
The steering lock (steering lock) deters attempted theft of your vehicle.
Locking
›
Stop the vehicle.
› Switch off the engine or the ignition by pressing the starter button
» Fig. 134.›Open the driver door.
The steering is locked automatically.
If the driver's door is opened and the ignition is switched off afterwards, the
steering is only locked after the vehicle is locked.
Unlocking›
Open the driver's door and get into the vehicle.
›
Close the driver's door.
The steering is unlocked within 2 seconds.
If the system does not unlock the steering at the first time (for example when
the front wheels are in contact with an obstacle), then two more unlocking at-
tempts are performed automatically.
If the steering is still not unlocked, then the following message is displayed on the display of the instrument cluster.
Move the steering wheel!
MOVE STEERING WHEEL
Slightly move the steering wheel and the system will make up to 3 more at-
tempts to unlock after 2 seconds. At the same time, the indicator light flash-
es.
If the steering is still not unlocked, to try to eliminate the possible cause and
then repeat the unlocking attempt.
Ignition on/off
Read and observe
and on page 137 first.
›
Press the starter button » Fig. 134 on page 138 briefly.
The ignition is switched on or off.
On vehicles fitted with a manual gearbox, the clutch pedal must not be de-
pressed while switching the ignition on or off, otherwise the system would try
to start.
On vehicles fitted with a automatic gearbox, the brake pedal must not be de-
pressed while switching the ignition on or off, otherwise the system would try
to start.
138Driving
Page 141 of 246
If the driver's door is opened while the igition is on, an audible signal sounds
and the following message appears in the instrument cluster display.
Ignition on!
IGNITION ON
When leaving the vehicle always switch off the ignition.
Note
The ignition is switched on when indicated by the lighting up of certain indica-
tor lamps in the instrument cluster.
Starting the engine
Read and observe
and on page 137 first.
Vehicles with a diesel engine are equipped with a glow plug system. The glow
plug warning light lights up after the ignition has been switched on. Start
the engine once the warning light has gone out.
You should not switch on any major electrical components during the heating
period otherwise the vehicle battery will be drained unnecessarily.
Procedure for starting the engine
›
Firmly apply the handbrake.
›
Move the gearshift lever into neutral or move the selector lever into position
P or N.
›
Depress and hold the clutch pedal (vehicles with a manual gearbox) or brake
pedal (vehicles with an automatic gearbox) until the engine starts.
›
Press and hold » Fig. 134 on page 138 1)
the starter button until the engine
starts.
CAUTION
■ If the engine does not start up after a second attempt, one of the following
fuses may be defective. ■ Petrol engine - fuse for the electric fuel pump.
■ Diesel engine - fuse for the control unit for glow plugs or glow plug relay
and fuel pump.■
Check the fuse and replace if necessary » page 215, or seek assistance from
a specialist garage.
Switching off the engine
Read and observe
and on page 137 first.
›
Stop the vehicle.
›
Press the starter button » Fig. 134 on page 138 briefly.
The engine and the ignition are switched off simultaneously.
The engine can be switched off up to a speed of 2 km/h.
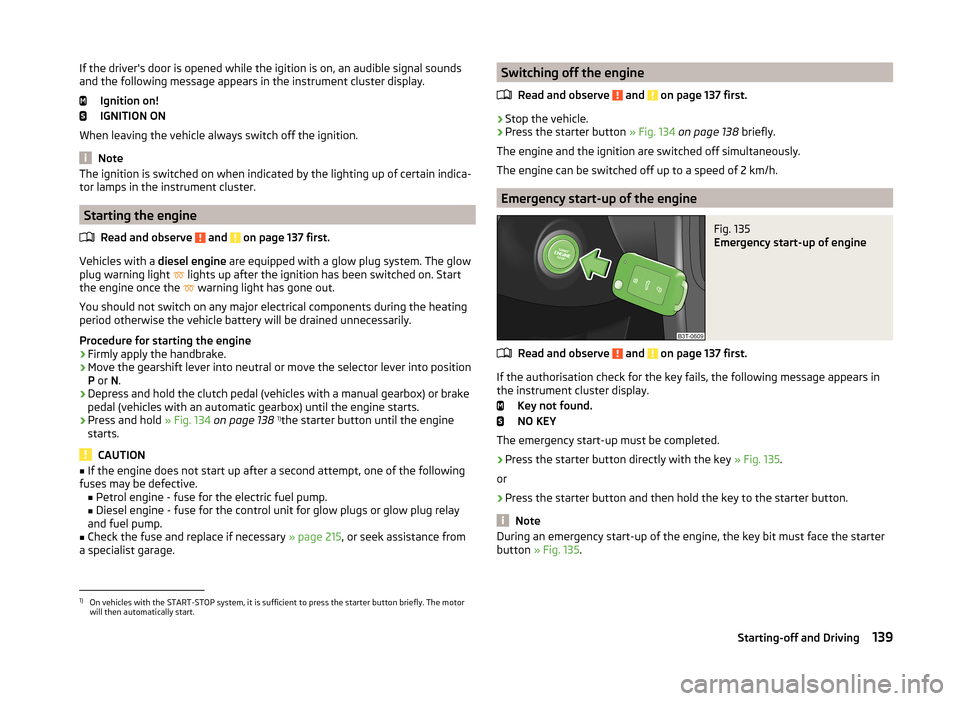
Emergency start-up of the engine
Fig. 135
Emergency start-up of engine
Read and observe and on page 137 first.
If the authorisation check for the key fails, the following message appears in
the instrument cluster display.
Key not found.
NO KEY
The emergency start-up must be completed.
› Press the starter button directly with the key
» Fig. 135.
or
› Press the starter button and then hold the key to the starter button.
Note
During an emergency start-up of the engine, the key bit must face the starter
button » Fig. 135 .1)
On vehicles with the START-STOP system, it is sufficient to press the starter button briefly. The motor
will then automatically start.
139Starting-off and Driving
Page 145 of 246
The following modes can be selected with the selector lever » Fig. 138.P
– Parking mode
The driven wheels are locked mechanically in this mode.
The parking mode must only be selected when the vehicle is stationary.
R
- Reverse gear
Reverse gear can only be engaged when the vehicle is stationary and the en-
gine is at idling speed.
Before moving into mode R from mode P or N, depress the brake pedal while
simultaneously pressing the lock button in the direction of the ar-
row » Fig. 139 .
N
- Neutral
The power transmission to the drive wheels is interrupted in this mode.
D
- Mode for forwards travel (normal programme)
In mode D, the forward gears are automatically changed according to the en-
gine load, accelerator pedal actuation and driving speed.
S
- Mode for forwards travel (sports programme)
In mode S, the forward gears are shifted automatically up and down at higher
engine speeds than in mode D.
Before changing to mode S from mode D, press the lock button in the direction
of the arrow » Fig. 139.
Releasing selector lever from mode P or N (selector lever lock)
The selector lever is locked in modes P and N to prevent the forwards travel
mode from being selected accidentally and setting the vehicle in motion. The
warning light illuminates in the instrument cluster
» page 39.
The selector lever is released by depressing the brake pedal while simultane-
ously pressing the lock button in the direction of the arrow » Fig. 139.
The selector lever is not locked when quickly moving via position N (e.g. from R
to D). This, for example, helps to rock out a vehicle that is stuck, e.g. in a bank
of snow. The selector lever lock will engage if the lever is in position N for
more than approx. 2 seconds without the brake pedal being depressed.
The selector lever is locked only when the vehicle is stationary and at speeds up to 5 km/h.
NoteIf you want to move the selector lever from mode P to mode D or vice versa,
move the selector lever quickly. This prevents modes R or N from being acci-
dentally selected.
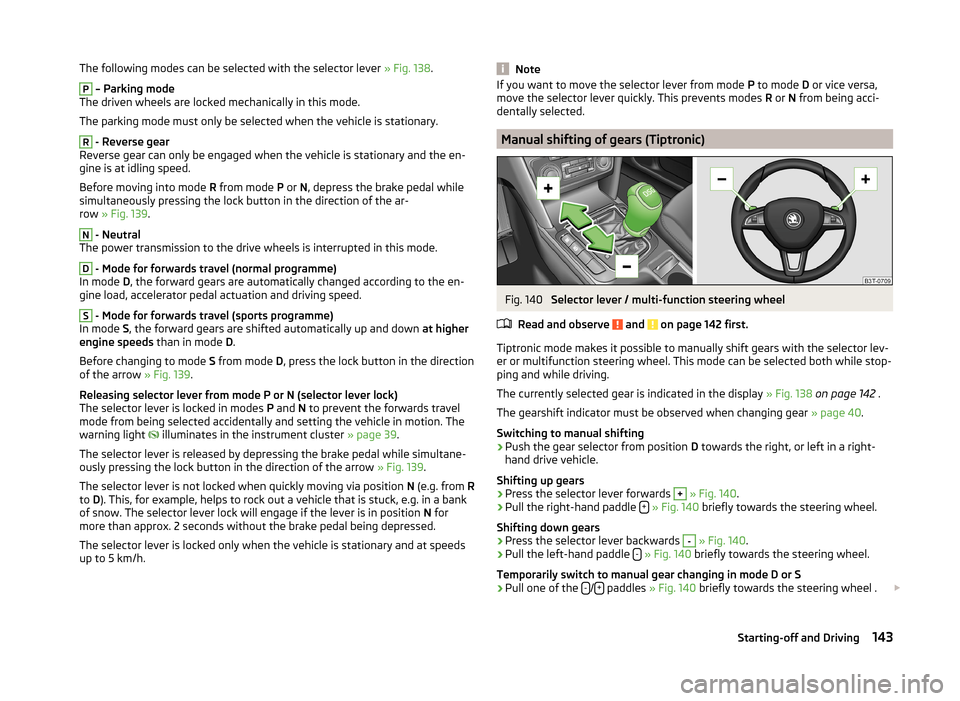
Manual shifting of gears (Tiptronic)
Fig. 140
Selector lever / multi-function steering wheel
Read and observe
and on page 142 first.
Tiptronic mode makes it possible to manually shift gears with the selector lev-
er or multifunction steering wheel. This mode can be selected both while stop-
ping and while driving.
The currently selected gear is indicated in the display » Fig. 138 on page 142 .
The gearshift indicator must be observed when changing gear » page 40.
Switching to manual shifting
›
Push the gear selector from position D towards the right, or left in a right-
hand drive vehicle.
Shifting up gears
›
Press the selector lever forwards
+
» Fig. 140 .
›
Pull the right-hand paddle +
» Fig. 140 briefly towards the steering wheel.
Shifting down gears
›
Press the selector lever backwards
-
» Fig. 140 .
›
Pull the left-hand paddle -
» Fig. 140 briefly towards the steering wheel.
Temporarily switch to manual gear changing in mode D or S
›
Pull one of the -/+ paddles
» Fig. 140 briefly towards the steering wheel .
143Starting-off and Driving
Page 154 of 246
The warning light lights up in the instrument cluster when the ASR is deacti-
vated.
Antilock brake system (ABS)
Read and observe
and on page 151 first.
ABS prevents the wheels locking when braking. Thus helping the driver to
maintain control of the vehicle.
The intervention of the ABS is noticeable from the pulsating movements of
the brake pedal which is accompanied by noises.
When the ABS system is active, do not brake periodically or reduce the pres- sure on the brake pedal.
Traction Control System (TCS)
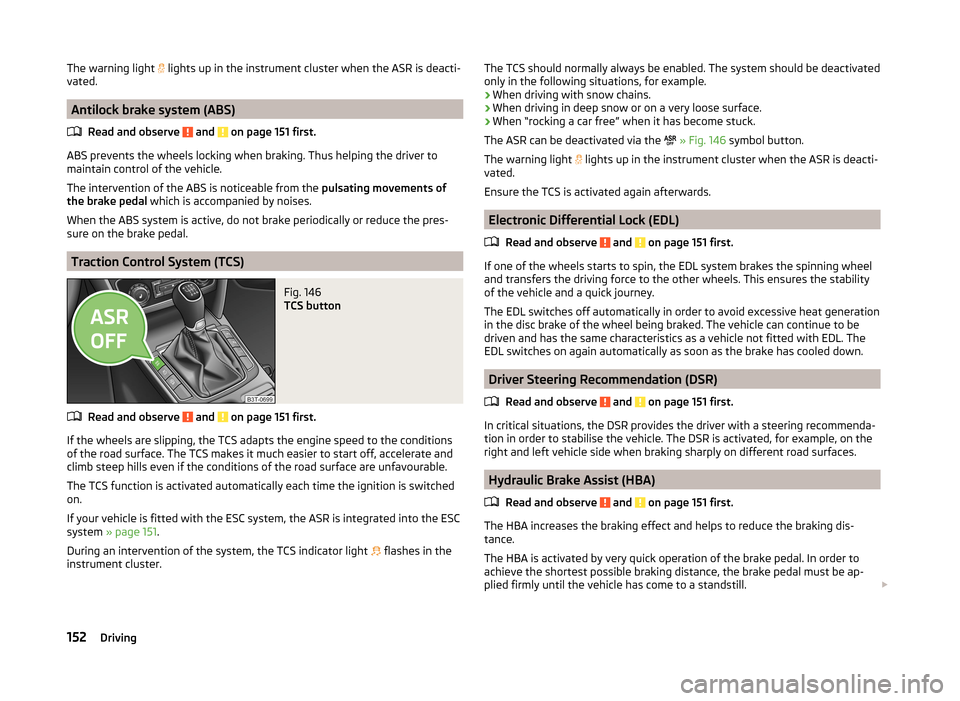
Fig. 146
TCS button
Read and observe and on page 151 first.
If the wheels are slipping, the TCS adapts the engine speed to the conditions
of the road surface. The TCS makes it much easier to start off, accelerate and
climb steep hills even if the conditions of the road surface are unfavourable.
The TCS function is activated automatically each time the ignition is switched
on.
If your vehicle is fitted with the ESC system, the ASR is integrated into the ESC
system » page 151 .
During an intervention of the system, the TCS indicator light flashes in the
instrument cluster.
The TCS should normally always be enabled. The system should be deactivated
only in the following situations, for example.
› When driving with snow chains.
› When driving in deep snow or on a very loose surface.
› When “rocking a car free” when it has become stuck.
The ASR can be deactivated via the
» Fig. 146 symbol button.
The warning light
lights up in the instrument cluster when the ASR is deacti-
vated.
Ensure the TCS is activated again afterwards.
Electronic Differential Lock (EDL)
Read and observe
and on page 151 first.
If one of the wheels starts to spin, the EDL system brakes the spinning wheel
and transfers the driving force to the other wheels. This ensures the stability
of the vehicle and a quick journey.
The EDL switches off automatically in order to avoid excessive heat generation
in the disc brake of the wheel being braked. The vehicle can continue to be
driven and has the same characteristics as a vehicle not fitted with EDL. The
EDL switches on again automatically as soon as the brake has cooled down.
Driver Steering Recommendation (DSR)
Read and observe
and on page 151 first.
In critical situations, the DSR provides the driver with a steering recommenda-
tion in order to stabilise the vehicle. The DSR is activated, for example, on the
right and left vehicle side when braking sharply on different road surfaces.
Hydraulic Brake Assist (HBA)
Read and observe
and on page 151 first.
The HBA increases the braking effect and helps to reduce the braking dis-
tance.
The HBA is activated by very quick operation of the brake pedal. In order to
achieve the shortest possible braking distance, the brake pedal must be ap-
plied firmly until the vehicle has come to a standstill.
152Driving
Page 157 of 246
The parking aid is part of the park assist system, therefore the information
and safety guidelines » page 153 , Parking aid must also be read and ob-
served.WARNING■ The system only serves to support and does not relieve the driver of the
responsibility for the vehicle operation.■
During the parking process, the system automatically performs rapid
steering movements. While it is doing so, do not place your hands between
the steering wheel – risk of injury!
■
During a parking manoeuvre on loose or slippery surfaces (gravel, snow,
ice, etc.) you may stray from the calculated road because of the surface
conditions. We therefore recommend not using the system in such situa-
tions.
■
External noise sources may affect the signals of the system sensors. Un-
der adverse conditions, this may cause objects or people to not be recog-
nised by the system.
CAUTION
■ If other vehicles are parked behind or on the kerb, the system can guide your
vehicle beyond the kerb or onto it. Ensure that the wheels or the wheel rims of
your vehicle are not damaged and if necessary intervene in time.■
Under certain circumstances, the surfaces or structures of certain objects
such as wire mesh fences or powder snow cannot be detected by the system.
■
Under adverse weather conditions (heavy rain, water vapour, very low or
high temperatures etc.) system function may be limited.
CAUTION
The correct evaluation of the parking space and the parking procedure de-
pends on the circumference of the wheels on the vehicle.■
The system only works correctly if the vehicle is fitted with the wheel size
approved by the manufacturer.
■
Do without the use of the system if snow chains or a spare wheel is moun-
ted.
■
If wheels other than those approved by the manufacturer are mounted, the
resulting position of the vehicle in the parking space can differ slightly. This
can be avoided by readjusting the system at a specialist garage.
Note
We recommend performing the parking at a safe speed to about 5 km / h.Functioning
Read and observe
and on page 155 first.
Basic system operations
› The measurement and evaluation of the size of parking spaces when driving.
› The determination of the correct position of the vehicle for parking.
› The calculation of the line on which the vehicle drives backwards into the
parking space or forwards from the parking space.
› Automatic rotation of the front wheels during the parking.
The display of the instrument cluster (hereinafter only in the display) informa- tion and system messages are displayed.
When the system is activated, the warning light lights up
» Fig. 148 on
page 155 -
.
The traction control system (TCS) must always be switched on when parking.
Finding a parking space
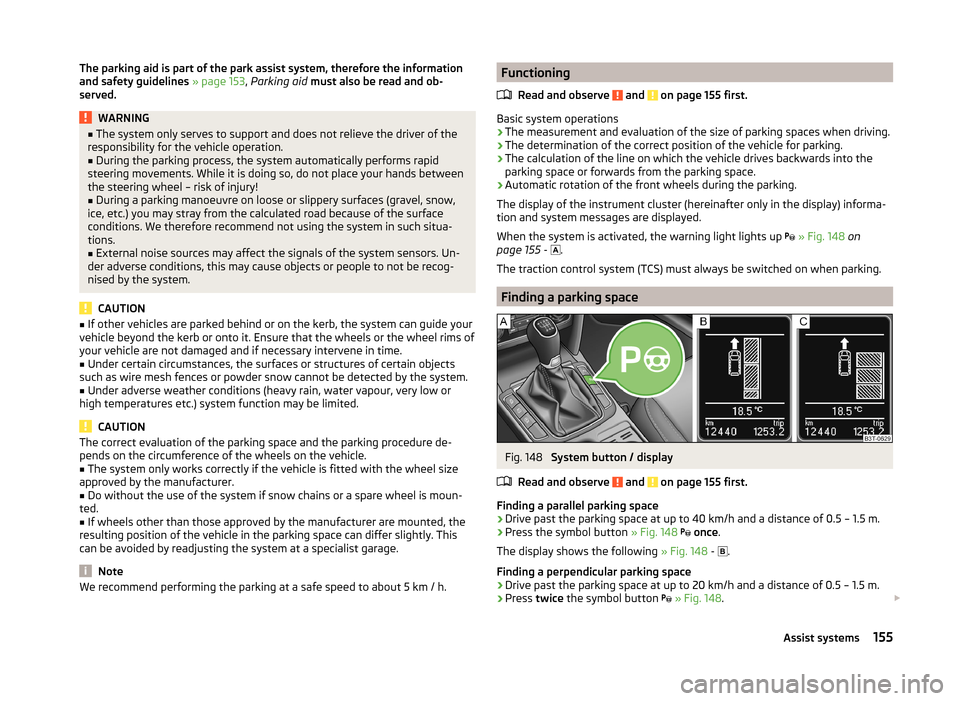
Fig. 148
System button / display
Read and observe
and on page 155 first.
Finding a parallel parking space
›
Drive past the parking space at up to 40 km/h and a distance of 0.5 – 1.5 m.
›
Press the symbol button » Fig. 148
once .
The display shows the following » Fig. 148 -
.
Finding a perpendicular parking space
›
Drive past the parking space at up to 20 km/h and a distance of 0.5 – 1.5 m.
›
Press twice the symbol button
» Fig. 148 .
155Assist systems