display SKODA SUPERB 2014 2.G / (B6/3T) Owner's Manual
[x] Cancel search | Manufacturer: SKODA, Model Year: 2014, Model line: SUPERB, Model: SKODA SUPERB 2014 2.G / (B6/3T)Pages: 246, PDF Size: 17.16 MB
Page 2 of 246
Layout of this Owner's Manual (explanations)
This Owner's Manual has been systematically designed to make it easy for you
to search for and obtain the information you require.
Chapters, table of contents and subject index
The text of the Owner's manual is divided into relatively short sections which
are combined into easy-to-read chapters. The chapter you are reading at any
particular moment is always specified on the bottom right of the page.
The Table of contents is arranged according to the chapters and the detailed
Subject index at the end of the Owner's Manual helps you to rapidly find the
information you are looking for.
Direction indications
All direction indications such as “left”, “right”, “front”, “rear” relate to the direction of travel of the vehicle.
Units of measurement
All values are expressed in metric units.
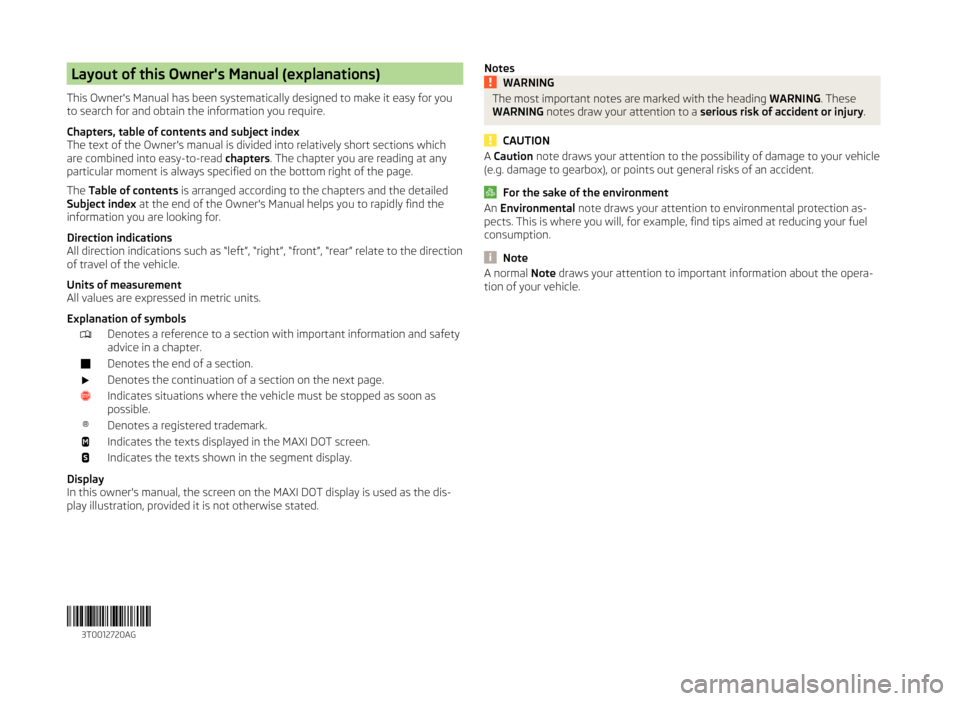
Explanation of symbolsDenotes a reference to a section with important information and safety
advice in a chapter.Denotes the end of a section.Denotes the continuation of a section on the next page.Indicates situations where the vehicle must be stopped as soon as
possible.®Denotes a registered trademark.Indicates the texts displayed in the MAXI DOT screen.Indicates the texts shown in the segment display.
Display
In this owner's manual, the screen on the MAXI DOT display is used as the dis-
play illustration, provided it is not otherwise stated.
NotesWARNINGThe most important notes are marked with the heading WARNING. These
WARNING notes draw your attention to a serious risk of accident or injury .
CAUTION
A Caution note draws your attention to the possibility of damage to your vehicle
(e.g. damage to gearbox), or points out general risks of an accident.
For the sake of the environment
An Environmental note draws your attention to environmental protection as-
pects. This is where you will, for example, find tips aimed at reducing your fuel
consumption.
Note
A normal Note draws your attention to important information about the opera-
tion of your vehicle. 3T0012720AG
Page 5 of 246
Table of Contents
Abbreviations
Safety
Passive Safety
6
General information
6
Correct and safe seated position
7
Seat belts
10
Using seat belts
10
Inertia reels and belt tensioners
13
Airbag system
14
Description of the airbag system
14
Airbag overview
15
Deactivating airbags
19
Transporting children safely
21
Child seat
21
Fastening systems
23
Operation
Cockpit
27
Overview
26
Instruments and Indicator Lights
28
Instrument cluster
28
Warning lights
32
Information system
39
Driver information system
39
Multifunction display (MFD)
41
MAXI DOT display
44
Service interval display
46
Unlocking and opening
48
Unlocking and locking
48
Anti-theft alarm system
54
Luggage compartment lid
55Electric boot lid (Superb Combi)57Electric power windows59
Electric sliding/tilting roof
62
Panoramic sliding/tilting roof (Superb Estate)
63
Lights and visibility
65
Lights
65
Interior lights
71
Visibility
73
Windscreen wipers and washers
75
Rear mirror
77
Seats and useful equipment
79
Adjusting the seats
79
Seat features
83
Practical equipment
86
Luggage compartment
95
Removable light (Superb Combi)
101
Variable loading floor in the luggage
compartment (Estate)
102
Extending variable loading floor with
integrated aluminium rails and faseting
elements (Superb Combi)
103
Net partition (Superb Combi)
105
Roof rack system
106
Air conditioning system
108
Heating, ventilation, cooling
108
Air conditioning system (manual air
conditioning system)
110
Climatronic (automatic air conditioning
system)
113
Auxiliary heating (auxiliary heating and
ventilation)
116
Communication and multimedia
119
General information
119
Universal telephone preinstallation GSM II
122
Universal telephone preinstallation GSM IIl
124
WLAN
127Voice control129Multimedia131
Driving
Starting-off and Driving
135
Starting and stopping the engine using the key
135
Starting and stopping the engine - KESSY
137
Brakes
140
Manual gear changing and pedals
141
Automatic gearbox
142
Running in
145
Economical driving and environmental
sustainability
146
Avoiding damage to your vehicle
149
Driving abroad
150
Assist systems
151
Brake assist systems
151
Parking aid
153
Park assist
154
Cruise Control System
158
START-STOP
159
Fatigue detection (break recommendation)
162
Towing a trailer
163
Towing device
163
Trailer
166
General Maintenance
Car care
169
Services, modifications, and technical
alterations
169
Washing your car
172
Taking care of your vehicle exterior
173
Taking care of the interior
1763Table of Contents
Page 7 of 246
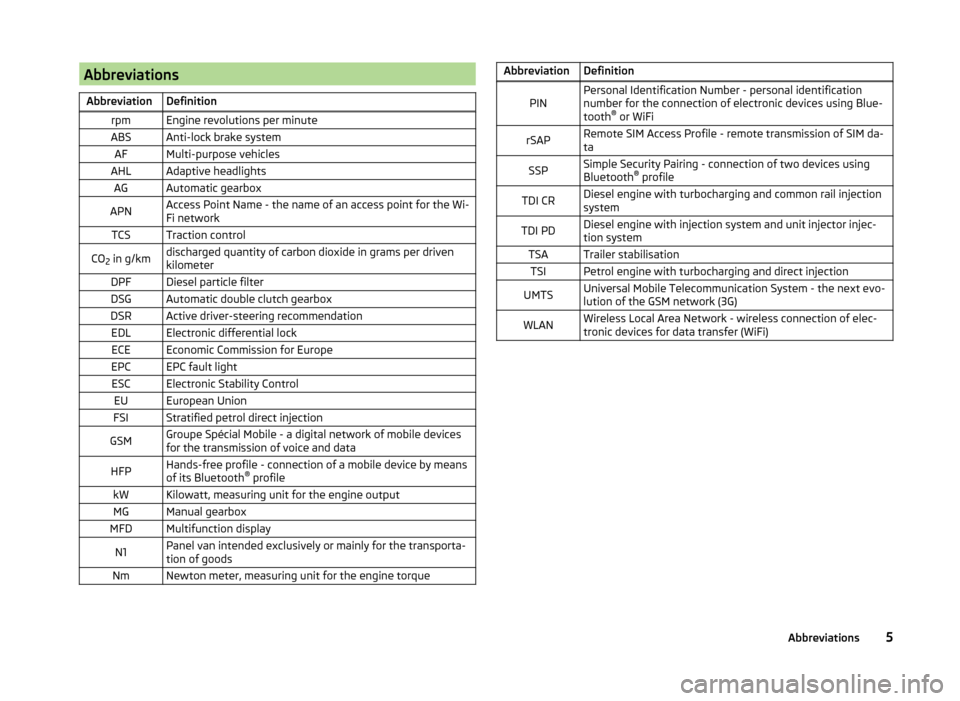
AbbreviationsAbbreviationDefinitionrpmEngine revolutions per minuteABSAnti-lock brake systemAFMulti-purpose vehiclesAHLAdaptive headlightsAGAutomatic gearboxAPNAccess Point Name - the name of an access point for the Wi-
Fi networkTCSTraction controlCO 2 in g/kmdischarged quantity of carbon dioxide in grams per driven
kilometerDPFDiesel particle filterDSGAutomatic double clutch gearboxDSRActive driver-steering recommendationEDLElectronic differential lockECEEconomic Commission for EuropeEPCEPC fault lightESCElectronic Stability ControlEUEuropean UnionFSIStratified petrol direct injectionGSMGroupe Spécial Mobile - a digital network of mobile devices
for the transmission of voice and dataHFPHands-free profile - connection of a mobile device by means
of its Bluetooth ®
profilekWKilowatt, measuring unit for the engine outputMGManual gearboxMFDMultifunction displayN1Panel van intended exclusively or mainly for the transporta-
tion of goodsNmNewton meter, measuring unit for the engine torqueAbbreviationDefinitionPINPersonal Identification Number - personal identification
number for the connection of electronic devices using Blue-
tooth ®
or WiFirSAPRemote SIM Access Profile - remote transmission of SIM da-
taSSPSimple Security Pairing - connection of two devices using
Bluetooth ®
profileTDI CRDiesel engine with turbocharging and common rail injection
systemTDI PDDiesel engine with injection system and unit injector injec-
tion systemTSATrailer stabilisationTSIPetrol engine with turbocharging and direct injectionUMTSUniversal Mobile Telecommunication System - the next evo-
lution of the GSM network (3G)WLANWireless Local Area Network - wireless connection of elec-
tronic devices for data transfer (WiFi)5Abbreviations
Page 20 of 246
WARNING■Only hang light items of clothing on the hooks fitted in the vehicle. Never
leave any heavy or sharp-edged objects in the pockets of the items of
clothing.■
Ensure that there are no excessive forces, such as violent knocks, kicks
etc., impact on the backrests of the seats otherwise the system may be
damaged. The side airbags would not be deployed in such a case!
■
Any seat or protective covers which you fit to the driver or front passen-
ger seats must only be of the type expressly authorized by ŠKODA. In view
of the fact that the airbag inflates out of the backrest of the seat, use of
non-approved seat or protective covers would considerably impair the pro-
tective function of the side airbag.
■
Any damage to the original seat covers in the area of the side airbag mod-
ule must be repaired immediately by a specialist garage.
■
The airbag modules in the front seats must not display any damage,
cracks or deep scratches. It is not permissible to use force in order to open
the modules.
Note
■ In vehicles with side airbags at the front, a label with the word AIRBAG is lo-
cated on the front seat backrests.■
In vehicles with rear side airbags, the word AIRBAG is located between the
entrance area and the rear seat rest.
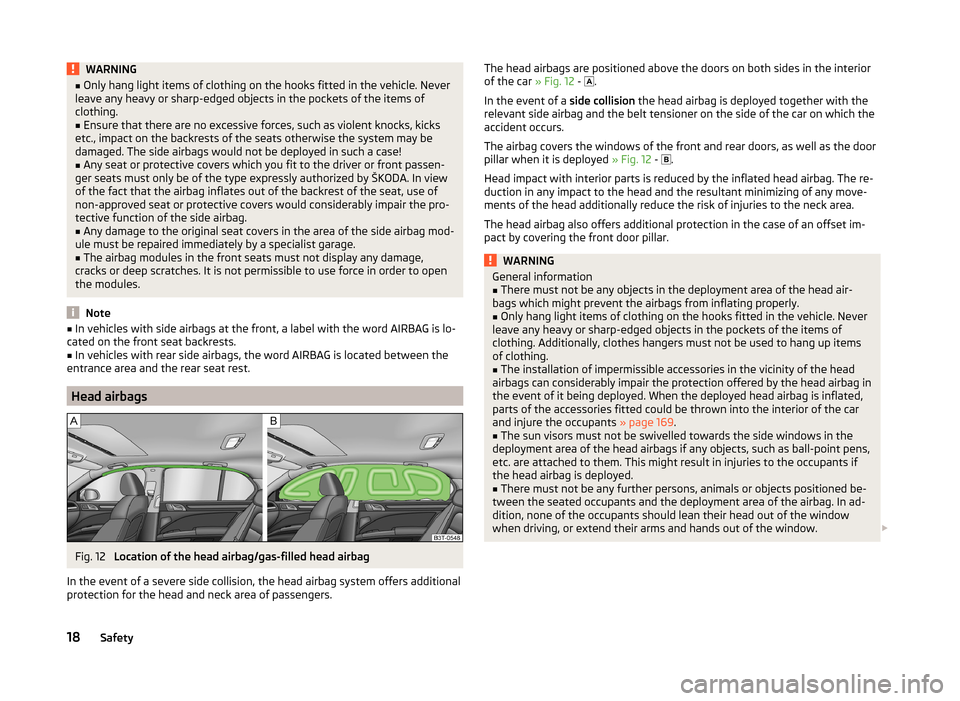
Head airbags
Fig. 12
Location of the head airbag/gas-filled head airbag
In the event of a severe side collision, the head airbag system offers additional
protection for the head and neck area of passengers.
The head airbags are positioned above the doors on both sides in the interior
of the car » Fig. 12 - .
In the event of a side collision the head airbag is deployed together with the
relevant side airbag and the belt tensioner on the side of the car on which the
accident occurs.
The airbag covers the windows of the front and rear doors, as well as the door
pillar when it is deployed » Fig. 12 -
.
Head impact with interior parts is reduced by the inflated head airbag. The re-
duction in any impact to the head and the resultant minimizing of any move-
ments of the head additionally reduce the risk of injuries to the neck area.
The head airbag also offers additional protection in the case of an offset im-
pact by covering the front door pillar.WARNINGGeneral information■There must not be any objects in the deployment area of the head air-
bags which might prevent the airbags from inflating properly.■
Only hang light items of clothing on the hooks fitted in the vehicle. Never
leave any heavy or sharp-edged objects in the pockets of the items of
clothing. Additionally, clothes hangers must not be used to hang up items
of clothing.
■
The installation of impermissible accessories in the vicinity of the head
airbags can considerably impair the protection offered by the head airbag in
the event of it being deployed. When the deployed head airbag is inflated,
parts of the accessories fitted could be thrown into the interior of the car
and injure the occupants » page 169.
■
The sun visors must not be swivelled towards the side windows in the
deployment area of the head airbags if any objects, such as ball-point pens,
etc. are attached to them. This might result in injuries to the occupants if
the head airbag is deployed.
■
There must not be any further persons, animals or objects positioned be-
tween the seated occupants and the deployment area of the airbag. In ad-
dition, none of the occupants should lean their head out of the window
when driving, or extend their arms and hands out of the window.
18Safety
Page 29 of 246
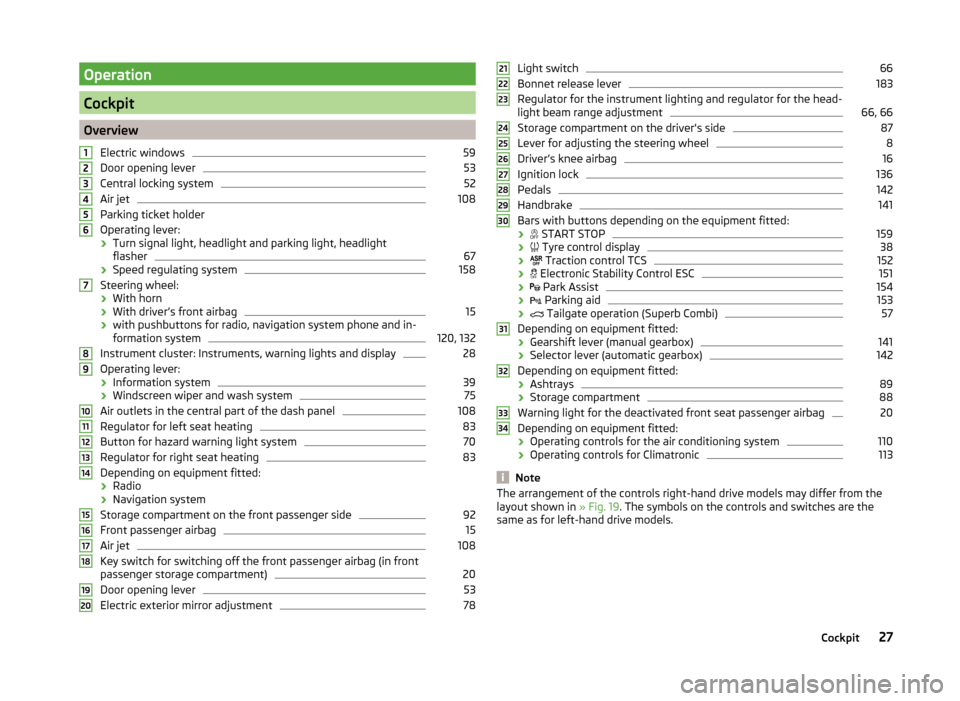
Operation
Cockpit
OverviewElectric windows
59
Door opening lever
53
Central locking system
52
Air jet
108
Parking ticket holder
Operating lever: › Turn signal light, headlight and parking light, headlight
flasher
67
› Speed regulating system
158
Steering wheel:
› With horn
› With driver’s front airbag
15
›with pushbuttons for radio, navigation system phone and in-
formation system
120, 132
Instrument cluster: Instruments, warning lights and display
28
Operating lever:
› Information system
39
›Windscreen wiper and wash system
75
Air outlets in the central part of the dash panel
108
Regulator for left seat heating
83
Button for hazard warning light system
70
Regulator for right seat heating
83
Depending on equipment fitted:
› Radio
› Navigation system
Storage compartment on the front passenger side
92
Front passenger airbag
15
Air jet
108
Key switch for switching off the front passenger airbag (in front
passenger storage compartment)
20
Door opening lever
53
Electric exterior mirror adjustment
781234567891011121314151617181920Light switch66
Bonnet release lever
183
Regulator for the instrument lighting and regulator for the head-
light beam range adjustment
66, 66
Storage compartment on the driver's side
87
Lever for adjusting the steering wheel
8
Driver’s knee airbag
16
Ignition lock
136
Pedals
142
Handbrake
141
Bars with buttons depending on the equipment fitted:
›
START STOP
159
›
Tyre control display
38
›
Traction control TCS
152
›
Electronic Stability Control ESC
151
›
Park Assist
154
›
Parking aid
153
›
Tailgate operation (Superb Combi)
57
Depending on equipment fitted:
› Gearshift lever (manual gearbox)
141
›Selector lever (automatic gearbox)
142
Depending on equipment fitted:
› Ashtrays
89
›Storage compartment
88
Warning light for the deactivated front seat passenger airbag
20
Depending on equipment fitted:
› Operating controls for the air conditioning system
110
›
Operating controls for Climatronic
113
Note
The arrangement of the controls right-hand drive models may differ from the
layout shown in » Fig. 19. The symbols on the controls and switches are the
same as for left-hand drive models.212223242526272829303132333427Cockpit
Page 30 of 246
Instruments and Indicator Lights
Instrument cluster
Introduction
This chapter contains information on the following subjects:
Overview
28
Revolutions counter
29
Speedometer
29
Coolant temperature gauge
29
Display
29
Fuel gauge
30
Counter for distance driven
30
30
Display of the second speed
31
Display in rear centre console
31
Auto Check Control
31
Fault display
If there is a fault in the instrument cluster, the Error message will appear in
the display. Have the fault rectified as soon as possible by a specialist garage.
WARNING■ Concentrate fully at all times on your driving! As the driver you are fully
responsible for road safety.■
Never operate the controls in the instrument cluster while driving - risk of
accident. Operate the controls only when the vehicle is at a standstill.
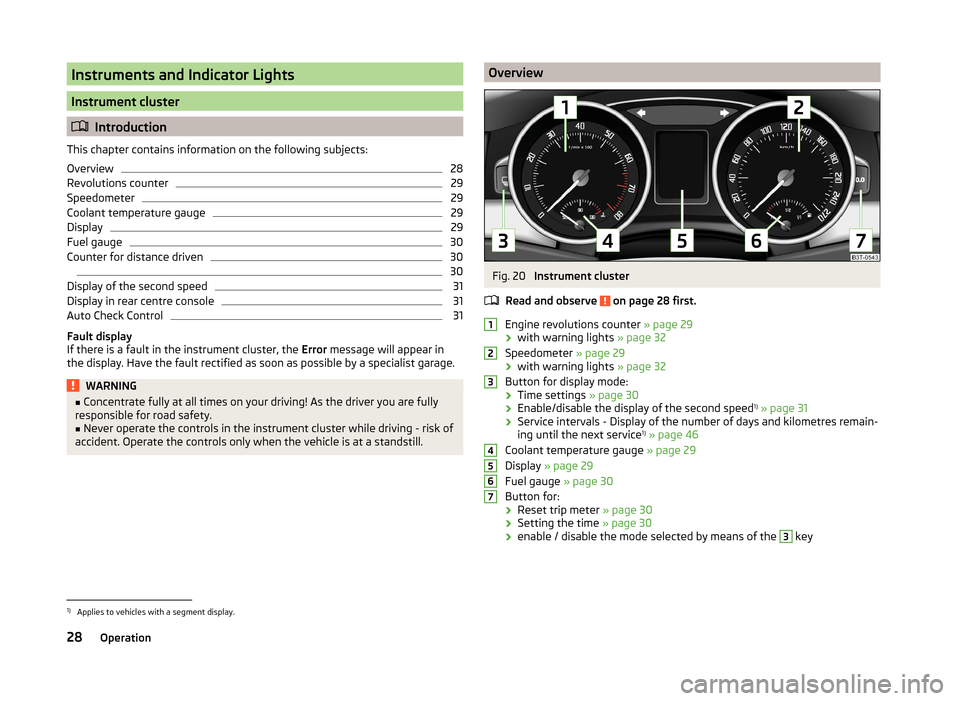
OverviewFig. 20
Instrument cluster
Read and observe
on page 28 first.
Engine revolutions counter » page 29
› with warning lights
» page 32
Speedometer » page 29
› with warning lights
» page 32
Button for display mode:
› Time settings
» page 30
› Enable/disable the display of the second speed 1)
» page 31
› Service intervals - Display of the number of days and kilometres remain-
ing until the next service 1)
» page 46
Coolant temperature gauge » page 29
Display » page 29
Fuel gauge » page 30
Button for: › Reset trip meter
» page 30
› Setting the time
» page 30
› enable / disable the mode selected by means of the
3
key
12345671)
Applies to vehicles with a segment display.
28Operation
Page 31 of 246
Revolutions counterRead and observe
on page 28 first.
The red scale of the revolution counter
1
» Fig. 20 on page 28 indicates the
range in which the system begins to limit the engine speed. The system auto-
matically restricts the engine speed to a steady limit.
You should shift into the next higher gear before the red scale of the revolu-
tion counter is reached, or select mode D on the automatic gearbox.
Follow the recommended gear to prevent engine speeds that are too high or too low » page 40 .
Speedometer
Read and observe
on page 28 first.
Warning against excessive speeds
An audible warning signal will sound when the vehicle speed exceeds 120 km/
h 1)
. The audible warning signal is switched off when the vehicle speed falls be-
low 120 km/h.
Coolant temperature gauge
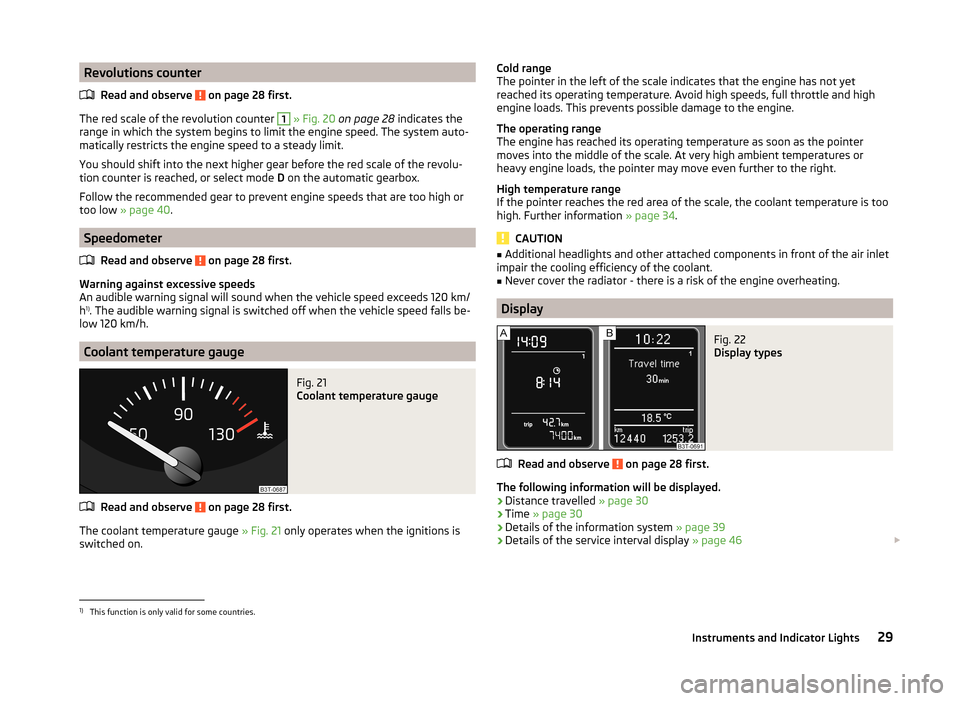
Fig. 21
Coolant temperature gauge
Read and observe on page 28 first.
The coolant temperature gauge » Fig. 21 only operates when the ignitions is
switched on.
Cold range
The pointer in the left of the scale indicates that the engine has not yet
reached its operating temperature. Avoid high speeds, full throttle and high
engine loads. This prevents possible damage to the engine.
The operating range
The engine has reached its operating temperature as soon as the pointer
moves into the middle of the scale. At very high ambient temperatures or
heavy engine loads, the pointer may move even further to the right.
High temperature range
If the pointer reaches the red area of the scale, the coolant temperature is too high. Further information » page 34.
CAUTION
■
Additional headlights and other attached components in front of the air inlet
impair the cooling efficiency of the coolant.■
Never cover the radiator - there is a risk of the engine overheating.
Display
Fig. 22
Display types
Read and observe on page 28 first.
The following information will be displayed.
› Distance travelled
» page 30
› Time
» page 30
› Details of the information system
» page 39
› Details of the service interval display
» page 46
1)
This function is only valid for some countries.
29Instruments and Indicator Lights
Page 32 of 246
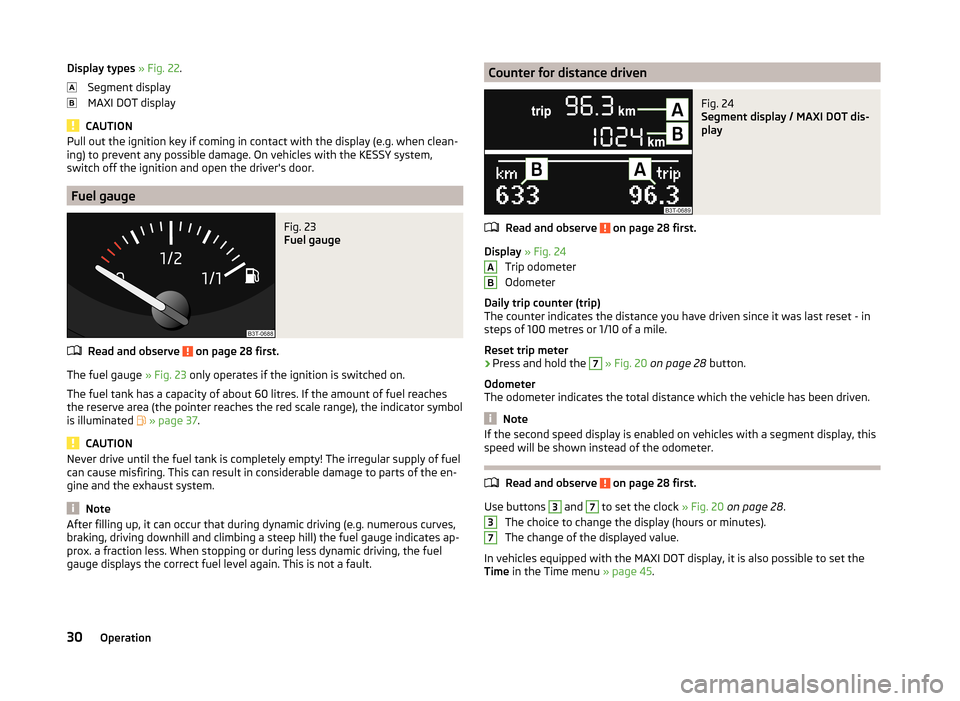
Display types » Fig. 22 .
Segment display
MAXI DOT display
CAUTION
Pull out the ignition key if coming in contact with the display (e.g. when clean-
ing) to prevent any possible damage. On vehicles with the KESSY system,
switch off the ignition and open the driver's door.
Fuel gauge
Fig. 23
Fuel gauge
Read and observe on page 28 first.
The fuel gauge » Fig. 23 only operates if the ignition is switched on.
The fuel tank has a capacity of about 60 litres. If the amount of fuel reaches
the reserve area (the pointer reaches the red scale range), the indicator symbol
is illuminated
» page 37 .
CAUTION
Never drive until the fuel tank is completely empty! The irregular supply of fuel
can cause misfiring. This can result in considerable damage to parts of the en-
gine and the exhaust system.
Note
After filling up, it can occur that during dynamic driving (e.g. numerous curves,
braking, driving downhill and climbing a steep hill) the fuel gauge indicates ap-
prox. a fraction less. When stopping or during less dynamic driving, the fuel
gauge displays the correct fuel level again. This is not a fault.Counter for distance drivenFig. 24
Segment display / MAXI DOT dis-
play
Read and observe on page 28 first.
Display » Fig. 24
Trip odometer
Odometer
Daily trip counter (trip)
The counter indicates the distance you have driven since it was last reset - in
steps of 100 metres or 1/10 of a mile.
Reset trip meter
›
Press and hold the
7
» Fig. 20 on page 28 button.
Odometer
The odometer indicates the total distance which the vehicle has been driven.
Note
If the second speed display is enabled on vehicles with a segment display, this
speed will be shown instead of the odometer.
Read and observe on page 28 first.
Use buttons
3
and
7
to set the clock » Fig. 20 on page 28 .
The choice to change the display (hours or minutes).
The change of the displayed value.
In vehicles equipped with the MAXI DOT display, it is also possible to set the
Time in the Time menu » page 45.
AB3730Operation
Page 33 of 246
Display of the second speedRead and observe
on page 28 first.
The display can show the current speed in mph 1)
.
This feature is provided for driving in countries with different speed units.
Maxi DOT display
The display of the second speed can be set in the Alt. speed dis. menu
item » page 45 , Settings .
Segment display
›
Press key
3
» Fig. 20 on page 28 repeatedly, until the odometer display
flashes » page 30 .
›
Press the
7
key while the display flashes.
The second speed is displayed instead of the odometer.
The display of the second speed can be disabled in the same way.
Display in rear centre console
Fig. 25
Centre console at rear: Display
Read and observe on page 28 first.
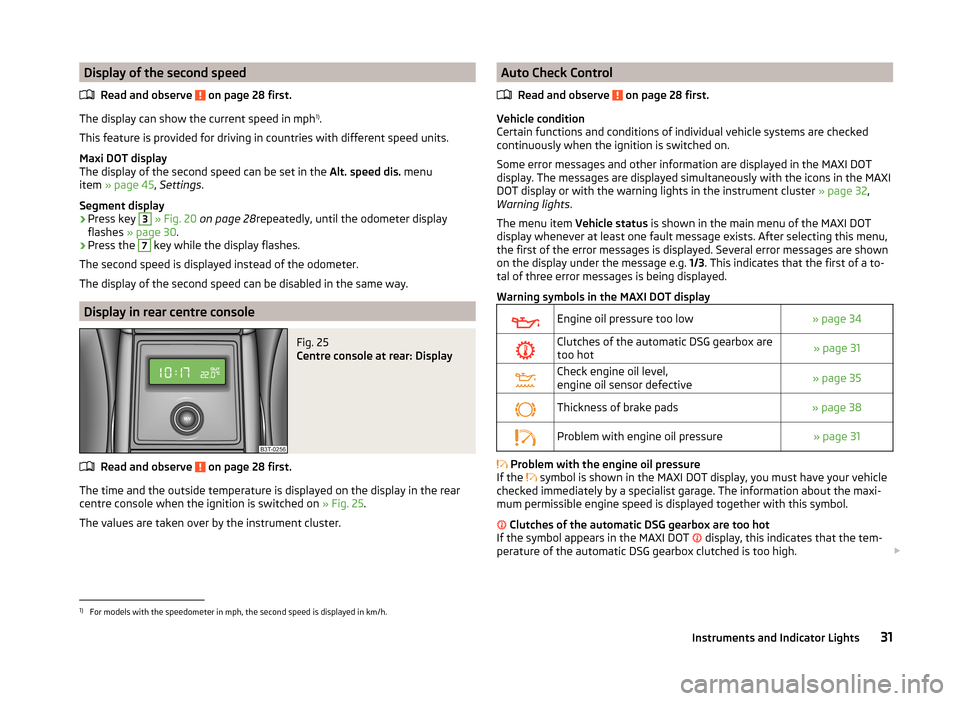
The time and the outside temperature is displayed on the display in the rear
centre console when the ignition is switched on » Fig. 25.
The values are taken over by the instrument cluster.
Auto Check Control
Read and observe
on page 28 first.
Vehicle condition
Certain functions and conditions of individual vehicle systems are checked
continuously when the ignition is switched on.
Some error messages and other information are displayed in the MAXI DOT
display. The messages are displayed simultaneously with the icons in the MAXI
DOT display or with the warning lights in the instrument cluster » page 32,
Warning lights .
The menu item Vehicle status is shown in the main menu of the MAXI DOT
display whenever at least one fault message exists. After selecting this menu,
the first of the error messages is displayed. Several error messages are shown
on the display under the message e.g. 1/3. This indicates that the first of a to-
tal of three error messages is being displayed.
Warning symbols in the MAXI DOT display
Engine oil pressure too low» page 34Clutches of the automatic DSG gearbox are
too hot» page 31Check engine oil level,
engine oil sensor defective» page 35Thickness of brake pads» page 38Problem with engine oil pressure» page 31
Problem with the engine oil pressure
If the symbol is shown in the MAXI DOT display, you must have your vehicle
checked immediately by a specialist garage. The information about the maxi-
mum permissible engine speed is displayed together with this symbol.
Clutches of the automatic DSG gearbox are too hot
If the symbol appears in the MAXI DOT display, this indicates that the tem-
perature of the automatic DSG gearbox clutched is too high.
1)
For models with the speedometer in mph, the second speed is displayed in km/h.
31Instruments and Indicator Lights
Page 34 of 246
The following message is shown in the MAXI DOT display.Gearbox overheated. Stop! Log book!
do not continue to drive! Stop the vehicle, switch off the engine, and wait
until the
icon goes out – risk of gearbox damage! You can continue your
journey as soon as the symbol disappears.WARNINGIf you have to stop for technical reasons, then park the vehicle at a safe
distance from the traffic, switch off the engine and activate the hazard
warning lights system » page 70. The warning triangle must be set up at
the prescribed distance - observe the national legal provisions when doing
so.
Note
■ If the MAXI DOT display shows warning messages, these messages must be
confirmed in order to access the main menu » page 40 .■
As long as the operational faults are not rectified, the symbols are always in-
dicated again. After they are displayed for the first time, the symbols continue
to be indicated without any extra messages for the driver.
Warning lights
Introduction
This chapter contains information on the following subjects:
Handbrake
33
Brake system
33
Seat belt warning light
33
Generator
33
Door open
34
Engine oil pressure
34
Coolant
34
Bonnet
34
Boot lid
34
Power steering / steering lock (system KESSY)
34
Engine oil level
35
Traction Control System (ASR)
35
Electronic Stability Control (ESC)
35 Antilock brake system (ABS)36 Rear fog light36
Lamp failure
36
Adaptive headlights (AFS)
36
Exhaust inspection system
36
Glow plug system (diesel engine)
36
Engine performance check (petrol engine)
37
Diesel particulate filter (diesel engine)
37
Fuel reserve
37
Airbag system
38
Tyre inflation pressure
38
Windscreen washer fluid level
38
Pads
38
Turn signal system
38
Low beam
39
Fog lights
39
Cruise control system
39
Selector lever lock / starter (system KESSY)
39
Main beam
39
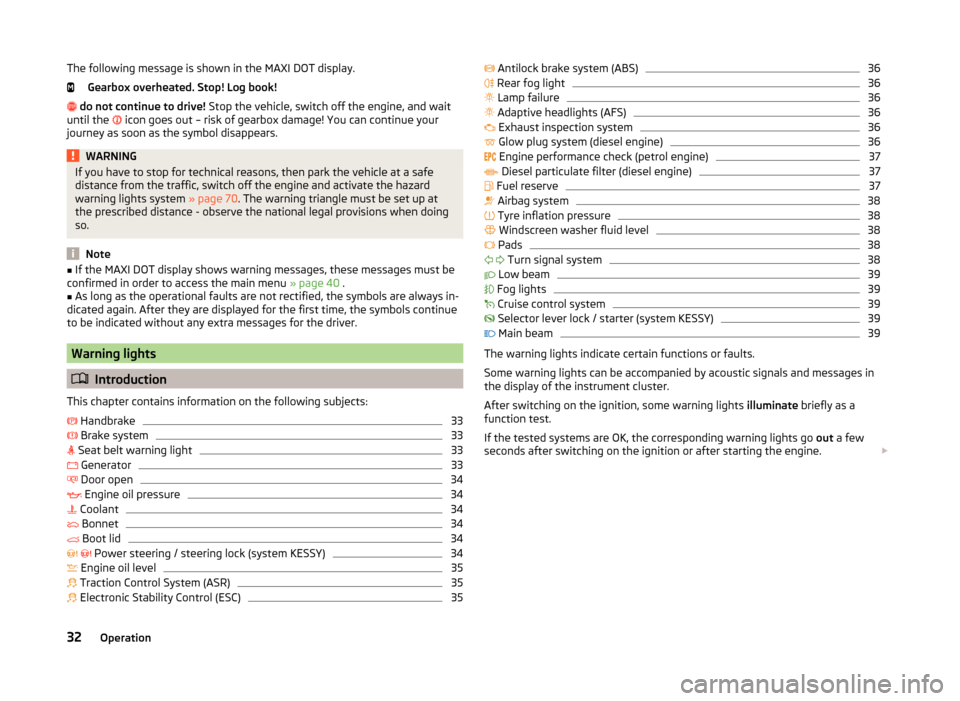
The warning lights indicate certain functions or faults.
Some warning lights can be accompanied by acoustic signals and messages in
the display of the instrument cluster.
After switching on the ignition, some warning lights illuminate briefly as a
function test.
If the tested systems are OK, the corresponding warning lights go out a few
seconds after switching on the ignition or after starting the engine.
32Operation