water pump SKODA SUPERB 2014 2.G / (B6/3T) Owner's Manual
[x] Cancel search | Manufacturer: SKODA, Model Year: 2014, Model line: SUPERB, Model: SKODA SUPERB 2014 2.G / (B6/3T)Pages: 246, PDF Size: 17.16 MB
Page 119 of 246

WARNING■The auxiliary heating (aux. heating) must never be operated in closed
rooms (e.g. garages) – risk of poisoning!■
The auxiliary heating (aux. heating) must not be allowed to run during re-
fuelling – risk of fire.
■
The exhaust pipe of the auxiliary heating (aux. heating) is located on the
underside of the vehicle. Therefore, if you wish to operate the auxiliary
heating (aux. heating), do not park the vehicle in such a way that the ex-
haust gases can come into contact with highly flammable materials (e.g. dry
grass) or easily inflammable substances (e.g. spilt fuel) – risk of fire.
CAUTION
■ Running auxiliary heating (aux. heating) consumes fuel from the vehicle tank
and automatically controls the filling level. If only a low quantity of fuel is
present in the fuel tank, the auxiliary heating (aux. heating) switches off.■
The exhaust pipe of the auxiliary heating (aux. heating), which is located on
the underside of the vehicle, must not be clogged and the exhaust flow must
not be blocked.
■
If the auxiliary heating (aux. heating) is running, the vehicle battery discharg-
es. If the auxiliary heating and ventilation has been operated several times
over a longer period, the vehicle must be driven a few kilometres in order to
recharge the vehicle battery.
Note
■ The auxiliary heating (aux. heating) switches on the blower B » Fig. 124 on
page 110 or » Fig. 125 on page 113 only if it has achieved a coolant temperature
of approx. 50 °C.■
At low outside temperatures, this can result in a formation of water vapour in
the area of the engine compartment. This is quite normal and is not an operat-
ing problem.
■
The air inlet in front of the windscreen must be free (e.g. of ice, snow or
leaves) to ensure that the auxiliary heating (aux. heating) operates properly.
■
So that warm air can flow into the vehicle interior after switching on the aux-
iliary heating, you must maintain the comfort temperature normally selected
by you, leave the fan switched on and leave the air outlet vents in an open po-
sition. It is recommended to put the air flow in the position
or
.
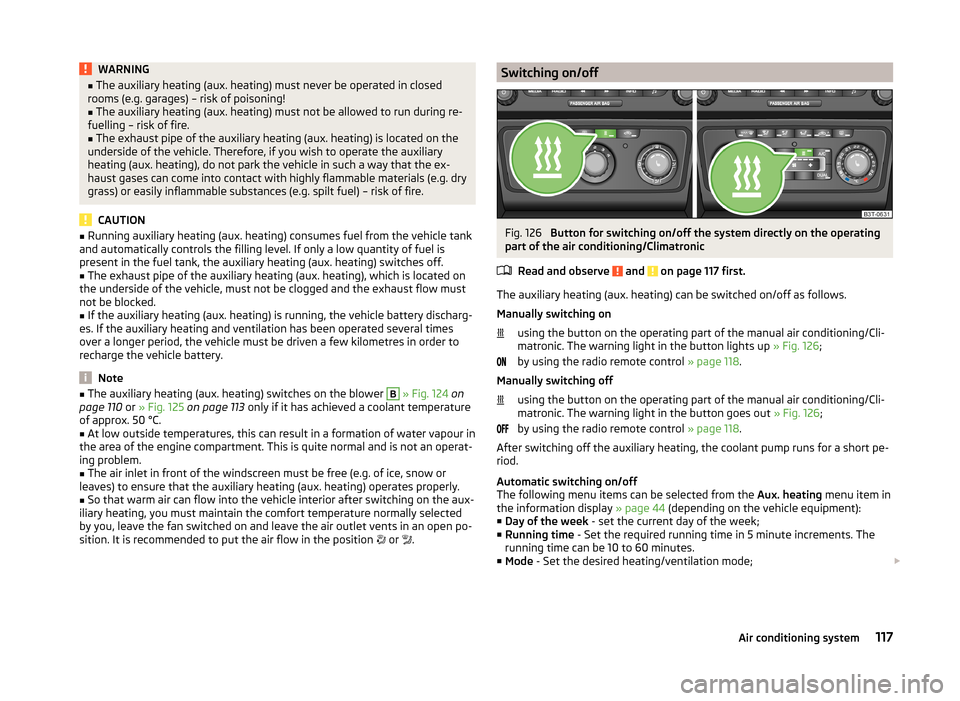
Switching on/offFig. 126
Button for switching on/off the system directly on the operating
part of the air conditioning/Climatronic
Read and observe
and on page 117 first.
The auxiliary heating (aux. heating) can be switched on/off as follows.
Manually switching on using the button on the operating part of the manual air conditioning/Cli-
matronic. The warning light in the button lights up » Fig. 126;
by using the radio remote control » page 118.
Manually switching off using the button on the operating part of the manual air conditioning/Cli-
matronic. The warning light in the button goes out » Fig. 126;
by using the radio remote control » page 118.
After switching off the auxiliary heating, the coolant pump runs for a short pe-
riod.
Automatic switching on/off
The following menu items can be selected from the Aux. heating menu item in
the information display » page 44 (depending on the vehicle equipment):
■ Day of the week - set the current day of the week;
■ Running time - Set the required running time in 5 minute increments. The
running time can be 10 to 60 minutes.
■ Mode - Set the desired heating/ventilation mode;
117Air conditioning system
Page 219 of 246

No.Power consumer27Fuel pump relay, control unit for fuel pump, injection valves28Electric boot lid29Haldex30Climate controlled front seats31DVD pre-installation32Front power window, central locking system of the rear doors33Electric sliding/tilting roof34Alarm, spare horn35front and rear lighter36Headlight cleaning system37Heated front seats38Heated rear seats39Rear window wiper40Fan air-conditioning system, relay for auxiliary heating and ventila-
tion41Not assigned42Light switch43Control unit for trailer detection44Control unit for trailer detection45Control unit for trailer detection46Switch for seat heating47Telephone preinstallation48Preparation for the aftermarket radio49Only for START-STOP: Central control unit, DC-DC converter, the
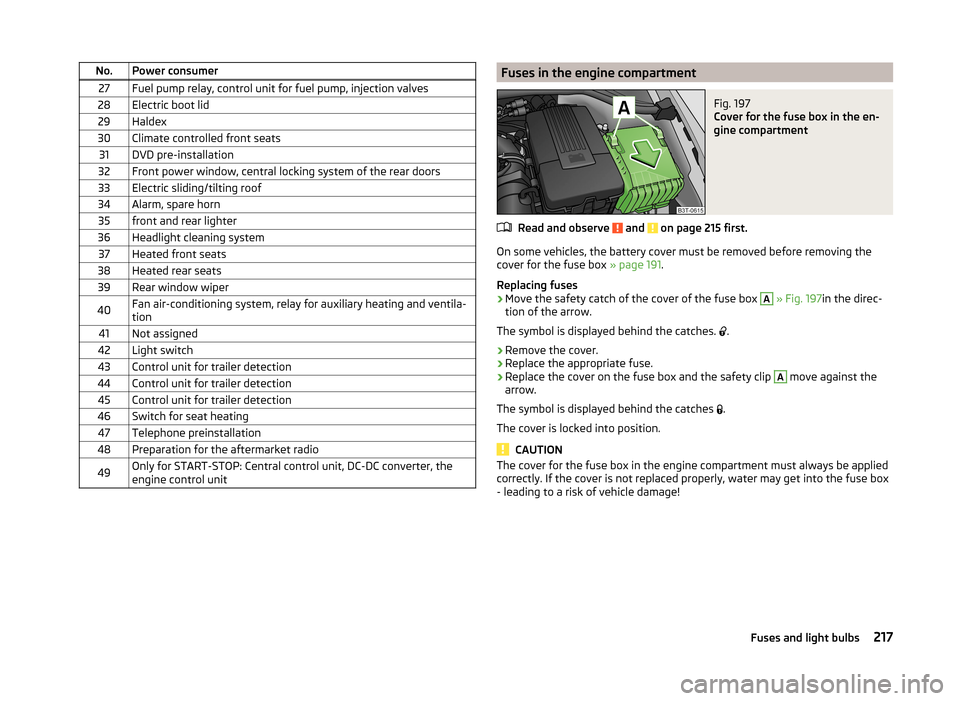
engine control unitFuses in the engine compartmentFig. 197
Cover for the fuse box in the en-
gine compartment
Read and observe and on page 215 first.
On some vehicles, the battery cover must be removed before removing the
cover for the fuse box » page 191.
Replacing fuses
›
Move the safety catch of the cover of the fuse box
A
» Fig. 197 in the direc-
tion of the arrow.
The symbol is displayed behind the catches. .
›
Remove the cover.
›
Replace the appropriate fuse.
›
Replace the cover on the fuse box and the safety clip
A
move against the
arrow.
The symbol is displayed behind the catches .
The cover is locked into position.
CAUTION
The cover for the fuse box in the engine compartment must always be applied
correctly. If the cover is not replaced properly, water may get into the fuse box
- leading to a risk of vehicle damage!217Fuses and light bulbs