manual radio set SKODA SUPERB 2015 3.G / (B8/3V) Owner's Manual
[x] Cancel search | Manufacturer: SKODA, Model Year: 2015, Model line: SUPERB, Model: SKODA SUPERB 2015 3.G / (B8/3V)Pages: 276, PDF Size: 42.14 MB
Page 58 of 276

Individual settingsRead and observe
and on page 53 first.
The following functions of the central locking system can be set individually in
the Infotainment » Owner´s Manual Infotainment , chapter CAR - Car settings.
Opening a single door
The function allows you to unlock only the driver's door and the fuel filler flap
with the radio remote control. KESSY makes possible the release of individual
doors as well as the fuel filler flap, depending on the area in which the key is
located. The other doors and the boot lid are only unlocked when the unlock-
ing is repeated.
Unlocking a vehicle side door
This function enables you to unlock both doors on the driver's side and the
fuel filler flap with the radio remote control unit. KESSY makes possible the re-
lease of both doors on one side as well as the fuel filler flap, depending on the
area in which the key is located. The other doors and the boot lid are only un-
locked when the unlocking is repeated.
Unlock all doors
The function allows you to unlock all doors, the boot lid and the fuel filler flap.
Automatic locking/unlocking
The function allows you to lock all doors and the boot lid from a speed of
about 15 km / h. The button in the boot lid handle is deactivated.
Renewed automatic unlocking of all doors as well as the luggage compartment
door when removing the ignition key or by opening any of the doors. In vehi-
cles with the system KESSY this is when any door is opened.
The vehicle can also be unlocked by pressing the Central Locking Button in
the centre console » page 55.
Acoustic signals when locking / unlocking
For vehicles with an anti-theft alarm system, the acoustic signals can be ena-
bled / disabled in the Infotainment » Owner´s Manual Infotainment , chap-
ter CAR - Vehicle Settings .
Opening/closing a doorFig. 41
Door handle/door opening lever
Read and observe
and on page 53 first.
Opening from the outside
›
Unlock the vehicle.
›
Pull on the door handle
A
in the direction of the arrow » Fig. 41.
Opening from the inside
›
Pull on door opening lever
B
of the door and push the door away from you.
Closing from the inside
›
Grasp pull handle
C
and close the door.
WARNING■ Make sure that the door has closed correctly as it can open suddenly
while driving – risk of death!■
Only open and close the door when there is no one in the opening/closing
range – risk of injury!
■
An opened door can close automatically if there is a strong wind or the
vehicle is on an incline – risk of injury!
■
Never drive with the doors open - it can be fatal!
56Using the system
Page 73 of 276

Fog lights with the CORNER functionRead and observe
on page 67 first.
The function CORNER provides better illumination of the nearby environment
when turning, manoeuvring or anything similar.
The function automatically switches on the fog lights on each side of the ve- hicle, if the following conditions are met.
The turn signal is switched on or the front wheels are turned sharply 1)
.
The vehicle speed is below 40 km/h.
The low beam is switched on.
The fog lights are not switched on.
Note
The two fog lights are switched on when you shift into the reverse gear.
COMING HOME / LEAVING HOME
Read and observe
on page 67 first.
The function COMING HOME ensures that the vehicle's environment is illumi-
nated after switching off the ignition and opening the driver's door.
The function LEAVING HOME ensures that the vehicle's environment is illumi-
nated after unlocking the vehicle with the radio remote control unit.
The function switches the light on only if there is poorer visibility and the light
switch is in the position .
Enabling / disabling and setting functions
The functions and setting of the lighting duration can be activated or deactiva-
ted in the Infotainment system » Owner´s Manual Infotainment , chap-
ter CARVehicle settings .
CAUTION■
Poorer visibility is evaluated by a motor mounted below the windscreen in
the holder of the interior mirror sensor. Do not attach any stickers or similar
objects in front of the light sensor on the windscreen in order to avoid impair-
ing the function or its reliability.■
If this option is always enabled, then the battery is heavily loaded.
Hazard warning light system
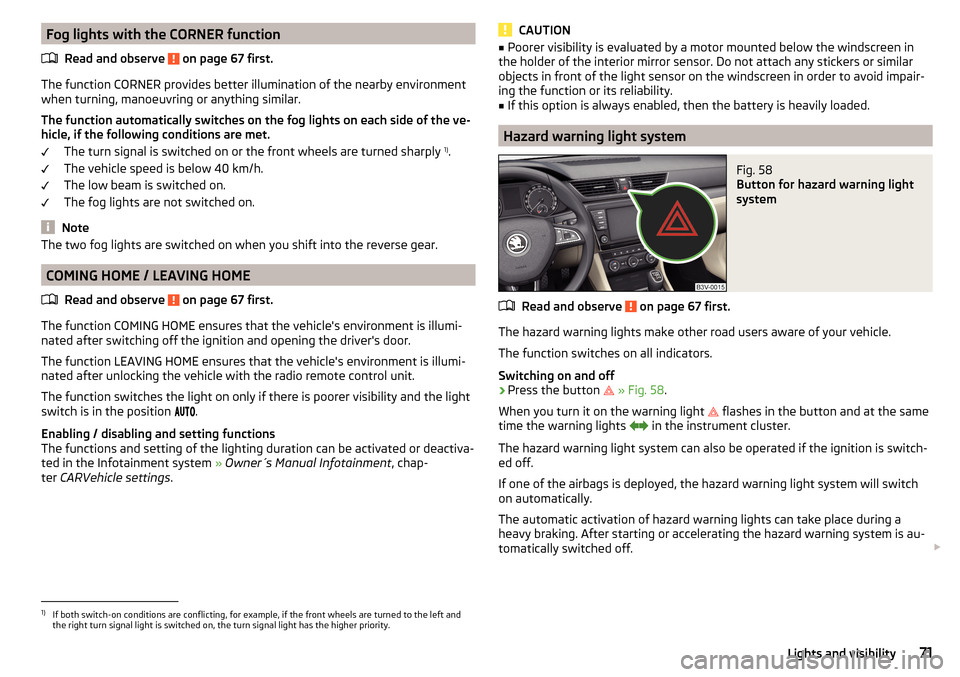
Fig. 58
Button for hazard warning light
system
Read and observe on page 67 first.
The hazard warning lights make other road users aware of your vehicle.
The function switches on all indicators.
Switching on and off
›
Press the button
» Fig. 58 .
When you turn it on the warning light
flashes in the button and at the same
time the warning lights
in the instrument cluster.
The hazard warning light system can also be operated if the ignition is switch-
ed off.
If one of the airbags is deployed, the hazard warning light system will switch
on automatically.
The automatic activation of hazard warning lights can take place during a
heavy braking. After starting or accelerating the hazard warning system is au-
tomatically switched off.
1)
If both switch-on conditions are conflicting, for example, if the front wheels are turned to the left and
the right turn signal light is switched on, the turn signal light has the higher priority.
71Lights and visibility
Page 125 of 276

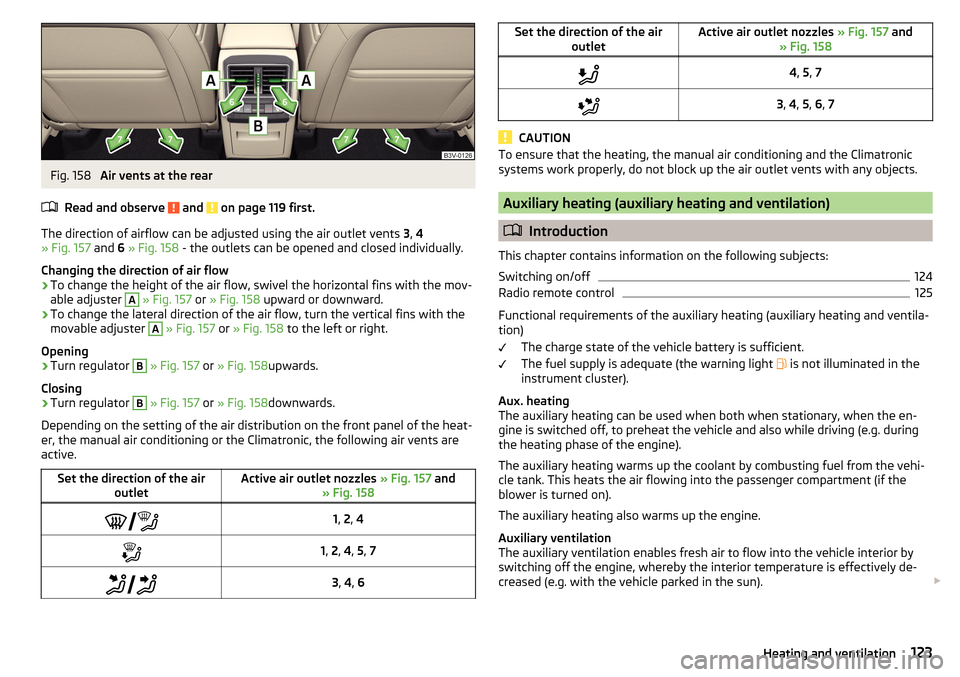
Fig. 158
Air vents at the rear
Read and observe
and on page 119 first.
The direction of airflow can be adjusted using the air outlet vents 3, 4
» Fig. 157 and 6 » Fig. 158 - the outlets can be opened and closed individually.
Changing the direction of air flow
›
To change the height of the air flow, swivel the horizontal fins with the mov-
able adjuster
A
» Fig. 157 or » Fig. 158 upward or downward.
›
To change the lateral direction of the air flow, turn the vertical fins with the
movable adjuster
A
» Fig. 157 or » Fig. 158 to the left or right.
Opening
›
Turn regulator
B
» Fig. 157 or » Fig. 158 upwards.
Closing
›
Turn regulator
B
» Fig. 157 or » Fig. 158 downwards.
Depending on the setting of the air distribution on the front panel of the heat-
er, the manual air conditioning or the Climatronic, the following air vents are
active.
Set the direction of the air outletActive air outlet nozzles » Fig. 157 and
» Fig. 158 1, 2 , 41, 2 , 4 , 5 , 7 3, 4 , 6Set the direction of the air
outletActive air outlet nozzles » Fig. 157 and
» Fig. 1584 , 5 , 73 , 4 , 5 , 6 , 7
CAUTION
To ensure that the heating, the manual air conditioning and the Climatronic
systems work properly, do not block up the air outlet vents with any objects.
Auxiliary heating (auxiliary heating and ventilation)
Introduction
This chapter contains information on the following subjects:
Switching on/off
124
Radio remote control
125
Functional requirements of the auxiliary heating (auxiliary heating and ventila-
tion)
The charge state of the vehicle battery is sufficient.
The fuel supply is adequate (the warning light is not illuminated in the
instrument cluster).
Aux. heating
The auxiliary heating can be used when both when stationary, when the en-
gine is switched off, to preheat the vehicle and also while driving (e.g. during
the heating phase of the engine).
The auxiliary heating warms up the coolant by combusting fuel from the vehi-
cle tank. This heats the air flowing into the passenger compartment (if the
blower is turned on).
The auxiliary heating also warms up the engine.
Auxiliary ventilation
The auxiliary ventilation enables fresh air to flow into the vehicle interior by
switching off the engine, whereby the interior temperature is effectively de-
creased (e.g. with the vehicle parked in the sun).
123Heating and ventilation
Page 126 of 276

WARNING■The auxiliary heating (auxiliary heating and ventilation) (following as aux.
heating) must never be operated in closed rooms (e.g. garages) – risk of
poisoning!■
The auxiliary heating must not be allowed to run during refuelling – risk
of fire.
■
The exhaust pipe of the auxiliary heating is located on the underside of
the vehicle. If you want to use the heater, do not switch off the car in pla-
ces where the exhaust fumes can come into contact with flammable mate-
rials such as dry grass, undergrowth, leaves, spilled fuel etc. -. risk of fire.
CAUTION
■ The exhaust pipe of the auxiliary heating, which is located on the underside
of the vehicle, must not be clogged and the exhaust flow must not be blocked.■
If the auxiliary heating is running, the vehicle battery discharges.
■
The air inlet in front of the windscreen must be free (e.g. of ice, snow or
leaves) to ensure that the auxiliary heating operates properly.
Note
■ The auxiliary heating only switches the blower on, if it has achieved a coolant
temperature of approx. 50 °C.■
At low outside temperatures, this can result in a formation of water vapour in
the area of the engine compartment. This is quite normal and is not an operat-
ing problem.
■
So that warm air can flow into the vehicle interior after switching on the aux.
heating, you must maintain the comfort temperature normally selected by you,
leave the fan switched on and leave the air outlet vents in open. It is recom-
mended to put the air flow in the position
or
.
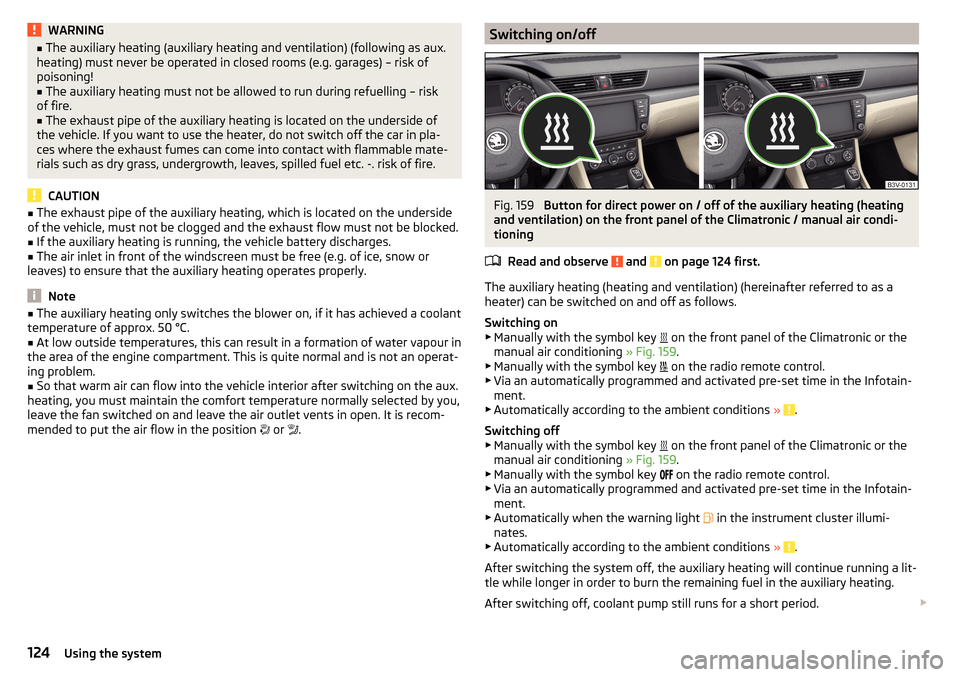
Switching on/offFig. 159
Button for direct power on / off of the auxiliary heating (heating
and ventilation) on the front panel of the Climatronic / manual air condi-
tioning
Read and observe
and on page 124 first.
The auxiliary heating (heating and ventilation) (hereinafter referred to as a
heater) can be switched on and off as follows.
Switching on
▶ Manually with the symbol key on the front panel of the Climatronic or the
manual air conditioning » Fig. 159.
▶ Manually with the symbol key on the radio remote control.
▶ Via an automatically programmed and activated pre-set time in the Infotain-
ment.
▶ Automatically according to the ambient conditions »
.
Switching off
▶ Manually with the symbol key on the front panel of the Climatronic or the
manual air conditioning » Fig. 159.
▶ Manually with the symbol key on the radio remote control.
▶ Via an automatically programmed and activated pre-set time in the Infotain-
ment.
▶ Automatically when the warning light in the instrument cluster illumi-
nates.
▶ Automatically according to the ambient conditions »
.
After switching the system off, the auxiliary heating will continue running a lit-
tle while longer in order to burn the remaining fuel in the auxiliary heating.
After switching off, coolant pump still runs for a short period.
124Using the system
Page 127 of 276

Programming the auxiliary heating in the Infotainment
For vehicles with Climatronic: on the front panel of the Climatronic button
→
Press
For vehicles with manual air conditioning: button in the Infotainment fea-
ture
→
Press
When automatic switching on is activated, the indicator light in the symbol key
lights up » Fig. 159 for about 10 seconds after the ignition is turned off.
CAUTION
The automatic switching on and off the heating for rapid heating of the vehicle
interior can be disabled in the Infotainment » Owner´s Manual Infotainment ,
chapter Setting the heating and the cooling system .
Radio remote control
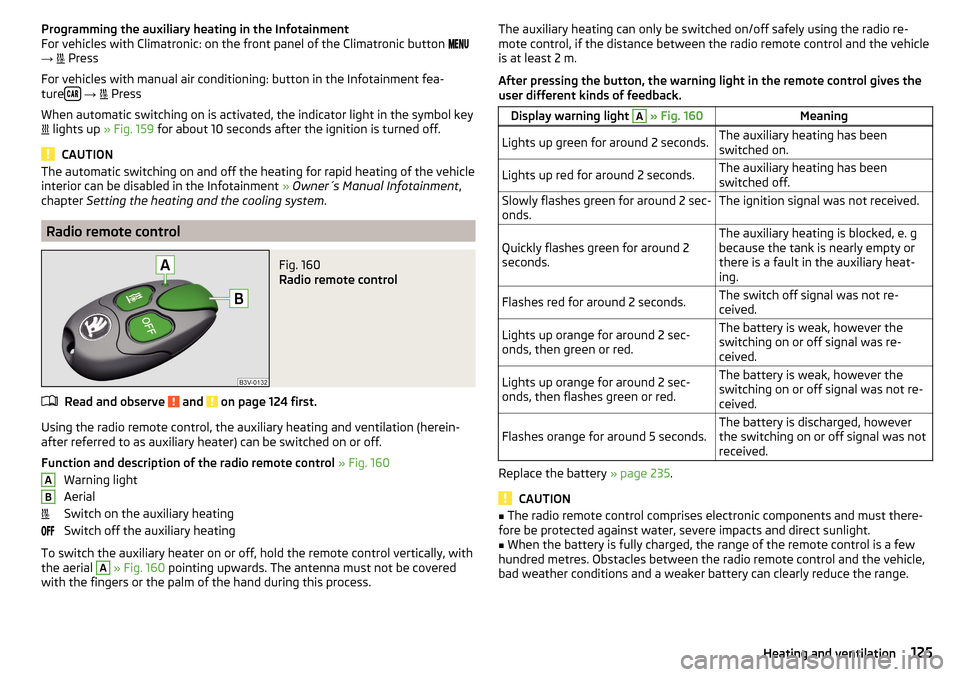
Fig. 160
Radio remote control
Read and observe and on page 124 first.
Using the radio remote control, the auxiliary heating and ventilation (herein-
after referred to as auxiliary heater) can be switched on or off.
Function and description of the radio remote control » Fig. 160
Warning light
Aerial
Switch on the auxiliary heating
Switch off the auxiliary heating
To switch the auxiliary heater on or off, hold the remote control vertically, with
the aerial
A
» Fig. 160 pointing upwards. The antenna must not be covered
with the fingers or the palm of the hand during this process.
ABThe auxiliary heating can only be switched on/off safely using the radio re-
mote control, if the distance between the radio remote control and the vehicle
is at least 2 m.
After pressing the button, the warning light in the remote control gives the
user different kinds of feedback.Display warning light A » Fig. 160MeaningLights up green for around 2 seconds.The auxiliary heating has been
switched on.Lights up red for around 2 seconds.The auxiliary heating has been
switched off.Slowly flashes green for around 2 sec-
onds.The ignition signal was not received.Quickly flashes green for around 2
seconds.The auxiliary heating is blocked, e. g
because the tank is nearly empty or
there is a fault in the auxiliary heat-
ing.Flashes red for around 2 seconds.The switch off signal was not re-
ceived.Lights up orange for around 2 sec-
onds, then green or red.The battery is weak, however the
switching on or off signal was re-
ceived.Lights up orange for around 2 sec-
onds, then flashes green or red.The battery is weak, however the
switching on or off signal was not re-
ceived.Flashes orange for around 5 seconds.The battery is discharged, however
the switching on or off signal was not
received.
Replace the battery » page 235.
CAUTION
■
The radio remote control comprises electronic components and must there-
fore be protected against water, severe impacts and direct sunlight.■
When the battery is fully charged, the range of the remote control is a few
hundred metres. Obstacles between the radio remote control and the vehicle,
bad weather conditions and a weaker battery can clearly reduce the range.
125Heating and ventilation