oil capacity SKODA SUPERB 2015 3.G / (B8/3V) Owner's Manual
[x] Cancel search | Manufacturer: SKODA, Model Year: 2015, Model line: SUPERB, Model: SKODA SUPERB 2015 3.G / (B8/3V)Pages: 276, PDF Size: 42.14 MB
Page 13 of 276

Seat belts
Using seat belts
Introduction
This chapter contains information on the following subjects:
The physical principle of a head-on collision
12
Correct routing of seat belt
12
Fastening and unfastening seat belts
13
Seat belts that are fastened correctly offer good protection in the event of an
accident. They reduce the risk of an injury and increase the chance of survival
in the event of a major accident.
Properly fastened seat belts hold occupants to correctly set seats in the right
seat position.
Particular safety aspects must be observed when transporting children in the
vehicle » page 20 .
WARNING■
Fasten your seat belt before each journey - even when driving in town!
This also applies to other passengers - there is a danger of injury!■
Maximum seat belt protection is only achieved if you are correctly seated
» page 8 , Correct and safe seated position .
■
The seat backrests of the front seats must not be tilted too far to the rear
otherwise the seatbelts can lose their effectiveness.
WARNINGInformation on the correct routing of the belt■Always ensure that the webbing of the seat belts is properly routed. Seat
belts which are not correctly adjusted can themselves cause injuries even
in minor accidents.■
Adjust the height of the belt in such a way that the shoulder part of the
belt is roughly positioned across the middle of your shoulder - on no ac-
count across your neck.
WARNING (Continued)■ A seat belt which is hanging too loose can result in injuries as your body is
moved forward by the kinetic energy produced in an accident and is then
suddenly held firm by the belt.■
The belt webbing must not run across solid or fragile objects (e.g. specta-
cles, ball-point pens, bunches of keys etc.). Such objects can cause injury.
WARNINGInformation on dealing with the safety belts■The belt webbing must not be jammed in-between at any point or twis-
ted, or chafe against any sharp edges.■
Make sure you do not catch the seat belt in the door when closing it.
WARNINGInformation on the proper use of safety belts■No two persons (also not children) should ever use a single seat belt to-
gether.■
The lock tongue should only be inserted into the lock which is the correct
one for your seat. Wrong use of the safety belt will reduce its capacity to
protect and the risk of injury increases.
■
The slot of the belt tongue must not be blocked, otherwise the belt
tongue will not lock in place properly.
■
Many layers of clothing and loose clothing (e. g. a winter coat over a jack-
et) do not allow you to be correctly seated and impairs proper operation of
the seat belts.
■
Do not use clamps or other objects to adjust seat belts (e.g. for shorten-
ing the belts for smaller persons).
■
The seat belts for the rear seats can only fulfil their function reliably
when the seat backrests are correctly locked into position » page 85.
WARNINGInformation on the care and maintenance of safety belts■The belt webbing must always be kept clean. Soiled belt webbing may im-
pair proper operation of the inertia reel » page 200.■
The seat belts must not be removed or changed in any way. Do not at-
tempt to repair the seat belts yourself.
11Seat belts
Page 45 of 276

OperationFig. 30
Buttons / dial: on the control lever / the multifunction steering
wheel
Read and observe
on page 42 first.
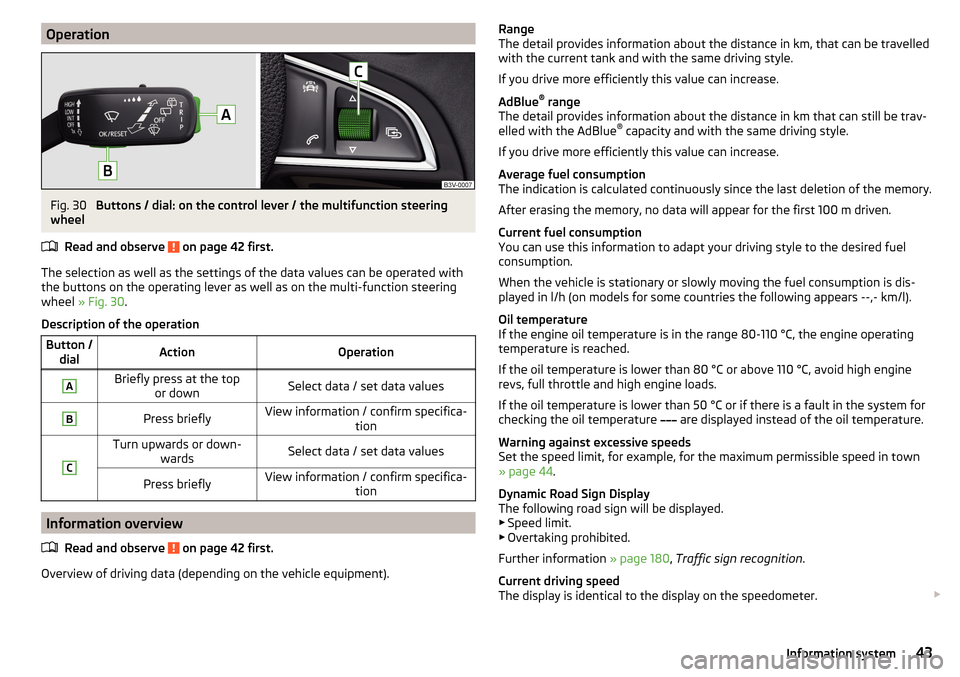
The selection as well as the settings of the data values can be operated with
the buttons on the operating lever as well as on the multi-function steering
wheel » Fig. 30 .
Description of the operation
Button / dialActionOperationABriefly press at the top or downSelect data / set data valuesBPress brieflyView information / confirm specifica- tionCTurn upwards or down-wardsSelect data / set data valuesPress brieflyView information / confirm specifica- tion
Information overview
Read and observe
on page 42 first.
Overview of driving data (depending on the vehicle equipment).
Range
The detail provides information about the distance in km, that can be travelled
with the current tank and with the same driving style.
If you drive more efficiently this value can increase.
AdBlue ®
range
The detail provides information about the distance in km that can still be trav-
elled with the AdBlue ®
capacity and with the same driving style.
If you drive more efficiently this value can increase.
Average fuel consumption
The indication is calculated continuously since the last deletion of the memory.
After erasing the memory, no data will appear for the first 100 m driven.
Current fuel consumption
You can use this information to adapt your driving style to the desired fuel
consumption.
When the vehicle is stationary or slowly moving the fuel consumption is dis-
played in l/h (on models for some countries the following appears --,- km/l).
Oil temperature
If the engine oil temperature is in the range 80-110 °C, the engine operating
temperature is reached.
If the oil temperature is lower than 80 °C or above 110 °C, avoid high engine
revs, full throttle and high engine loads.
If the oil temperature is lower than 50 °C or if there is a fault in the system for
checking the oil temperature are displayed instead of the oil temperature.
Warning against excessive speeds
Set the speed limit, for example, for the maximum permissible speed in town
» page 44 .
Dynamic Road Sign Display
The following road sign will be displayed. ▶ Speed limit.
▶ Overtaking prohibited.
Further information » page 180, Traffic sign recognition .
Current driving speed
The display is identical to the display on the speedometer. 43Information system
Page 90 of 276

Removing›Pull the head restraint out of the seat backrest as far as the stop.›
Press down the locking button
A
in the direction of arrow
1
» Fig. 84 , while
at the same time using a flat screwdriver with a max. width of 5 mm to press
the locking button in opening
B
in the direction of arrow
2
.
›
Remove the restraint in the direction of arrow
3
.
Fitting
›
Slide the restraint into the seat backrest in the direction of arrow
4
until the
locking button clicks into place.
CAUTION
Store the head restraints that were removed in such a way that they are not
damaged or soiled.
Seat heating and ventilation
Introduction
Fig. 85
Button arrangement: Heated front seats (and ventilation) / rear
seat heating
Fig. 86
Display of the front seat heating (and ventilation) with control
lamps
This chapter contains information on the following subjects:
Front seats with heating
89
Front seats with heating and ventilation
89
Rear seats with seat heating
90
The front seats can be heated depending on the equipment or heated and
ventilated.
Only the outboard rear seats can be heated.
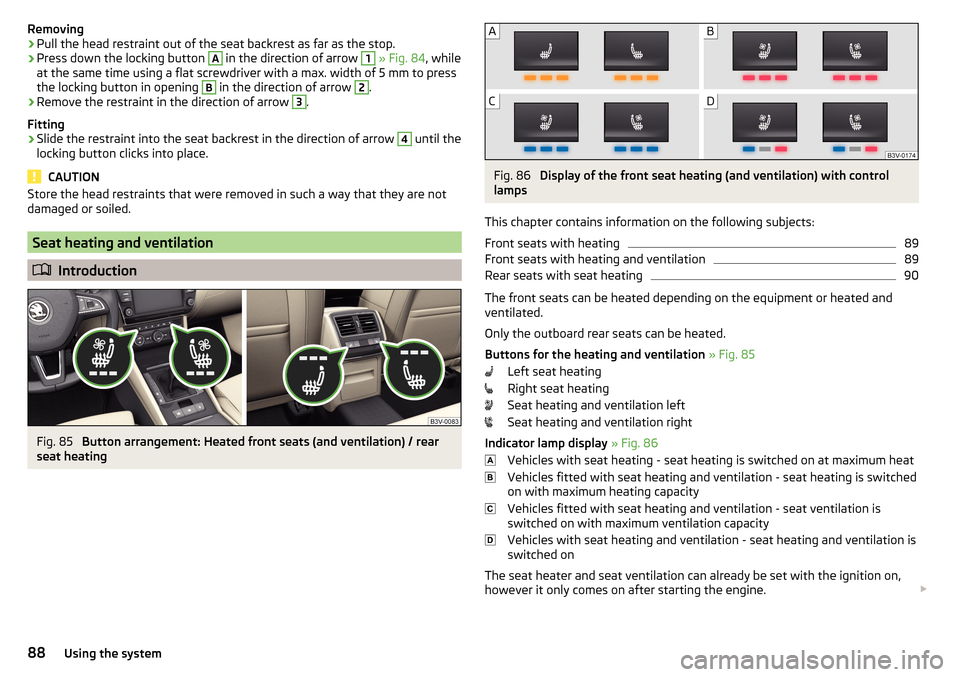
Buttons for the heating and ventilation » Fig. 85
Left seat heating
Right seat heating
Seat heating and ventilation left
Seat heating and ventilation right
Indicator lamp display » Fig. 86
Vehicles with seat heating - seat heating is switched on at maximum heat
Vehicles fitted with seat heating and ventilation - seat heating is switched
on with maximum heating capacity
Vehicles fitted with seat heating and ventilation - seat ventilation is
switched on with maximum ventilation capacity
Vehicles with seat heating and ventilation - seat heating and ventilation is
switched on
The seat heater and seat ventilation can already be set with the ignition on,
however it only comes on after starting the engine.
88Using the system
Page 210 of 276

Engine compartment overviewFig. 228
Principle sketch: Engine compartment
Read and observe
and on page 206 first.
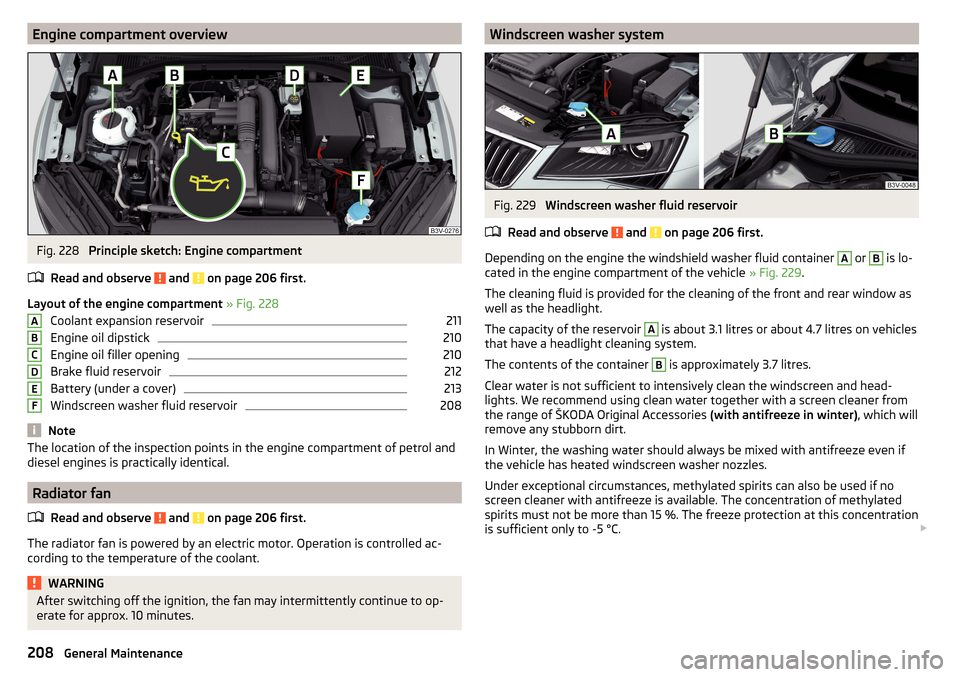
Layout of the engine compartment » Fig. 228
Coolant expansion reservoir
211
Engine oil dipstick
210
Engine oil filler opening
210
Brake fluid reservoir
212
Battery (under a cover)
213
Windscreen washer fluid reservoir
208
Note
The location of the inspection points in the engine compartment of petrol and
diesel engines is practically identical.
Radiator fan
Read and observe
and on page 206 first.
The radiator fan is powered by an electric motor. Operation is controlled ac-
cording to the temperature of the coolant.
WARNINGAfter switching off the ignition, the fan may intermittently continue to op-
erate for approx. 10 minutes.ABCDEFWindscreen washer systemFig. 229
Windscreen washer fluid reservoir
Read and observe
and on page 206 first.
Depending on the engine the windshield washer fluid container
A
or
B
is lo-
cated in the engine compartment of the vehicle » Fig. 229.
The cleaning fluid is provided for the cleaning of the front and rear window as
well as the headlight.
The capacity of the reservoir
A
is about 3.1 litres or about 4.7 litres on vehicles
that have a headlight cleaning system.
The contents of the container
B
is approximately 3.7 litres.
Clear water is not sufficient to intensively clean the windscreen and head-
lights. We recommend using clean water together with a screen cleaner from
the range of ŠKODA Original Accessories (with antifreeze in winter), which will
remove any stubborn dirt.
In Winter, the washing water should always be mixed with antifreeze even if
the vehicle has heated windscreen washer nozzles.
Under exceptional circumstances, methylated spirits can also be used if no
screen cleaner with antifreeze is available. The concentration of methylated
spirits must not be more than 15 %. The freeze protection at this concentration
is sufficient only to -5 °C.
208General Maintenance