turn signal SKODA SUPERB 2015 3.G / (B8/3V) Swing Infotinment Car Radio Manual
[x] Cancel search | Manufacturer: SKODA, Model Year: 2015, Model line: SUPERB, Model: SKODA SUPERB 2015 3.G / (B8/3V)Pages: 43, PDF Size: 4.7 MB
Page 15 of 43
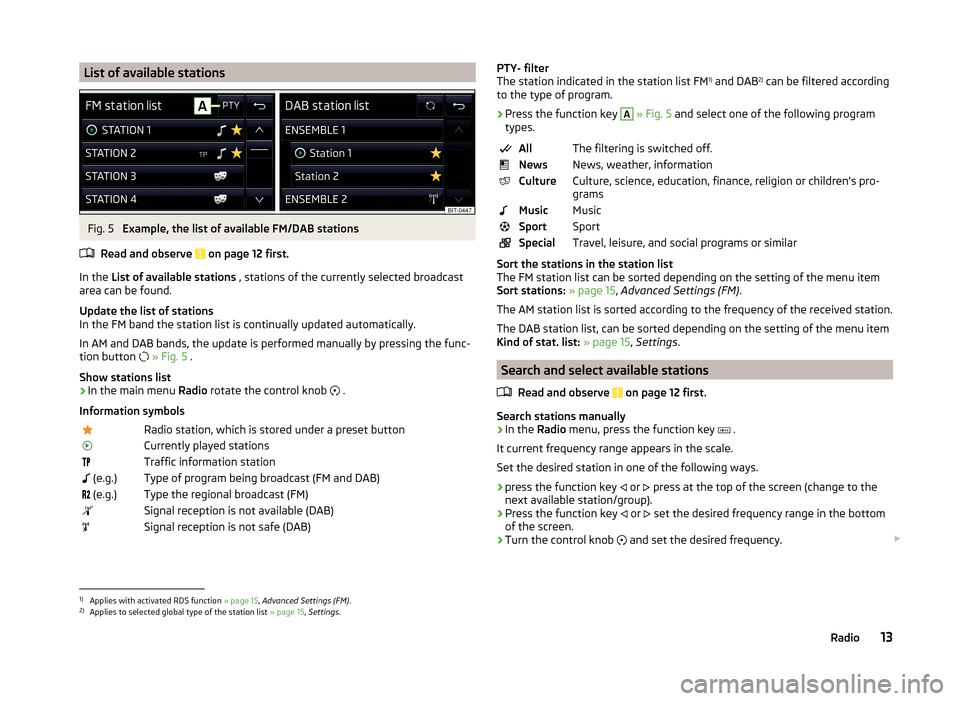
List of available stationsFig. 5
Example, the list of available FM/DAB stations
Read and observe
on page 12 first.
In the List of available stations , stations of the currently selected broadcast
area can be found.
Update the list of stations
In the FM band the station list is continually updated automatically.
In AM and DAB bands, the update is performed manually by pressing the func- tion button
» Fig. 5 .
Show stations list
›
In the main menu Radio rotate the control knob
.
Information symbols
Radio station, which is stored under a preset buttonCurrently played stationsTraffic information station (e.g.)Type of program being broadcast (FM and DAB) (e.g.)Type the regional broadcast (FM)Signal reception is not available (DAB)Signal reception is not safe (DAB)PTY- filter
The station indicated in the station list FM 1)
and DAB 2)
can be filtered according
to the type of program.
› Press the function key A
» Fig. 5 and select one of the following program
types.
AllThe filtering is switched off.NewsNews, weather, informationCultureCulture, science, education, finance, religion or children's pro-
gramsMusicMusicSportSportSpecialTravel, leisure, and social programs or similar
Sort the stations in the station list
The FM station list can be sorted depending on the setting of the menu item
Sort stations: » page 15 , Advanced Settings (FM) .
The AM station list is sorted according to the frequency of the received station. The DAB station list, can be sorted depending on the setting of the menu item
Kind of stat. list: » page 15 , Settings .
Search and select available stations
Read and observe
on page 12 first.
Search stations manually
›
In the Radio menu, press the function key
.
It current frequency range appears in the scale.
Set the desired station in one of the following ways.
›
press the function key or
press at the top of the screen (change to the
next available station/group).
›
Press the function key or
set the desired frequency range in the bottom
of the screen.
›
Turn the control knob and set the desired frequency.
1)
Applies with activated RDS function
» page 15, Advanced Settings (FM) .
2)
Applies to selected global type of the station list » page 15, Settings .
13Radio
Page 16 of 43
›Move the slider on the scale of the frequency range by touching with the fin-
ger.
Close the menu for manual search by pressing the controller
.
Select station from the list of available stations›
In the Radio menu, press the function key
or
press the top of the screen.
or
›
In the menu Radio press the control knob
.
The list of available stations opens.
›
Select the desired connection station.
Playback available stations (Scan)
›
In the menu Radio press the control knob
.
The search is started.
This function plays all the available stations in succession for a few seconds
each.
By pressing the control again the search is completed and the current sta-
tion remains set.
Store preferred station
Read and observe
on page 12 first.
For each broadcasting range there are 12 preset buttons to store the preferred
stations. These preset buttons are divided into three memory groups.
A station can be stored in the device memory in one of the following ways.
Store station from the Radio menu
›
In the menu Radio select a station and hold the desired station button
C
» Fig. 4 on page 12 until you hear an acoustic signal.
If a station was already stored in the desired position it is replaced with the
currently selected station.
Save station from the station list
›
In the list of available stations » page 13 hold the function key of the desired
station.
›
Select a storage group.
›
Press the station button.
Station logos
Read and observe
on page 12 first.
The station key of a preferred station can contain the name and the station
logo.
Assign station logo manually
›
In the Radio menu, press the function key
→ Station logos .
›
Press the preset button for the station, which a logo is to be assigned to.
A menu of media (SD card, USB) is displayed.
›
In the relevant media select the logo you want to have.
Remove station logo
›
In the Radio menu, press the function key
→ Station logos .
›
Press the preset button for the station, which a logo is to be removed from.
or
›
Press the button
All to delete the logos of all the station buttons simulta-
neously.
›
Confirm / cancel the removal.
Note
■ The following image formats are supported: jpg, gif, png, bmp.■We recommend a resolution of up to 500 x 500 pixels.
TP Traffic programme
Read and observe
on page 12 first.
The function allows the reception of traffic information.
Switching on/off
›
In the Radio menu, press the function key
.
›
Enable or disable the menu item
Traffic program (TP).
Current traffic reports
During a traffic announcement, the following menu is displayed.
›
Cancel - Interruption of the current traffic report, the TP function remains ac-
tive
›
Deactivate - Interrupt the current traffic report and turn off TP function
14Radio
Page 24 of 43
Telephone
Introductory information
Introduction
This chapter contains information on the following subjects:
Telephone
22
Settings
22
Function problems
23
This chapter covers the operation of a Bluetooth ®
device connected to the tel-
ephone.
If a telephone is connected to the device with multiple SIM cards, then calls
can be accepted by all SIM cards of the connected phone.
For outgoing calls, it depends on the type of connected telephone, either only
the primary SIM card or one of the other SIM cards can be selected.
WARNINGThe national legal regulations for using a mobile phone in a vehicle must be
observed.
Telephone
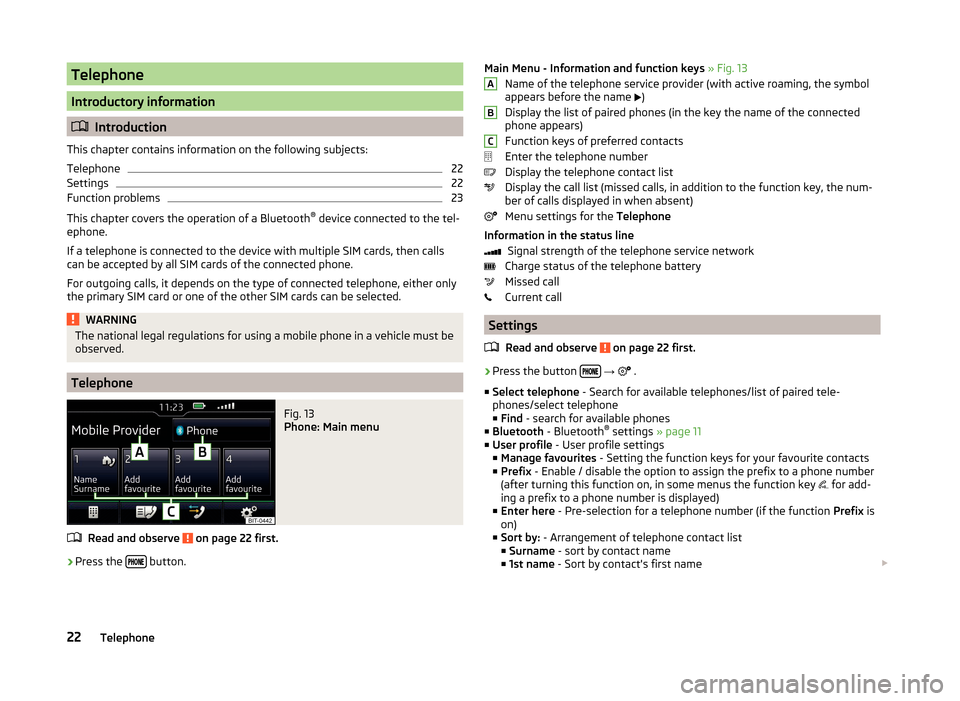
Fig. 13
Phone: Main menu
Read and observe on page 22 first.
›
Press the button.
Main Menu - Information and function keys
» Fig. 13
Name of the telephone service provider (with active roaming, the symbol
appears before the name
)
Display the list of paired phones (in the key the name of the connected
phone appears)
Function keys of preferred contacts
Enter the telephone number
Display the telephone contact list
Display the call list (missed calls, in addition to the function key, the num-
ber of calls displayed in when absent)
Menu settings for the Telephone
Information in the status line Signal strength of the telephone service network
Charge status of the telephone battery
Missed call
Current call
Settings
Read and observe
on page 22 first.
›
Press the button
→
.
■ Select telephone - Search for available telephones/list of paired tele-
phones/select telephone ■ Find - search for available phones
■ Bluetooth - Bluetooth ®
settings » page 11
■ User profile - User profile settings
■ Manage favourites - Setting the function keys for your favourite contacts
■ Prefix - Enable / disable the option to assign the prefix to a phone number
(after turning this function on, in some menus the function key for add-
ing a prefix to a phone number is displayed)
■ Enter here - Pre-selection for a telephone number (if the function Prefix is
on)
■ Sort by: - Arrangement of telephone contact list
■ Surname - sort by contact name
■ 1st name - Sort by contact's first name
ABC22Telephone
Page 25 of 43
■Imp. contacts - Import telephone contacts
■ Select ringtone - Selecting the ring tone
■ Remember your mobile - Turn on/off the warning mode before forgetting
the phone in the vehicle (if the phone was connected to the device)
Function problems
Read and observe
on page 22 first.
If there are problems with the availability of the mobile network or with theBluetooth ®
function, one of the following messages may appear on the device
screen.
MessageMeaningNet. search…The phone scans for available wire-
less networks.
No network
The telephone has no connection to a
mobile network, it may not support
sending information on the network
state.
Rejected
The telephone service provider has
rejected the connection (e.g. not
enough mobile telephone credit, SIM
card blocked, roaming not available).To use the Bluetooth function,
please switch on the ignition.Switch-on the ignition.Please switch on Bluetooth.Switch on the Bluetooth ®
function on
the device.Please connect a mobile telephone.Find telephone and connect to the
device.Telephone not available.A problem with the Bluetooth ®
unit in
the device, consult a specialist.Telephone is currently unavailable.Unknown
(Name of the telephone service pro-
vider)The telephone did not provide any in-
formation regarding the telephone
service provider.Pair and connect
Introduction
This chapter contains information on the following subjects:
conditions for pairing
23
Telephone search
24
Coupling - no telephone connected
24
Coupling - a telephone connection
24
Coupling from the telephone
24
Pairing confirmation
25
Administering paired devices
25
To connect a telephone with the device, the two devices must be paired via
Bluetooth ®
.
The pairing process is dependent on whether another telephone is connected
or not connected to the device at the time of pairing.
A connection with a telephone that is already paired does not require pairing.
It is enough to find the telephone that has been paired in the list of paired
phones and make the connection.
Note
■ The range of the connection to the hands-free system is limited to the pas-
senger compartment.■
The maximum number of paired phones is 20. Pairing a new telephone after
reaching the maximum number causes the telephone that has not been paired
for the longest time to be automatically replaced.
conditions for pairing
The telephone can be paired with the device under the following conditions. The ignition is switched on.
The Bluetooth ®
function of the device » page 11 and the telephone is
switched on.
The visibility of the device » page 11 and the telephone is switched on.
The telephone is within range of the Bluetooth ®
signal of the device.
The telephone is compatible with the device.
The pairing can be initiated from the device or from the telephone.
23Telephone
Page 33 of 43
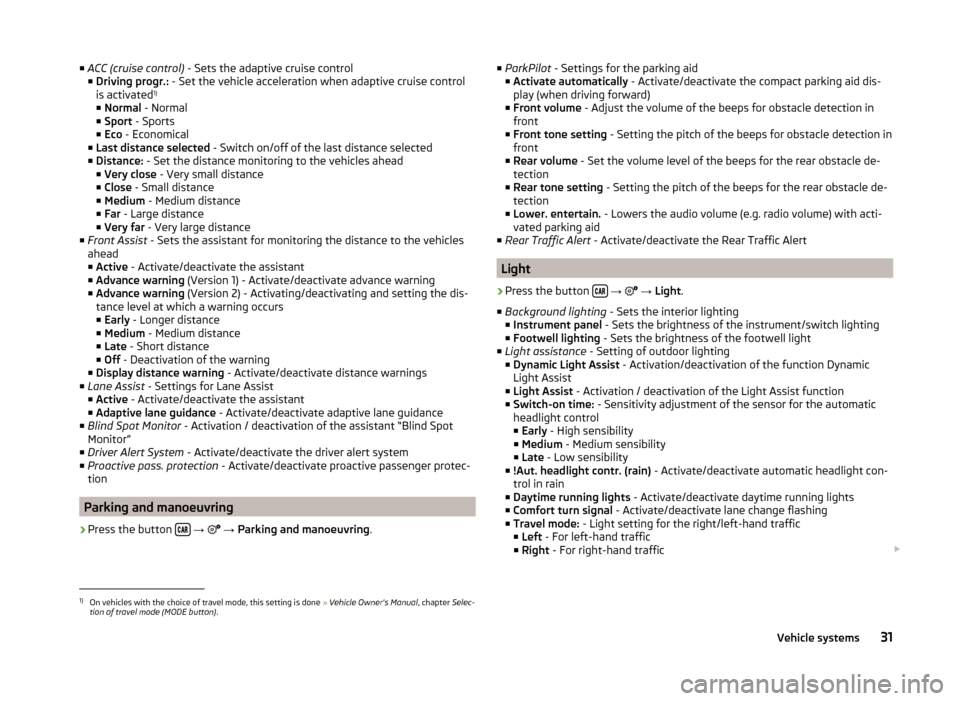
■ACC (cruise control) - Sets the adaptive cruise control
■ Driving progr.: - Set the vehicle acceleration when adaptive cruise control
is activated 1)
■ Normal - Normal
■ Sport - Sports
■ Eco - Economical
■ Last distance selected - Switch on/off of the last distance selected
■ Distance: - Set the distance monitoring to the vehicles ahead
■ Very close - Very small distance
■ Close - Small distance
■ Medium - Medium distance
■ Far - Large distance
■ Very far - Very large distance
■ Front Assist - Sets the assistant for monitoring the distance to the vehicles
ahead
■ Active - Activate/deactivate the assistant
■ Advance warning (Version 1) - Activate/deactivate advance warning
■ Advance warning (Version 2) - Activating/deactivating and setting the dis-
tance level at which a warning occurs
■ Early - Longer distance
■ Medium - Medium distance
■ Late - Short distance
■ Off - Deactivation of the warning
■ Display distance warning - Activate/deactivate distance warnings
■ Lane Assist - Settings for Lane Assist
■ Active - Activate/deactivate the assistant
■ Adaptive lane guidance - Activate/deactivate adaptive lane guidance
■ Blind Spot Monitor - Activation / deactivation of the assistant “Blind Spot
Monitor”
■ Driver Alert System - Activate/deactivate the driver alert system
■ Proactive pass. protection - Activate/deactivate proactive passenger protec-
tion
Parking and manoeuvring
›
Press the button
→
→ Parking and manoeuvring .
■
ParkPilot - Settings for the parking aid
■ Activate automatically - Activate/deactivate the compact parking aid dis-
play (when driving forward)
■ Front volume - Adjust the volume of the beeps for obstacle detection in
front
■ Front tone setting - Setting the pitch of the beeps for obstacle detection in
front
■ Rear volume - Set the volume level of the beeps for the rear obstacle de-
tection
■ Rear tone setting - Setting the pitch of the beeps for the rear obstacle de-
tection
■ Lower. entertain. - Lowers the audio volume (e.g. radio volume) with acti-
vated parking aid
■ Rear Traffic Alert - Activate/deactivate the Rear Traffic Alert
Light
›
Press the button
→
→ Light .
■ Background lighting - Sets the interior lighting
■ Instrument panel - Sets the brightness of the instrument/switch lighting
■ Footwell lighting - Sets the brightness of the footwell light
■ Light assistance - Setting of outdoor lighting
■ Dynamic Light Assist - Activation/deactivation of the function Dynamic
Light Assist
■ Light Assist - Activation / deactivation of the Light Assist function
■ Switch-on time: - Sensitivity adjustment of the sensor for the automatic
headlight control
■ Early - High sensibility
■ Medium - Medium sensibility
■ Late - Low sensibility
■ !Aut. headlight contr. (rain) - Activate/deactivate automatic headlight con-
trol in rain
■ Daytime running lights - Activate/deactivate daytime running lights
■ Comfort turn signal - Activate/deactivate lane change flashing
■ Travel mode: - Light setting for the right/left-hand traffic
■ Left - For left-hand traffic
■ Right - For right-hand traffic
1)
On vehicles with the choice of travel mode, this setting is done
» Vehicle Owner's Manual , chapter Selec-
tion of travel mode (MODE button) .
31Vehicle systems