phone SKODA SUPERB 2016 3.G / (B8/3V) Columbus Amundsen Bolero Infotainment System Navigation Manual
[x] Cancel search | Manufacturer: SKODA, Model Year: 2016, Model line: SUPERB, Model: SKODA SUPERB 2016 3.G / (B8/3V)Pages: 100, PDF Size: 12.8 MB
Page 56 of 100
SmartLink
Introductory information
Introduction to the subject
Fig. 54
QR code with reference to the
ŠKODA websites
Read in the QR code » Fig. 54using the respective application on your external
device orenter the following address in the web browser to open the website
with information on the SmartLink communication system.
http://go.skoda.eu/connectivity-smartlink
SmartLink offers the ability to display certified applications on an external de-
vice equipped with a USB device on the device screen and to operate them.
SmartLink supports the following communication systems. ▶ Android Auto ™
▶ Apple CarPlay ™
▶ MirrorLink ®
Using the applications in the connected external device it is possible to use
the navigation, to make a call, to listen to music.
For reasons of safety, the operation of some applications while driving is limi-
ted or not possible.
Depending on model of the connected external device, some applications can
be started using the voice activation, via the device screen, using the operat-
ing elements on the device or using the buttons on the multi-function steering
wheel.
The voice control of the connected external device can be activated by holding
the button
or holding the button
on the multifunction steering wheel.
CAUTION■
Depending on the type of the connected external device and the frequency
of use, the charging current may not be sufficient to charge the battery of the
connected device.■
To establish the connection, it is necessary that the date and time in the de-
vice are set correctly. If the date and time setting is based on the GPS signal,
then problems may arise with establishing a connection with a poor GPS signal
reception.
Note
■ During the connection process, information messages may be displayed on
the device screen, and in the phone display. These messages must be ob-
served and confirmed if necessary (e.g. Release of data transfer, enabling the
contact import, release of text messages).■
We recommend that you use extension cords from ŠKODA Original Accesso-
ries.
■
With some connected devices, it is necessary that the connected external
device is unlocked over the entire duration of the connection for trouble-free
functioning of the SmartLink function“”.
Main menu
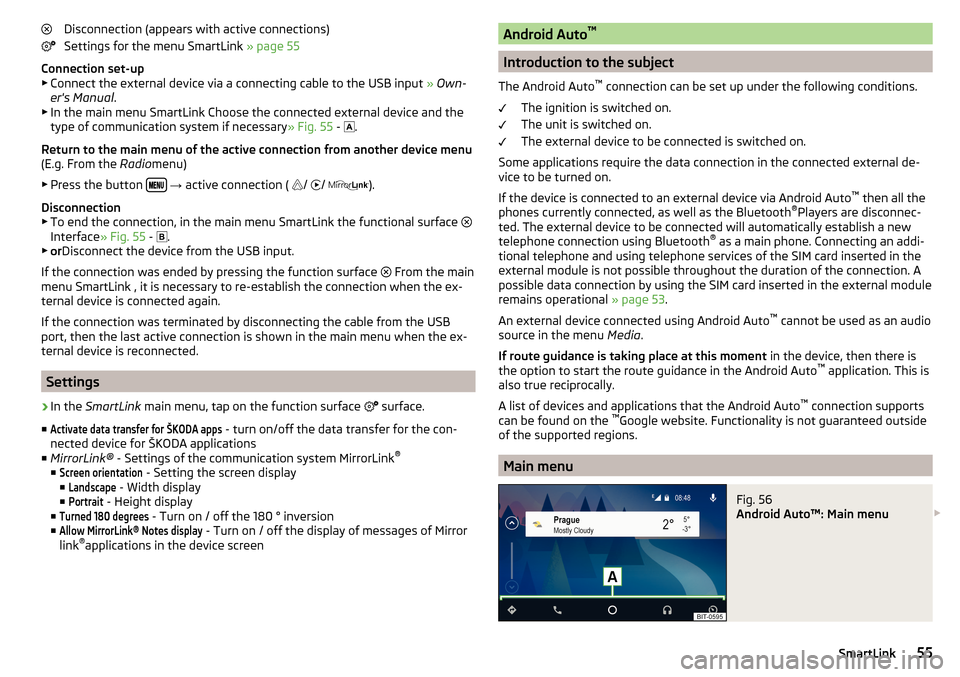
Fig. 55
Main menu: no connection / example of an active connection
›
To display the main menu SmartLinkpress the button , then the function-
al surface
surface.
Main menu - functional surfaces » Fig. 55
Active connection
Display of information about SmartLink
A54SmartLink
Page 57 of 100
Disconnection (appears with active connections)
Settings for the menu SmartLink » page 55
Connection set-up ▶ Connect the external device via a connecting cable to the USB input » Own-
er's Manual .
▶ In the main menu SmartLink Choose the connected external device and the
type of communication system if necessary » Fig. 55 -
.
Return to the main menu of the active connection from another device menu
(E.g. From the Radiomenu)
▶ Press the button
→ active connection (
/
/
).
Disconnection
▶ To end the connection, in the main menu SmartLink the functional surface
Interface » Fig. 55 -
.
▶ or Disconnect the device from the USB input.
If the connection was ended by pressing the function surface From the main
menu SmartLink , it is necessary to re-establish the connection when the ex-
ternal device is connected again.
If the connection was terminated by disconnecting the cable from the USB
port, then the last active connection is shown in the main menu when the ex-
ternal device is reconnected.
Settings
›
In the SmartLink main menu, tap on the function surface
surface.
■
Activate data transfer for ŠKODA apps
- turn on/off the data transfer for the con-
nected device for ŠKODA applications
■ MirrorLink® - Settings of the communication system MirrorLink ®
■
Screen orientation
- Setting the screen display
■
Landscape
- Width display
■
Portrait
- Height display
■
Turned 180 degrees
- Turn on / off the 180 ° inversion
■
Allow MirrorLink® Notes display
- Turn on / off the display of messages of Mirror
link ®
applications in the device screen
Android Auto ™
Introduction to the subject
The Android Auto ™
connection can be set up under the following conditions.
The ignition is switched on.
The unit is switched on.
The external device to be connected is switched on.
Some applications require the data connection in the connected external de-
vice to be turned on.
If the device is connected to an external device via Android Auto ™
then all the
phones currently connected, as well as the Bluetooth ®
Players are disconnec-
ted. The external device to be connected will automatically establish a new
telephone connection using Bluetooth ®
as a main phone. Connecting an addi-
tional telephone and using telephone services of the SIM card inserted in the
external module is not possible throughout the duration of the connection. A
possible data connection by using the SIM card inserted in the external module
remains operational » page 53.
An external device connected using Android Auto ™
cannot be used as an audio
source in the menu Media.
If route guidance is taking place at this moment in the device, then there is
the option to start the route guidance in the Android Auto ™
application. This is
also true reciprocally.
A list of devices and applications that the Android Auto ™
connection supports
can be found on the ™
Google website. Functionality is not guaranteed outside
of the supported regions.
Main menu
Fig. 56
Android Auto™: Main menu
55SmartLink
Page 58 of 100
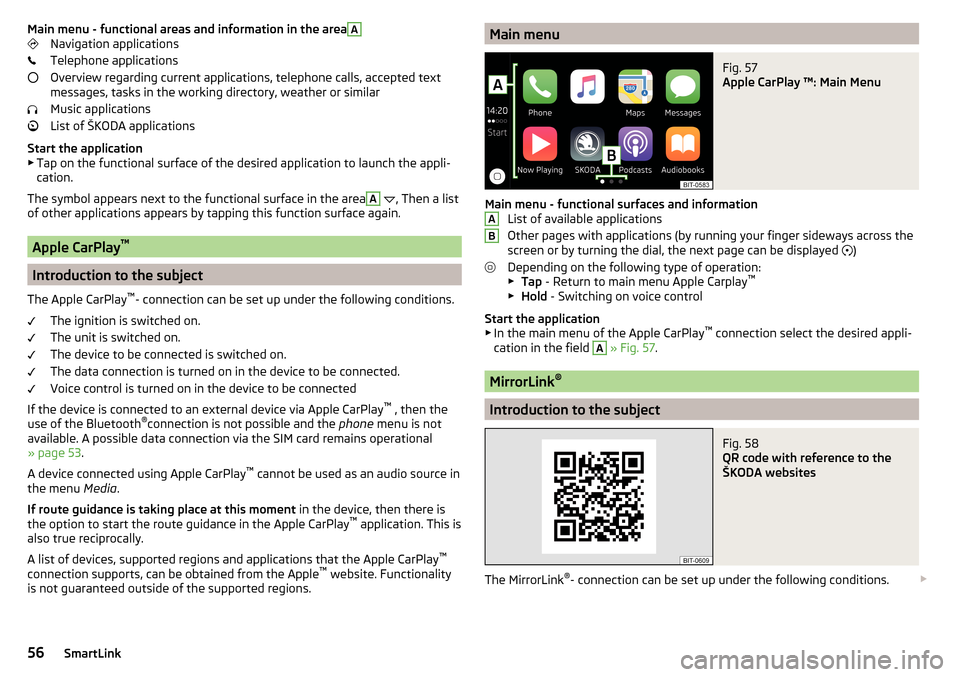
Main menu - functional areas and information in the areaANavigation applications
Telephone applications
Overview regarding current applications, telephone calls, accepted text
messages, tasks in the working directory, weather or similar
Music applications
List of ŠKODA applications
Start the application ▶ Tap on the functional surface of the desired application to launch the appli-
cation.
The symbol appears next to the functional surface in the areaA
, Then a list
of other applications appears by tapping this function surface again.
Apple CarPlay ™
Introduction to the subject
The Apple CarPlay ™
- connection can be set up under the following conditions.
The ignition is switched on.
The unit is switched on.
The device to be connected is switched on.
The data connection is turned on in the device to be connected.
Voice control is turned on in the device to be connected
If the device is connected to an external device via Apple CarPlay ™
, then the
use of the Bluetooth ®
connection is not possible and the phone menu is not
available. A possible data connection via the SIM card remains operational
» page 53 .
A device connected using Apple CarPlay ™
cannot be used as an audio source in
the menu Media.
If route guidance is taking place at this moment in the device, then there is
the option to start the route guidance in the Apple CarPlay ™
application. This is
also true reciprocally.
A list of devices, supported regions and applications that the Apple CarPlay ™
connection supports, can be obtained from the Apple ™
website. Functionality
is not guaranteed outside of the supported regions.
Main menuFig. 57
Apple CarPlay ™: Main Menu
Main menu - functional surfaces and information List of available applications
Other pages with applications (by running your finger sideways across the
screen or by turning the dial, the next page can be displayed )
Depending on the following type of operation: ▶ Tap - Return to main menu Apple Carplay ™
▶ Hold - Switching on voice control
Start the application ▶ In the main menu of the Apple CarPlay ™
connection select the desired appli-
cation in the field
A
» Fig. 57 .
MirrorLink ®
Introduction to the subject
Fig. 58
QR code with reference to the
ŠKODA websites
The MirrorLink ®
- connection can be set up under the following conditions.
AB56SmartLink
Page 59 of 100
The ignition is switched on.
The unit is switched on.
The external device to be connected is switched on.
Some applications require the data connection in the connected external de-
vice to be turned on.
If you want to use the menu Telephone, then before establishing the
MirrorLink ®
connection with the telephone then connect the device first via
Bluetooth ®
.
An external device connected using MirrorLink ®
cannot be used as an audio
source in the menu Media.
If route guidance is taking place at this moment using the device, then this is
not terminated by starting the route guidance in the MirrorLink ®
- application.
Read in the QR code » Fig. 58using the respective application on your external
device (e.g. Telephone, tablet) orenter the following address in the web
browser to open the website with supported Mirrorlink ®
applications.
http://go.skoda.eu/connectivity
Main menu
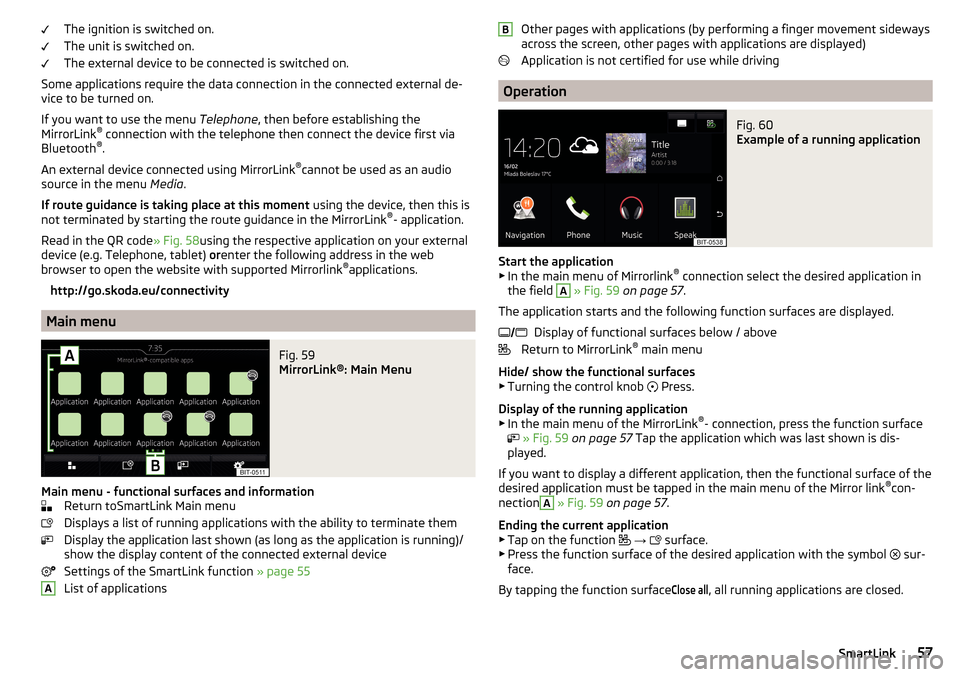
Fig. 59
MirrorLink®: Main Menu
Main menu - functional surfaces and information Return toSmartLink Main menu
Displays a list of running applications with the ability to terminate them
Display the application last shown (as long as the application is running)/
show the display content of the connected external device
Settings of the SmartLink function » page 55
List of applications
AOther pages with applications (by performing a finger movement sideways
across the screen, other pages with applications are displayed)
Application is not certified for use while driving
Operation
Fig. 60
Example of a running application
Start the application ▶ In the main menu of Mirrorlink ®
connection select the desired application in
the field
A
» Fig. 59 on page 57 .
The application starts and the following function surfaces are displayed. Display of functional surfaces below / above
Return to MirrorLink ®
main menu
Hide/ show the functional surfaces ▶ Turning the control knob Press.
Display of the running application
▶ In the main menu of the MirrorLink ®
- connection, press the function surface
» Fig. 59 on page 57 Tap the application which was last shown is dis-
played.
If you want to display a different application, then the functional surface of the
desired application must be tapped in the main menu of the Mirror link ®
con-
nection
A
» Fig. 59 on page 57 .
Ending the current application
▶ Tap on the function
→
surface.
▶ Press the function surface of the desired application with the symbol sur-
face.
By tapping the function surface
Close all
, all running applications are closed.
B 57SmartLink
Page 65 of 100
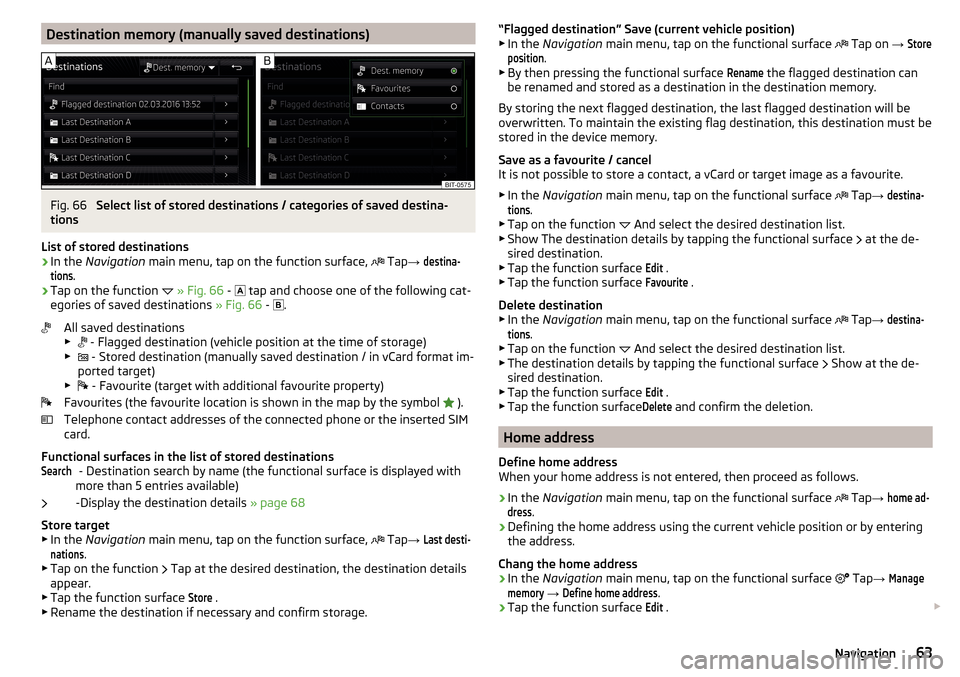
Destination memory (manually saved destinations)Fig. 66
Select list of stored destinations / categories of saved destina-
tions
List of stored destinations
›
In the Navigation main menu, tap on the function surface,
Tap
→
destina-tions
.
›
Tap on the function
» Fig. 66 -
tap and choose one of the following cat-
egories of saved destinations » Fig. 66 -
.
All saved destinations
▶ - Flagged destination (vehicle position at the time of storage)
▶ - Stored destination (manually saved destination / in vCard format im-
ported target)
▶ - Favourite (target with additional favourite property)
Favourites (the favourite location is shown in the map by the symbol ).
Telephone contact addresses of the connected phone or the inserted SIM
card.
Functional surfaces in the list of stored destinations - Destination search by name (the functional surface is displayed with
more than 5 entries available)
-Display the destination details » page 68
Store target ▶ In the Navigation main menu, tap on the function surface,
Tap
→
Last desti-nations
.
▶ Tap on the function Tap at the desired destination, the destination details
appear.
▶ Tap the function surface
Store
.
▶ Rename the destination if necessary and confirm storage.
Search“Flagged destination” Save (current vehicle position)
▶ In the Navigation main menu, tap on the functional surface Tap on → Storeposition
.
▶ By then pressing the functional surface
Rename
the flagged destination can
be renamed and stored as a destination in the destination memory.
By storing the next flagged destination, the last flagged destination will be
overwritten. To maintain the existing flag destination, this destination must be
stored in the device memory.
Save as a favourite / cancel
It is not possible to store a contact, a vCard or target image as a favourite.
▶ In the Navigation main menu, tap on the functional surface
Tap
→
destina-tions
.
▶ Tap on the function And select the desired destination list.
▶ Show The destination details by tapping the functional surface at the de-
sired destination.
▶ Tap the function surface
Edit
.
▶ Tap the function surface
Favourite
.
Delete destination ▶ In the Navigation main menu, tap on the functional surface
Tap
→
destina-tions
.
▶ Tap on the function And select the desired destination list.
▶ The destination details by tapping the functional surface Show at the de-
sired destination.
▶ Tap the function surface
Edit
.
▶ Tap the function surface
Delete
and confirm the deletion.
Home address
Define home address
When your home address is not entered, then proceed as follows.
›
In the Navigation main menu, tap on the functional surface
Tap
→
home ad-dress
.
›
Defining the home address using the current vehicle position or by entering
the address.
Chang the home address
›
In the Navigation main menu, tap on the functional surface
Tap
→
Managememory
→
Define home address
.
›
Tap the function surface
Edit
.
63Navigation
Page 66 of 100
›Edit the home address or set one up using the current vehicle position or by
entering the address.
Delete home address›
In the Navigation main menu, tap on the functional surface
Tap →
Managememory
→
Delete user data
→
Home address
.
›
Tap the function surface
Delete
and confirm the deletion.
Import my destinations
Introduction to the subject
Fig. 67
QR code with reference to the
ŠKODA websites
In this chapter, destinations are described which can be imported into the de-
vice memory.
Custom destinations can be created by means of the ŠKODA application
“MyDestination”.
Read in the QR code » Fig. 67using the respective application on your external
device (e.g. Telephone, tablet) orAfter entering the following address in the
web browser more information on the “MyDestination” application will be dis-
played.
http://go.skoda.eu/my-destination
Custom destination in vCard-format
In the device memory, a custom destination can be imported in the vCard for-
mat (*.vcf) from an SD card or a USB source.
Import
›
Insert an SD card into the external module or in the device (applies to Yeti) or
connect a USB source to your own destination file.
› In the
Navigation main menu, tap on the functional surface Tap → Managememory
→
Import objectives (SD / USB)
.›
Select the source and confirm the import.
Route guidance
›
In the Navigation main menu, tap on the functional surface
→
Destinations
→
→
surface.
›
Search for and select the desired imported destination.
Delete own destination
›
In the Navigation main menu, tap on the functional surface
→
Destinations
→
→
surface.
›
Tap on the function
Tap on the desired own destination.
›
In the destination details, tap the functional surface
Edit
→
Delete
and confirm
the deletion.
Own POI categories (My POIs)
Import / update
›
Insert an SD card with POI categories into the external module or into the
device (applies to Yeti).
›
In the Navigation main menu, tap on the functional surface
Tap
→
UpdateMy POIs (SD / USB)
→
Update
.
›
Select the source and confirm the import.
If there is already the same POI category name in the device, then it will be
overwritten during import.
Show own category destinations in the map
›
In the Navigation main menu, tap on the functional surface
Tap
→
Map
→
Select categories for POIs
→
My points of interest (Personal POI)
.
Clear all own POI categories
›
In the Navigation main menu, tap on the functional surface
Tap
→
Managememory
→
Delete my POIs
.
›
Tap the function surface
Delete
and confirm the deletion.
Image with GPS coordinates
The device enables the guidance to the GPScoordinate data stored in the im-
age.
The image can be obtained from an external device in which GPS coordinates
are stored when creating an image. If necessary, this can be created and im-
ported in the “MyDestination” application.
64Navigation
Page 70 of 100
›Press the
button, then tap on the function
Tap → driver assistance →
Traffic Sign Recognition → Speed warning:
.
For trailer towing We recommend that you activate the detection of trailer-re-
lated traffic signs.›
Press the button, then tap on the function
Tap →
driver assistance
→
Trailer detection →
Show Traffic Signs relevant to trailers
.
Route guidance
Introduction to the subject
A route is created by starting route guidance to a destination. Additional inter-
mediate destinations can be added to the route.
The route guidance takes place as follows
▶ Through graphical driving instructions in the device display screen and in the
display of the instrument cluster.
▶ With navigation announcements.
The unit tries to allow for continued guidance even if the navigation data is in-
complete or there is no data at all for the given area.
The route is recalculated each time if you ignore driving recommendations or change the route.
CAUTION
The navigation announcements provided may vary from the actual situations,
e.g. due to out-of-date navigation data.
Destination details
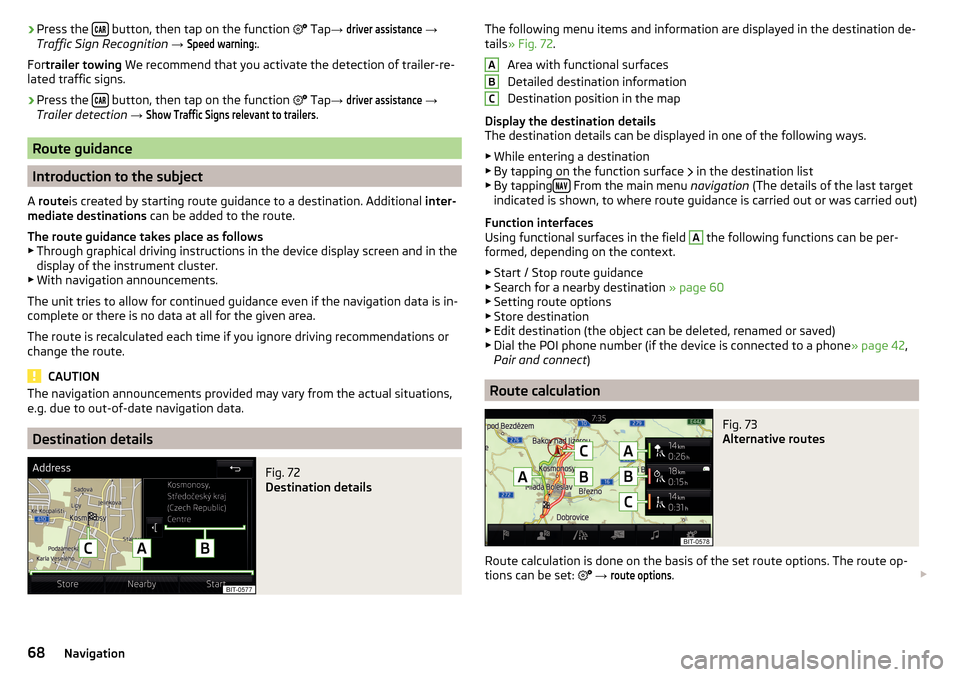
Fig. 72
Destination details
The following menu items and information are displayed in the destination de-
tails » Fig. 72 .
Area with functional surfaces
Detailed destination information
Destination position in the map
Display the destination details
The destination details can be displayed in one of the following ways.
▶ While entering a destination
▶ By tapping on the function surface
in the destination list
▶ By tapping
From the main menu
navigation (The details of the last target
indicated is shown, to where route guidance is carried out or was carried out)
Function interfaces
Using functional surfaces in the field
A
the following functions can be per-
formed, depending on the context.
▶ Start / Stop route guidance
▶ Search for a nearby destination » page 60
▶ Setting route options
▶ Store destination
▶ Edit destination (the object can be deleted, renamed or saved)
▶ Dial the POI phone number (if the device is connected to a phone » page 42,
Pair and connect )
Route calculation
Fig. 73
Alternative routes
Route calculation is done on the basis of the set route options. The route op-
tions can be set:
→
route options
.
ABC68Navigation
Page 78 of 100
Remove traffic obstruction
The traffic obstruction is removed from the route after completion of the route
guidance or can manually be removed as follows.›
In the Navigation main menu, tap on the functional surface
Tap
→
Cancel"congest. ahead"
.
Settings
Route options
›
In the Navigation main menu, tap on the functional surface
Tap →
route op-tions
.
■
Suggest 3 alternative routes
- Switch on/off the menu for alternative routes (eco-
nomical, fast, short)
■
Route:
- Setting the preferred route
■
Most frequent routes
- Show/hide the menu of the most frequent routes in the
split screen
■
Dynamic route
- Switch on/off dynamic route recalculation due to TMC traffic
reports
■
Avoid motorways
- Switch on/off the non-use of motorways in the route cal-
culation
■
Avoid ferries and motorail trains
- Switch on/off the non-use of ferries and mo-
torail trains in the route calculation
■
Avoid toll roads
- Switch on/off use of toll roads for the route calculation
■
Avoid tunnels
- Switch on/off use of tunnels for the route calculation
■
Avoid routes requiring toll stickers
- Switch use of routes requiring toll stickers
on/off for route calculation
■
Show available toll stickers
- Selection of countries for which a valid toll sticker is
required (routes requiring toll stickers are used for route calculation)
■
Consider trailer
- Turn on / off the option to take the trailer into account for
route calculation » page 69
Map
›
In the Navigation main menu, tap on the functional surface
Tap
→
map
.
■
Show road signs
- Switch on/off the display of traffic signs
■
Lane guidance
- Display of lane guidance on/off
■
Show favourites
- Switch on/off the display of favourites
■Show POIs - Switch on/off the display of POIs
■Select Interest categories
- Selection of the displayed category POIs
■
Show brands for POIs
- Switch on/off the company logos available for the POIs
shown
Manage memory
›
In the Navigation main menu, tap on the functional surface
Tap →
Managememory
.
■
Sort Contacts:
- Setting the arrangement of the phonebook
■
Surname
- Sorting by the contact surname
■
By first name
- Sorting by the contact first name
■
Define home address
- Enter the home address
■
Delete My POIs
- Deleting own POI categories (Personal POI)
■
Update My POIs (SD / USB)
- Import / update your own POI categories (Personal
POI)
■
Import objectives (SD / USB)
- Import destinations in vCard format
■
Delete User Data
- Delete user data (by pressing the function surface
Delete
and
confirm the deletion) ■
Last destinations
- Delete the last destinations
■
Dest. memory
- Delete the stored destinations
■
Routes
- Delete saved routes
■
My points of interest (Personal POI)
- Delete the custom POIs
■
Entered cities
- Delete the history of places already entered via the address
■
Home address
- Delete the stored home address
■
Flagged destination
- Delete the flagged destination
■
Waypoints
- Deleting the points in Waypoint points (Applies to Columbus)
■
Most frequent routes
- Deletion of the most travelled routes
Navigation announcements
›
In the Navigation main menu, tap on the functional surface
Tap
→
naviga-tion announcements
.
■
Volume
- Volume control of the navigation announcements
■
Entertainment fading (nav. announce.)
- Setting the fading of the audio volume (e.g.
radio volume.) with navigation announcements
■
Nav. announcements:
- Sets the type of the nav. announcements
■
Comprehensive
- All navigation announcements
■
Brief
- Short navigation announcements
■
Only in the event of issues
- Only navigation announcements when a route is
changed
76Navigation
Page 79 of 100
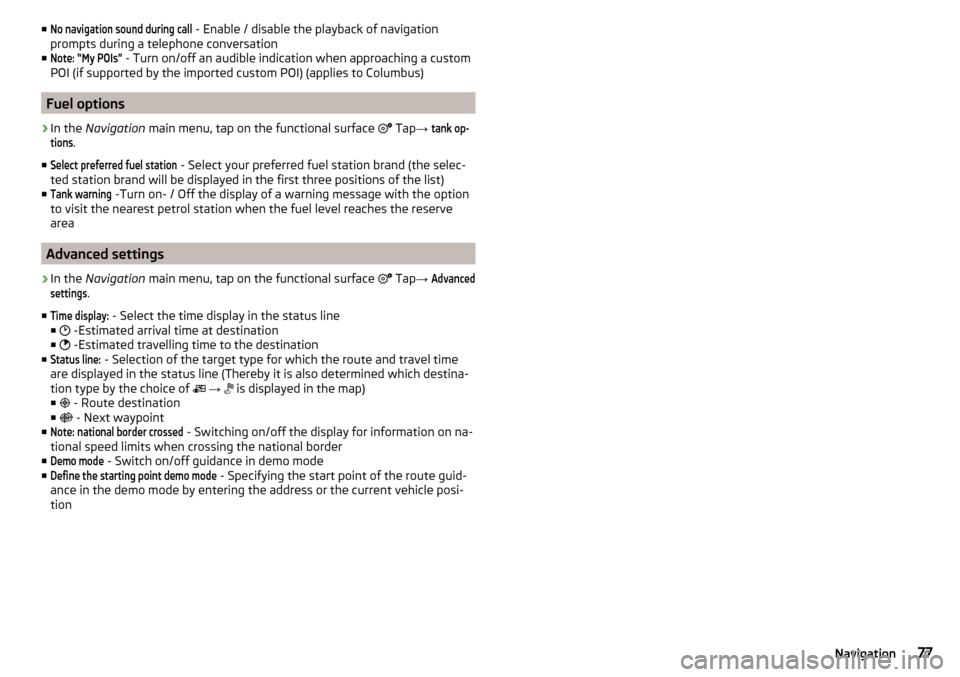
■No navigation sound during call - Enable / disable the playback of navigation
prompts during a telephone conversation
■Note: “My POIs”
- Turn on/off an audible indication when approaching a custom
POI (if supported by the imported custom POI) (applies to Columbus)
Fuel options
›
In the Navigation main menu, tap on the functional surface
Tap →
tank op-tions
.
■
Select preferred fuel station
- Select your preferred fuel station brand (the selec-
ted station brand will be displayed in the first three positions of the list)
■
Tank warning
-Turn on- / Off the display of a warning message with the option
to visit the nearest petrol station when the fuel level reaches the reserve
area
Advanced settings
›
In the Navigation main menu, tap on the functional surface
Tap
→
Advancedsettings
.
■
Time display:
- Select the time display in the status line
■ -Estimated arrival time at destination
■ -Estimated travelling time to the destination
■
Status line:
- Selection of the target type for which the route and travel time
are displayed in the status line (Thereby it is also determined which destina-
tion type by the choice of
→
is displayed in the map)
■ - Route destination
■ - Next waypoint
■
Note: national border crossed
- Switching on/off the display for information on na-
tional speed limits when crossing the national border
■
Demo mode
- Switch on/off guidance in demo mode
■
Define the starting point demo mode
- Specifying the start point of the route guid-
ance in the demo mode by entering the address or the current vehicle posi-
tion
77Navigation
Page 88 of 100
Saved destination63
Telephone contact63
vCard63
Destination details68
Destination management Destination details
68
Favourite68
Storage68
Destination memory63
Detail of the traffic report75
device Restart
11
Device connect to the telephone
42
Software update11
Device Description - Amundsen8
Device Description - Columbus7
Device Hotspot52
Device language18
Device menu CAR
78
Media Command36
Media (Audio)24
Media (video)32
Navigation59
Phone39
Radio21
Sound17
TV tuner34
Device Menu Pictures
31
SmartLink54
Device operation12
Device screen12
Device operation using an application in the ex- ternal device
14
device screen keyboard
13
Device screen17
Areas12
Important information10
Maintenance10
Operation12
Disclaimer6
Diverting calls41
Door locking81
Doors-Operation81
Door unlocking81
DriveGreen79
Driver Assistance80
Driving abroad - light79
Driving data Display
78
Power on/off82
DVD27
DVD-Video Select video source
32
DVD video Main menu
32
Menu33
DVD video menu33
Dynamic Road Sign Display80
Dynamic route switch on / off
75
E
Easy Open
81
Eco Tips - Multi-function display82
Edit route70
Elevation59
Emergency call46
Enter destination address
61
Destination on the map62
EPG TV tuner
35
Equalizer17
ESC sport79
ESC system79
external device data transfer18
External devices6
External module CD / DVD
27
SD card28
SIM card45
Video DVD32
F
Factory settings
82
Fatigue detection80
Favourite63, 68
file formats media
30
Requirements and Restrictions30
File formats Pictures
32
Video DVD33
Finish route guidance70
Flagged destination63
FM21
Settings23
Front Assist80
Fuel options77
Function surfaces12
G
Gas station
62
GPS59
Graphical driving recommendations69
H
Headlight range control
79
Heated windscreen83
Heating82, 83
High beam79
86Index