CD player SKODA SUPERB 2016 3.G / (B8/3V) Columbus Amundsen Bolero Infotainment System Navigation Manual
[x] Cancel search | Manufacturer: SKODA, Model Year: 2016, Model line: SUPERB, Model: SKODA SUPERB 2016 3.G / (B8/3V)Pages: 100, PDF Size: 12.8 MB
Page 4 of 100
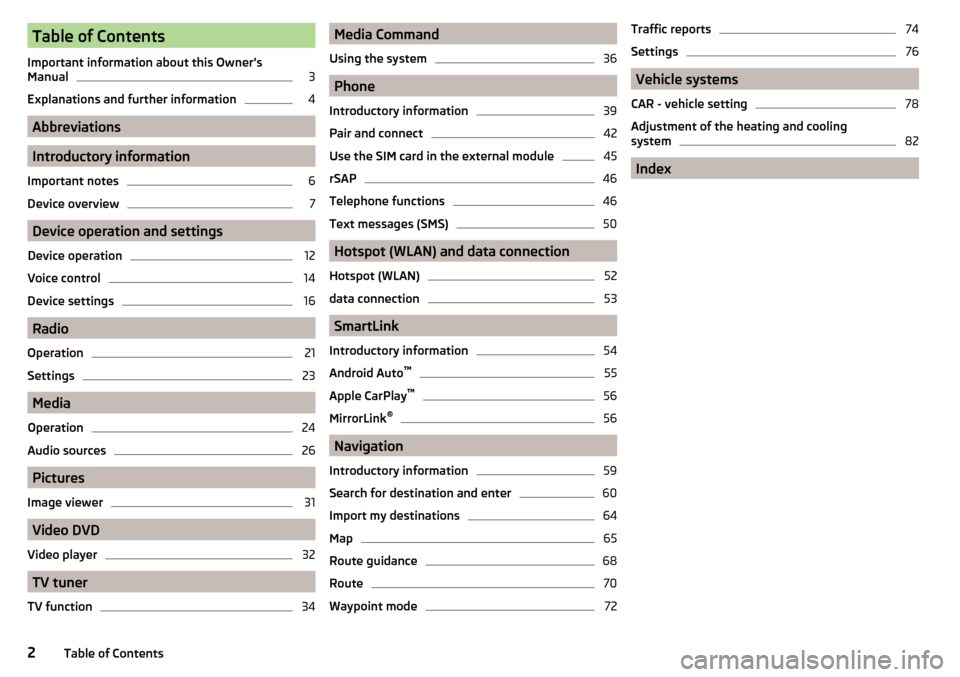
Table of Contents
Important information about this Owner's
Manual3
Explanations and further information
4
Abbreviations
Introductory information
Important notes
6
Device overview
7
Device operation and settings
Device operation
12
Voice control
14
Device settings
16
Radio
Operation
21
Settings
23
Media
Operation
24
Audio sources
26
Pictures
Image viewer
31
Video DVD
Video player
32
TV tuner
TV function
34Media Command
Using the system36
Phone
Introductory information
39
Pair and connect
42
Use the SIM card in the external module
45
rSAP
46
Telephone functions
46
Text messages (SMS)
50
Hotspot (WLAN) and data connection
Hotspot (WLAN)
52
data connection
53
SmartLink
Introductory information
54
Android Auto ™
55
Apple CarPlay ™
56
MirrorLink®
56
Navigation
Introductory information
59
Search for destination and enter
60
Import my destinations
64
Map
65
Route guidance
68
Route
70
Waypoint mode
72Traffic reports74
Settings
76
Vehicle systems
CAR - vehicle setting
78
Adjustment of the heating and cooling system
82
Index
2Table of Contents
Page 5 of 100
Important information about this Owner's Manual
This manual is valid for all types of Columbus, Amundsen and Bolero infotain-
ment systems (hereafter only known as devices). The device may differ de-
pending on the vehicle model, in which it is installed in both its appearance
and in the arrangement of the controls.
This Owner's Manual describes all possible device functions without identify-
ing them as special equipment, model variants or market-dependent equip-
ment. Consequently, the device in your vehicle does not need to contain all of
the functions described in this Owner's Manual.
For example, if the vehicle is not factory equipped with the CANTON sound
system, the menu points
CANTON Optimisation
,
CANTON Surround
and
CANTON Equalis-er
are not shown.
The availability of some features described in this Owner's Manual depends
on the type of external devices (for example, telephone, music player, etc.).
The illustrations in this Owner's Manual are for illustrative purposes only. The
illustrations can differ in minor details from your vehicle; they are only inten-
ded to provide general information.
ŠKODA AUTO pursues a policy of ongoing product and model development
with all vehicles. Therefore, changes to the scope of delivery with regard to
design, equipment and technology are possible at any time. The information
provided in this Owner's Manual corresponds to the information available at
the time of publishing.
Therefore, legal claims cannot be made based on the technical data, illustra-
tions and information contained in this Owner's Manual.
We recommend that the web pages that are referred to in this Owner's Man-
ual are displayed using the classic view. Not all necessary information may be
displayed correctly if the mobile view is chosen.
Screen texts that appear in this Owner's Manual may differ slightly depending
on the texts show on the device screen.
Information and System Support
Information e.g. related to updating the device software, compatible external
devices etc., Please refer to the following websites.
http://go.skoda.eu/infotainment
Declaration of conformity
ŠKODA AUTO hereby declares that the ŠKODA Infotainment systems meet the
basic requirements and additional provisions of the 1999/5/EC Directive with
reference to radio equipment and telecommunications devices.3Important information about this Owner's Manual
Page 21 of 100
Bluetooth®
Settings›
Press the button, then tap on the function surface
→ Tap
Bluetooth
.
■
Bluetooth
- Switch on/off Bluetooth ®
function
■
Visibility:
- switch on/off the visibility of the Bluetooth ®
device for other exter-
nal devices
■
Name:
- Changing the name of the Bluetooth ®
unit
■
Paired devices
- display the list of paired Bluetooth ®
devices
■
Find devices
- searches for available devices
■
Bluetooth audio (A2DP/AVRCP)
- Turn on/off the ability to connect an audio device
(e.g. MP3 player, tablet etc.)
Settings
›
Press the button, then tap on the function surface
→ Tap
network
.
■
Network settings
- Setting of the data connection according to the associated
telephone service provider (APN settings)
■
Access point name: ...
- Setting of the access point name
■
User name: …
- Setting of user name
■
Password: ...
- Password setting
■
Authentication
- Setting for the type of verification
■
Normal
- Without verification
■
Safe
- Verification required
■
Reset Access Point (APN)
- Delete the parameters for the network setting
■
Save
- Store the parameters for the network setting
■
Network provider: ...
- Selection of the data service provider (the menu item is
visible when the data services are active in the SIM card inserted in the ex-
ternal module)
■
Data roaming
- Enable / disable the use of data roaming connection
■
Current connection details
- Display of information on data downloaded (by press-
ing the function key
Reset
the data information is deleted)
■
Data connection:
- Data service settings for the SIM card inserted in the external
module
■
Off
- Data services are turned off
■
Inquire
- Data services are actively seeking confirmation
■
On
- Data services are turned on
Wireless settings
Applies to Columbus, Amundsen (not applicable to Yeti).›
Press the button, then tap on the function surface
Tap →
WLAN
.
■
WLAN
- List of available hotspots of external devices
■
WLAN
- Turn on / off the device wireless
■
WPS Quick Connect (WPS button)
- Establishing a secure connection to the hot-
spot of the external device via WPS (applies to Amundsen)
■
Manual settings
- Setting the parameters for search and connection to the
hotspot of the external device ■
Network name
- Enter the Hotspot name
■
Network key
- Setting the access password
■
Security level:
- Adjustment of the coverage
■
WPA2
- WPA2 security
■
WPA
- WPA security
■
No security level
- No coverage (without required entry of the access pass-
word)
■
Connect
- Connection establishment
■
Search
- Search / Restore the list of available hotspots
■
Mobile hotspot
- Setting device hotspots (in the functional surface the symbol
is displayed with the number of connected external devices)
■
Mobile hotspot
- Turn on / off device hotspots
■
WPS Quick Connect (WPS button)
- Establishing a secure connection to the de-
vice via WPS hotspot (applies to Amundsen)
■
Hotspot settings
- Setting the parameters for the connection to the device
hotspot
■
Security level:
- Setting the connection coverage
■
WPA2
- WPA2 security
■
WPA
- WPA security
■
No security level
- No coverage (without required entry of the access pass-
word)
■
Network key
- Entering the access password
■
SSID: ...
- Name of the device hotspot
■
Do not send network name (SSID)
-Switch WLAN hotspot security on/off
■
Storage
- Storage of the device hotspot parameters
System information
›
Press the button, then tap on the function surface
Tap
→
system infor-mation
.
19Device operation and settings
Page 29 of 100
CAUTION■Do not save any important data or that which has not been backed up on the
connected audio sources. ŠKODA assumes no responsibility for lost or dam-
aged files or connected audio sources.■
When changing or connecting an audio source, this may cause sudden
changes in volume. Reduce the volume before changing or connecting an au-
dio source.
■
When connecting an external audio source, the external source information
messages can be displayed. These messages must be observed and if neces-
sary confirmed (e.g. enabling data transfer etc).
Note
The national copyright laws that apply in your country must be observed.
Jukebox
Applies to Columbus.
In the Jukebox (in the unit's internal memory), supported audio / video files can
be imported from the connected audio sources.
Import files
›
Tap on the function
Tap →
Manage jukebox
→
Import
.
›
Select the desired source.
›
Select the desired folders or files.
›
Tap on the function
surface.
Delete files
›
Tap on the function
Tap →
Manage jukebox
→
Delete
.
›
Select the desired folder or files in the selected category.
›
Tap on the function
Tap →
Delete
.
Show level of the device memory
›
Tap on the function
Tap
Manage jukebox
.
It displays information about the occupied and free space on the device mem-
ory and the number of files that can not be imported.
Note
■ Files that have already been copied are recognized and cannot be copied
again (shown in grey).■
It is not possible to copy files while simultaneously playing back audio or vid-
eo files in the CD/DVD drive.
CD / DVD
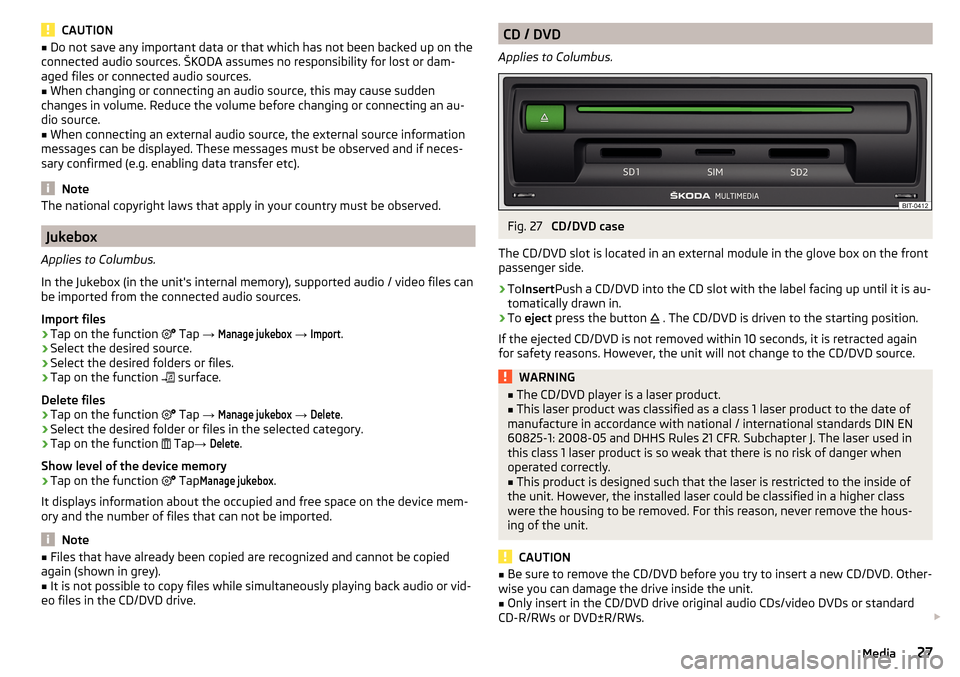
Applies to Columbus.Fig. 27
CD/DVD case
The CD/DVD slot is located in an external module in the glove box on the front
passenger side.
›
To Insert Push a CD/DVD into the CD slot with the label facing up until it is au-
tomatically drawn in.
›
To eject press the button
. The CD/DVD is driven to the starting position.
If the ejected CD/DVD is not removed within 10 seconds, it is retracted again
for safety reasons. However, the unit will not change to the CD/DVD source.
WARNING■ The CD/DVD player is a laser product.■This laser product was classified as a class 1 laser product to the date of
manufacture in accordance with national / international standards DIN EN 60825-1: 2008-05 and DHHS Rules 21 CFR. Subchapter J. The laser used in
this class 1 laser product is so weak that there is no risk of danger when
operated correctly.■
This product is designed such that the laser is restricted to the inside of
the unit. However, the installed laser could be classified in a higher class
were the housing to be removed. For this reason, never remove the hous-
ing of the unit.
CAUTION
■ Be sure to remove the CD/DVD before you try to insert a new CD/DVD. Other-
wise you can damage the drive inside the unit.■
Only insert in the CD/DVD drive original audio CDs/video DVDs or standard
CD-R/RWs or DVD±R/RWs.
27Media
Page 31 of 100
AUX - input
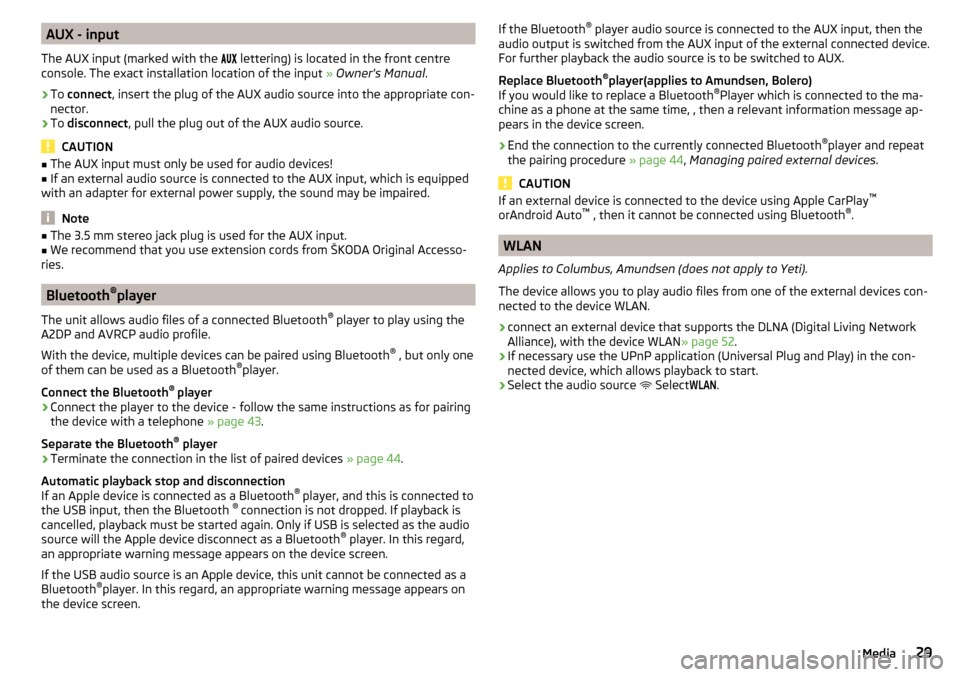
The AUX input (marked with the
lettering) is located in the front centre
console. The exact installation location of the input » Owner's Manual .›
To connect , insert the plug of the AUX audio source into the appropriate con-
nector.
›
To disconnect , pull the plug out of the AUX audio source.
CAUTION
■
The AUX input must only be used for audio devices!■If an external audio source is connected to the AUX input, which is equipped
with an adapter for external power supply, the sound may be impaired.
Note
■ The 3.5 mm stereo jack plug is used for the AUX input.■We recommend that you use extension cords from ŠKODA Original Accesso-
ries.
Bluetooth ®
player
The unit allows audio files of a connected Bluetooth ®
player to play using the
A2DP and AVRCP audio profile.
With the device, multiple devices can be paired using Bluetooth ®
, but only one
of them can be used as a Bluetooth ®
player.
Connect the Bluetooth ®
player
›
Connect the player to the device - follow the same instructions as for pairing
the device with a telephone » page 43.
Separate the Bluetooth ®
player
›
Terminate the connection in the list of paired devices » page 44.
Automatic playback stop and disconnection
If an Apple device is connected as a Bluetooth ®
player, and this is connected to
the USB input, then the Bluetooth ®
connection is not dropped. If playback is
cancelled, playback must be started again. Only if USB is selected as the audio
source will the Apple device disconnect as a Bluetooth ®
player. In this regard,
an appropriate warning message appears on the device screen.
If the USB audio source is an Apple device, this unit cannot be connected as a
Bluetooth ®
player. In this regard, an appropriate warning message appears on
the device screen.
If the Bluetooth ®
player audio source is connected to the AUX input, then the
audio output is switched from the AUX input of the external connected device.
For further playback the audio source is to be switched to AUX.
Replace Bluetooth ®
player(applies to Amundsen, Bolero)
If you would like to replace a Bluetooth ®
Player which is connected to the ma-
chine as a phone at the same time, , then a relevant information message ap-
pears in the device screen.›
End the connection to the currently connected Bluetooth ®
player and repeat
the pairing procedure » page 44, Managing paired external devices .
CAUTION
If an external device is connected to the device using Apple CarPlay ™
orAndroid Auto ™
, then it cannot be connected using Bluetooth ®
.
WLAN
Applies to Columbus, Amundsen (does not apply to Yeti).
The device allows you to play audio files from one of the external devices con-
nected to the device WLAN.
›
connect an external device that supports the DLNA (Digital Living Network
Alliance), with the device WLAN » page 52.
›
If necessary use the UPnP application (Universal Plug and Play) in the con-
nected device, which allows playback to start.
›
Select the audio source Select
WLAN
.
29Media
Page 34 of 100
Supported image file formats and sources
Supported image sourcesSourceTypeSpecificationfile systemSD cardStandard sizeSD, SDHC, SDXCFAT16 VFAT
FAT32
exFAT NTFS
USB devicesUSB stick;
HDD (without
special software)USB 1.x; 2.x and
3.x or higher with support of USB 2.xCD / DVD (Applies
to Columbus)CD-R / RW (Up to 700 MB);
DVD±R/RWISO9660;
Joliet (Level 1,2,3); UDF 1.x;UDF 2.x
-
Supported file formats
Codec type
(File formats)File suffixMax. resolution (Megapixels)BMPbmp4JP (E) Gjpg; jpeg4; 64GIFgif4PNGpng4
Note
■ The max. supported image size is 20 MB.■The GPT standards (GUID partition table) method structured image sources
are not supported by the device.
Settings
›
In the images main menu, tap on the function surface
surface.
■
Image view:
- Image view settings
■
Full
- Display the maximum image size while retaining the aspect ratio
■
Automatic
- Full screen display
■
Display time:
- Set the display time for the slideshow
■
Repeat slide show
- Switching on/off the slideshow repeat
Video DVD
Video player
Main menu
Applies to Columbus.
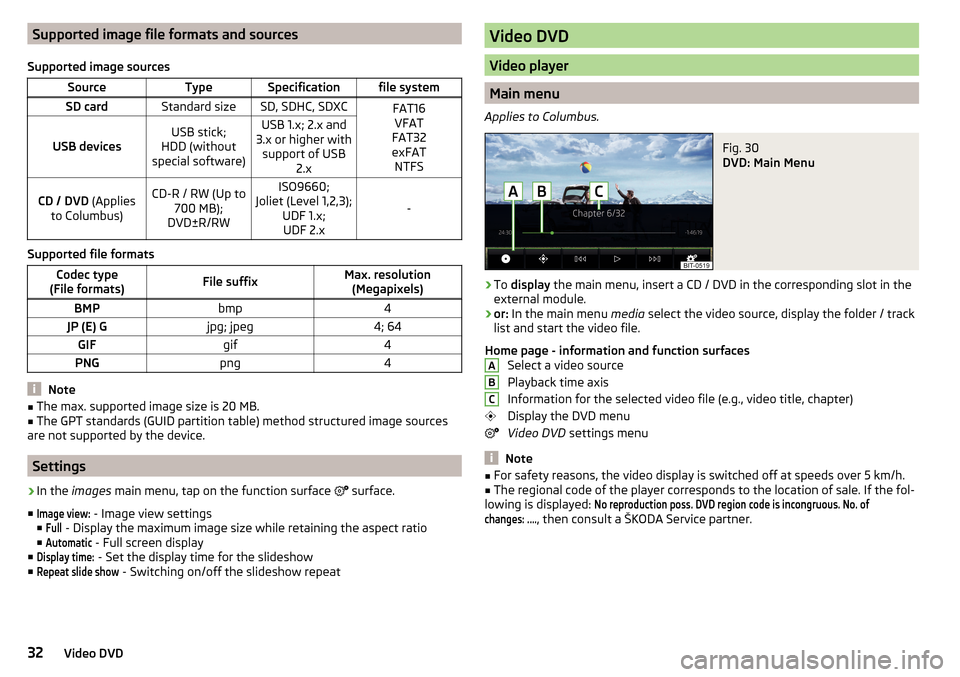
Fig. 30
DVD: Main Menu
›
To display the main menu, insert a CD / DVD in the corresponding slot in the
external module.
›
or: In the main menu media select the video source, display the folder / track
list and start the video file.
Home page - information and function surfaces Select a video source
Playback time axis
Information for the selected video file (e.g., video title, chapter)
Display the DVD menu
Video DVD settings menu
Note
■
For safety reasons, the video display is switched off at speeds over 5 km/h.■The regional code of the player corresponds to the location of sale. If the fol-
lowing is displayed:
No reproduction poss. DVD region code is incongruous. No. ofchanges: ....
, then consult a ŠKODA Service partner.
ABC32Video DVD
Page 41 of 100
Phone
Introductory information
Introduction to the subject
This chapter deals with the operation of a device with the telephone connec- ted via Bluetooth ®
as well as the use of the SIM-card in the external module.
Depending on the Bluetooth ®
-profile used it is possible to connect to a tele-
phone or two phones simultaneously to the device.
The SIM card in the external module can be used for data and telephone serv-
ices (applies to Columbus).
If telephones are connected to the device with multiple SIM cards, then calls
can be accepted by all SIM cards of the connected telephones.
For outgoing calls, it depends on the type of connected telephone, either only
the primary SIM card or one of the other SIM cards can be selected.
The device makes it possible to choose if you want to work with text messag-
es on the main phone (if supported by phone), or work with text messages in-
serted in the external module.
If the device to is connected to an external device via Apple CarPlay ™
, then the
use of the Bluetooth ®
Connection is not possible and the phone menu is not
available. A possible data connection via the SIM card remains operational
» page 53 .
If the device is connected to an external device via Android Auto ™
then the
connected phones and the Bluetooth ®
player are automatically disconnected
by connecting to external device and it connects to the device via Bluetooth ®
.
Connecting an additional telephone and the use of telephone services on the
SIM card via Android Auto ™
is not possible over the duration of the connection.
If the Bluetooth ®
Feature was not turned on in external device to be connec-
ted, it will be automatically switched on usingAndroid Auto ™
switched when
setting up the connection. A possible data connection via the SIM card remains
operational » page 53.
Phonebox
The storage compartment in the front centre console can be equipped with
the Phonebox function » Owner's Manual .
If a telephone is directed, with its rear side downwards, on the pad in the stor-
age compartment, the phone signal is amplified by the roof antenna.
Telephones that support the Qi standard for wireless charging, can also be charged wirelessly in the storage compartment.WARNINGThe general binding country-specific regulations for operating mobile
phones in the vehicle must be observed.WARNINGWhile wireless charging is taking place, no objects may be between the pad
and the telephone being charged.■
Metal objects can become hot due to the action of the induction field -
There is a risk of injury. If there is a metal object in the storage compart-
ment that has become hot, then take out the telephone and let the object
cool in the storage compartment!
CAUTION
While wireless charging is taking place, there may be noobjects between the
pad and the telephone being charged - thePhoneboxFunction could be im-
paired.■
With cards with a magnetic strip or chip, SD card, USB flash drives and similar
devices, there is a risk of data loss and damage to the disk.
■
Metal objects can become hot due to the action of the induction field - there
is a risk of damage to the telephone.
Note
■ At the start of the wireless charging, the appropriate message appears on
the device screen.■
For optimum telephone signal strength and uninterrupted wireless charging,
we recommend placing the phone in the storage compartment without the
protective sleeve, if possible.
■
It is normal for the telephone to heat up during the wireless charging.
39Phone
Page 42 of 100
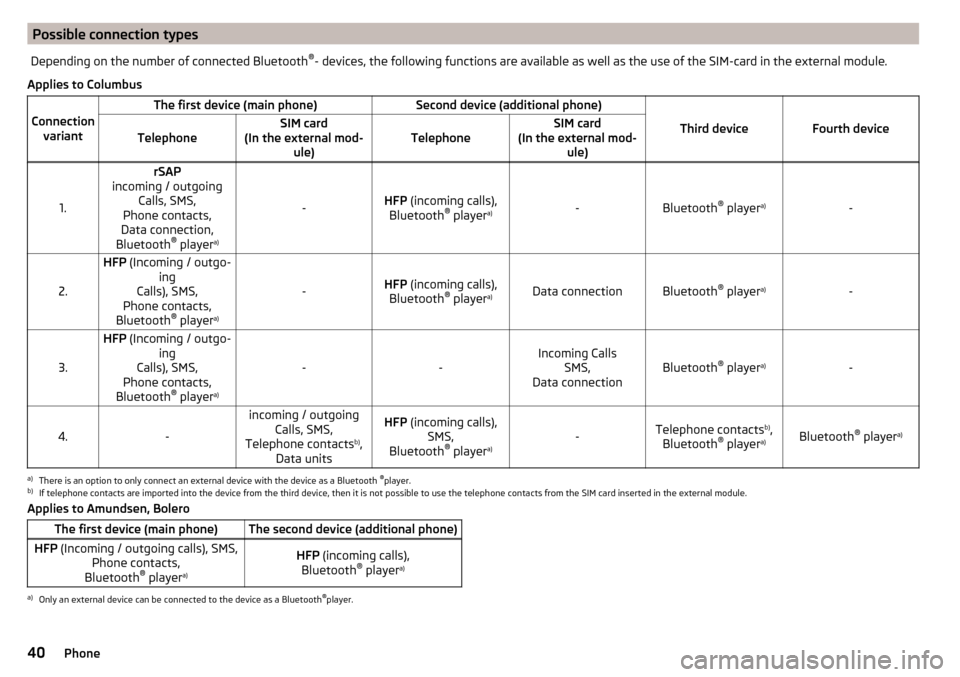
Possible connection typesDepending on the number of connected Bluetooth®
- devices, the following functions are available as well as the use of the SIM-card in the external module.
Applies to Columbus
Connection
variant
The first device (main phone)Second device (additional phone)
Third deviceFourth deviceTelephoneSIM card
(In the external mod- ule)TelephoneSIM card
(In the external mod- ule)
1.
rSAP
incoming / outgoing Calls, SMS,
Phone contacts,
Data connection,
Bluetooth ®
player a)
-HFP
(incoming calls),
Bluetooth ®
player a)-Bluetooth
®
player a)-2.
HFP
(Incoming / outgo-
ing
Calls), SMS,
Phone contacts,
Bluetooth ®
player a)
-HFP
(incoming calls),
Bluetooth ®
player a)Data connectionBluetooth ®
player a)-3.
HFP
(Incoming / outgo-
ing
Calls), SMS,
Phone contacts,
Bluetooth ®
player a)
--Incoming Calls
SMS,
Data connectionBluetooth ®
player a)-4.-
incoming / outgoing
Calls, SMS,
Telephone contacts b)
,
Data unitsHFP (incoming calls),
SMS,
Bluetooth ®
player a)-Telephone contacts b)
,
Bluetooth ®
player a)Bluetooth ®
player a)
a)
There is an option to only connect an external device with the device as a Bluetooth
®
player.
b)
If telephone contacts are imported into the device from the third device, then it is not possible to use the telephone contacts from the SIM card inserted in the external module.
Applies to Amundsen, BoleroThe first device (main phone)The second device (additional phone)HFP (Incoming / outgoing calls), SMS,
Phone contacts,
Bluetooth ®
player a)HFP
(incoming calls),
Bluetooth ®
player a)a)
Only an external device can be connected to the device as a Bluetooth
®
player.
40Phone
Page 45 of 100
Up to 20 external devices can be paired with the device. After reaching the
maximum number, the pairing of the next external device will replace that of
the device that has not been used for the longest period of time.
A connection with a telephone that is already paired does not require coupling. It is enough to find the telephone that has been coupled in the list of coupled
phones and make the connection.WARNINGPair and connect a telephone to the device only when the vehicle is at a
standstill - there is risk of accident!
conditions for coupling
Fig. 38
QR code with reference to the
ŠKODA websites
The telephone can be coupled with the device under the following conditions.
The ignition is switched on.
The Bluetooth ®
function of the device and the telephone is switched on.
The visibility of the device and the telephone is switched on.
The telephone is within range of the Bluetooth ®
signal of the device.
The telephone is compatible with the device.
There is no external device connected to the device using Apple CarPlay ™
.
The pairing can be initiated from the device or from the telephone.
During the pairing and connection process, information messages are dis-
played in the device screen and the telephone screen. These messages must
be observed and if necessary confirmed (e.g. enabling the contact import or
connecting the Bluetooth ®
player etc).
By reading the QR code » Fig. 38 using the associated application in the exter-
nal device (e.g. phone, tablet) or after typing the following address into the
web browser, information about the compatibility of phones and updates are
available for Bluetooth ®
device can be displayed.
http://go.skoda.eu/compatibility
Pairing and connection process
Pair the telephone with the device
›
Search available Bluetooth ®
devices in your telephone.
›
Select the device (name of the device
→
Bluetooth
→
Name:
).
›
Confirm or enter the PIN code to confirm the pairing.
The Telephone is connected to the device or merely paired, depending on the
number of already connected external devices and the use of the SIM card in-
serted in the external module (applies to Columbus).
Pair the device with the telephone
›
If there is no telephone connected to the device, then press the button
then tap the function surface
Find telephone
.
›
or: If a telephone is to the device, then tap the function surface in the phone
main menu
→ Tap
Find telephone
.
›
or: If a SIM card with activated telephone services is connected to the exter-
nal module, then in the main menu phone the functional surface
Tap
→
Findtelephone
.
›
Select the desired telephone from the list of selected external Bluetooth ®
devices.
›
Confirm the PIN code (enter and confirm if necessary to confirm the pairing.
If external Bluetooth ®
devices are already connected to the device, then dur-
ing the pairing and connection process messages and options for the possible
connection type (e.g. replacement of the connected external Bluetooth ®
de-
vice) are displayed.
Possible connection types for phones, for the SIM card in the external module
if necessary » page 40.
43Phone
Page 46 of 100
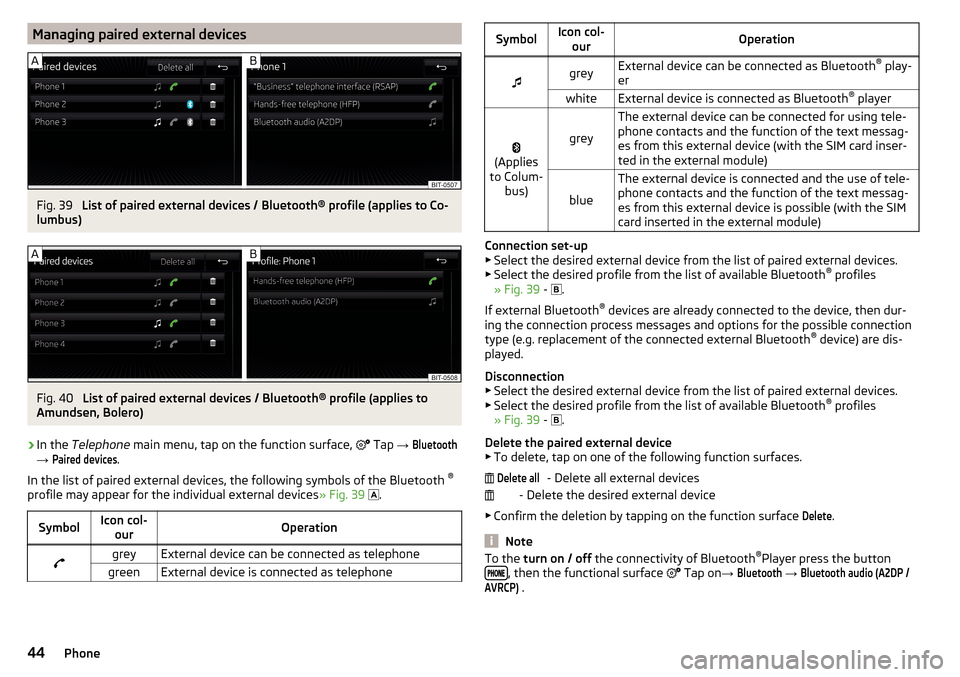
Managing paired external devicesFig. 39
List of paired external devices / Bluetooth® profile (applies to Co-
lumbus)
Fig. 40
List of paired external devices / Bluetooth® profile (applies to
Amundsen, Bolero)
›
In the Telephone main menu, tap on the function surface,
Tap →
Bluetooth
→
Paired devices
.
In the list of paired external devices, the following symbols of the Bluetooth ®
profile may appear for the individual external devices » Fig. 39
.
SymbolIcon col-
ourOperationgreyExternal device can be connected as telephonegreenExternal device is connected as telephoneSymbolIcon col-ourOperationgreyExternal device can be connected as Bluetooth ®
play-
erwhiteExternal device is connected as Bluetooth ®
player
(Applies
to Colum- bus)grey
The external device can be connected for using tele-
phone contacts and the function of the text messag-
es from this external device (with the SIM card inser-
ted in the external module)
blue
The external device is connected and the use of tele-
phone contacts and the function of the text messag-
es from this external device is possible (with the SIM
card inserted in the external module)
Connection set-up ▶ Select the desired external device from the list of paired external devices.
▶ Select the desired profile from the list of available Bluetooth ®
profiles
» Fig. 39 -
.
If external Bluetooth ®
devices are already connected to the device, then dur-
ing the connection process messages and options for the possible connection
type (e.g. replacement of the connected external Bluetooth ®
device) are dis-
played.
Disconnection
▶ Select the desired external device from the list of paired external devices.
▶ Select the desired profile from the list of available Bluetooth ®
profiles
» Fig. 39 -
.
Delete the paired external device ▶ To delete, tap on one of the following function surfaces.
- Delete all external devices
- Delete the desired external device
▶ Confirm the deletion by tapping on the function surface
Delete
.
Note
To the turn on / off the connectivity of Bluetooth ®
Player press the button
, then the functional surface Tap on →
Bluetooth
→
Bluetooth audio (A2DP /AVRCP)
.
Delete all44Phone