lock SKODA SUPERB 2016 3.G / (B8/3V) Repair Manual
[x] Cancel search | Manufacturer: SKODA, Model Year: 2016, Model line: SUPERB, Model: SKODA SUPERB 2016 3.G / (B8/3V)Pages: 336, PDF Size: 53.89 MB
Page 169 of 336
›Remove the SIM card from the slot.
CAUTION
■
When inserting a SIM card of the incorrect size, there is a risk of damage to
Infotainment.■
Avoid using a an adapter for the SIM card as the SIM card may fall out while
driving due to vehicle vibrations - There is a risk of damage to the external
module.
■
If you let the SIM card protrude out from the slot, then it may fall out of the
slot while driving due to vehicle vibrations.
rSAP
Applies to Infotainment Columbus with the SIM card slot in the external mod-
ule.
The Bluetooth ®
profile RSAP (remote transmission of SIM data) also allows, in
contrast to Bluetooth ®
profile HFP the use of data services of the connected
telephone (if this profile is supported by the telephone and data services are
enabled in this telephone) » page 175.
The use of Bluetooth ®
profile RSAP requires the telephone function of the ex-
ternal module to be switched on.
Switching on and off
›
In the Telephone main menu, tap on the function surface,
→
Telephone In-terface “Business”
.
The pairing and connection process takes place in the same way to the Blue-
tooth ®
profile HFP » page 163.
If the rSAP profile supported by the telephone to be connected, then infotain-
ment tries to connect using this profile. Depending on the telephone, it is pos-
sible to block or release the connection using an rSAP profile in the telephone.
If a SIM card is inserted in the external module, it is not possible to connect the
telephone to Infotainment using the rSAP profile.
Note
If Infotainment is connected to an external device via Apple CarPlay or Android
Auto, then using the data connection via rSAP is not possible.167Telephone
Page 178 of 336
SmartLink
Introductory information
Introduction to the subject
Applies to Infotainment Columbus, Amundsen, Bolero.
Fig. 217
Information on SmartLink on the
ŠKODA websites
Read in the QR code » Fig. 217orenter the following address in the web brows-
er to open the website with information on the SmartLink communication sys-
tem.
http://go.skoda.eu/connectivity-smartlink
SmartLink offers the ability to display certified applications on an external de-
vice equipped with a USB device on the Infotainment screen and to operate
them.
SmartLink supports the following communication systems. ▶ Android Auto
▶ Apple CarPlay
▶ MirrorLink ®
Using the applications in the connected external device it is possible to use the navigation to make a call, to listen to music.
For reasons of safety, the operation of some applications while driving is not
possible or only limited.
Depending on model of the connected external device, some applications can
be started using the voice activation, via the Infotainment screen, using the
operating elements on Infotainment or using the buttons on the multi-func-
tion steering wheel.
The voice control of the connected external device can be activated by holding
the button or holding the button
on the multifunction steering wheel.
CAUTION
To establish the connection, it is necessary for the date and time in Infotain-
ment to be set correctly. If the date and time setting is based on the GPS sig-
nal, then problems may arise with establishing a connection with a poor GPS
signal reception.
Note
■ During the connection process, information messages may be displayed on
the Infotainment screen, and in the telephone display. These messages must
be observed and confirmed if necessary (e.g. Release of data transfer, enabling
the contact import, release of text messages).■
We recommend that you use extension cords from ŠKODA Original Accesso-
ries.
■
With some connected devices, it is necessary for the connected external de-
vice to be unlocked over the entire duration of the connection for trouble-free
functioning of the SmartLink function“”.
Main menu
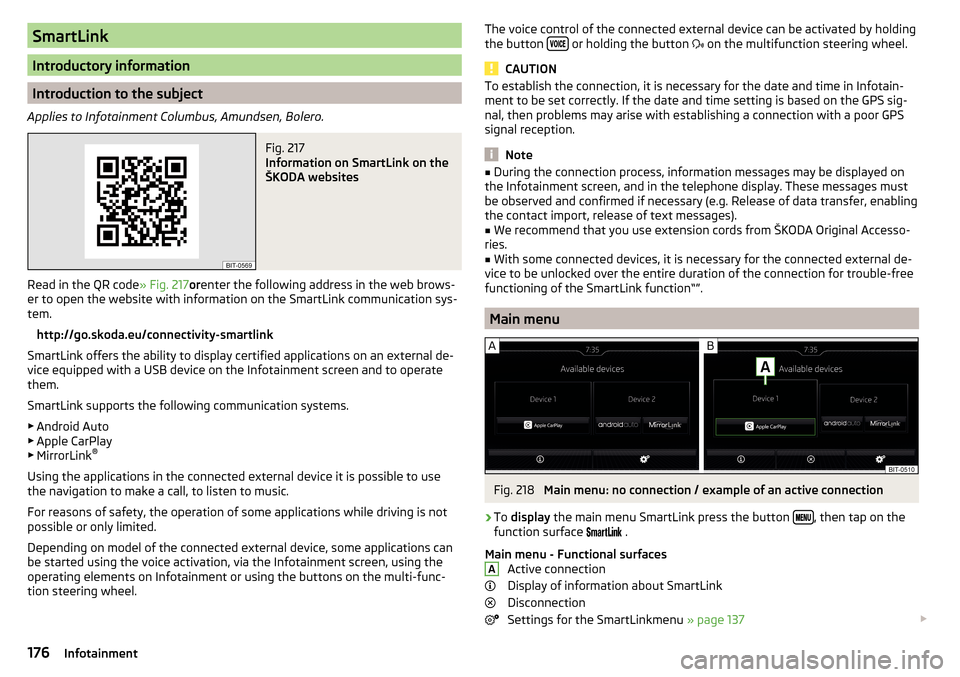
Fig. 218
Main menu: no connection / example of an active connection
›
To display the main menu SmartLink press the button , then tap on the
function surface
.
Main menu - Functional surfaces Active connection
Display of information about SmartLink
Disconnection
Settings for the SmartLinkmenu » page 137
A176Infotainment
Page 182 of 336
■MirrorLink® availability on this mobile device is restricted. Using of the connected de-
vice is not possible while driving
■The mobile device is locked. Please unlock the mobile device to use MirrorLink®
- Unlock
the connected “external device ”
■
Unable to start app or app not working.
- Disconnect the external device and recon-
nect
Navigation
Introductory information
Navigation - Function sequence
Applies to Infotainment Columbus, Amundsen.
Route guidance is started as follows.
›
Search for/ enter a new destination or Select one of the stored destinations.
›
Confirm the route calculation in the destination details or if necessary, adjust
the route options.
›
Select the preferred route type, if this is requested by Infotainment.
A route calculation occurs and route guidance starts.
The route guidance is provided by graphical nav. announcements.
There is an option to add additional destinations during route guidance, or to
adapt the route.
If a traffic radio station is available, information concerning traffic delays is
evaluated by Infotainment and, if necessary, an alternative route is offered.
If you deviate from the route, then a new route calculation is carried out.
GPS satellite signal
Infotainment uses the GPS (Global Positioning System) satellite signal for
route guidance.
Outside the range of the GPS satellite signal (e.g. in dense vegetation, in tun-
nels, parking garages, etc.), Infotainment navigates only with restrictions using
vehicle sensors.
Infotainment offers the option to show in the split screen display the following
Position
» Fig. 226 on page 182 information about the current geographical po-
sition of the vehicle and the satellite signal.
Geographical longitude
Geographical latitude
Elevation
Number of received/available satellites
If no GPS satellite signal is available, no values are displayed.
180Infotainment
Page 201 of 336
Driving
Starting-off and Driving
Starting and stopping the engine
Introduction
This chapter contains information on the following subjects:
Electronic immobiliser and steering lock
199
Switch on/off ignition
200
Starting/stopping the engine
200
Problems with the engine start - vehicles with starter button
201
Depending on equipment fitted, it is possible to switch the ignition on/off and
start/stop the engine with the key in the ignition or using the starter button .
WARNING■
Never switch off the engine before the vehicle is stationary – risk of acci-
dent!■
The ignition must always be switched during the journey when the en-
gine is idling. Otherwise, the steering may lock - danger of an accident!
■
Do not withdraw the ignition key from the ignition lock until the vehicle
has come to a stop » page 205, Parking . Otherwise, the steering may lock -
danger of an accident!
■
Never leave the vehicle unattended with the engine running - there is a
risk of theft, accident etc.!
■
Never run the engine in an enclosed space (e.g. in garages) - there is the
danger of poisoning and death!
CAUTION
■ Only start the engine when the engine and the vehicle are stationary - there
is a danger of starter and engine damage!■
Do not push-start the engine – there is a risk of damaging the engine and
the catalytic converter! The battery from another vehicle can be used as a
push-start aid.
■
On vehicles with the starter button, pay attention to where the key is loca-
ted. The system can recognize the valid key, even if it has been accidentally
left on the vehicle roof - there is danger of loss or damage to the key!
NoteDo not warm up the engine while the vehicle is stationary. If possible, start
your journey as soon as the engine has started. The engine will reach its oper-
ating temperature faster.
Electronic immobiliser and steering lock
Read and observe
and on page 199 first.
The electronic immobiliser (hereinafter referred to as immobiliser) makes it
more difficult for someone to attempt to steal or use your vehicle without au-
thorisation.
Immobilizer
The immobilizer enables the engine start exclusively using the original vehicle
keys.
Malfunction of the immobilizer
If the immobiliser components in the key fail, it is not possible to start the en-
gine. A message appears in the display of the instrument cluster to explain
that the immobiliser is active.
To start, use the other vehicle key or seek help from a specialist garage.
Steering lock - lock
›
On vehicles with ignition lock, remove the key and turn the steering wheel
until the steering lock engages.
›
On vehicles with a starter button, switch off the ignition and open the driv-
er's door. If the driver's door is opened and the ignition is switched off after-
wards, the steering is only locked automatically after the vehicle has been
locked.
Steering lock - unlock
›
On vehicles with ignition lock, insert the key into the ignition and turn on the
ignition. If this is not possible, move the steering wheel slightly back and
forth and thereby unlock the steering lock.
›
On vehicles with starter button, get into the car and close the driver's door.
Under certain circumstances, the steering lock can be unlocked only when
the ignition is switched on or the engine is started.
WARNINGNever let the vehicle roll with locked steering lock - there is a risk of acci-
dent!199Starting-off and Driving
Page 202 of 336
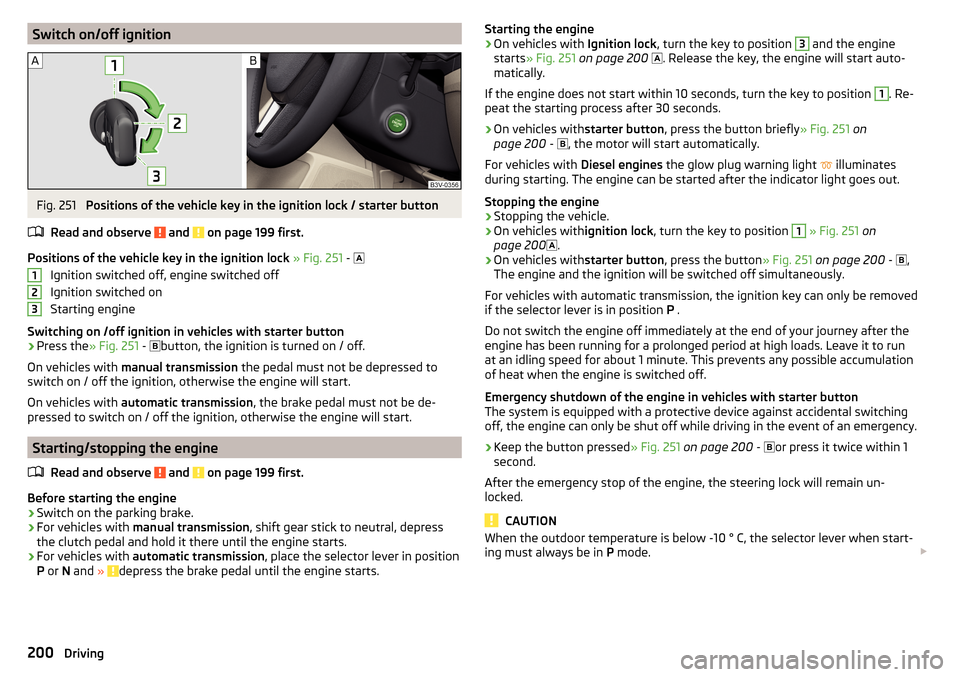
Switch on/off ignitionFig. 251
Positions of the vehicle key in the ignition lock / starter button
Read and observe
and on page 199 first.
Positions of the vehicle key in the ignition lock » Fig. 251 -
Ignition switched off, engine switched off
Ignition switched on
Starting engine
Switching on /off ignition in vehicles with starter button
›
Press the » Fig. 251 -
button, the ignition is turned on / off.
On vehicles with manual transmission the pedal must not be depressed to
switch on / off the ignition, otherwise the engine will start.
On vehicles with automatic transmission , the brake pedal must not be de-
pressed to switch on / off the ignition, otherwise the engine will start.
Starting/stopping the engine
Read and observe
and on page 199 first.
Before starting the engine
›
Switch on the parking brake.
›
For vehicles with manual transmission , shift gear stick to neutral, depress
the clutch pedal and hold it there until the engine starts.
›
For vehicles with automatic transmission , place the selector lever in position
P or N and » depress the brake pedal until the engine starts.
123Starting the engine›On vehicles with Ignition lock, turn the key to position 3 and the engine
starts » Fig. 251 on page 200
. Release the key, the engine will start auto-
matically.
If the engine does not start within 10 seconds, turn the key to position 1
. Re-
peat the starting process after 30 seconds.
›
On vehicles with starter button, press the button briefly » Fig. 251 on
page 200 -
, the motor will start automatically.
For vehicles with Diesel engines the glow plug warning light
illuminates
during starting. The engine can be started after the indicator light goes out.
Stopping the engine
›
Stopping the vehicle.
›
On vehicles with ignition lock, turn the key to position
1
» Fig. 251 on
page 200 .
›
On vehicles with
starter button, press the button » Fig. 251 on page 200 -
,
The engine and the ignition will be switched off simultaneously.
For vehicles with automatic transmission, the ignition key can only be removed
if the selector lever is in position P .
Do not switch the engine off immediately at the end of your journey after the
engine has been running for a prolonged period at high loads. Leave it to run
at an idling speed for about 1 minute. This prevents any possible accumulation
of heat when the engine is switched off.
Emergency shutdown of the engine in vehicles with starter button
The system is equipped with a protective device against accidental switching
off, the engine can only be shut off while driving in the event of an emergency.
›
Keep the button pressed » Fig. 251 on page 200 -
or press it twice within 1
second.
After the emergency stop of the engine, the steering lock will remain un-
locked.
CAUTION
When the outdoor temperature is below -10 ° C, the selector lever when start-
ing must always be in P mode. 200Driving
Page 206 of 336
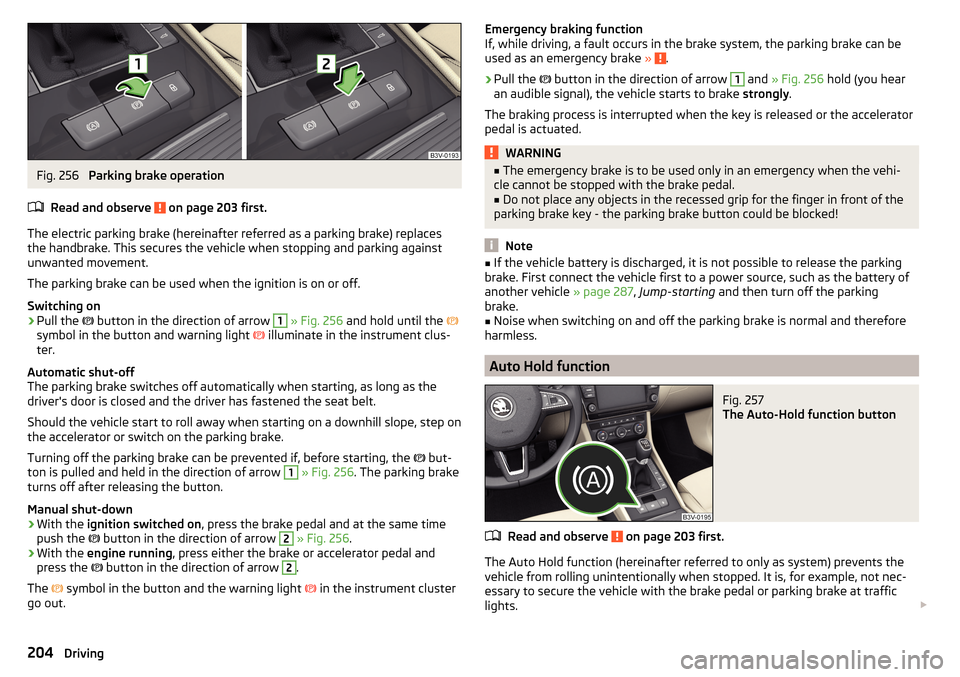
Fig. 256
Parking brake operation
Read and observe
on page 203 first.
The electric parking brake (hereinafter referred as a parking brake) replaces the handbrake. This secures the vehicle when stopping and parking against
unwanted movement.
The parking brake can be used when the ignition is on or off.
Switching on
›
Pull the button in the direction of arrow
1
» Fig. 256 and hold until the
symbol in the button and warning light illuminate in the instrument clus-
ter.
Automatic shut-off
The parking brake switches off automatically when starting, as long as the
driver's door is closed and the driver has fastened the seat belt.
Should the vehicle start to roll away when starting on a downhill slope, step on
the accelerator or switch on the parking brake.
Turning off the parking brake can be prevented if, before starting, the but-
ton is pulled and held in the direction of arrow
1
» Fig. 256 . The parking brake
turns off after releasing the button.
Manual shut-down
›
With the ignition switched on , press the brake pedal and at the same time
push the button in the direction of arrow
2
» Fig. 256 .
›
With the engine running , press either the brake or accelerator pedal and
press the button in the direction of arrow
2
.
The symbol in the button and the warning light
in the instrument cluster
go out.
Emergency braking function
If, while driving, a fault occurs in the brake system, the parking brake can be
used as an emergency brake »
.
›
Pull the
button in the direction of arrow
1
and » Fig. 256 hold (you hear
an audible signal), the vehicle starts to brake strongly.
The braking process is interrupted when the key is released or the accelerator
pedal is actuated.
WARNING■ The emergency brake is to be used only in an emergency when the vehi-
cle cannot be stopped with the brake pedal.■
Do not place any objects in the recessed grip for the finger in front of the
parking brake key - the parking brake button could be blocked!
Note
■ If the vehicle battery is discharged, it is not possible to release the parking
brake. First connect the vehicle first to a power source, such as the battery of
another vehicle » page 287, Jump-starting and then turn off the parking
brake.■
Noise when switching on and off the parking brake is normal and therefore
harmless.
Auto Hold function
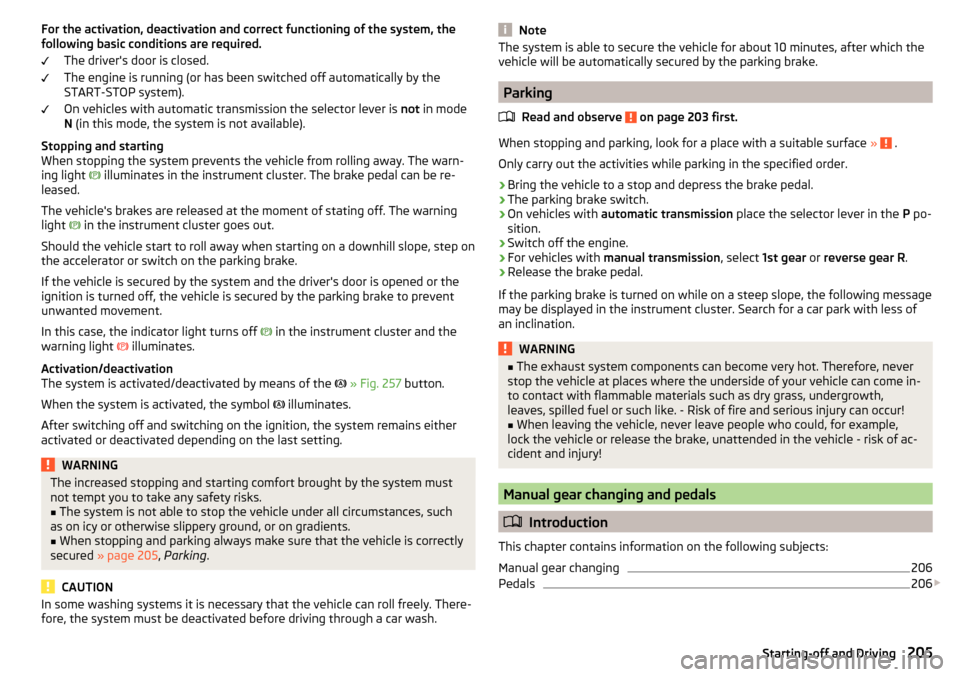
Fig. 257
The Auto-Hold function button
Read and observe on page 203 first.
The Auto Hold function (hereinafter referred to only as system) prevents the
vehicle from rolling unintentionally when stopped. It is, for example, not nec-
essary to secure the vehicle with the brake pedal or parking brake at traffic
lights.
204Driving
Page 207 of 336
For the activation, deactivation and correct functioning of the system, the
following basic conditions are required.
The driver's door is closed.
The engine is running (or has been switched off automatically by the
START-STOP system).
On vehicles with automatic transmission the selector lever is not in mode
N (in this mode, the system is not available).
Stopping and starting
When stopping the system prevents the vehicle from rolling away. The warn-
ing light
illuminates in the instrument cluster. The brake pedal can be re-
leased.
The vehicle's brakes are released at the moment of stating off. The warning
light in the instrument cluster goes out.
Should the vehicle start to roll away when starting on a downhill slope, step on
the accelerator or switch on the parking brake.
If the vehicle is secured by the system and the driver's door is opened or the ignition is turned off, the vehicle is secured by the parking brake to prevent
unwanted movement.
In this case, the indicator light turns off in the instrument cluster and the
warning light illuminates.
Activation/deactivation
The system is activated/deactivated by means of the
» Fig. 257 button.
When the system is activated, the symbol illuminates.
After switching off and switching on the ignition, the system remains either
activated or deactivated depending on the last setting.WARNINGThe increased stopping and starting comfort brought by the system must
not tempt you to take any safety risks.■
The system is not able to stop the vehicle under all circumstances, such
as on icy or otherwise slippery ground, or on gradients.
■
When stopping and parking always make sure that the vehicle is correctly
secured » page 205 , Parking .
CAUTION
In some washing systems it is necessary that the vehicle can roll freely. There-
fore, the system must be deactivated before driving through a car wash.NoteThe system is able to secure the vehicle for about 10 minutes, after which the
vehicle will be automatically secured by the parking brake.
Parking
Read and observe
on page 203 first.
When stopping and parking, look for a place with a suitable surface » .
Only carry out the activities while parking in the specified order.
›
Bring the vehicle to a stop and depress the brake pedal.
›
The parking brake switch.
›
On vehicles with automatic transmission place the selector lever in the P po-
sition.
›
Switch off the engine.
›
For vehicles with manual transmission , select 1st gear or reverse gear R .
›
Release the brake pedal.
If the parking brake is turned on while on a steep slope, the following message
may be displayed in the instrument cluster. Search for a car park with less of
an inclination.
WARNING■ The exhaust system components can become very hot. Therefore, never
stop the vehicle at places where the underside of your vehicle can come in-
to contact with flammable materials such as dry grass, undergrowth,
leaves, spilled fuel or such like. - Risk of fire and serious injury can occur!■
When leaving the vehicle, never leave people who could, for example,
lock the vehicle or release the brake, unattended in the vehicle - risk of ac-
cident and injury!
Manual gear changing and pedals
Introduction
This chapter contains information on the following subjects:
Manual gear changing
206
Pedals
206
205Starting-off and Driving
Page 208 of 336

CAUTIONWhen stopping on a slope, never try to hold the vehicle using the clutch and
the accelerator pedal – this may lead to damage to the clutch.
Manual gear changing
Fig. 258
The shift pattern
Read and observe on page 206 first.
On the gear lever, the shift pattern for the individual gear positions is shown
» Fig. 258 .
The gear shift indicator should be observed when changing gear » page 44.
Always depress the clutch pedal all the way down. This prevents uneven wear
on the clutch.
Engage reverse gear
›
Stop the vehicle.
›
The clutch pedal is fully depressed.
›
Switch the gear lever to N.
›
Push the shift lever downwards fully to the left and then forward into
R » Fig. 258 .
The reversing lights will come on once reverse gear is engaged, provided the
ignition is on.
WARNINGNever engage reverse gear when driving – risk of accident!
CAUTION
If not in the process of changing gear, do not leave your hand on the gear shift
lever while driving. The pressure from the hand can cause the gear shift mech-
anism to wear excessively.Pedals
Read and observe
on page 206 first.
The operation of the pedals must not be hindered under any circumstances!
In the driver's footwell, only a footmat (supplied by the factory or from the
ŠKODA Original Accessories) which is secured on the respective attachment
points should be used.
WARNINGNo objects should be located in the driver's footwell, otherwise the pedal
operation could be disabled - risk of accident!
Automatic transmission
Introduction
This chapter contains information on the following subjects:
Select selector lever position
207
Selector lever lock
207
Manual shifting of gears (Tiptronic)
208
Start and run
208
The automatic transmission performs an automatic gear change irrespective of
the engine load, the operation of the accelerator, the vehicle speed and the
selected driving mode.
The modes of the automatic transmission can be adjusted by the driver by
means of the selector lever.
WARNING■ Do not use the throttle if the forwards mode has been set using the se-
lector lever prior to starting up - risk of accident!■
Never move the selector lever to mode R or P when driving – risk of acci-
dent!
206Driving
Page 209 of 336

WARNING (Continued)■If the vehicle stalls, with engine running, in the D, S , R or Tiptronic mode,
then the vehicle must be prevented from rolling away by means of the
brake pedal, parking brake or using the Auto Hold function. Even when the
engine is idling, the power transmission is never completely interrupted –
the vehicle creeps.■
When leaving the vehicle, the selector lever must always be set to P .
Otherwise, the vehicle could start to move - risk of accident.
CAUTION
■ If you want to move the selector lever from position N to position D / S whilst
driving, the engine must be running at idling speed.■
When stopping on a slope, never try to hold the vehicle using the accelerator
pedal – this may lead to gear damage.
Select selector lever position
Fig. 259
Selector lever settings / display
Read and observe and on page 206 first.
The selector lever can be moved through shifting to one of the following posi-
tions » Fig. 259 . In some positions you have to push the locking button
» page 207 , Selector lever lock .
When the ignition is switched on, the gearbox mode and the currently selected
gear are indicated in the display » Fig. 259.
Park - the position can be set only when the vehicle is at a standstill.
The drive wheels are mechanically locked.
Reverse gear - the position can be set only when the vehicle is at a stand-
still and the engine is at idling speed.
Neutral (idle position) - the power transmission to the drive wheels is in-
terrupted.
PRNForward mode / sports programme - the gear change takes place in the
position S at higher engine speeds than in mode D
(Sprung position) - choice between positions D and S
If the Sport driving mode is selected with the engine running » page 240, Se-
lect the driving mode (Driving Mode Selection) , the transmission is automati-
cally set in the S mode.
E – Economical driving mode
If the driving mode Eco or Individual (engine - Eco) » page 240 is selected and
the selection lever is in the setting D/S, the transmission is automatically set
to mode E. This mode cannot be selected with the selector lever.
The forwards mode is switched up or down automatically in mode E at lower
engine speeds than in mode D.
Selector lever lock
Fig. 260
Shift lock button
Read and observe and on page 206 first.
The selector lever is locked in mode P and N to prevent that the forward driv-
ing is selected accidentally, thereby setting the vehicle in motion.
The selector lever is locked only when the vehicle is stationary and at speeds
up to 5 km/h.
The selector lever lock is indicated by the illumination of the warning light.
Release the gear selector lever from P mode or N
›
Press the brake pedal and the lock button at the same time in the direction
of
1
» Fig. 260 .
To move the selector lever from mode N to D / S only the brake pedal is press-
ed.
D/S207Starting-off and Driving
Page 210 of 336
The selector lever is not locked when quickly moving across the position N
(e.g. from R to D/S ). This, for example, helps to rock out a vehicle that is stuck,
e.g. in a bank of snow. The selector lever lock will engage if the lever is in posi-
tion N for more than approx. 2 seconds without the brake pedal being de-
pressed.
If it is not possible to release the gear selector from mode P in the usual man-
ner, then this can be emergency unlocked » page 293.
Note
If you want to switch the selector lever from mode P to mode D/S or vice ver-
sa, move the selector lever quickly. This prevents that you accidentally select
mode R or N.
Manual shifting of gears (Tiptronic)
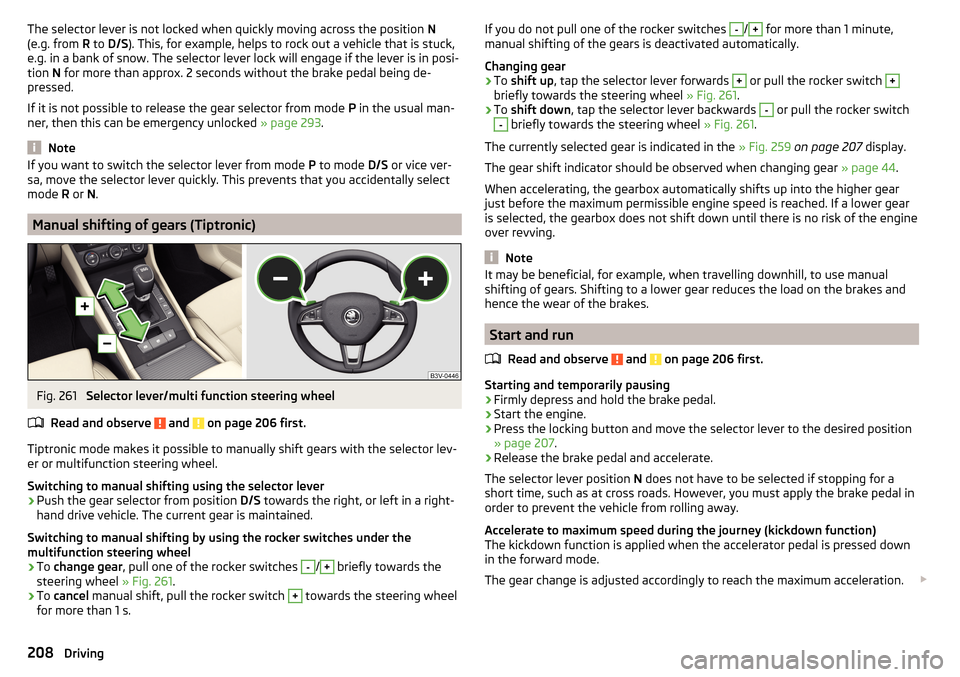
Fig. 261
Selector lever/multi function steering wheel
Read and observe
and on page 206 first.
Tiptronic mode makes it possible to manually shift gears with the selector lev-
er or multifunction steering wheel.
Switching to manual shifting using the selector lever
›
Push the gear selector from position D/S towards the right, or left in a right-
hand drive vehicle. The current gear is maintained.
Switching to manual shifting by using the rocker switches under the
multifunction steering wheel
›
To change gear , pull one of the rocker switches
-
/
+
briefly towards the
steering wheel » Fig. 261.
›
To cancel manual shift, pull the rocker switch
+
towards the steering wheel
for more than 1 s.
If you do not pull one of the rocker switches -/+ for more than 1 minute,
manual shifting of the gears is deactivated automatically.
Changing gear›
To shift up , tap the selector lever forwards
+
or pull the rocker switch
+
briefly towards the steering wheel » Fig. 261.
›
To shift down , tap the selector lever backwards
-
or pull the rocker switch
-
briefly towards the steering wheel » Fig. 261.
The currently selected gear is indicated in the » Fig. 259 on page 207 display.
The gear shift indicator should be observed when changing gear » page 44.
When accelerating, the gearbox automatically shifts up into the higher gear
just before the maximum permissible engine speed is reached. If a lower gear
is selected, the gearbox does not shift down until there is no risk of the engine
over revving.
Note
It may be beneficial, for example, when travelling downhill, to use manual
shifting of gears. Shifting to a lower gear reduces the load on the brakes and
hence the wear of the brakes.
Start and run
Read and observe
and on page 206 first.
Starting and temporarily pausing
›
Firmly depress and hold the brake pedal.
›
Start the engine.
›
Press the locking button and move the selector lever to the desired position
» page 207 .
›
Release the brake pedal and accelerate.
The selector lever position N does not have to be selected if stopping for a
short time, such as at cross roads. However, you must apply the brake pedal in
order to prevent the vehicle from rolling away.
Accelerate to maximum speed during the journey (kickdown function)
The kickdown function is applied when the accelerator pedal is pressed down
in the forward mode.
The gear change is adjusted accordingly to reach the maximum acceleration.
208Driving