warning SKODA SUPERB 2016 3.G / (B8/3V) Manual Online
[x] Cancel search | Manufacturer: SKODA, Model Year: 2016, Model line: SUPERB, Model: SKODA SUPERB 2016 3.G / (B8/3V)Pages: 336, PDF Size: 53.89 MB
Page 119 of 336

Operating modes
Automatic mode works in three modes - moderate, medium, and intensive.
Setting of the different modes takes place via the functional surface D
» Fig. 150 on page 116 or » Fig. 151 on page 116 .
After the automatic mode is switched on, Climatronic works in the last selec-
ted mode. The currently selected mode is displayed in the Infotainment dis-
play.
Air distribution control
Read and observe
on page 114 first.
The recirculation mode prevents contaminated outside air getting into the In-terior of the vehicle. In recirculated air mode air is sucked out of the interior of
the vehicle and then fed back into the interior.
›
To switch on , press the
button. The warning light below the button lights
up.
›
To switch off , press the
button again. The warning light below the button
goes out.
Heating and manual air conditioning system
If the air distribution control is set to position when the recirculation modes
is switched on, the recirculated-air mode is switched off. By pressing the
button, the air recirculation also in this position can be switched on again.
When the cooling system ( button) is switched on and the temperature reg-
ulator is “turned” to the left, the recirculated-air mode is switched on.
Climatronic
The Climatronic can have a sensor that measures the air recirculation mode
and automatically turns on if there is an increased concentration of pollutants
in the incoming air.
When the pollutant concentration decreases to the normal level, the recircula-
ted air mode is automatically switched off.
Automatically switching the air recirculation function on/off can be adjusted by pressing the button on the Climatronic and by subsequently pressing the
function surfaces
→
automatic air recirculation
in the Infotainment screen. Au-
tomatic switching on / off works at a temperature above 2 ° C.
A shut-off of the air recirculation function takes place automatically by press-
ing the button, possibly depending on the moisture conditions in the vehi-
cle interior.
WARNINGThe air recirculation cannot be switched on for a longer period of time be-
cause there is no supply of fresh air from the outside. “Stale air” may result
in fatigue in the driver and occupants, reduce attention levels and also
cause the windows to mist up. As soon as the windows mist up, turn the air
recirculation mode off immediately - there is a risk of accident!
CAUTION
We recommend not smoking in the vehicle when the recirculating air operation
is switched on. The smoke sucked from inside the vehicle is deposited on the
evaporator of the air conditioner. This produces a permanent odour when the
air conditioning system is operating which can only be eliminated through con-
siderable effort and expense (replacement of compressor).
Air outlet vents
Fig. 152
Air vents at the front
117Heating and ventilation
Page 120 of 336
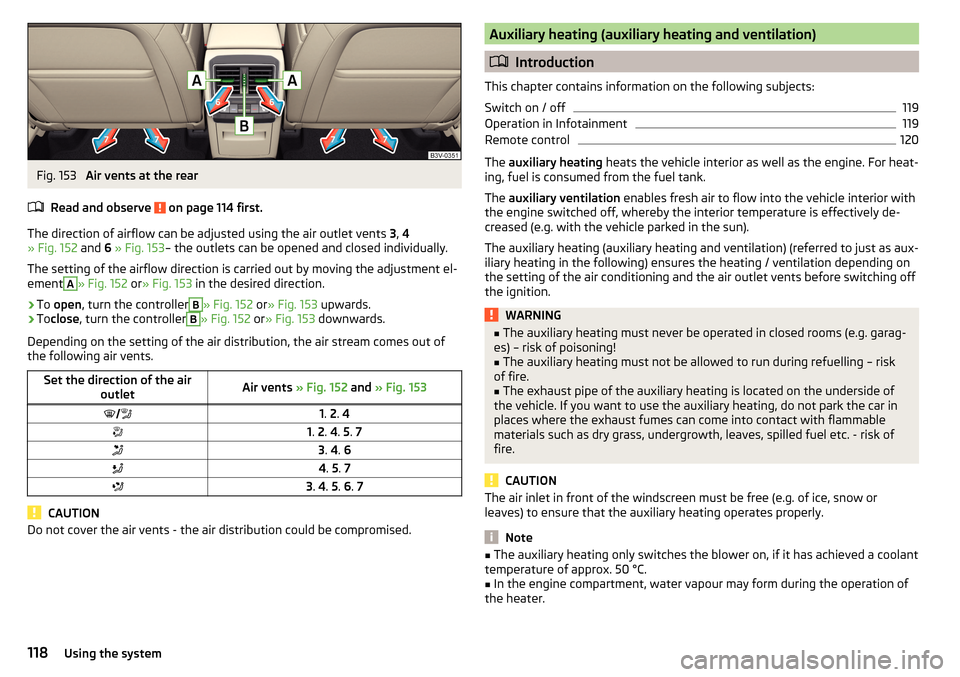
Fig. 153
Air vents at the rear
Read and observe
on page 114 first.
The direction of airflow can be adjusted using the air outlet vents 3, 4
» Fig. 152 and 6 » Fig. 153 – the outlets can be opened and closed individually.
The setting of the airflow direction is carried out by moving the adjustment el-
ement
A
» Fig. 152 or» Fig. 153 in the desired direction.
›
To open , turn the controller
B
» Fig. 152 or» Fig. 153 upwards.
›
Toclose , turn the controller
B
» Fig. 152 or» Fig. 153 downwards.
Depending on the setting of the air distribution, the air stream comes out of
the following air vents.
Set the direction of the air outletAir vents » Fig. 152 and » Fig. 1531. 2 . 41. 2 . 4 . 5 . 73 . 4 . 64 . 5 . 73 . 4 . 5 . 6 . 7
CAUTION
Do not cover the air vents - the air distribution could be compromised.Auxiliary heating (auxiliary heating and ventilation)
Introduction
This chapter contains information on the following subjects:
Switch on / off
119
Operation in Infotainment
119
Remote control
120
The auxiliary heating heats the vehicle interior as well as the engine. For heat-
ing, fuel is consumed from the fuel tank.
The auxiliary ventilation enables fresh air to flow into the vehicle interior with
the engine switched off, whereby the interior temperature is effectively de-
creased (e.g. with the vehicle parked in the sun).
The auxiliary heating (auxiliary heating and ventilation) (referred to just as aux- iliary heating in the following) ensures the heating / ventilation depending on
the setting of the air conditioning and the air outlet vents before switching off
the ignition.
WARNING■ The auxiliary heating must never be operated in closed rooms (e.g. garag-
es) – risk of poisoning!■
The auxiliary heating must not be allowed to run during refuelling – risk
of fire.
■
The exhaust pipe of the auxiliary heating is located on the underside of
the vehicle. If you want to use the auxiliary heating, do not park the car in
places where the exhaust fumes can come into contact with flammable
materials such as dry grass, undergrowth, leaves, spilled fuel etc. - risk of
fire.
CAUTION
The air inlet in front of the windscreen must be free (e.g. of ice, snow or
leaves) to ensure that the auxiliary heating operates properly.
Note
■ The auxiliary heating only switches the blower on, if it has achieved a coolant
temperature of approx. 50 °C.■
In the engine compartment, water vapour may form during the operation of
the heater.
118Using the system
Page 121 of 336
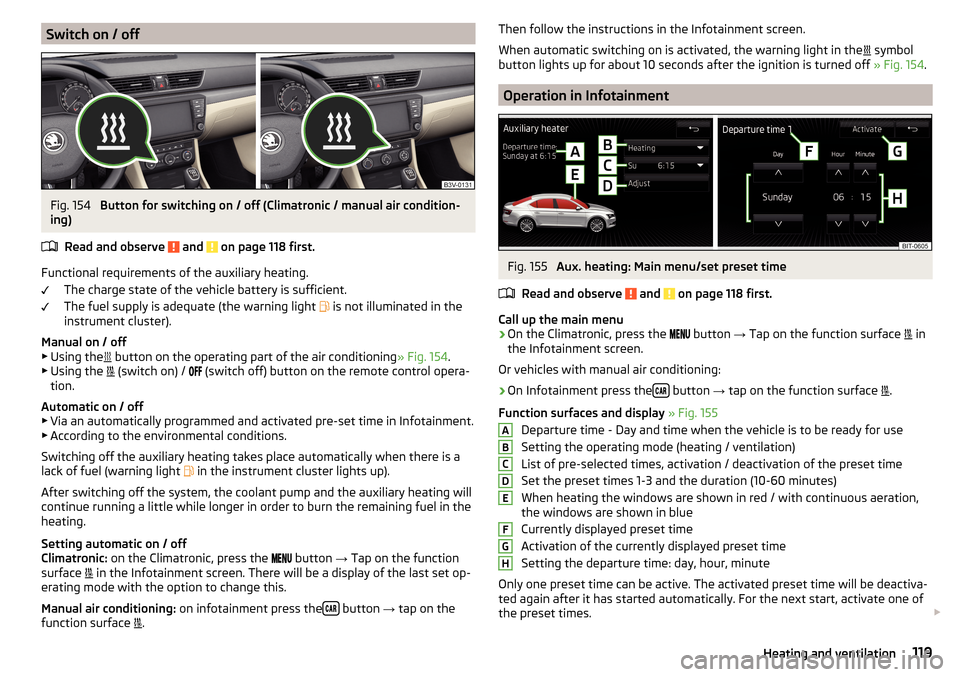
Switch on / offFig. 154
Button for switching on / off (Climatronic / manual air condition-
ing)
Read and observe
and on page 118 first.
Functional requirements of the auxiliary heating. The charge state of the vehicle battery is sufficient.
The fuel supply is adequate (the warning light is not illuminated in the
instrument cluster).
Manual on / off ▶ Using the button on the operating part of the air conditioning
» Fig. 154.
▶ Using the (switch on) /
(switch off) button on the remote control opera-
tion.
Automatic on / off ▶ Via an automatically programmed and activated pre-set time in Infotainment.
▶ According to the environmental conditions.
Switching off the auxiliary heating takes place automatically when there is a
lack of fuel (warning light in the instrument cluster lights up).
After switching off the system, the coolant pump and the auxiliary heating will
continue running a little while longer in order to burn the remaining fuel in the
heating.
Setting automatic on / off
Climatronic: on the Climatronic, press the
button
→ Tap on the function
surface in the Infotainment screen. There will be a display of the last set op-
erating mode with the option to change this.
Manual air conditioning: on infotainment press the
button
→ tap on the
function surface .
Then follow the instructions in the Infotainment screen.
When automatic switching on is activated, the warning light in the
symbol
button lights up for about 10 seconds after the ignition is turned off » Fig. 154.
Operation in Infotainment
Fig. 155
Aux. heating: Main menu/set preset time
Read and observe
and on page 118 first.
Call up the main menu
›
On the Climatronic, press the button
→ Tap on the function surface
in
the Infotainment screen.
Or vehicles with manual air conditioning:
›
On Infotainment press the button
→ tap on the function surface
.
Function surfaces and display » Fig. 155
Departure time - Day and time when the vehicle is to be ready for use
Setting the operating mode (heating / ventilation)
List of pre-selected times, activation / deactivation of the preset time
Set the preset times 1-3 and the duration (10-60 minutes)
When heating the windows are shown in red / with continuous aeration,
the windows are shown in blue
Currently displayed preset time
Activation of the currently displayed preset time
Setting the departure time: day, hour, minute
Only one preset time can be active. The activated preset time will be deactiva-
ted again after it has started automatically. For the next start, activate one of
the preset times.
ABCDEFGH119Heating and ventilation
Page 122 of 336
Note■When selecting the day in the preset time, there is an option between Sun-
day and Monday without the specified day. If this setting is selected, the vehi-
cle will be ready for use at the selected time, regardless of the current day.■
If a different time is set, the activated preset time is automatically deactiva-
ted. The preset time must be reactivated.
Remote control
Fig. 156
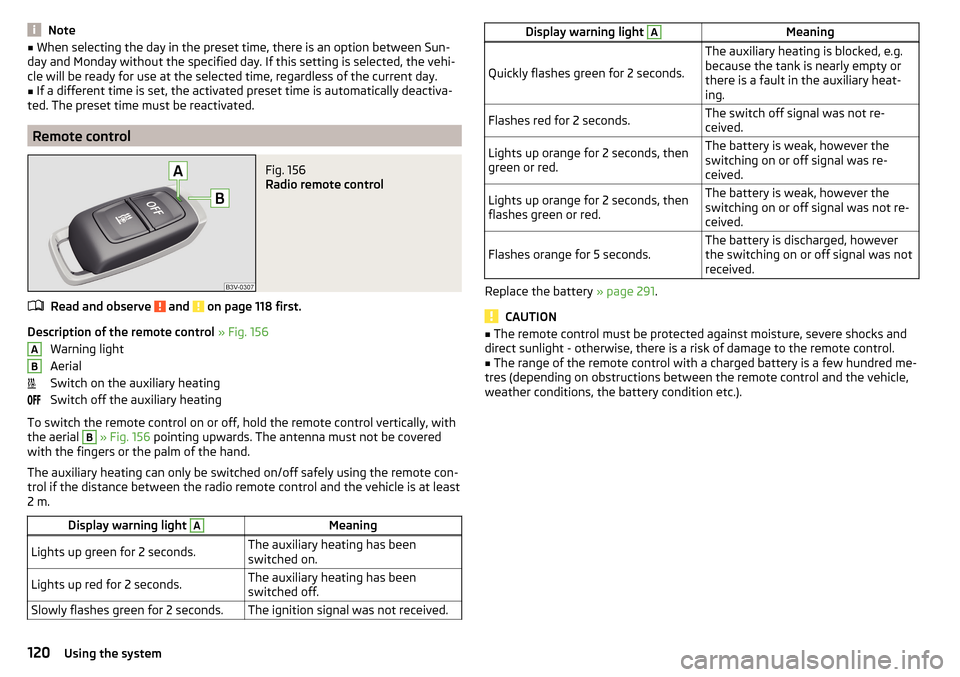
Radio remote control
Read and observe and on page 118 first.
Description of the remote control » Fig. 156
Warning light
Aerial
Switch on the auxiliary heating
Switch off the auxiliary heating
To switch the remote control on or off, hold the remote control vertically, with
the aerial
B
» Fig. 156 pointing upwards. The antenna must not be covered
with the fingers or the palm of the hand.
The auxiliary heating can only be switched on/off safely using the remote con-
trol if the distance between the radio remote control and the vehicle is at least
2 m.
Display warning light AMeaningLights up green for 2 seconds.The auxiliary heating has been
switched on.Lights up red for 2 seconds.The auxiliary heating has been
switched off.Slowly flashes green for 2 seconds.The ignition signal was not received.ABDisplay warning light AMeaning
Quickly flashes green for 2 seconds.
The auxiliary heating is blocked, e.g.
because the tank is nearly empty or
there is a fault in the auxiliary heat-
ing.Flashes red for 2 seconds.The switch off signal was not re-
ceived.Lights up orange for 2 seconds, then
green or red.The battery is weak, however the
switching on or off signal was re-
ceived.Lights up orange for 2 seconds, then
flashes green or red.The battery is weak, however the
switching on or off signal was not re-
ceived.Flashes orange for 5 seconds.The battery is discharged, however
the switching on or off signal was not
received.
Replace the battery » page 291.
CAUTION
■
The remote control must be protected against moisture, severe shocks and
direct sunlight - otherwise, there is a risk of damage to the remote control.■
The range of the remote control with a charged battery is a few hundred me-
tres (depending on obstructions between the remote control and the vehicle,
weather conditions, the battery condition etc.).
120Using the system
Page 123 of 336
Infotainment
Introductory information
Important information
Introduction to the subject
WARNING■Only use Infotainment in such a way that you have control of the vehicle
in every traffic situation (e.g. Do not write text messages while driving, do
not couple or connect the telephone, do not work with the contact list, do
not enter any destinations, do not connect WLAN or SmartLink etc.)- Other-
wise there is a risk of an accident!■
Always route the connection cable of the external device in such a way
that it does not restrict you when driving.
WARNING■ Adjust the volume to ensure that acoustic signals from outside the vehi-
cle, e.g. sirens from emergency vehicles, can be heard at all times.■
High volumes can cause hearing damage!
CAUTION
In some countries, some Infotainment features can no longer be selected
when the vehicle is running faster than a certain speed. This is not a malfunc-
tion, but complies with the national legal regulations.
Mobile telephones and applications
Fig. 157
QR code with reference to web
pages for checking the compati-
bility of devices
The availability of some of the functions described in this Owner's Manual
depends on the type of device to be connected and the applications installed
in it.
Mobile telephones
On the ŠKODA pages, check to see if Infotainment is compatible with the se-
lected mobile telephones. This check takes place by reading the QR code
» Fig. 157 or after typing the following address into the web browser.
http://go.skoda.eu/compatibility
Due to the multitude of mobile telephones as well as the ongoing develop-
ment of these devices, ŠKODA AUTO cannot always ensure compatibility with
Infotainment unconditionally. It is always recommended to physically check
the function on the associated vehicle, including the ŠKODA Partners, before-
hand.
Only those versions of the selected telephones will be tested and supported
which originate from the official distribution network. The same also applies to
their firmware and software.
The functions of the mobile telephone to be tested may differ from the same
type of mobile telephone depending on the specification for the respective
country or the specific service.
Mobile telephones with the operating system and in the version available at
the time of these tests will be tested. In this regard, it could be the case that
the functions of a mobile telephone may differ with a different operating sys-
tem version compared to the one used with the tested telephone.
ŠKODA AUTO can accept no responsibility for the continuous changes made by the mobile telephone manufacturers and application vendors.
ŠKODA AUTO does not accept any liability for any damage to Infotainment or
the vehicle due to the use of incorrect or illegal applications or the improper or
unauthorized use of mobile telephones.
Applications
Applications can be installed in external devices (e.g. Mobile, tablet) making it
possible to display additional information in the Infotainment screen or to op-
erate Infotainment.
Due to the variety of applications as well as their ongoing development, the
available applications may not work in all external devices. ŠKODA AUTO can
accept no liability for their proper function.
Applications, their use and the required data connection may be chargeable. 121Introductory information
Page 131 of 336
▶You are recommended to speak louder at higher speeds, so that the sound of
your voice is not drowned out by the increased ambient noise.
▶ During voice control, limit additional noise in the vehicle, e.g. passengers
talking at the same time.WARNINGThe emergency number must be dialled manually. Your voice commands
may not be recognized in such situations. The telephone connection may
not be established or the connection may take too much time to complete.
CAUTION
■ The messages are generated by Infotainment. The flawless clarity (e.g. road
or city name) cannot always be guaranteed.■
For some Infotainment languages, there is no voice control available. Info-
tainment indicates this fact through a text message that is displayed after set-
ting the device language screen.
Note
During voice control, no nav. announcements and traffic announcements are
played.
Voice control on / off
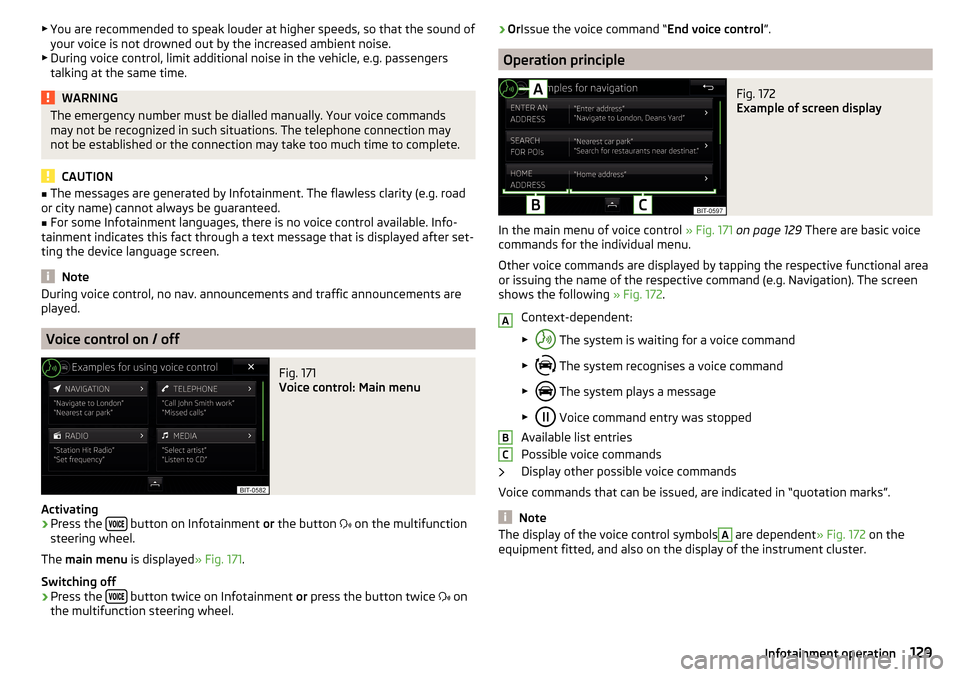
Fig. 171
Voice control: Main menu
Activating
›
Press the button on Infotainment
or the button
on the multifunction
steering wheel.
The main menu is displayed » Fig. 171.
Switching off
›
Press the button twice on Infotainment
or press the button twice
on
the multifunction steering wheel.
› Or
Issue the voice command “ End voice control”.
Operation principle
Fig. 172
Example of screen display
In the main menu of voice control » Fig. 171 on page 129 There are basic voice
commands for the individual menu.
Other voice commands are displayed by tapping the respective functional area
or issuing the name of the respective command (e.g. Navigation). The screen
shows the following » Fig. 172.
Context-dependent:
▶ The system is waiting for a voice command
▶ The system recognises a voice command
▶ The system plays a message
▶ Voice command entry was stopped
Available list entries
Possible voice commands
Display other possible voice commands
Voice commands that can be issued, are indicated in “quotation marks”.
Note
The display of the voice control symbolsA are dependent » Fig. 172 on the
equipment fitted, and also on the display of the instrument cluster.ABC129Infotainment operation
Page 137 of 336
■Auto-save station logos- Automatic storage of the station logos
■DAB traffic announcements
- Switch on/off DAB traffic announcements
■
Other DAB messages
- Switch on/off other announcements (e.g., warnings, re-
gional weather, sports reports, financial news)
■
DAB - DAB station tracking
- Switch on/off automatic DAB station tracking on an-
other frequency or in other station groups
■
Automatic DAB - FM switching
- Switch on/off auto-switching from DAB to the FM
broadcasting range if the DAB signal is lost
■
Switch to a similar station
- Enable / disable automatic switching to another sta-
tion with similar content in the event of signal loss (applies to Infotainment
Columbus)
■
L-band
- Enable / disable the availability of L-band
Automatic change from DAB to FM
If DAB reception is poor, the device tries to find an FM station.
The station name is followed by ( ) while the station is being received on the
FM band. When the corresponding DAB station is can be received again, the
system automatically switches from FM to DAB.
If a DAB station is also not available in the FM band due to poor reception, In-
fotainment will be switched to mute.
L-band
For the DAB radio reception in different countries, different broadcasting rang-
es are used. In some countries the DAB radio reception is only possible in the
so called L-band.
If no L-band DAB radio reception is possible in the country then we recom-
mend turning off the L-band. The channel scan is therefore faster.
Media menu settings
›
Tap on the function surface in the Media main
surface.
■
Sound
- sound settings
■
Manage Jukebox
- Administration (record / delete) supported files (audio / video)
in Infotainment internal memory (applies to Infotainment Columbus)
■
Mix/repeat including subfolders
- Switching the title display including subfolders
■
Bluetooth
- Settings for the Bluetooth ®
function
■
WLAN
- WLAN settings (applies to Infotainment Columbus)
■
Video (DVD) settings
- Setting the parameters of the DVD video (applies to Info-
tainment Columbus)
■
Remove safely:
- Safe removal of the external device
■
Traffic program (TP)
- Switches traffic programme on/off
Image menu settings›
In the images main menu, tap on the function surface
surface.
■
Image display:
- Image view setting
■
Full
- Display the maximum image size while retaining the aspect ratio
■
Automatic
- Full screen display
■
Display time:
- Set the display time for the slideshow
■
Repeat slideshow
- Switching on/off the slideshow repeat
Video DVD menu settings
Only valid for Infotainment Columbus.
›
In the Video DVD main menu, tap on the function surface
.
Depending on the DVD some of the following menu items are displayed.
■
Format:
- Set the screen width/height ratio
■
Audio channel:
- Audio channel selection
■
Subtitles:
- Selecting subtitles
■
Enter/change PIN for parental settings
- Management of the PIN code for parental
control
■
Parental settings:
- Parental settings selection
TV tuner menu settings
Only valid for Infotainment Columbus.
›
In the TV tuner main menu , tap on the function surface
.
■
Arrow buttons:
- Setting the function of the functional surfaces
■
Preset list
- Change between stations stored in the preset list
■
Station list
- Switch between all available TV stations
■
Screen
- Brightness, contrast and colour settings
■
Format:
- Select aspect ratio
■
Audio channel:
- Audio channel selection
■
TV standard:
- Select TV-Region
■
Subtitles
- Enable / disable the subtitle display
■
Sound
- sound settings
■
Automatic station tracking
- Switch on / off the automatic station tracking
■
Preset list
- Management of the TV station preset list
135Infotainment settings - Columbus, Amundsen, Bolero
Page 138 of 336
Telephone menu settings›
In the Telephone main menu, tap on the function surface
.
■
Hands-free
- Switching a call to the Telephone / back to Infotainment (the
menu item is displayed during a call)
■
Select Telephone
- Search for available Telephones/list of paired Tele-
phones/select Telephone
■
Bluetooth
- Bluetooth ®
settings
■
User profile
- user profile settings
■
Manage favourites
- Set the function surfaces for your favourite contacts
■
Mailbox number:
- Enter the Telephone number of the mailbox
■
Network selection
- Select the telephone service provider of the SIM card in-
serted in the external module (valid for Infotainment Columbus with the
SIM card slot in the external module)
■
Priority:
- Select the priority of telephone services of the SIM card inserted in
the external module (valid for Infotainment Columbus with the SIM card
slot in the external module) ■
Automatic
- Depending on the telephone service provider
■
Telephone call
- telephone calls are preferred
■
Data transfer
- A data connection is preferred
■
Sort by:
- Arrangement of the Telephone contact list
■
Surname
- Arrangement by contact surname
■
1st name
- Sort by contact's first name
■
Profile Name:
- Rename the profile of the SIM card inserted in the external
module (valid for Infotainment Columbus with the SIM card slot in the ex-
ternal module)
■
Import contacts:
- Import Telephone contacts
■
Select device contacts
- Open the coupled Telephones menu (applies to Info-
tainment Columbus with the SIM card slot in the external module - if the
SIM card is inserted in the external module)
■
Select ringtone
- Selecting the ring tone
■
Reminder: remember your mobile phone
- Turn on/off the warning mode before
forgetting the Telephone in the vehicle (if the Telephone was connected to
Infotainment)
■
Show pictures for contacts
- Switch on/off the display of the image assigned to
the contact
■
Conference call
- Activates/deactivates conference calls
■Call settings - Setting the Telephone features of the SIM card inserted in the
external module during a call (applies to Infotainment Columbus with the SIM
card slot in the external module)
■Hold call:
- Switch on/off the display of the option for answering an incoming
call during a call, determining the current divert setting
■
On
- Turn on the display
■
Off
- Turn off the display
■
Request status
- Checking the settings of the SIM card function
■
Send own number:
- Setting the Telephone number display for the call recipi-
ent ■
On
- Turn on the display
■
Off
- Turn off the display
■
Network dependent
- Telephone service provider dependent display
■
Request status
- Checking the settings of the SIM card function
■
Delete calls
- Deleting the selected type of call carried out using the SIM card
inserted in the external device (applies to Infotainment Columbus with the
SIM card slot in the external module)
■
All
- Delete all calls
■
Missed calls
- Delete list of missed calls
■
Dialled numbers
- Delete outgoing calls
■
Received calls
- Delete list of received calls
■
Text message settings:
- Text message setting of the SIM card inserted in the ex-
ternal module (valid for Infotainment Columbus with the SIM card slot in the
external module)
■
Standard account
- Setting for the use of text messages on the SIM card or the
connected telephone
■
No standard account
- Without priority (selection of the SIM card or the con-
nected telephone required)
■
SIM
- A list of text messages on the SIM card
■
MAP
- A list of text messages of the connected telephone
■
Service centre number:
- Setting the number of SMS services of the telephone
service provider
■
Store sent text messages
- Enable / disable the storage of the text message on
the SIM card
■
Period of validity:
- Adjustment of the period in which the telephone service
provider will try to send the text message (for example, when power is off.)
■
Delete text messages
- Delete the data stored on the SIM card text messages
■
All
- Delete all text messages
■
Inbox
- Delete the text messages received
■
Outbox
- Delete draft text messages
■
Sent
- Delete sent text messages
136Infotainment
Page 140 of 336
■Sort Contacts: - Setting the arrangement of the Telephonebook
■By surname
- Sorting by the contact surname
■
By first name
- Sorting by the contact first name
■
Define home address
- Enter the home address
■
Delete My POIs
- Deleting own POI categories (Personal POI)
■
Update "My POIs" (SD/USB)
- Import / update your own POI categories (Personal
POI)
■
Import objectives (SD / USB)
- Import destinations in vCard format
■
Delete user data
- Delete user data (by pressing the function surface
Delete
and
confirm the deletion) ■
Last destinations
- Delete the last destinations
■
Dest. memory
- Delete the stored destinations
■
Routes
- Delete saved routes
■
My points of interest (Personal POI)
- Delete the custom POIs
■
Entered cities
- Delete the history of places already entered via the address
■
Home address
- Delete the stored home address
■
Flagged destination
- Delete the flagged destination
■
Waypoint tour
- Delete items in the Waypoint mode menu (Applies to Info-
tainment Columbus)
■
Most frequent routes
- Deletion of the most travelled routes
Nav. announcements
›
In the Navigation main menu, tap the functional surface
Tap
→
Nav. an-nouncements
.
■
Volume
- Volume control of the nav. announcements
■
Entertainment fading (nav. announce.)
- Setting the fading of the audio volume (e.g.
radio nav. announcements
■
Nav. announcements:
- Setting the playback method of nav. announcements
■
Comprehensive
- All nav. announcements
■
Brief
- Short nav. announcements
■
Congestion only
- Only nav. announcements when a route is changed
■
No navigation sound during call
- Enable / disable non-playback of nav. announce-
ments during a telephone call
■
Note: “My POIs”
- Turn on/off an audible indication when approaching a custom
POI (if supported by the imported custom POI) (applies to Infotainment Co-
lumbus)
Top speeds
›
In the Navigation main menu, tap the functional surface
→
Top speeds
.
The speed limits in the current country are displayed.
With the Note: National border crossed
function switched on, the country-specific
speed limits » page 138, Advanced settings when crossing international bor-
ders are displayed.
Tank options
›
In the Navigation main menu, tap the functional surface
Tap →
Fuel op-tions
.
■
Select preferred fuel station
- Select your preferred fuel station brand (the selec-
ted station brand will be displayed in the first three positions of the list)
■
Fuel warning
-Turn on- / Off the display of a warning message with the option
to visit the nearest petrol station when the fuel level reaches the reserve
area
Version information
›
In the Navigation main menu, tap the function surface
→
Version informa-tion
.
A list of countries shown, for whom navigation data exists, together with the
date of the last update.
An update of the navigation data can be carried out is by tapping the function-
al surface
Update (SD / USB)
.
The information on updating the navigation data is to be obtained from a
ŠKODA partner or on the following ŠKODA Internet pages.
http://go.skoda.eu/updateportal
Advanced settings
›
In the Navigation main menu, tap the functional surface
→
Advanced set-tings
.
■
Time display:
- Select the time display in the status line
■ - Estimated arrival time at destination
■ - Estimated travelling time to the destination
■
Status line
- Selection of the target type, for which the status line, the route
and travel time are displayed (Here it is also determined which destination
type after selecting
→
is displayed in the map)
■ - Route destination
■ - Next waypoint
138Infotainment
Page 143 of 336
■Kind of stat. list:- Sort types of radio stations in the station list (DAB)
■Global
- alphanumeric station sorting with the filtering ability according to
the transmitted program type
■
Hierarchical
- station sorting according to their assigned parent station
groups (Ensemble) - Tree structure of the list
■
Station logos
- manual management of station logos
■
Delete presets
- Delete the stations stored under preset buttons
■
Advanced settings
- further settings that are different depending on the selec-
ted broadcasting range(FM and DAB)
Advanced Settings (FM)
›
Select the FM band in the Radio main menu and tap on the function surface
→
Advanced settings
.
■
RDS regional:
- Switch on/off the automatic tracking of related regional stations
■
Automatic
- auto-selects the station with the best reception at the moment.
If you lose reception in the given region, Infotainment will automatically set
another available region.
■
Fixed
- Maintains the selected regional station continuously. When the sig-
nal is lost, another station must be set manually.
■
Alternative frequency (AF)
- Search for alternative frequencies of the station cur-
rently being played to on/off
■
Radio Data System (RDS)
- enable/disable RDS function (receiving additional in-
formation from the station) 1)
■
Sort stations:
- Sort types of radio stations in the station list (FM)
■
Group
- Sort by transmitted program type
■
ABC
- Alphabetical order according to station name
Advanced Settings (DAB)
›
In the Radio main menu, select the DAB range and tap on the function sur-
face
→
Advanced settings
.
■
DAB traffic announcements
- Turn on / off DAB announcements
■
Other DAB messages
- Switch on/off other announcements (e.g., warnings, re-
gional weather, sports reports, financial news)
■DAB station tracking - Switch on/off automatic DAB station tracking on another
frequency or in other station groups
■Auto. DAB - FM switching
- switches on/off auto-switching from DAB to the FM
frequency band if the DAB signal is lost
Automatic change from DAB to FM
If DAB reception is poor, the device tries to find an FM station.
The station name is followed by (
) while the station is being received on the
FM band. When the corresponding DAB station is can be received again, the
system automatically switches from FM to DAB.
If a DAB station is also not available in the FM band due to poor reception, In-
fotainment will be switched to mute.
Media menu settings
›
Tap on the function surface in the Media main menu
.
■
Sound
- sound settings
■
Mix/repeat inc. subfolders
- Switch on/off the title display including subfolders
■
Bluetooth
- Settings for the Bluetooth ®
function
■
Traffic program (TP)
- Switches traffic programme on/off
■
Activate AUX
- Enables / disables the AUX input
■
Remove SD card safely
- Safe removal of the inserted SD storage card
■
Remove USB safely
- safe removal of external device connected to the USB in-
put
Telephone menu settings
›
In the Telephone main menu, tap on the function surface
.
■
Hands-free
- Switching a call to the Telephone / back to Infotainment (the
menu item is displayed during a call)
■
Select telephone
- Search for available telephones/list of paired telephones/se-
lect telephone
■
Find
- search for available Telephones
■
Bluetooth
- Bluetooth ®
settings
1)
Only valid for some countries.
141Infotainment settings - Swing