fuel type SKODA SUPERB 2016 3.G / (B8/3V) Owner's Manual
[x] Cancel search | Manufacturer: SKODA, Model Year: 2016, Model line: SUPERB, Model: SKODA SUPERB 2016 3.G / (B8/3V)Pages: 336, PDF Size: 53.89 MB
Page 52 of 336
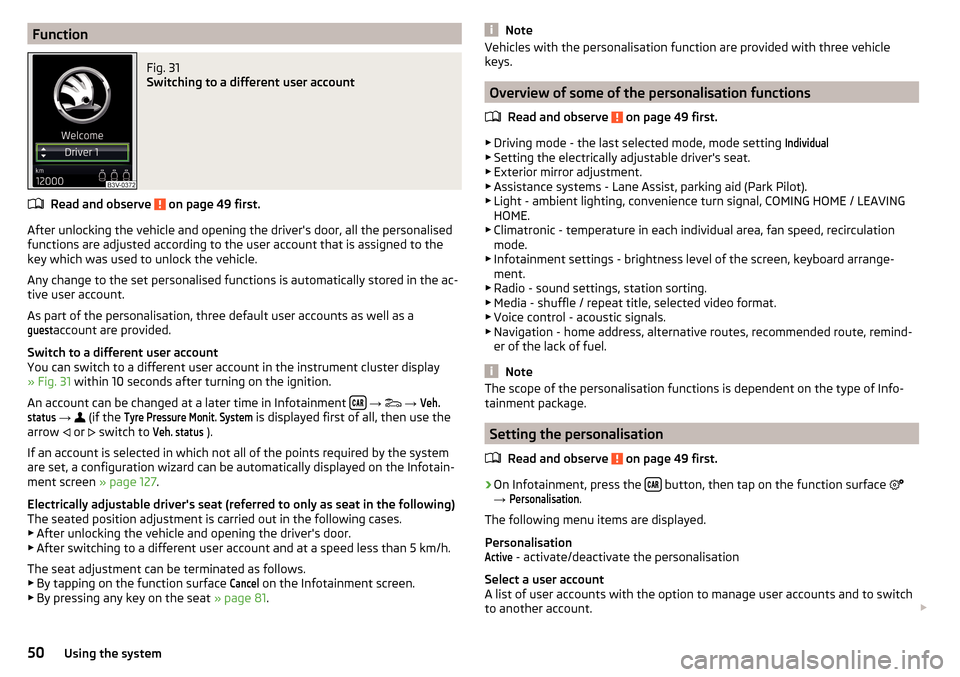
FunctionFig. 31
Switching to a different user account
Read and observe on page 49 first.
After unlocking the vehicle and opening the driver's door, all the personalised
functions are adjusted according to the user account that is assigned to the
key which was used to unlock the vehicle.
Any change to the set personalised functions is automatically stored in the ac- tive user account.
As part of the personalisation, three default user accounts as well as a
guest
account are provided.
Switch to a different user account
You can switch to a different user account in the instrument cluster display
» Fig. 31 within 10 seconds after turning on the ignition.
An account can be changed at a later time in Infotainment
→
→
Veh.status
→
(if the
Tyre Pressure Monit. System
is displayed first of all, then use the
arrow or
switch to
Veh. status
).
If an account is selected in which not all of the points required by the system
are set, a configuration wizard can be automatically displayed on the Infotain-
ment screen » page 127.
Electrically adjustable driver's seat (referred to only as seat in the following)
The seated position adjustment is carried out in the following cases. ▶ After unlocking the vehicle and opening the driver's door.
▶ After switching to a different user account and at a speed less than 5 km/h.
The seat adjustment can be terminated as follows.
▶ By tapping on the function surface
Cancel
on the Infotainment screen.
▶ By pressing any key on the seat » page 81.
NoteVehicles with the personalisation function are provided with three vehicle
keys.
Overview of some of the personalisation functions
Read and observe
on page 49 first.
▶Driving mode - the last selected mode, mode setting
Individual
▶Setting the electrically adjustable driver's seat.
▶ Exterior mirror adjustment.
▶ Assistance systems - Lane Assist, parking aid (Park Pilot).
▶ Light - ambient lighting, convenience turn signal, COMING HOME / LEAVING
HOME.
▶ Climatronic - temperature in each individual area, fan speed, recirculation
mode.
▶ Infotainment settings - brightness level of the screen, keyboard arrange-
ment.
▶ Radio - sound settings, station sorting.
▶ Media - shuffle / repeat title, selected video format.
▶ Voice control - acoustic signals.
▶ Navigation - home address, alternative routes, recommended route, remind-
er of the lack of fuel.
Note
The scope of the personalisation functions is dependent on the type of Info-
tainment package.
Setting the personalisation
Read and observe
on page 49 first.
›
On Infotainment, press the button, then tap on the function surface
→
Personalisation
.
The following menu items are displayed.
Personalisation
Active
- activate/deactivate the personalisation
Select a user account
A list of user accounts with the option to manage user accounts and to switch
to another account.
50Using the system
Page 53 of 336
■ - Account management with the following options:
■Rename user account
- rename the user account (not applicable to the
Guest
account)
■
Copy settings to another account
- copy the settings of an active user account to
another user account
■
Reset user account
- reset the selected user account to factory settings
Adjusting ■
Key assignment:
- options for assigning the vehicle key to the user account:
■
Manual
- detected vehicle key must be assigned to the active user account
manually
■
Automatic
- detected vehicle key automatically assigned to a different ac-
count of the active user account
■
Assign vehicle key to current user account
- manual assignment of the detected ve-
hicle key to the active user account - follow the instructions on the Infotain-
ment screen
■
Reset all
- reset the personalisation and the user accounts to factory settings
SmartGate
Introduction to the subject
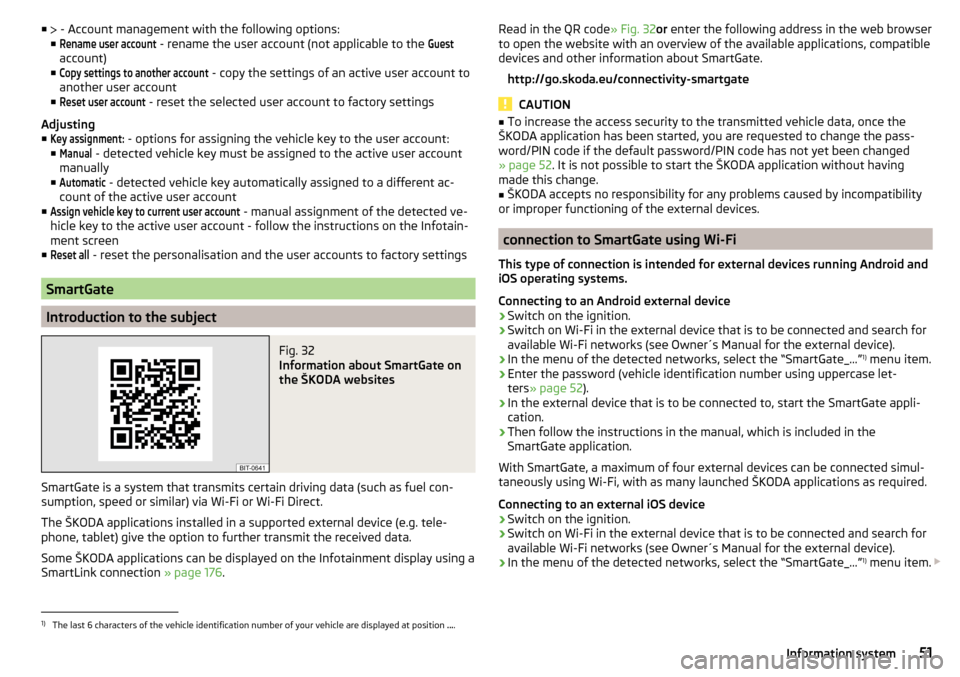
Fig. 32
Information about SmartGate on
the ŠKODA websites
SmartGate is a system that transmits certain driving data (such as fuel con-
sumption, speed or similar) via Wi-Fi or Wi-Fi Direct.
The ŠKODA applications installed in a supported external device (e.g. tele-
phone, tablet) give the option to further transmit the received data.
Some ŠKODA applications can be displayed on the Infotainment display using a SmartLink connection » page 176.
Read in the QR code » Fig. 32or enter the following address in the web browser
to open the website with an overview of the available applications, compatible
devices and other information about SmartGate.
http://go.skoda.eu/connectivity-smartgate
CAUTION
■ To increase the access security to the transmitted vehicle data, once the
ŠKODA application has been started, you are requested to change the pass-
word/PIN code if the default password/PIN code has not yet been changed
» page 52 . It is not possible to start the ŠKODA application without having
made this change.■
ŠKODA accepts no responsibility for any problems caused by incompatibility
or improper functioning of the external devices.
connection to SmartGate using Wi-Fi
This type of connection is intended for external devices running Android and
iOS operating systems.
Connecting to an Android external device
›
Switch on the ignition.
›
Switch on Wi-Fi in the external device that is to be connected and search for
available Wi-Fi networks (see Owner´s Manual for the external device).
›
In the menu of the detected networks, select the “SmartGate_...” 1)
menu item.
›
Enter the password (vehicle identification number using uppercase let-
ters » page 52 ).
›
In the external device that is to be connected to, start the SmartGate appli-
cation.
›
Then follow the instructions in the manual, which is included in the
SmartGate application.
With SmartGate, a maximum of four external devices can be connected simul-
taneously using Wi-Fi, with as many launched ŠKODA applications as required.
Connecting to an external iOS device
›
Switch on the ignition.
›
Switch on Wi-Fi in the external device that is to be connected and search for
available Wi-Fi networks (see Owner´s Manual for the external device).
›
In the menu of the detected networks, select the “SmartGate_...” 1)
menu item.
1)
The last 6 characters of the vehicle identification number of your vehicle are displayed at position
....
51Information system
Page 58 of 336
SafeLockRead and observe
and on page 54 first.
SafeLock prevents the doors from behind opened from inside as well as win-
dow operation. This makes it more difficult for anyone to break into the vehi-
cle.
Switching on
SafeLock switches on when the vehicle is locked.
This function is pointed out by the following message on the display of the in-
strument cluster after the ignition is switched off.
Observe SAFE interlock! Log book!CHECK SAFELOCK
Switch-on display
With the activated SafeLock, the warning light in the driver´s door flashes for 2
seconds in rapid succession, this then starts to flash at longer intervals.
Switching off ▶ By locking twice within 2 seconds.
▶ or: by deactivating the interior monitor and the towing protection
» page 58 .
The warning light in the driver´s door flashes fast for about 2 seconds, goes
out and starts to flash at longer intervals after about 30 seconds.
If the vehicle is locked and the safe securing system is switched off, the door
can be opened separately from the inside by a single pull on opening lever.
The safelock switches on the next time the vehicle is locked.
WARNINGIf the car is locked and the safe securing system activated, no people must
remain in the car as it will then not be possible to either unlock a door or
open a window from the inside. The locked doors make it more difficult for
rescuers to get into the vehicle in an emergency – risk to life!
Individual settings
Read and observe
and on page 54 first.
The following functions of the central locking can be individually adjusted in
infotainment in the
→
→
Opening and closing
menu.
All doors
The function allows you to unlock all doors, the boot lid and the fuel filler flap.
Single door
The function allows you to unlock only the driver's door and the fuel filler flap
with the radio remote control. KESSY allows the unlocking of a single door
which is in the vicinity of the key, as well as the fuel filler flap. The other doors
and the boot lid are only unlocked once the door handle is unlocked or
touched.
Doors on a vehicle side
This function enables you to unlock both doors on the driver's side and the
fuel filler flap with the radio remote control unit. KESSY allows the unlocking of
both doors which are in the vicinity of the key, as well as the fuel filler flap. The
other doors and the boot lid are only unlocked once the door handle is un-
locked or touched.
Automatic locking/unlocking
This function enables the locking of all doors and the boot lid from a speed of
15 km/h. Opening the doors and the boot lid from the outside is not possible.
The renewed unlocking of the doors and the boot lid is carried out when the
ignition key is removed or when the door is opened from inside (depending on
the individual setting for the central locking system).
Note
The individual adjustment of the central locking system is stored (depending
on the Infotainment type) in the active user account personalisation
» page 49 .56Using the system
Page 140 of 336
■Sort Contacts: - Setting the arrangement of the Telephonebook
■By surname
- Sorting by the contact surname
■
By first name
- Sorting by the contact first name
■
Define home address
- Enter the home address
■
Delete My POIs
- Deleting own POI categories (Personal POI)
■
Update "My POIs" (SD/USB)
- Import / update your own POI categories (Personal
POI)
■
Import objectives (SD / USB)
- Import destinations in vCard format
■
Delete user data
- Delete user data (by pressing the function surface
Delete
and
confirm the deletion) ■
Last destinations
- Delete the last destinations
■
Dest. memory
- Delete the stored destinations
■
Routes
- Delete saved routes
■
My points of interest (Personal POI)
- Delete the custom POIs
■
Entered cities
- Delete the history of places already entered via the address
■
Home address
- Delete the stored home address
■
Flagged destination
- Delete the flagged destination
■
Waypoint tour
- Delete items in the Waypoint mode menu (Applies to Info-
tainment Columbus)
■
Most frequent routes
- Deletion of the most travelled routes
Nav. announcements
›
In the Navigation main menu, tap the functional surface
Tap
→
Nav. an-nouncements
.
■
Volume
- Volume control of the nav. announcements
■
Entertainment fading (nav. announce.)
- Setting the fading of the audio volume (e.g.
radio nav. announcements
■
Nav. announcements:
- Setting the playback method of nav. announcements
■
Comprehensive
- All nav. announcements
■
Brief
- Short nav. announcements
■
Congestion only
- Only nav. announcements when a route is changed
■
No navigation sound during call
- Enable / disable non-playback of nav. announce-
ments during a telephone call
■
Note: “My POIs”
- Turn on/off an audible indication when approaching a custom
POI (if supported by the imported custom POI) (applies to Infotainment Co-
lumbus)
Top speeds
›
In the Navigation main menu, tap the functional surface
→
Top speeds
.
The speed limits in the current country are displayed.
With the Note: National border crossed
function switched on, the country-specific
speed limits » page 138, Advanced settings when crossing international bor-
ders are displayed.
Tank options
›
In the Navigation main menu, tap the functional surface
Tap →
Fuel op-tions
.
■
Select preferred fuel station
- Select your preferred fuel station brand (the selec-
ted station brand will be displayed in the first three positions of the list)
■
Fuel warning
-Turn on- / Off the display of a warning message with the option
to visit the nearest petrol station when the fuel level reaches the reserve
area
Version information
›
In the Navigation main menu, tap the function surface
→
Version informa-tion
.
A list of countries shown, for whom navigation data exists, together with the
date of the last update.
An update of the navigation data can be carried out is by tapping the function-
al surface
Update (SD / USB)
.
The information on updating the navigation data is to be obtained from a
ŠKODA partner or on the following ŠKODA Internet pages.
http://go.skoda.eu/updateportal
Advanced settings
›
In the Navigation main menu, tap the functional surface
→
Advanced set-tings
.
■
Time display:
- Select the time display in the status line
■ - Estimated arrival time at destination
■ - Estimated travelling time to the destination
■
Status line
- Selection of the target type, for which the status line, the route
and travel time are displayed (Here it is also determined which destination
type after selecting
→
is displayed in the map)
■ - Route destination
■ - Next waypoint
138Infotainment
Page 260 of 336
WARNING■No changes may be made to parts of the airbag system, the front bumper
and the body.■
Any work on the airbag system including the installation and removal of
system components due to other repair work (e.g. removal of the steering
wheel) must only be carried out by a specialist garage.
■
Do not manipulate individual parts of the airbag system, as this might re-
sult in the airbag being deployed.
■
If the airbag is triggered, the airbag system must be exchanged.
WARNINGThe airbag system operates using pressure sensors located in the front
doors. For this reason, no adjustments may be carried out to the doors or
door panels (e.g. installation of additional loudspeakers). The resulting
damage can negatively affect the function of the airbag system - there is a
risk of accidents and fatal injuries! The following guidelines must be ob-
served.■
Any work on the front doors and their door panels must be carried out by
a specialist garage.
■
Never drive with removed inner door panels or openings in the panels.
Acceptance and recycling of used vehicles
Read and observe
on page 256 first.
All new ŠKODA vehicles are 95% recyclable.
Service intervals
Introduction
This chapter contains information on the following subjects:
Overview of service intervals
259
Fixed service intervals QI1 - QI4
259
Flexible service interval QI6
259
Digital Service Plan
260
The service interval display in the display of the instrument cluster will remind
you to carry out every service stipulated by the manufacturer at the right time
in order to prevent you from forgetting them » page 49.
The completion of services can be verified through the printed verification
from the digital service schedule and the respective receipts.
The specified service intervals are tailored to normal operating conditions.
In the case of difficult operating conditions, it is necessary to have some serv-
ice work performed before the date of the next service or between the speci-
fied service intervals. This applies mainly to the cleaning or the replacement of
the air filter insert in regions with heavy dust pollution as well as checking and
replacing the toothed belt, but also to vehicles with diesel particle filters,
which can put greater strain on the engine oil.
The following is understood under difficult conditions:
▶ Fuel containing sulphur.
▶ Frequent short trips.
▶ Longer periods of engine idling (e.g. taxis).
▶ Operation in areas with heavy dust pollution.
▶ Frequent trailer operation.
▶ Predominantly stop-and-go traffic as is often the case in city driving, for ex-
ample.
▶ Operation predominantly during winter.
You will be told at the specialist garage whether the operating conditions of your vehicle may make it necessary for service work to be carried out between
the normal service intervals.
Different service charges may apply from the particular scope of work required,
depending on the vehicle type and equipment and the status of your vehicle.
Note
■ The customer is responsible for covering the cost of all services including
changing or replenishing the oil, even during the warranty period, unless sta-
ted otherwise in the ŠKODA AUTO. warranty terms or other agreements.■
You will be informed about the current service scopes for the particular serv-
ice work by the specialist garage.
258General Maintenance
Page 278 of 336
Wheels
Wheels and tyres
Introduction
This chapter contains information on the following subjects:
Advice on tyre/wheel usage
276
Tyre pressure
277
Tire wear and wheel change
277
Spare wheel
278
Tyre marking
278
Advice on tyre/wheel usage
New tyres , during the first 500 km, new tyres do not offer optimum grip and
appropriate care should therefore be taken when driving.
Always fit tyres with a greater profile depth on the front wheels.
Wheels and bolts are matched to each other in terms of design. We recom-
mend that you use wheel rims and wheel bolts from ŠKODA Original Accesso-
ries.
Always store wheels or tyres in a cool, dry and, where possible, dark place. The
tyres themselves should be stored standing.
Tyre life
Tyres age and lose their original characteristics, even if they are not being
used. Therefore, we recommend not using tyres that are more than 6 years
old.
The manufacturing date is indicated on the tyre sidewall (possibly on the in-
side ). E.g. DOT ... 10 16... means, for example, that the tyre was manufactured
in the 10. week of 2016.
Tyre damage
We recommend checking your tyres and wheel rims for damage (punctures,
cuts, splits and bulges, etc.) on a regular basis.
Remove any foreign objects in the tyre tread immediately (e.g. small stones).
Foreign bodies which have penetrated into the tyre (e.g. screws or nails)
should not be removed. Seek help from a specialist garage.
Installation of new tyres
Only fit radial tyres of the same type, size (rolling circumference) and the same
tread pattern on one axle on all 4 wheels.
When mounting new tyres the tyres have to be replaced axle by axle.
Uni-directional tires
The direction of rotation of the tyres is marked by arrows on the wall of the
tyre .
The specified running direction must be strictly adhered to, otherwise the fol-
lowing tyre characteristics may be degraded. ▶ Driving stability.
▶ Traction.
▶ Tyre noise and tyre wear.
Tyres with increased puncture resistance
Some vehicles may be fitted with tyres at the factory that have increased
puncture resistance (so-called “SEAL” tyres). For some countries, vehicles are
equipped with “SEAL” tyres delivered without a spare wheel and appropriate
tools.
If “SEAL”tyres are replaced with standard tyres, the vehicle must be retrofitted
with a puncture repair kit or spare wheel and appropriate hand tools.WARNING■ Never use tyres if you do not know anything about the condition and age.■Never drive with damaged tyres – risk of accident.
CAUTION
■ The tyres must be protected from contact with substances such as oil,
grease and fuel, which could damage them. If the tyres come into contact with
these substances, then we recommend you have this checked out in a special-
ist workshop.■
Do not use rims with ground or polished surface in winter conditions - there
is a risk of wheel damage (e.g. from the road grit).
Note
■ We recommend that any work on the wheels or tyres is carried out by a spe-
cialist garage.■
We recommend that you use wheel rims, tyres, full wheel trims and snow
chains from ŠKODA Original Accessories.
276General Maintenance
Page 305 of 336
Technical data
Technical data
Basic vehicle data
Introduction
This chapter contains information on the following subjects:
Vehicle data
303
Operating weight
304
Payload
305
Measurement of fuel consumption and CO 2 emissions according to ECE
Regulations and EU Directives
305
Dimensions - Superb
306
Dimensions - Superb estate
307
Overhang angle
308
The details given in the vehicle's technical documentation always take prece-
dence over the details in the Owner's Manual.
The listed performance values were determined without performance-reduc- ing equipment, e.g. air conditioning system.
The values given have been determined in accordance with the rules and con-
ditions specified in statutory or technical regulations for determining opera-
tional and technical data for motor vehicles.
The values listed are for the basic model without any optional equipment.
Vehicle dataFig. 369
Vehicle data sticker
Fig. 370
Rating plate
Vehicle data sticker
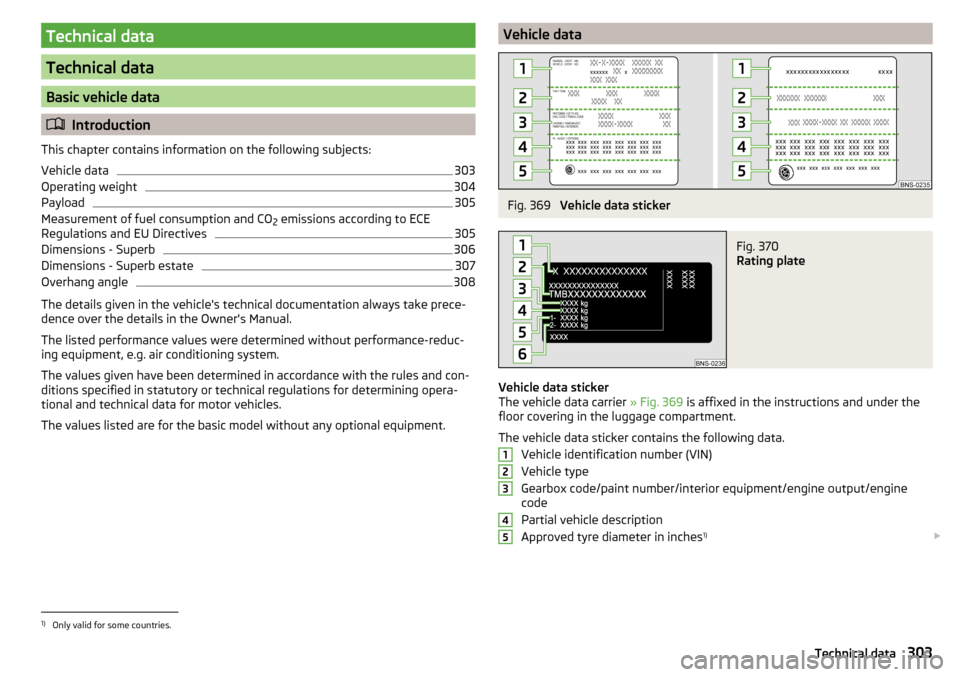
The vehicle data carrier » Fig. 369 is affixed in the instructions and under the
floor covering in the luggage compartment.
The vehicle data sticker contains the following data. Vehicle identification number (VIN)
Vehicle type
Gearbox code/paint number/interior equipment/engine output/engine
code
Partial vehicle description
Approved tyre diameter in inches 1)
123451)
Only valid for some countries.
303Technical data
Page 306 of 336
The approved tyres and rim sizes for your vehicle are listed in the vehicle's
technical documentation (the so called COC document) and this also states the
declaration of conformity.
Type plate
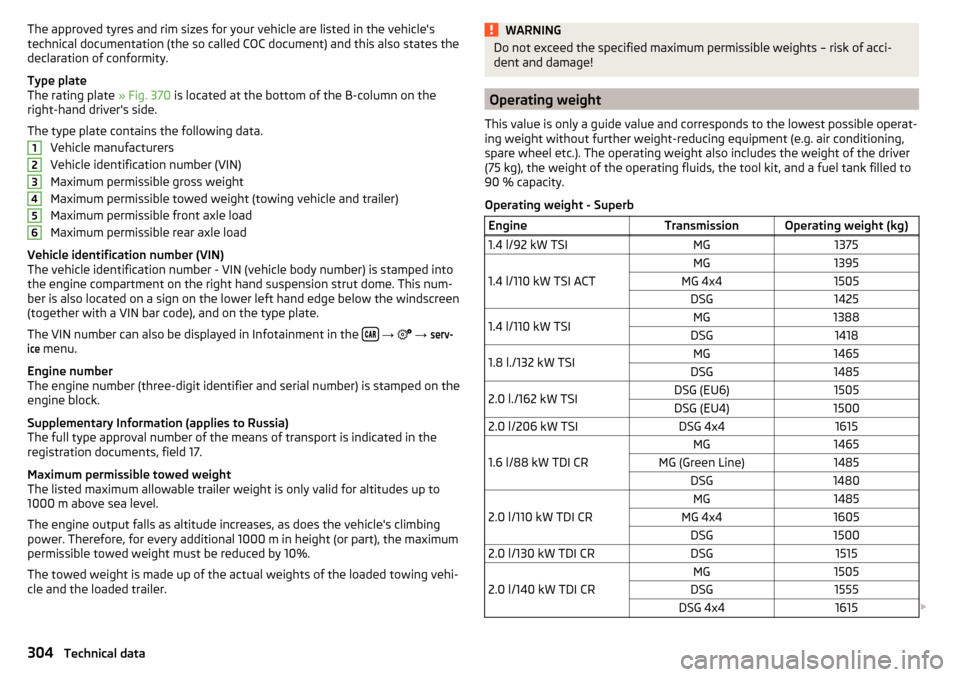
The rating plate » Fig. 370 is located at the bottom of the B-column on the
right-hand driver's side.
The type plate contains the following data. Vehicle manufacturers
Vehicle identification number (VIN)
Maximum permissible gross weight
Maximum permissible towed weight (towing vehicle and trailer)
Maximum permissible front axle load
Maximum permissible rear axle load
Vehicle identification number (VIN)
The vehicle identification number - VIN (vehicle body number) is stamped into
the engine compartment on the right hand suspension strut dome. This num-
ber is also located on a sign on the lower left hand edge below the windscreen
(together with a VIN bar code), and on the type plate.
The VIN number can also be displayed in Infotainment in the
→
→
serv-ice
menu.
Engine number
The engine number (three-digit identifier and serial number) is stamped on the
engine block.
Supplementary Information (applies to Russia)
The full type approval number of the means of transport is indicated in the
registration documents, field 17.
Maximum permissible towed weight
The listed maximum allowable trailer weight is only valid for altitudes up to
1000 m above sea level.
The engine output falls as altitude increases, as does the vehicle's climbing
power. Therefore, for every additional 1000 m in height (or part), the maximum
permissible towed weight must be reduced by 10%.
The towed weight is made up of the actual weights of the loaded towing vehi-
cle and the loaded trailer.
123456WARNINGDo not exceed the specified maximum permissible weights – risk of acci-
dent and damage!
Operating weight
This value is only a guide value and corresponds to the lowest possible operat-
ing weight without further weight-reducing equipment (e.g. air conditioning,
spare wheel etc.). The operating weight also includes the weight of the driver
(75 kg), the weight of the operating fluids, the tool kit, and a fuel tank filled to
90 % capacity.
Operating weight - Superb
EngineTransmissionOperating weight (kg)1.4 l/92 kW TSIMG1375
1.4 l/110 kW TSI ACT
MG1395MG 4x41505DSG14251.4 l/110 kW TSIMG1388DSG14181.8 l./132 kW TSIMG1465DSG14852.0 l./162 kW TSIDSG (EU6)1505DSG (EU4)15002.0 l/206 kW TSIDSG 4x41615
1.6 l/88 kW TDI CR
MG1465MG (Green Line)1485DSG1480
2.0 l/110 kW TDI CR
MG1485MG 4x41605DSG15002.0 l/130 kW TDI CRDSG1515
2.0 l/140 kW TDI CR
MG1505DSG1555DSG 4x41615 304Technical data
Page 329 of 336
UnlockingCentral locking button55
in case of emergency292
Remote control54
Unlocking and locking53
Unlock steering lock199
Update navigation data181
Update the navigation data138
USB90, 150
Safe removal140
Used vehicles Acceptance and recycling
258
Useful equipment Clothes hook
93
Cup holders90
Glasses compartment92
Removable through-loading bag95
User account Configuration wizard
127
User profile136, 141
V
Variable loading floor
109
vCard185, 186
Vehicle - Settings198
Vehicle battery charging
275
Safety instructions273
Warning light39
Vehicle care Outside
261
Vehicle condition See Auto Check Control
44
Vehicle data sticker303
Vehicle data sticker and type plate Vehicle data sticker and type plate
303
Vehicle dimensions306, 307
Vehicle height306, 307
Vehicle identification number (VIN)303
Vehicle length306, 307
Vehicle systems198
Vehicle tool kit281
Vehicle width306, 307
Ventilation Seats
85
Vest280
Video DVD Compatible sources
156
Main menu155
Play back155
Select video source155
Supported file formats156
Video DVD menu155
Menu155
Video player155
VIN Vehicle identification number
303
Virtual pedal61
Visibility74
Visors75
Voice control128
Commands130
Correction of a voice command input130
Help130
Not recognising a voice command130
on / off129
Operation principle129
Settings133
Stop / restore command130
Voicemail168
Volume127
Volume setting127
W
Waiter Voice control
129
Warning display - low temperature42
Warning lights33
Warning symbols see Warning lights33
Warning triangle280
Warning when speeding47
Warranty5
Washing the vehicle260
Waste container91
Water in the fuel filter42
Waypoint mode194
Main menu194
Record waypoints195
Set waypoint manually195
Waypoint tour memory195, 196
Waypoint tour memory195, 196
Weather conditions256
Weights303, 304, 305
Wheel bolts Anti-theft wheel bolts
284
Caps283
Loosening and tightening284
Wheels276
Changing282
Full trim283
Load Index278
Snow chains279
Speed symbol278
Tyre age276
Tyre damage276
Tyre pressure277
Tyre storage276
Uni-directional tires276
Winter tyres278
Wi-Fi51
Wi-Fi direct52
Window operation
62
Window operation62
Windscreen Heating
198
327Index