glove box SKODA SUPERB 2016 3.G / (B8/3V) Owner's Manual
[x] Cancel search | Manufacturer: SKODA, Model Year: 2016, Model line: SUPERB, Model: SKODA SUPERB 2016 3.G / (B8/3V)Pages: 336, PDF Size: 53.89 MB
Page 57 of 336

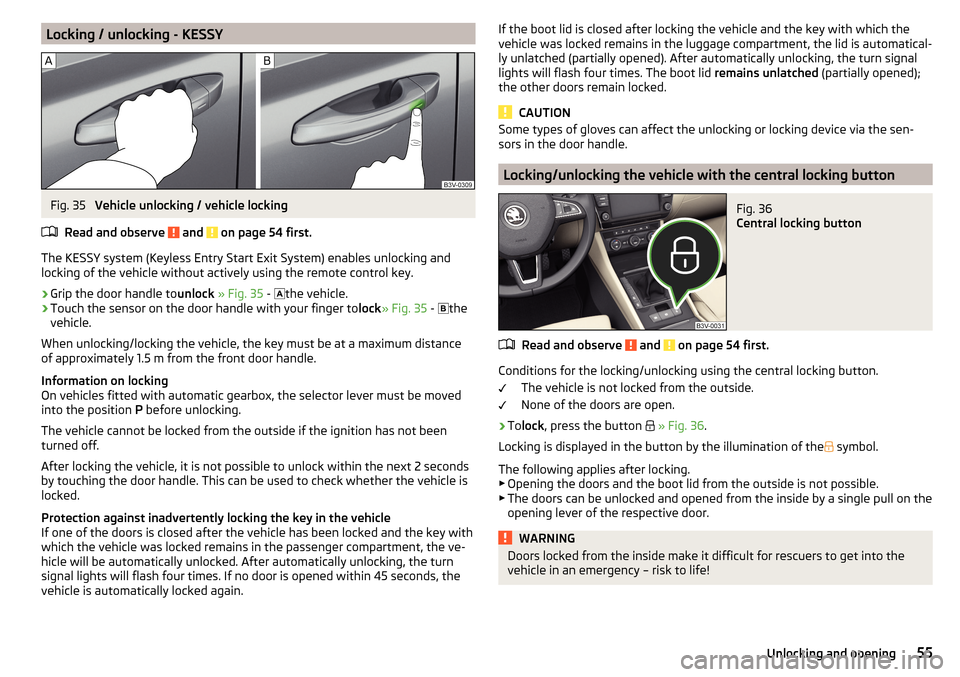
Locking / unlocking - KESSYFig. 35
Vehicle unlocking / vehicle locking
Read and observe
and on page 54 first.
The KESSY system (Keyless Entry Start Exit System) enables unlocking and
locking of the vehicle without actively using the remote control key.
›
Grip the door handle to unlock » Fig. 35 -
the vehicle.
›
Touch the sensor on the door handle with your finger to
lock» Fig. 35 -
the
vehicle.
When unlocking/locking the vehicle, the key must be at a maximum distance
of approximately 1.5 m from the front door handle.
Information on locking
On vehicles fitted with automatic gearbox, the selector lever must be moved
into the position P before unlocking.
The vehicle cannot be locked from the outside if the ignition has not been
turned off.
After locking the vehicle, it is not possible to unlock within the next 2 seconds
by touching the door handle. This can be used to check whether the vehicle is
locked.
Protection against inadvertently locking the key in the vehicle
If one of the doors is closed after the vehicle has been locked and the key with
which the vehicle was locked remains in the passenger compartment, the ve-
hicle will be automatically unlocked. After automatically unlocking, the turn
signal lights will flash four times. If no door is opened within 45 seconds, the
vehicle is automatically locked again.
If the boot lid is closed after locking the vehicle and the key with which the
vehicle was locked remains in the luggage compartment, the lid is automatical-
ly unlatched (partially opened). After automatically unlocking, the turn signal
lights will flash four times. The boot lid remains unlatched (partially opened);
the other doors remain locked.
CAUTION
Some types of gloves can affect the unlocking or locking device via the sen-
sors in the door handle.
Locking/unlocking the vehicle with the central locking button
Fig. 36
Central locking button
Read and observe and on page 54 first.
Conditions for the locking/unlocking using the central locking button.
The vehicle is not locked from the outside.
None of the doors are open.
›
To lock , press the button
» Fig. 36 .
Locking is displayed in the button by the illumination of the
symbol.
The following applies after locking. ▶ Opening the doors and the boot lid from the outside is not possible.
▶ The doors can be unlocked and opened from the inside by a single pull on the
opening lever of the respective door.
WARNINGDoors locked from the inside make it difficult for rescuers to get into the
vehicle in an emergency – risk to life!55Unlocking and opening
Page 151 of 336

Select the audio source
Tap - selection of the parent folder / Hold - selection of the audio source
Audio sources
Introduction to the subject
›
To playback connect or insert the desired audio source. Starts playback auto-
matically, then select the audio source » page 146.
If AUX is selected as the audio source, the playback must be started on the
connected device.
CAUTION
■ Do not save any important data or that which has not been backed up on the
connected audio sources. ŠKODA assumes no responsibility for lost or dam-
aged files or connected audio sources.■
When changing or connecting an audio source, this may cause sudden
changes in volume. Reduce the volume before changing or connecting an au-
dio source.
■
When connecting an external audio source, the external source information
messages can be displayed. These messages must be observed and confirmed
if necessary (e.g. enabling data transfer etc).
Note
The national copyright laws that apply in your country must be observed.
CD / DVD
Only applies to Infotainment Columbus.
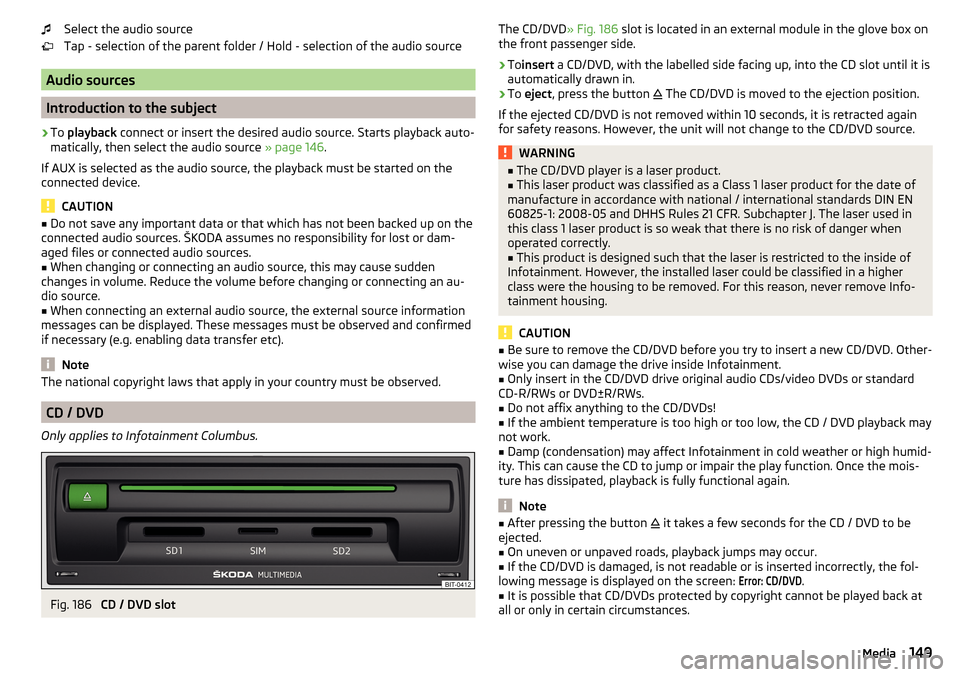
Fig. 186
CD / DVD slot
The CD/DVD
» Fig. 186 slot is located in an external module in the glove box on
the front passenger side.›
To insert a CD/DVD, with the labelled side facing up, into the CD slot until it is
automatically drawn in.
›
To eject , press the button
The CD/DVD is moved to the ejection position.
If the ejected CD/DVD is not removed within 10 seconds, it is retracted again
for safety reasons. However, the unit will not change to the CD/DVD source.
WARNING■ The CD/DVD player is a laser product.■This laser product was classified as a Class 1 laser product for the date of
manufacture in accordance with national / international standards DIN EN
60825-1: 2008-05 and DHHS Rules 21 CFR. Subchapter J. The laser used in
this class 1 laser product is so weak that there is no risk of danger when
operated correctly.■
This product is designed such that the laser is restricted to the inside of
Infotainment. However, the installed laser could be classified in a higher
class were the housing to be removed. For this reason, never remove Info-
tainment housing.
CAUTION
■ Be sure to remove the CD/DVD before you try to insert a new CD/DVD. Other-
wise you can damage the drive inside Infotainment.■
Only insert in the CD/DVD drive original audio CDs/video DVDs or standard
CD-R/RWs or DVD±R/RWs.
■
Do not affix anything to the CD/DVDs!
■
If the ambient temperature is too high or too low, the CD / DVD playback may
not work.
■
Damp (condensation) may affect Infotainment in cold weather or high humid-
ity. This can cause the CD to jump or impair the play function. Once the mois-
ture has dissipated, playback is fully functional again.
Note
■ After pressing the button it takes a few seconds for the CD / DVD to be
ejected.■
On uneven or unpaved roads, playback jumps may occur.
■
If the CD/DVD is damaged, is not readable or is inserted incorrectly, the fol-
lowing message is displayed on the screen:
Error: CD/DVD
.
■
It is possible that CD/DVDs protected by copyright cannot be played back at
all or only in certain circumstances.
149Media
Page 168 of 336

Use the SIM card in the external module
Applies to Infotainment Columbus with the SIM card slot in the external mod-
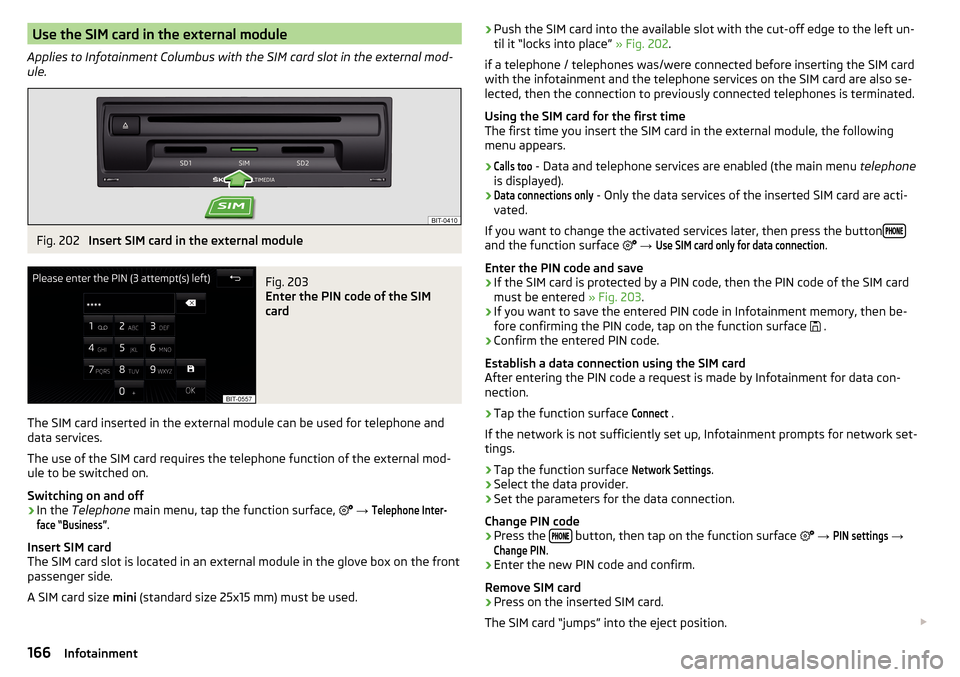
ule.Fig. 202
Insert SIM card in the external module
Fig. 203
Enter the PIN code of the SIM
card
The SIM card inserted in the external module can be used for telephone and
data services.
The use of the SIM card requires the telephone function of the external mod-
ule to be switched on.
Switching on and off
›
In the Telephone main menu, tap the function surface,
→
Telephone Inter-face “Business”
.
Insert SIM card
The SIM card slot is located in an external module in the glove box on the front
passenger side.
A SIM card size mini (standard size 25x15 mm) must be used.
›Push the SIM card into the available slot with the cut-off edge to the left un-
til it “locks into place” » Fig. 202.
if a telephone / telephones was/were connected before inserting the SIM card
with the infotainment and the telephone services on the SIM card are also se-
lected, then the connection to previously connected telephones is terminated.
Using the SIM card for the first time
The first time you insert the SIM card in the external module, the following
menu appears.›Calls too
- Data and telephone services are enabled (the main menu telephone
is displayed).
›Data connections only
- Only the data services of the inserted SIM card are acti-
vated.
If you want to change the activated services later, then press the button
and the function surface
→
Use SIM card only for data connection
.
Enter the PIN code and save
›
If the SIM card is protected by a PIN code, then the PIN code of the SIM card
must be entered » Fig. 203.
›
If you want to save the entered PIN code in Infotainment memory, then be-
fore confirming the PIN code, tap on the function surface .
›
Confirm the entered PIN code.
Establish a data connection using the SIM card
After entering the PIN code a request is made by Infotainment for data con-
nection.
›
Tap the function surface
Connect
.
If the network is not sufficiently set up, Infotainment prompts for network set-
tings.
›
Tap the function surface
Network Settings
.
›
Select the data provider.
›
Set the parameters for the data connection.
Change PIN code
›
Press the button, then tap on the function surface
→
PIN settings
→
Change PIN
.
›
Enter the new PIN code and confirm.
Remove SIM card
›
Press on the inserted SIM card.
The SIM card “jumps” into the eject position.
166Infotainment
Page 301 of 336

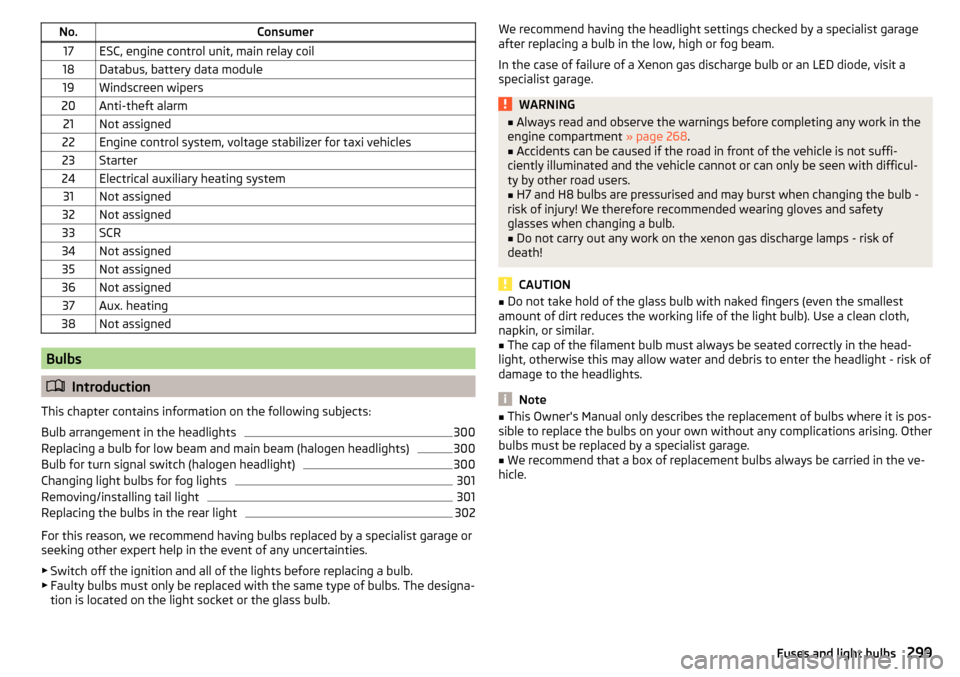
No.Consumer17ESC, engine control unit, main relay coil18Databus, battery data module19Windscreen wipers20Anti-theft alarm21Not assigned22Engine control system, voltage stabilizer for taxi vehicles23Starter24Electrical auxiliary heating system31Not assigned32Not assigned33SCR34Not assigned35Not assigned36Not assigned37Aux. heating38Not assigned
Bulbs
Introduction
This chapter contains information on the following subjects:
Bulb arrangement in the headlights
300
Replacing a bulb for low beam and main beam (halogen headlights)
300
Bulb for turn signal switch (halogen headlight)
300
Changing light bulbs for fog lights
301
Removing/installing tail light
301
Replacing the bulbs in the rear light
302
For this reason, we recommend having bulbs replaced by a specialist garage or
seeking other expert help in the event of any uncertainties.
▶ Switch off the ignition and all of the lights before replacing a bulb.
▶ Faulty bulbs must only be replaced with the same type of bulbs. The designa-
tion is located on the light socket or the glass bulb.
We recommend having the headlight settings checked by a specialist garage
after replacing a bulb in the low, high or fog beam.
In the case of failure of a Xenon gas discharge bulb or an LED diode, visit a
specialist garage.WARNING■ Always read and observe the warnings before completing any work in the
engine compartment » page 268.■
Accidents can be caused if the road in front of the vehicle is not suffi-
ciently illuminated and the vehicle cannot or can only be seen with difficul-
ty by other road users.
■
H7 and H8 bulbs are pressurised and may burst when changing the bulb -
risk of injury! We therefore recommended wearing gloves and safety
glasses when changing a bulb.
■
Do not carry out any work on the xenon gas discharge lamps - risk of
death!
CAUTION
■ Do not take hold of the glass bulb with naked fingers (even the smallest
amount of dirt reduces the working life of the light bulb). Use a clean cloth,
napkin, or similar.■
The cap of the filament bulb must always be seated correctly in the head-
light, otherwise this may allow water and debris to enter the headlight - risk of
damage to the headlights.
Note
■ This Owner's Manual only describes the replacement of bulbs where it is pos-
sible to replace the bulbs on your own without any complications arising. Other
bulbs must be replaced by a specialist garage.■
We recommend that a box of replacement bulbs always be carried in the ve-
hicle.
299Fuses and light bulbs