turn signal bulb SKODA YETI 2010 1.G / 5L Owner's Manual
[x] Cancel search | Manufacturer: SKODA, Model Year: 2010, Model line: YETI, Model: SKODA YETI 2010 1.G / 5LPages: 271, PDF Size: 14.71 MB
Page 29 of 271
Instruments and warning lights
28
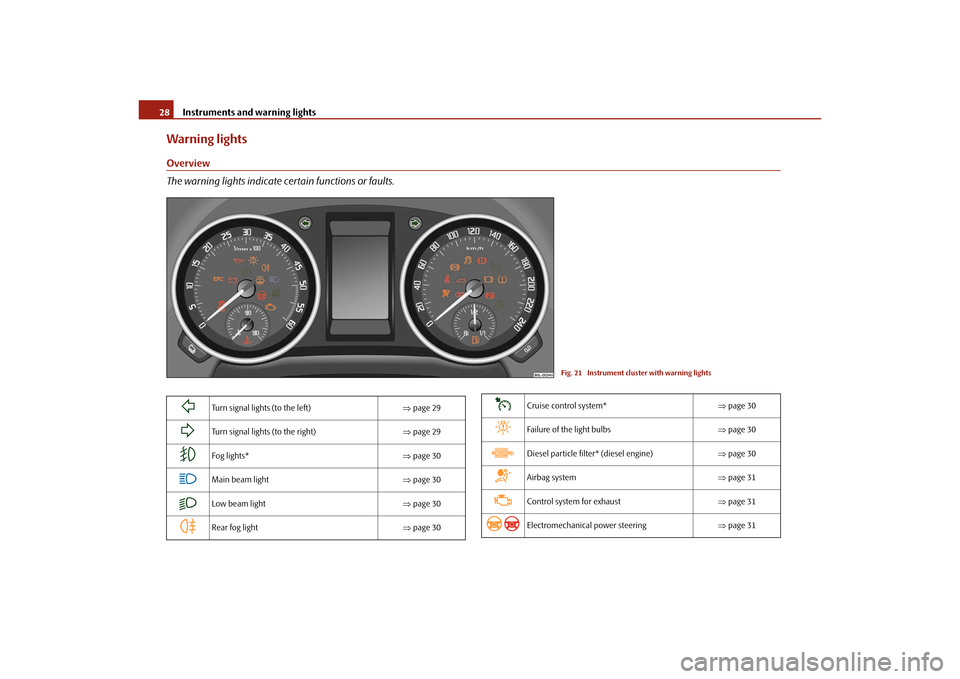
Warning lightsOverview
The warning lights indicate certain functions or faults.
Fig. 21 Instrument cluster with warning lights
Turn signal lights (to the left) page 29
Turn signal lights (to the right) page 29
Fog lights* page 30
Main beam light page 30
Low beam light page 30
Rear fog light page 30
Cruise control system* page 30
Failure of the light bulbs page 30
Diesel particle filter* (diesel engine) page 30
Airbag system page 31
Control system for exhaust page 31
Electromechanical power steering page 31
s2ug.6.book Page 28 Friday, April 9, 2010 2:24 PM
Page 31 of 271
Instruments and warning lights
30
Further information about the turn signal system page 59.Fog lights*
The warning light
comes on when the fog lights are operating page 56.
Main beam
The indicator light
comes on when the main beam is selected or also when the
headlight flasher is operated.
Further information about the main beam page 59.
Low beam
The warning light
comes on when low beam is selected page 53.
Rear fog light
The warning light
comes on when the rear fog lights are operating page 57.
Cruise control system*
The warning light
lights up, when operating the speed regulating system.
Bulb failure
The warning light
comes on if a bulb is faulty:
up to 2 seconds after the ignition is switched on;
when switching on the defective light bulb.
The following text e.g will be disp layed in the information display*:
Check front right dipped beam!
The rear side lights and the licence plate li ghting require several light bulbs. The indi-
cator light
only lights up if all light bulbs of the licence plate lighting or the parking light (in one rear light unit) are defective.
Check regularly the function of the light
bulbs.
Diesel particle filter*
(diesel engine)
If the warning light
comes on, this means that soot has accumulated in the diesel
particle filter because of the frequent short distances.
In order to clean the diesel particle filter, the vehicle should be driven at an even speed
of at least 60 km/h at engine speeds of 1 800 - 2 500 rpm for at least 15 minutes or until
the warning light goes out with the 4th or 5th gear engaged (automatic gearbox: posi-
tion S) when the traffic situation permits it . This increases the exhaust temperature and
the soot deposited in the diesel particle filter is burnt.
Always pay attention to the valid speed limits .
The warning light
goes out after the successful cleaning of the diesel particle filter.
If the filter is not properly cleaned, the warning light
does not go out and the
warning light
begins to flash. In the information display* appears Diesel-particle
filter: Owner's manual. Afterwards the engine control unit shifts the engine into the
emergency mode, which only has a reduced po wer output. After switching the ignition
off and on again the warning light
comes on.
Have the vehicle inspected without delay by your specialist garage.
WARNING
If you do not pay attention to the warning light coming on and the corre-
sponding descriptions and warning notes, this may result in injuries or major
vehicle damage.
Always adjust your speed to suit weather, road, region and traffic condi-
tions. The route indicated by the warnin g light must not tempt you to disregard
the national regulations for road traffic.Caution
As long as the warning light
li ghts up, o ne must take into account an incre as ed f uel
consumption and in certain circumstances a power reduction of the engine.
s2ug.6.book Page 30 Friday, April 9, 2010 2:24 PM
Page 55 of 271
Lights and Visibility
54
Deactivating the function daylight driving lights
– Pull the turn signal light lever towards the steering wheel up to 3 seconds after switching on the ignition and at the same time, slide it to the bottom and hold it in
this position for at least 3 seconds.Activating the function daylight driving lights– Pull the turn signal light lever towards the steering wheel up to 3 seconds after switching on the ignition and at the same time, slide it to the top and hold it in this
position for at least 3 seconds.
In some countries, the national legal provisions require that the rear parking lights
come on together with the bulbs for daylight driving lights when activating the function
daylight driving lights.
On vehicles which are fitted with bulbs for daylight driving lights in the fog lights, the
parking lights do not come on when activa ting the function daylight driving lights.
When the daylight driving lights are switched on, the lighting of the instrument cluster
is switched on as well.
On vehicles fitted with an information displa y*, you can also activate or deactivate in
the menu the function da ylight driving lights:
Setup
Lights & Vision (Lights & Vision)
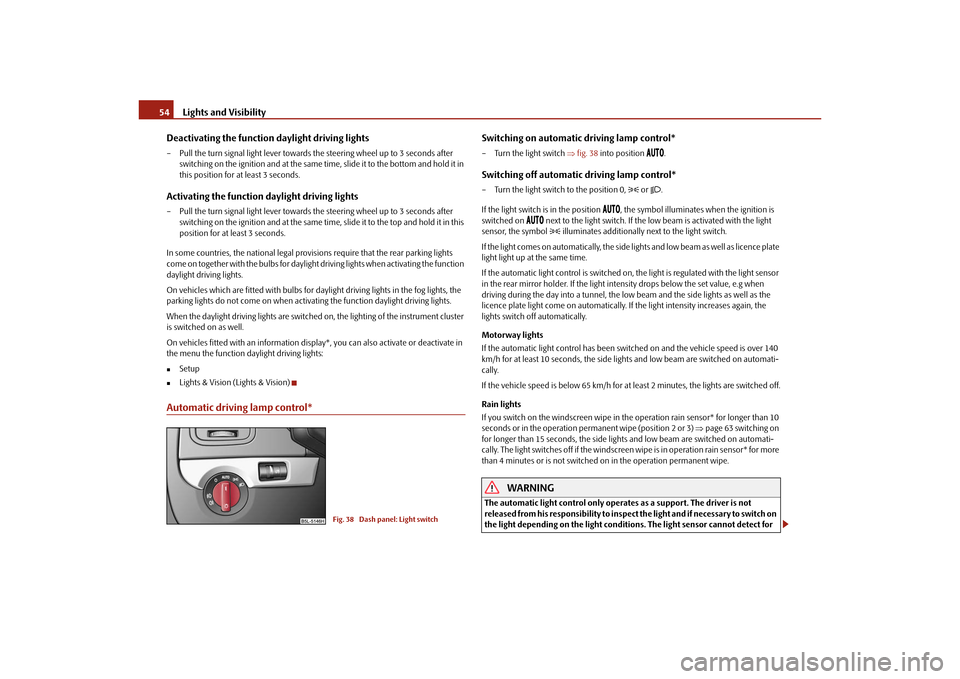
Automatic driving lamp control*
Switching on automatic driving lamp control*– Turn the light switch fig. 38 into position
.
Switching off automatic driving lamp control*– Turn the light switch to the position 0,
or .
If the light switch is in the position
, the symbol illuminates when the ignition is
switched on
next to the light switch. If the low beam is activated with the light
sensor, the symbol illuminates additionally next to the light switch.
If the light comes on automatically, the side lights and low beam as well as licence plate
light light up at the same time.
If the automatic light control is switched on, the light is regulated with the light sensor
in the rear mirror holder. If the light intensity drops below the set value, e.g when
driving during the day into a tunnel, the lo w beam and the side lights as well as the
licence plate light come on automatically. If the light intensity increases again, the
lights switch off automatically.
Motorway lights
If the automatic light control has been swit ched on and the vehicle speed is over 140
km/h for at least 10 seconds, the side ligh ts and low beam are switched on automati-
cally.
If the vehicle speed is below 65 km/h for at least 2 minutes, the lights are switched off.
Rain lights
If you switch on the windscreen wipe in th e operation rain sensor* for longer than 10
seconds or in the operation perm anent wipe (position 2 or 3) page 63 switching on
for longer than 15 seconds, the side ligh ts and low beam are switched on automati-
cally. The light switches off if the windscreen wipe is in operation rain sensor* for more
than 4 minutes or is not switched on in the operation permanent wipe.
WARNING
The automatic light control only operat es as a support. The driver is not
released from his responsibility to inspect the light and if necessary to switch on
the light depending on the light conditions. The light sensor cannot detect for
Fig. 38 Dash panel: Light switch
s2ug.6.book Page 54 Friday, April 9, 2010 2:24 PM
Page 59 of 271
Lights and Visibility
58
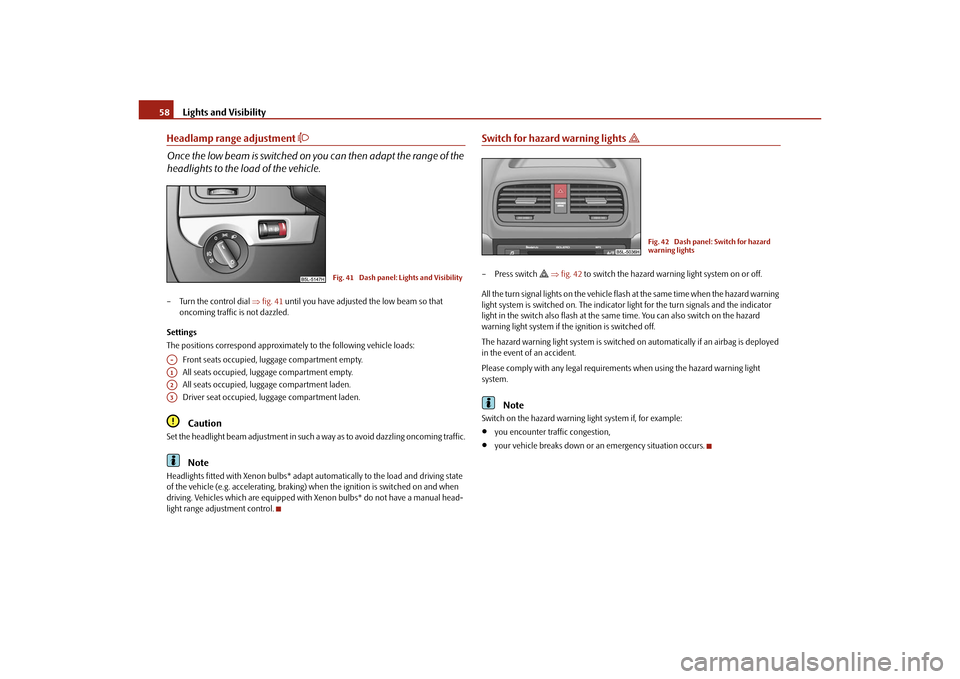
Headlamp range adjustment
Once the low beam is switched on you can then adapt the range of the
headlights to the lo ad of the vehicle.– Turn the control dial fig. 41 until you have adjusted the low beam so that
oncoming traffic is not dazzled.
Settings
The positions correspond approximately to the following vehicle loads:
Front seats occupied, luggage compartment empty.
All seats occupied, luggage compartment empty.
All seats occupied, luggage compartment laden.
Driver seat occupied, lu ggage compartment laden.
Caution
Set the headlight beam adjustment in such a way as to avoid dazzling oncoming traffic.
Note
Headlights fitted with Xenon bulbs* adapt automatically to the load and driving state
of the vehicle (e.g. accelerating, braking) wh en the ignition is switched on and when
driving. Vehicles which are equipped with Xenon bulbs* do not have a manual head-
light range adjustment control.
Switch for hazard warning lights
– Press switch
fig. 42 to switch the hazard warning light system on or off.
All the turn signal lights on the vehicle flas h at the same time when the hazard warning
light system is switched on. The indicator light for the turn signals and the indicator
light in the switch also flash at the same time. You can also switch on the hazard
warning light system if the ignition is switched off.
The hazard warning light system is switched on automatically if an airbag is deployed
in the event of an accident.
Please comply with any legal requirements when using the hazard warning light
system.
Note
Switch on the hazard warning light system if, for example:
you encounter traffic congestion,
your vehicle breaks down or an emergency situation occurs.
Fig. 41 Dash panel: Lights and Visibility
A-A1A2A3
Fig. 42 Dash panel: Switch for hazard
warning lights
s2ug.6.book Page 58 Friday, April 9, 2010 2:24 PM
Page 60 of 271
Lights and Visibility59
Using the system
Safety
Driving Tips
General Maintenance
Breakdown assistance
Technical Data
The turn signal
and main beam lever
The parking lights and headlight flas her are also switched on and off
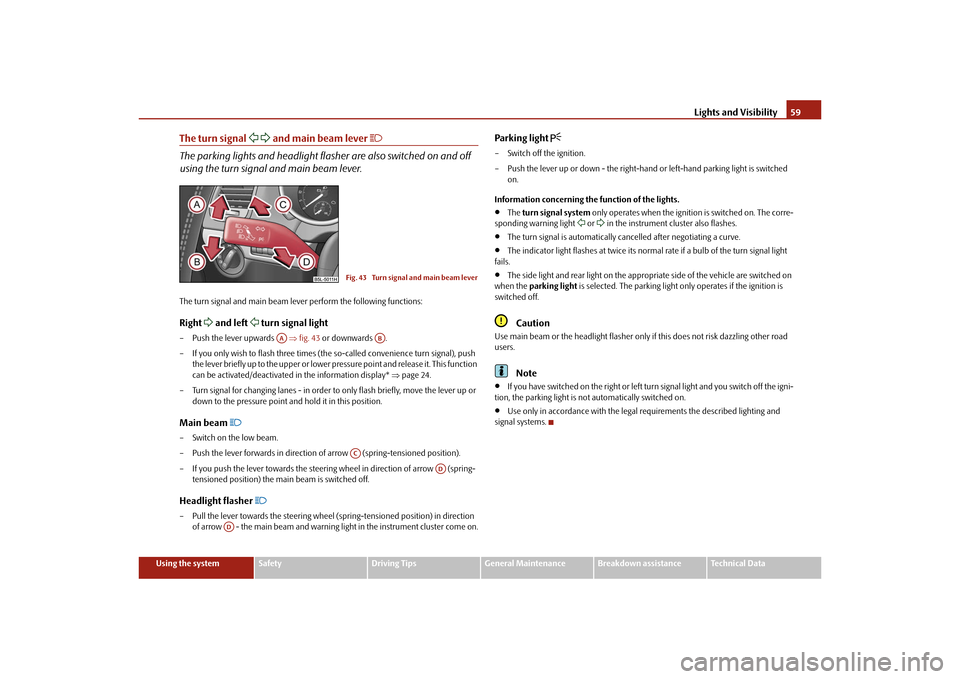
using the turn signal and main beam lever.The turn signal and main beam le ver perform the following functions:Right
and left
turn signal light
– Push the lever upwards fig. 43 or downwards .
– If you only wish to flash three times (the so-called convenience turn signal), push
the lever briefly up to the upper or lower pr essure point and release it. This function
can be activated/deactivated in the information display* page 24.
– Turn signal for changing lanes - in order to only flash briefly, move the lever up or
down to the pressure point and hold it in this position.Main beam
– Switch on the low beam.
– Push the lever forwards in direction of arrow (spring-tensioned position).
– If you push the lever towards the steering wheel in direction of arrow (spring-
tensioned position) the main beam is switched off.Headlight flasher
– Pull the lever towards the steering wheel (spring-tensioned position) in direction
of arrow - the main beam and warning light in the instrument cluster come on.
Parking light
– Switch off the ignition.
– Push the lever up or down - the right-hand or left-hand parking light is switched
on.
Information concerning the function of the lights.
The turn signal system only operates when the ignition is switched on. The corre-
sponding warning light
or in the instrument cluster also flashes.
The turn signal is automatically cancelled after negotiating a curve.
The indicator light flashes at twice its normal rate if a bulb of the turn signal light
fails.
The side light and rear light on the appropriate side of the vehicle are switched on
when the parking light is selected. The parking light only operates if the ignition is
switched off.Caution
Use main beam or the headlight flasher only if this does not risk dazzling other road
users.
Note
If you have switched on the right or left turn signal light and you switch off the igni-
tion, the parking light is not automatically switched on.
Use only in accordance with the legal requirements the described lighting and
signal systems.
Fig. 43 Turn signal and main beam lever
AA
AB
AC
AD
AD
s2ug.6.book Page 59 Friday, April 9, 2010 2:24 PM
Page 235 of 271
Fuses and light bulbs
234
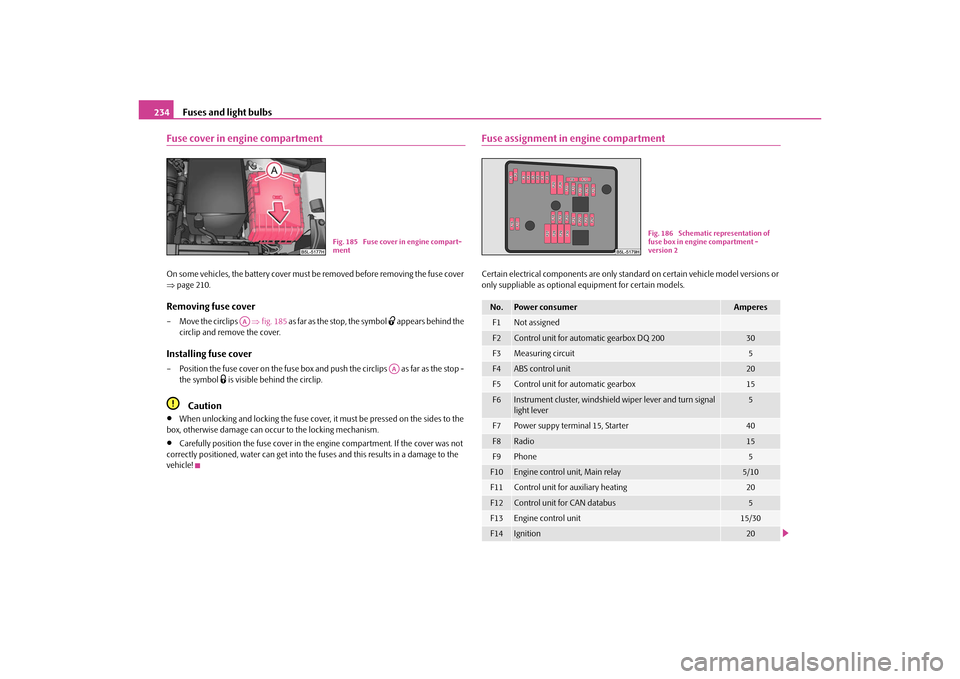
Fuse cover in engine compartmentOn some vehicles, the battery cover must be removed before removing the fuse cover
page 210.Removing fuse cover– Move the circlips fig. 185 as far as the stop, the symbol
appears behind the
circlip and remove the cover.
Installing fuse cover– Position the fuse cover on the fuse box and push the circlips as far as the stop -
the symbol
is visible behind the circlip.
Caution
When unlocking and locking the fuse cover, it must be pressed on the sides to the
box, otherwise damage can occur to the locking mechanism.
Carefully position the fuse cover in the engine compartment. If the cover was not
correctly positioned, water can get into the fuses and this results in a damage to the
vehicle!
Fuse assignment in engine compartmentCertain electrical components are only stan dard on certain vehicle model versions or
only suppliable as optional equipment for certain models.
Fig. 185 Fuse cover in engine compart-
ment
AA
AA
No.
Power consumer
Amperes
F1
Not assigned
F2
Control unit for automatic gearbox DQ 200
30
F3
Measuring circuit
5
F4
ABS control unit
20
F5
Control unit for automatic gearbox
15
F6
Instrument cluster, windshield wiper lever and turn signal
light lever
5
F7
Power suppy terminal 15, Starter
40
F8
Radio
15
F9
Phone
5
F10
Engine control unit, Main relay
5/10
F11
Control unit for auxiliary heating
20
F12
Control unit for CAN databus
5
F13
Engine control unit
15/30
F14
Ignition
20
Fig. 186 Schematic representation of
fuse box in engine compartment -
version 2
s2ug.6.book Page 234 Friday, April 9, 2010 2:24 PM
Page 236 of 271
Fuses and light bulbs235
Using the system
Safety
Driving Tips
General Maintenance
Breakdown assistance
Technical Data
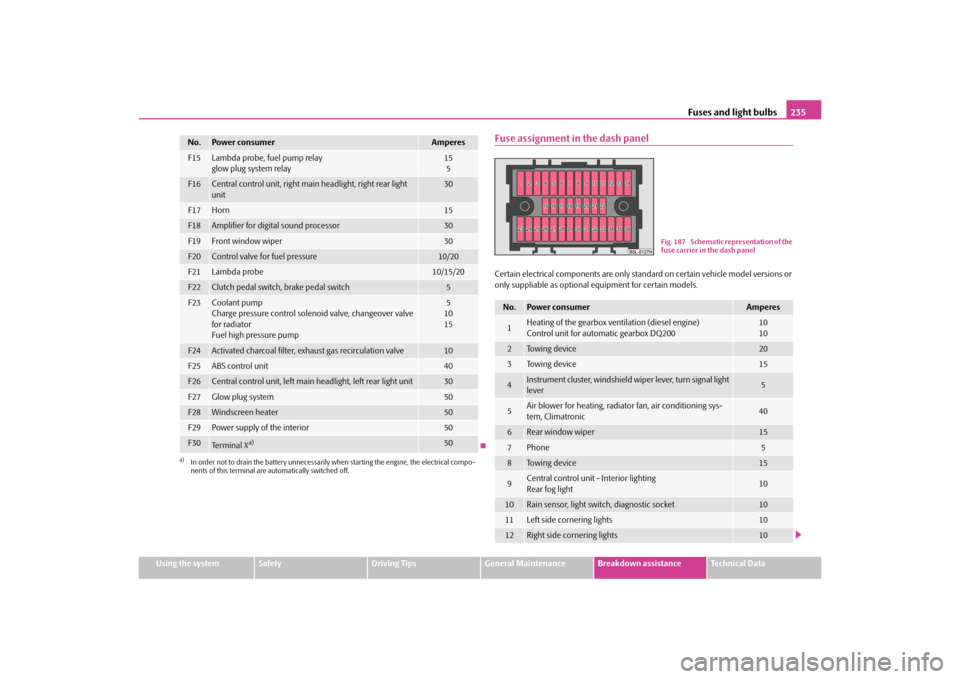
Fuse assignment in the dash panelCertain electrical components are only stan dard on certain vehicle model versions or
only suppliable as optional equipment for certain models.
F15
Lambda probe, fuel pump relay
glow plug system relay
15
5
F16
Central control unit, right main headlight, right rear light
unit
30
F17
Horn
15
F18
Amplifier for digital sound processor
30
F19
Front window wiper
30
F20
Control valve for fuel pressure
10/20
F21
Lambda probe
10/15/20
F22
Clutch pedal switch, brake pedal switch
5
F23
Coolant pump
Charge pressure control solenoid valve, changeover valve
for radiator
Fuel high pressure pump
5
10
15
F24
Activated charcoal filter, ex haust gas recirculation valve
10
F25
ABS control unit
40
F26
Central control unit, left main headlight, left rear light unit
30
F27
Glow plug system
50
F28
Windscreen heater
50
F29
Power supply of the interior
50
F30
Te r m i n a l X
a)
50
a)In order not to drain the battery unnecessarily wh en starting the engine, the electrical compo-
nents of this terminal are automatically switched off.No.
Power consumer
Amperes
No.
Power consumer
Amperes
1
Heating of the gearbox ventilation (diesel engine)
Control unit for automatic gearbox DQ200
10
10
2
To w i n g d e v i c e
20
3
To w i n g d e v i c e
15
4
Instrument cluster, windshield wiper lever, turn signal light
lever
5
5
Air blower for heating, radiat or fan, air conditioning sys-
tem, Climatronic
40
6
Rear window wiper
15
7
Phone
5
8
To w i n g d e v i c e
15
9
Central control unit - Interior lighting
Rear fog light
10
10
Rain sensor, light switch, diagnostic socket
10
11
Left side cornering lights
10
12
Right side cornering lights
10
Fig. 187 Schematic representation of the
fuse carrier in the dash panel
s2ug.6.book Page 235 Friday, April 9, 2010 2:24 PM
Page 241 of 271
Fuses and light bulbs
240
– Remove the rubber protective cap page 238, fig. 188 .
– Unplug plug .
– Take the faulty bulb out of the fixture by turning in direction of arrow and insert a new one in the reverse procedure.
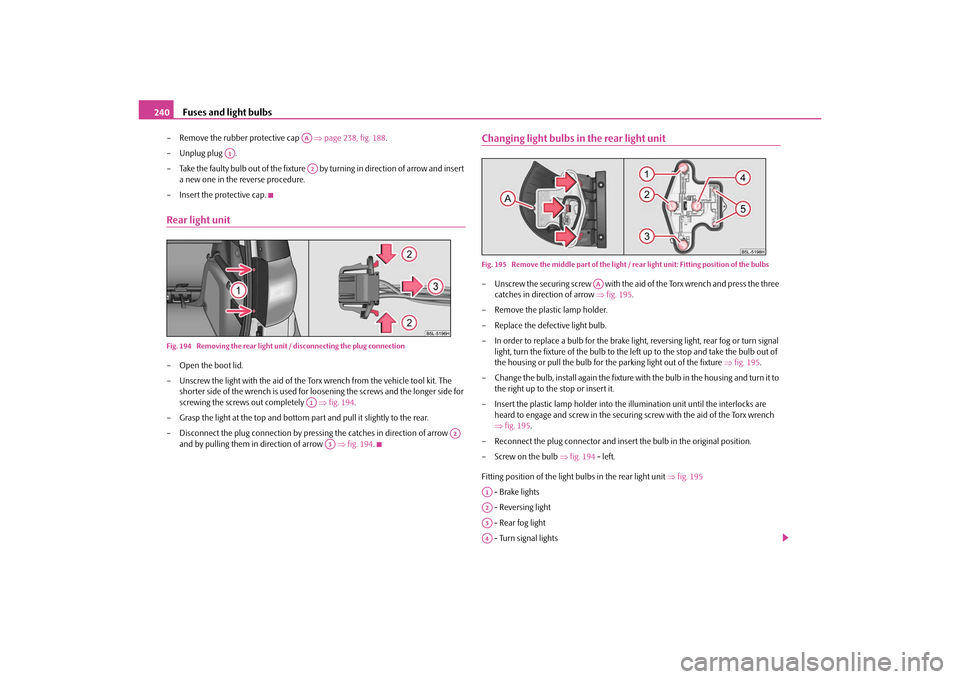
– Insert the protective cap.Rear light unitFig. 194 Removing the rear light uni t / disconnecting the plug connection– Open the boot lid.
– Unscrew the light with the aid of the Torx wrench from the vehicle tool kit. The
shorter side of the wrench is used for loosening the screws and the longer side for
screwing the screws out completely fig. 194 .
– Grasp the light at the top and bottom pa rt and pull it slightly to the rear.
– Disconnect the plug connection by pressi ng the catches in direction of arrow
and by pulling them in direction of arrow fig. 194 .
Changing light bulbs in the rear light unitFig. 195 Remove the middle part of the light / rear light unit: Fitting position of the bulbs– Unscrew the securing screw with the aid of the Torx wrench and press the three
catches in direction of arrow fig. 195 .
– Remove the plastic lamp holder.
– Replace the defective light bulb.
– In order to replace a bulb for the brake light, reversing light, rear fog or turn signal
light, turn the fixture of the bulb to the left up to the stop and take the bulb out of
the housing or pull the bulb for the parking light out of the fixture fig. 195 .
– Change the bulb, install again the fixture with the bulb in the housing and turn it to
the right up to the stop or insert it.
– Insert the plastic lamp holder into the illumination unit until the interlocks are heard to engage and screw in the securing screw with the aid of the Torx wrench
fig. 195 .
– Reconnect the plug connector and insert the bulb in the original position.
– Screw on the bulb fig. 194 - left.
Fitting position of the light bulbs in the rear light unit fig. 195
- Brake lights
- Reversing light
- Rear fog light
- Turn signal lights
AA
A1
A2A1
A2
A3
AA
A1A2A3A4
s2ug.6.book Page 240 Friday, April 9, 2010 2:24 PM