window SKODA YETI 2012 1.G / 5L Amundsen Navigation System Manual
[x] Cancel search | Manufacturer: SKODA, Model Year: 2012, Model line: YETI, Model: SKODA YETI 2012 1.G / 5LPages: 31, PDF Size: 2.89 MB
Page 8 of 31

Return to the previous menu level with the button 13.C
Set value
›
Pressing the button
C
opens an additional screen in which it is possible to set
the required value by turning the menu knob
15
, e.g. treble.
D
“Pop-up window”
›
Pressing the function key
D
opens a so-called “Pop-up window” with addition-
al menu points.
›
Briefly press one of the available menu points. The pop-up window will disap-
pear and the newly selected menu point is displayed in the function key.
If none of the available menu points is chosen, the “pop-up window” will disap-
pear after around 5 seconds.
A DAB ensemble appears in the list of DAB stations after pressing this function
key » page 10 , Digital radio DAB .
E
“Checkbox”
Some functions can only be switched on or off. There is a so-called “Check box” in front of a function which can only be switched on or off:
- Function is switched on.
- Function is switched off.
›
To switch a function on or off, briefly press the corresponding function once.
F
Variable function keys
The key function is context-dependent. The function currently being offered can
be selected by pressing the appropriate function key
F
(or using button
17
).
Sample menu in the Instruction Manual
Press the keys ABC
→ DEF - these keys must be pressed one after the other.
■ XYZ
- Description of a function key in the first menu level
■ XYZ - Description of a function key in the second menu level
■ XYZ - Description of a function key in the second menu level
■ XYZ - Description of a function key in the first menu level
Ð
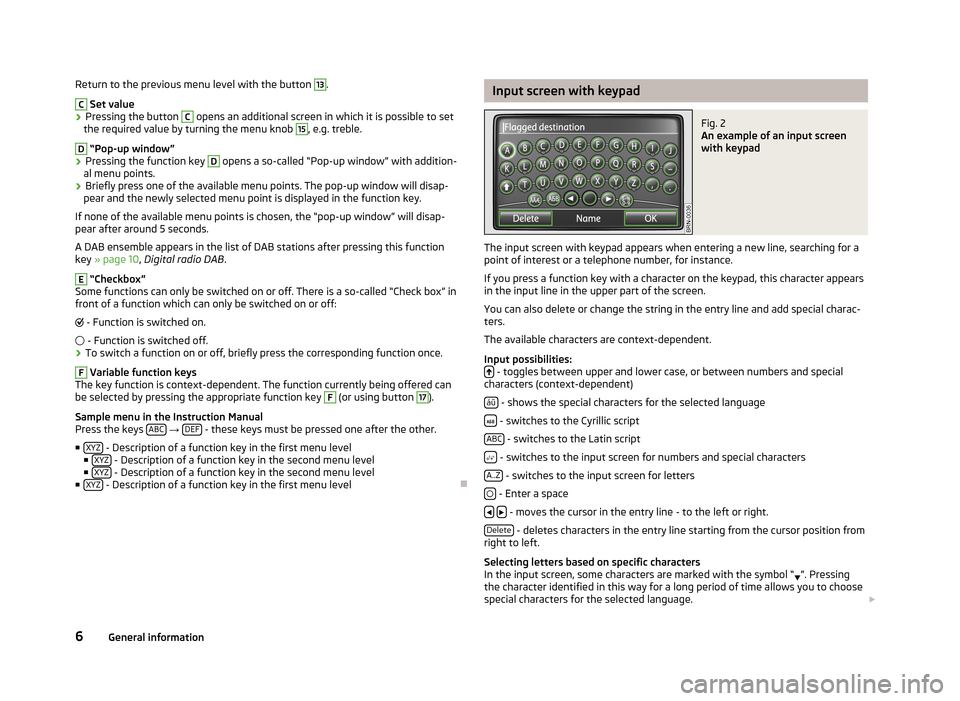
Input screen with keypadFig. 2
An example of an input screen
with keypad
The input screen with keypad appears when entering a new line, searching for a
point of interest or a telephone number, for instance.
If you press a function key with a character on the keypad, this character appears
in the input line in the upper part of the screen.
You can also delete or change the string in the entry line and add special charac-ters.
The available characters are context-dependent.
Input possibilities:
- toggles between upper and lower case, or between numbers and special
characters (context-dependent)
áü
- shows the special characters for the selected language
- switches to the Cyrillic script
ABC
- switches to the Latin script
- switches to the input screen for numbers and special characters
A..Z
- switches to the input screen for letters
- Enter a space
- moves the cursor in the entry line - to the left or right.
Delete
- deletes characters in the entry line starting from the cursor position from
right to left.
Selecting letters based on specific characters
In the input screen, some characters are marked with the symbol “ ”. Pressing
the character identified in this way for a long period of time allows you to choose
special characters for the selected language.
6General information
Page 14 of 31

Introductory information about the CD mode
Insert CD›
Insert a CD, with the labelled side facing up, into the CD slot
9
until it is auto-
matically drawn in. The play function will start automatically.
Eject CD
›
Press the button – die CD is ejected.
If the ejected CD is not taken out within 10 seconds, it will be retracted again for safety reasons.
CD not legible
If a CD is inserted which cannot be read by the unit, a pop-up window is displayed with a note. Press the function key OK
, the CD is moved to the removal position.
CD to jump
Uneven road surfaces and strong vibrations may cause the CD to jump.
Formation of condensation
When it is cold and after rain showers, moisture can deposit in the CD drive (con-
densate). This can effect the CD jump or impair the play function. In such cases,
wait until the moisture has dissipated.
Notes for the care of the CDs
If a CD is soiled, never clean the CD with circular movements but rather from the
inside to the outside with a soft lint-free cloth. In case of severe layers of dirt we
recommend to clean the CD with a commercially available CD cleaner. Also in thiscase, do not clean the CD with circular movements but rather from the inside to
the outside, and then let it dry.
WARNINGThe CD player is a class 1 laser device. Opening the CD player produces a risk
of injury through non-visible laser radiation.
CAUTION
■ Only audio-CDs (CD-A) and MP3-CDs can be played in the internal drive. Never
place DVDs into the internal drive – irreparable damage may result.■
Never insert CDs with the designation “Do not insert in drives without a drawer”
or Eco Disc into the internal drive.
■
Inserting a second CD while a CD is being ejected can damage the CD drive in
the unit. After pressing the Eject button there is a delay of a few seconds be-
fore the CD is ejected. During this time the lock in front of the CD case is open. Be
sure to wait until the CD has been fully ejected before you try to insert a new CD.■
If the CD has mechanical damage or is incorrectly or not fully inserted, the fol-
lowing message appears on the screen “ Error: CD”. Check the CD and insert in
properly into the drive. if the message “ Error: CD” appears, try using another CD
and visit a specialist garage
■
If the inside temperature of the unit is too high, no CDs will be accepted. The
unit switches into the last active operating mode.
■
Never use liquids such as benzine, paint thinner or record cleaner, otherwise
the surface of the CD may be damaged!
■
Never expose the CD to direct sun light!
■
Only write on the CD with appropriate writing tools.
■
Do not affix anything to the CD!
Note
■ If the function key CD is inactive, no Audio CD has been inserted or the inserted
Audio CD is not readable.■
It is possible that CDs protected by copyright and self-made CD-R and CD-RW
are not returned at all or only in certain circumstances.
■
The national copyright laws that apply in your country must be observed.
■
The CD player contains no parts that need servicing or that can be repaired. If
the CD player is defective, visit a specialist garage.
Ð
Memory card
Inserting a memory card
›
Push the memory card into the memory card lose
16
with the trimmed edge to
the front right until it “locks into place”. The play function will start automatical-
ly.
Taking out a memory card
›
In the “System and sound settings” menu, choose the menu point “Remove SD
card” » page 8 , System and sound settings .
›
Press the inserted memory card. The memory card “jumps” into the initial posi-
tion.
12MEDIA mode
Page 21 of 31

The following appears automatically after you insert the memory card: Assign -
assigns the memory card to the radio navigation system. For licensing reasons,
the memory card is assigned to your radio navigation system and cannot be used
in a different radio navigation system.
■ Use SD
- use the navigation data directly from the memory card. If you want to
use navigation data from other regions which differs from the data stored in the memory of the radio navigation system, you can also use data directly from the
memory card for guidance. This means you have two different sets of naviga-
tion data at your disposal. This means it is not necessary to copy the navigation
data from the memory card to the memory of the radio navigation system.
■ Install
- copies the navigation data from the memory card to the internal memo-
ry of the radio navigation system. The “old” navigation data in the internal mem-
ory of the radio navigation system are deleted. Data cannot be recovered once deleted »
.
No navigation data is available during copying. The copy process takes around 2
hours.
Do not remove the memory card during the process of copying data from the
memory card to the internal memory of the radio navigation system! You can
damage the memory card!
Manual copying
If you insert the memory card with valid navigation data but the copy process
does notstart automatically, you can start it manually.
Press the button NAV
→ SETUP.
■ Navigation data basis
- displays the options for the navigation data
■ Install/use SD data - installs/uses the navigation data from the memory card
CAUTION
If the navigation data of the radio navigation data is overwritten by a different
version, these data can not be restored !
Note
You can obtain a memory card with the latest navigation data or data for other
countries from ŠKODA Original Accessories.Ð
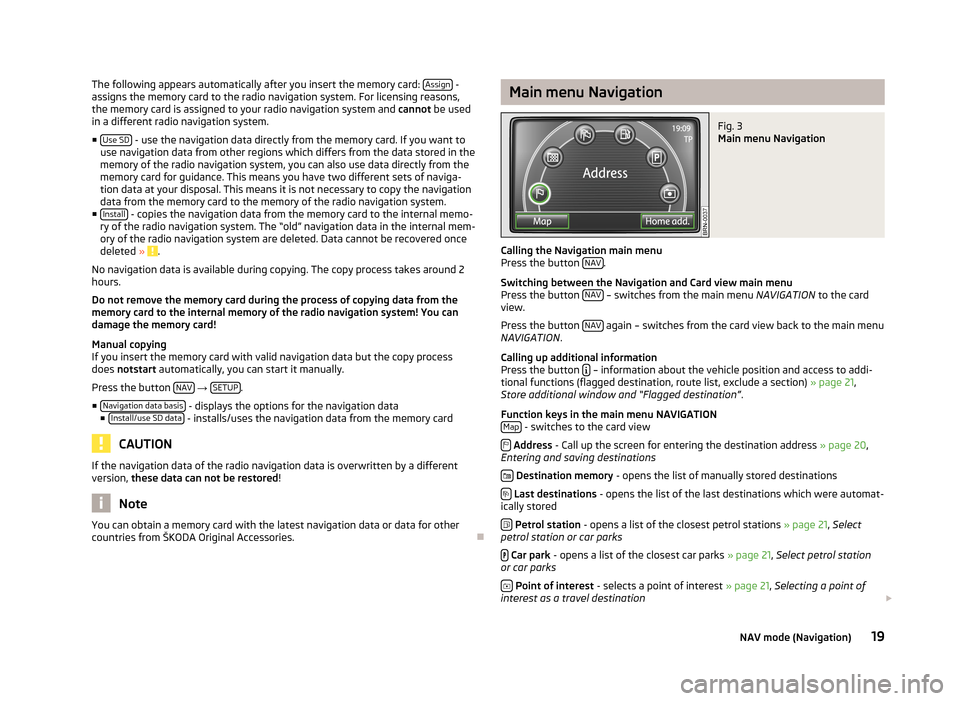
Main menu NavigationFig. 3
Main menu Navigation
Calling the Navigation main menu
Press the button NAV.
Switching between the Navigation and Card view main menu
Press the button NAV
– switches from the main menu
NAVIGATION to the card
view.
Press the button NAV
again – switches from the card view back to the main menu
NAVIGATION .
Calling up additional information
Press the button
– information about the vehicle position and access to addi-
tional functions (flagged destination, route list, exclude a section) » page 21,
Store additional window and “Flagged destination” .
Function keys in the main menu NAVIGATION Map
- switches to the card view
Address - Call up the screen for entering the destination address » page 20,
Entering and saving destinations
Destination memory - opens the list of manually stored destinations
Last destinations - opens the list of the last destinations which were automat-
ically stored
Petrol station - opens a list of the closest petrol stations » page 21, Select
petrol station or car parks
Car park - opens a list of the closest car parks » page 21, Select petrol station
or car parks
Point of interest - selects a point of interest » page 21, Selecting a point of
interest as a travel destination
19NAV mode (Navigation)
Page 23 of 31

■Store - opens screen for entering the name of the destination
■ Delete - change the name of the destination
■ OK - saves the name of the destination
■ Start - starts route guidance
Destination memory
Press the button NAV
→ - displays a list of the manually-saved destinations
(guidance can be started by pressing the function button with a displayed desti-
nation).
Turn the menu knob
15
to select a destination that you want to rename, edit or
delete.
■ SD destinations
- displays the list of all destinations stored on the SD card
■ Import - imports destinations from the SD card into the unit's memory
■ All - selects all destinations on the SD card
■ Import - imports selected destinations from the SD card into the unit's mem-
ory
■ Details
- displays additional information about the destination
■ Import - selects destinations to import
■ Start - starts route guidance
■ Details - shows additional information about the destination (name of the desti-
nation, country, city, etc.). The displayed information can be changed. ■ Delete
- deletes the selected destination
■ Start - starts route guidance
Store last destinations
Press the button NAV
→ - the list of the last automatically saved destinations
is displayed.
After you confirm one of the displayed destinations, the device switches to the
map view and route guidance begins automatically.
■ Details
- displays details about the destination
■ Save - saves the destination under a name that you enter
■ Delete - deletes name of destination
■ OK - confirms and saves the name of the destination
■ Start - starts route guidance
Entering a stopover destination
An additional destination and one stopover destination can be entered during the
route guidance. You reach the entered stopover destination before the route
guidance is resumed to the final destination. The final destination is the destina-
tion for which was route guidance was initially started. Always make sure wheth-
er you enter a stopover or the final destination when entering a destination.
During route guidance, press the button NAV - switches to the main menu of
Navigation.
Enter a new address or select a previously saved address. StopoverStopover
- choose a newly-entered destination as the stopover
New destin.
- end the current route guidance and choose a new destination as the
final destination
Select petrol station or car parks
Press the button NAV
→ -
Petrol Station or -
Car Park - The system will
search for petrol stations or car parks in the vicinity of the current location.
■ Save
- saves in the destination memory
■ Details - displays details about the destination
■ Save - saves in the destination memory
■ Start - starts route guidance
Selecting a point of interest as a travel destination
Press the key NAV
→ -
POI .
■ Town
- search in the centre of a place of your choice
■ Here - search in the vicinity of the current location
A search screen opens for selecting the point of interest by means of entering a “keyword” or a word which is part of the name for the point of interest. The point
of interest is searched for within a surrounding area of 75 km.
“Key words” which can be entered include words such as hotel, stadium, ŠKODA,
or a part of the name of a destination, e.g. lake, or words such as hunger, thirsty,
shop, relax, etc.
Pay attention to the correct entry of the “key word” (including special characters). ■ Delete
- deletes the entered characters
■ Find - search based on the parameters entered
■ Save - saves in the destination memory
■ Details - displays details about the destination
■ Save - saves in the destination memory
■ Start - starts route guidance
Store additional window and “Flagged destination”
Press the button
- opens pop-up window.
If route guidance is not active, a pop-up window appears containing details about
the current position with the following info:
21NAV mode (Navigation)