navigation system SKODA YETI 2013 1.G / 5L Owner's Manual
[x] Cancel search | Manufacturer: SKODA, Model Year: 2013, Model line: YETI, Model: SKODA YETI 2013 1.G / 5LPages: 266, PDF Size: 26.71 MB
Page 12 of 266
Using the system
Cockpit
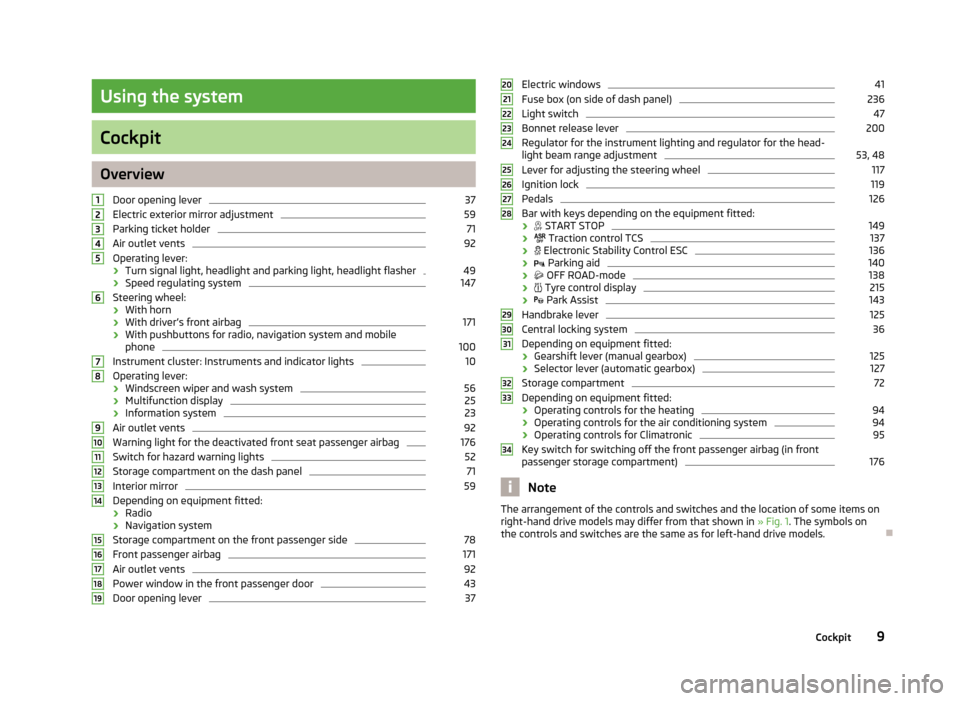
OverviewDoor opening lever
37
Electric exterior mirror adjustment
59
Parking ticket holder
71
Air outlet vents
92
Operating lever:
› Turn signal light, headlight and parking light, headlight flasher
49
›Speed regulating system
147
Steering wheel:
› With horn
› With driver’s front airbag
171
›With pushbuttons for radio, navigation system and mobile
phone
100
Instrument cluster: Instruments and indicator lights
10
Operating lever:
› Windscreen wiper and wash system
56
›Multifunction display
25
›Information system
23
Air outlet vents
92
Warning light for the deactivated front seat passenger airbag
176
Switch for hazard warning lights
52
Storage compartment on the dash panel
71
Interior mirror
59
Depending on equipment fitted:
› Radio
› Navigation system
Storage compartment on the front passenger side
78
Front passenger airbag
171
Air outlet vents
92
Power window in the front passenger door
43
Door opening lever
3712345678910111213141516171819Electric windows41Fuse box (on side of dash panel)236
Light switch
47
Bonnet release lever
200
Regulator for the instrument lighting and regulator for the head- light beam range adjustment
53, 48
Lever for adjusting the steering wheel
117
Ignition lock
119
Pedals
126
Bar with keys depending on the equipment fitted:
›
START STOP
149
›
Traction control TCS
137
›
Electronic Stability Control ESC
136
›
Parking aid
140
›
OFF ROAD-mode
138
›
Tyre control display
215
›
Park Assist
143
Handbrake lever
125
Central locking system
36
Depending on equipment fitted:
› Gearshift lever (manual gearbox)
125
›
Selector lever (automatic gearbox)
127
Storage compartment
72
Depending on equipment fitted:
› Operating controls for the heating
94
›Operating controls for the air conditioning system
94
›
Operating controls for Climatronic
95
Key switch for switching off the front passenger airbag (in front
passenger storage compartment)
176
Note
The arrangement of the controls and switches and the location of some items on
right-hand drive models may differ from that shown in » Fig. 1. The symbols on
the controls and switches are the same as for left-hand drive models.2021222324252627282930313233349Cockpit
Page 28 of 266
WARNINGThe driver is always responsible for selecting the correct gear in different driv-
ing situations, such as overtaking.
For the sake of the environment
Correct shifting up has the following advantages.■It helps to reduce fuel consumption.■
It reduces the operating noise.
■
It protects the environment.
■
It benefits the durability and reliability of the engine.
Door, boot or engine compartment warning
First read and observe the introductory information and safety warn-ings
on page 23.
Vehicles with a MAXI DOT display
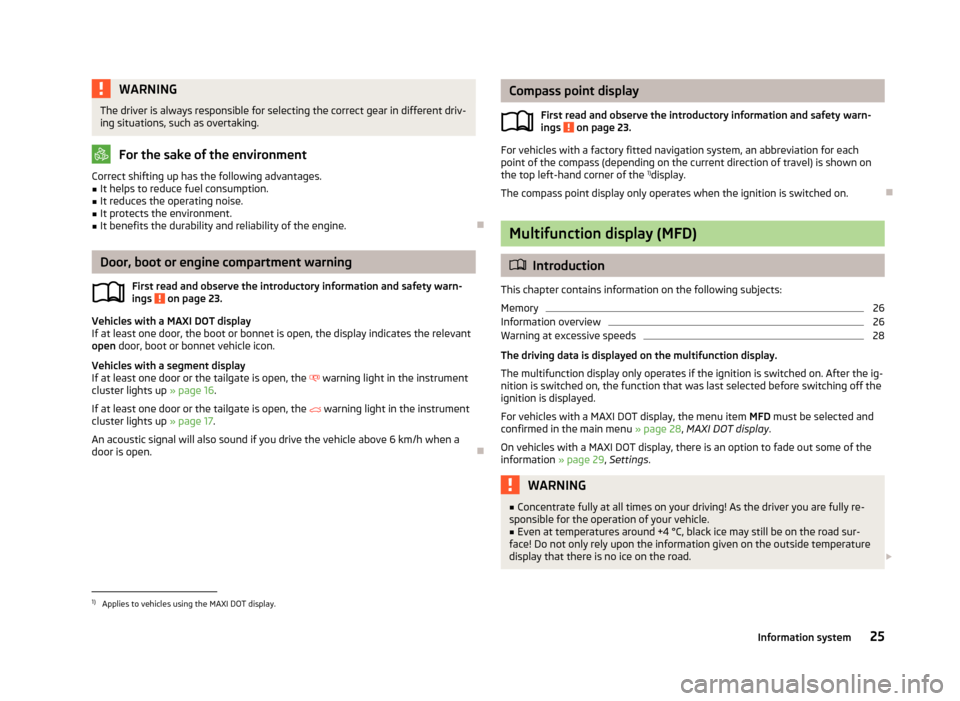
If at least one door, the boot or bonnet is open, the display indicates the relevant
open door, boot or bonnet vehicle icon.
Vehicles with a segment display
If at least one door or the tailgate is open, the
warning light in the instrument
cluster lights up » page 16.
If at least one door or the tailgate is open, the
warning light in the instrument
cluster lights up » page 17.
An acoustic signal will also sound if you drive the vehicle above 6 km/h when a
door is open.
Compass point display
First read and observe the introductory information and safety warn-
ings
on page 23.
For vehicles with a factory fitted navigation system, an abbreviation for each
point of the compass (depending on the current direction of travel) is shown on
the top left-hand corner of the 1)
display.
The compass point display only operates when the ignition is switched on.
Multifunction display (MFD)
Introduction
This chapter contains information on the following subjects:
Memory
26
Information overview
26
Warning at excessive speeds
28
The driving data is displayed on the multifunction display. The multifunction display only operates if the ignition is switched on. After the ig-nition is switched on, the function that was last selected before switching off the
ignition is displayed.
For vehicles with a MAXI DOT display, the menu item MFD must be selected and
confirmed in the main menu » page 28, MAXI DOT display .
On vehicles with a MAXI DOT display, there is an option to fade out some of the information » page 29, Settings .
WARNING■
Concentrate fully at all times on your driving! As the driver you are fully re-
sponsible for the operation of your vehicle.■
Even at temperatures around +4 °C, black ice may still be on the road sur-
face! Do not only rely upon the information given on the outside temperature
display that there is no ice on the road.
1)
Applies to vehicles using the MAXI DOT display.
25Information system
Page 32 of 266
Main menu points
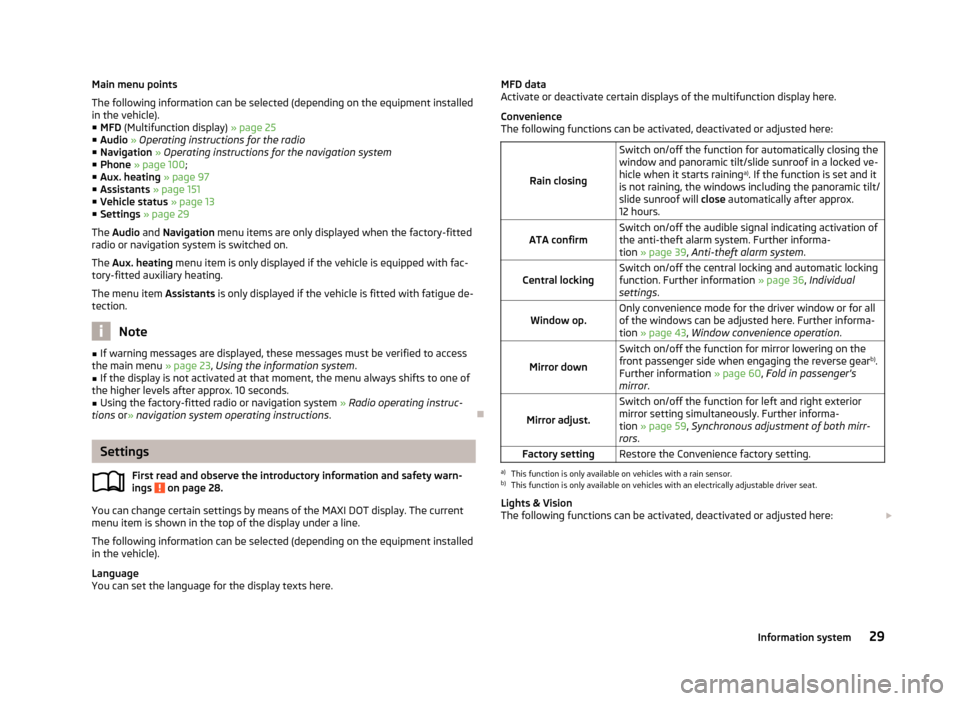
The following information can be selected (depending on the equipment installed in the vehicle).
■ MFD (Multifunction display) » page 25
■ Audio » Operating instructions for the radio
■ Navigation » Operating instructions for the navigation system
■ Phone » page 100 ;
■ Aux. heating » page 97
■ Assistants » page 151
■ Vehicle status » page 13
■ Settings » page 29
The Audio and Navigation menu items are only displayed when the factory-fitted
radio or navigation system is switched on.
The Aux. heating menu item is only displayed if the vehicle is equipped with fac-
tory-fitted auxiliary heating.
The menu item Assistants is only displayed if the vehicle is fitted with fatigue de-
tection.
Note
■ If warning messages are displayed, these messages must be verified to access
the main menu » page 23, Using the information system .■
If the display is not activated at that moment, the menu always shifts to one of
the higher levels after approx. 10 seconds.
■
Using the factory-fitted radio or navigation system » Radio operating instruc-
tions or» navigation system operating instructions .
Settings
First read and observe the introductory information and safety warn-
ings
on page 28.
You can change certain settings by means of the MAXI DOT display. The current
menu item is shown in the top of the display under a line.
The following information can be selected (depending on the equipment installed in the vehicle).
Language
You can set the language for the display texts here.
MFD data
Activate or deactivate certain displays of the multifunction display here.
Convenience
The following functions can be activated, deactivated or adjusted here:
Rain closing
Switch on/off the function for automatically closing the window and panoramic tilt/slide sunroof in a locked ve-
hicle when it starts raining a)
. If the function is set and it
is not raining, the windows including the panoramic tilt/
slide sunroof will close automatically after approx.
12 hours.ATA confirmSwitch on/off the audible signal indicating activation of the anti-theft alarm system. Further informa-
tion » page 39 , Anti-theft alarm system .Central lockingSwitch on/off the central locking and automatic locking
function. Further information » page 36, Individual
settings .Window op.Only convenience mode for the driver window or for all
of the windows can be adjusted here. Further informa-tion » page 43 , Window convenience operation .
Mirror down
Switch on/off the function for mirror lowering on the
front passenger side when engaging the reverse gear b)
.
Further information » page 60, Fold in passenger's
mirror .
Mirror adjust.
Switch on/off the function for left and right exterior
mirror setting simultaneously. Further informa-
tion » page 59 , Synchronous adjustment of both mirr-
rors .Factory settingRestore the Convenience factory setting.a)
This function is only available on vehicles with a rain sensor.
b)
This function is only available on vehicles with an electrically adjustable driver seat.
Lights & Vision
The following functions can be activated, deactivated or adjusted here:
29Information system
Page 61 of 266
Alternative park position of the rear window wiperFirst read and observe the introductory information and safety warn-ings
on page 56.
Each time after switching off the engine for the second time, the wiper blade ofthe rear window wiper is tilted. This prolongs the life of the wiper blade.
Activation/deactivation
›
Switch on the ignition.
›
Push the operating level into the position
6
» Fig. 36 on page 57 five times in
succession within 5 seconds.
›
Switch off the ignition. After switching on the ignition again, the alternative
park position of the rear window wiper is activated/deactivated.
Headlight cleaning system
First read and observe the introductory information and safety warn-
ings
on page 56.
After the ignition is switched on, the headlights are always cleaned at the first
and after every tenth spray of the windscreen (setting
5
» Fig. 36 on page 57),
when the low beam or main beam is switched on.
You should remove stubborn dirt (such as insect residues) from the headlight len-
ses at regular intervals, for example when refuelling. The following guidelines
must be observed » page 191, Headlight lenses .
To ensure the proper operation of the cleaning system during the winter, any
snow should be removed from the washer nozzle fixtures and ice should be
cleared with a de-icing spray.
CAUTION
Never remove the nozzles from the headlight cleaning system by hand – risk of
damage!
Rear mirror
Introduction
This chapter contains information on the following subjects:
Interior mirror
59
Exterior mirrors
59WARNING■ Make sure that the mirror is not covered by ice, snow, mist or other objects.■Convex (curved outward) or aspheric exterior mirrors increase the field of vi-
sion. They do, however, make objects appear smaller in the mirror. These mir-
rors are therefore only of limited use for estimating distances to the following
vehicles.■
Whenever possible use the interior mirror for estimating the distances to
the following vehicles.
■
The illuminated display of an external navigation unit can lead to operation-
al faults to the automatic dimming interior mirror – risk of accident.
WARNING■ Automatic dimming mirrors contain an electrolytic fluid which may leak
should the mirror glass break.■
The leaking electrolytic fluid can irritate the skin, eyes and breath apparatus.
Immediately seek out fresh air and leave the vehicle. If this is not possible, at
least open the window.
■
If you swallow electrolytic fluid, seek medical assistance immediately.
■
If your eyes or skin come into contact with the electrolytic fluid, immediately
wash the affected area for a few minutes long with a lot of water. Then con- sult a doctor immediately.
58Using the system
Page 99 of 266
The interior temperature can be set between +18 °C and +26 ℃. The interior tem-
perature is regulated automatically within this range.
If a temperature lower than +18 °C is selected, a blue symbol lights up at the start
of the numerical scale.
If a temperature higher than +26 °C is selected, a red symbol lights up at the start
of the numerical scale.
At both end positions, Climatronic runs at maximum cooling/heating output and
the temperature is automatically not regulated.
Controlling blower
The Climatronic system controls the blower stages automatically in line with the
interior temperature. However, the blower stages can be manually adapted to
suit your particular needs.
Automatic mode
The automatic mode is used in order to maintain a constant temperature and to
demist the windows in the interior of the car.
If the warning light in the top right corner of the button
lights up, the Clima-
tronic operates in “HIGH”-mode. The “HIGH” mode is the standard setting of the
Climatronic.
Upon pressing the
button again, the Climatronic switches to “LOW”-mode
and the indicator light in the top left corner lights up. The Climatronic uses only in this mode the lower blower speed. However taking into account the noise level,
this is more comfortable, yet be aware that the effectiveness of the air condition-
ing system is reduced particularly if the vehicle is fully occupied.
By pressing the button
again, it is changed to “HIGH”-mode.
Automatic mode is switched off by pressing one of the buttons for the air distri- bution or by increasing/decreasing the blower speed. The temperature is never-
theless regulated.WARNING■ Do not switch off the Climatronic system for longer than necessary.■Switch on the Climatronic system as soon as the windows mist up.Note■Do not stick anything onto or cover the interior temperature sensor B » Fig. 95
as this could impair the functioning of the Climatronic.■
On vehicles equipped with a factory-fitted radio or radio navigation system, the
Climatronic information is also shown on their displays. This function can be
switched off, see » operating instructions for the radio or navigation system .
Note
If the windscreen mists up, press the symbol button . Press the button
once the windscreen has demisted.
Using the air conditioning system economically
First read and observe the introductory information and safety warn-ings
on page 91.
The air conditioning system compressor uses power from the engine when in
cooling mode, which will affect the fuel consumption.
It recommended to open the windows or the doors of a vehicle for which the inte-rior has been strongly heated through the effect of direct sunlight in order to al-
low the heated air to escape.
The cooling system should not be on if the windows are open.
If the desired interior temperature can be achieved without switching the cooling
system on, then we do not recommend turning this on.
For the sake of the environment
Pollutant emissions are also reduced when fuel is saved » page 130, Economical
driving and environmental sustainability .
96Using the system
Page 103 of 266
Communication and multimedia
General information
Introduction
This chapter contains information on the following subjects:
Mobile phones and two-way radio systems
100
Universal telephone preinstallation (hands free)
100
Operating the phone on the multifunction steering wheel
101
Symbols in the MAXI DOT display
102
Phone Phonebook
103
Mobile phones and two-way radio systems
First read and observe the introductory information given on page 100.
ŠKODA permits the operation of mobile phones and two-way radio systems with
a professionally installed external aerial and a maximum transmission power of
up to 10 watts.
Please ask at a specialist workshop about installing and operating mobile phones
and two-way radio systems that have a transmission power of more than 10 W.
Operating mobile phones or two-way radio systems may interfere with the func-
tionality of the electronic systems in your vehicle.
The possible reasons for this are: › No external aerial.
› External aerial incorrectly installed.
› transmission power greater than 10 watts.
WARNING■
If a mobile phone or a two-way radio system is operated in a vehicle without
an external aerial or an external aerial which has been installed incorrectly,
this can increase the strength of the electromagnetic field inside the vehicle.■
Two-way radio systems, mobile phones or mounts must not be installed on
airbag covers or within the immediate deployment range of the airbags.
■
Never leave a mobile phone on a seat, on the dash panel or in any area
where it can become a projectile during a sudden braking manoeuvre, an acci-
dent or a collision — risk of injury.
■
Before transport of the vehicle by air, the Bluetooth ®
function must be
switched off by a specialist company.
Universal telephone preinstallation (hands free)
First read and observe the introductory information given on page 100.
The universal telephone pre-installation (“hands-free system”) includes a conven-ience mode for the mobile phone via voice control, the multifunction steeringwheel, the adapter, radio or the navigation system.
WARNING■ Concentrate fully at all times on your driving! As the driver you are fully re-
sponsible for the operation of your vehicle. Only use the hands-free system to the extent that you are in full control of your vehicle in any traffic situation.■
The national regulations for using a mobile phone in a vehicle must be ob-
served.
100Using the system
Page 106 of 266
Phone PhonebookFirst read and observe the introductory information given on page 100.
A phone phonebook is part of the hands-free system. This phone phonebook can
be used depending on the type of mobile phone.
After the telephone's first connection to the hands-free system, the phone bookfrom the phone and the SIM card loads into the hands-free memory.
Each time the telephone has established a new connection with the hands-freesystem, an update of the relevant phone book is performed. The updating can
take a few minutes. During this period, the available phone book is the one stored
at the previous update. Newly stored telephone numbers are only shown after the updating has ended.
The update is interrupted if a telephone event (e.g. incoming or outgoing call,
voice control dialogue) occurs during the updating procedure. After the telephone
event has ended, the updating starts anew.
GSM II
The internal phonebook provides 2 500 free memory locations. Each contact can contain up to 4 numbers.
On vehicles fitted with the Columbus navigation system, a maximum of 1 200 tel-
ephone contacts are shown on the display of this appliance.
If the number of contacts loaded exceeds 2 500, the phone book is not complete.
GSM III
The internal phonebook provides 2 000 free memory locations. Each contact can
contain up to 5 numbers.
On vehicles fitted with the Columbus navigation system, a maximum of 1 000 tel- ephone contacts are shown on the display of this appliance.
If the mobile phone's telephone book has more than 2,000 contacts, the follow-
ing message will appear in the MAXI DOTdisplay:
Phone book not fully loaded
Universal telephone preinstallation GSM II
Introduction
This chapter contains information on the following subjects:
Connecting the mobile phone to the hands-free system
103
Telephone operation in the MAXI DOT display
104
The universal telephone preinstallation GSM II comprises the following functions.
› Phone Phonebook
» page 103.
› Convenience operation of the telephone via the multifunction steering
wheel » page 101 .
› Telephone operation in the MAXI DOT display
» page 104.
› Voice control of the telephone
» page 110.
› Music playback from the telephone or other multimedia units
» page 113.
All communication between a mobile phone and your vehicle's hands-free system is established with the help of Bluetooth ®
technology.
Note
The following guidelines must be observed » page 100, Mobile phones and two-
way radio systems .
Connecting the mobile phone to the hands-free system
First read and observe the introductory information given on page 103.
To connect a mobile phone with the hands-free system, the two devices must be
paired. Detailed information on this is provided in the operating instructions for
your mobile phone.
The following steps must be carried out for the connection.
›
Activate Bluetooth ®
and the visibility of your mobile phone on your telephone.
›
Switch on the ignition.
›
Select the Phone - New user menu in the MAXI DOT display and wait until the
hands-free system has completed the search.
›
Select the phone you wish to connect from the list of units found.
103Communication and multimedia
Page 107 of 266
›Confirm the PIN 1)
.›If the hands-free system announces (as standard SKODA_BT) on the display of
the mobile phone, enter the PIN 1 )
within 30 seconds and wait, until the connec-
tion is established 2)
.›
To finish pairing in the MAXI DOT display, confirm the creation of the new user
profile.
If there is no free space available to create a new user profile, delete an existing
user profile.
During the connecting procedure, no other mobile phone may be connected with the hands-free system.
Up to four mobile phones can be paired with the hands-free system, whereby on- ly one mobile phone can communicate with the hands-free system.
The visibility of the hands-free system is automatically switched off 3 minutes af-
ter the ignition is switched on and is also deactivated when the mobile phone has
connected to the hands-free system.
Restoring the visibility of the hands-free system
If you have not managed to connect your mobile phone with the hands-free sys- tem within 3 minutes of switching on the ignition, the visibility of the hands-free system can be reestablished for 3 minutes in the following ways.
› By turning the ignition off and on.
› By turning voice control off and on.
› In the MAXI DOT display under menu item
Bluetooth - Visibility .
Creating a connection with an already paired mobile phone
After switching on the ignition, the connection is automatically established for
the already paired mobile phone 2)
. Check on your mobile phone if the automatic
connection has been established.
Disconnecting the connection
› By withdrawing the ignition key.
› By disconnecting the hands-free system in the mobile phone.
› By disconnecting from the user in the MAXI DOT display under the menu item
Bluetooth - User .
Solving connection problems
If the hands-free system reports No paired phone found, check the operating
status of the mobile phone.
› Is the mobile phone switched on?
› Is the PIN code entered?
› Is Bluetooth ®
active?
› Is the visibility of the mobile phone active?
› Has the mobile phone already been paired with the hands-free system?
Telephone operation in the MAXI DOT display
First read and observe the introductory information given on page 103.
The following menu items can be selected from the Phone menu.
■ Phone book
■ Dial number 3)
■ Call register
■ Voice mailbox
■ Bluetooth 3)
■ Settings 4)
■ Back
Phone book
The Phone book menu item lists the contacts downloaded from the telephone
memory and the mobile phone SIM card.
1)
Depending on the Bluetooth®
version on the mobile phone, an automatically generated 6-digit PIN
(SSP) is either displayed, or the PIN 1234 has to be entered manually.
2)
Some mobile phones have a menu, in which the authorisation for establishing a Bluetooth ®
connec-
tion is completed by inputting a code. If the authorisation input is required, it must always be per-
formed when re-establishing the Bluetooth connection.
3)
On vehicles fitted with the Amundsen+ navigation system, this function can be accessed via the navi-
gation system menu; refer to the » operating instructions for the Amundsen+ navigation system .
4)
This function is not available in vehicles fitted with the Amundsen+ navigation system.
104Using the system
Page 108 of 266
Dial number
Any telephone number can be entered in the Dial number menu item. The re-
quired digits must be selected one after the other using the adjustment wheel,
and then confirmed by pressing the adjustment wheel. You can select digits 0-9,
symbols , , # and the Cancel, Call and Delete functions.
Call register
The following menu items can be selected in the Call register menu item.
■ Missed calls - List of missed calls
■ Dialled numbers - List of dialled numbers
■ Received calls - list of received calls
Voice mailbox
In the Voice mailbox menu item, you can set the number of the voice mailbox 1)
and then dial the number.
Bluetooth
The following menu items can be selected from the Bluetooth menu item.
■ User - Overview of the stored telephones
■ New user - Search for new mobile phones that are in the reception range
■ Visibility - Switches on the visibility of the hands-free system for other devices
■ Media player - Playback via Bluetooth ®
■ Active device - Connected device
■ Paired devices - List of paired devices
■ Search - Device search
■ Phone name - option to change the name of the phone (default SKODA_BT)
Settings
The following menu items can be selected from the Settings menu item.
■ Phone book - Phonebook
■ Update 1)
- Update the phone book
■ List - Arrange the entries in the phone book
■ Surname - Arrange according to surname
■ Surname - Sorted by contact name
■ Ring tone - Ring tone setting
Back
Return in the Start menu of the telephone.
Universal telephone preinstallation GSM IIl
Introduction
This chapter contains information on the following subjects:
Connecting the phone to the hands-free system
106
Telephone operation in the MAXI DOT display
107
Internet connection via Bluetooth ®
108
The universal telephone preparation GSM III includes the following functions:
› Phone Phonebook
» page 103.
› Convenience operation via the multifunction steering wheel
» page 101.
› Telephone operation in the MAXI DOT display
» page 107.
› Voice control of the telephone
» page 110.
› Music playback from the telephone or other multimedia units
» page 113.
› Internet connection
» page 108.
› Display of SMS messages
» page 107.
All communication between a telephone and the hands-free system of your vehi- cle can only be established with the help of the following profiles of Bluetooth ®
technology.
rSAP - Remote SIM access profile
After connecting the telephone with the hands-free system via the rSAP profile,
the telephone deregisters from the GSM network, and communication with the
network is only enabled by the hands-free system via the vehicle's external aerial. In the telephone only the interface for Bluetooth ®
remains active. In this case,
you can only use the mobile phone to disconnect from the hands-free system, de-
activate the Bluetooth ®
connection or dial the emergency number 112 (only valid
in some countries).
HFP - Hands Free Profile
After connecting the telephone with the hands-free system via the HFP profile,
the telephone continues to use its GMS module and the internal antenna to com-
municate with the GSM network.
1)
On vehicles fitted with the Amundsen+ navigation system, this function can be accessed via the navi-
gation system menu; refer to the » operating instructions for the Amundsen+ navigation system .
105Communication and multimedia
Page 109 of 266
NoteThe following guidelines must be observed » page 100, Mobile phones and two-
way radio systems .
Connecting the phone to the hands-free system
First read and observe the introductory information given on page 105.
To connect a mobile phone with the hands-free system, it is necessary to inter-
connect the telephone and hands-free system. Detailed information on this is
provided in the operating instructions for your mobile phone. The following steps must be carried out for the connection.
Connecting the telephone with the hands-free system via the rSAP profile
›
Activate Bluetooth ®
and the visibility of your mobile phone on your telephone.
For certain mobile phones it is necessary to switch on first the rSAP function.
›
Switch on the ignition.
›
Select the Phone - New user menu in the MAXI DOT display and wait until the
hands-free system has completed the search.
›
Select the phone you wish to connect from the list of units found.
›
Confirm the PIN 1)
.
›
If your SIM card is blocked by a PIN code, enter the PIN code for the SIM card in
your phone. The telephone connects to the hands-free system (during the first
connection you can only enter the PIN code in the MAXI DOT display when the
vehicle is stationary, as this is the only situation when you can choose whether
the PIN code should be stored).
›
To save a new user, follow the instructions in the Maxi DOT display.
›
Reconfirm the rSAP command on your mobile phone to download the tele-
phone book and the identification data from the SIM card into the hands-free
system.
Connecting the telephone with the hands-free system via the HPP profile
›
Activate Bluetooth ®
and the visibility of your mobile phone on your telephone.
›
Switch on the ignition.
› Select the
Phone - New user menu in the MAXI DOT display and wait until the
hands-free system has completed the search.›
Select the phone you wish to connect from the list of units found.
›
Confirm the PIN 1)
.
›
Follow the instructions on the MAXI DOT display and the mobile phone to store
a new user or to download the telephone book and identification data from the
SIM card into the hands-free system.
The telephone primarily connects via the rSAP profile.
If the PIN code was stored, the telephone is automatically detected and connec-
ted with the hands-free system the next time the ignition is switched on. Check
your mobile phone to see whether this automatic connection has been establish-
ed.
Disconnecting the connection
› By removing the key from the ignition lock (the connection is disconnected dur-
ing a telephone call).
› By disconnecting the hands-free system in the mobile phone.
› Select the user by disconnecting the user in the Maxi DOT display in the
Blue-
tooth - User menu option - Disconnect.
On vehicles which are fitted with a radio or navigation system at the factory, it is
possible to terminate the telephone call after removing the key from the ignition
lock by pressing the button on the touchscreen of the radio 2)
or navigation sys-
tem; refer to the » Operating instructions for the radio or navigation system .
Note
■
In the memory of the hands-free system, up to three users can be stored,
whereby the hands-free system can only communicate actively with one user. If a connection is established with a fourth mobile phone, one of the users must be
deleted.■
When connecting to the hands-free system, follow the instructions on your mo-
bile phone.
1)
Depending on the Bluetooth ®
version on the mobile phone, an automatically generated 6-digit PIN
(SSP) will either be displayed, or a 16-digit code displayed in the MAXI DOTdisplay will need to be en-
tered into your mobile phone and confirmed within 30 seconds by following the instructions on your
mobile phone display.
2)
Does not apply for Radio Swing.
106Using the system