Brake light switch SKODA YETI 2015 1.G / 5L Owner's Manual
[x] Cancel search | Manufacturer: SKODA, Model Year: 2015, Model line: YETI, Model: SKODA YETI 2015 1.G / 5LPages: 232, PDF Size: 30.84 MB
Page 29 of 232
Using the system
Cockpit
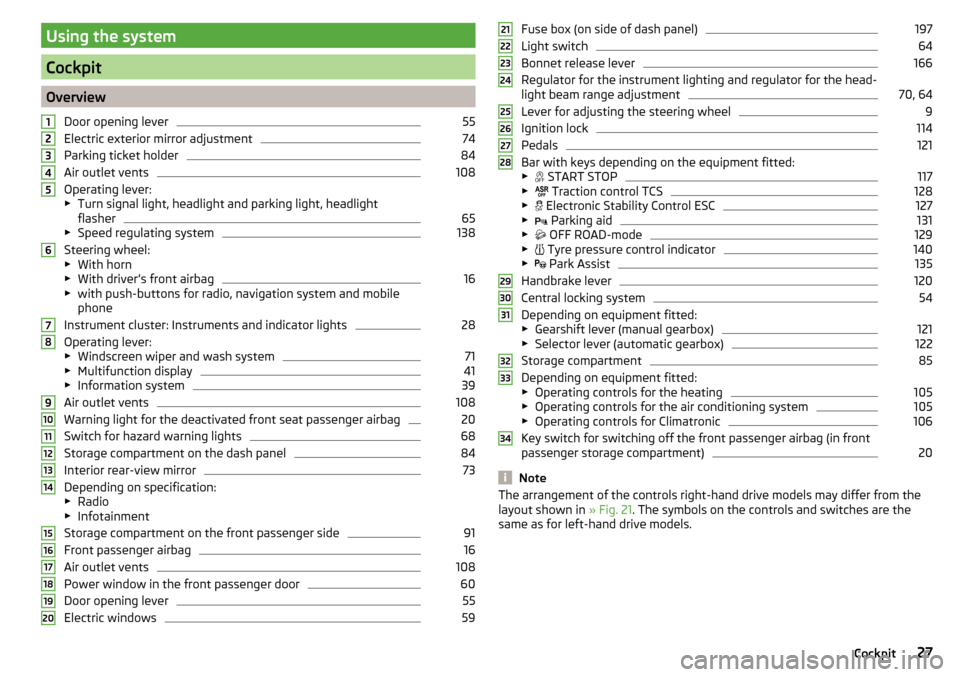
OverviewDoor opening lever
55
Electric exterior mirror adjustment
74
Parking ticket holder
84
Air outlet vents
108
Operating lever:
▶ Turn signal light, headlight and parking light, headlight
flasher
65
▶ Speed regulating system
138
Steering wheel:
▶ With horn
▶ With driver’s front airbag
16
▶with push-buttons for radio, navigation system and mobile
phone
Instrument cluster: Instruments and indicator lights
28
Operating lever:
▶ Windscreen wiper and wash system
71
▶Multifunction display
41
▶Information system
39
Air outlet vents
108
Warning light for the deactivated front seat passenger airbag
20
Switch for hazard warning lights
68
Storage compartment on the dash panel
84
Interior rear-view mirror
73
Depending on specification:
▶ Radio
▶ Infotainment
Storage compartment on the front passenger side
91
Front passenger airbag
16
Air outlet vents
108
Power window in the front passenger door
60
Door opening lever
55
Electric windows
591234567891011121314151617181920Fuse box (on side of dash panel)197
Light switch
64
Bonnet release lever
166
Regulator for the instrument lighting and regulator for the head-
light beam range adjustment
70, 64
Lever for adjusting the steering wheel
9
Ignition lock
114
Pedals
121
Bar with keys depending on the equipment fitted:
▶ START STOP
117
▶
Traction control TCS
128
▶
Electronic Stability Control ESC
127
▶
Parking aid
131
▶
OFF ROAD-mode
129
▶
Tyre pressure control indicator
140
▶
Park Assist
135
Handbrake lever
120
Central locking system
54
Depending on equipment fitted:
▶ Gearshift lever (manual gearbox)
121
▶Selector lever (automatic gearbox)
122
Storage compartment
85
Depending on equipment fitted:
▶ Operating controls for the heating
105
▶Operating controls for the air conditioning system
105
▶Operating controls for Climatronic
106
Key switch for switching off the front passenger airbag (in front
passenger storage compartment)
20
Note
The arrangement of the controls right-hand drive models may differ from the
layout shown in » Fig. 21. The symbols on the controls and switches are the
same as for left-hand drive models.212223242526272829303132333427Cockpit
Page 34 of 232
AdBlue (DEF) refill! Range: ...ADBLUE RANGE …
The range in the display indicates the distance that can be driven with the re-
maining AdBlue ®
left in the tank.
Refill AdBlue ®
» page 164 .
AdBlue (DEF) refill! No engine start in …ADBLUE NO START IN …
The range in the display indicates the distance to travel, after which no engine
restart is possible, as long as no AdBlue ®
is added.
Refill AdBlue ®
» page 164 .
AdBlue (DEF) refill! No engine start possible.ADBLUE NO RESTART
It is no longer possible to start the engine.
Refill AdBlue ®
» page 164 .
WARNINGIf you have to stop for technical reasons, then park the vehicle at a safe
distance from the traffic, switch off the engine and switch on the hazard
warning light system » page 68. Place the warning triangle at the prescri-
bed distance.
Note
■ If the MAXI DOT display shows warning messages, these messages must be
confirmed in order to access the main menu » page 41, Operation .■
As long as the operational faults are not rectified, the warning lights are al-
ways indicated again. After they are displayed for the first time, the warning
lights continue to be indicated without any extra messages for the driver.
Warning lights
Introduction
This chapter contains information on the following subjects:
Handbrake
33
Brake system
33
Seat belt warning light
33 Alternator33 Door open33
Coolant
33
Boot lid
34
Power steering/steering lock (KESSY system)
34
34
Traction Control System (ASR)
35
Electronic Stability Control (ESC)
35
Traction control (TCS) is deactivated
35
Antilock brake system (ABS)
36
Rear fog light
36
Lamp failure
36
Xenon headlights (AFS)
36
Exhaust inspection system
36
Glow plug system (diesel engine)
36
Engine performance check (petrol engine)
37
Diesel particulate filter (diesel engine)
37
Fuel reserve
37
Airbag system
37
Tyre pressure
38
Windscreen washer fluid level
38
Turn signal system
38
Fog lights
39
Cruise control system
39
Brake pedal (automatic gearbox)
39
OFF ROADmode
39
Main beam
39
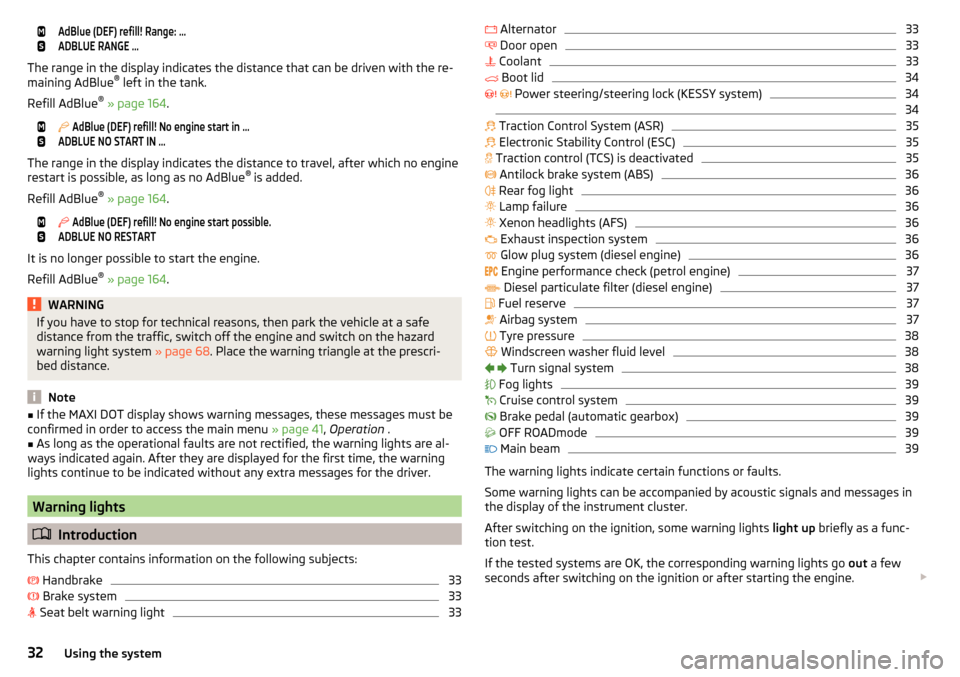
The warning lights indicate certain functions or faults.
Some warning lights can be accompanied by acoustic signals and messages in
the display of the instrument cluster.
After switching on the ignition, some warning lights light up briefly as a func-
tion test.
If the tested systems are OK, the corresponding warning lights go out a few
seconds after switching on the ignition or after starting the engine.
32Using the system
Page 35 of 232
WARNING■Ignoring illuminated warning lights and related messages or instructions
in the display of the instrument cluster may lead to serious personal injury
or damage to the vehicle.■
If you have to stop for technical reasons, then park the vehicle at a safe
distance from the traffic, switch off the engine and switch on the hazard
warning light system » page 68. Place the warning triangle at the prescri-
bed distance.
■
The engine compartment of your car is a hazardous area. The following
warning instructions must be followed at all times when working in the en-
gine compartment » page 165, Engine compartment .
Handbrake
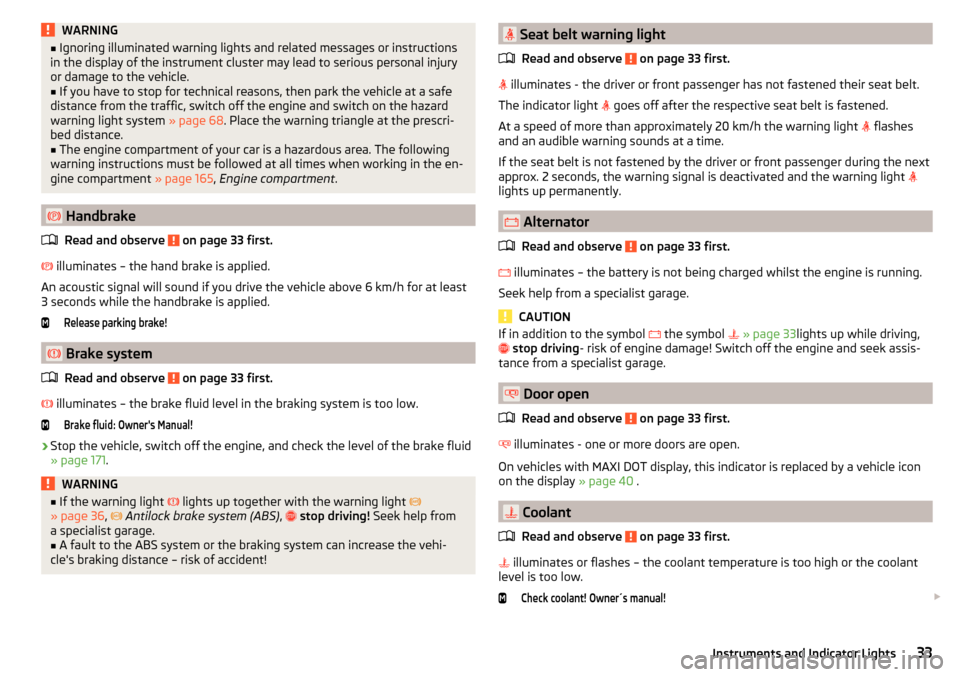
Read and observe
on page 33 first.
illuminates – the hand brake is applied.
An acoustic signal will sound if you drive the vehicle above 6 km/h for at least
3 seconds while the handbrake is applied.
Release parking brake!
Brake system
Read and observe
on page 33 first.
illuminates – the brake fluid level in the braking system is too low.
Brake fluid: Owner's Manual!›
Stop the vehicle, switch off the engine, and check the level of the brake fluid
» page 171 .
WARNING■
If the warning light lights up together with the warning light
» page 36 , Antilock brake system (ABS) , stop driving! Seek help from
a specialist garage.■
A fault to the ABS system or the braking system can increase the vehi-
cle's braking distance – risk of accident!
Seat belt warning light
Read and observe
on page 33 first.
illuminates - the driver or front passenger has not fastened their seat belt.
The indicator light
goes off after the respective seat belt is fastened.
At a speed of more than approximately 20 km/h the warning light
flashes
and an audible warning sounds at a time.
If the seat belt is not fastened by the driver or front passenger during the next
approx. 2 seconds, the warning signal is deactivated and the warning light
lights up permanently.
Alternator
Read and observe
on page 33 first.
illuminates – the battery is not being charged whilst the engine is running.
Seek help from a specialist garage.
CAUTION
If in addition to the symbol the symbol » page 33 lights up while driving,
stop driving - risk of engine damage! Switch off the engine and seek assis-
tance from a specialist garage.
Door open
Read and observe
on page 33 first.
illuminates - one or more doors are open.
On vehicles with MAXI DOT display, this indicator is replaced by a vehicle icon
on the display » page 40 .
Coolant
Read and observe
on page 33 first.
illuminates or flashes – the coolant temperature is too high or the coolant
level is too low.
Check coolant! Owner´s manual!
33Instruments and Indicator Lights
Page 38 of 232
Traction control (ASR) is deactivated.
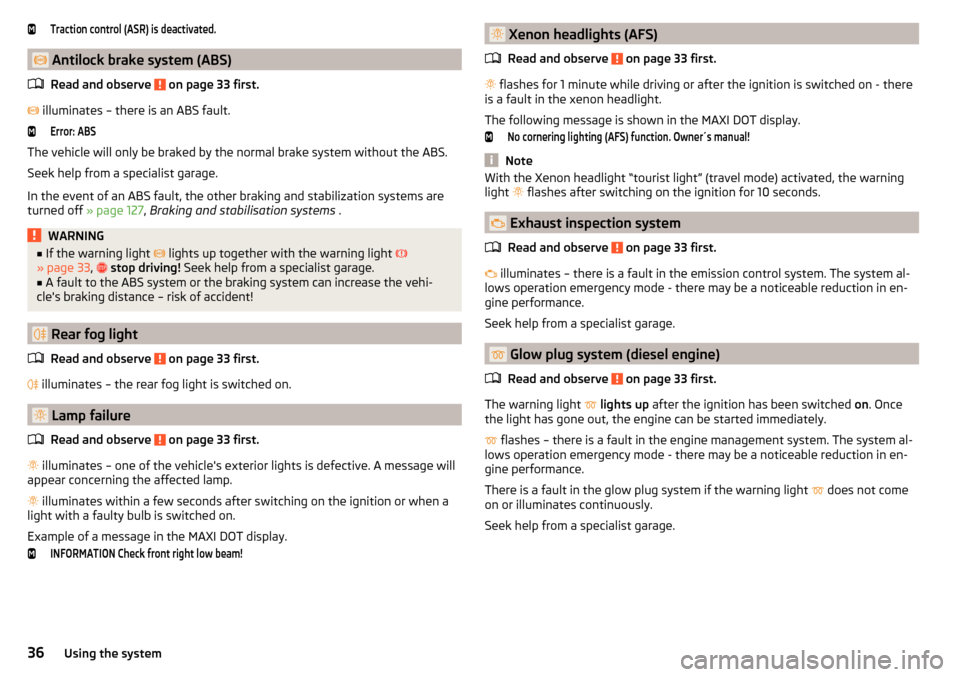
Antilock brake system (ABS)Read and observe
on page 33 first.
illuminates – there is an ABS fault.
Error: ABS
The vehicle will only be braked by the normal brake system without the ABS.
Seek help from a specialist garage.
In the event of an ABS fault, the other braking and stabilization systems are
turned off » page 127, Braking and stabilisation systems .
WARNING■
If the warning light lights up together with the warning light
» page 33 , stop driving! Seek help from a specialist garage.■
A fault to the ABS system or the braking system can increase the vehi-
cle's braking distance – risk of accident!
Rear fog light
Read and observe
on page 33 first.
illuminates – the rear fog light is switched on.
Lamp failure
Read and observe
on page 33 first.
illuminates – one of the vehicle's exterior lights is defective. A message will
appear concerning the affected lamp.
illuminates within a few seconds after switching on the ignition or when a
light with a faulty bulb is switched on.
Example of a message in the MAXI DOT display.
INFORMATION Check front right low beam! Xenon headlights (AFS)
Read and observe
on page 33 first.
flashes for 1 minute while driving or after the ignition is switched on - there
is a fault in the xenon headlight.
The following message is shown in the MAXI DOT display.
No cornering lighting (AFS) function. Owner´s manual!
Note
With the Xenon headlight “tourist light” (travel mode) activated, the warning
light flashes after switching on the ignition for 10 seconds.
Exhaust inspection system
Read and observe
on page 33 first.
illuminates – there is a fault in the emission control system. The system al-
lows operation emergency mode - there may be a noticeable reduction in en-
gine performance.
Seek help from a specialist garage.
Glow plug system (diesel engine)
Read and observe
on page 33 first.
The warning light
lights up after the ignition has been switched on. Once
the light has gone out, the engine can be started immediately.
flashes – there is a fault in the engine management system. The system al-
lows operation emergency mode - there may be a noticeable reduction in en-
gine performance.
There is a fault in the glow plug system if the warning light does not come
on or illuminates continuously.
Seek help from a specialist garage.
36Using the system
Page 41 of 232
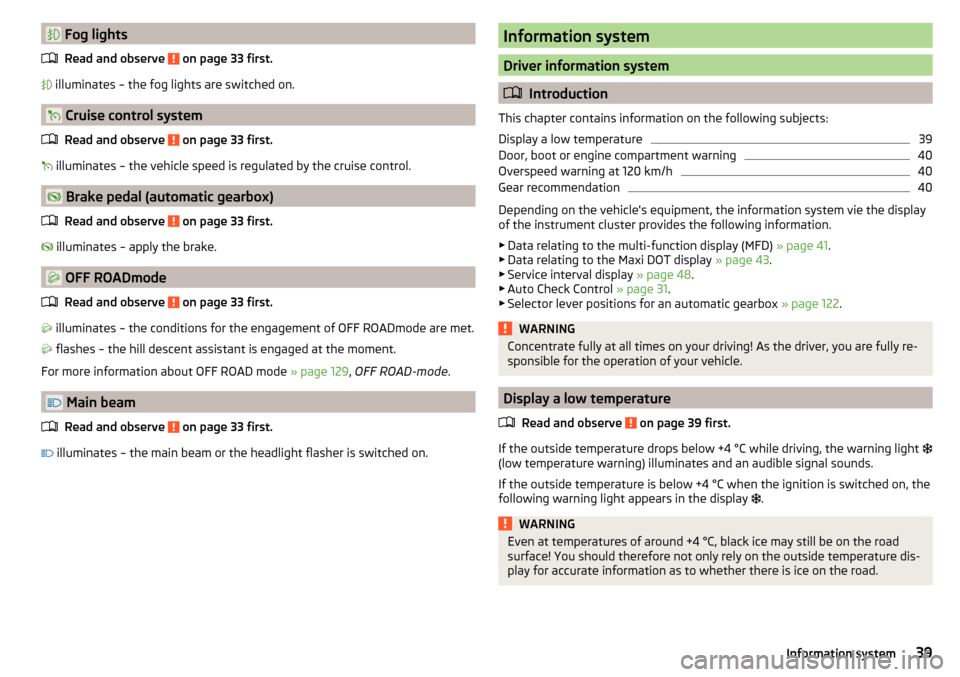
Fog lightsRead and observe
on page 33 first.
illuminates – the fog lights are switched on.
Cruise control system
Read and observe
on page 33 first.
illuminates – the vehicle speed is regulated by the cruise control.
Brake pedal (automatic gearbox)
Read and observe
on page 33 first.
illuminates – apply the brake.
OFF ROADmode
Read and observe
on page 33 first.
illuminates – the conditions for the engagement of OFF ROADmode are met.
flashes – the hill descent assistant is engaged at the moment.
For more information about OFF ROAD mode » page 129, OFF ROAD-mode .
Main beam
Read and observe
on page 33 first.
illuminates – the main beam or the headlight flasher is switched on.
Information system
Driver information system
Introduction
This chapter contains information on the following subjects:
Display a low temperature
39
Door, boot or engine compartment warning
40
Overspeed warning at 120 km/h
40
Gear recommendation
40
Depending on the vehicle's equipment, the information system vie the display
of the instrument cluster provides the following information.
▶ Data relating to the multi-function display (MFD) » page 41.
▶ Data relating to the Maxi DOT display » page 43.
▶ Service interval display » page 48.
▶ Auto Check Control » page 31.
▶ Selector lever positions for an automatic gearbox » page 122.
WARNINGConcentrate fully at all times on your driving! As the driver, you are fully re-
sponsible for the operation of your vehicle.
Display a low temperature
Read and observe
on page 39 first.
If the outside temperature drops below +4 °C while driving, the warning light
(low temperature warning) illuminates and an audible signal sounds.
If the outside temperature is below +4 °C when the ignition is switched on, the
following warning light appears in the display .
WARNINGEven at temperatures of around +4 °C, black ice may still be on the road
surface! You should therefore not only rely on the outside temperature dis- play for accurate information as to whether there is ice on the road.39Information system
Page 88 of 232
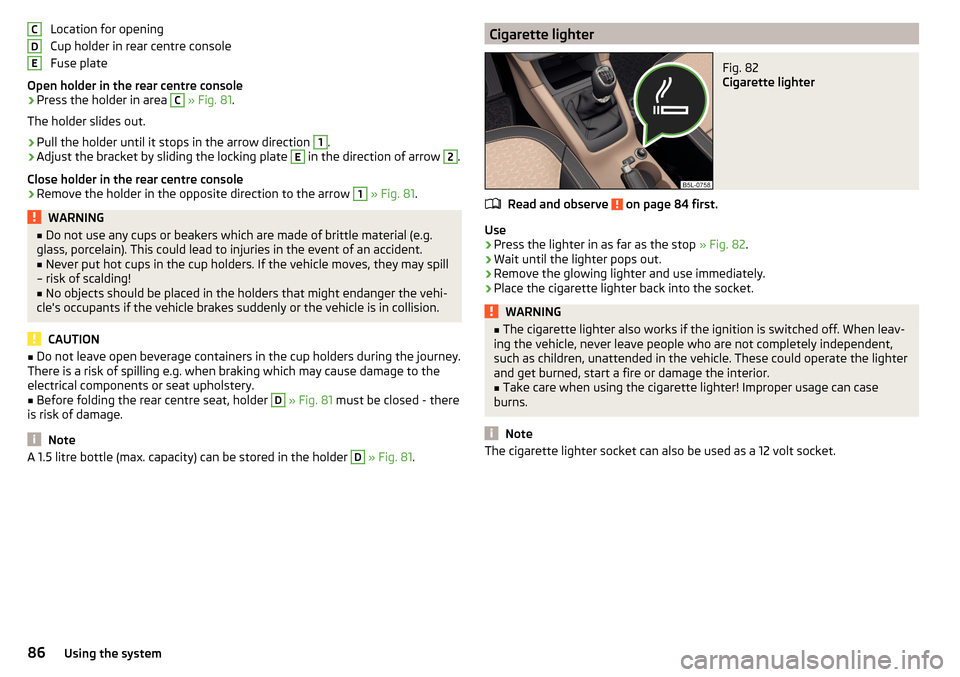
Location for opening
Cup holder in rear centre console
Fuse plate
Open holder in the rear centre console›
Press the holder in area
C
» Fig. 81 .
The holder slides out.
›
Pull the holder until it stops in the arrow direction
1
.
›
Adjust the bracket by sliding the locking plate
E
in the direction of arrow
2
.
Close holder in the rear centre console
›
Remove the holder in the opposite direction to the arrow
1
» Fig. 81 .
WARNING■
Do not use any cups or beakers which are made of brittle material (e.g.
glass, porcelain). This could lead to injuries in the event of an accident.■
Never put hot cups in the cup holders. If the vehicle moves, they may spill
– risk of scalding!
■
No objects should be placed in the holders that might endanger the vehi-
cle's occupants if the vehicle brakes suddenly or the vehicle is in collision.
CAUTION
■ Do not leave open beverage containers in the cup holders during the journey.
There is a risk of spilling e.g. when braking which may cause damage to the
electrical components or seat upholstery.■
Before folding the rear centre seat, holder
D
» Fig. 81 must be closed - there
is risk of damage.
Note
A 1.5 litre bottle (max. capacity) can be stored in the holder D » Fig. 81 .CDECigarette lighterFig. 82
Cigarette lighter
Read and observe on page 84 first.
Use
›
Press the lighter in as far as the stop
» Fig. 82.
›
Wait until the lighter pops out.
›
Remove the glowing lighter and use immediately.
›
Place the cigarette lighter back into the socket.
WARNING■
The cigarette lighter also works if the ignition is switched off. When leav-
ing the vehicle, never leave people who are not completely independent,
such as children, unattended in the vehicle. These could operate the lighter
and get burned, start a fire or damage the interior.■
Take care when using the cigarette lighter! Improper usage can case
burns.
Note
The cigarette lighter socket can also be used as a 12 volt socket.86Using the system
Page 116 of 232
Steering lock locking / unlockingRead and observe
and on page 113 first.
The steering lock (steering lock) deters any attempted theft of your vehicle.
Locking
›
Withdraw the ignition key.
›
Turn the steering wheel to the left or right until the steering lock clicks into
place.
Unlocking
›
Insert the key into the ignition lock.
›
Switch on the ignition » page 114.
The steering wheel is unlocked.
If the ignition switch cannot be turned on, then turn the steering wheel back
and forth slightly and thereby unlock the steering lock.
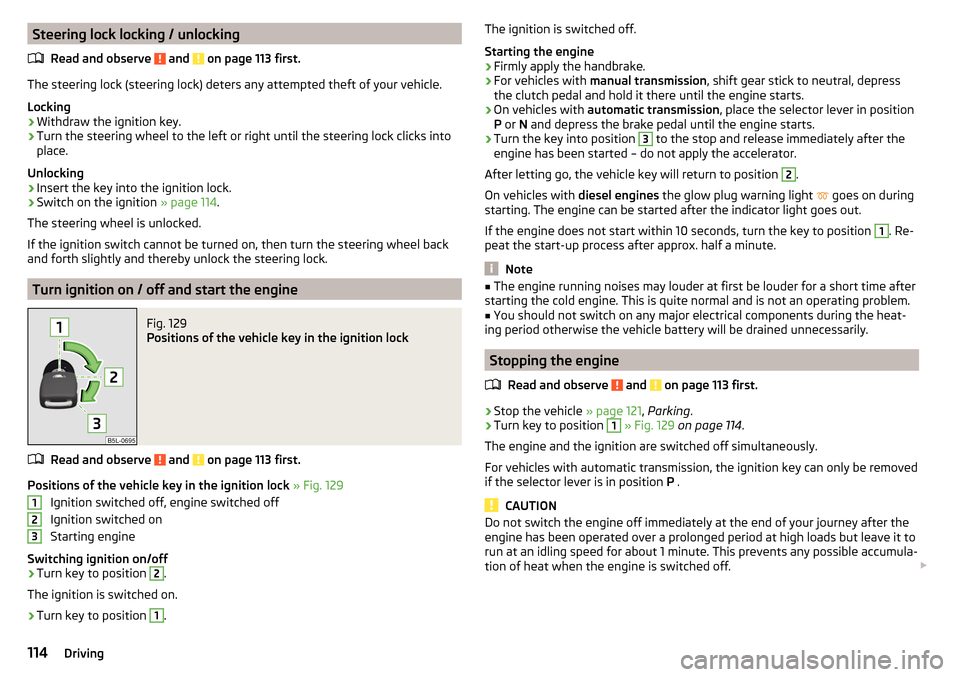
Turn ignition on / off and start the engine
Fig. 129
Positions of the vehicle key in the ignition lock
Read and observe and on page 113 first.
Positions of the vehicle key in the ignition lock » Fig. 129
Ignition switched off, engine switched off
Ignition switched on
Starting engine
Switching ignition on/off
›
Turn key to position
2
.
The ignition is switched on.
›
Turn key to position
1
.
123The ignition is switched off.
Starting the engine›
Firmly apply the handbrake.
›
For vehicles with manual transmission , shift gear stick to neutral, depress
the clutch pedal and hold it there until the engine starts.
›
On vehicles with automatic transmission , place the selector lever in position
P or N and depress the brake pedal until the engine starts.
›
Turn the key into position
3
to the stop and release immediately after the
engine has been started – do not apply the accelerator.
After letting go, the vehicle key will return to position
2
.
On vehicles with diesel engines the glow plug warning light
goes on during
starting. The engine can be started after the indicator light goes out.
If the engine does not start within 10 seconds, turn the key to position
1
. Re-
peat the start-up process after approx. half a minute.
Note
■ The engine running noises may louder at first be louder for a short time after
starting the cold engine. This is quite normal and is not an operating problem.■
You should not switch on any major electrical components during the heat-
ing period otherwise the vehicle battery will be drained unnecessarily.
Stopping the engine
Read and observe
and on page 113 first.
›
Stop the vehicle » page 121, Parking .
›
Turn key to position
1
» Fig. 129 on page 114 .
The engine and the ignition are switched off simultaneously.
For vehicles with automatic transmission, the ignition key can only be removed
if the selector lever is in position P .
CAUTION
Do not switch the engine off immediately at the end of your journey after the
engine has been operated over a prolonged period at high loads but leave it to
run at an idling speed for about 1 minute. This prevents any possible accumula-
tion of heat when the engine is switched off. 114Driving
Page 118 of 232
Under certain circumstances (e.g. after switching off the ignition and opening
the driver's door), the steering is enabled only when the ignition is switched on
or the engine is started.WARNINGNever let the vehicle roll with locked steering lock - there is a risk of acci-
dent!
Switch ignition on / off
Read and observe
and on page 115 first.
›
Press the button » Fig. 130 on page 115 briefly.
The ignition is switched on or off.
On vehicles fitted with a manual gearbox, the clutch pedal must not be de-
pressed while switching the ignition on or off, otherwise the system would try
to start.
On vehicles fitted with a automatic gearbox, the brake pedal must not be de-
pressed while switching the ignition on or off, otherwise the system would try
to start.
If the driver's door is opened while the ignition is on, an audible signal sounds
and the following message appears in the instrument cluster display.
Ignition on.IGNITION ON
When leaving the vehicle always switch off the ignition.
Starting the engine
Read and observe
and on page 115 first.
Starting the engine
›
Firmly apply the handbrake.
›
For vehicles with manual transmission , shift gear stick to neutral, depress
the clutch pedal and hold it there until the engine starts.
›
On vehicles with automatic transmission , place the selector lever in position
P or N and depress the brake pedal until the engine starts.
› Press and hold the starter button
» Fig. 130 on page 115 1)
until the engine
starts.
In vehicles with diesel engines after pressing the button, the glow plug warn-
ing light
lights up. The engine can be started after the indicator light goes
out.
Note
■ The engine running noises may louder at first be louder for a short time after
starting the cold engine. This is quite normal and is not an operating problem.■
You should not switch on any major electrical components during the heat-
ing period otherwise the vehicle battery will be drained unnecessarily.
Switching off the engine
Read and observe
and on page 115 first.
Switching off
›
Stop the vehicle » page 121, Parking .
›
Press the button » Fig. 130 on page 115 briefly.
The engine and the ignition are switched off simultaneously.
Emergency shutdown
If necessary and in exceptional cases, the engine may even be turned off while
driving.
›
Press the starter button » Fig. 130 on page 115 for longer than 1 second or
twice within 1 second.
After the emergency stop of the motor, the steering lock will remain unlocked.
CAUTION
Do not switch the engine off immediately at the end of your journey after the
engine has been operated over a prolonged period at high loads but leave it to
run at an idling speed for about 1 minute. This prevents any possible accumula-
tion of heat when the engine is switched off.
Note
After switching off the ignition, the radiator fan may intermittently continue to
operate for approx. 10 minutes.1)
On vehicles with the START-STOP system, it is sufficient to press the starter button briefly. The motor
will then automatically start.
116Driving
Page 120 of 232
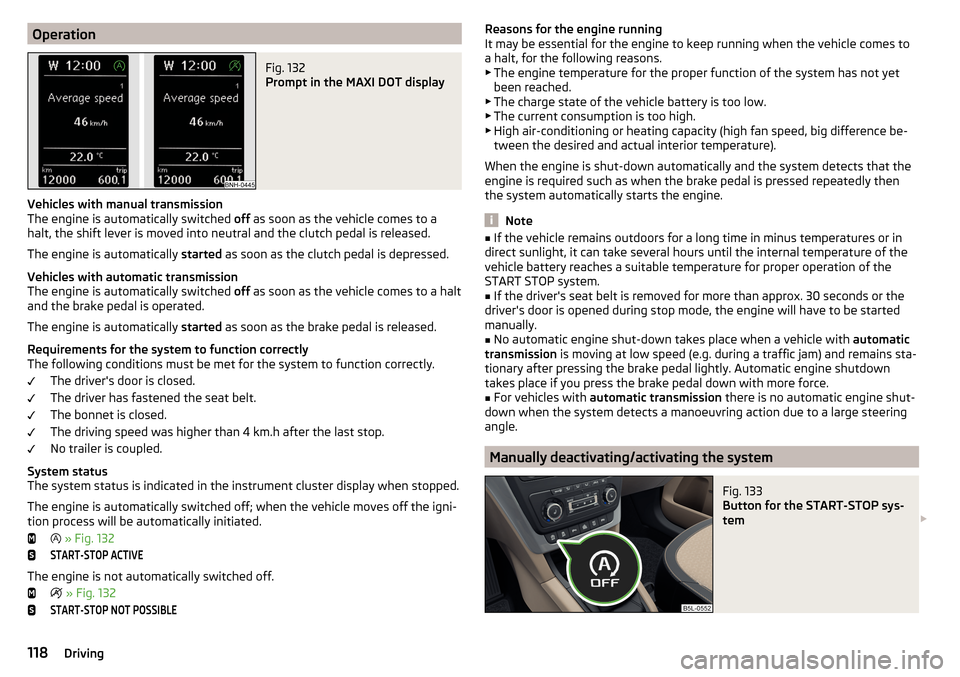
OperationFig. 132
Prompt in the MAXI DOT display
Vehicles with manual transmission
The engine is automatically switched off as soon as the vehicle comes to a
halt, the shift lever is moved into neutral and the clutch pedal is released.
The engine is automatically started as soon as the clutch pedal is depressed.
Vehicles with automatic transmission
The engine is automatically switched off as soon as the vehicle comes to a halt
and the brake pedal is operated.
The engine is automatically started as soon as the brake pedal is released.
Requirements for the system to function correctly
The following conditions must be met for the system to function correctly.
The driver's door is closed.
The driver has fastened the seat belt.
The bonnet is closed.
The driving speed was higher than 4 km.h after the last stop.
No trailer is coupled.
System status
The system status is indicated in the instrument cluster display when stopped.
The engine is automatically switched off; when the vehicle moves off the igni-
tion process will be automatically initiated.
» Fig. 132
START-STOP ACTIVE
The engine is not automatically switched off.
» Fig. 132
START-STOP NOT POSSIBLEReasons for the engine running
It may be essential for the engine to keep running when the vehicle comes to
a halt, for the following reasons. ▶ The engine temperature for the proper function of the system has not yet
been reached.
▶ The charge state of the vehicle battery is too low.
▶ The current consumption is too high.
▶ High air-conditioning or heating capacity (high fan speed, big difference be-
tween the desired and actual interior temperature).
When the engine is shut-down automatically and the system detects that the engine is required such as when the brake pedal is pressed repeatedly then
the system automatically starts the engine.
Note
■ If the vehicle remains outdoors for a long time in minus temperatures or in
direct sunlight, it can take several hours until the internal temperature of the
vehicle battery reaches a suitable temperature for proper operation of the
START STOP system.■
If the driver's seat belt is removed for more than approx. 30 seconds or the
driver's door is opened during stop mode, the engine will have to be started
manually.
■
No automatic engine shut-down takes place when a vehicle with automatic
transmission is moving at low speed (e.g. during a traffic jam) and remains sta-
tionary after pressing the brake pedal lightly. Automatic engine shutdown
takes place if you press the brake pedal down with more force.
■
For vehicles with automatic transmission there is no automatic engine shut-
down when the system detects a manoeuvring action due to a large steering
angle.
Manually deactivating/activating the system
Fig. 133
Button for the START-STOP sys-
tem
118Driving
Page 121 of 232
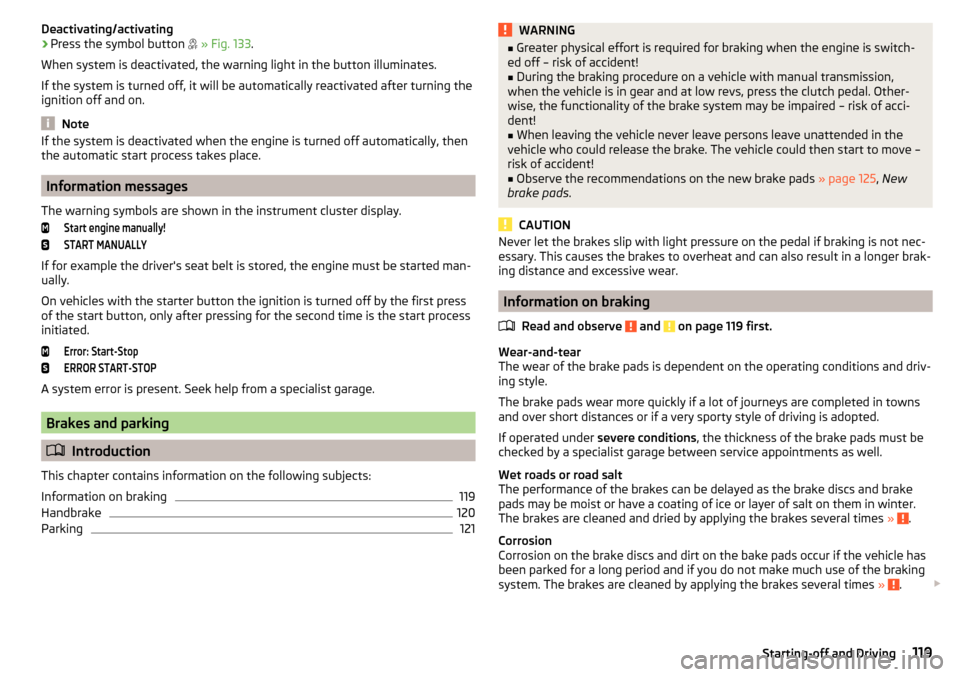
Deactivating/activating›Press the symbol button » Fig. 133 .
When system is deactivated, the warning light in the button illuminates.
If the system is turned off, it will be automatically reactivated after turning the
ignition off and on.
Note
If the system is deactivated when the engine is turned off automatically, then
the automatic start process takes place.
Information messages
The warning symbols are shown in the instrument cluster display.
Start engine manually!START MANUALLY
If for example the driver's seat belt is stored, the engine must be started man-
ually.
On vehicles with the starter button the ignition is turned off by the first press
of the start button, only after pressing for the second time is the start process
initiated.
Error: Start-StopERROR START-STOP
A system error is present. Seek help from a specialist garage.
Brakes and parking
Introduction
This chapter contains information on the following subjects:
Information on braking
119
Handbrake
120
Parking
121WARNING■ Greater physical effort is required for braking when the engine is switch-
ed off – risk of accident!■
During the braking procedure on a vehicle with manual transmission,
when the vehicle is in gear and at low revs, press the clutch pedal. Other-
wise, the functionality of the brake system may be impaired – risk of acci-
dent!
■
When leaving the vehicle never leave persons leave unattended in the
vehicle who could release the brake. The vehicle could then start to move –
risk of accident!
■
Observe the recommendations on the new brake pads » page 125, New
brake pads .
CAUTION
Never let the brakes slip with light pressure on the pedal if braking is not nec-
essary. This causes the brakes to overheat and can also result in a longer brak-
ing distance and excessive wear.
Information on braking
Read and observe
and on page 119 first.
Wear-and-tear
The wear of the brake pads is dependent on the operating conditions and driv-
ing style.
The brake pads wear more quickly if a lot of journeys are completed in towns
and over short distances or if a very sporty style of driving is adopted.
If operated under severe conditions , the thickness of the brake pads must be
checked by a specialist garage between service appointments as well.
Wet roads or road salt
The performance of the brakes can be delayed as the brake discs and brake
pads may be moist or have a coating of ice or layer of salt on them in winter.
The brakes are cleaned and dried by applying the brakes several times »
.
Corrosion
Corrosion on the brake discs and dirt on the bake pads occur if the vehicle has
been parked for a long period and if you do not make much use of the braking
system. The brakes are cleaned by applying the brakes several times »
.
119Starting-off and Driving