sd card SKODA YETI 2016 1.G / 5L Columbus Amundsen Bolero Infotainment System Navigation Manual
[x] Cancel search | Manufacturer: SKODA, Model Year: 2016, Model line: YETI, Model: SKODA YETI 2016 1.G / 5LPages: 100, PDF Size: 12.8 MB
Page 52 of 100
End conference call
Conference call details
Conference details ▶ During the ongoing conference call, press the function surface
surface.
A list of other conference participants is displayed. The following functions can
be selected depending on the type of telephone.
View details of participant
Talk to a participant separately from the conference
End the call to a conference participant
Text messages (SMS)
Main menu
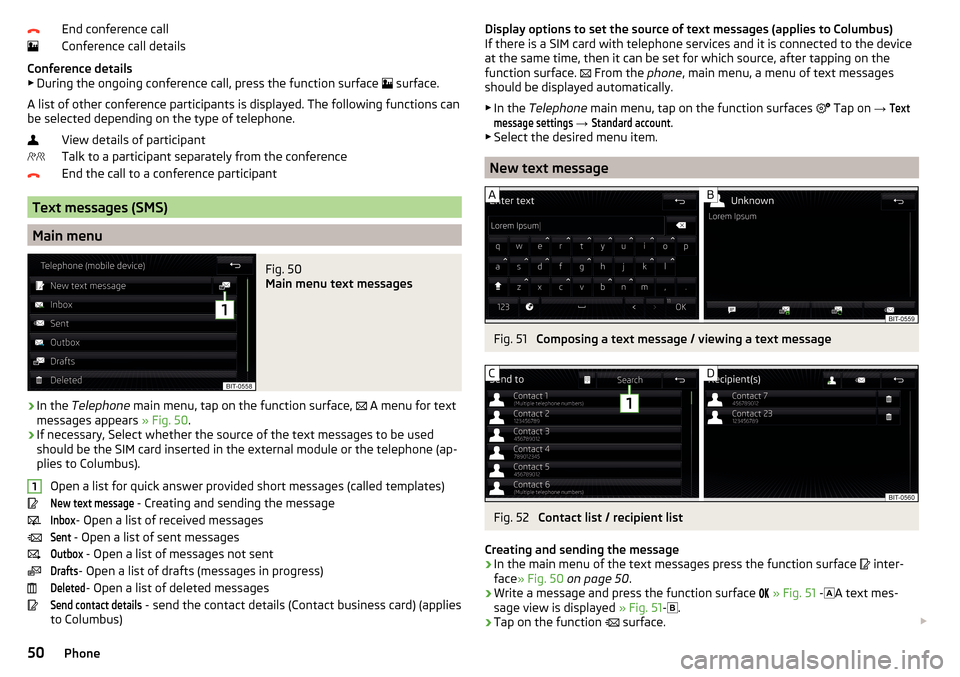
Fig. 50
Main menu text messages
›
In the Telephone main menu, tap on the function surface,
A menu for text
messages appears » Fig. 50.
›
If necessary, Select whether the source of the text messages to be used
should be the SIM card inserted in the external module or the telephone (ap-
plies to Columbus).
Open a list for quick answer provided short messages (called templates)
New text message
- Creating and sending the message
Inbox
- Open a list of received messages
Sent
- Open a list of sent messages
Outbox
- Open a list of messages not sent
Drafts
- Open a list of drafts (messages in progress)
Deleted
- Open a list of deleted messages
Send contact details
- send the contact details (Contact business card) (applies
to Columbus)
1Display options to set the source of text messages (applies to Columbus)
If there is a SIM card with telephone services and it is connected to the device
at the same time, then it can be set for which source, after tapping on the
function surface.
From the phone, main menu, a menu of text messages
should be displayed automatically.
▶ In the Telephone main menu, tap on the function surfaces
Tap on → Textmessage settings
→
Standard account
.
▶ Select the desired menu item.
New text message
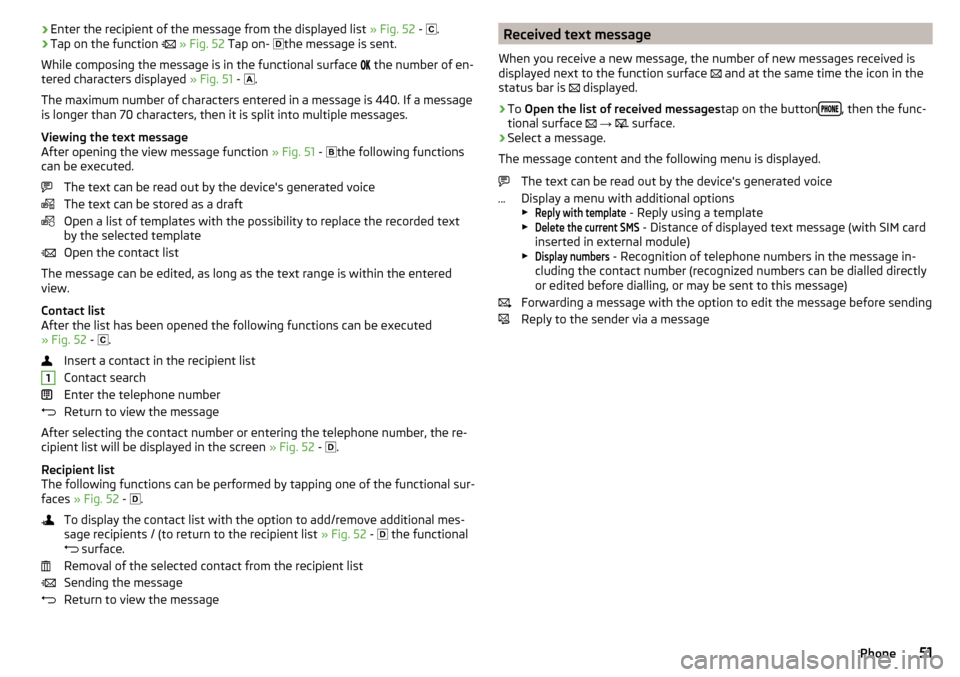
Fig. 51
Composing a text message / viewing a text message
Fig. 52
Contact list / recipient list
Creating and sending the message
›
In the main menu of the text messages press the function surface
inter-
face » Fig. 50 on page 50 .
›
Write a message and press the function surface
» Fig. 51 -
A text mes-
sage view is displayed » Fig. 51-
.
›
Tap on the function
surface.
50Phone
Page 53 of 100
›Enter the recipient of the message from the displayed list
» Fig. 52 - .›Tap on the function » Fig. 52 Tap on- the message is sent.
While composing the message is in the functional surface
the number of en-
tered characters displayed » Fig. 51 -
.
The maximum number of characters entered in a message is 440. If a message
is longer than 70 characters, then it is split into multiple messages.
Viewing the text message
After opening the view message function » Fig. 51 -
the following functions
can be executed.
The text can be read out by the device's generated voice
The text can be stored as a draft
Open a list of templates with the possibility to replace the recorded text
by the selected template
Open the contact list
The message can be edited, as long as the text range is within the entered
view.
Contact list
After the list has been opened the following functions can be executed
» Fig. 52 -
.
Insert a contact in the recipient list
Contact search
Enter the telephone number
Return to view the message
After selecting the contact number or entering the telephone number, the re-
cipient list will be displayed in the screen » Fig. 52 -
.
Recipient list
The following functions can be performed by tapping one of the functional sur-
faces » Fig. 52 -
.
To display the contact list with the option to add/remove additional mes-
sage recipients / (to return to the recipient list » Fig. 52 -
the functional
surface.
Removal of the selected contact from the recipient list
Sending the message
Return to view the message1Received text message
When you receive a new message, the number of new messages received is
displayed next to the function surface
and at the same time the icon in the
status bar is
displayed.›
To Open the list of received messages tap on the button, then the func-
tional surface
→
surface.
›
Select a message.
The message content and the following menu is displayed.
The text can be read out by the device's generated voice
Display a menu with additional options
▶
Reply with template
- Reply using a template
▶
Delete the current SMS
- Distance of displayed text message (with SIM card
inserted in external module)
▶
Display numbers
- Recognition of telephone numbers in the message in-
cluding the contact number (recognized numbers can be dialled directly or edited before dialling, or may be sent to this message)
Forwarding a message with the option to edit the message before sending
Reply to the sender via a message
51Phone
Page 54 of 100
Hotspot (WLAN) and data connection
Hotspot (WLAN)
Introduction to the subject
Applies to Columbus, Amundsen (not applicable to Yeti).
WLAN can be used to connect to the Internet, to playback audio files in the menu media or for operating the device using an application in the external
device (e.g. ŠKODA Media Command).
The requirement for the WLAN function is the ignition is switched on. After
switching on the ignition, the last-used WLAN connection appears.
It is possible to connect up to 8 external devices on the device hotspot and at
the same time to connect the device to the Hotspot of other external devices.
Applies to Columbus: If there is a SIM card with active data services in the ex-
ternal module, or if there a connection to the telephone via Bluetooth ®profile
RSAP, it's not possible to connect to the external device hotspot.
connect an external device to the hotspot (WLAN) of the device
Device hotspot on / off
›
Press the button, then tap on the function surface
Tap
→
WLAN
→
Mo-bile hotspot
→
Mobile hotspot
.
Set device hotspot
▶ Press the
button, then tap on the function surface
Tap
→
WLAN
→
Mo-bile hotspot
→
Mobile hotspot
.
▶ Setting required menu items the following menu.
■
Security level:
- Setting connection security
■
Network key
- Entering the access password
■
SSID: ...
- Name of the device hotspot
■
Do not send network name (SSID)
-Turn WLAN hotspot visibility on/off
▶ Tap the functional surface
Save
to save the parameters of the devices hot-
spot.
Connect ▶ Enable the Wi-Fi in the external device and search for any available hotspots
▶ Select the device hotspot (if necessary enter the required password).
▶ Confirm the connection establishment.
Establish secure connection using WPS (applies to Amundsen) ▶ WLAN in device on.
▶ Press the
button, then tap on the function
Tap →
WLAN
→
WLAN
→
WPS Quick Connect (WPS button)
.
▶ Turn on the option to connect to the device hotspot using WPS.
Connect device to the hotspot (WLAN) of the external device
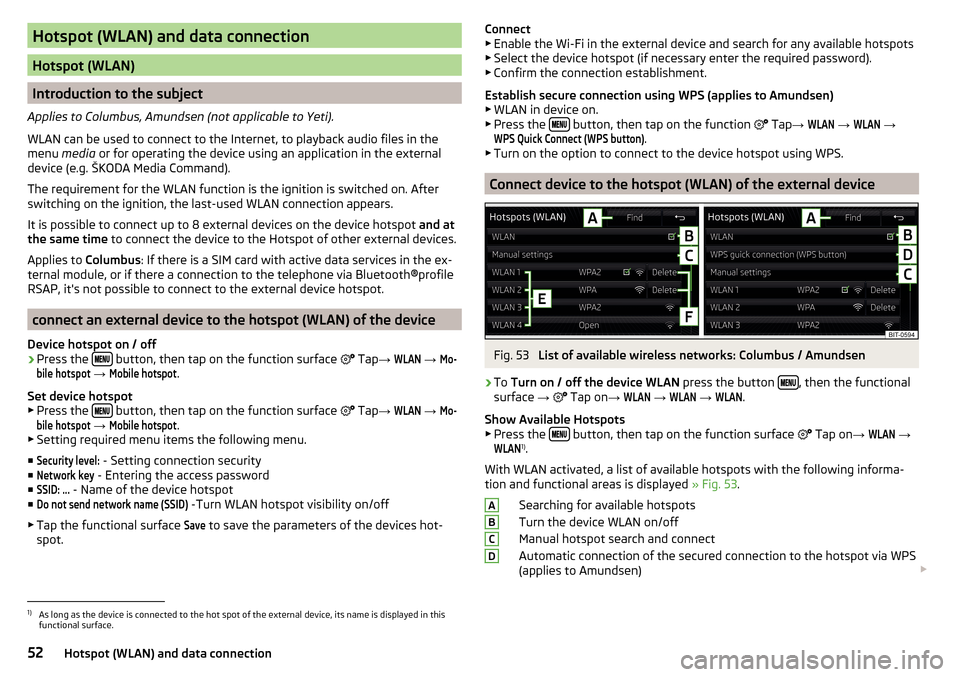
Fig. 53
List of available wireless networks: Columbus / Amundsen
›
To Turn on / off the device WLAN press the button , then the functional
surface →
Tap on
→
WLAN
→
WLAN
→
WLAN
.
Show Available Hotspots
▶ Press the
button, then tap on the function surface
Tap on
→
WLAN
→
WLAN
1)
.
With WLAN activated, a list of available hotspots with the following informa-
tion and functional areas is displayed » Fig. 53.
Searching for available hotspots
Turn the device WLAN on/off
Manual hotspot search and connect
Automatic connection of the secured connection to the hotspot via WPS
(applies to Amundsen)
ABCD1)
As long as the device is connected to the hot spot of the external device, its name is displayed in this
functional surface.
52Hotspot (WLAN) and data connection
Page 55 of 100
Functional surfaces of the available hotspots
Disconnection from the currently connected hotpot by deleting the de-
vice memory access password (The functional surface will only be shown
when connected)
Current connection
Wi-Fi strength of the external device
Connect ▶ WLAN in device on.
▶ Show the list of available hotspots, if necessary, update the list by tapping
the functional surfaceSearch
.
▶ Select the desired hotspot
▶ If the access to the hotspot is password protected, then enter the required
password.
Search for connection manually and connect ▶ Turn on WLAN in the device.
▶ Display list of available hotspots.
▶ Tap on the functional surface
Manual settings
and set the required hotspot pa-
rameters.
▶ Tap the function surface
Connect
.
▶ If the parameters for the search are set correctly and the hotspot is available,
then the connection will take place.
Establish secure connection using WPS (applies to Amundsen)
▶ Turn on WLAN in the device.
▶ In the external device, turn on the option to connect to the external device
via WPS.
▶ Press the
button, then tap on the function surface
Tap on
→
WLAN
→
Portable hotspot
→
WPS Quick Connect (WPS button)
.
End connection to the hotspot ▶ Press button when the desired Hotspot (WLAN) is found
,then the func-
tional surface →
Tap
→
WLAN
→
WLAN
→
Delete
.
data connection
Using the data connection, the device can be connected to the Internet. The
data connection can be established in one of the following ways.
Data connection using rSAP (applies to Columbus)
›
Connect the device via Bluetooth ®
profile rSAP to a telephone with activated
data services » page 46.
EFData connection using the SIM card in the external module (applies to
Columbus)›
Insert a SIM card with activated data services into the external module
» page 45 .
Data connection via WLAN
›
Connect the equipment to the hotspot of an external device with activated
data services » page 52, Connect device to the hotspot (WLAN) of the exter-
nal device .
Note
If the device is connected to an external device via Apple CarPlay ™
or Android
car ™
, then using the data connection by means of rSAP is not possible.53Hotspot (WLAN) and data connection
Page 57 of 100
Disconnection (appears with active connections)
Settings for the menu SmartLink » page 55
Connection set-up ▶ Connect the external device via a connecting cable to the USB input » Own-
er's Manual .
▶ In the main menu SmartLink Choose the connected external device and the
type of communication system if necessary » Fig. 55 -
.
Return to the main menu of the active connection from another device menu
(E.g. From the Radiomenu)
▶ Press the button
→ active connection (
/
/
).
Disconnection
▶ To end the connection, in the main menu SmartLink the functional surface
Interface » Fig. 55 -
.
▶ or Disconnect the device from the USB input.
If the connection was ended by pressing the function surface From the main
menu SmartLink , it is necessary to re-establish the connection when the ex-
ternal device is connected again.
If the connection was terminated by disconnecting the cable from the USB
port, then the last active connection is shown in the main menu when the ex-
ternal device is reconnected.
Settings
›
In the SmartLink main menu, tap on the function surface
surface.
■
Activate data transfer for ŠKODA apps
- turn on/off the data transfer for the con-
nected device for ŠKODA applications
■ MirrorLink® - Settings of the communication system MirrorLink ®
■
Screen orientation
- Setting the screen display
■
Landscape
- Width display
■
Portrait
- Height display
■
Turned 180 degrees
- Turn on / off the 180 ° inversion
■
Allow MirrorLink® Notes display
- Turn on / off the display of messages of Mirror
link ®
applications in the device screen
Android Auto ™
Introduction to the subject
The Android Auto ™
connection can be set up under the following conditions.
The ignition is switched on.
The unit is switched on.
The external device to be connected is switched on.
Some applications require the data connection in the connected external de-
vice to be turned on.
If the device is connected to an external device via Android Auto ™
then all the
phones currently connected, as well as the Bluetooth ®
Players are disconnec-
ted. The external device to be connected will automatically establish a new
telephone connection using Bluetooth ®
as a main phone. Connecting an addi-
tional telephone and using telephone services of the SIM card inserted in the
external module is not possible throughout the duration of the connection. A
possible data connection by using the SIM card inserted in the external module
remains operational » page 53.
An external device connected using Android Auto ™
cannot be used as an audio
source in the menu Media.
If route guidance is taking place at this moment in the device, then there is
the option to start the route guidance in the Android Auto ™
application. This is
also true reciprocally.
A list of devices and applications that the Android Auto ™
connection supports
can be found on the ™
Google website. Functionality is not guaranteed outside
of the supported regions.
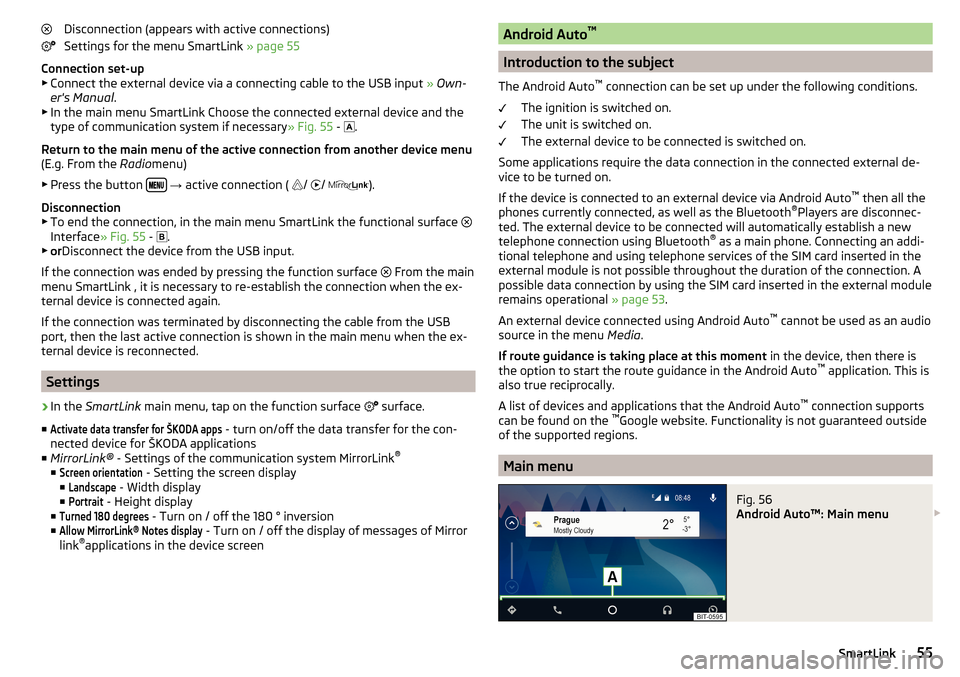
Main menu
Fig. 56
Android Auto™: Main menu
55SmartLink
Page 58 of 100
Main menu - functional areas and information in the areaANavigation applications
Telephone applications
Overview regarding current applications, telephone calls, accepted text
messages, tasks in the working directory, weather or similar
Music applications
List of ŠKODA applications
Start the application ▶ Tap on the functional surface of the desired application to launch the appli-
cation.
The symbol appears next to the functional surface in the areaA
, Then a list
of other applications appears by tapping this function surface again.
Apple CarPlay ™
Introduction to the subject
The Apple CarPlay ™
- connection can be set up under the following conditions.
The ignition is switched on.
The unit is switched on.
The device to be connected is switched on.
The data connection is turned on in the device to be connected.
Voice control is turned on in the device to be connected
If the device is connected to an external device via Apple CarPlay ™
, then the
use of the Bluetooth ®
connection is not possible and the phone menu is not
available. A possible data connection via the SIM card remains operational
» page 53 .
A device connected using Apple CarPlay ™
cannot be used as an audio source in
the menu Media.
If route guidance is taking place at this moment in the device, then there is
the option to start the route guidance in the Apple CarPlay ™
application. This is
also true reciprocally.
A list of devices, supported regions and applications that the Apple CarPlay ™
connection supports, can be obtained from the Apple ™
website. Functionality
is not guaranteed outside of the supported regions.
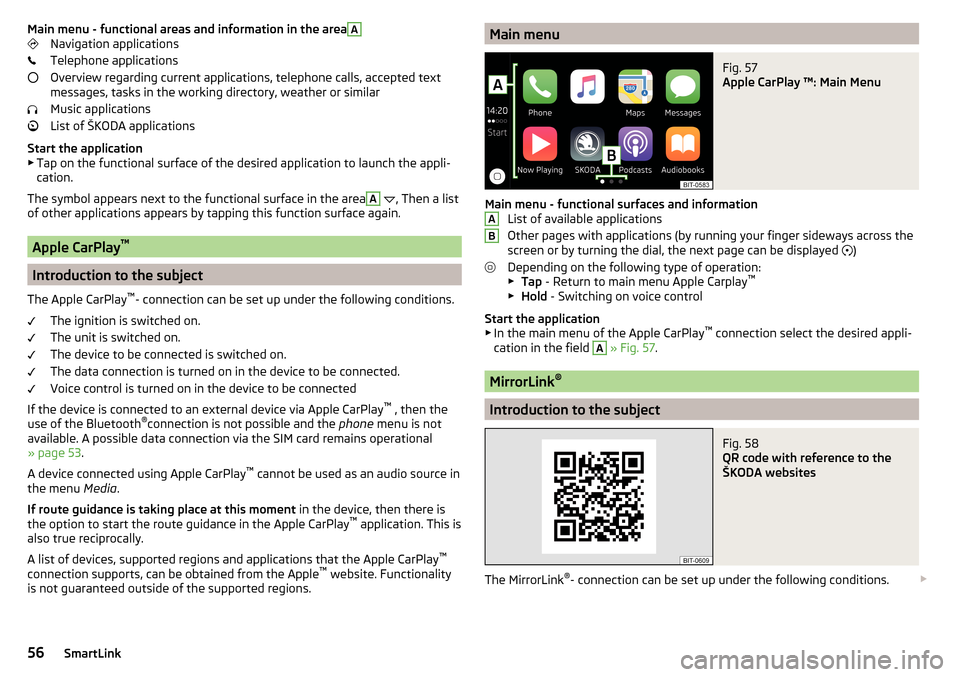
Main menuFig. 57
Apple CarPlay ™: Main Menu
Main menu - functional surfaces and information List of available applications
Other pages with applications (by running your finger sideways across the
screen or by turning the dial, the next page can be displayed )
Depending on the following type of operation: ▶ Tap - Return to main menu Apple Carplay ™
▶ Hold - Switching on voice control
Start the application ▶ In the main menu of the Apple CarPlay ™
connection select the desired appli-
cation in the field
A
» Fig. 57 .
MirrorLink ®
Introduction to the subject
Fig. 58
QR code with reference to the
ŠKODA websites
The MirrorLink ®
- connection can be set up under the following conditions.
AB56SmartLink
Page 61 of 100
Navigation
Introductory information
Navigation - function sequence
Applies to Columbus, Amundsen.
Route guidance is started as follows.
›
Search for/ enter a new destination or Select one of the stored destinations.
›
Confirm the route calculation in the destination details or if necessary, adjust
the route options.
›
Select the preferred route type, if this is requested by the device.
A route calculation occurs and route guidance starts.
The route guidance is provided by graphical driving recommendations and nav- igation announcements.
The is an option to add additional destinations during route guidance, or to
adapt the route.
If a traffic radio station is available, information concerning traffic delays is
evaluated by the device and, if necessary, an alternative route is offered.
If you deviate from the route, then a new route calculation is carried out.
GPS satellite signal
The unit uses the GPS (Global Positioning System) satellite signal for route
guidance.
Outside the range of the GPS satellite signal (e.g. in dense vegetation, in tun-
nels, parking garages, etc.), the unit navigates only with restrictions using ve-
hicle sensors.
The unit offers the possibility to show in the split screen display the following
Position
» Fig. 62 on page 60 information about the current geographical posi-
tion of the vehicle and the satellite signal.
Geographical longitude
Geographical latitude
Elevation
Number of received/available satellites
If no GPS satellite signal is available, no values are displayed.
Navigation data
Columbus navigation data source
The navigation data is stored in the internal memory.
Amundsen navigation data source
The navigation data is stored on an Original SD Card .
In order to ensure the function of the navigation, the Original SD card, with the
navigation data, must be inserted in the respective slot » page 28, SD card .
If the original SD card should be damaged or lost, a new original SD card can be
purchased from the ŠKODA Original Accessories.
With a Non-original SD Card, the navigation does not work .
Finding out the version of the navigation data›
In the Navigation main menu, tap on the function surface,
Tap
→
Versioninformation
.
Update navigation data
We recommend that you update the navigation data on a regular basis (e.g.
Due to newly developed roads and changed traffic signs).
The information on updating the navigation data is to be obtained from a
ŠKODA partner or on the following ŠKODA Internet pages.
http://go.skoda.eu/infotainment
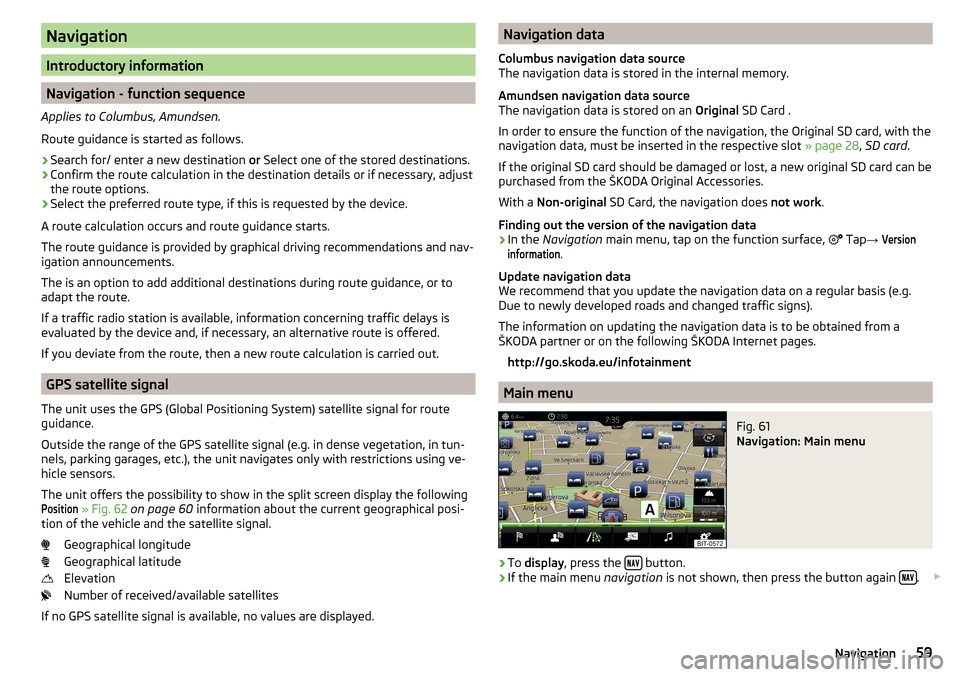
Main menu
Fig. 61
Navigation: Main menu
›
To display , press the button.
›
If the main menu
navigation is not shown, then press the button again .
59Navigation
Page 65 of 100
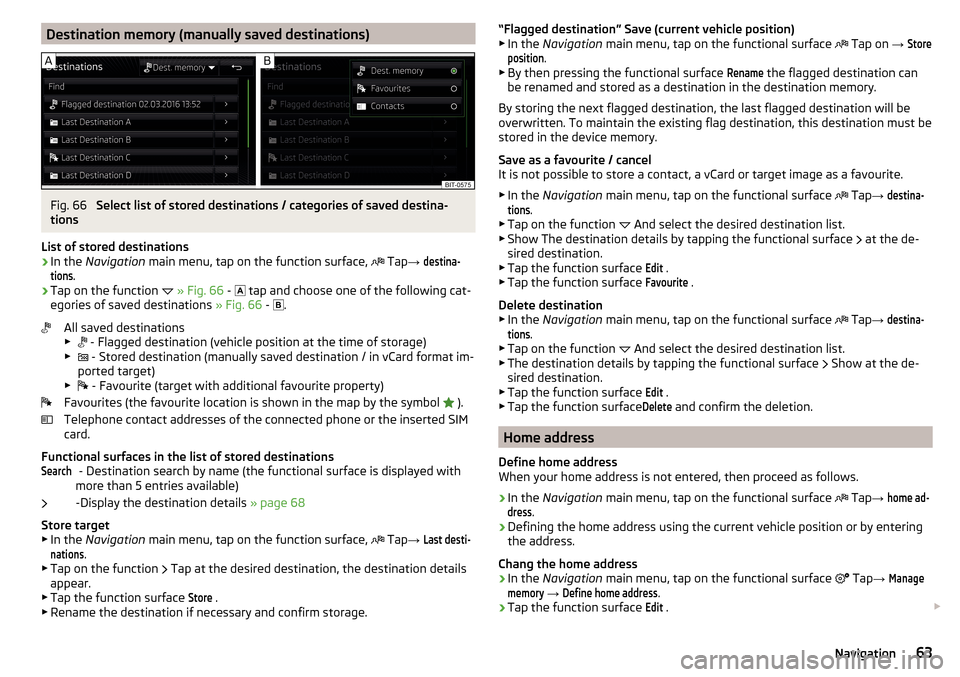
Destination memory (manually saved destinations)Fig. 66
Select list of stored destinations / categories of saved destina-
tions
List of stored destinations
›
In the Navigation main menu, tap on the function surface,
Tap
→
destina-tions
.
›
Tap on the function
» Fig. 66 -
tap and choose one of the following cat-
egories of saved destinations » Fig. 66 -
.
All saved destinations
▶ - Flagged destination (vehicle position at the time of storage)
▶ - Stored destination (manually saved destination / in vCard format im-
ported target)
▶ - Favourite (target with additional favourite property)
Favourites (the favourite location is shown in the map by the symbol ).
Telephone contact addresses of the connected phone or the inserted SIM
card.
Functional surfaces in the list of stored destinations - Destination search by name (the functional surface is displayed with
more than 5 entries available)
-Display the destination details » page 68
Store target ▶ In the Navigation main menu, tap on the function surface,
Tap
→
Last desti-nations
.
▶ Tap on the function Tap at the desired destination, the destination details
appear.
▶ Tap the function surface
Store
.
▶ Rename the destination if necessary and confirm storage.
Search“Flagged destination” Save (current vehicle position)
▶ In the Navigation main menu, tap on the functional surface Tap on → Storeposition
.
▶ By then pressing the functional surface
Rename
the flagged destination can
be renamed and stored as a destination in the destination memory.
By storing the next flagged destination, the last flagged destination will be
overwritten. To maintain the existing flag destination, this destination must be
stored in the device memory.
Save as a favourite / cancel
It is not possible to store a contact, a vCard or target image as a favourite.
▶ In the Navigation main menu, tap on the functional surface
Tap
→
destina-tions
.
▶ Tap on the function And select the desired destination list.
▶ Show The destination details by tapping the functional surface at the de-
sired destination.
▶ Tap the function surface
Edit
.
▶ Tap the function surface
Favourite
.
Delete destination ▶ In the Navigation main menu, tap on the functional surface
Tap
→
destina-tions
.
▶ Tap on the function And select the desired destination list.
▶ The destination details by tapping the functional surface Show at the de-
sired destination.
▶ Tap the function surface
Edit
.
▶ Tap the function surface
Delete
and confirm the deletion.
Home address
Define home address
When your home address is not entered, then proceed as follows.
›
In the Navigation main menu, tap on the functional surface
Tap
→
home ad-dress
.
›
Defining the home address using the current vehicle position or by entering
the address.
Chang the home address
›
In the Navigation main menu, tap on the functional surface
Tap
→
Managememory
→
Define home address
.
›
Tap the function surface
Edit
.
63Navigation
Page 66 of 100
›Edit the home address or set one up using the current vehicle position or by
entering the address.
Delete home address›
In the Navigation main menu, tap on the functional surface
Tap →
Managememory
→
Delete user data
→
Home address
.
›
Tap the function surface
Delete
and confirm the deletion.
Import my destinations
Introduction to the subject
Fig. 67
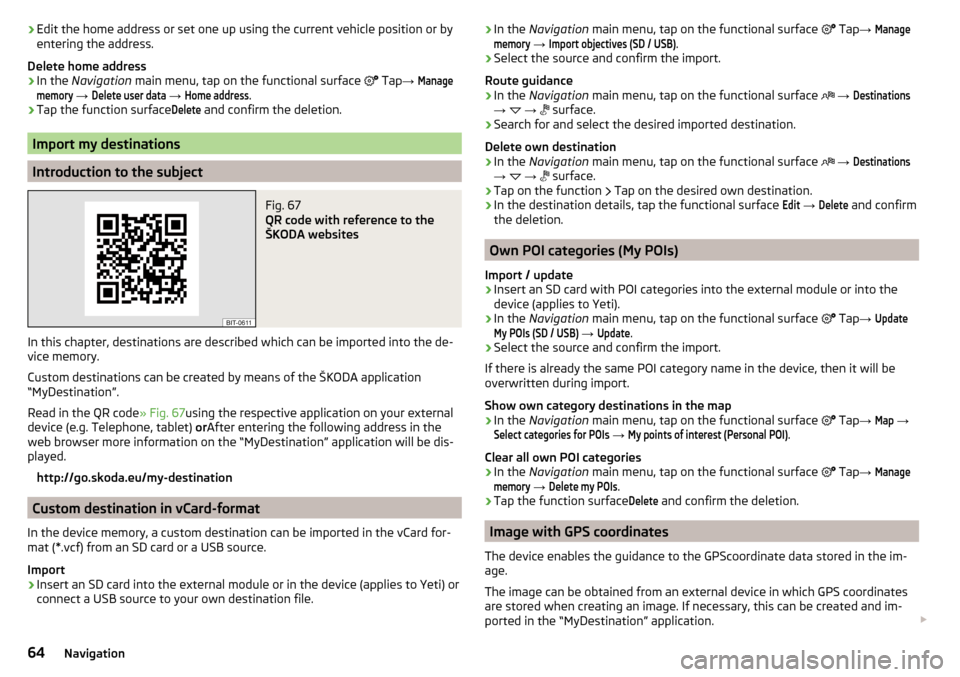
QR code with reference to the
ŠKODA websites
In this chapter, destinations are described which can be imported into the de-
vice memory.
Custom destinations can be created by means of the ŠKODA application
“MyDestination”.
Read in the QR code » Fig. 67using the respective application on your external
device (e.g. Telephone, tablet) orAfter entering the following address in the
web browser more information on the “MyDestination” application will be dis-
played.
http://go.skoda.eu/my-destination
Custom destination in vCard-format
In the device memory, a custom destination can be imported in the vCard for-
mat (*.vcf) from an SD card or a USB source.
Import
›
Insert an SD card into the external module or in the device (applies to Yeti) or
connect a USB source to your own destination file.
› In the
Navigation main menu, tap on the functional surface Tap → Managememory
→
Import objectives (SD / USB)
.›
Select the source and confirm the import.
Route guidance
›
In the Navigation main menu, tap on the functional surface
→
Destinations
→
→
surface.
›
Search for and select the desired imported destination.
Delete own destination
›
In the Navigation main menu, tap on the functional surface
→
Destinations
→
→
surface.
›
Tap on the function
Tap on the desired own destination.
›
In the destination details, tap the functional surface
Edit
→
Delete
and confirm
the deletion.
Own POI categories (My POIs)
Import / update
›
Insert an SD card with POI categories into the external module or into the
device (applies to Yeti).
›
In the Navigation main menu, tap on the functional surface
Tap
→
UpdateMy POIs (SD / USB)
→
Update
.
›
Select the source and confirm the import.
If there is already the same POI category name in the device, then it will be
overwritten during import.
Show own category destinations in the map
›
In the Navigation main menu, tap on the functional surface
Tap
→
Map
→
Select categories for POIs
→
My points of interest (Personal POI)
.
Clear all own POI categories
›
In the Navigation main menu, tap on the functional surface
Tap
→
Managememory
→
Delete my POIs
.
›
Tap the function surface
Delete
and confirm the deletion.
Image with GPS coordinates
The device enables the guidance to the GPScoordinate data stored in the im-
age.
The image can be obtained from an external device in which GPS coordinates
are stored when creating an image. If necessary, this can be created and im-
ported in the “MyDestination” application.
64Navigation
Page 67 of 100
›Press the
button, then tap on the function surface Images.›Select the connected source and open the image with GPS coordinates.›
Tap on the function
Tap in the image, a menu opens with the option to
start route guidance.
Map
Map description
Fig. 68
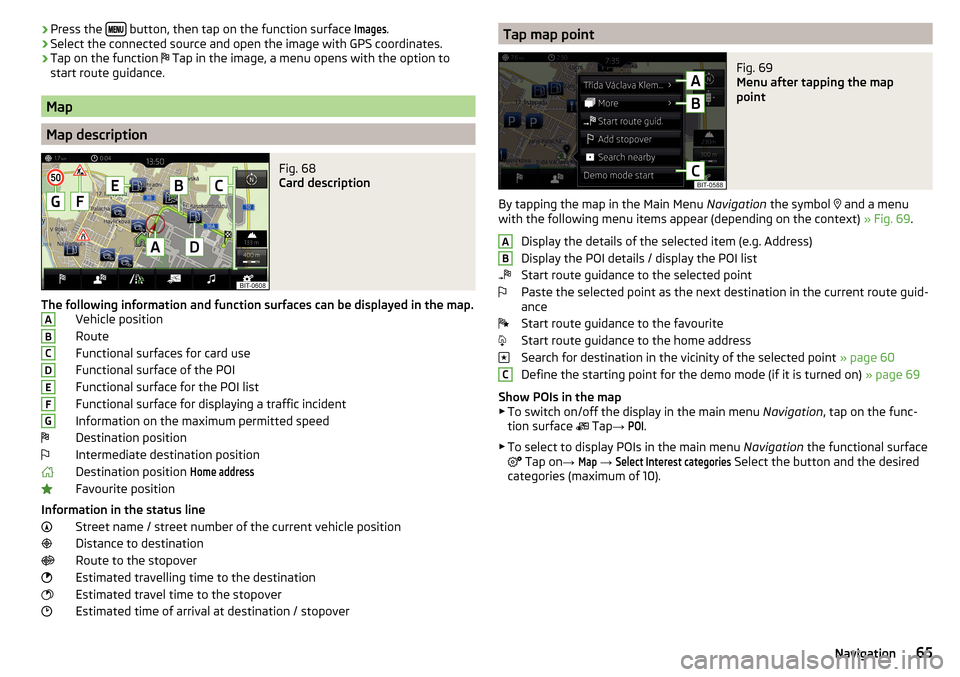
Card description
The following information and function surfaces can be displayed in the map. Vehicle position
Route
Functional surfaces for card use
Functional surface of the POI
Functional surface for the POI list
Functional surface for displaying a traffic incident
Information on the maximum permitted speed Destination position
Intermediate destination position
Destination position
Home address
Favourite position
Information in the status line Street name / street number of the current vehicle position
Distance to destination
Route to the stopover
Estimated travelling time to the destination
Estimated travel time to the stopover
Estimated time of arrival at destination / stopover
ABCDEFGTap map pointFig. 69
Menu after tapping the map
point
By tapping the map in the Main Menu Navigation the symbol
and a menu
with the following menu items appear (depending on the context) » Fig. 69.
Display the details of the selected item (e.g. Address)
Display the POI details / display the POI list
Start route guidance to the selected point
Paste the selected point as the next destination in the current route guid-
ance
Start route guidance to the favourite
Start route guidance to the home address
Search for destination in the vicinity of the selected point » page 60
Define the starting point for the demo mode (if it is turned on) » page 69
Show POIs in the map
▶ To switch on/off the display in the main menu Navigation, tap on the func-
tion surface Tap
→
POI
.
▶ To select to display POIs in the main menu Navigation the functional surface
Tap on
→
Map
→
Select Interest categories
Select the button and the desired
categories (maximum of 10).
ABC65Navigation