engine overheat SKODA YETI 2016 1.G / 5L Owner's Manual
[x] Cancel search | Manufacturer: SKODA, Model Year: 2016, Model line: YETI, Model: SKODA YETI 2016 1.G / 5LPages: 200, PDF Size: 28.98 MB
Page 32 of 200

Auto Check Control
Vehicle condition
Certain functions and conditions of individual vehicle systems are checked
continuously when the ignition is switched on. If there is a system failure, the
relevant message is displayed in the MAXI DOTDisplay, in conjunction with in-
dicator lights, if necessary, indicator light illumination takes place in the instru-
ment cluster » page 31, Warning lights .
The menu item Vehicle status
is shown in the main menu of the MAXI DOT dis-
play whenever at least one fault message exists. After selecting this menu,
the first of the error messages is displayed.
Several error messages are shown on the display under the message e.g. 1/3.
This indicates that the first of a total of three error messages is being dis-
played.
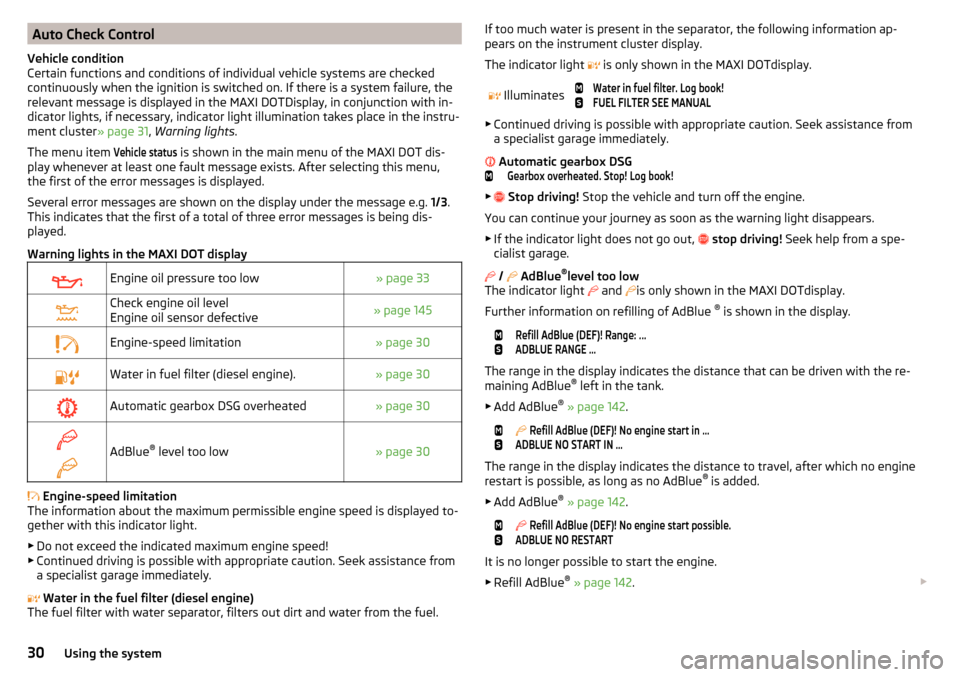
Warning lights in the MAXI DOT display
Engine oil pressure too low» page 33Check engine oil level
Engine oil sensor defective» page 145Engine-speed limitation» page 30Water in fuel filter (diesel engine).» page 30Automatic gearbox DSG overheated» page 30
AdBlue ®
level too low» page 30
Engine-speed limitation
The information about the maximum permissible engine speed is displayed to-
gether with this indicator light.
▶ Do not exceed the indicated maximum engine speed!
▶ Continued driving is possible with appropriate caution. Seek assistance from
a specialist garage immediately.
Water in the fuel filter (diesel engine)
The fuel filter with water separator, filters out dirt and water from the fuel.
If too much water is present in the separator, the following information ap-
pears on the instrument cluster display.
The indicator light is only shown in the MAXI DOTdisplay.
Illuminates
Water in fuel filter. Log book!FUEL FILTER SEE MANUAL
▶ Continued driving is possible with appropriate caution. Seek assistance from
a specialist garage immediately.
Automatic gearbox DSG
Gearbox overheated. Stop! Log book!
▶
Stop driving! Stop the vehicle and turn off the engine.
You can continue your journey as soon as the warning light disappears.
▶ If the indicator light does not go out,
stop driving! Seek help from a spe-
cialist garage.
/
AdBlue ®
level too low
The indicator light and
is only shown in the MAXI DOTdisplay.
Further information on refilling of AdBlue ®
is shown in the display.
Refill AdBlue (DEF)! Range: ...ADBLUE RANGE …
The range in the display indicates the distance that can be driven with the re-
maining AdBlue ®
left in the tank.
▶ Add AdBlue ®
» page 142 .
Refill AdBlue (DEF)! No engine start in …ADBLUE NO START IN …
The range in the display indicates the distance to travel, after which no engine
restart is possible, as long as no AdBlue ®
is added.
▶ Add AdBlue ®
» page 142 .
Refill AdBlue (DEF)! No engine start possible.ADBLUE NO RESTART
It is no longer possible to start the engine.
▶ Refill AdBlue ®
» page 142 .
30Using the system
Page 106 of 200

The wear and tear on the brake pads is dependent on the operating condi-
tions and driving style. In difficult conditions (e.g. urban, sporty driving), the
condition of the brakes should be checked between services by a specialist ga-
rage.
Brake response can be slower if the brakes are covered in moisture or, in win-
ter, have a layer of ice or salt on them . The brakes should be cleaned and
dried by applying the brakes many times over »
.
Corrosion on the brake discs and dirt on the brake pads can occur if the vehicle
has been parked for a long period and if you do not make much use of the
braking system. The brakes are cleaned by applying the brakes several times
over »
.
Before negotiating a long or steep gradient , reduce speed and shift down a
gear. As a result, the braking effect of the engine will be used, reducing the
load on the brakes. If, nevertheless, there is a need for additional braking, it
should be carried out at intervals.
Emergency braking warning - if it is necessary to brake hard, the system may
cause the brake lights to automatically flash, to alert the traffic behind.
New brake pads must first be “run in” because these do not initially have the
best possible braking effect. Drive especially carefully for the first 200 km or
so.
If the brake fluid level is too low, it can cause faults in the braking system ;
the warning light will light up in the instrument cluster
» page 32,
Braking
system . If the warning light does not light up, yet the stopping distance is per-
ceived to be longer than before, the driving style should be adapted in view of
the unknown cause of the problem, and braking kept to a minimum - seek the
help of a specialist garage without delay.
The brake booster increases the pressure generated with the brake pedal. The
brake booster only operates when the engine is running.
WARNING■ Greater physical effort is required for braking when the engine is switch-
ed off – risk of accident!■
During the braking procedure on a vehicle with manual transmission,
when the vehicle is in gear and at low revs, press the clutch pedal. Other-
wise, the functionality of the brake system may be impaired – risk of acci-
dent!
WARNING (Continued)■ Do not depress the brake pedal if there is no requirement to slow down.
This causes the brakes to overheat and can also result in a longer braking
distance and excessive wear - There is a risk of an accident!■
Only brake for the purpose of drying and cleaning the brake discs if the
traffic conditions permit this. Do not place any other road users in jeopardy.
■
Recommendations for new brake pads should be followed.
■
When stopping and parking, the parking brake should always be applied
firmly, otherwise the vehicle could move off - There is risk of an accident!
■
If a front spoiler, full wheel trim, etc. is mounted retrospectively, it must
be ensured that the air supply to the front wheel brakes is not reduced.
Otherwise, the front brakes could be in danger of overheating – There is
risk of an accident!
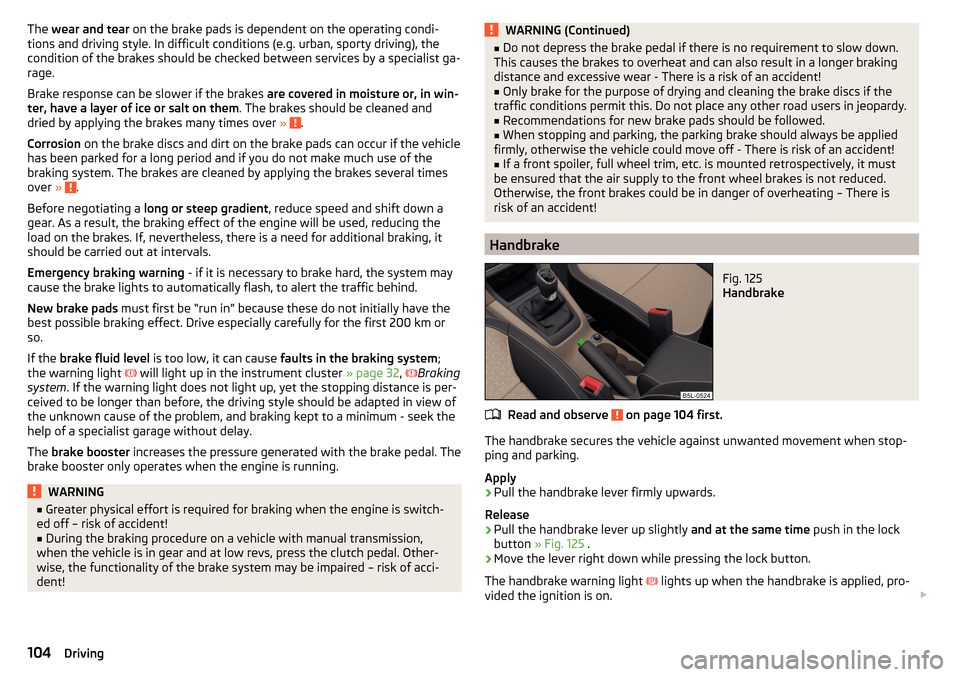
Handbrake
Fig. 125
Handbrake
Read and observe on page 104 first.
The handbrake secures the vehicle against unwanted movement when stop-
ping and parking.
Apply
›
Pull the handbrake lever firmly upwards.
Release
›
Pull the handbrake lever up slightly and at the same time push in the lock
button » Fig. 125 .
›
Move the lever right down while pressing the lock button.
The handbrake warning light
lights up when the handbrake is applied, pro-
vided the ignition is on.
104Driving
Page 107 of 200

A warning signal sounds if the vehicle is inadvertently driven off with the
handbrake applied. The handbrake warning is activated if the vehicle is driven
at a speed of over 5 km/h for more than 3 seconds.WARNINGDisengage the handbrake completely. A handbrake which is only partially
disengaged can result in the rear brakes overheating. This can have a nega-
tive effect on the operation of the brake system – risk of accident!
Note
Push the armrest cover all the way back to the stop before applying the hand-
brake » page 71 .
Parking
Read and observe
on page 104 first.
When stopping and parking, look for a place with a suitable surface » .
Only carry out the activities while parking in the specified order.
›
Bring the vehicle to a stop and depress the brake pedal.
›
Firmly apply the handbrake.
›
On vehicles with automatic transmission place the selector lever in the P po-
sition.
›
Switch off the engine.
›
For vehicles with Manual transmission select the 1st gear or the Reverse
gear R .
›
Release the brake pedal.
WARNING■
The exhaust system components can become very hot. Therefore, never
stop the vehicle in places where the underside of your vehicle could come
into contact with flammable materials (e.g. dry grass, leaves, spilled fuel or
the like). - Risk of fire and serious injury can occur!■
When leaving the vehicle, never leave people unattended in the car who
could, for example, lock the vehicle or release the brake - There is a risk of
accidents and injury!
Manual gear changing and pedals
Introduction
This chapter contains information on the following subjects:
Manual gear changing
105
Pedals
106
Manual gear changing
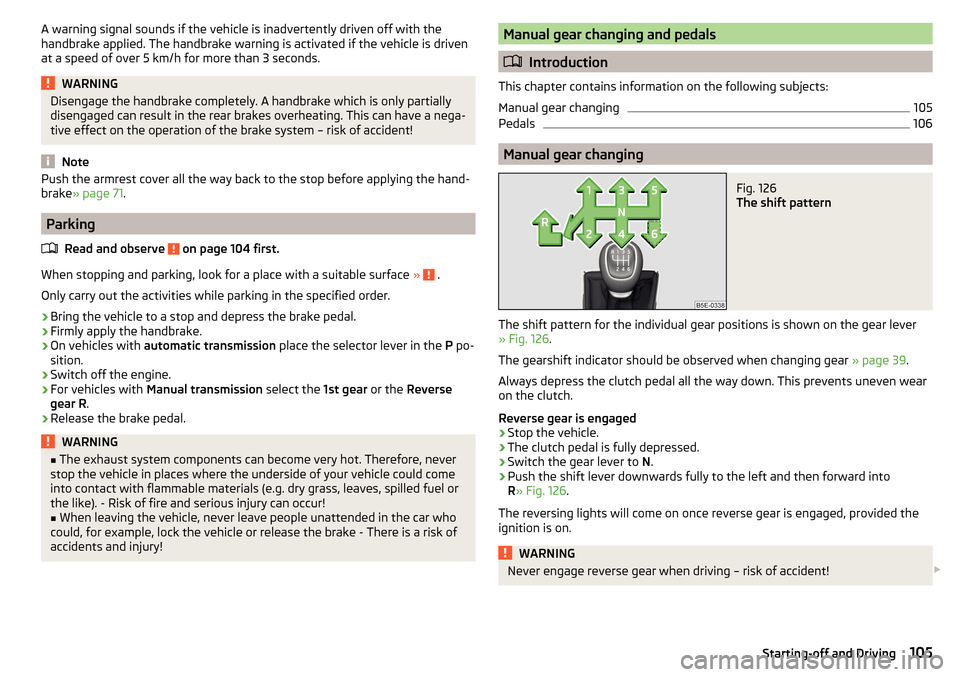
Fig. 126
The shift pattern
The shift pattern for the individual gear positions is shown on the gear lever » Fig. 126 .
The gearshift indicator should be observed when changing gear » page 39.
Always depress the clutch pedal all the way down. This prevents uneven wear
on the clutch.
Reverse gear is engaged
›
Stop the vehicle.
›
The clutch pedal is fully depressed.
›
Switch the gear lever to N.
›
Push the shift lever downwards fully to the left and then forward into
R » Fig. 126 .
The reversing lights will come on once reverse gear is engaged, provided the ignition is on.
WARNINGNever engage reverse gear when driving – risk of accident! 105Starting-off and Driving
Page 148 of 200

CAUTION■The oil level must never be below range A » Fig. 161 – risk of damage to the
engine as well as to the exhaust system.■
If a top up with oil is not possible or the oil level is above range
A
,
Stop
driving! Switch off the engine and seek assistance from a specialist garage.
Note
Too low engine oil level is shown in the instrument cluster by the warning
light illuminating and also indicated by the message » page 33. Nevertheless,
we recommend checking the oil level on a regular basis using the dipstick.
Coolant
Introduction
This chapter contains information on the following subjects:
Checking and refilling
146
The coolant helps to keep the engine temperature down, and consists of wa- ter and coolant additive (with additives that protect the cooling system against
corrosion and prevent furring).
The proportion of coolant additive in the coolant must be 40 to 60 %.
The correct mix of water and coolant additive should be checked and if neces-
sary corrected by a specialist garage.
WARNING■ The following instructions must be followed at all times when working on
the engine compartment » page 142.■
Never open the end cover of the coolant expansion reservoir while the
engine is still warm. The cooling system is pressurised -There is a risk of
scalding or injury from splashes of coolant!
■
To protect against the coolant splashing, cover the cap with a cloth when
opening.
■
Coolant and coolant fumes are harmful - avoid contact with the coolant. If
the coolant comes into contact with the eye or skin, wash the affected area
with plenty of water for several minutes, and where appropriate seek medi-
cal help.
CAUTIONDo not cover the radiator and install any parts (e.g auxiliary lights.) in front of
the air intakes - There is a risk of the engine overheating.
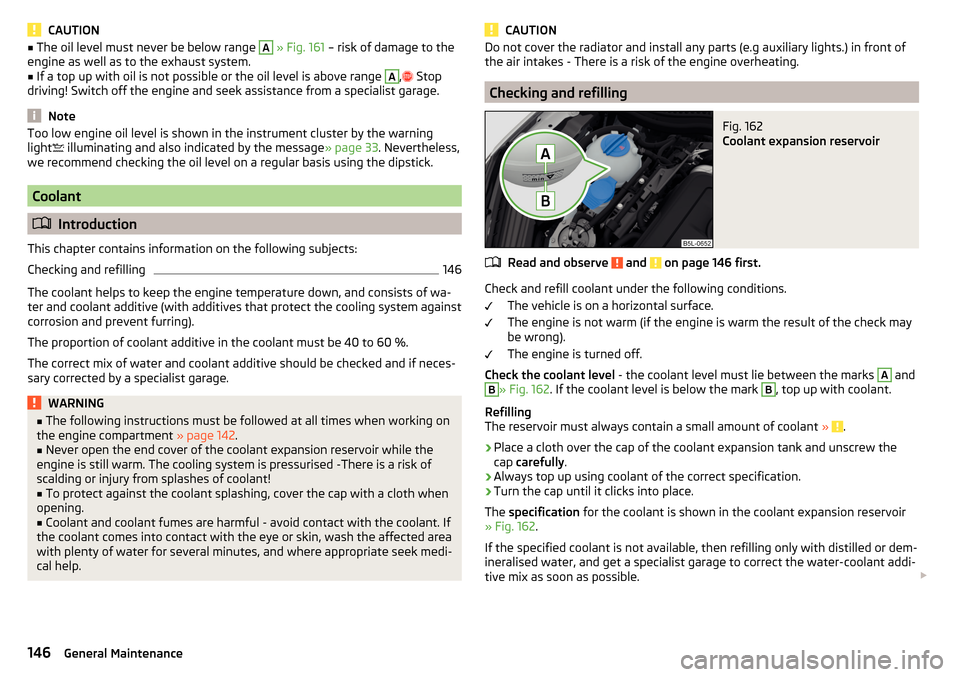
Checking and refilling
Fig. 162
Coolant expansion reservoir
Read and observe and on page 146 first.
Check and refill coolant under the following conditions.
The vehicle is on a horizontal surface.
The engine is not warm (if the engine is warm the result of the check may
be wrong).
The engine is turned off.
Check the coolant level - the coolant level must lie between the marks
A
and
B
» Fig. 162. If the coolant level is below the mark
B
, top up with coolant.
Refilling
The reservoir must always contain a small amount of coolant »
.
›
Place a cloth over the cap of the coolant expansion tank and unscrew the
cap carefully .
›
Always top up using coolant of the correct specification.
›
Turn the cap until it clicks into place.
The specification for the coolant is shown in the coolant expansion reservoir
» Fig. 162 .
If the specified coolant is not available, then refilling only with distilled or dem-
ineralised water, and get a specialist garage to correct the water-coolant addi-
tive mix as soon as possible.
146General Maintenance