OIL SPEC SKODA YETI 2017 Owner´s Manual
[x] Cancel search | Manufacturer: SKODA, Model Year: 2017, Model line: YETI, Model: SKODA YETI 2017Pages: 200, PDF Size: 28.93 MB
Page 135 of 200
WARNING■No changes may be made to airbag system components, the front bump-
er and the bodywork.■
Any work on the airbag system including the installation and removal of
system components due to other repair work (e.g. removal of the steering
wheel) must only be carried out by a specialist garage.
■
Do not manipulate individual parts of the airbag system, as this might re-
sult in the airbag being deployed.
■
If the airbag has been deployed, the airbag system must be replaced.
WARNINGThe airbag system operates using pressure sensors located in the front
doors. For this reason, no adjustments may be carried out to the doors or
door panels (e.g. installation of additional loudspeakers). Resulting damage
can impair the functioning of the airbag system - There is a risk of acci-
dents and fatal injuries! The following guidelines must be observed.■
Any work on the front doors and their door panels must be carried out by
a specialist garage.
■
Never drive the vehicle with the inner door panels removed or with open-
ings in the panelling.
Acceptance and recycling of used vehicles
Read and observe
on page 131 first.
All new ŠKODA vehicles are 95% recyclable.
Service intervals
Introduction
This chapter contains information on the following subjects:
Overview of service intervals
134
Fixed service intervals QI1 - QI4
134
Variable service interval QI6
134
Digital Service Plan
135
The service interval display in the display of the instrument cluster will remind
you to carry out every service stipulated by the manufacturer at the right time
in order to prevent you from forgetting any » page 44.
The completion of services can be verified through the printed verification
from the digital service schedule and the respective receipts.
The specified service intervals are tailored to normal operating conditions.
In the case of aggravated operating conditions, it will be necessary to have
some service work carried out before the date of the next regular service or
between the specified service intervals. This applies mainly to the cleaning or
the replacement of the air filter insert in regions with heavy dust pollution as
well as checking and replacing the toothed belt, but also to vehicles with die-
sel particle filters, which can put greater strain on the engine oil.
The following is taken to mean aggravated operating conditions: ▶ Fuel containing sulphur.
▶ Frequent short trips.
▶ Longer periods of engine idling (e.g. taxis).
▶ Operation in areas with heavy dust pollution.
▶ Frequent trailer operation.
▶ Predominantly stop-and-go traffic as is e.g. often the case in city driving.
▶ Operation predominantly during winter.
You will be told at the specialist garage whether the operating conditions of
your vehicle may make it necessary for service work to be carried out between
the normal service intervals.
Different service charges may apply according to the particular scope of work
required, the vehicle type and specification, and your vehicle’s condition.
Note
■ The customer is responsible for covering the cost of all services including
changing or replenishing the oil, even during the warranty period, unless sta-
ted otherwise in the ŠKODA AUTO warranty terms or other agreements.■
You will be informed about the service checks and actions at each service by
the specialist garage.
133Care and maintenance
Page 136 of 200
Overview of service intervalsFig. 153
Vehicle data: Service Interval
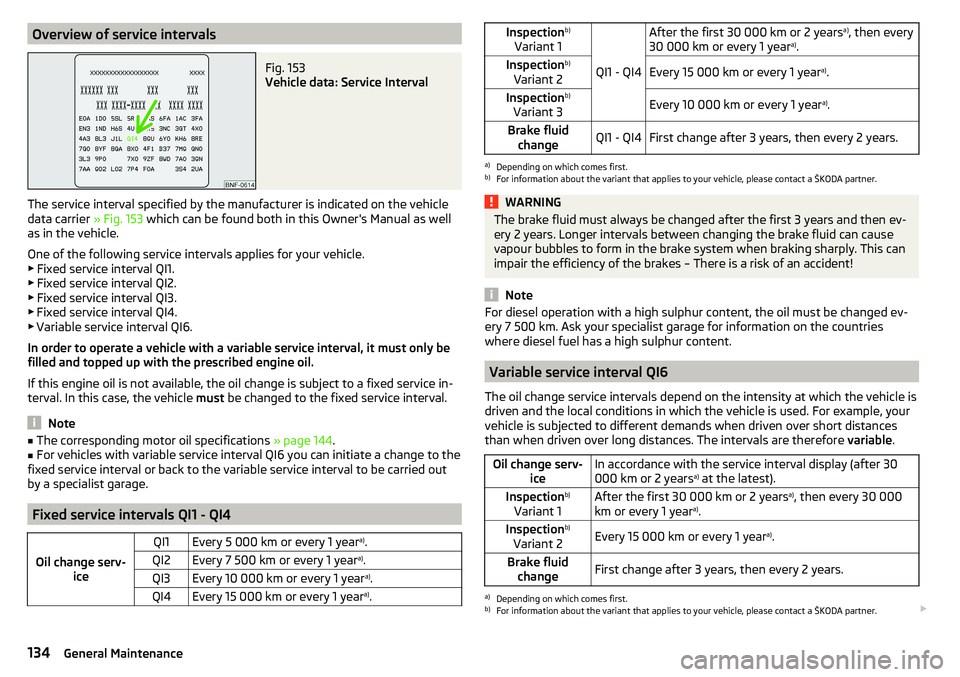
The service interval specified by the manufacturer is indicated on the vehicle
data carrier » Fig. 153 which can be found both in this Owner's Manual as well
as in the vehicle.
One of the following service intervals applies for your vehicle. ▶ Fixed service interval QI1.
▶ Fixed service interval QI2.
▶ Fixed service interval QI3.
▶ Fixed service interval QI4.
▶ Variable service interval QI6.
In order to operate a vehicle with a variable service interval, it must only be
filled and topped up with the prescribed engine oil.
If this engine oil is not available, the oil change is subject to a fixed service in-
terval. In this case, the vehicle must be changed to the fixed service interval.
Note
■
The corresponding motor oil specifications » page 144.■For vehicles with variable service interval QI6 you can initiate a change to the
fixed service interval or back to the variable service interval to be carried out
by a specialist garage.
Fixed service intervals QI1 - QI4
Oil change serv- ice
QI1Every 5 000 km or every 1 year a)
.QI2Every 7 500 km or every 1 year a)
.QI3Every 10 000 km or every 1 year a)
.QI4Every 15 000 km or every 1 year a)
.Inspection b)
Variant 1
QI1 - QI4
After the first 30 000 km or 2 years a)
, then every
30 000 km or every 1 year a)
.Inspection b)
Variant 2Every 15 000 km or every 1 year a)
.Inspection b)
Variant 3Every 10 000 km or every 1 year a)
.Brake fluid
changeQI1 - QI4First change after 3 years, then every 2 years.a)
Depending on which comes first.
b)
For information about the variant that applies to your vehicle, please contact a ŠKODA partner.
WARNINGThe brake fluid must always be changed after the first 3 years and then ev-
ery 2 years. Longer intervals between changing the brake fluid can cause
vapour bubbles to form in the brake system when braking sharply. This can
impair the efficiency of the brakes – There is a risk of an accident!
Note
For diesel operation with a high sulphur content, the oil must be changed ev-
ery 7 500 km. Ask your specialist garage for information on the countries
where diesel fuel has a high sulphur content.
Variable service interval QI6
The oil change service intervals depend on the intensity at which the vehicle is
driven and the local conditions in which the vehicle is used. For example, your
vehicle is subjected to different demands when driven over short distances
than when driven over long distances. The intervals are therefore variable.
Oil change serv-
iceIn accordance with the service interval display (after 30
000 km or 2 years a)
at the latest).Inspection b)
Variant 1After the first 30 000 km or 2 years a)
, then every 30 000
km or every 1 year a)
.Inspection b)
Variant 2Every 15 000 km or every 1 year a)
.Brake fluid
changeFirst change after 3 years, then every 2 years.a)
Depending on which comes first.
b)
For information about the variant that applies to your vehicle, please contact a ŠKODA partner.
134General Maintenance
Page 138 of 200
If your vehicle is fitted with any particular attached parts (e.g. spoiler, roof rack
system, aerial etc.) it is best to consult the operator of the car wash system be-
forehand.
After an automatic wash with wax treatment, the wiper blades should be
cleaned with cleaning agents specially designed for the purpose, and then de-
greased.
Pressure Washers
When washing the vehicle with a high-pressure cleaner, the instructions for
use of the equipment must be observed. This particularly applies to instruc-
tions regarding the pressure and spraying distance from the vehicle surface.WARNING■
When washing your vehicle in the winter: Water and ice in the braking
system can affect the braking efficiency – risk of accident!■
Take care when cleaning the underbody or the inside of the wheel wells -
there is a risk of injury from sharp metal parts!
CAUTION
■ Do not wash the vehicle in direct sunlight, do not exert pressure on the body
while washing. The temperature of the washing water should be no more than
60 °C max. - otherwise there is a risk of damaging the vehicle paint.■
Before driving through a car wash fold in the exterior mirrors - There is a risk
of damage.
■
For vehicles with roof antenna the antenna rod should be unscrewed before
driving through a car wash - there is a risk of damage.
CAUTION
Washing the vehicle with high-pressure cleaners■Films should not be washed with any high-pressure cleaners - There is a risk
of damage.■
Do not aim the water jet directly at the lock cylinders or the door or opening
joints when washing the vehicle in the winter – there is a risk of freezing.
■
Hold a large spraying distance to the rear camera lens, to plastic parts (e.g.
Roof racks, spoilers, protective strips and the like), as well as soft materials
such as rubber hoses or insulation material.
■
The sensors of the parking aid can be sprayed only for a short time and there
must be a minimum distance of 10 cm - there is a risk of damage.
Exterior car care
Read and observe
and on page 135 first.
Vehicle compo- nentsCircumstancesRemedy
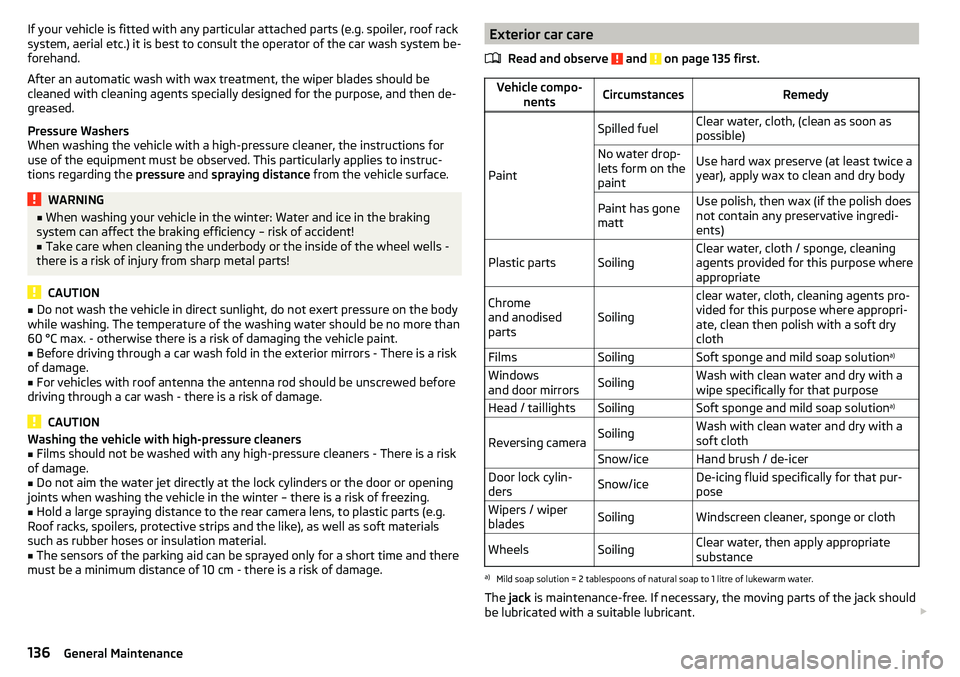
Paint
Spilled fuelClear water, cloth, (clean as soon as
possible)No water drop-
lets form on the
paintUse hard wax preserve (at least twice a
year), apply wax to clean and dry bodyPaint has gone
mattUse polish, then wax (if the polish does
not contain any preservative ingredi-
ents)Plastic partsSoilingClear water, cloth / sponge, cleaning
agents provided for this purpose where
appropriateChrome
and anodised
partsSoiling
clear water, cloth, cleaning agents pro-
vided for this purpose where appropri-
ate, clean then polish with a soft dry
clothFilmsSoilingSoft sponge and mild soap solution a)Windows
and door mirrorsSoilingWash with clean water and dry with a
wipe specifically for that purposeHead / taillightsSoilingSoft sponge and mild soap solution a)
Reversing cameraSoilingWash with clean water and dry with a
soft clothSnow/iceHand brush / de-icerDoor lock cylin-
dersSnow/iceDe-icing fluid specifically for that pur-
poseWipers / wiper
bladesSoilingWindscreen cleaner, sponge or clothWheelsSoilingClear water, then apply appropriate
substancea)
Mild soap solution = 2 tablespoons of natural soap to 1 litre of lukewarm water.
The jack is maintenance-free. If necessary, the moving parts of the jack should
be lubricated with a suitable lubricant.
136General Maintenance
Page 140 of 200
Caring for the interiorRead and observe
and on page 135 first.
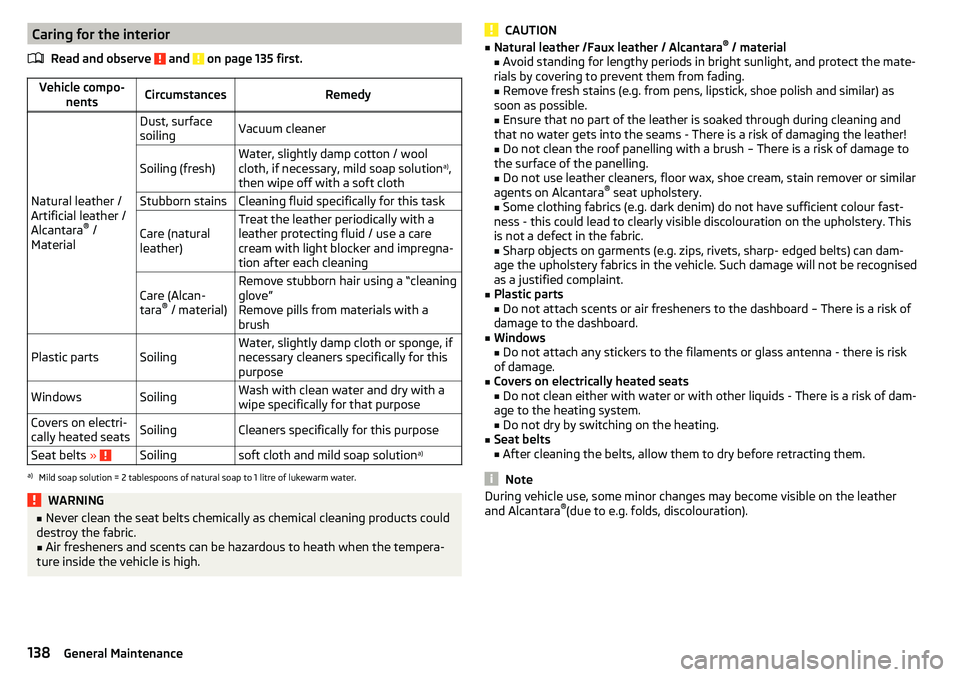
Vehicle compo- nentsCircumstancesRemedy
Natural leather /
Artificial leather /
Alcantara ®
/
Material
Dust, surface
soilingVacuum cleanerSoiling (fresh)Water, slightly damp cotton / wool
cloth, if necessary, mild soap solution a)
,
then wipe off with a soft clothStubborn stainsCleaning fluid specifically for this taskCare (natural
leather)Treat the leather periodically with a
leather protecting fluid / use a care
cream with light blocker and impregna-
tion after each cleaningCare (Alcan-
tara ®
/ material)Remove stubborn hair using a “cleaning
glove”
Remove pills from materials with a
brushPlastic partsSoilingWater, slightly damp cloth or sponge, if
necessary cleaners specifically for this
purposeWindowsSoilingWash with clean water and dry with a
wipe specifically for that purposeCovers on electri-
cally heated seatsSoilingCleaners specifically for this purposeSeat belts » Soilingsoft cloth and mild soap solution a)a)
Mild soap solution = 2 tablespoons of natural soap to 1 litre of lukewarm water.
WARNING■
Never clean the seat belts chemically as chemical cleaning products could
destroy the fabric.■
Air fresheners and scents can be hazardous to heath when the tempera-
ture inside the vehicle is high.
CAUTION■ Natural leather /Faux leather / Alcantara ®
/ material
■ Avoid standing for lengthy periods in bright sunlight, and protect the mate-
rials by covering to prevent them from fading.
■ Remove fresh stains (e.g. from pens, lipstick, shoe polish and similar) as
soon as possible.
■ Ensure that no part of the leather is soaked through during cleaning and
that no water gets into the seams - There is a risk of damaging the leather!
■ Do not clean the roof panelling with a brush – There is a risk of damage to
the surface of the panelling. ■ Do not use leather cleaners, floor wax, shoe cream, stain remover or similar
agents on Alcantara ®
seat upholstery.
■ Some clothing fabrics (e.g. dark denim) do not have sufficient colour fast-
ness - this could lead to clearly visible discolouration on the upholstery. This
is not a defect in the fabric. ■ Sharp objects on garments (e.g. zips, rivets, sharp- edged belts) can dam-
age the upholstery fabrics in the vehicle. Such damage will not be recognised
as a justified complaint.■
Plastic parts ■ Do not attach scents or air fresheners to the dashboard – There is a risk of
damage to the dashboard.
■
Windows
■ Do not attach any stickers to the filaments or glass antenna - there is risk
of damage.
■
Covers on electrically heated seats ■ Do not clean either with water or with other liquids - There is a risk of dam-
age to the heating system. ■ Do not dry by switching on the heating.
■
Seat belts
■ After cleaning the belts, allow them to dry before retracting them.
Note
During vehicle use, some minor changes may become visible on the leather
and Alcantara ®
(due to e.g. folds, discolouration).138General Maintenance
Page 146 of 200
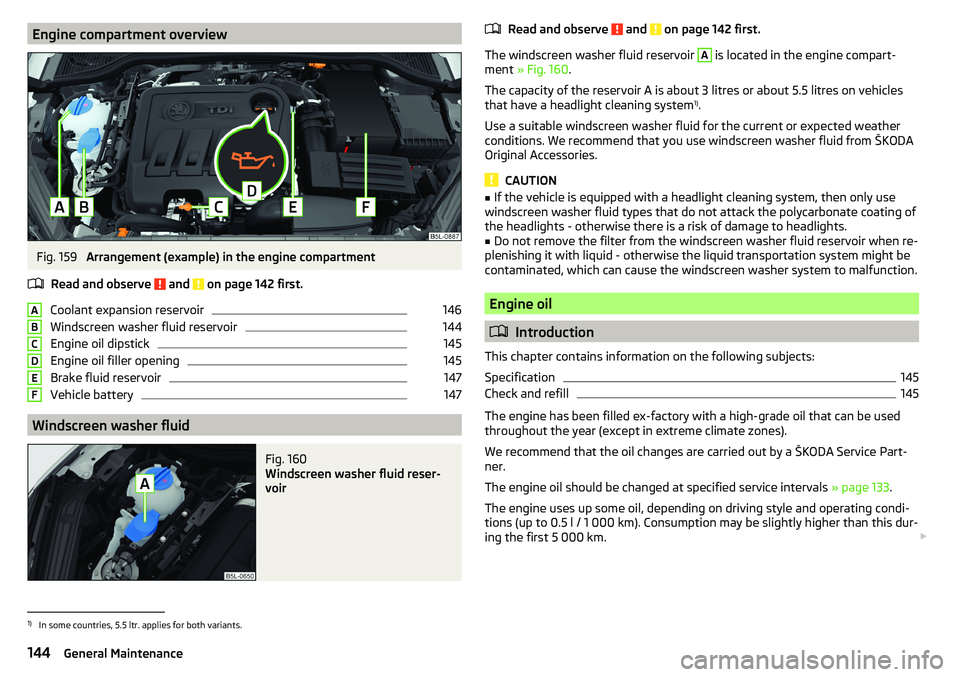
Engine compartment overviewFig. 159
Arrangement (example) in the engine compartment
Read and observe
and on page 142 first.
Coolant expansion reservoir
146
Windscreen washer fluid reservoir
144
Engine oil dipstick
145
Engine oil filler opening
145
Brake fluid reservoir
147
Vehicle battery
147
Windscreen washer fluid
Fig. 160
Windscreen washer fluid reser-
voir
ABCDEFRead and observe and on page 142 first.
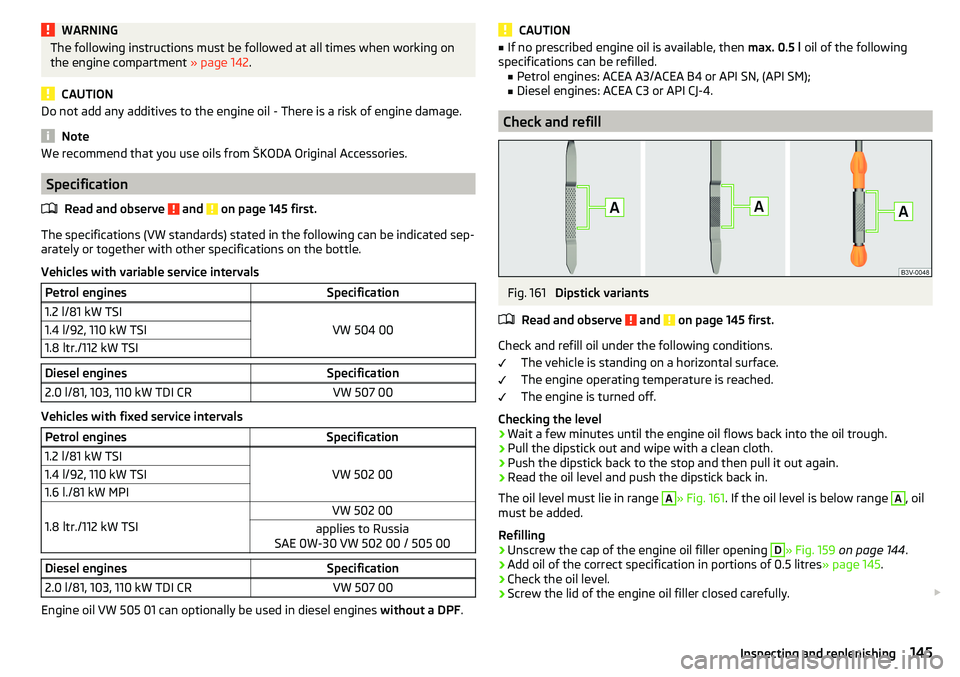
The windscreen washer fluid reservoir
A
is located in the engine compart-
ment » Fig. 160 .
The capacity of the reservoir A is about 3 litres or about 5.5 litres on vehicles
that have a headlight cleaning system 1)
.
Use a suitable windscreen washer fluid for the current or expected weather
conditions. We recommend that you use windscreen washer fluid from ŠKODA
Original Accessories.
CAUTION
■ If the vehicle is equipped with a headlight cleaning system, then only use
windscreen washer fluid types that do not attack the polycarbonate coating of
the headlights - otherwise there is a risk of damage to headlights.■
Do not remove the filter from the windscreen washer fluid reservoir when re-
plenishing it with liquid - otherwise the liquid transportation system might be
contaminated, which can cause the windscreen washer system to malfunction.
Engine oil
Introduction
This chapter contains information on the following subjects:
Specification
145
Check and refill
145
The engine has been filled ex-factory with a high-grade oil that can be used
throughout the year (except in extreme climate zones).
We recommend that the oil changes are carried out by a ŠKODA Service Part- ner.
The engine oil should be changed at specified service intervals » page 133.
The engine uses up some oil, depending on driving style and operating condi-
tions (up to 0.5 l / 1 000 km). Consumption may be slightly higher than this dur-
ing the first 5 000 km.
1)
In some countries, 5.5 ltr. applies for both variants.
144General Maintenance
Page 147 of 200
WARNINGThe following instructions must be followed at all times when working on
the engine compartment » page 142.
CAUTION
Do not add any additives to the engine oil - There is a risk of engine damage.
Note
We recommend that you use oils from ŠKODA Original Accessories.
Specification
Read and observe
and on page 145 first.
The specifications (VW standards) stated in the following can be indicated sep-arately or together with other specifications on the bottle.
Vehicles with variable service intervals
Petrol enginesSpecification1.2 l/81 kW TSI
VW 504 00
1.4 l/92, 110 kW TSI1.8 ltr./112 kW TSIDiesel enginesSpecification2.0 l/81, 103, 110 kW TDI CRVW 507 00
Vehicles with fixed service intervals
Petrol enginesSpecification1.2 l/81 kW TSI
VW 502 00
1.4 l/92, 110 kW TSI1.6 l./81 kW MPI
1.8 ltr./112 kW TSI
VW 502 00applies to Russia
SAE 0W-30 VW 502 00 / 505 00Diesel enginesSpecification2.0 l/81, 103, 110 kW TDI CRVW 507 00
Engine oil VW 505 01 can optionally be used in diesel engines without a DPF.
CAUTION■
If no prescribed engine oil is available, then max. 0.5 l oil of the following
specifications can be refilled. ■Petrol engines: ACEA A3/ACEA B4 or API SN, (API SM);
■ Diesel engines: ACEA C3 or API CJ-4.
Check and refill
Fig. 161
Dipstick variants
Read and observe
and on page 145 first.
Check and refill oil under the following conditions. The vehicle is standing on a horizontal surface.
The engine operating temperature is reached.
The engine is turned off.
Checking the level
›
Wait a few minutes until the engine oil flows back into the oil trough.
›
Pull the dipstick out and wipe with a clean cloth.
›
Push the dipstick back to the stop and then pull it out again.
›
Read the oil level and push the dipstick back in.
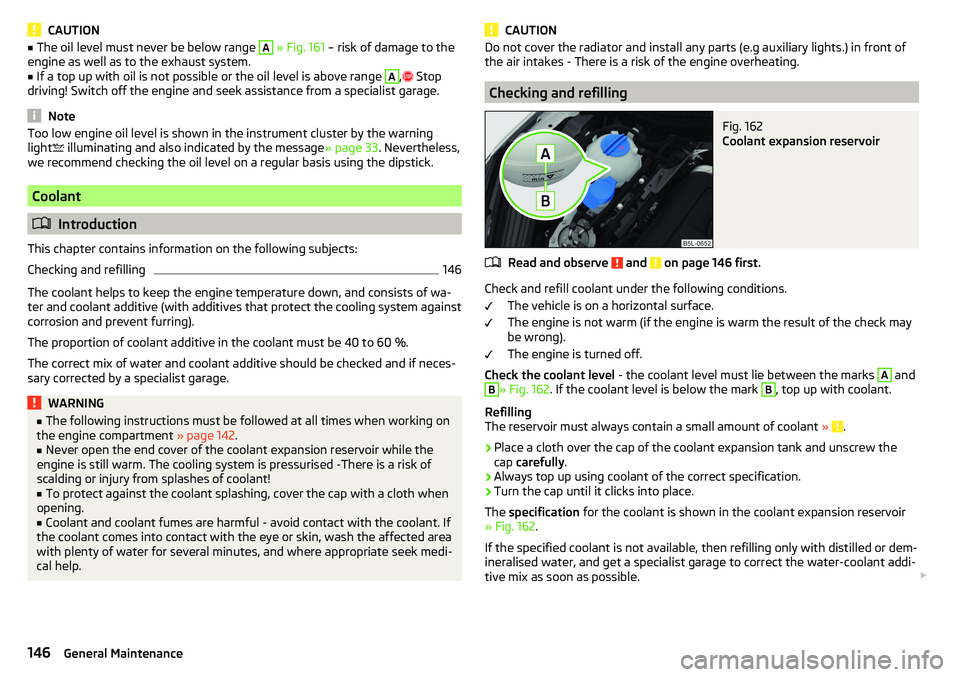
The oil level must lie in range
A
» Fig. 161 . If the oil level is below range
A
, oil
must be added.
Refilling
›
Unscrew the cap of the engine oil filler opening
D
» Fig. 159 on page 144 .
›
Add oil of the correct specification in portions of 0.5 litres » page 145.
›
Check the oil level.
›
Screw the lid of the engine oil filler closed carefully.
145Inspecting and replenishing
Page 148 of 200
CAUTION■The oil level must never be below range A » Fig. 161 – risk of damage to the
engine as well as to the exhaust system.■
If a top up with oil is not possible or the oil level is above range
A
,
Stop
driving! Switch off the engine and seek assistance from a specialist garage.
Note
Too low engine oil level is shown in the instrument cluster by the warning
light illuminating and also indicated by the message » page 33. Nevertheless,
we recommend checking the oil level on a regular basis using the dipstick.
Coolant
Introduction
This chapter contains information on the following subjects:
Checking and refilling
146
The coolant helps to keep the engine temperature down, and consists of wa- ter and coolant additive (with additives that protect the cooling system against
corrosion and prevent furring).
The proportion of coolant additive in the coolant must be 40 to 60 %.
The correct mix of water and coolant additive should be checked and if neces-
sary corrected by a specialist garage.
WARNING■ The following instructions must be followed at all times when working on
the engine compartment » page 142.■
Never open the end cover of the coolant expansion reservoir while the
engine is still warm. The cooling system is pressurised -There is a risk of
scalding or injury from splashes of coolant!
■
To protect against the coolant splashing, cover the cap with a cloth when
opening.
■
Coolant and coolant fumes are harmful - avoid contact with the coolant. If
the coolant comes into contact with the eye or skin, wash the affected area
with plenty of water for several minutes, and where appropriate seek medi-
cal help.
CAUTIONDo not cover the radiator and install any parts (e.g auxiliary lights.) in front of
the air intakes - There is a risk of the engine overheating.
Checking and refilling
Fig. 162
Coolant expansion reservoir
Read and observe and on page 146 first.
Check and refill coolant under the following conditions.
The vehicle is on a horizontal surface.
The engine is not warm (if the engine is warm the result of the check may
be wrong).
The engine is turned off.
Check the coolant level - the coolant level must lie between the marks
A
and
B
» Fig. 162. If the coolant level is below the mark
B
, top up with coolant.
Refilling
The reservoir must always contain a small amount of coolant »
.
›
Place a cloth over the cap of the coolant expansion tank and unscrew the
cap carefully .
›
Always top up using coolant of the correct specification.
›
Turn the cap until it clicks into place.
The specification for the coolant is shown in the coolant expansion reservoir
» Fig. 162 .
If the specified coolant is not available, then refilling only with distilled or dem-
ineralised water, and get a specialist garage to correct the water-coolant addi-
tive mix as soon as possible.
146General Maintenance
Page 152 of 200
Wheels
Wheels and tyres
Introduction
This chapter contains information on the following subjects:
Advice on tyre/wheel usage
150
Tyre pressure
151
Tyre wear and wheel change
151
Spare wheel
152
Tyre marking
152
Advice on tyre/wheel usage
During the first 500 km, new tyres do not offer optimum grip; appropriate care
should therefore be taken when driving.
Tyres with the deeper profiles should always be fitted to the front wheels.
Rims and wheel bolts are matched to each other in terms of design. We rec-
ommend that you use rims and wheel bolts from ŠKODA Original Accessories.
Wheels and tyres should always be stored in a cool, dry and dark place. The
tyres themselves should be stored vertically.
Tyre life
Tyres age and lose their original characteristics, even if they are not being
used. We recommend that you do not use tyres that are more than 6 years old.
The manufacturing date is indicated on the tyre sidewall (possibly on the in-
side ). For example, DOT ... 10 16...means, for example, that the tyre was manu-
factured in the 10. week of 2016.
Tyre damage
We recommend checking your tyres and wheel rims for damage (punctures,
cuts, splits and bulges etc.) on a regular basis.
Remove any foreign objects in the tyre’s profile immediately (e.g. small stones).
Foreign bodies which have penetrated into the tyre (e.g. screws or nails)
should not be removed and help should be sought from a specialist garage.
Fitting new tyres
Only fit approved radial tyres of the same type, size (rolling circumference) and
the same tread pattern on one axle on all four wheels.
When mounting new tires the tires have to be replaced axle by axle.
Unidirectional tyres
The direction of rotation of the tyres is marked by arrows on the wall of the
tyre .
The specified running direction must be strictly adhered to, otherwise the fol-
lowing tyre characteristics may be degraded. ▶ Driving stability.
▶ Traction.
▶ Tyre noise and tyre wear.WARNING■Never use tyres if you do not know anything about their condition and
age There is a risk of accidents.■
Never drive with damaged tyres – risk of accident.
CAUTION
■ The tyres must be protected from contact with substances (e.g. oil, grease
and fuel) which could damage them. If the tyres come into contact with these
substances, then we recommend you have this checked out in a specialist
workshop.■
Do not use rims with ground or polished surfaces in winter conditions - there
is a risk of rim damage (e.g through salt spreading).
Note
■ We recommend that any work on the wheels or tyres be carried out by a spe-
cialist garage.■
We recommend that you use tyres, snow chains and full wheel trims from
ŠKODA Original Accessories.
150General Maintenance
Page 158 of 200
›Jack up the vehicle
» page 158 until the wheel that needs changing is clear of
the ground.›
Unscrew the wheel bolts and place them on a clean surface (cloth, paper,
etc.).
›
Remove the wheel carefully.
›
Attach the spare wheel and slightly screw on the wheel bolts.
›
Lower the vehicle.
›
Tighten the wheel bolts opposite each other using the wheel wrench (“pull- ing crossways”) » page 158.
›
Replace the wheel trim » page 156 and caps » page 157 .
When fitting unidirectional tyres, ensure that the direction of rotation is cor-
rect » page 150 .
All bolts must be clean and must turn easily. If screws are corroded and diffi-
cult to move, these must be replaced.
WARNING■ Undo the wheel bolts just a little (about one turn), provided the vehicle
has not yet been jacked up. Otherwise the wheel could come loose and fall
off – risk of injury.■
Under no circumstances must the bolts be greased or oiled - cause an ac-
cident.
Subsequent steps
After changing the wheel, the following work must be carried out.
›
Stow the replaced wheel in the well under the floor covering of the luggage
compartment and secure with a locking screw.
›
Stow the vehicle tool kit in the space provided.
›
Check tyre pressure on the mounted wheel and adjust if necessary and, with
vehicles with tyre pressure monitoring, save the tyre pressure values in the
system » page 123 .
›
Have the tightening torque of the wheel bolts checked as soon as possible.
The prescribed tightening torque is 120 Nm.
Replace the damaged wheel or consult a specialist garage about repair op-
tions.
WARNINGTightening torque which is too high can damage the threads and this can
result in permanent deformation of the contact surfaces on the rim. Where
tightening torque is too low, the wheels may become loose while driving -
There is a risk of an accident. Therefore drive cautiously and only at a mod-
erate speed until the tightening torque has been checked.
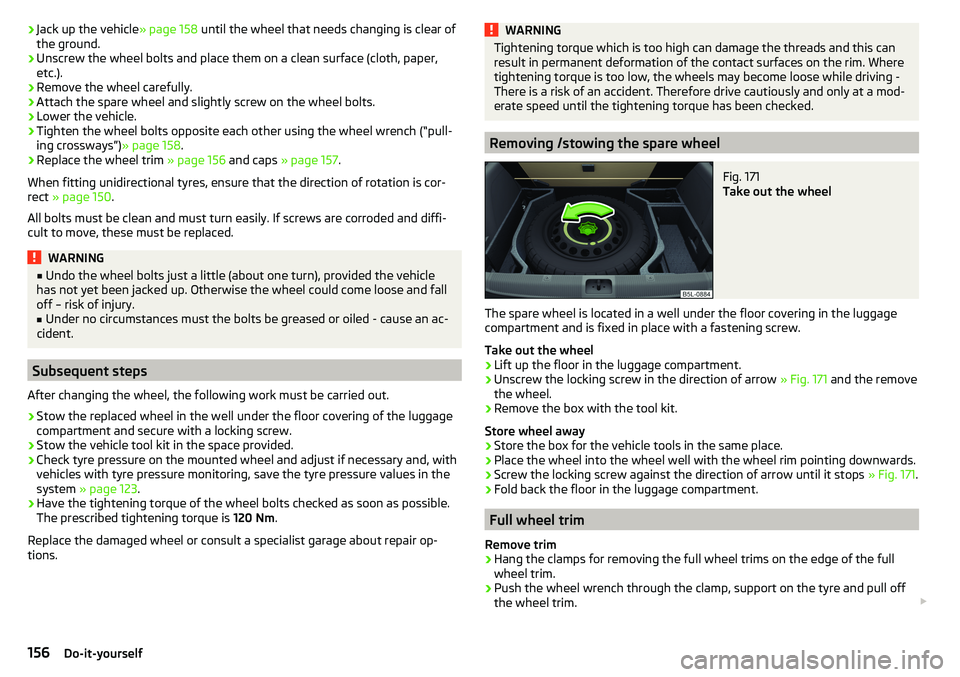
Removing /stowing the spare wheel
Fig. 171
Take out the wheel
The spare wheel is located in a well under the floor covering in the luggage
compartment and is fixed in place with a fastening screw.
Take out the wheel
›
Lift up the floor in the luggage compartment.
›
Unscrew the locking screw in the direction of arrow » Fig. 171 and the remove
the wheel.
›
Remove the box with the tool kit.
Store wheel away
›
Store the box for the vehicle tools in the same place.
›
Place the wheel into the wheel well with the wheel rim pointing downwards.
›
Screw the locking screw against the direction of arrow until it stops » Fig. 171.
›
Fold back the floor in the luggage compartment.
Full wheel trim
Remove trim
›
Hang the clamps for removing the full wheel trims on the edge of the full
wheel trim.
›
Push the wheel wrench through the clamp, support on the tyre and pull off
the wheel trim.
156Do-it-yourself
Page 164 of 200

WARNING■Never clamp the jump cable to the negative terminal of the discharged
battery -There is a risk of an explosion.■
The non-insulated parts of the terminal clamps must never touch each
other – risk of short circuit!
■
The jump-start cable connected to the positive terminal of the battery
must not come into contact with electrically conducting parts of the vehicle
– risk of short circuit!
■
Position the jump cables so that they cannot be caught in rotating parts
in the engine compartment - danger of injuries and the risk of vehicle dam-
age.
Towing the vehicle
Information about the towing process
Fig. 179
Braided tow rope / Spiral tow rope
To tow with a tow rope, only use a braided synthetic fibre rope » Fig. 179 -
»
.
Attach the tow rope or the tow bar to the towing eyes at the front
» page 163 , towing eyes at the rear » page 163 or to the towing device of
the trailer device » page 124 .
Conditions for towing. Cars with automatic gearboxes must not be towed with the rear wheels
raised - there is a risk of gearbox damage!
If the gearbox has no oil, your vehicle must be towed with the front axle
raised clear of the ground or on a breakdown vehicle or trailer.
The maximum towing speed is 50 km/h.
The vehicle must be transported on a special breakdown vehicle or trailer
if it is not possible to tow in the vehicle in the way described or if the tow-
ing distance is greater than 50 km.
Driver of the tow vehicle›
On vehicles with manual transmission , engage gear slowly when starting.
›
On vehicles with automatic transmission , accelerate with particular care.
›
Only then approach correctly when the rope is taut.
Driver of the towed vehicle
›
If possible, the vehicle should be towed with the engine running. The brake
booster and power steering only operate if the engine is running, otherwise
much greater force has to be applied to the brake pedal and more power has
to be expended for steering.
›
If it is not possible to start the engine, switch on the ignition so that the
steering wheel does not lock and so that the turn signal lights, windscreen
wipers and windscreen washer system can be used.
›
Take the vehicle out of gear or move the selector lever into position N if the
vehicle is fitted with an automatic gearbox.
›
Keep the tow rope taut at all times during the towing procedure.
WARNING■ Spiral tow ropes must not be used for towing » Fig. 179- , the towing
eye may unscrew out of the vehicle - There is a risk of an accident.■
Ensure tow rope is not twisted - risk of accident.
CAUTION
■ Do not tow-start the engine – There is a risk of damaging the engine. The
battery from another vehicle can be used as a jump-start aid » page 161, Jump-
starting .■
For off-road towing manoeuvres, there is a risk to both vehicles that the fas-
teners may become overloaded and damaged.
Note
We recommend that you use a tow rope from ŠKODA Original Accessories.162Do-it-yourself