headlamp SMART FORTWO COUPE 2010 Owners Manual
[x] Cancel search | Manufacturer: SMART, Model Year: 2010, Model line: FORTWO COUPE, Model: SMART FORTWO COUPE 2010Pages: 216, PDF Size: 9.7 MB
Page 6 of 216
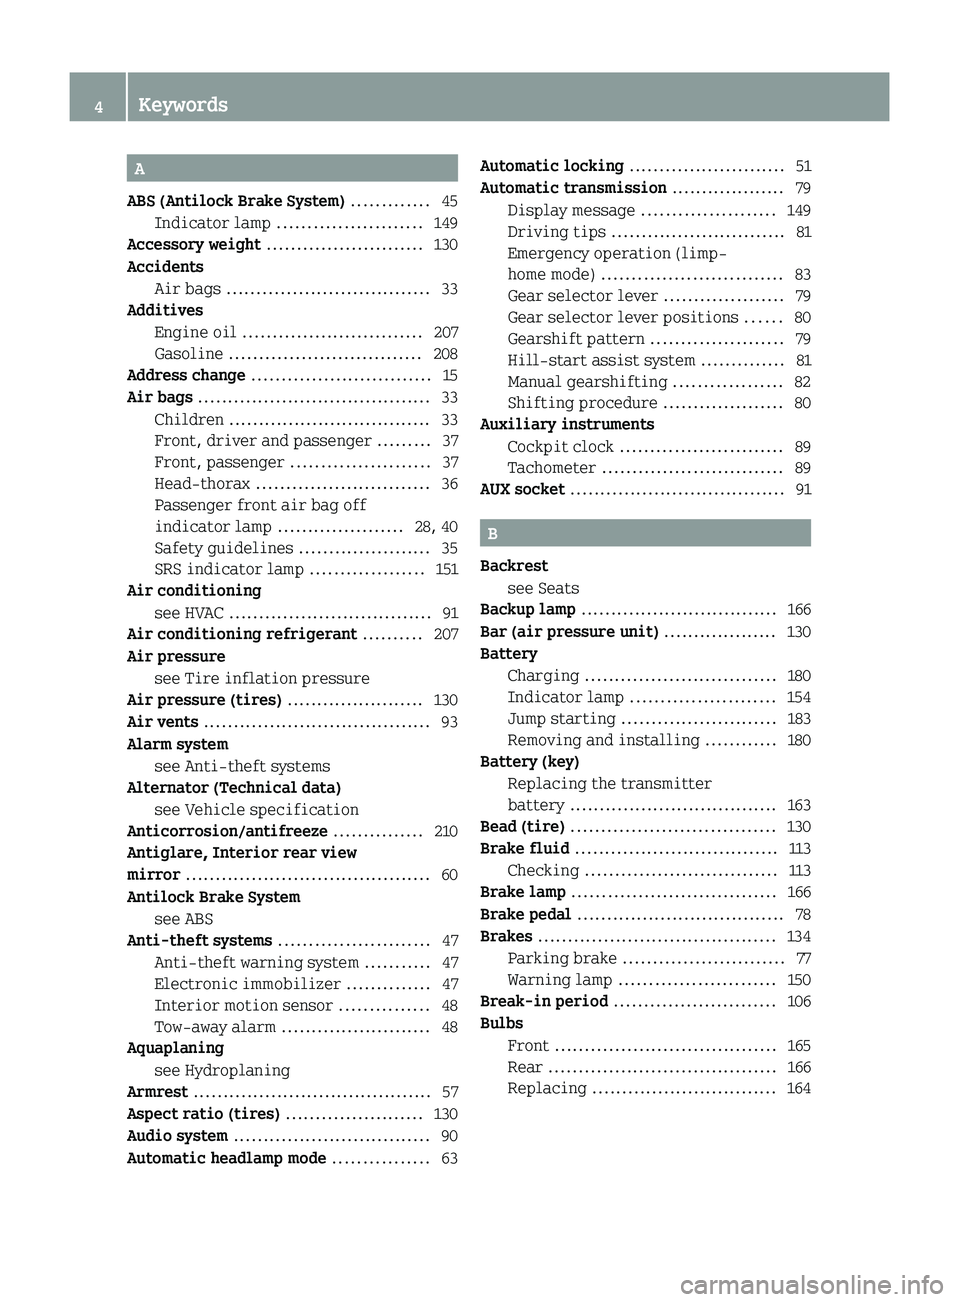
A
ABS (Antilock Brake System) ............. 45
Indicator lamp ........................ 149
Accessory weight .......................... 130
Accidents
Air bags .................................. 33
Additives
Engine oil .............................. 207
Gasoline ................................ 208
Address change .............................. 15
Air bags ....................................... 33
Children .................................. 33
Front, driver and passenger .........37
Front, passenger ....................... 37
Head-thorax ............................. 36
Passenger front air bag off
indicator lamp ..................... 28, 40
Safety guidelines ......................35
SRS indicator lamp ...................151
Air conditioning
see HVAC .................................. 91
Air conditioning refrigerant .......... 207
Air pressure see Tire inflation pressure
Air pressure (tires) ....................... 130
Air vents ...................................... 93
Alarm system see Anti-theft systems
Alternator (Technical data)
see Vehicle specification
Anticorrosion/antifreeze ............... 210
Antiglare, Interior rear view
mirror ......................................... 60
Antilock Brake System see ABS
Anti-theft systems ......................... 47
Anti-theft warning system ...........47
Electronic immobilizer ..............47
Interior motion sensor ...............48
Tow-away alarm ......................... 48
Aquaplaning
see Hydroplaning
Armrest ........................................ 57
Aspect ratio (tires) ....................... 130
Audio system ................................. 90
Automatic headlamp mode ................ 63Automatic locking .......................... 51
Automatic transmission ................... 79
Display message ...................... 149
Driving tips ............................. 81
Emergency operation (limp-
home mode) .............................. 83
Gear selector lever ....................79
Gear selector lever positions ......80
Gearshift pattern ...................... 79
Hill-start assist system ..............81
Manual gearshifting ..................82
Shifting procedure ....................80
Auxiliary instruments
Cockpit clock ........................... 89
Tachometer .............................. 89
AUX socket .................................... 91
B
Backrest see Seats
Backup lamp ................................. 166
Bar (air pressure unit) ................... 130
Battery
Charging ................................ 180
Indicator lamp ........................ 154
Jump starting .......................... 183
Removing and installing ............180
Battery (key)
Replacing the transmitter
battery ................................... 163
Bead (tire) .................................. 130
Brake fluid .................................. 113
Checking ................................ 113
Brake lamp .................................. 166
Brake pedal ................................... 78
Brakes ........................................ 134
Parking brake ........................... 77
Warning lamp .......................... 150
Break-in period ........................... 106
Bulbs
Front ..................................... 165
Rear ...................................... 166
Replacing ............................... 164
4Keywords451_AKB; 3; 22, en-USd2ureepe,Version: 2.11.8.12009-07-27T09:36:34+02:00 - Seite 4
Page 9 of 216
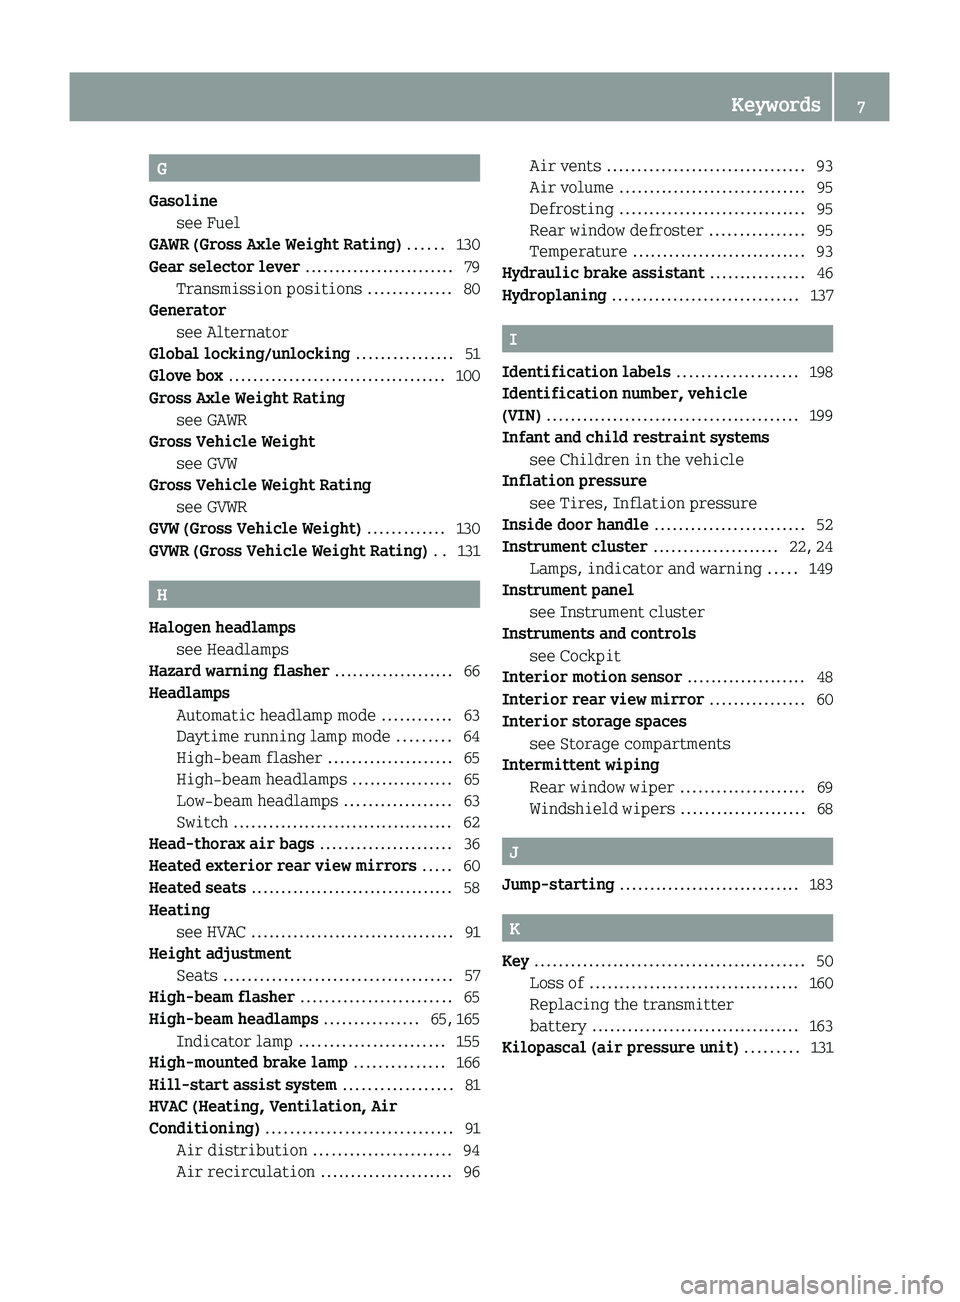
G
Gasoline see Fuel
GAWR (Gross Axle Weight Rating) ...... 130
Gear selector lever ......................... 79
Transmission positions ..............80
Generator
see Alternator
Global locking/unlocking ................ 51
Glove box .................................... 100
Gross Axle Weight Rating see GAWR
Gross Vehicle Weight
see GVW
Gross Vehicle Weight Rating
see GVWR
GVW (Gross Vehicle Weight) ............. 130
GVWR (Gross Vehicle Weight Rating) .. 131
H
Halogen headlamps see Headlamps
Hazard warning flasher .................... 66
Headlamps
Automatic headlamp mode ............63
Daytime running lamp mode .........64
High-beam flasher .....................65
High-beam headlamps ................. 65
Low-beam headlamps ..................63
Switch ..................................... 62
Head-thorax air bags ...................... 36
Heated exterior rear view mirrors ..... 60
Heated seats .................................. 58
Heating
see HVAC .................................. 91
Height adjustment
Seats ...................................... 57
High-beam flasher ......................... 65
High-beam headlamps ................ 65, 165
Indicator lamp ........................ 155
High-mounted brake lamp ............... 166
Hill-start assist system .................. 81
HVAC (Heating, Ventilation, Air
Conditioning) ............................... 91
Air distribution ....................... 94
Air recirculation ...................... 96
Air vents ................................. 93
Air volume ............................... 95
Defrosting ............................... 95
Rear window defroster ................95
Temperature ............................. 93
Hydraulic brake assistant ................ 46
Hydroplaning ............................... 137
I
Identification labels .................... 198
Identification number, vehicle
(VIN) .......................................... 199
Infant and child restraint systems see Children in the vehicle
Inflation pressure
see Tires, Inflation pressure
Inside door handle ......................... 52
Instrument cluster ..................... 22, 24
Lamps, indicator and warning .....149
Instrument panel
see Instrument cluster
Instruments and controls
see Cockpit
Interior motion sensor .................... 48
Interior rear view mirror ................ 60
Interior storage spaces see Storage compartments
Intermittent wiping
Rear window wiper .....................69
Windshield wipers .....................68
J
Jump-starting .............................. 183
K
Key ............................................. 50
Loss of ................................... 160
Replacing the transmitter
battery ................................... 163
Kilopascal (air pressure unit) ......... 131
Keywords7451_AKB; 3; 22, en-USd2ureepe,Version: 2.11.8.12009-07-27T09:36:34+02:00 - Seite 7
Page 10 of 216
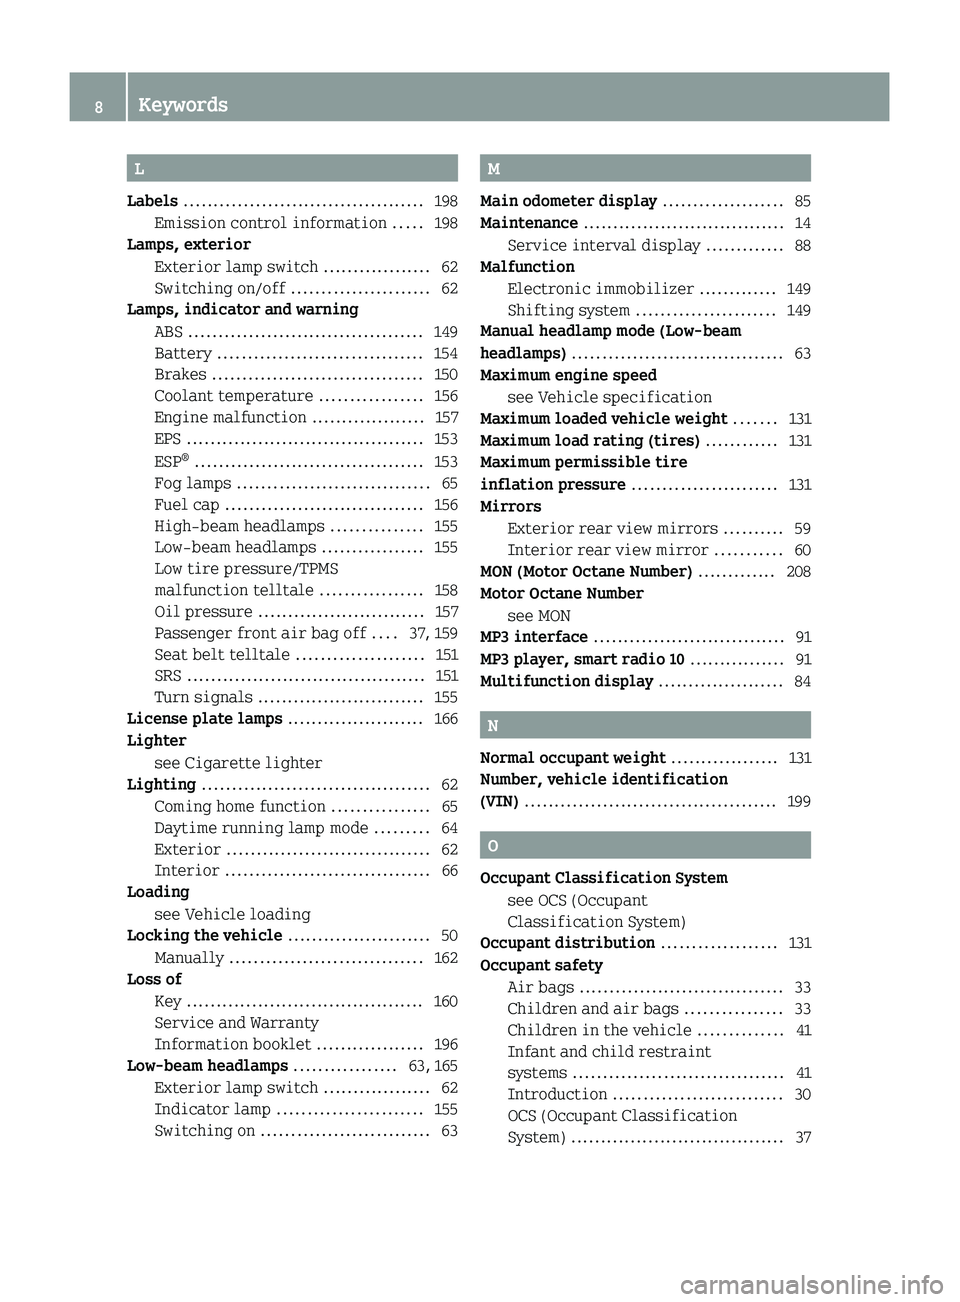
L
Labels ........................................ 198
Emission control information .....198
Lamps, exterior
Exterior lamp switch ..................62
Switching on/off ....................... 62
Lamps, indicator and warning
ABS ....................................... 149
Battery .................................. 154
Brakes ................................... 150
Coolant temperature .................156
Engine malfunction ...................157
EPS ........................................ 153
ESP ®
...................................... 153
Fog lamps ................................ 65
Fuel cap ................................. 156
High-beam headlamps ...............155
Low-beam headlamps .................155
Low tire pressure/TPMS
malfunction telltale .................158
Oil pressure ............................ 157
Passenger front air bag off ....37, 159
Seat belt telltale ..................... 151
SRS ........................................ 151
Turn signals ............................ 155
License plate lamps ....................... 166
Lighter see Cigarette lighter
Lighting ...................................... 62
Coming home function ................65
Daytime running lamp mode .........64
Exterior .................................. 62
Interior .................................. 66
Loading
see Vehicle loading
Locking the vehicle ........................ 50
Manually ................................ 162
Loss of
Key ........................................ 160
Service and Warranty
Information booklet ..................196
Low-beam headlamps ................. 63, 165
Exterior lamp switch ..................62
Indicator lamp ........................ 155
Switching on ............................ 63M
Main odometer display .................... 85
Maintenance .................................. 14
Service interval display .............88
Malfunction
Electronic immobilizer .............149
Shifting system ....................... 149
Manual headlamp mode (Low-beam
headlamps) ................................... 63
Maximum engine speed see Vehicle specification
Maximum loaded vehicle weight ....... 131
Maximum load rating (tires) ............ 131
Maximum permissible tire
inflation pressure ........................ 131
Mirrors
Exterior rear view mirrors ..........59
Interior rear view mirror ...........60
MON (Motor Octane Number) ............. 208
Motor Octane Number see MON
MP3 interface ................................ 91
MP3 player, smart radio 10 ................ 91
Multifunction display ..................... 84
N
Normal occupant weight .................. 131
Number, vehicle identification
(VIN) .......................................... 199
O
Occupant Classification System see OCS (Occupant
Classification System)
Occupant distribution ................... 131
Occupant safety
Air bags .................................. 33
Children and air bags ................33
Children in the vehicle ..............41
Infant and child restraint
systems ................................... 41
Introduction ............................ 30
OCS (Occupant Classification
System) .................................... 37
8Keywords451_AKB; 3; 22, en-USd2ureepe,Version: 2.11.8.12009-07-27T09:36:34+02:00 - Seite 8
Page 25 of 216
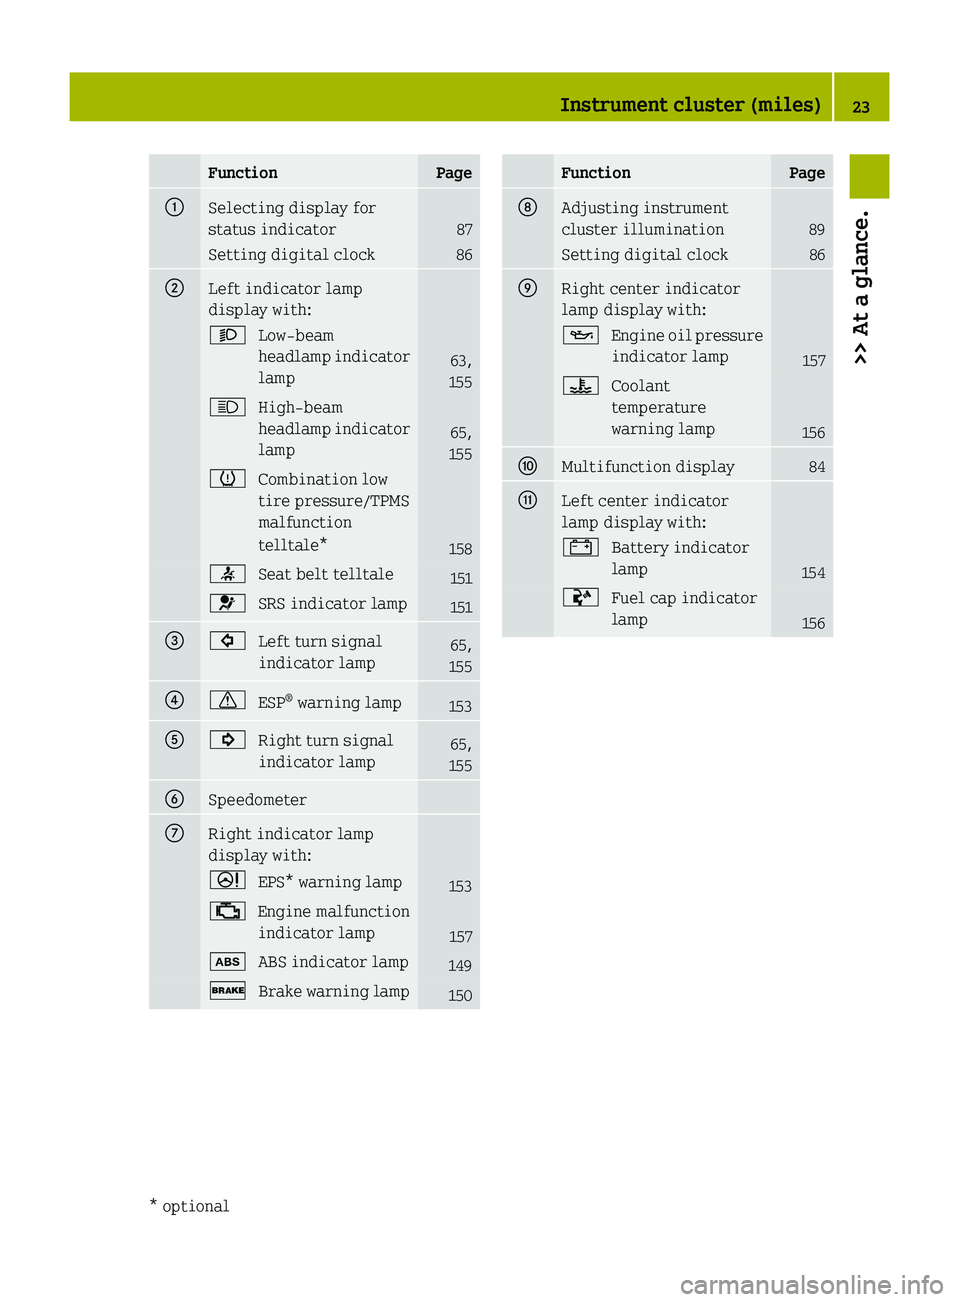
FunctionPage0046Selecting display for
status indicator
87
Setting digital clock860047Left indicator lamp
display with:0065Low‑beam
headlamp indicator
lamp
63,
155
0063High‑beam
headlamp indicator
lamp
65,
155
0077Combination low
tire pressure/TPMS
malfunction
telltale*
158
0082Seat belt telltale1510081SRS indicator lamp151008A0026Left turn signal
indicator lamp65,
15500880067ESP ®
warning lamp15300860024Right turn signal
indicator lamp65,
1550087Speedometer006ERight indicator lamp
display with:0052EPS* warning lamp15300BBEngine malfunction
indicator lamp
157
00EBABS indicator lamp1490027Brake warning lamp150FunctionPage006FAdjusting instrument
cluster illumination
89
Setting digital clock860070Right center indicator
lamp display with:00B5Engine oil pressure
indicator lamp
157
00AECoolant
temperature
warning lamp
156
0071Multifunction display840072Left center indicator
lamp display with:003FBattery indicator
lamp
154
00ACFuel cap indicator
lamp
156
Instrument cluster (miles)23>> At a glance.* optional451_AKB; 3; 22, en-USd2ureepe,Version: 2.11.8.12009-07-27T09:36:34+02:00 - Seite 23
Page 27 of 216
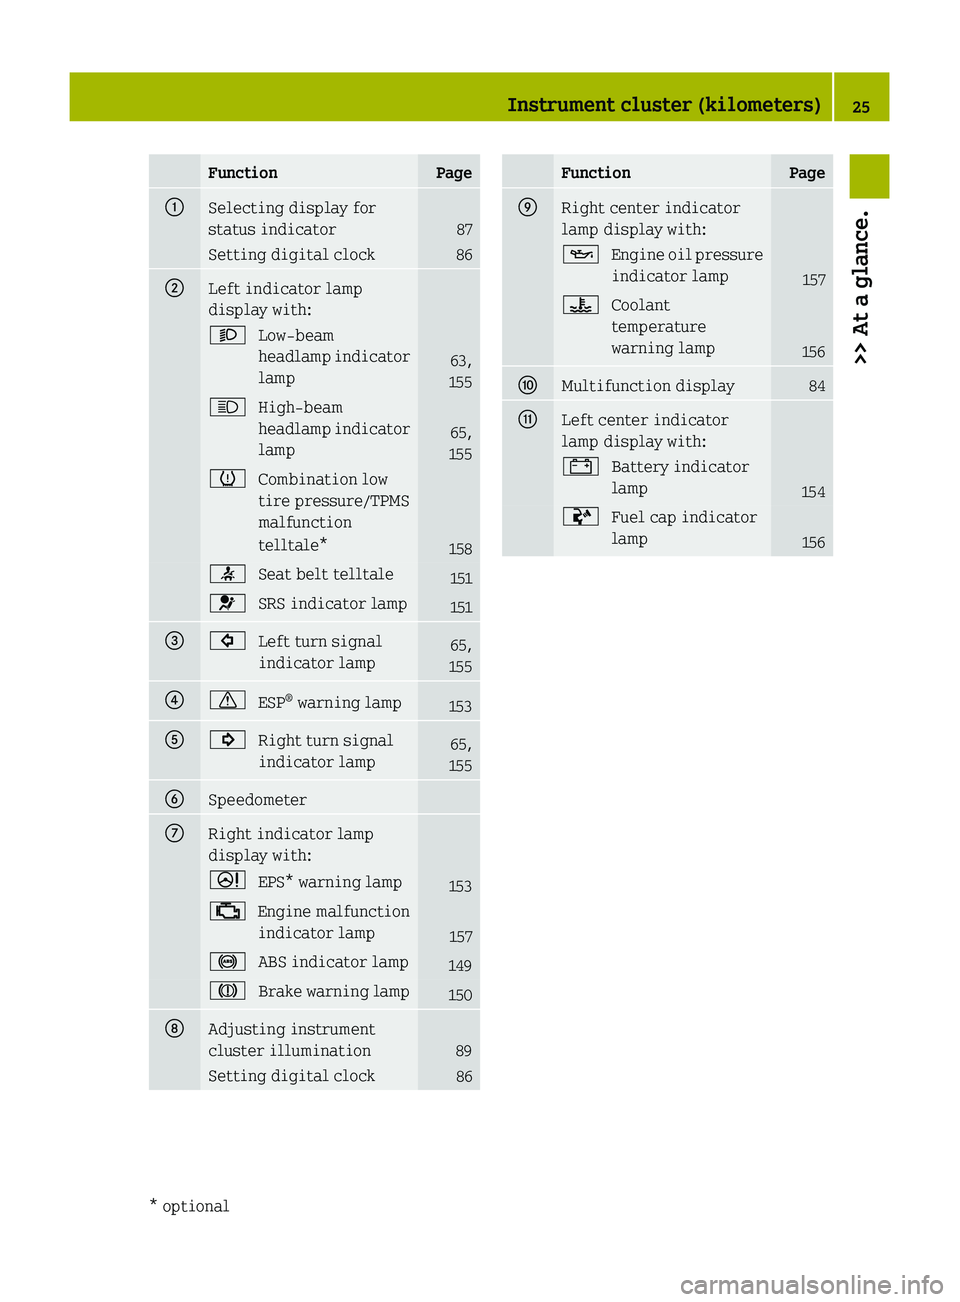
FunctionPage0046Selecting display for
status indicator
87
Setting digital clock860047Left indicator lamp
display with:0065Low‑beam
headlamp indicator
lamp
63,
155
0063High‑beam
headlamp indicator
lamp
65,
155
0077Combination low
tire pressure/TPMS
malfunction
telltale*
158
0082Seat belt telltale1510081SRS indicator lamp151008A0026Left turn signal
indicator lamp65,
15500880067ESP ®
warning lamp15300860024Right turn signal
indicator lamp65,
1550087Speedometer006ERight indicator lamp
display with:0052EPS* warning lamp15300BBEngine malfunction
indicator lamp
157
0031ABS indicator lamp149004DBrake warning lamp150006FAdjusting instrument
cluster illumination
89
Setting digital clock86FunctionPage0070Right center indicator
lamp display with:00B5Engine oil pressure
indicator lamp
157
00AECoolant
temperature
warning lamp
156
0071Multifunction display840072Left center indicator
lamp display with:003FBattery indicator
lamp
154
00ACFuel cap indicator
lamp
156
Instrument cluster (kilometers)25>> At a glance.* optional451_AKB; 3; 22, en-USd2ureepe,Version: 2.11.8.12009-07-27T09:36:34+02:00 - Seite 25
Page 58 of 216
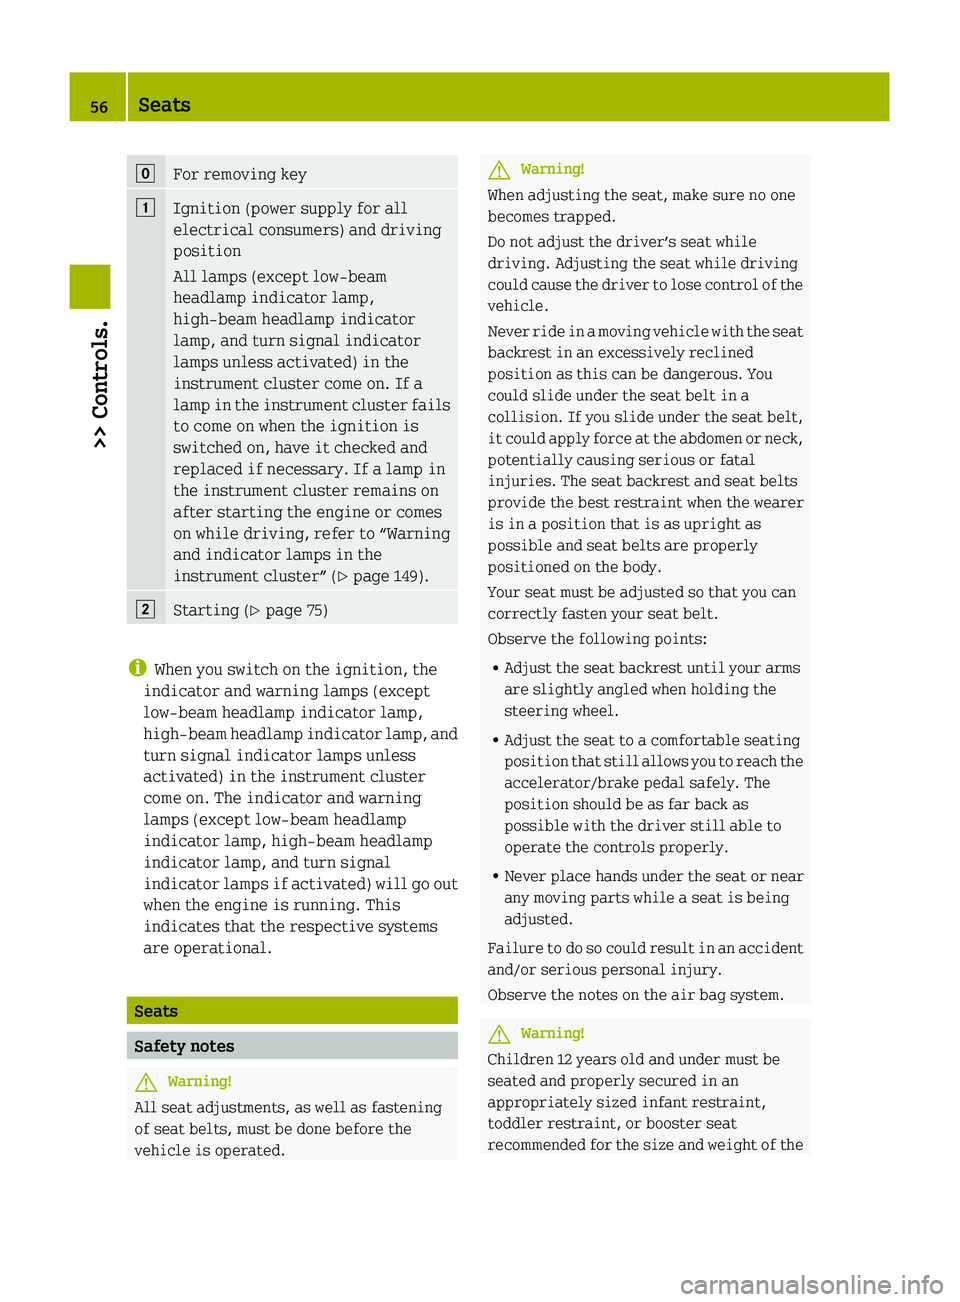
005DFor removing key004AIgnition (power supply for all
electrical consumers) and driving
position
All lamps (except low‑beam
headlamp indicator lamp,
high‑beam headlamp indicator
lamp, and turn signal indicator
lamps unless activated) in the
instrument cluster come on. If a
lamp in the instrument cluster fails
to come on when the ignition is
switched on, have it checked and
replaced if necessary. If a lamp in
the instrument cluster remains on
after starting the engine or comes
on while driving, refer to “Warning
and indicator lamps in the
instrument cluster” ( Y page 149).004BStarting ( Y page 75)
i
When you switch on the ignition, the
indicator and warning lamps (except
low‑beam headlamp indicator lamp,
high‑beam headlamp indicator lamp, and
turn signal indicator lamps unless
activated) in the instrument cluster
come on. The indicator and warning
lamps (except low‑beam headlamp
indicator lamp, high‑beam headlamp
indicator lamp, and turn signal
indicator lamps if activated) will go out
when the engine is running. This
indicates that the respective systems
are operational.
Seats
Safety notes
GWarning!
All seat adjustments, as well as fastening
of seat belts, must be done before the
vehicle is operated.
GWarning!
When adjusting the seat, make sure no one
becomes trapped.
Do not adjust the driver’s seat while
driving. Adjusting the seat while driving
could cause the driver to lose control of the
vehicle.
Never ride in a moving vehicle with the seat
backrest in an excessively reclined
position as this can be dangerous. You
could slide under the seat belt in a
collision. If you slide under the seat belt,
it could apply force at the abdomen or neck,
potentially causing serious or fatal
injuries. The seat backrest and seat belts
provide the best restraint when the wearer
is in a position that is as upright as
possible and seat belts are properly
positioned on the body.
Your seat must be adjusted so that you can
correctly fasten your seat belt.
Observe the following points:
R Adjust the seat backrest until your arms
are slightly angled when holding the
steering wheel.
R Adjust the seat to a comfortable seating
position that still allows you to reach the
accelerator/brake pedal safely. The
position should be as far back as
possible with the driver still able to
operate the controls properly.
R Never place hands under the seat or near
any moving parts while a seat is being
adjusted.
Failure to do so could result in an accident
and/or serious personal injury.
Observe the notes on the air bag system.
GWarning!
Children 12 years old and under must be
seated and properly secured in an
appropriately sized infant restraint,
toddler restraint, or booster seat
recommended for the size and weight of the
56Seats>> Controls.
451_AKB; 3; 22, en-USd2ureepe,Version: 2.11.8.12009-07-27T09:36:34+02:00 - Seite 56
Page 64 of 216
Proper use of seat belts
RDo not twist the seat belt when fastening.
R Adjust the seat belt so that the shoulder
portion is located as close as possible
to the middle of the shoulder (it should
not touch the neck). Never pass the
shoulder portion of the seat belt under
your arm.
R Position the lap belt as low as possible
on your hips (over hip joint) and not
across the abdomen.
R Place the seat backrest in a position that
is as upright as possible.
R Never use a seat belt for more than one
person at a time.
R Do not fasten a seat belt around a person
and another object at the same time. When
using a seat belt to secure infant or
toddler restraints or children in booster
seats, always follow the child seat
manufacturer’s instructions.
R Check your seat belt during travel to
make sure it is properly positioned.
R Make sure the seat belt is always fitted
snugly. Take special care to maintain a
snug fit when wearing loose clothing.
GWarning!
Do not pass seat belts over sharp edges.
They could tear.
Do not allow the seat belt to get caught in
the door or in the seat adjustment
mechanism. This could damage the seat
belt.
Never attempt to make modifications to
seat belts. This could impair the
effectiveness of the seat belts.
Do not bleach or dye seat belts as this may
severely weaken them. In a crash they may
not be able to provide adequate protection.
Damaged seat belts or seat belts that were
highly stressed in an accident must be
replaced. Contact an authorized smart
center.
Lighting
Exterior lamp switch
For safety, smart recommends that you
drive with your low‑beam headlamps on
during the day. In certain countries, local
laws dictate that low‑beam headlamps are
switched on automatically during
operation of the vehicle.
i If you drive in countries where
vehicles drive on the other side of the
road than the country in which the
vehicle is registered, you must have the
headlamps modified for symmetrical low
beams. Relevant information can be
obtained at any authorized smart center.
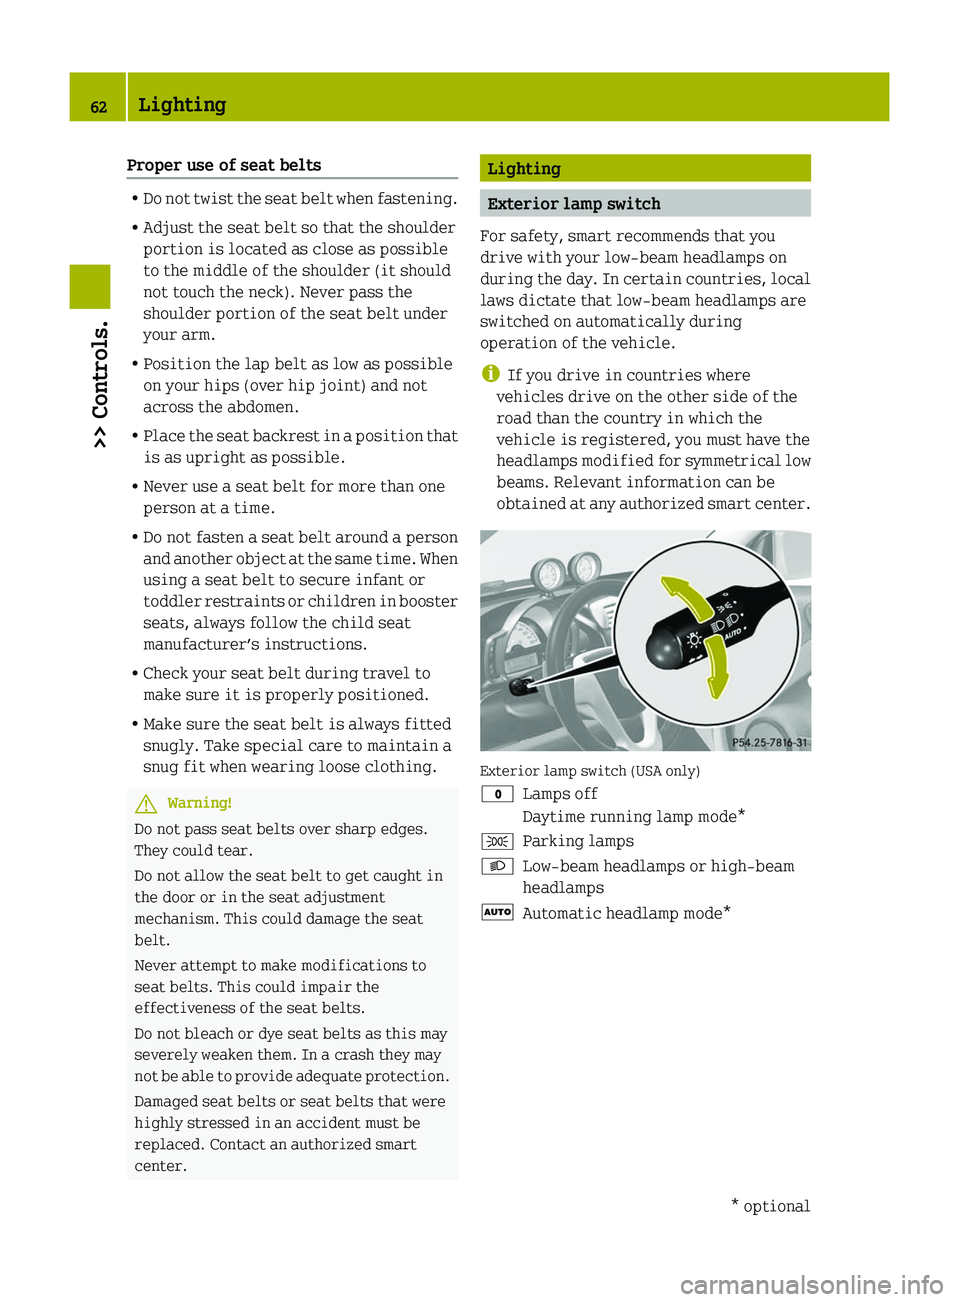
Exterior lamp switch (USA only)
0027Lamps off
Daytime running lamp mode*006CParking lamps0064Low‑beam headlamps or high‑beam
headlamps005AAutomatic headlamp mode*62Lighting>> Controls.* optional451_AKB; 3; 22, en-USd2ureepe,Version: 2.11.8.12009-07-27T09:36:34+02:00 - Seite 62
Page 65 of 216
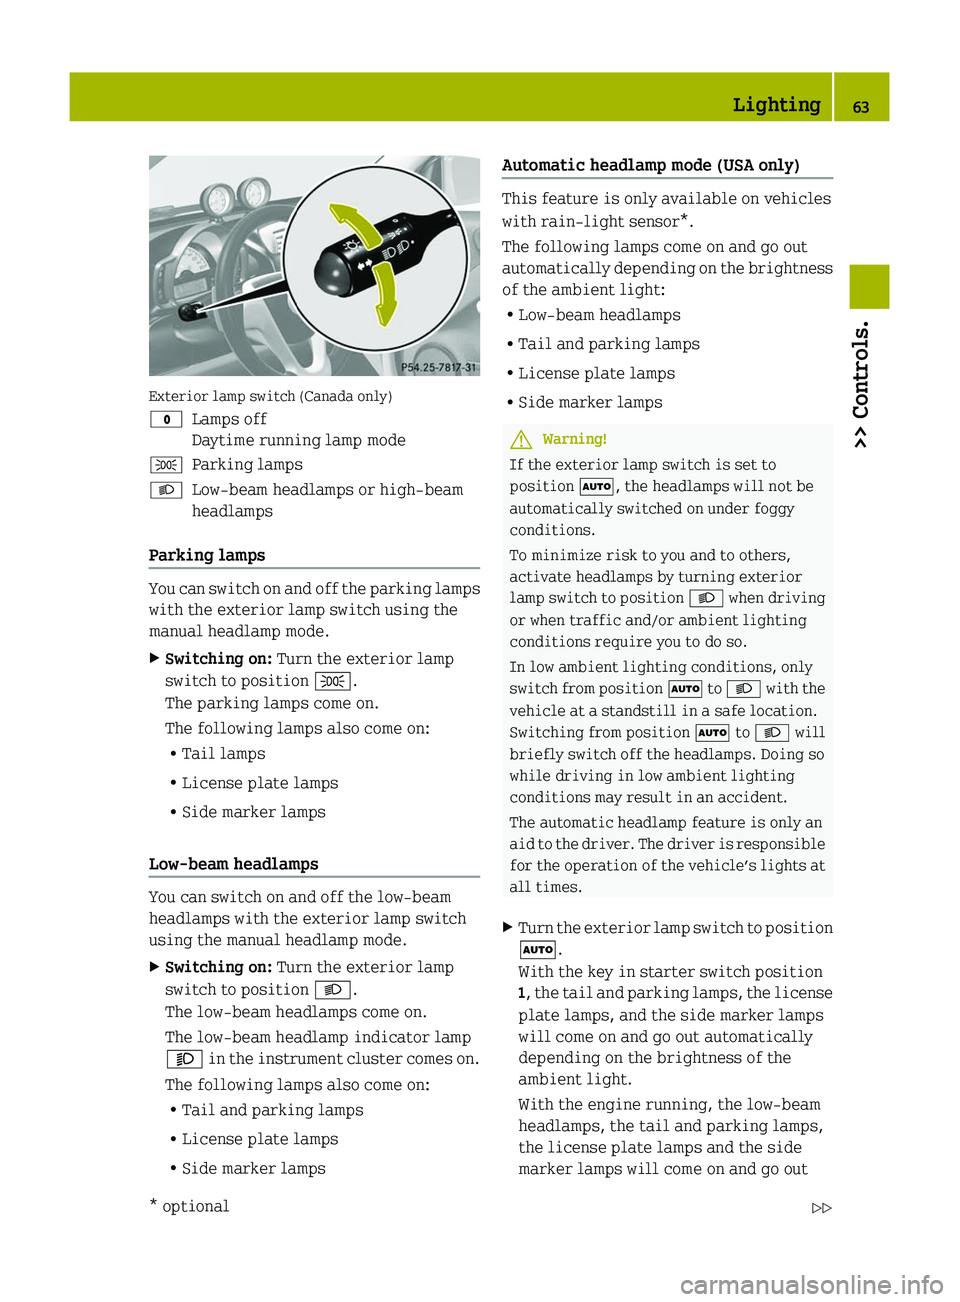
Exterior lamp switch (Canada only)
0027Lamps off
Daytime running lamp mode006CParking lamps0064Low‑beam headlamps or high‑beam
headlamps
Parking lamps
You can switch on and off the parking lamps
with the exterior lamp switch using the
manual headlamp mode.
XSwitching on: Turn the exterior lamp
switch to position 006C.
The parking lamps come on.
The following lamps also come on:
R Tail lamps
R License plate lamps
R Side marker lamps
Low‑beam headlamps
You can switch on and off the low‑beam
headlamps with the exterior lamp switch
using the manual headlamp mode.
XSwitching on: Turn the exterior lamp
switch to position 0064.
The low‑beam headlamps come on.
The low‑beam headlamp indicator lamp
0065 in the instrument cluster comes on.
The following lamps also come on:
R Tail and parking lamps
R License plate lamps
R Side marker lampsAutomatic headlamp mode (USA only)
This feature is only available on vehicles
with rain-light sensor*.
The following lamps come on and go out
automatically depending on the brightness
of the ambient light:
R Low‑beam headlamps
R Tail and parking lamps
R License plate lamps
R Side marker lamps
GWarning!
If the exterior lamp switch is set to
position 005A, the headlamps will not be
automatically switched on under foggy
conditions.
To minimize risk to you and to others,
activate headlamps by turning exterior
lamp switch to position 0064 when driving
or when traffic and/or ambient lighting
conditions require you to do so.
In low ambient lighting conditions, only
switch from position 005A to 0064 with the
vehicle at a standstill in a safe location.
Switching from position 005A to 0064 will
briefly switch off the headlamps. Doing so
while driving in low ambient lighting
conditions may result in an accident.
The automatic headlamp feature is only an
aid to the driver. The driver is responsible
for the operation of the vehicle’s lights at
all times.
XTurn the exterior lamp switch to position
005A .
With the key in starter switch position
1 , the tail and parking lamps, the license
plate lamps, and the side marker lamps
will come on and go out automatically
depending on the brightness of the
ambient light.
With the engine running, the low‑beam
headlamps, the tail and parking lamps,
the license plate lamps and the side
marker lamps will come on and go outLighting63>> Controls.* optional451_AKB; 3; 22, en-USd2ureepe,Version: 2.11.8.12009-07-27T09:36:34+02:00 - Seite 63Z
Page 66 of 216
automatically depending on the
brightness of the ambient light.
Daytime running lamp mode (Canada only)
In Canada, the daytime running lamp mode
is mandatory and therefore in a constant
mode.
XTurn the exterior lamp switch to position
0027 .
i
With the engine running, the low‑beam
headlamps cannot be switched off
manually.
You cannot switch on the high‑beam
headlamps.
The high‑beam flasher is available at all
times.
For nighttime driving you should turn the
exterior lamp switch to position 0064 to
permit activation of the high‑beam
headlamps.
When the engine is running, and you
R turn the exterior lamp switch to position
006C , the low‑beam headlamps, the tail
and parking lamps, the license plate
lamps and the side marker lamps come on
R turn the exterior lamp switch to position
0064 , the manual headlamp mode has
priority over the daytime running lamp
mode.
The corresponding exterior lamps come
on ( Y page 62).
Daytime running lamp mode* (USA only)
In the USA, the daytime running lamp mode
is deactivated by default.
XActivating: Switch off the ignition.XSwitch on the high-beam flasher and
press button 0038 on the key
simultaneously.
An acoustic signal sounds.The daytime running lamp mode is
activated.XTurn the exterior lamp switch to position
0027 .
i
With the engine running, the low‑beam
headlamps cannot be switched off
manually.
i When the daytime running lamp mode is
activated, the rain-light sensor* is
without function.
When the engine is running, and you turn
the exterior lamp switch to position 006C
or 0064 , the manual headlamp mode has
priority over the daytime running lamp
mode.
The corresponding exterior lamps come on
( Y page 62).
XDeactivating: Switch off the ignition
and remove the key from the starter
switch.XSwitch on the high-beam flasher and
press button 0034 on the key
simultaneously.
An acoustic signal sounds.
The daytime running lamp mode is
deactivated.
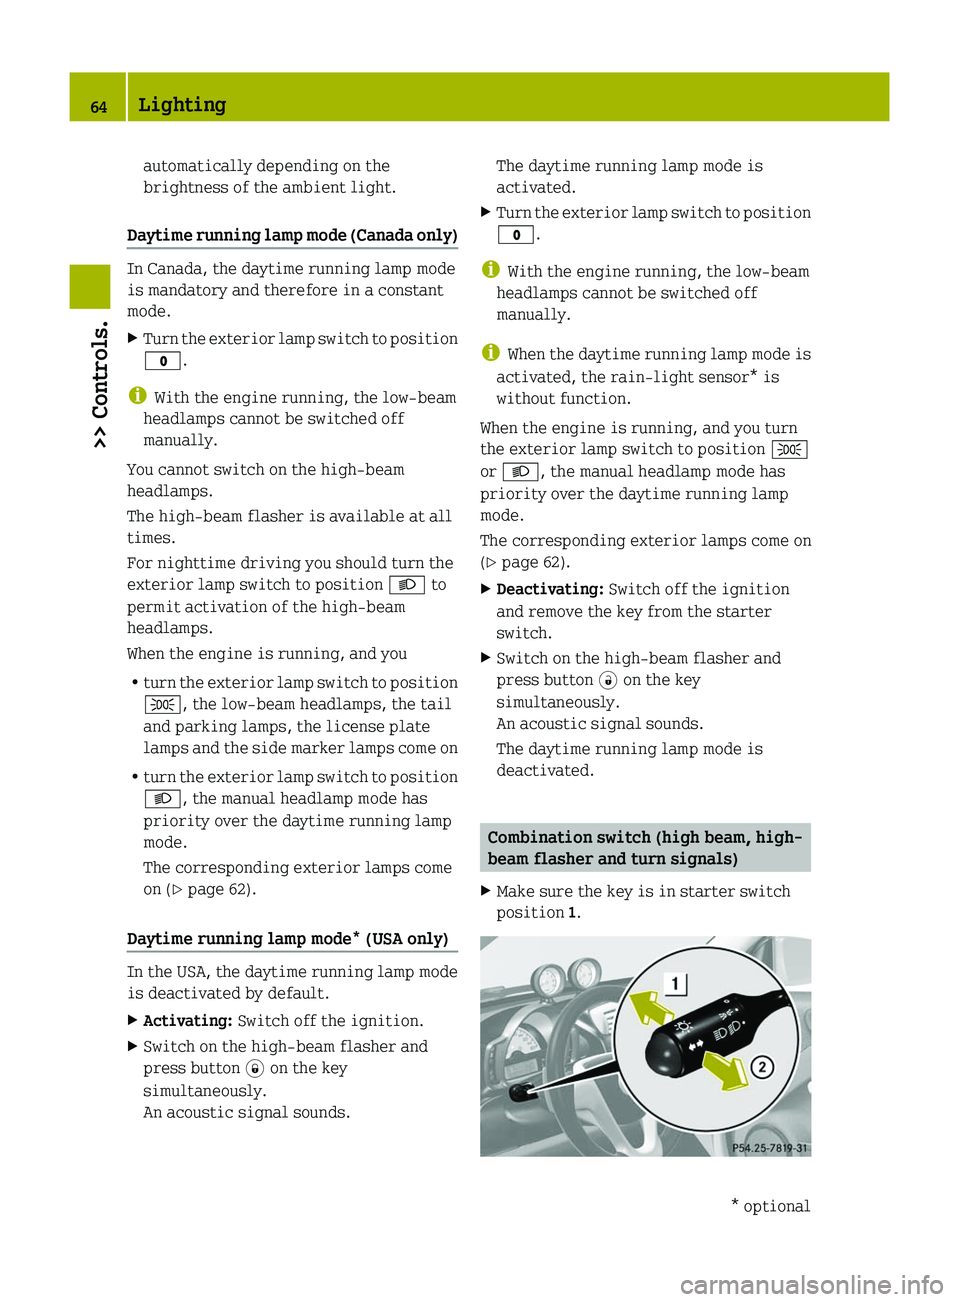
Combination switch (high beam, high-
beam flasher and turn signals)
XMake sure the key is in starter switch
position 1.64Lighting>> Controls.* optional451_AKB; 3; 22, en-USd2ureepe,Version: 2.11.8.12009-07-27T09:36:34+02:00 - Seite 64
Page 67 of 216
High‑beam headlamps XMake sure the low‑beam headlamps are
switched on ( Y page 63).XSwitching on: Push the combination
switch to position 004A.
The high‑beam headlamps come on.
The high‑beam headlamp indicator lamp
0063 in the instrument cluster comes on.XSwitching off: Pull the combination
switch in direction of arrow 0047 to its
original position.
The high‑beam headlamps go out.
The high‑beam headlamp indicator lamp
0063 in the instrument cluster goes out.
High‑beam flasher
XPull the combination switch briefly in
direction of arrow 0047.
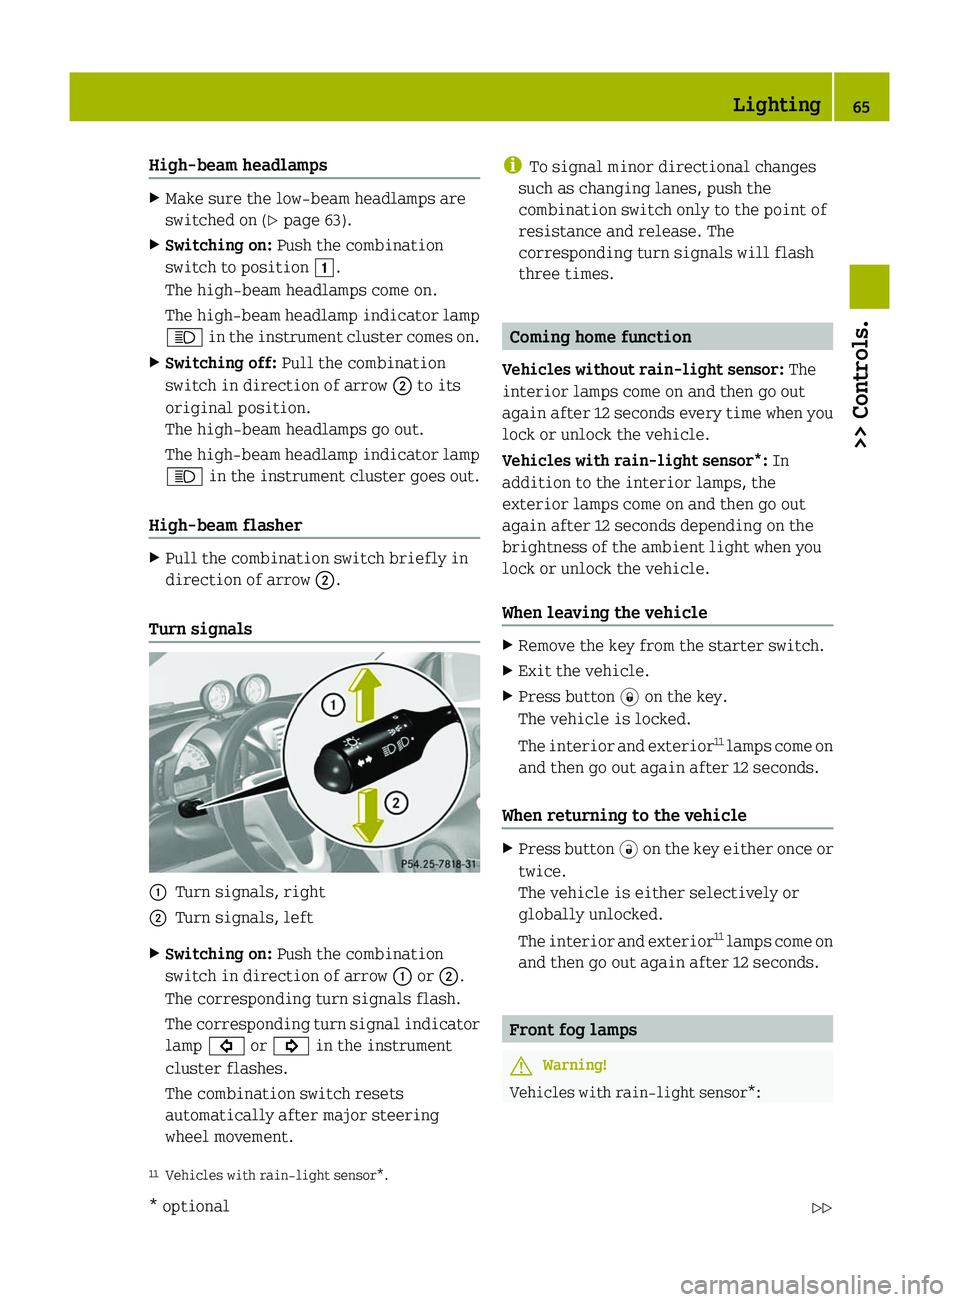
Turn signals
0046Turn signals, right0047Turn signals, leftXSwitching on: Push the combination
switch in direction of arrow 0046 or 0047.
The corresponding turn signals flash.
The corresponding turn signal indicator
lamp 0026 or 0024 in the instrument
cluster flashes.
The combination switch resets
automatically after major steering
wheel movement.i To signal minor directional changes
such as changing lanes, push the
combination switch only to the point of
resistance and release. The
corresponding turn signals will flash
three times.
Coming home function
Vehicles without rain-light sensor: The
interior lamps come on and then go out
again after 12 seconds every time when you
lock or unlock the vehicle.
Vehicles with rain-light sensor*: In
addition to the interior lamps, the
exterior lamps come on and then go out
again after 12 seconds depending on the
brightness of the ambient light when you
lock or unlock the vehicle.
When leaving the vehicle
XRemove the key from the starter switch.XExit the vehicle.XPress button 0038 on the key.
The vehicle is locked.
The interior and exterior 11
lamps come on
and then go out again after 12 seconds.
When returning to the vehicle
XPress button 0034 on the key either once or
twice.
The vehicle is either selectively or
globally unlocked.
The interior and exterior 11
lamps come on
and then go out again after 12 seconds.
Front fog lamps
GWarning!
Vehicles with rain-light sensor*:
11 Vehicles with rain-light sensor*.Lighting65>> Controls.* optional451_AKB; 3; 22, en-USd2ureepe,Version: 2.11.8.12009-07-27T09:36:34+02:00 - Seite 65Z