service indicator SMART FORTWO COUPE ELECTRIC DRIVE 2014 Owners Manual
[x] Cancel search | Manufacturer: SMART, Model Year: 2014, Model line: FORTWO COUPE ELECTRIC DRIVE, Model: SMART FORTWO COUPE ELECTRIC DRIVE 2014Pages: 222, PDF Size: 16.17 MB
Page 9 of 222
High-voltage battery
Battery care ............................ 113
Charge level gauge ..................... 81
Charging (AC power socket) ......... 114
Charging (control system) ...........92
Charging (private wallbox) .........115
Charging (public charging sta-
tion) ...................................... 117
Charging cable ........................ 115
Charging cable warming ............114
Cruise range ........................... 113
Discharged battery ...................113
Displaying available power .........85
ECO indicator ........................... 86
Energy consumption ..................113
Intelligent charging manage-
ment ...................................... 123
Introduction ........................... .112
Notes ..................................... 198
Outside temperatures ................113
Overvoltage protection ..............114
Problems with the charging
process .................................. 120
READY indicator ........................ 87
Terms of use ............................ 114
Warning label (wheel change) ......196
Warning lamp ........................... 171
High-voltage disconnect device ........18
Hill-start assist system ..................81
Hydraulic brake assistant ................48
Hydroplaning ............................... 150I
Identification labels ....................214
Identification number, vehicle
(VIN) .......................................... 215
Infant and child restraint systems see Children in the vehicle
Inflation pressure
see Tires, Inflation pressure
Inside door handle ......................... 54
Instrument cluster .....................23, 25
Illumination ............................ 83
Lamps, indicator and warning .....166
Instrument panel
see Instrument cluster Instruments and controls
see Cockpit
Intelligent charging management
High-voltage battery ................123
Interior motion sensor .................... 49
Interior rear view mirror ................61
Interior storage spaces see Storage compartments
Intermittent wiping
Rear window wiper .....................70
Windshield wipers .....................69
Internet connection
Via mobile service module .........122
Via powerline .......................... 122 J
Jump-starting ............................. 200 K
Key ............................................. 52
Loss of ................................... 176
Replacing the transmitter bat-
tery ....................................... 178
Kilopascal (air pressure unit) .........144
Knee bag ....................................... 37 L
Labels ........................................ 214
Emission control information .....214
Lamps, exterior
Exterior lamp switch ..................64
Switching on/off ....................... 64
Lamps, indicator and warning
12-volt-battery ........................ 171
ABS ....................................... .167
Brakes ................................... 167
Coolant temperature .................172
Drive diagnostics ....................173
EPS ........................................ 170
ESP ®
...................................... 170
Fog lamps ................................ 67
High-beam headlamps ................1 71
High-voltage battery .................171
Low-beam headlamps .................171
Low tire pressure/TPMS mal-
function telltale ...................... 173 Index
7
Page 10 of 222
Overview (kilometers)
................26
Overview (miles) ....................... 24
Passenger front air bag off ....36, 175
Seat belt telltale .....................168
SRS ........................................ 169
Turn signals ............................ 172
License plate lamps .......................181
Lighting ...................................... 64
Ambient lighting* .....................67
Coming home function ................66
Daytime running lamp mode .........65
Exterior .................................. 64
Interior .................................. 68
Loading
see Vehicle loading
Locking the vehicle ........................52
Manually ................................. 177
Loss of
Key ........................................ 176
Service and Warranty Informa-
tion booklet ............................ 212
Low-beam headlamps .................64, 180
Exterior lamp switch ..................64
Indicator lamp .........................1 71
Switching on ............................ 64M
Maintenance .................................. 14
Manual headlamp mode (Low-beam
headlamps) ................................... 64
Maximum loaded vehicle weight .......144
Maximum load rating (tires) ............144
Maximum permissible tire infla-
tion pressure ............................... 144
Mirrors Exterior rear view mirrors ..........61
Interior rear view mirror ............61 N
Normal occupant weight .................145
Number, vehicle identification
(VIN) .......................................... 215 O
Occupant Classification System see OCS (Occupant Classifica-
tion System)
Occupant distribution ...................145
Occupant safety Air bags .................................. 33
Children and air bags ................33
Children in the vehicle ..............42
Infant and child restraint sys-
tems ....................................... 43
Introduction ............................ 30
OCS (Occupant Classification
System) ................................... 39
Passenger front air bag off
indicator lamp ......................... 39
Seat belts ............................ 31, 35
SRS indicator lamp, malfunction .169
OCS (Occupant Classification Sys-
tem) ............................................ 39
Self-test ................................. 42
On-board Diagnostics Socket (OBD) ...213
Online access .............................. 120
Operating range ............................. 14
Operating safety ............................ 16
Outside temperature display ............87
Overhead control panel ...................28 P
Paintwork care ............................. 157
Panic alarm .................................. 45
Parcel nets ............................ 104, 107
Parking ........................................ 77
Parking brake ................................ 77
Parking lamps .............................. 180
Parts service ............................... 212
PASS AIR BAG OFF indicator lamp see Passenger front air bag off
indicator lamp
Passenger front air bag ...................36
Passenger front air bag off indica-
tor lamp ............................. 28, 36, 175
Passenger safety see Occupant safety
Passenger seat .............................. .59
Pedals ........................................ 1478
Index
Page 11 of 222
Power assistance
.......................... 147
Power gauge .................................. 81
Power outlet ................................. 110
Power washer ................................ 156
Practical hints Display message s..................... 161
Flat tire ................................. 187
Fuses ..................................... 205
Jump starting .......................... 200
Replacing bulbs ....................... 179
Replacing transmitter battery ....178
Replacing wiper blades .............185
Towing ................................... 203
Unlocking/locking manually .......177
Warning and indicator
lamps ............................... 166, 175
What to do if ............................ 166
Where will I find... ?................. 160
Problems with your vehicle ..............18
Product information .......................13
Production options weight ..............145
PSI (air pressure unit) ...................145 R
Radio .......................................... 95
Radio transmitters ........................ 152
Rain-light sensor .......................... 69
READY indicator ............................ 87
Rear lamps Overview ................................ 181
Rear window defroster ...................103
Rear window wiper/washer ...............70
Replacing wiper blade ..............185
Recommended tire inflation pres-
sure ..................................... 128, 145
Remote control see Key
Replacing bulbs ............................ 179
Reporting safety defects ..................18
Restraint systems see Occupant safety
Rims ..................................... 145, 216
Roadside Assistance .......................15
Roof see Soft top system S
Safety Driving safety systems ...............46
Occupant safety ......................... 30
Reporting defects ......................18
Safety belts
see Seat belts
Saving energy .............................. 149
Seat belt force limiter .................... 33
Seat belts ..................................... 31
Children in the vehicle ..............42
Fastening ................................ 62
Proper use of ............................ 31
Safety guidelines ......................35
Safety notes .............................. 31
Telltale ................................. 168
Seat heating ................................. 60
Seating capacity .......................... 134
Seats ........................................... 58
Adjustment ............................... 58
Armrest ................................... 59
Heating ................................... 60
Passenger seat .......................... 59
Self-test
OCS (Occupant Classification
System) ................................... 42
SRS ......................................... 30
Service
see Maintenance
Service, parts .............................. 212
Service and warranty Booklet .................................. 212
Service flap ................................. 123
Service life (tires) .......................137
Setting the departure time (Control
system) ........................................ 90
Setting the maximum charge current
(Control system) ............................. 92
Side marker lamps ......................... 180
Sidewall (tires) ............................ 145
Side windows Operation ................................ 75
Signs and labels ........................... 214
smart surround sound system .............97
Snow chains ................................. 146 Index
9
Page 12 of 222
Snow tires
see Winter tires
Soft top system .............................. 70
Cleaning the soft top fabric .......157
Locking rear soft top manually ....178
Mounting the side rails ..............74
Opening and closing the rear
soft top ............................... 56, 72
Opening and closing the
retractable soft top ...............55, 71
Removing the side rails ..............73
Storing the side rails ................74
Sound package ............................... 97
SRS (Supplemental Restraint Sys-
tem)
Indicator lamp ........................ 169
Standing water, driving through ......152
Starter switch positions ..................57
Starting the engine ........................76
Steering wheel paddle shifters .........79
Storage compartments ....................106
Coin holder ............................. 106
Door pockets ........................... 106
Drawer ................................... 107
Glove box ................................ 106
in the tailgate ......................... 107
Parcel nets ............................. 107
Storage tray in center console ....107
Storage trays next to steering
wheel ..................................... 106
Storing tires ............................... 138
Sun screen ................................... 109
Sun visors ................................... 109T
Tailgate Closing ............................... 55, 57
Opening .............................. 54, 56
Tail lamps ................................... 181
Technical data Brake fluid ............................. 218
Coolant .................................. 219
Dimensions and weights .............215
Identification labels ................214
Rims and tires ......................... 216Service fluids and capacities
.....217
Windshield/rear window washer
system ................................... 218
Temperature
Coolant .................................. 152
Interior temperature ................101
Outside ................................... 87
Tether anchorage points
see Children in the vehicle
Thorax-pelvis side air bags .............38
Tightening torque Wheels ................................... 139
TIN (Tire Identification Num-
ber) ...................................... 142, 145
Tire and Loading Information plac-
ard ............................................ 133
Tire and loading terminology ..........143
Tire Identification Number see TIN
Tire inflation pressure
Checking ................................ 130
Important notes on ....................129
Placard on driver’s door B-pil-
lar ........................................ 133
Tire labeling ............................... 139
Tire load rating ........................... 145
Tire ply composition and material
used ........................................... 145
Tire Pressure Monitoring System
(TPMS) ........................................ 131
Tire repair kit ....................... 160, 187
Tires .................................... 127, 216
Air pressure ........................... 128
Care and maintenance ................137
Cleaning ................................ 138
Direction of rotation, spinning ..137
Driving instructions ................150
Flat tire ................................. 187
Important notes on tire infla-
tion pressure .......................... 129
Inflation pressure ....................130
Information placard .................133
Inspection .............................. 137
Labeling ................................ 139
Load rating ............................. 145
Ply composition and material
used ...................................... 14510
Index
Page 13 of 222
Problems under-/overinflation
...130
Retreads ................................. 127
Rims and tires (technical data) ...216
Rotation ................................. 139
Service life ............................ 137
Sizes ..................................... 216
Snow chains ............................ 146
Speed rating ................ 141, 145, 151
Storing .................................. 138
Temperature ...................... 130, 139
Terminology ............................ 143
Tire Identification Number ..142, 145
Tire Pressure Monitoring Sys-
tem (TPMS) .............................. 131
Traction ..................... 138, 145, 150
Tread ..................................... 145
Tread depth ....................... 137, 146
Treadwear indicators ..........137, 146
Vehicle maximum load on ...........146
Wheel change ........................... 195
Winter tires ...................... 146, 216
Tire speed rating ....................141, 145
Top tether see Children in the vehicle
Total load limit ........................... 145
Tow-away alarm ............................. 49
Towing ....................................... 203
Traction ................................ 145, 150
Transmission Driving tips ............................. 81
Hill-start assist system ..............81
Shifting procedure ....................79
Transmission position indicator ......84
Transmitting power values ..............213
Traveling abroad .......................... 153
Tread (tires) ................................ 145
Tread depth (tires) ..................137, 146
Treadwear indicators (tires) .....137, 146
Turning off the engine ....................79
Turn signal lamps ......................... 180
Turn signals ................................. 66
Indicator lamps ....................... 172 U
Uniform Tire Quality Grading
Standards .............................. 138, 146
Unlocking the vehicle .....................52
Manually ................................. 177
USB socket .................................... 96 V
Vehicle Bulbs ..................................... 179
Care ...................................... 153
Identification Number (VIN) .......215
Locking/unlockin g.................... 52
Modifications and alterations,
Operating safety ....................... 16
Towing ................................... 203
Unlocking/locking manually .......177
Vehicle Homepage
Data protection ........................ 121
Functions ............................... 121
General information .................120
Internet connection ..................122
Personal area .......................... 121
Vehicle Identification Number
(VIN) .......................................... 215
Vehicle lighting ........................... .64
Vehicle loading Instructions ............................ 108
Load limit .............................. 135
Roof rack ................................ 108
Terminology ............................ 143
Vehicle maximum load on the tire ....146
Vehicle specification ...................215
Vehicle washing see Vehicle care W
Warning signals Brake pads .............................. 177
Door ...................................... 176
Lighting ................................. 176
Parking .................................. 177
Parking brake .......................... 176
Seat belt reminder system ....168, 176
Warranty coverage ......................... 212 Index
11
Page 41 of 222
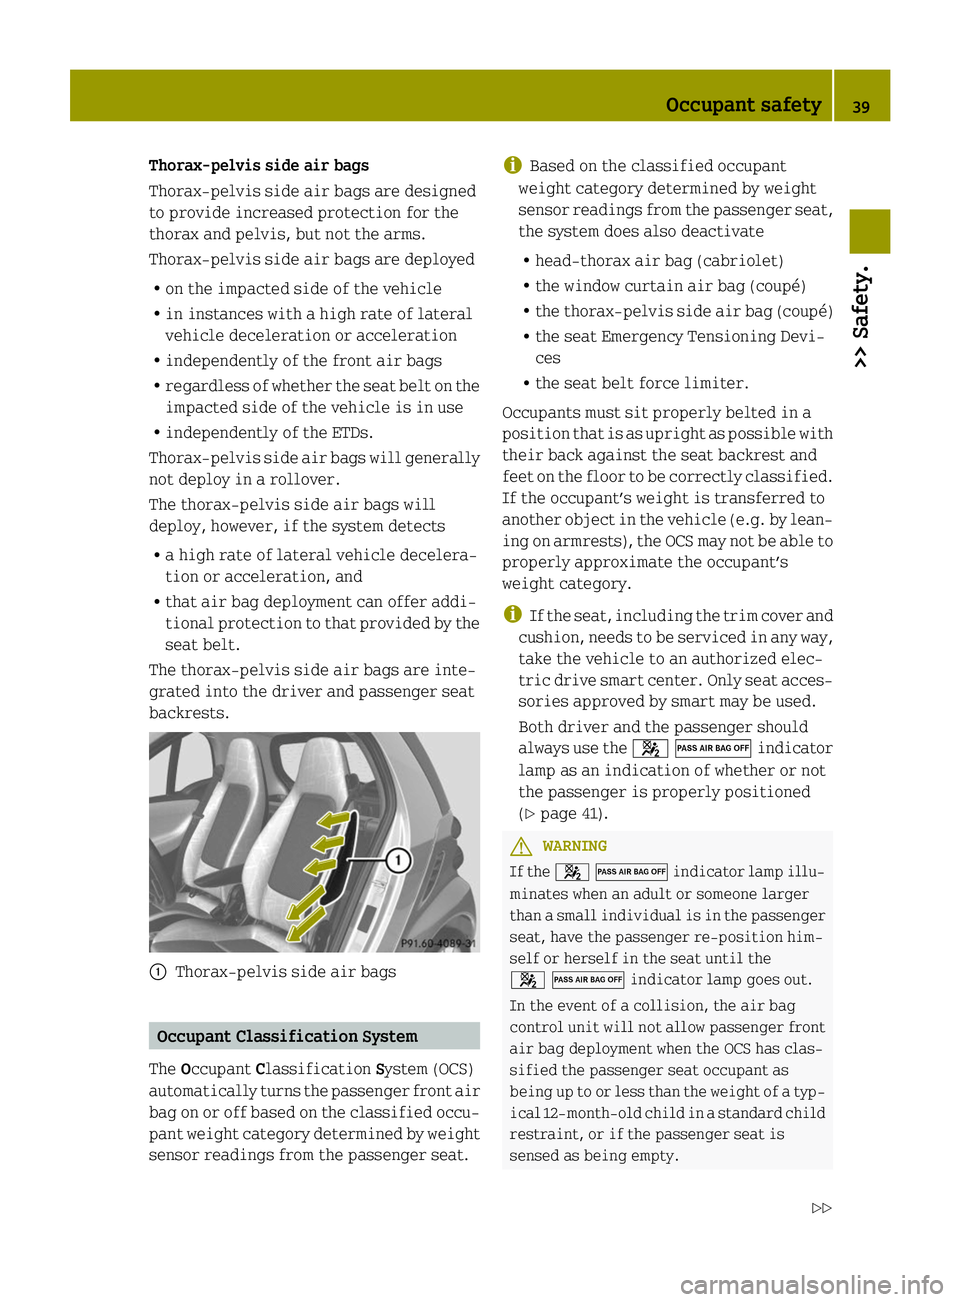
Thorax-pelvis side air bags
Thorax-pelvis side air bags are designed
to provide increased protection for the
thorax and pelvis, but not the arms.
Thorax-pelvis side air bags are deployed
R on the impacted side of the vehicle
R in instances with a high rate of lateral
vehicle deceleration or acceleration
R independently of the front air bags
R regardless of whether the seat belt on the
impacted side of the vehicle is in use
R independently of the ETDs.
Thorax-pelvis side air bags will generally
not deploy in a rollover.
The thorax-pelvis side air bags will
deploy, however, if the system detects
R a high rate of lateral vehicle decelera-
tion or acceleration, and
R that air bag deployment can offer addi-
tional protection to that provided by the
seat belt.
The thorax-pelvis side air bags are inte-
grated into the driver and passenger seat
backrests. 0043
Thorax-pelvis side air bags Occupant Classification System
The Occupant Classification System (OCS)
automatically turns the passenger front air
bag on or off based on the classified occu-
pant weight category determined by weight
sensor readings from the passenger seat. i
Based on the classified occupant
weight category determined by weight
sensor readings from the passenger seat,
the system does also deactivate
R head-thorax air bag (cabriolet)
R the window curtain air bag (coupé)
R the thorax-pelvis side air bag (coupé)
R the seat Emergency Tensioning Devi-
ces
R the seat belt force limiter.
Occupants must sit properly belted in a
position that is as upright as possible with
their back against the seat backrest and
feet on the floor to be correctly classified.
If the occupant’s weight is transferred to
another object in the vehicle (e.g. by lean-
ing on armrests), the OCS may not be able to
properly approximate the occupant’s
weight category.
i If the seat, including the trim cover and
cushion, needs to be serviced in any way,
take the vehicle to an authorized elec-
tric drive smart center. Only seat acces-
sories approved by smart may be used.
Both driver and the passenger should
always use the 0073006Findicator
lamp as an indication of whether or not
the passenger is properly positioned
(Y page 41). G
WARNING
If the 0073006Findicator lamp illu-
minates when an adult or someone larger
than a small individual is in the passenger
seat, have the passenger re-position him-
self or herself in the seat until the
0073006Findicator lamp goes out.
In the event of a collision, the air bag
control unit will not allow passenger front
air bag deployment when the OCS has clas-
sified the passenger seat occupant as
being up to or less than the weight of a typ-
ical 12‑month‑old child in a standard child
restraint, or if the passenger seat is
sensed as being empty. Occupant safety
39>> Safety.
Z
Page 124 of 222
mated values because, for example, they are
influenced by the following factors:
R outside temperature
R active electrical consumers, e.g. air
conditioning, lights
R personal driving style
R traffic conditions
Plan for a sufficient reserve accordingly.
Connecting the vehicle to the Internet Via mobile service module
i
This function is only available if the
vehicle is equipped with a mobile
service module.
You can use the “Vehicle Homepage” when
the vehicle has connected to the Internet
via the mobile service module. The mobile
service module uses GSM (Global System for
Mobile Communications) and transfers the
required data via radio transmission. The
vehicle automatically detects if a connec-
tion to the Internet via the mobile service
module is available or not. No pre-settings
need to be done.
In order to use data transfer via the mobile
service module you do not need a SIM card
and no contract.
i There may be service limitations if the
vehicle is located for example in a
underground garage. Service limita-
tions may also appear in areas with poor
mobile service coverage. In theses cases
you can launch the Internet connection
via powerline (Y page 122).
Via powerline
You can also access the “Vehicle Homepage”
if you do not have GSM reception. This is
possible for example via your DSL router.
This connection is built by the plugged in
charging cable with the aid of the power-
line technology.
The vehicle supports powerline communi-
cation according to the "HomePlug AV" standard. Data is transmitted via phase L1
and the neutral conductor of the power line.
In order for the vehicle to access the Inter-
net, you require a commercially available
adapter of the "HomePlug AV" standard.
This adapter must also have an encryption
button so that it can be configured to com-
municate with the vehicle. Connect the
adapter to the power supply as well as your
Internet connection. If the adapter is con-
nected to different phase than L1, a phase
coupler must be additionally installed.
Only in this way can stable communication
be guaranteed. For questions, consult a
qualified electrician.
i If you already have a powerline network
installed, the vehicle can be integrated
into it.
To establish a connection between the
vehicle and a powerline adapter, carry out
the following:
X Connect the vehicle to a power socket or
a wallbox.
The right 003Dindicator lamp on the
vehicle socket must flash green.
X Insert the powerline adapter into a
neighboring power socket. Observe that
the vehicle and the adapter are con-
nected via phase L1.
X Switch on the ignition.
X Call up the Charge current
Charge current menu on the
control system (Y page 92).
Carry out the following steps within
30 seconds:
X If the value of the charge current is not
set to 8 A: set the value to 8 A and confirm.
X Set the value of the charge current to
12 A and confirm.
X Set the value of the charge current to
8 A and confirm. 122
High-voltage battery>> Operation.
Page 139 of 222
For more information on tire load rating
(Y page 140).
For information on calculating total and
cargo load capacities (Y page 135).Direction of rotation
Unidirectional tires offer added advan-
tages, such as better hydroplaning per-
formance. To benefit, however, you must
make sure the tires rotate in the direction
specified.
An arrow on the sidewall indicates the
intended direction of rotation (spinning)
of the tire. Tire care and maintenance
G
WARNING
Regularly check the tires for damage. Dam-
aged tires can cause tire inflation pres-
sure loss. As a result, you could lose control
of your vehicle.
Worn, old tires can cause accidents. If the
tire tread is badly worn, or if the tires have
sustained damage, replace them.
Check the tire inflation pressure at least
once a month. For more information on
checking tire inflation pressure, see
“Recommended tire inflation pressure”
(Y page 128).
Tire inspection Every time you check the tire inflation
pressure, you should also inspect your
tires for the following
R
excessive treadwear (Y page 137)
R cord or fabric showing through the tire’s
rubber
R bumps, bulges, cuts, cracks or splits in
the tread or side of the tire
Replace the tire if you find any of the above
conditions. Life of tire G
WARNING
Tires should be replaced after 6 years,
regardless of the remaining tread.
The service life of a tire is dependent upon
varying factors including but not limited
to
R driving style
R tire inflation pressure
R distance driven
Tread depth G
WARNING
Although the applicable federal motor
vehicle safety laws consider a tire to be
worn when the treadwear indicators (TWI)
become visible at approximately 1
/ 16 in
(1.6 mm), we recommend that you do not allow
your tires to wear down to that level. As
tread depth approaches 1
/ 8 in (3 mm), the
adhesion properties on a wet road are
sharply reduced.
Depending upon the weather and/or road
surface (conditions), the tire traction var-
ies widely.
Do not allow your tires to wear down too far.
Adhesion properties on wet roads are
sharply reduced at tread depths of less
than 1
/ 8 in (3 mm).
Treadwear indicators (TWI) are required by
law. These indicators are located in six
places on the tread circumference and
become visible at a tread depth of approx-
imately 1
/ 16 in (1.6 mm), at which point the
tire is considered worn and should be
replaced.
Recommended minimum tire tread depth:
Summer tires 1
/ 8 in (3 mm)
Winter tires 1
/ 6 in (4 mm) Tires and wheels
137>> Operation. Z
Page 140 of 222
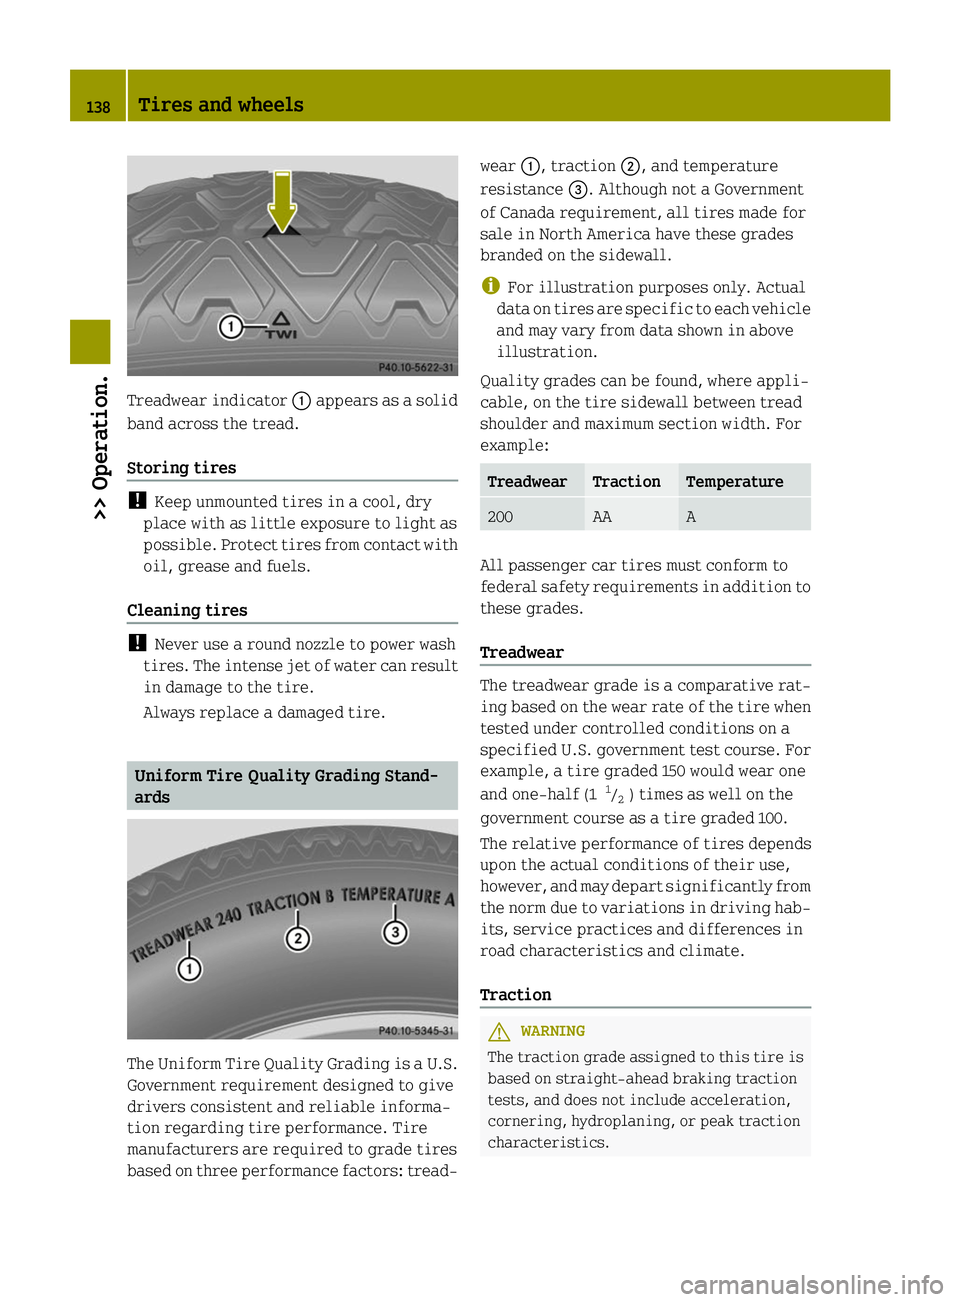
Treadwear indicator
0043appears as a solid
band across the tread.
Storing tires !
Keep unmounted tires in a cool, dry
place with as little exposure to light as
possible. Protect tires from contact with
oil, grease and fuels.
Cleaning tires !
Never use a round nozzle to power wash
tires. The intense jet of water can result
in damage to the tire.
Always replace a damaged tire. Uniform Tire Quality Grading Stand-
ards The Uniform Tire Quality Grading is a U.S.
Government requirement designed to give
drivers consistent and reliable informa-
tion regarding tire performance. Tire
manufacturers are required to grade tires
based on three performance factors: tread- wear
0043, traction 0044, and temperature
resistance 0087. Although not a Government
of Canada requirement, all tires made for
sale in North America have these grades
branded on the sidewall.
i For illustration purposes only. Actual
data on tires are specific to each vehicle
and may vary from data shown in above
illustration.
Quality grades can be found, where appli-
cable, on the tire sidewall between tread
shoulder and maximum section width. For
example: Treadwear Traction Temperature
200 AA A
All passenger car tires must conform to
federal safety requirements in addition to
these grades.
Treadwear The treadwear grade is a comparative rat-
ing based on the wear rate of the tire when
tested under controlled conditions on a
specified U.S. government test course. For
example, a tire graded 150 would wear one
and one-half (1 1
/ 2 ) times as well on the
government course as a tire graded 100.
The relative performance of tires depends
upon the actual conditions of their use,
however, and may depart significantly from
the norm due to variations in driving hab-
its, service practices and differences in
road characteristics and climate.
Traction G
WARNING
The traction grade assigned to this tire is
based on straight-ahead braking traction
tests, and does not include acceleration,
cornering, hydroplaning, or peak traction
characteristics. 138
Tires and wheels>> Operation.
Page 148 of 222
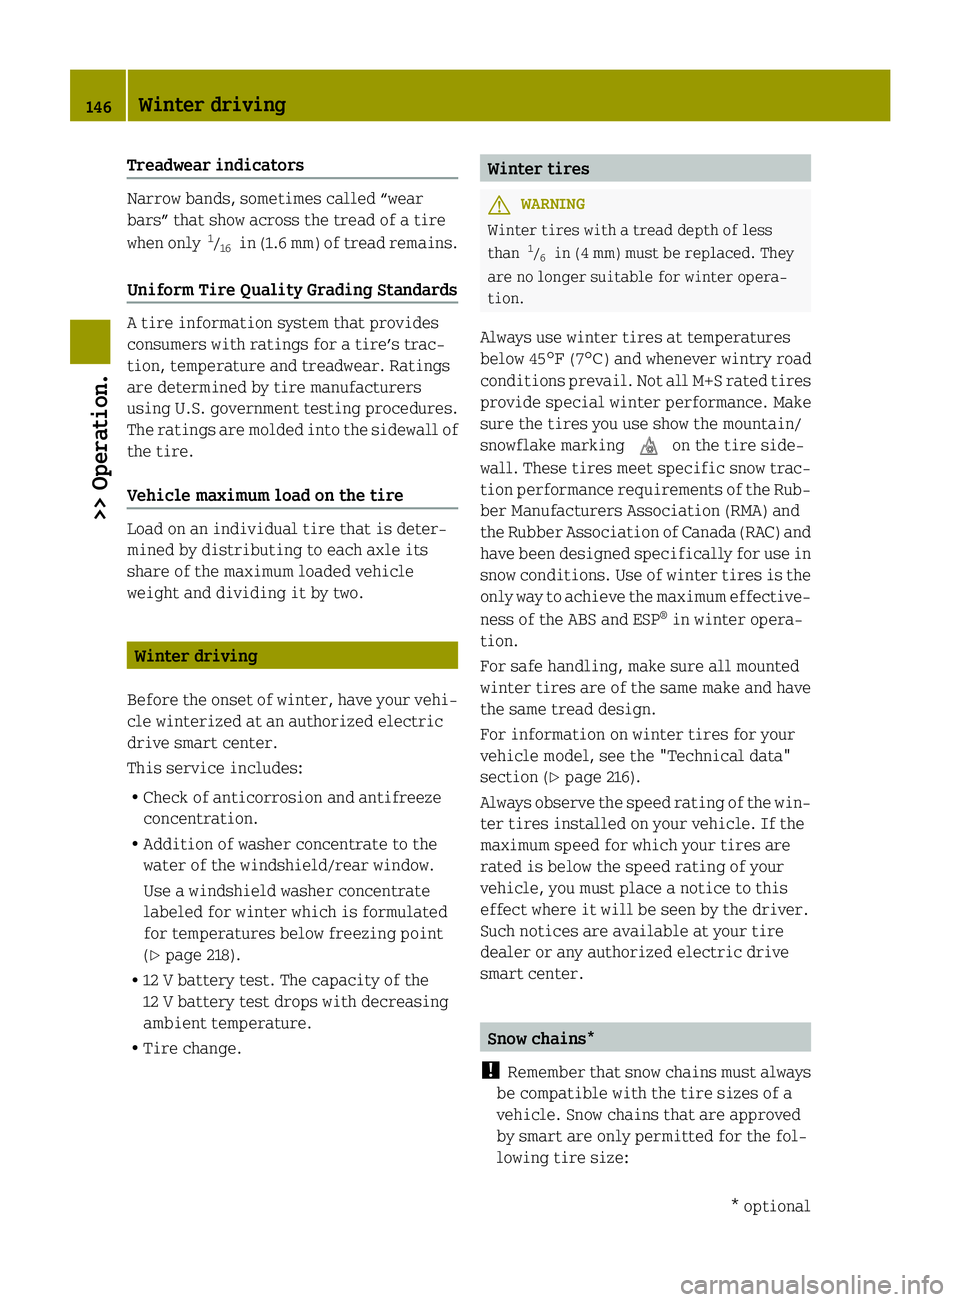
Treadwear indicators
Narrow bands, sometimes called “wear
bars” that show across the tread of a tire
when only 1
/ 16 in (1.6 mm) of tread remains.
Uniform Tire Quality Grading Standards A tire information system that provides
consumers with ratings for a tire’s trac-
tion, temperature and treadwear. Ratings
are determined by tire manufacturers
using U.S. government testing procedures.
The ratings are molded into the sidewall of
the tire.
Vehicle maximum load on the tire Load on an individual tire that is deter-
mined by distributing to each axle its
share of the maximum loaded vehicle
weight and dividing it by two. Winter driving
Before the onset of winter, have your vehi-
cle winterized at an authorized electric
drive smart center.
This service includes:
R Check of anticorrosion and antifreeze
concentration.
R Addition of washer concentrate to the
water of the windshield/rear window.
Use a windshield washer concentrate
labeled for winter which is formulated
for temperatures below freezing point
(Y page 218).
R 12 V battery test. The capacity of the
12 V battery test drops with decreasing
ambient temperature.
R Tire change. Winter tires
G
WARNING
Winter tires with a tread depth of less
than 1
/ 6 in (4 mm) must be replaced. They
are no longer suitable for winter opera-
tion.
Always use winter tires at temperatures
below 45 ¦(7¥) and whenever wintry road
conditions prevail. Not all M+S rated tires
provide special winter performance. Make
sure the tires you use show the mountain/
snowflake marking 004Don the tire side-
wall. These tires meet specific snow trac-
tion performance requirements of the Rub-
ber Manufacturers Association (RMA) and
the Rubber Association of Canada (RAC) and
have been designed specifically for use in
snow conditions. Use of winter tires is the
only way to achieve the maximum effective-
ness of the ABS and ESP ®
in winter opera-
tion.
For safe handling, make sure all mounted
winter tires are of the same make and have
the same tread design.
For information on winter tires for your
vehicle model, see the "Technical data"
section (Y page 216).
Always observe the speed rating of the win-
ter tires installed on your vehicle. If the
maximum speed for which your tires are
rated is below the speed rating of your
vehicle, you must place a notice to this
effect where it will be seen by the driver.
Such notices are available at your tire
dealer or any authorized electric drive
smart center. Snow chains*
! Remember that snow chains must always
be compatible with the tire sizes of a
vehicle. Snow chains that are approved
by smart are only permitted for the fol-
lowing tire size: 146
Winter driving>> Operation.
* optional