buttons SUBARU BRZ 2013 1.G Navigation Manual
[x] Cancel search | Manufacturer: SUBARU, Model Year: 2013, Model line: BRZ, Model: SUBARU BRZ 2013 1.GPages: 110, PDF Size: 8.78 MB
Page 55 of 110
Navigation 133
Navigation
3The preset search categories are displayed. This button
searches for everything around your current position (or
the latest confirmed position if it is unavailable).
• (Car R ep air A ro u n d H ere )
Vehicle repairs / Road-side assistance services
• (Health Around Here):
Hospitals / Emergency services
• ( Po lic e A ro un d H ere ):
Police stations
• (Gas Station Around Here):
Gas stations
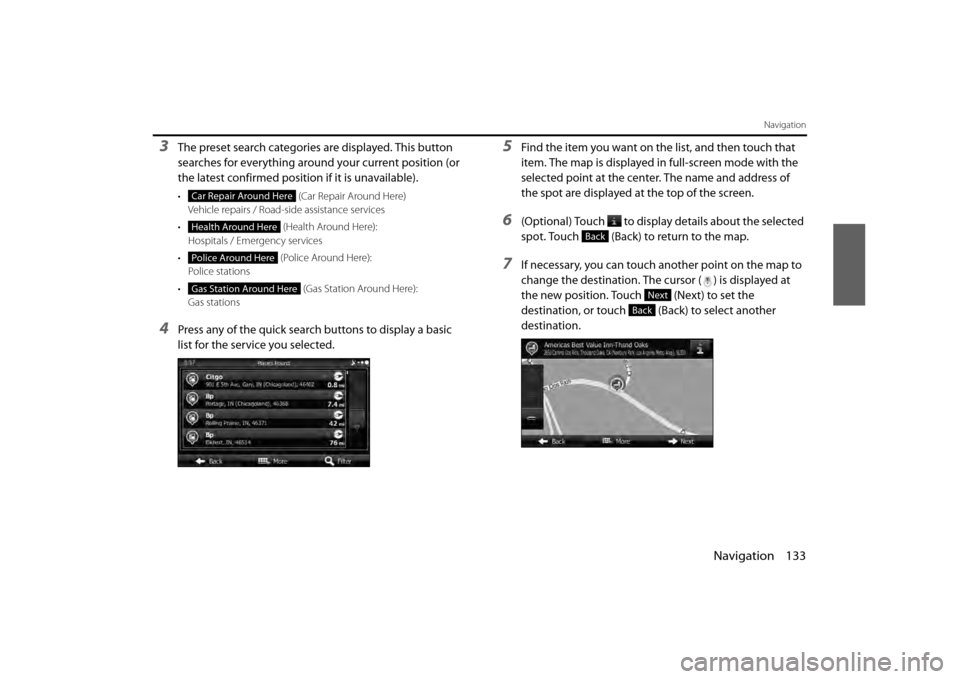
4Press any of the quick search buttons to display a basic
list for the service you selected.
5Find the item you want on the list, and then touch that
item. The map is displayed in full-screen mode with the
selected point at the center. The name and address of
the spot are displayed at the top of the screen.
6(Optional) Touch to display details about the selected
spot. Touch (Back) to return to the map.
7If necessary, you can touch another point on the map to
change the destination. The cursor ( ) is displayed at
the new position. Touch (Next) to set the
destination, or touch (Back) to select another
destination.
Car Repair Around Here
Health Around Here
Police Around Here
Gas Station Around Here
Back
Next
Back
Page 63 of 110
Navigation 141
Navigation
Displaying the Entire Route on the Map
You can easily display an overview of the entire route
currently being navigated. Follow the steps below to use the
initial settings screen.
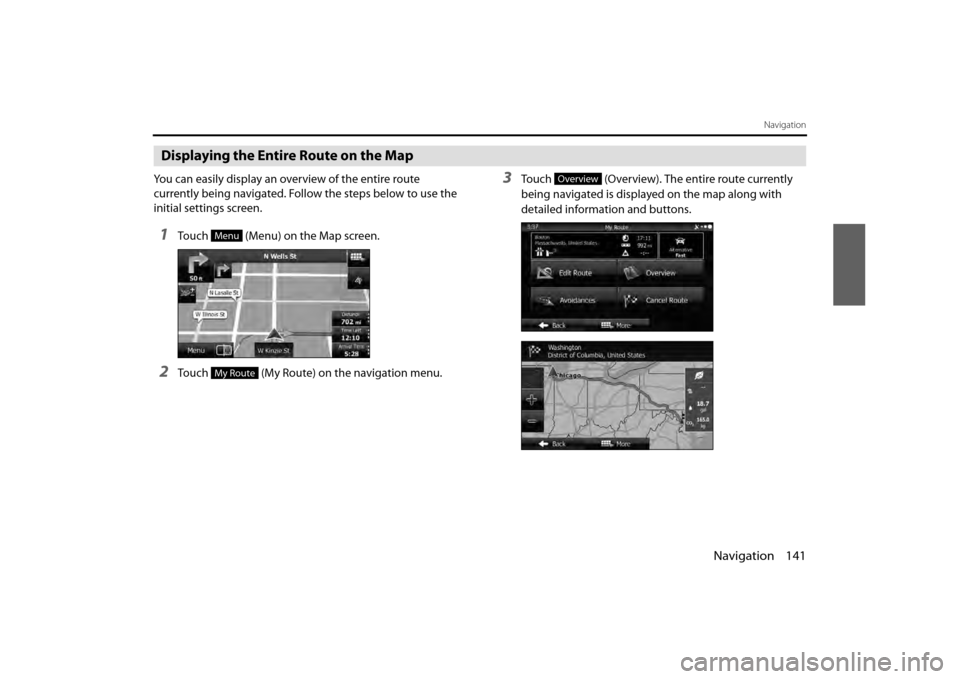
1Touch (Menu) on the Map screen.
2Touch (My Route) on the navigation menu.
3Touch (Overview). The entire route currently
being navigated is displayed on the map along with
detailed information and buttons.
Menu
My Route
Overview
Page 66 of 110
144 Navigation
Navigation
Changing the Route
When navigation has already begun, you can change the
route being navigated by using one of the following
methods. The methods are explained in the following section.
Selecting a new destination after the route has
been set: new route, waypoint, and final
destination
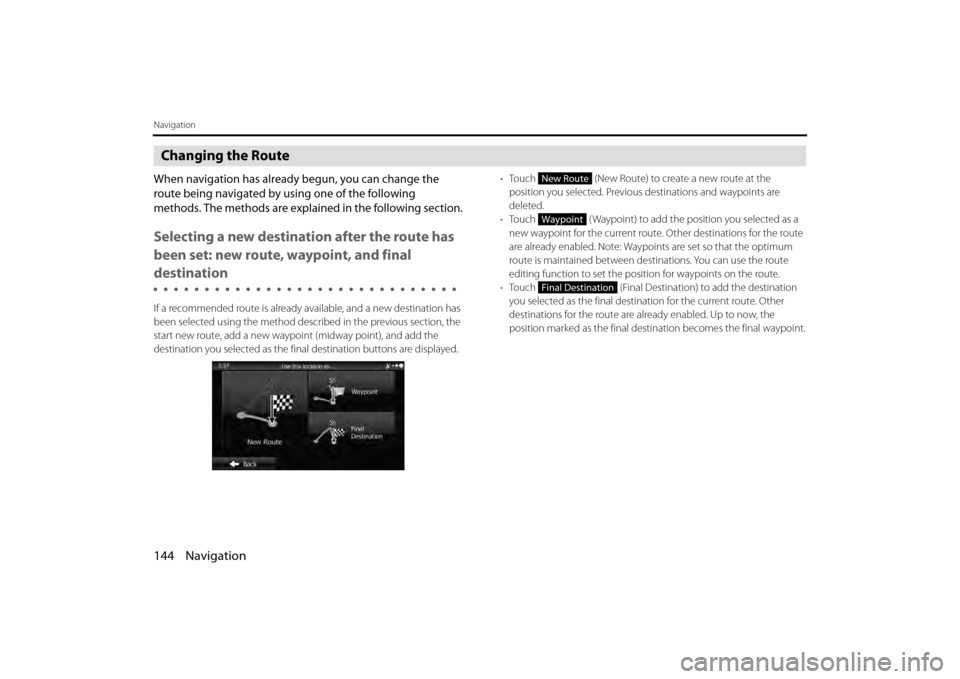
If a recommended route is already available, and a new destination has
been selected using the method described in the previous section, the
start new route, add a new waypoi nt (midway point), and add the
destination you selected as the fina l destination buttons are displayed. •
Touch (New Route) to create a new route at the
position you selected. Previous destinations and waypoints are
deleted.
• Touch ( Waypoint) to add the position you selected as a
new waypoint for the current route. Other destinations for the route
are already enabled. Note: Waypoi nts are set so that the optimum
route is maintained between destinations. You can use the route
editing function to set the posi tion for waypoints on the route.
• Touch (Final Destination) to add the destination
you selected as the final destinat ion for the current route. Other
destinations for the route are already enabled. Up to now, the
position marked as the final dest ination becomes the final waypoint.
New Route
Waypoint
Final Destination
Page 75 of 110
Navigation 153
Navigation
Displaying a Simulation of the Route
You can run a simulation of the route currently being
navigated. Follow the steps below to use the initial settings
screen.
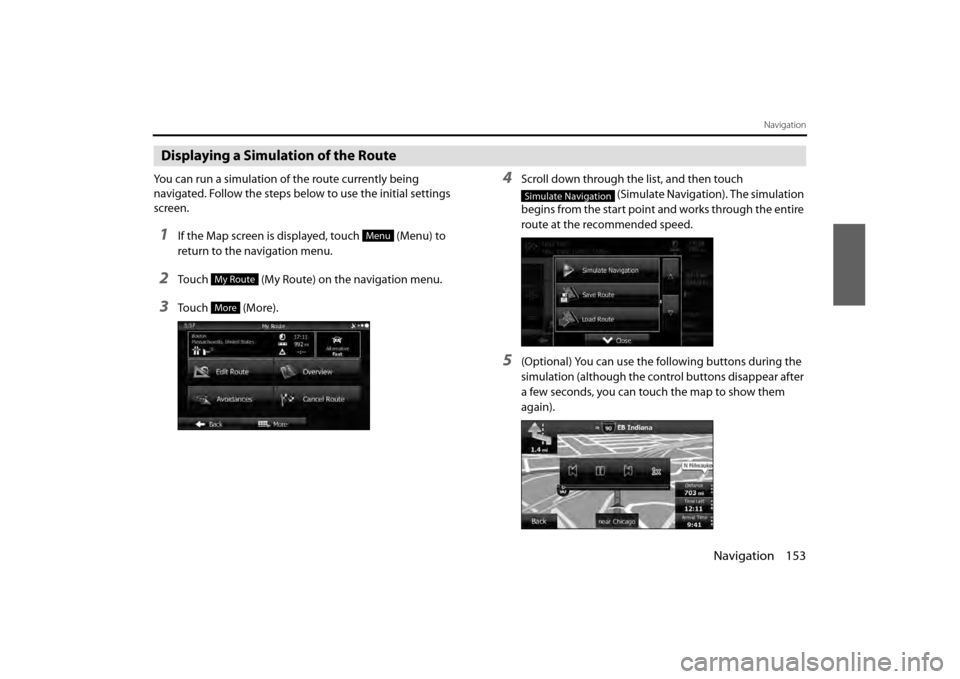
1If the Map screen is displayed, touch (Menu) to
return to the navigation menu.
2Touch (My Route) on the navigation menu.
3Touch (More).
4Scroll down through the list, and then touch (Simulate Navigation). The simulation
begins from the start point and works through the entire
route at the recommended speed.
5(Optional) You can use the following buttons during the
simulation (although the control buttons disappear after
a few seconds, you can touch the map to show them
again).
Menu
My Route
More
Simulate Navigation
Page 86 of 110
164 Navigation
Reference Data
Sound and Warnings
Performs volume adjustment or changes the voice guidance language.
Also enables various warnings and warning settings.
• (Volume):
Touch this button to adjust various volumes in the application. The
type and buttons for various differ ent volumes is displayed on a new
screen. See the following items for more details.
• (Voice Language):
This button displays the current language for voice guidance. Touch
this button to select a new lang uage/narrator from the available
languages and list of narrators. When you touch an item from the list,
a sample of the audio is played back. Touch (Back) after
selecting a new voice language.
• (TTS Pro):
Touch this button to select the frequency of voice information, as
well as turning on or off various voice information such as
information on traffic conditions. •
(Verbosity Level):
You can select the Verbosity Level from “Minimal”, “Compact”, or
“Verbose”.
• ( Voice Recognition):
Touch this button to turn on or off talk back voice recognition results,
or change the voice recognition method.
• (Alert Point Settings):
Displays driver warning informatio n on the map. Touch this button
to turn these warnings on or off, and set how far from the danger the
warning should be generated. You can make individual settings for
each type of warning.
• ( Warning Sign Alerts):
Displays driver warning informatio n on the map. Touch this button
to turn these warnings on or off, and set how far from the danger the
warning should be generated. You can make individual settings for
each type of warning.
CAUTION
Be sure to set the volume of the audio at an appropriate level.
Improper volume setting may re sult in hearing damage or a
traffic accident.
Volume
Voice Language
Back
TTS Pro
Verbosity Level
Voice Recognition
Alert Point Settings
Warning Sign Alerts
Page 87 of 110
Navigation 165
Reference Data
You can adjust the volume for the following voice categories.• Guidance:
Changes the volume for the guidance voice (when guiding using a
narrator).
• Alert Beeps:
Changes the volume for audio warnings (the beep).
Adjustment buttons for each audio classification: • Volume slider:
Adjusts the volume of the associated audio.
Page 95 of 110
Navigation 173
Reference Data
Units and Formats
Sets display units and the date display.• (Units and Formats):
Sets the units used by the prog ram to measure distance. Voice
guidance languages do not support all units displayed in the list.
You can select to display the time in various international date
formats.
Types of display units and date display settings: • (Distance):
Buttons the units used to display distance.
• (Fuel Economy):
Buttons the units used to display fuel consumption.
• (Currency):
Displays the keyboard screen allowing you to enter the currency
name. (For the keyboard, see “Using the Keyboard” on Page 88.)
• (Date Format):
Buttons the units used to display the date.
• (Date Delimiter):
Buttons the date delimiter.
• (Coordinate Display Format):
Buttons the coordinate display format.
Tr i p M o n i to r
Contains useful information on the user's distance moved in the trip
logs and path logs. You can save trip logs automatically by turning this
setting on, or save them manually wh en arriving at a destination. You
can view all logs on the trip monitor. Launch the trip monitor from the
“Others” menu. • (Enable Auto-Saving):
The trip monitor saves statistical data for the distance traveled. You
can set it so that the route is sa ved automatically if you need a log
after driving.
• Trip Database Size:
This is not a button. This line indi cates the current size of the trip
database. This shows the total for all saved trip logs and path logs.
• (Save Track Log):
You can save path logs (positional order acquired from GPS receiver)
in the trip log.
Units and Formats
Distance
Fuel Economy
Currency
Date Format
Date Delimiter
Coordinate Display Format
Enable Auto-Saving
Save Track Log