trunk SUBARU BRZ 2013 1.G Owners Manual
[x] Cancel search | Manufacturer: SUBARU, Model Year: 2013, Model line: BRZ, Model: SUBARU BRZ 2013 1.GPages: 484, PDF Size: 6.46 MB
Page 2 of 484
TABLE OF CONTENTSIndex
2
1-1. Key information
Keys ..................................... 20
1-2. Opening, closing and locking the doors and
trunk lid
Keyless access with push button start system ............. 23
Remote keyless entry system ................................ 37
Doors.................................... 42
Trunk lid ............................... 45
1-3. Adjustable components (seats, mirrors,
steering wheel)
Front seats ........................... 51
Rear seats ............................ 54
Head restraints ..................... 56
Seatbelts .............................. 58
Steering wheel ..................... 65
Anti-glare inside rear view mirror.......................... 66
Outside rear view mirrors ..... 67
1-4. Opening and closing the windows
Power windows .................... 70
1-5. Refueling Opening the fuel tank cap .... 73 1-6. Security system
Engine immobilizer system ................................ 77
Theft prevention labels (U.S.A.) ............................... 80
Alarm .................................... 81
1-7. Safety information Correct driving posture ......... 85
SRS airbag (Supplemental Restraint System airbag) .... 87
Front passenger occupant detection system .............. 122
Child restraint systems ....... 132
Installing child restraints ..... 136
2-1. Driving procedures Driving the vehicle .............. 146
Push-button ignition switch ............................... 160
Engine (ignition) switch....... 169
Automatic transmission ...... 172
Manual Transmission ......... 179
Turn signal lever ................. 182
Parking brake ..................... 183
Horn .................................... 184
1Before driving
2When driving
Page 7 of 484
7
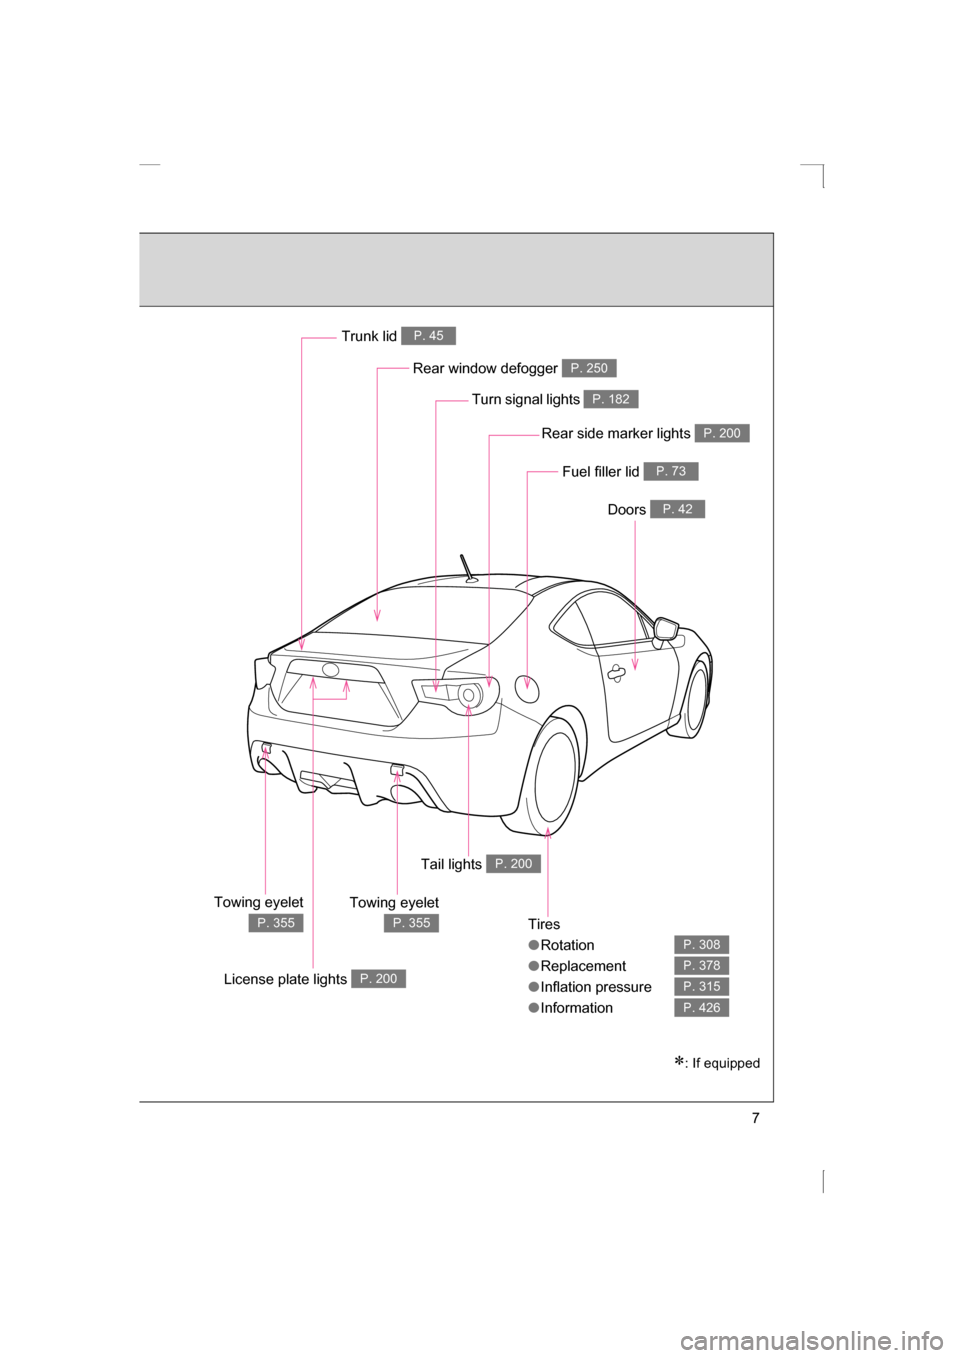
Tires
●Rotation
●Replacement
●Inflation pressure
●Information
P. 308
P. 378
P. 315
P. 426
Rear window defogger P. 250
Trunk lid P. 45
Doors P. 42
Fuel filler lid P. 73
Turn signal lights P. 182
Rear side marker lights P. 200
∗: If equipped
License plate lights P. 200
Tail lights P. 200
Towing eyelet
P. 355
Towing eyelet
P. 355
Page 13 of 484
13
C
BB
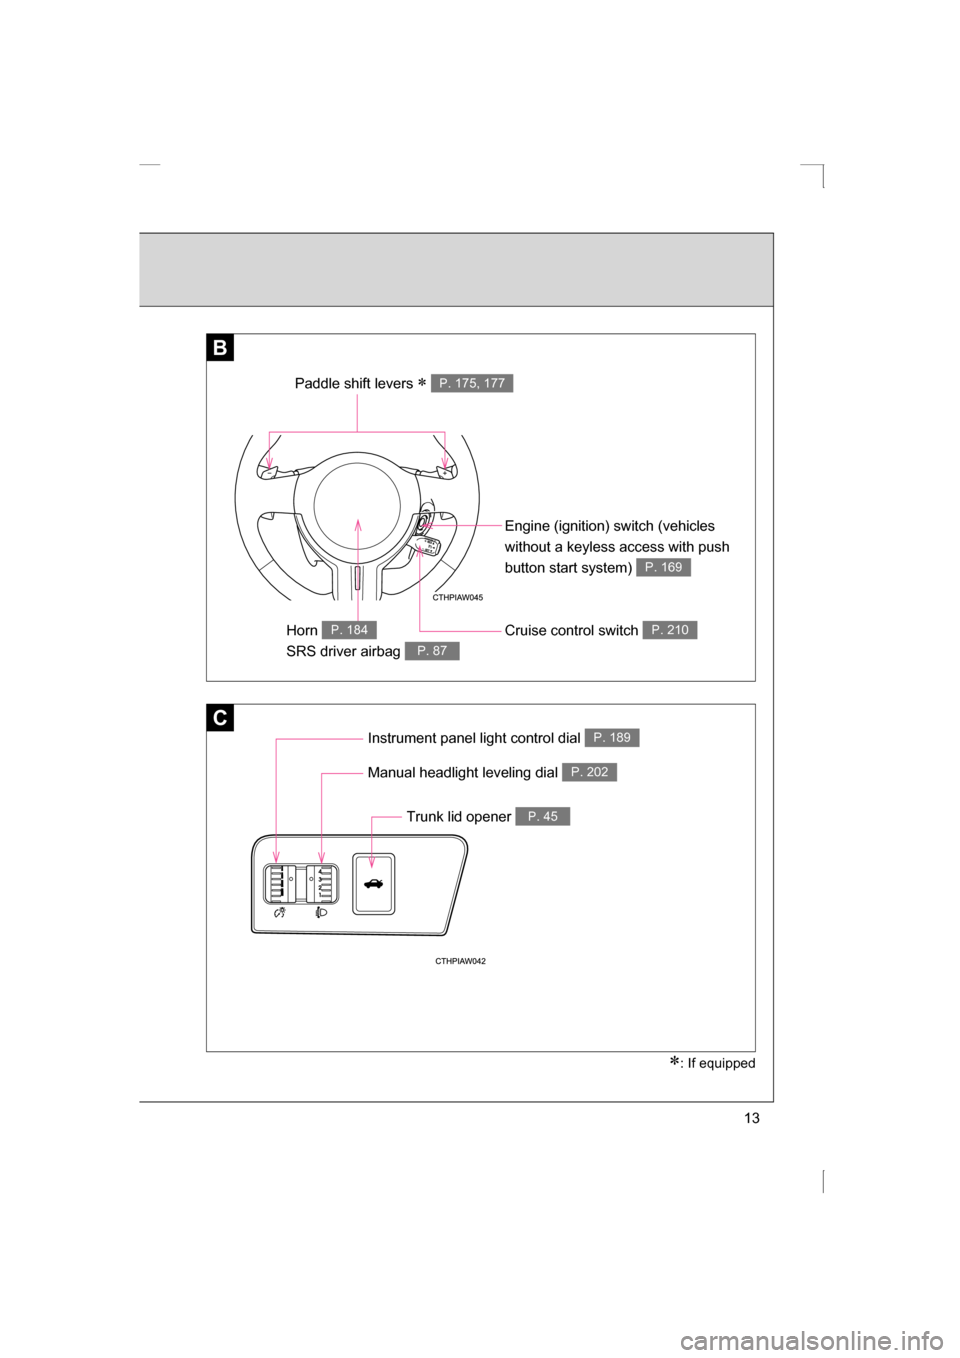
Paddle shift levers ∗ P. 175, 177
Engine (ignition) switch (vehicles
without a keyless access with push
button start system)
P. 169
Cruise control switch P. 210Horn
SRS driver airbag P. 184
P. 87
Instrument panel light control dial P. 189
Manual headlight leveling dial P. 202
Trunk lid opener P. 45
∗ : If equipped
Page 19 of 484
Before driving1
19
1-1. Key informationKeys ................................... 20
1-2. Opening, closing and locking the doors and
trunk lid
Keyless access with push button start
system ............................. 23
Remote keyless entry system ............................. 37
Doors ................................. 42
Trunk lid ............................. 45
1-3. Adjustable components (seats, mirrors, steering
wheel)
Front seats ......................... 51
Rear seats.......................... 54
Head restraints................... 56
Seatbelts ............................ 58
Steering wheel ................... 65
Anti-glare inside rear view mirror ....................... 66
Outside rear view mirrors.............................. 67 1-4. Opening and closing the
windows
Power windows .................. 70
1-5. Refueling Opening the fuel tank cap ................................... 73
1-6. Security system Engine immobilizer system ............................. 77
Theft prevention labels (U.S.A.) ............................ 80
Alarm.................................. 81
1-7. Safety information Correct driving posture....... 85 SRS airbag (Supplemental Restraint
System airbag) ................. 87
Front passenger occupant detection system ............ 122
Child restraint systems..... 132
Installing child restraints ........................ 136
Page 21 of 484
21
1-1. Key information
1
Before driving
Using the mechanical key (vehicles with a keyless access with
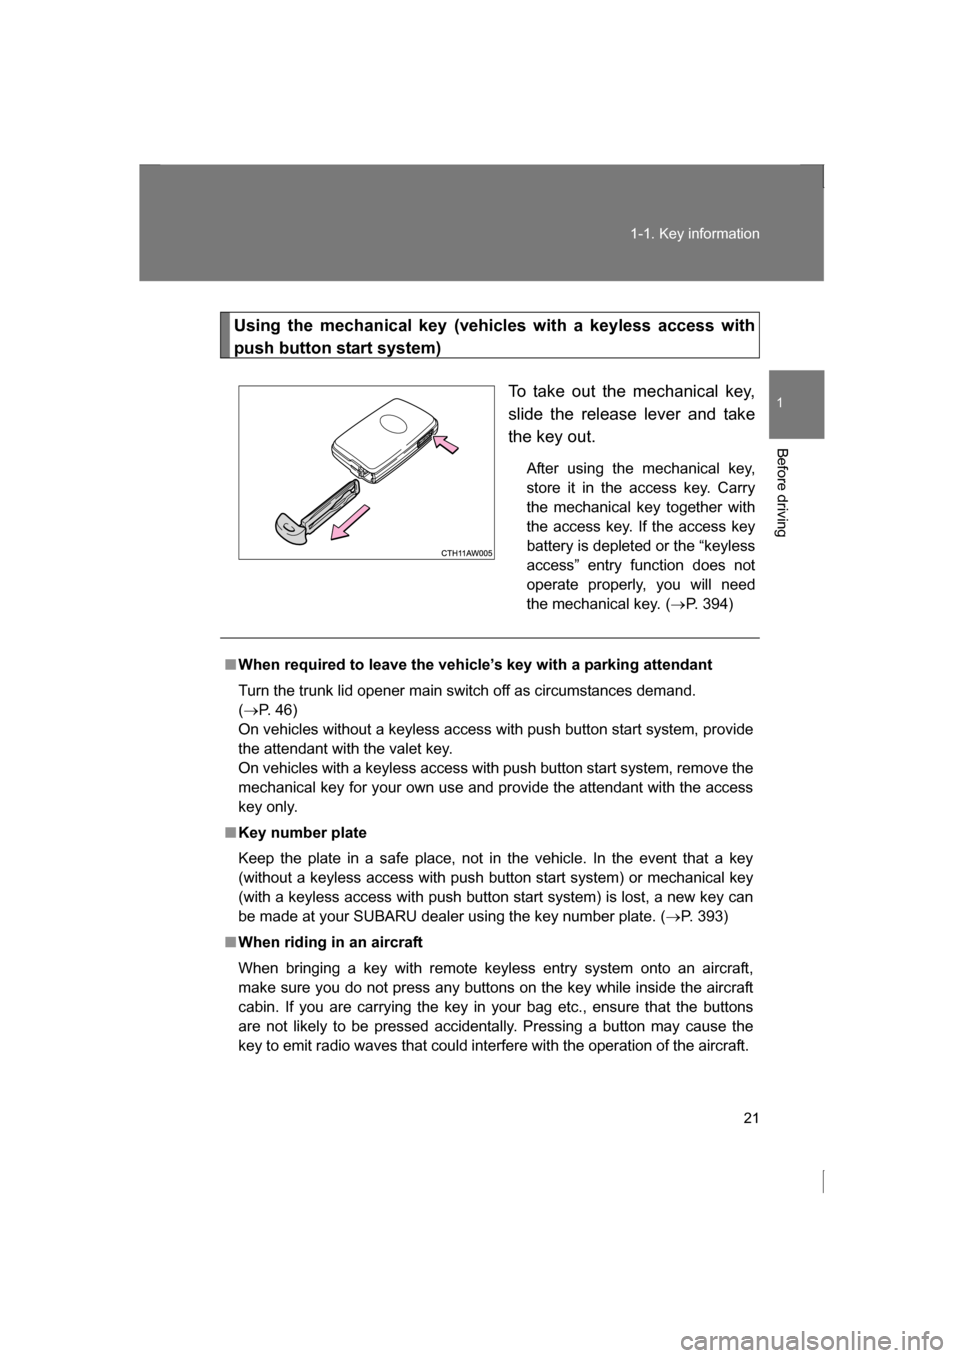
push button start system)To take out the mechanical key,
slide the release lever and take
the key out.After using the mechanical key,
store it in the access key. Carry
the mechanical key together with
the access key. If the access key
battery is depleted or the “keyless
access” entry function does not
operate properly, you will need
the mechanical key. ( → P. 394)
■When required to leave the vehicle’s key with a parking attendant
Turn the trunk lid opener main switch off as circumstances demand. (→ P. 46)
On vehicles without a keyless access with push button start system, provide
the attendant with the valet key.
On vehicles with a keyless access with push button start system, remove the
mechanical key for your own use and provide the attendant with the access
key only.
■Key number plate
Keep the plate in a safe place, not in the vehicle. In the event that a key
(without a keyless access with push button start system) or mechanical key
(with a keyless access with push button start system) is lost, a new key can
be made at your SUBARU dealer using the key number plate. ( →P. 393)
■When riding in an aircraft
When bringing a key with remote keyless entry system onto an aircraft,
make sure you do not press any buttons on the key while inside the aircraft
cabin. If you are carrying the key in your bag etc., ensure that the buttons
are not likely to be pressed accidentally. Pressing a button may cause the
key to emit radio waves that could interfere with the operation of the aircraft.
Page 23 of 484
23
1
Before driving
1-2. Opening, closing and locking the doors and trunk lid
Keyless access with push button start system∗
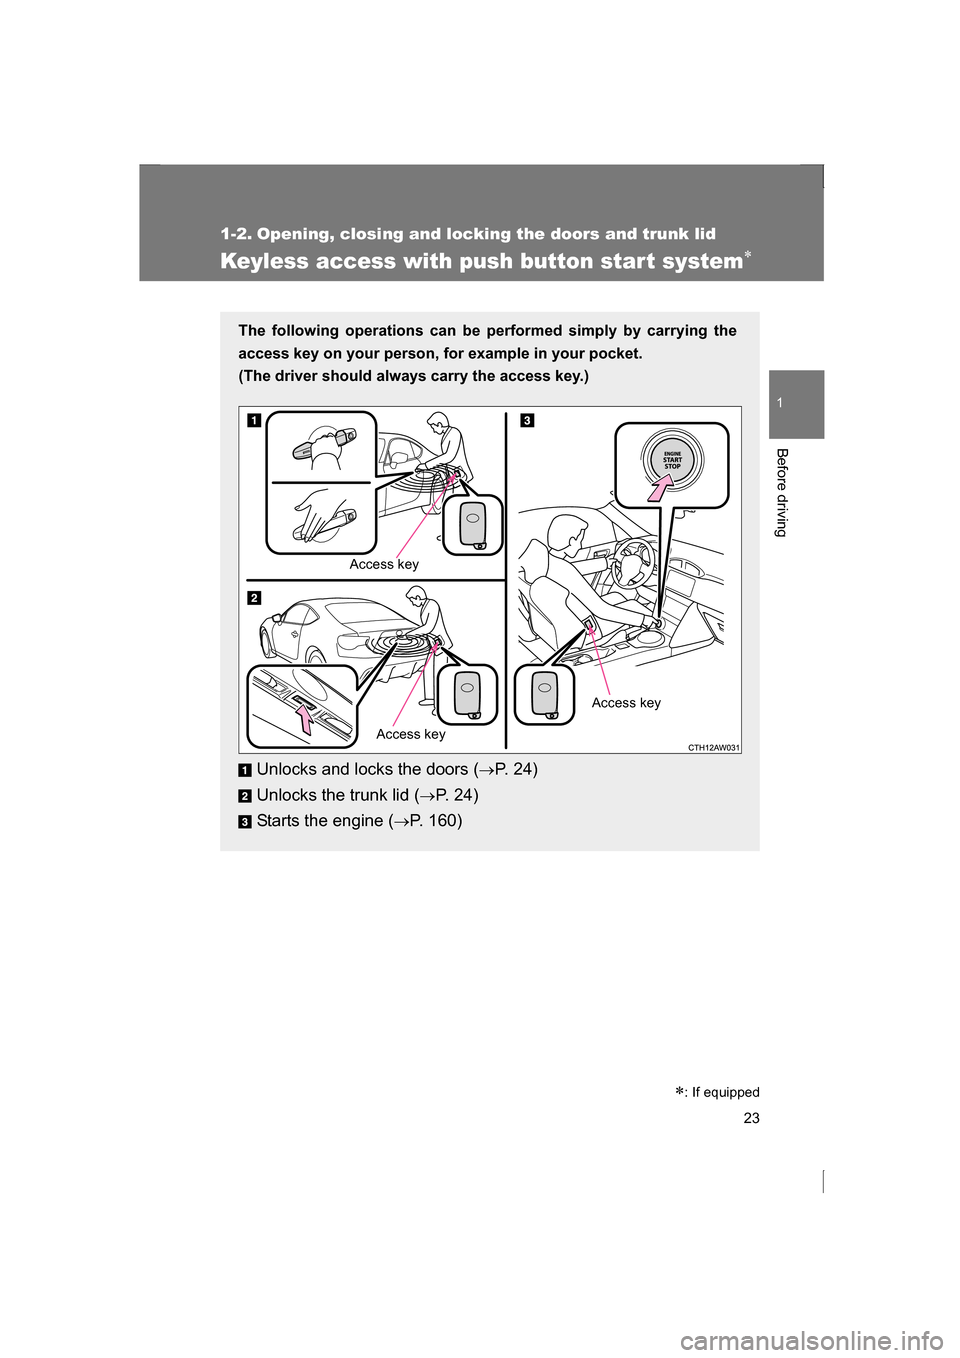
The following operations can be performed simply by carrying the
access key on your person, for example in your pocket.
(The driver should always carry the access key.)Unlocks and locks the doors ( →P. 2 4 )
Unlocks the trunk lid ( →P. 2 4 )
Starts the engine ( →P. 160)
Access key
Access key
Access key
∗: If equipped
Page 24 of 484
24
1-2. Opening, closing and locking the doors and trunk lid
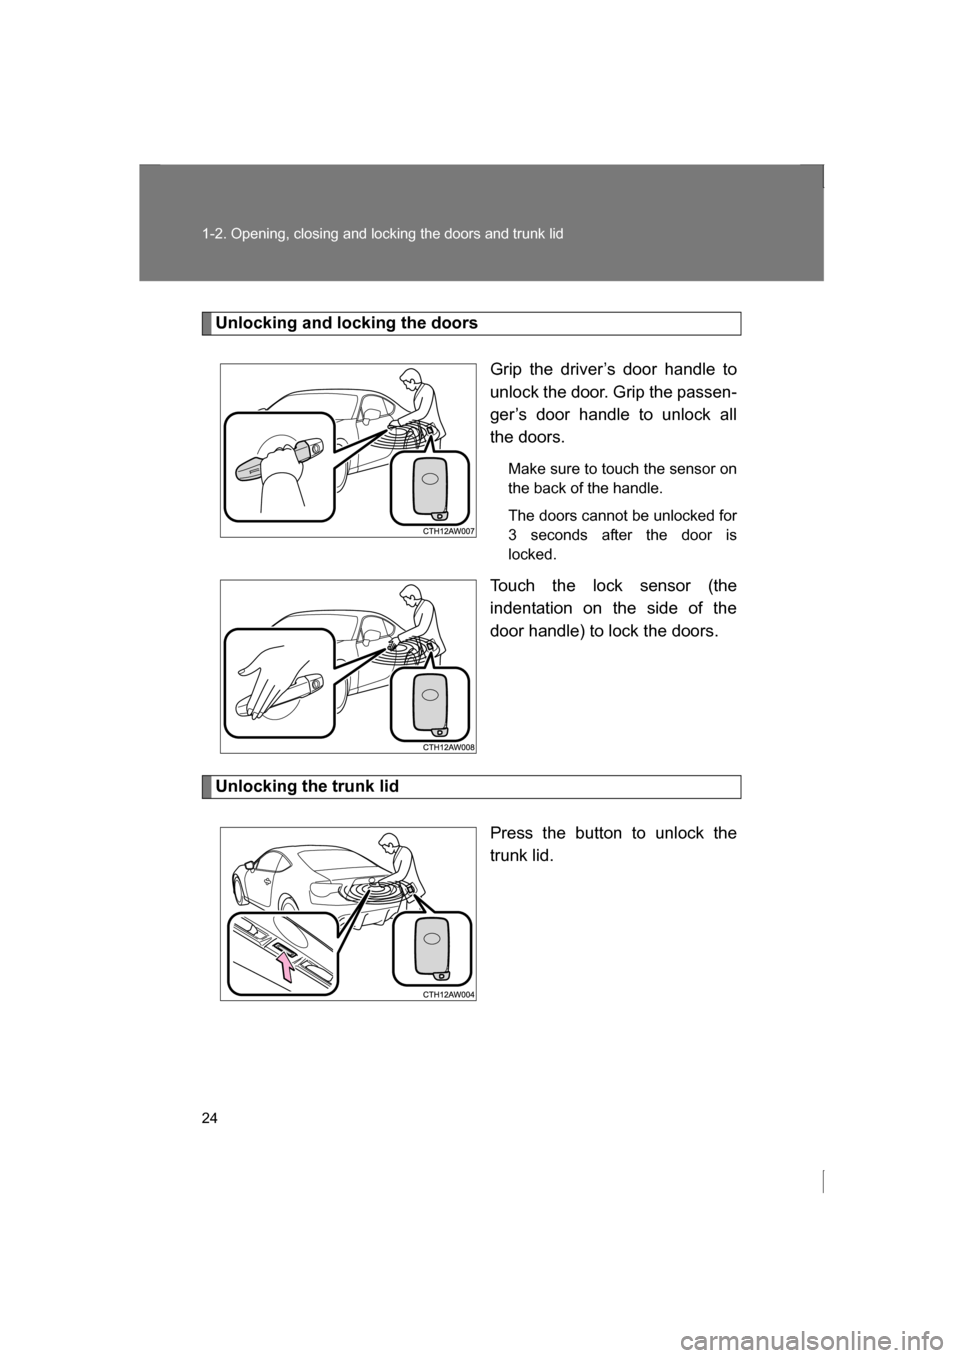
Unlocking and locking the doorsGrip the driver’s door handle to
unlock the door. Grip the passen-
ger’s door handle to unlock all
the doors.Make sure to touch the sensor on
the back of the handle.
The doors cannot be unlocked for
3 seconds after the door is
locked.
Touch the lock sensor (the
indentation on the side of the
door handle) to lock the doors.
Unlocking the trunk lid
Press the button to unlock the
trunk lid.
Page 25 of 484
25
1-2. Opening, closing and locking the doors and trunk lid
1
Before driving
Antenna location and effective range
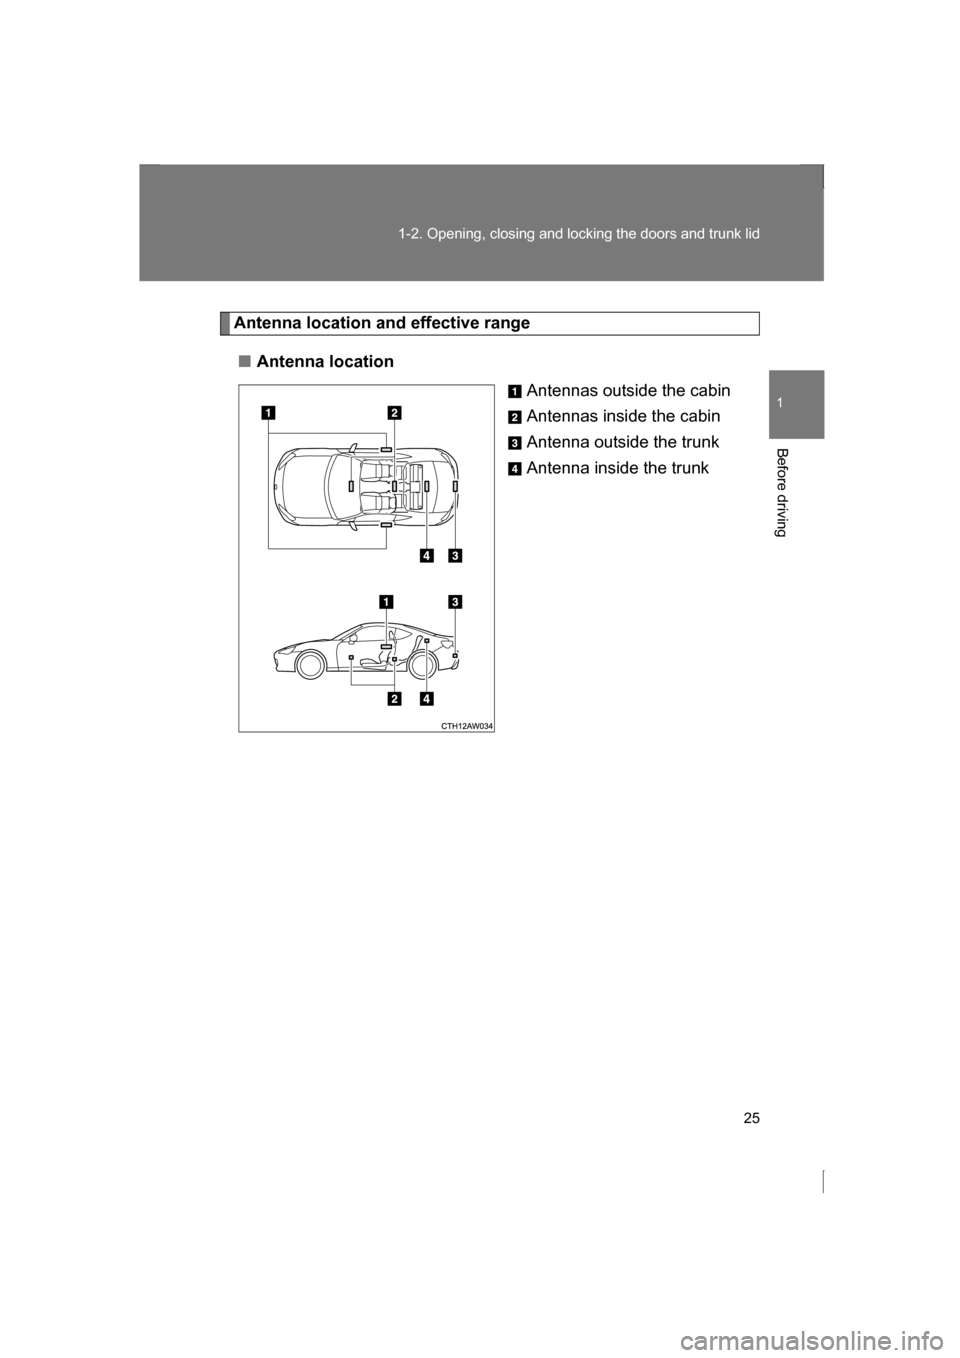
■Antenna locationAntennas outside the cabin
Antennas inside the cabin
Antenna outside the trunk
Antenna inside the trunk
Page 26 of 484
26
1-2. Opening, closing and locking the doors and trunk lid
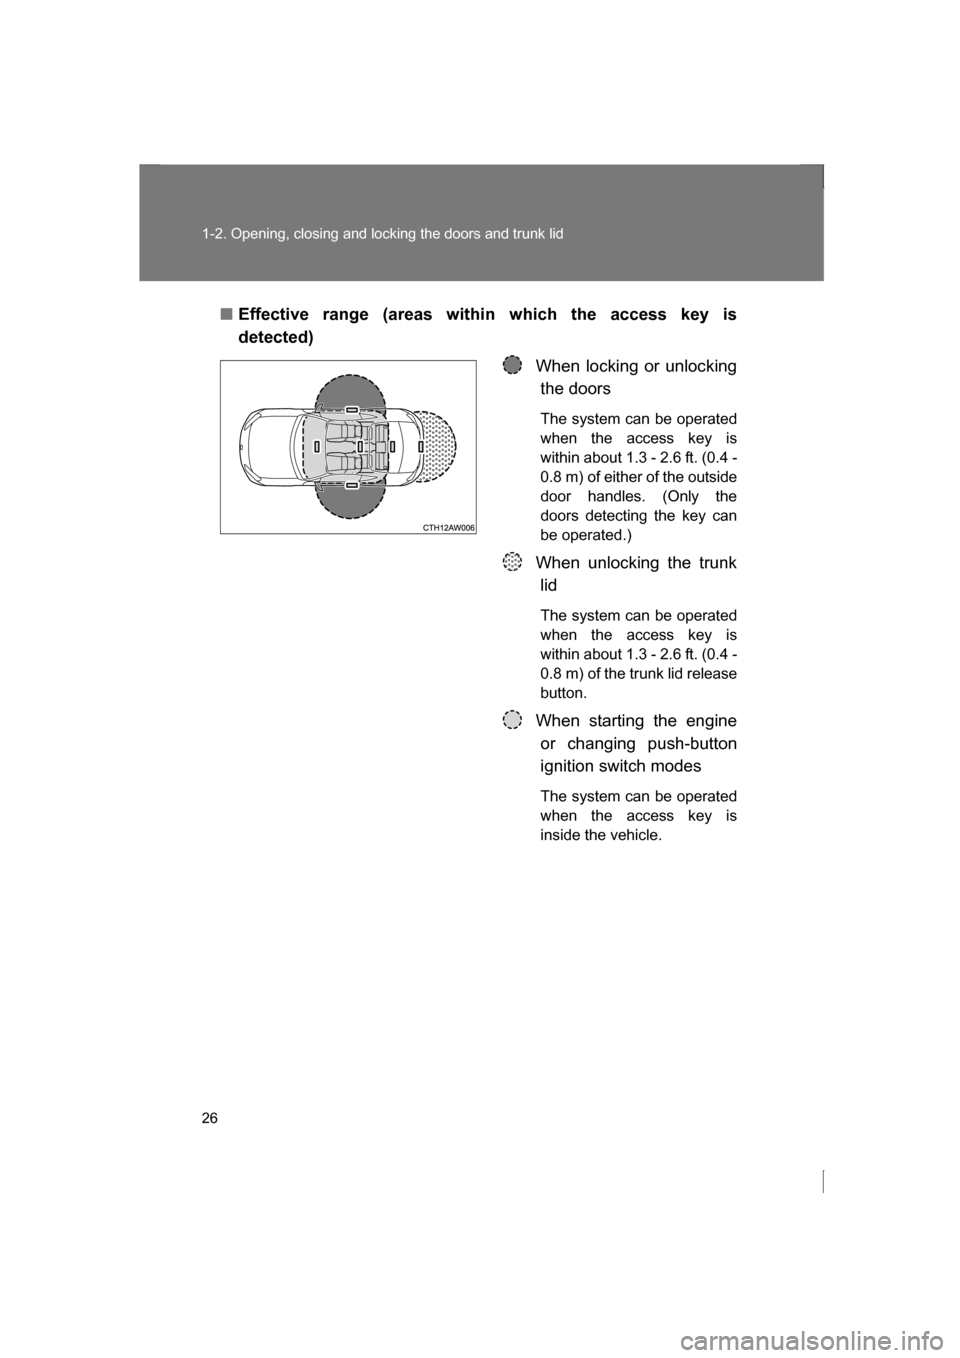
■Effective range (areas within which the access key is
detected)When locking or unlockingthe doors
The system can be operated
when the access key is
within about 1.3 - 2.6 ft. (0.4 -
0.8 m) of either of the outside
door handles. (Only the
doors detecting the key can
be operated.)
When unlocking the trunk lid
The system can be operated
when the access key is
within about 1.3 - 2.6 ft. (0.4 -
0.8 m) of the trunk lid releasebutton.
When starting the engine or changing push-button
ignition switch modes
The system can be operated
when the access key is
inside the vehicle.
Page 27 of 484
27
1-2. Opening, closing and locking the doors and trunk lid
1
Before driving
■Operation signals
A buzzer sounds and the hazard warning flashers flash to indicate that the
doors have been locked/unlocked. (Locked: once; Unlocked: twice)
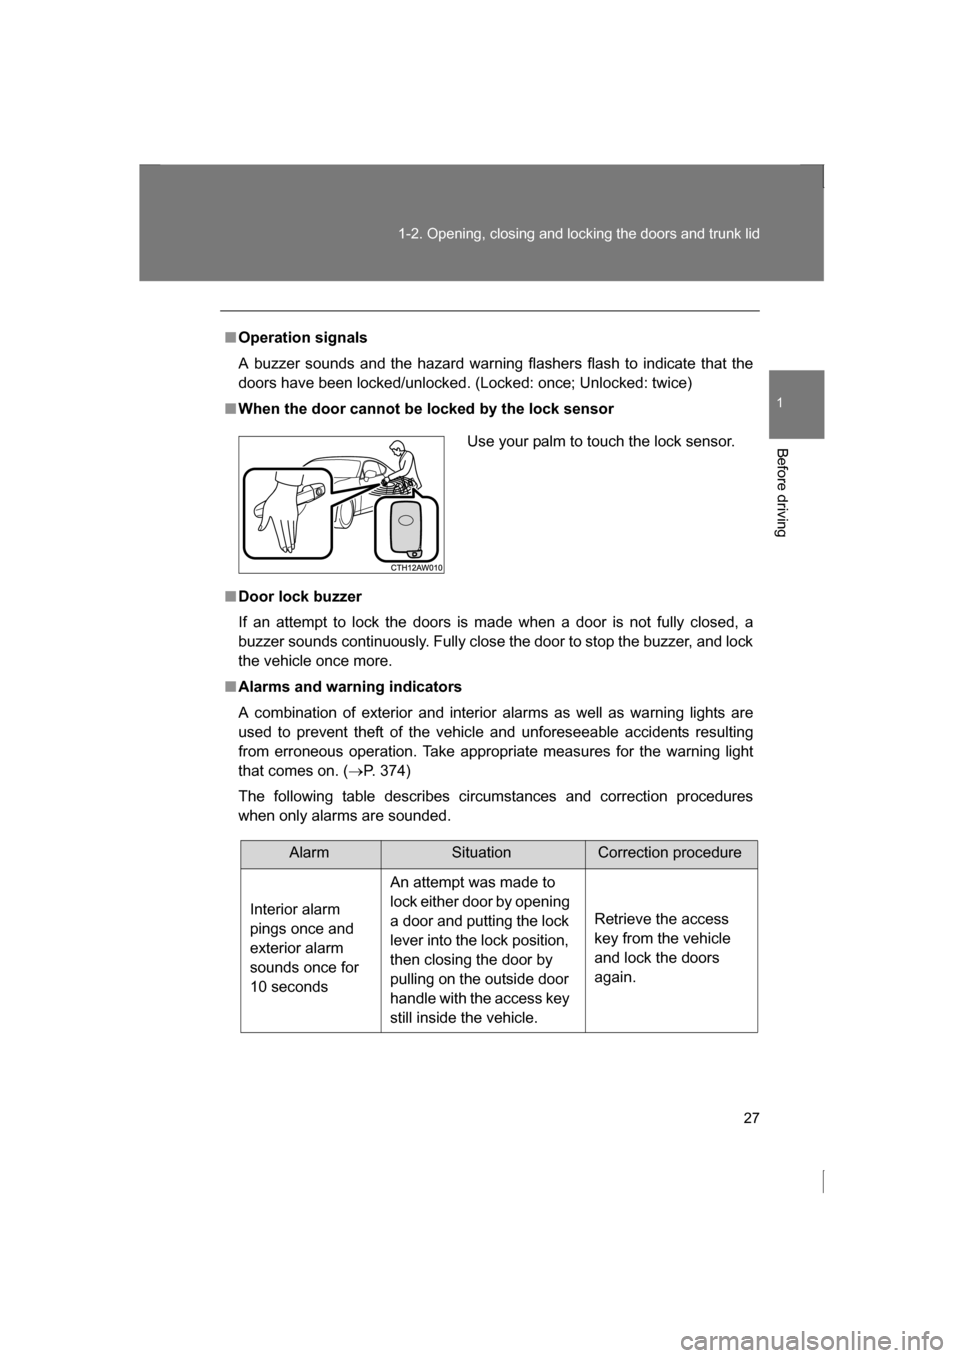
■When the door cannot be locked by the lock sensor
■Door lock buzzer
If an attempt to lock the doors is made when a door is not fully closed, a
buzzer sounds continuously. Fully close the door to stop the buzzer, and lock
the vehicle once more.
■Alarms and warning indicators
A combination of exterior and interior alarms as well as warning lights are
used to prevent theft of the vehicle and unforeseeable accidents resulting
from erroneous operation. Take appropriate measures for the warning light
that comes on. (→P. 374)
The following table describes circumstances and correction procedures
when only alarms are sounded. Use your palm to touch the lock sensor.
AlarmSituationCorrection procedure
Interior alarm
pings once and
exterior alarm
sounds once for
10 seconds An attempt was made to
lock either door by opening
a door and putting the lock
lever into the lock position,
then closing the door by
pulling on the outside door
handle with the access key
still inside the vehicle.
Retrieve the access
key from the vehicle
and lock the doors again.