ECO mode SUBARU BRZ 2017 1.G Navigation Manual
[x] Cancel search | Manufacturer: SUBARU, Model Year: 2017, Model line: BRZ, Model: SUBARU BRZ 2017 1.GPages: 334, PDF Size: 10.36 MB
Page 16 of 334
14 Introduction
Before Use
Turning the Power On or Off
This unit switches on automatically at ignition, and when started for the
first time, it displays the Navigation setting screen*. When the engine is
switched off, the unit also switches off.
* The second and subsequent times that the unit is started, the mode
screen that was last in use is displayed. If the last mode in use was the
Navigation screen, then your current position will be displayed. If it was
the Audio operation screen, then the audio selection that was last playing
will be displayed.
■Turning on the power
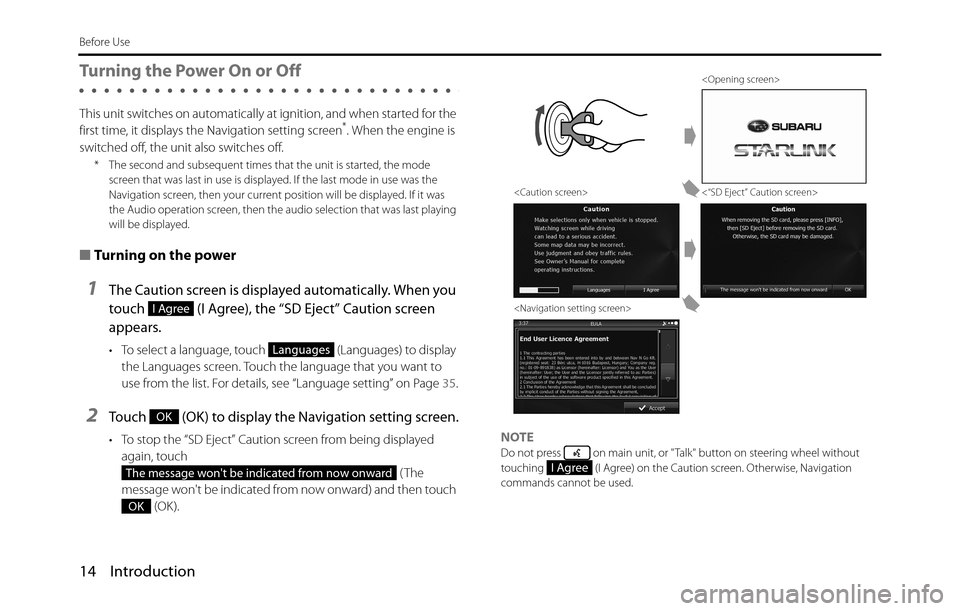
1The Caution screen is displayed automatically. When you
touch (I Agree), the “SD Eject” Caution screen
appears.
• To select a language, touch (Languages) to display
the Languages screen. Touch the language that you want to
use from the list. For details, see “Language setting” on Page 35.
2Touch (OK) to display the Navigation setting screen.
• To stop the “SD Eject” Caution screen from being displayed
again, touch
(The
message won't be indicated from now onward) and then touch
(OK).NOTEDo not press on main unit, or "Talk" button on steering wheel without
touching (I Agree) on the Caution screen. Otherwise, Navigation
commands cannot be used.
I Agree
Languages
OK
The message won't be indicated from now onward
OK
<“SD Eject” Caution screen>
I Agree
Page 54 of 334
52 Introduction
Before Use
Adjust the volume for phone calls
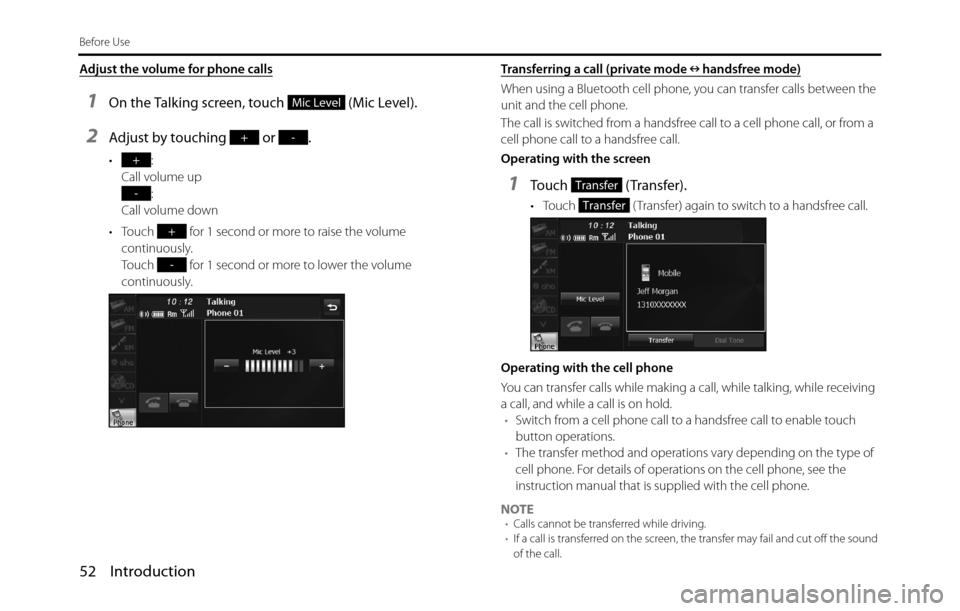
1On the Talking screen, touch (Mic Level).
2Adjust by touching or .
•:
Call volume up
:
Call volume down
• Touch for 1 second or more to raise the volume
continuously.
Touch for 1 second or more to lower the volume
continuously.Transferring a call (private mode handsfree mode)
When using a Bluetooth cell phone, you can transfer calls between the
unit and the cell phone.
The call is switched from a handsfree call to a cell phone call, or from a
cell phone call to a handsfree call.
Operating with the screen
1Touch (Transfer).
• Touch ( Transfer) again to switch to a handsfree call.
Operating with the cell phone
You can transfer calls while making a call, while talking, while receiving
a call, and while a call is on hold.
•Switch from a cell phone call to a handsfree call to enable touch
button operations.
•The transfer method and operations vary depending on the type of
cell phone. For details of operations on the cell phone, see the
instruction manual that is supplied with the cell phone.
NOTE
•Calls cannot be transferred while driving.
•If a call is transferred on the screen, the transfer may fail and cut off the sound
of the call.
Mic Level
+-
+
-
+
-
Transfer
Transfer
Page 99 of 334
Navigation 97
Read First
Quick Menu
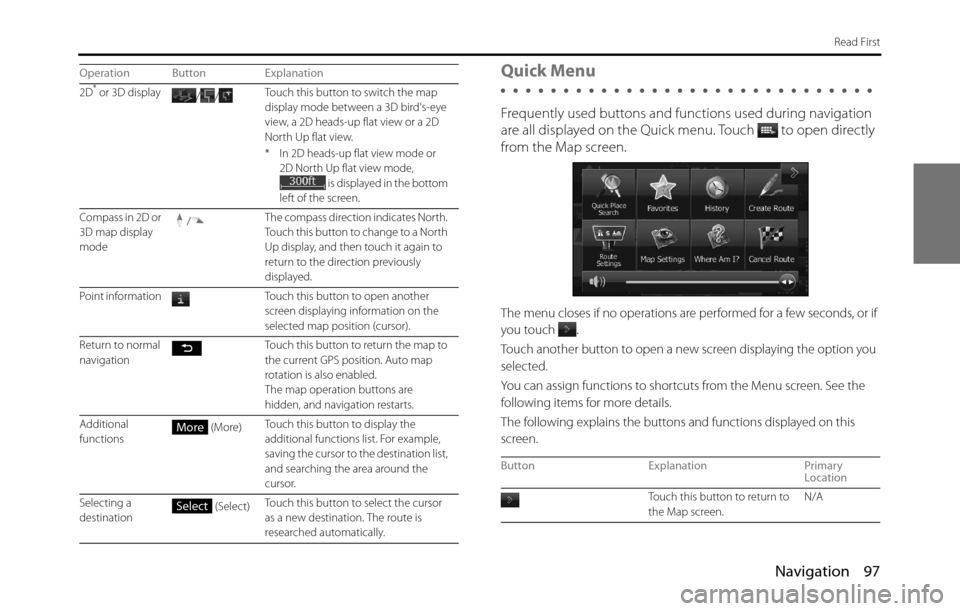
Frequently used buttons and functions used during navigation
are all displayed on the Quick menu.
Touch to open directly
from the Map screen.
The menu closes if no operations are performed for a few seconds, or if
you touch
.
Touch another button to open a new screen displaying the option you
selected.
You can assign functions to shortcuts from the Menu screen. See the
following items for more details.
The following explains the buttons and functions displayed on this
screen.
2D* or 3D display
//Touch this button to switch the map
display mode between a 3D bird's-eye
view, a 2D heads-up flat view or a 2D
North Up flat view.
* In 2D heads-up flat view mode or
2D North Up flat view mode,
is displayed in the bottom
left of the screen.
Compass in 2D or
3D map display
mode/The compass direction indicates North.
Touch this button to change to a North
Up display, and then touch it again to
return to the direction previously
displayed.
Point information Touch this button to open another
screen displaying information on the
selected map position (cursor).
Return to normal
navigation Touch this button to return the map to
the current GPS position. Auto map
rotation is also enabled.
The map operation buttons are
hidden, and navigation restarts.
Additional
functions (More)Touch this button to display the
additional functions list. For example,
saving the cursor to the destination list,
and searching the area around the
cursor.
Selecting a
destination (Select)Touch this button to select the cursor
as a new destination. The route is
researched automatically. Operation Button Explanation
More
Select
Button Explanation Primary
Location
Touch this button to return to
the Map screen. N/A
Page 110 of 334
108 Navigation
Navigation
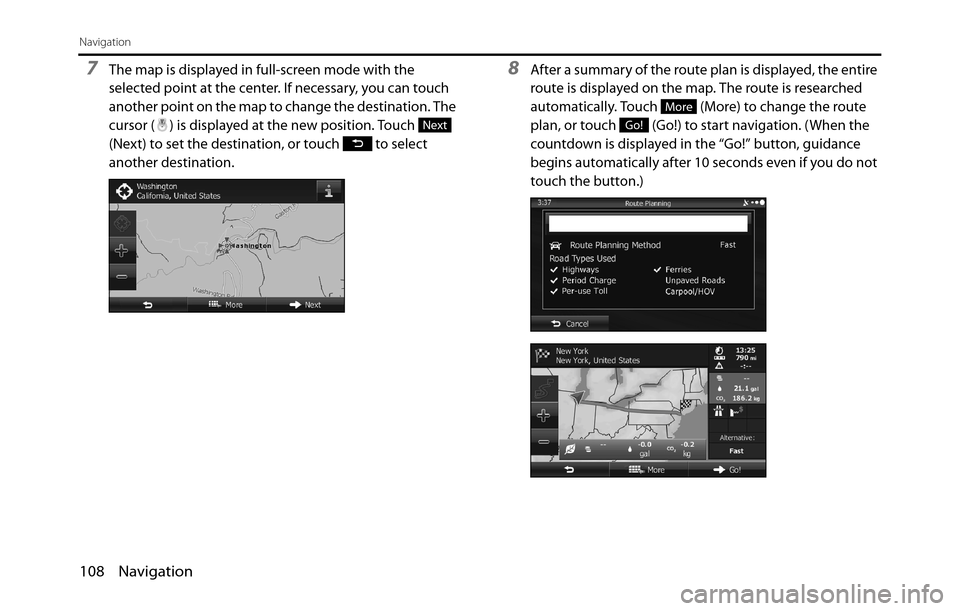
7The map is displayed in full-screen mode with the
selected point at the center. If necessary, you can touch
another point on the map to change the destination. The
cursor ( ) is displayed at the new position. Touch
(Next) to set the destination, or touch to select
another destination.8After a summary of the route plan is displayed, the entire
route is displayed on the map. The route is researched
automatically. Touch (More) to change the route
plan, or touch (Go!) to start navigation. (When the
countdown is displayed in the “Go!” button, guidance
begins automatically after 10 seconds even if you do not
touch the button.)
Next
More
Go!
Page 112 of 334
110 Navigation
Navigation
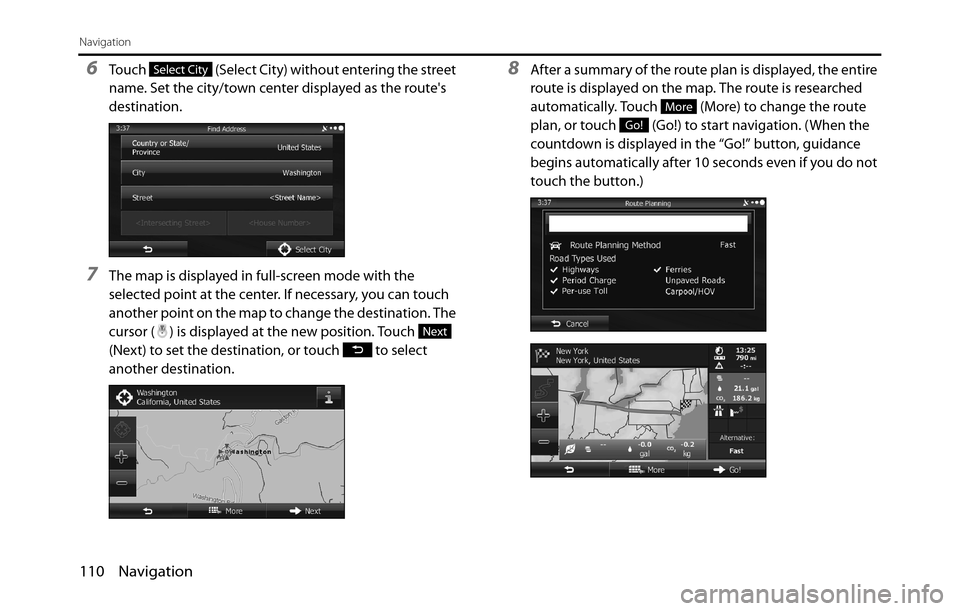
6Touch (Select City) without entering the street
name. Set the city/town center displayed as the route's
destination.
7The map is displayed in full-screen mode with the
selected point at the center. If necessary, you can touch
another point on the map to change the destination. The
cursor ( ) is displayed at the new position. Touch
(Next) to set the destination, or touch to select
another destination.
8After a summary of the route plan is displayed, the entire
route is displayed on the map. The route is researched
automatically. Touch (More) to change the route
plan, or touch (Go!) to start navigation. (When the
countdown is displayed in the “Go!” button, guidance
begins automatically after 10 seconds even if you do not
touch the button.)Select City
Next
More
Go!
Page 115 of 334
Navigation 113
Navigation
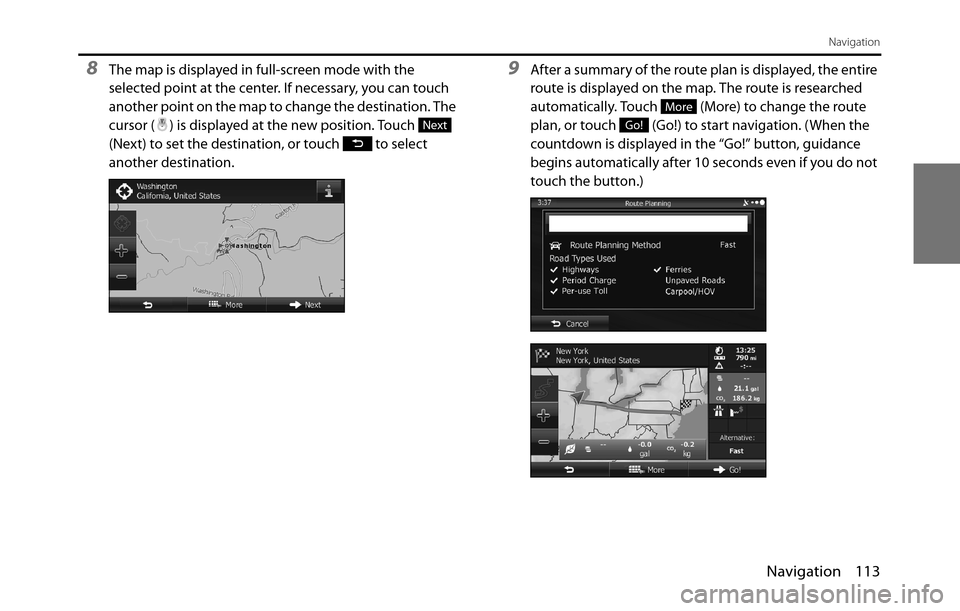
8The map is displayed in full-screen mode with the
selected point at the center. If necessary, you can touch
another point on the map to change the destination. The
cursor ( ) is displayed at the new position. Touch
(Next) to set the destination, or touch to select
another destination.9After a summary of the route plan is displayed, the entire
route is displayed on the map. The route is researched
automatically. Touch (More) to change the route
plan, or touch (Go!) to start navigation. (When the
countdown is displayed in the “Go!” button, guidance
begins automatically after 10 seconds even if you do not
touch the button.)
Next
More
Go!
Page 118 of 334
116 Navigation
Navigation
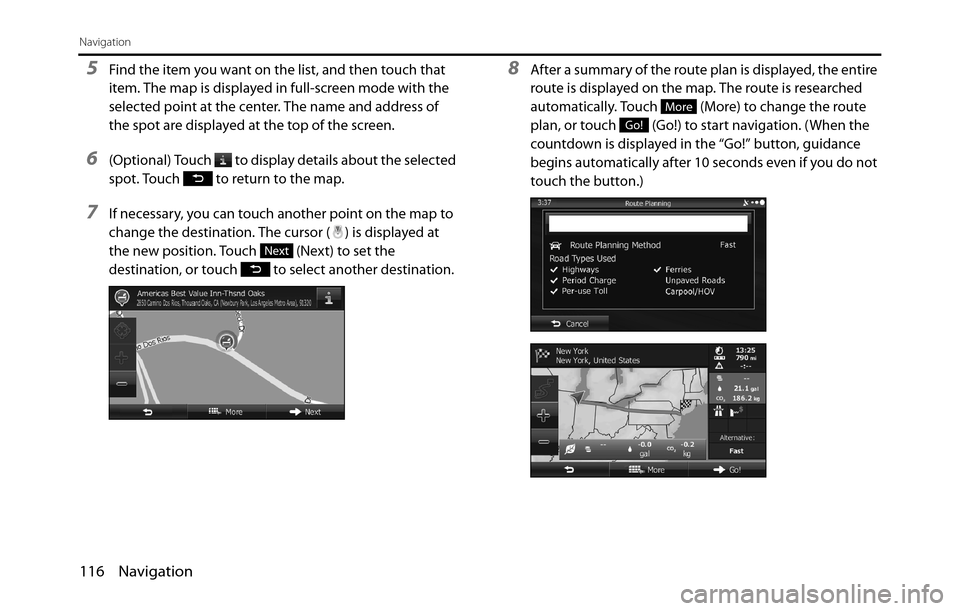
5Find the item you want on the list, and then touch that
item. The map is displayed in full-screen mode with the
selected point at the center. The name and address of
the spot are displayed at the top of the screen.
6(Optional) Touch to display details about the selected
spot. Touch to return to the map.
7If necessary, you can touch another point on the map to
change the destination. The cursor ( ) is displayed at
the new position. Touch (Next) to set the
destination, or touch to select another destination.
8After a summary of the route plan is displayed, the entire
route is displayed on the map. The route is researched
automatically. Touch (More) to change the route
plan, or touch (Go!) to start navigation. (When the
countdown is displayed in the “Go!” button, guidance
begins automatically after 10 seconds even if you do not
touch the button.)
Next
More
Go!
Page 132 of 334
130 Navigation
Navigation
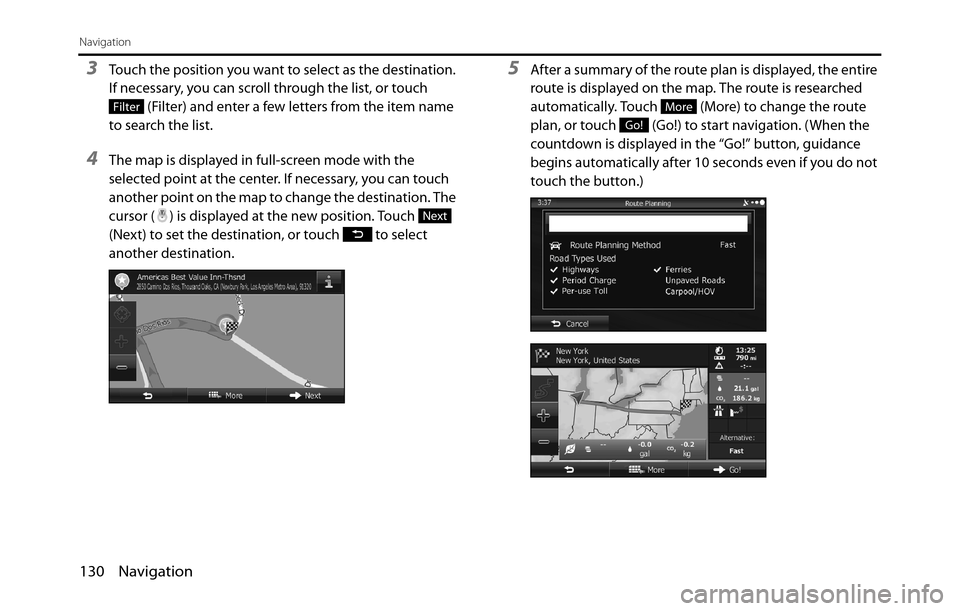
3Touch the position you want to select as the destination.
If necessary, you can scroll through the list, or touch
(Filter) and enter a few letters from the item name
to search the list.
4The map is displayed in full-screen mode with the
selected point at the center. If necessary, you can touch
another point on the map to change the destination. The
cursor ( ) is displayed at the new position. Touch
(Next) to set the destination, or touch to select
another destination.
5After a summary of the route plan is displayed, the entire
route is displayed on the map. The route is researched
automatically. Touch (More) to change the route
plan, or touch (Go!) to start navigation. (When the
countdown is displayed in the “Go!” button, guidance
begins automatically after 10 seconds even if you do not
touch the button.)
Filter
Next
More
Go!
Page 133 of 334
Navigation 131
Navigation
Selecting a Frequently Used Destination (Smart
History)
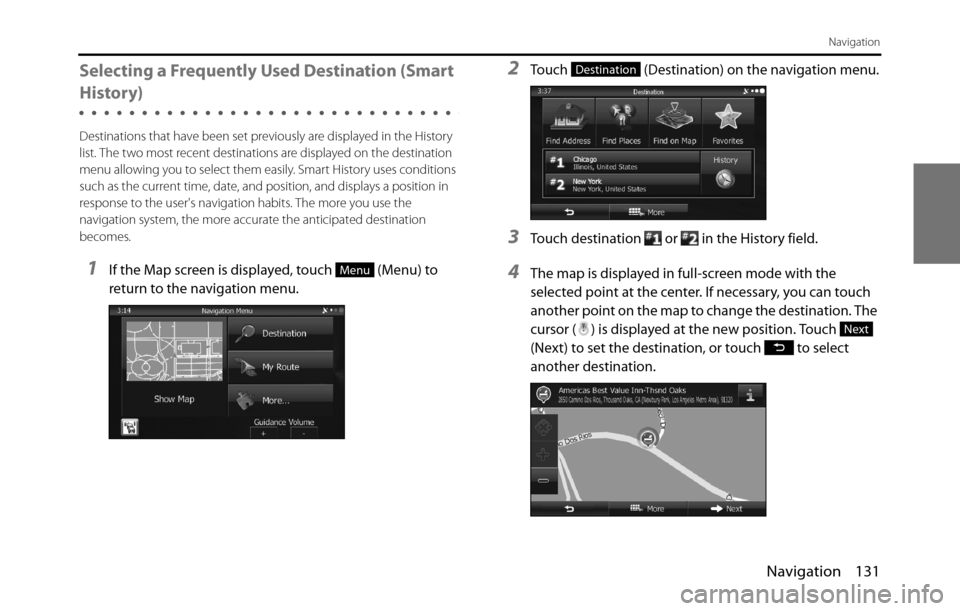
Destinations that have been set previously are displayed in the History
list. The two most recent destinations are displayed on the destination
menu allowing you to select them easily. Smart History uses conditions
such as the current time, date, and position, and displays a position in
response to the user's navigation habits. The more you use the
navigation system, the more accurate the anticipated destination
becomes.
1If the Map screen is displayed, touch (Menu) to
return to the navigation menu.
2Touch (Destination) on the navigation menu.
3Touch destination or in the History field.
4The map is displayed in full-screen mode with the
selected point at the center. If necessary, you can touch
another point on the map to change the destination. The
cursor ( ) is displayed at the new position. Touch
(Next) to set the destination, or touch to select
another destination.Menu
Destination
Next
Page 135 of 334
Navigation 133
Navigation
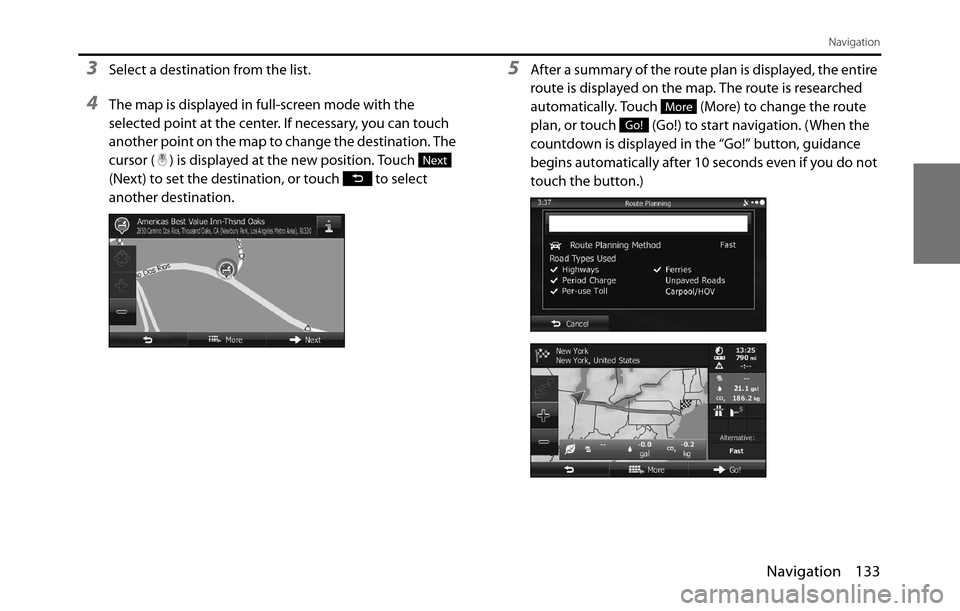
3Select a destination from the list.
4The map is displayed in full-screen mode with the
selected point at the center. If necessary, you can touch
another point on the map to change the destination. The
cursor ( ) is displayed at the new position. Touch
(Next) to set the destination, or touch to select
another destination.
5After a summary of the route plan is displayed, the entire
route is displayed on the map. The route is researched
automatically. Touch (More) to change the route
plan, or touch (Go!) to start navigation. (When the
countdown is displayed in the “Go!” button, guidance
begins automatically after 10 seconds even if you do not
touch the button.)
Next
More
Go!