buttons SUBARU BRZ 2017 1.G Navigation Manual
[x] Cancel search | Manufacturer: SUBARU, Model Year: 2017, Model line: BRZ, Model: SUBARU BRZ 2017 1.GPages: 334, PDF Size: 10.36 MB
Page 99 of 334
Navigation 97
Read First
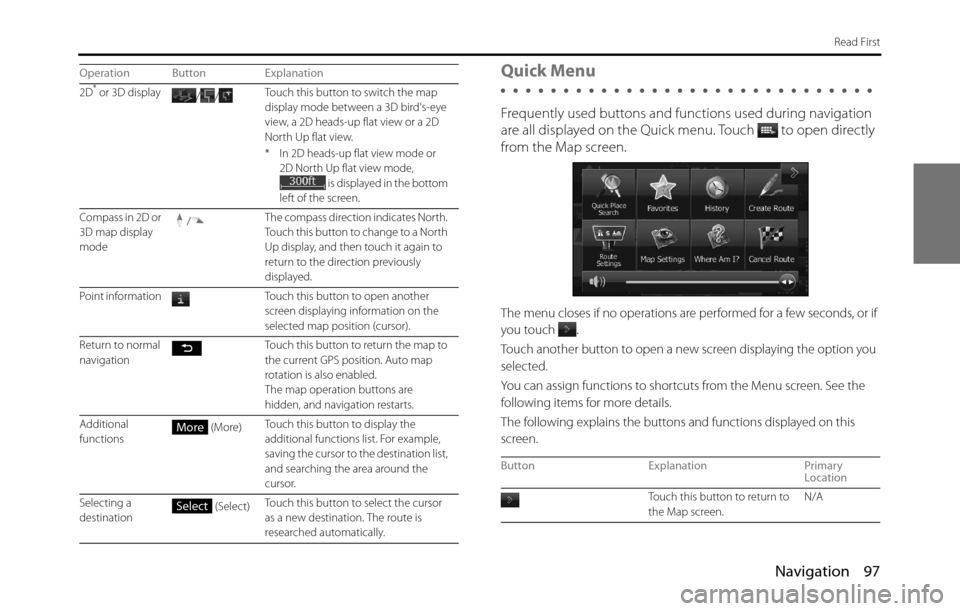
Quick Menu
Frequently used buttons and functions used during navigation
are all displayed on the Quick menu.
Touch to open directly
from the Map screen.
The menu closes if no operations are performed for a few seconds, or if
you touch
.
Touch another button to open a new screen displaying the option you
selected.
You can assign functions to shortcuts from the Menu screen. See the
following items for more details.
The following explains the buttons and functions displayed on this
screen.
2D* or 3D display
//Touch this button to switch the map
display mode between a 3D bird's-eye
view, a 2D heads-up flat view or a 2D
North Up flat view.
* In 2D heads-up flat view mode or
2D North Up flat view mode,
is displayed in the bottom
left of the screen.
Compass in 2D or
3D map display
mode/The compass direction indicates North.
Touch this button to change to a North
Up display, and then touch it again to
return to the direction previously
displayed.
Point information Touch this button to open another
screen displaying information on the
selected map position (cursor).
Return to normal
navigation Touch this button to return the map to
the current GPS position. Auto map
rotation is also enabled.
The map operation buttons are
hidden, and navigation restarts.
Additional
functions (More)Touch this button to display the
additional functions list. For example,
saving the cursor to the destination list,
and searching the area around the
cursor.
Selecting a
destination (Select)Touch this button to select the cursor
as a new destination. The route is
researched automatically. Operation Button Explanation
More
Select
Button Explanation Primary
Location
Touch this button to return to
the Map screen. N/A
Page 100 of 334
98 Navigation
Read First
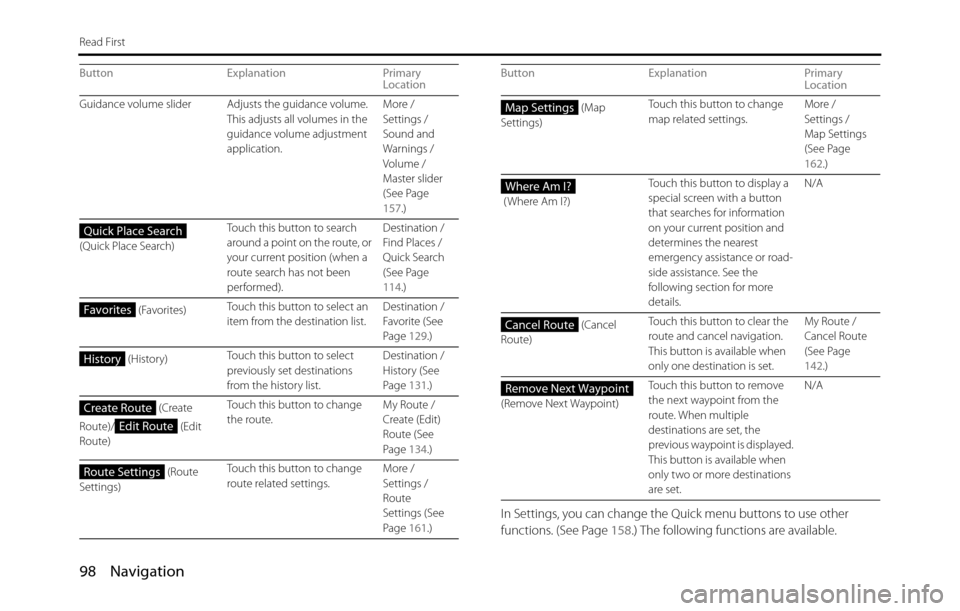
In Settings, you can change the Quick menu buttons to use other
functions. (See Page 158.) The following functions are available.
Guidance volume slider Adjusts the guidance volume.
This adjusts all volumes in the
guidance volume adjustment
application.More /
Settings /
Sound and
Warnings /
Volume /
Master slider
(See Page
157.)
(Quick Place Search)Touch this button to search
around a point on the route, or
your current position (when a
route search has not been
performed).Destination /
Find Places /
Quick Search
(See Page
114.)
(Favorites)Touch this button to select an
item from the destination list.Destination /
Favorite (See
Page 129.)
(History)Touch this button to select
previously set destinations
from the history list.Destination /
History (See
Page 131.)
(Create
Route)/ (Edit
Route)Touch this button to change
the route.My Route /
Create (Edit)
Route (See
Page 134.)
(Route
Settings)Touch this button to change
route related settings.More /
Settings /
Route
Settings (See
Page 161.) Button Explanation Primary
Location
Quick Place Search
Favorites
History
Create Route
Edit Route
Route Settings
(Map
Settings)Touch this button to change
map related settings.More /
Settings /
Map Settings
(See Page
162.)
( Where Am I?)Touch this button to display a
special screen with a button
that searches for information
on your current position and
determines the nearest
emergency assistance or road-
side assistance. See the
following section for more
details.N/A
(Cancel
Route)Touch this button to clear the
route and cancel navigation.
This button is available when
only one destination is set.My Route /
Cancel Route
(See Page
142.)
(Remove Next Waypoint)Touch this button to remove
the next waypoint from the
route. When multiple
destinations are set, the
previous waypoint is displayed.
This button is available when
only two or more destinations
are set.N/A Button Explanation Primary
LocationMap Settings
Where Am I?
Cancel Route
Remove Next Waypoint
Page 129 of 334
Navigation 127
Navigation
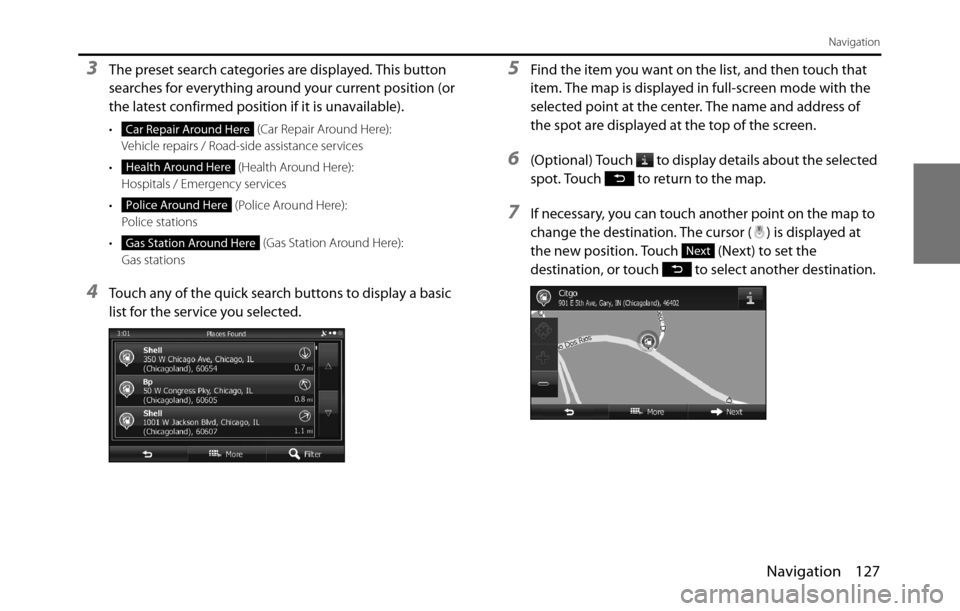
3The preset search categories are displayed. This button
searches for everything around your current position (or
the latest confirmed position if it is unavailable).
• (Car Repair Around Here):
Vehicle repairs / Road-side assistance services
• (Health Around Here):
Hospitals / Emergency services
• (Police Around Here):
Police stations
• (Gas Station Around Here):
Gas stations
4Touch any of the quick search buttons to display a basic
list for the service you selected.
5Find the item you want on the list, and then touch that
item. The map is displayed in full-screen mode with the
selected point at the center. The name and address of
the spot are displayed at the top of the screen.
6(Optional) Touch to display details about the selected
spot. Touch to return to the map.
7If necessary, you can touch another point on the map to
change the destination. The cursor ( ) is displayed at
the new position. Touch (Next) to set the
destination, or touch to select another destination.
Car Repair Around Here
Health Around Here
Police Around Here
Gas Station Around HereNext
Page 137 of 334
Navigation 135
Navigation
Displaying the Entire Route on the Map
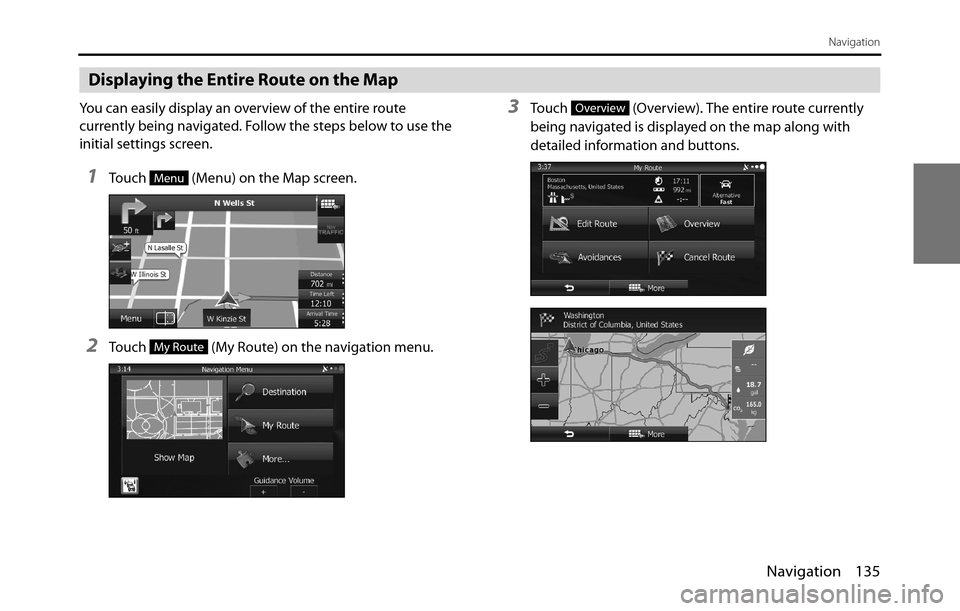
You can easily display an overview of the entire route
currently being navigated. Follow the steps below to use the
initial settings screen.
1Touch (Menu) on the Map screen.
2Touch (My Route) on the navigation menu.
3Touch (Overview). The entire route currently
being navigated is displayed on the map along with
detailed information and buttons.
Menu
My Route
Overview
Page 140 of 334
138 Navigation
Navigation
Changing the Route
When navigation has already begun, you can change the
route being navigated by using one of the following
methods. The methods are explained in the following section.
Selecting a new destination after the route has
been set: new route, waypoint, and final
destination
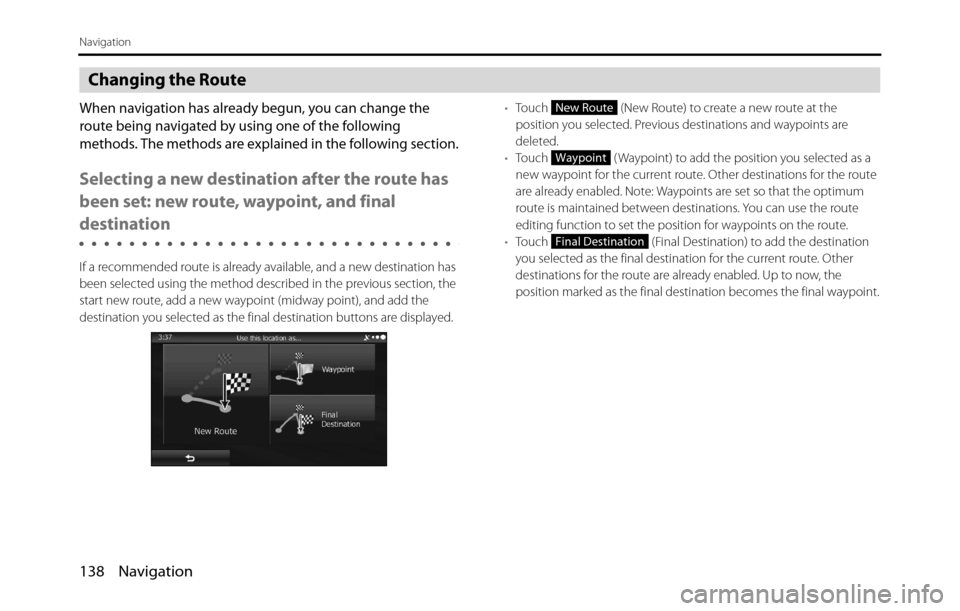
If a recommended route is already available, and a new destination has
been selected using the method described in the previous section, the
start new route, add a new waypoint (midway point), and add the
destination you selected as the final destination buttons are displayed.•Touch (New Route) to create a new route at the
position you selected. Previous destinations and waypoints are
deleted.
•Touch ( Waypoint) to add the position you selected as a
new waypoint for the current route. Other destinations for the route
are already enabled. Note: Waypoints are set so that the optimum
route is maintained between destinations. You can use the route
editing function to set the position for waypoints on the route.
•Touch (Final Destination) to add the destination
you selected as the final destination for the current route. Other
destinations for the route are already enabled. Up to now, the
position marked as the final destination becomes the final waypoint.
New Route
Waypoint
Final Destination
Page 149 of 334
Navigation 147
Navigation
Displaying a Simulation of the Route
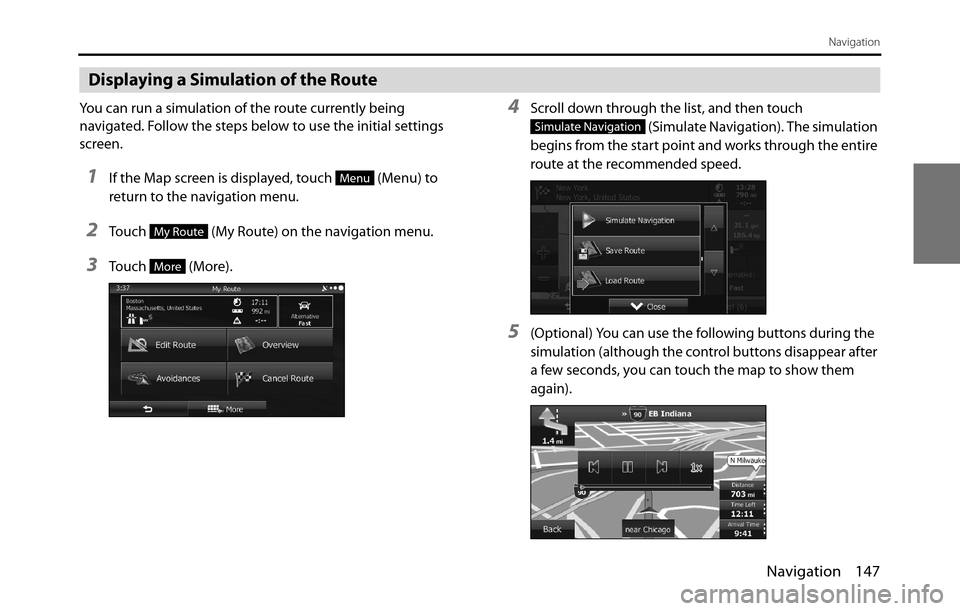
You can run a simulation of the route currently being
navigated. Follow the steps below to use the initial settings
screen.
1If the Map screen is displayed, touch (Menu) to
return to the navigation menu.
2Touch (My Route) on the navigation menu.
3Touch (More).
4Scroll down through the list, and then touch
(Simulate Navigation). The simulation
begins from the start point and works through the entire
route at the recommended speed.
5(Optional) You can use the following buttons during the
simulation (although the control buttons disappear after
a few seconds, you can touch the map to show them
again).
Menu
My Route
More
Simulate Navigation
Page 159 of 334
Navigation 157
Reference Data
Sound and Warnings
Performs volume adjustment or changes the voice guidance language.
Also enables various warnings and warning settings.
• (Volume):
Touch this button to adjust various volumes in the application. The
type and buttons for various different volumes is displayed on a new
screen. See the following items for more details.
• ( Voice Language):
This button displays the current language for voice guidance. Touch
this button to select a new language/narrator from the available
languages and list of narrators. When you touch an item from the list,
a sample of the audio is played back. Touch after selecting a
new voice language.
• (TTS Pro):
Touch this button to select the frequency of voice information, as
well as turning on or off various voice information such as
information on traffic conditions.• (Verbosity Level):
You can select the Verbosity Level from “Minimal”, “Compact”, or
“Verbose”.
• ( Voice Recognition):
Touch this button to turn on or off talk back voice recognition results,
or change the voice recognition method.
• (Alert Point Settings):
Displays driver warning information on the map. Touch this button
to turn these warnings on or off, and set how far from the danger the
warning should be generated. You can make individual settings for
each type of warning.
• ( Warning Sign Alerts):
Displays driver warning information on the map. Touch this button
to turn these warnings on or off, and set how far from the danger the
warning should be generated. You can make individual settings for
each type of warning.
You can adjust the volume for the following voice categories.
•Guidance:
Changes the volume for the guidance voice (when guiding using a
narrator).
•Alert Beeps:
Changes the volume for audio warnings (the beep).
Adjustment buttons for each audio classification:
•Volume slider:
Adjusts the volume of the associated audio. CAUTION
Be sure to set the volume of the audio at an appropriate level.
Improper volume setting may result in hearing damage or a
traffic accident.
Volume
Voice Language
TTS Pro
Verbosity Level
Voice Recognition
Alert Point Settings
Warning Sign Alerts
Page 184 of 334
182 Audio and Visual
Before Using the Audio and Visual System
Precautions When Using the System
WA R N I N G
Read this manual first
Read this manual carefully before using the audio and visual
system. We are not liable for accidents or other problems
resulting from failure to follow the instructions in this
manual.
Avoid operating the audio and visual system while driving
You should stop the vehicle in a safe place before operating
the audio and visual system. For safety, some of the audio
and visual system's functions cannot be used unless the
vehicle is stopped.
If you stare at the display too much or operate the buttons of
the system while driving, the audio and visual system could
distract your attention from the current traffic conditions. Be
sure to enter as much information as possible into the
system before departing. Also, be sure to stop your vehicle
in a safe place if you need to enter information.
The touch button on the display screen that cannot be used
have their colors toned down. Buttons on the touch screen
that cannot be used have their colors toned down.
Operating the audio and visual system while driving could
cause your attention to be distracted from the current traffic
conditions. This could result in a severe or fatal accident. Follow
the descriptions of all operations and the instructions for
safety given in this manual without fail.
Look at the audio and visual system screen only when
necessary
When you need to look at the audio and visual system
screen, do so for the shortest time possible. Looking away
from the road for too long could lead to an accident.
Keep the volume low enough for you to hear outside sounds
Keep the system's volume level low enough for you to be
able to hear outside sounds while driving. Otherwise, you
may not be able to react appropriately to traffic conditions,
resulting in an accident.
Page 185 of 334
Audio and Visual 183
Before Using the Audio and Visual System
About the audio and visual system
•Subjecting the control buttons or liquid crystal display to excessive
shock could result in audio and visual screen deformation or other
damage.
•Keep any heat source (including lighted cigarettes) away from the
audio and visual system. If a heat source is brought into contact with
the audio and visual system cabinet or panel, they could be
deformed or otherwise degraded.
•In extreme cold, the audio and visual screen may operate sluggishly
and the display may dim. Such conditions do not indicate a problem.
They will disappear when the temperature inside the vehicle rises to
a normal temperature.
•Tiny black and white dots may occasionally appear on the liquid
crystal display. These dots are a normal characteristic of the display.
They do not indicate a problem.
•When the audio and visual screen requires cleaning, gently wipe it
with a silicone cloth or other soft cloth. If necessary, spray the cloth
with neutral cleaning fluid. Be sure to wipe away any cleaning fluid
left on the audio and visual screen. Do not spray the cleaning fluid
directly onto the audio and visual screen. Spraying cleaning fluid
directly onto the audio and visual screen could cause an adverse
effect on internal components. It is also not recommended to wipe
the audio and visual screen with a stiff cloth or attempt to clean it
using thinners, alcohol, or any other volatile solvent. Doing so could
leave scratches or erase the control button labels. CAUTION
Never disassemble or modify the audio and visual system
Never disassemble or modify the system. Doing so may lead
to a fire, an electric shock, or some other type of accident.
Do not continue using the audio and visual system if it
malfunctions
If the system shows any sign of malfunctioning (for example,
the monitor displays no picture), stop using it immediately
and contact the nearest SUBARU dealer. Continuing to use
the system could lead to a fire, an electric shock, or some
other type of accident.
If the audio and visual system gets dirty, or emits smoke or an
odd smell, stop using it
If a foreign object gets inside the system, liquid is spilled
onto the system, or the system emits smoke or an unusual
smell, stop using it immediately and contact the nearest
SUBARU dealer. Continuing to use the system could lead to a
fire, an electric shock, or some other type of accident.
Page 199 of 334
Audio and Visual 197
Basic Operation
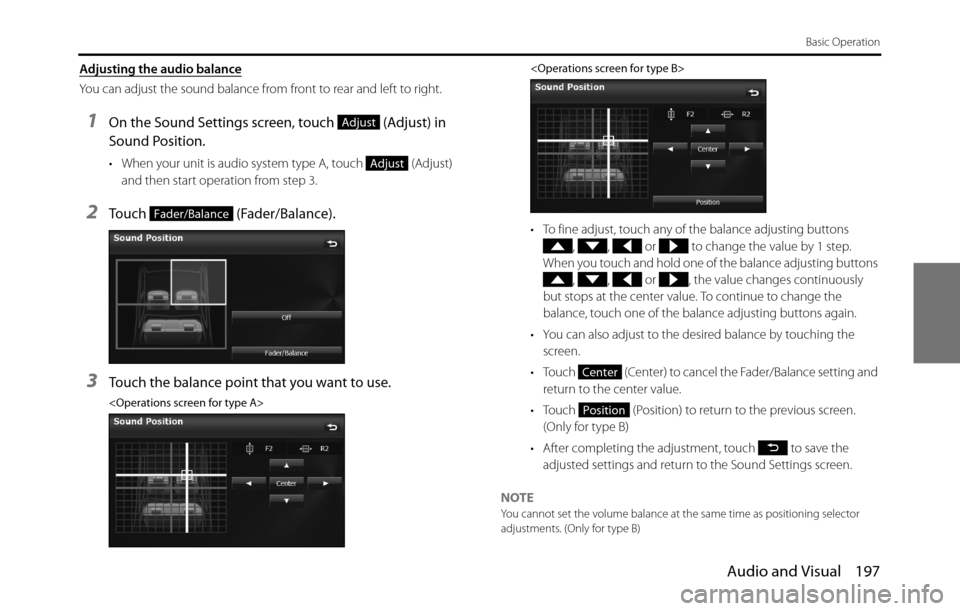
Adjusting the audio balance
You can adjust the sound balance from front to rear and left to right.
1On the Sound Settings screen, touch (Adjust) in
Sound Position.
• When your unit is audio system type A, touch (Adjust)
and then start operation from step 3.
2Touch (Fader/Balance).
3Touch the balance point that you want to use.
• To fine adjust, touch any of the balance adjusting buttons
, , or to change the value by 1 step.
When you touch and hold one of the balance adjusting buttons
, , or , the value changes continuously
but stops at the center value. To continue to change the
balance, touch one of the balance adjusting buttons again.
• You can also adjust to the desired balance by touching the
screen.
• Touch (Center) to cancel the Fader/Balance setting and
return to the center value.
• Touch (Position) to return to the previous screen.
(Only for type B)
• After completing the adjustment, touch to save the
adjusted settings and return to the Sound Settings screen.
NOTE
You cannot set the volume balance at the same time as positioning selector
adjustments. (Only for type B)
Adjust
Adjust
Fader/Balance
Center
Position