SUBARU BRZ 2020 Quick Guide
Manufacturer: SUBARU, Model Year: 2020, Model line: BRZ, Model: SUBARU BRZ 2020Pages: 36, PDF Size: 13.42 MB
Page 21 of 36
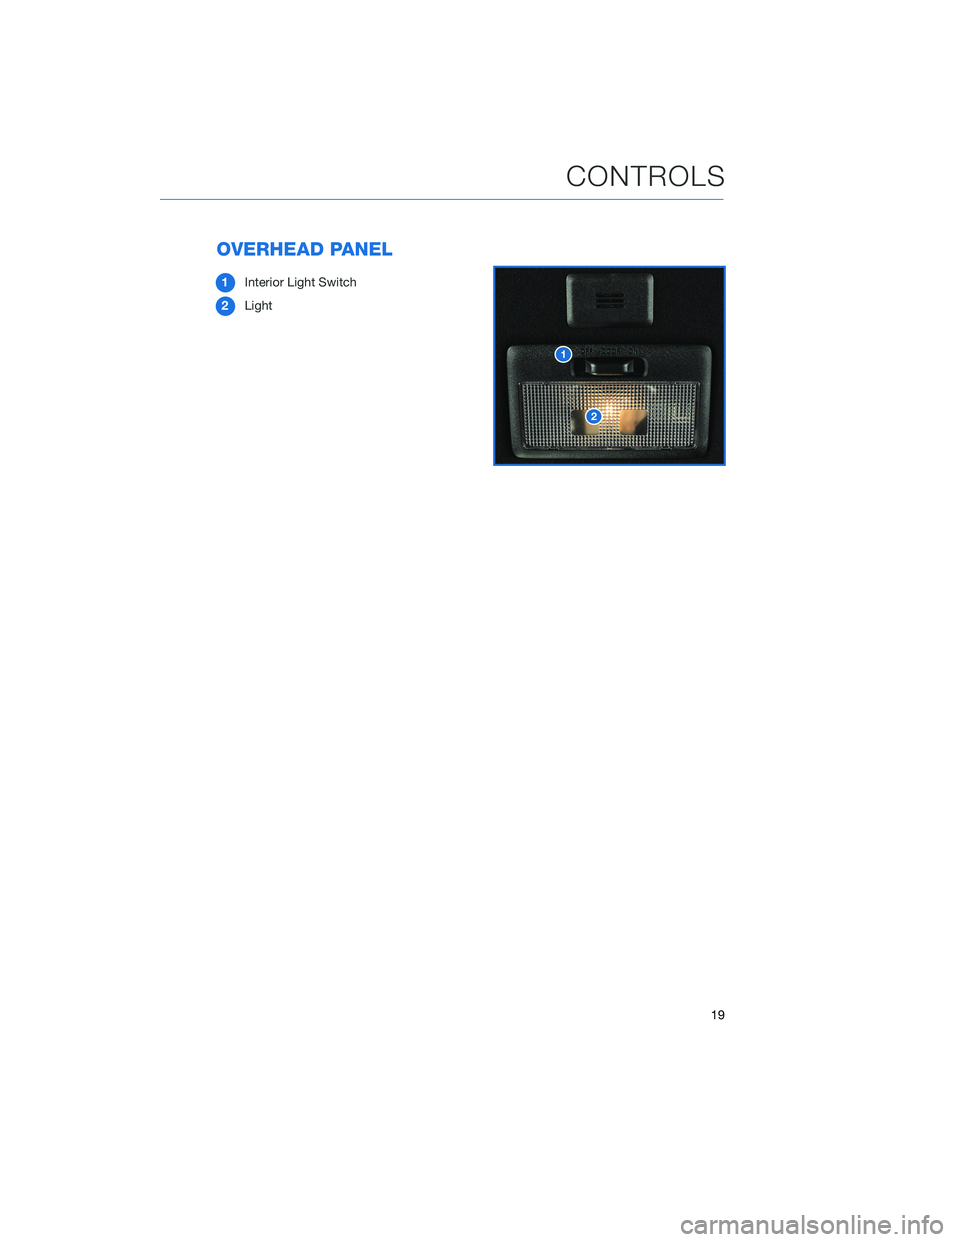
OVERHEAD PANEL
1Interior Light Switch
2Light
CONTROLS
19
Page 22 of 36
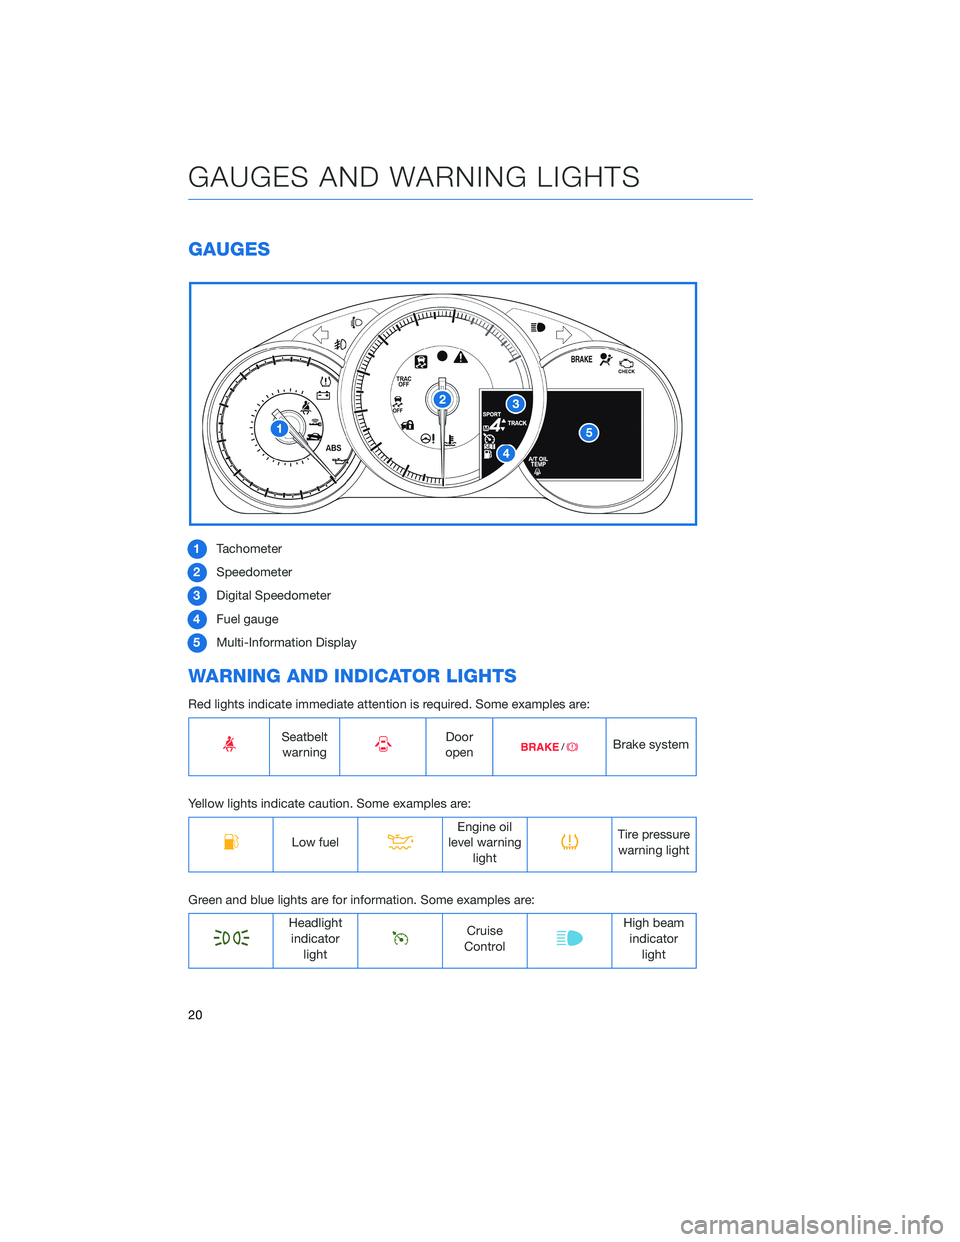
GAUGES
1Tachometer
2Speedometer
3Digital Speedometer
4Fuel gauge
5Multi-Information Display
WARNING AND INDICATOR LIGHTS
Red lights indicate immediate attention is required. Some examples are:
Seatbelt
warningDoor
openBrake system
Yellow lights indicate caution. Some examples are:
Low fuelEngine oil
level warning
lightTire pressure
warning light
Green and blue lights are for information. Some examples are:
Headlight
indicator
lightCruise
ControlHigh beam
indicator
light
GAUGES AND WARNING LIGHTS
20
Page 23 of 36
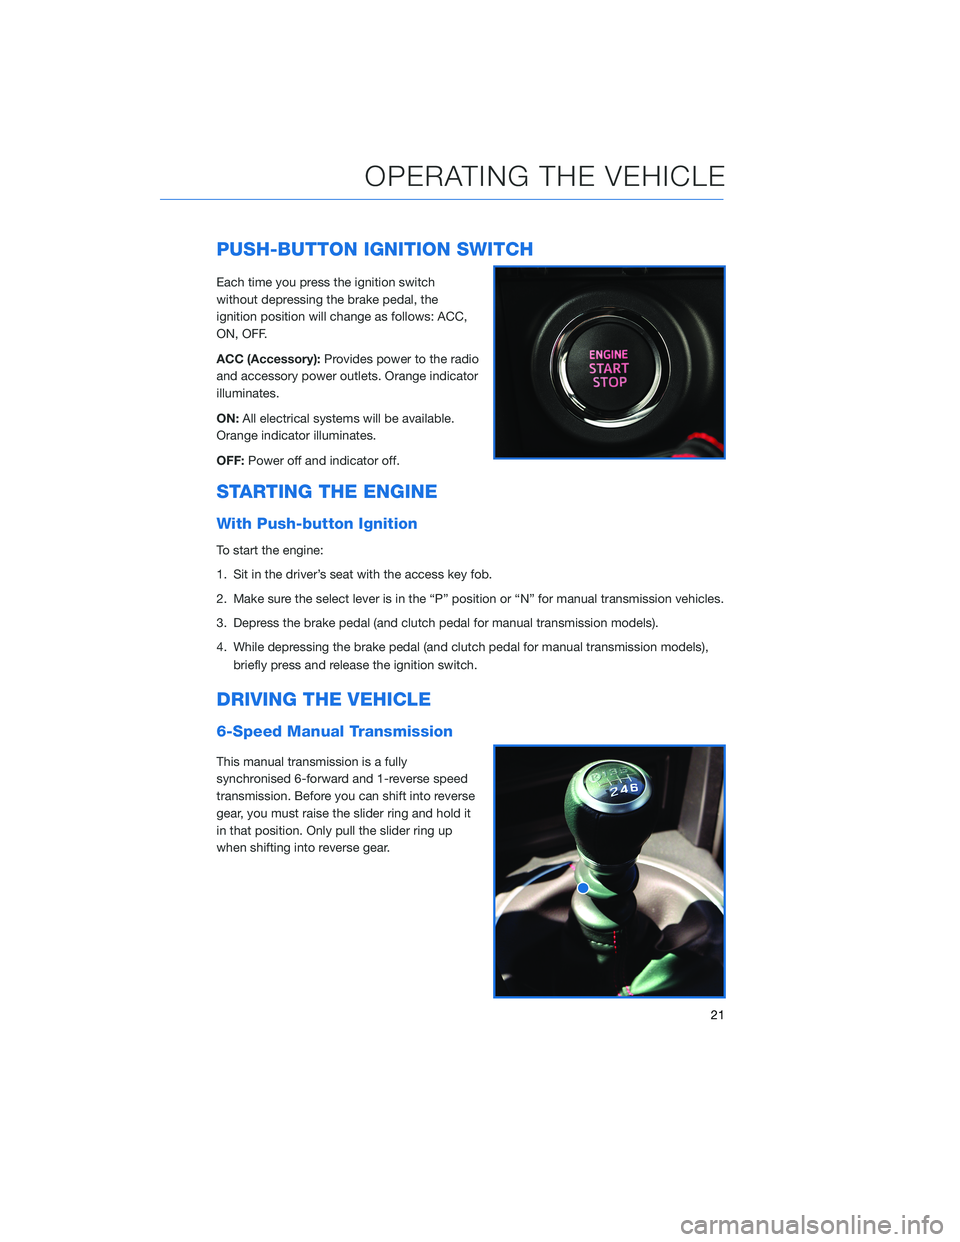
PUSH-BUTTON IGNITION SWITCH
Each time you press the ignition switch
without depressing the brake pedal, the
ignition position will change as follows: ACC,
ON, OFF.
ACC (Accessory):Provides power to the radio
and accessory power outlets. Orange indicator
illuminates.
ON:All electrical systems will be available.
Orange indicator illuminates.
OFF:Power off and indicator off.
STARTING THE ENGINE
With Push-button Ignition
To start the engine:
1. Sit in the driver’s seat with the access key fob.
2. Make sure the select lever is in the “P” position or “N” for manual transmission vehicles.
3. Depress the brake pedal (and clutch pedal for manual transmission models).
4. While depressing the brake pedal (and clutch pedal for manual transmission models),
briefly press and release the ignition switch.
DRIVING THE VEHICLE
6-Speed Manual Transmission
This manual transmission is a fully
synchronised 6-forward and 1-reverse speed
transmission. Before you can shift into reverse
gear, you must raise the slider ring and hold it
in that position. Only pull the slider ring up
when shifting into reverse gear.
OPERATING THE VEHICLE
21
Page 24 of 36
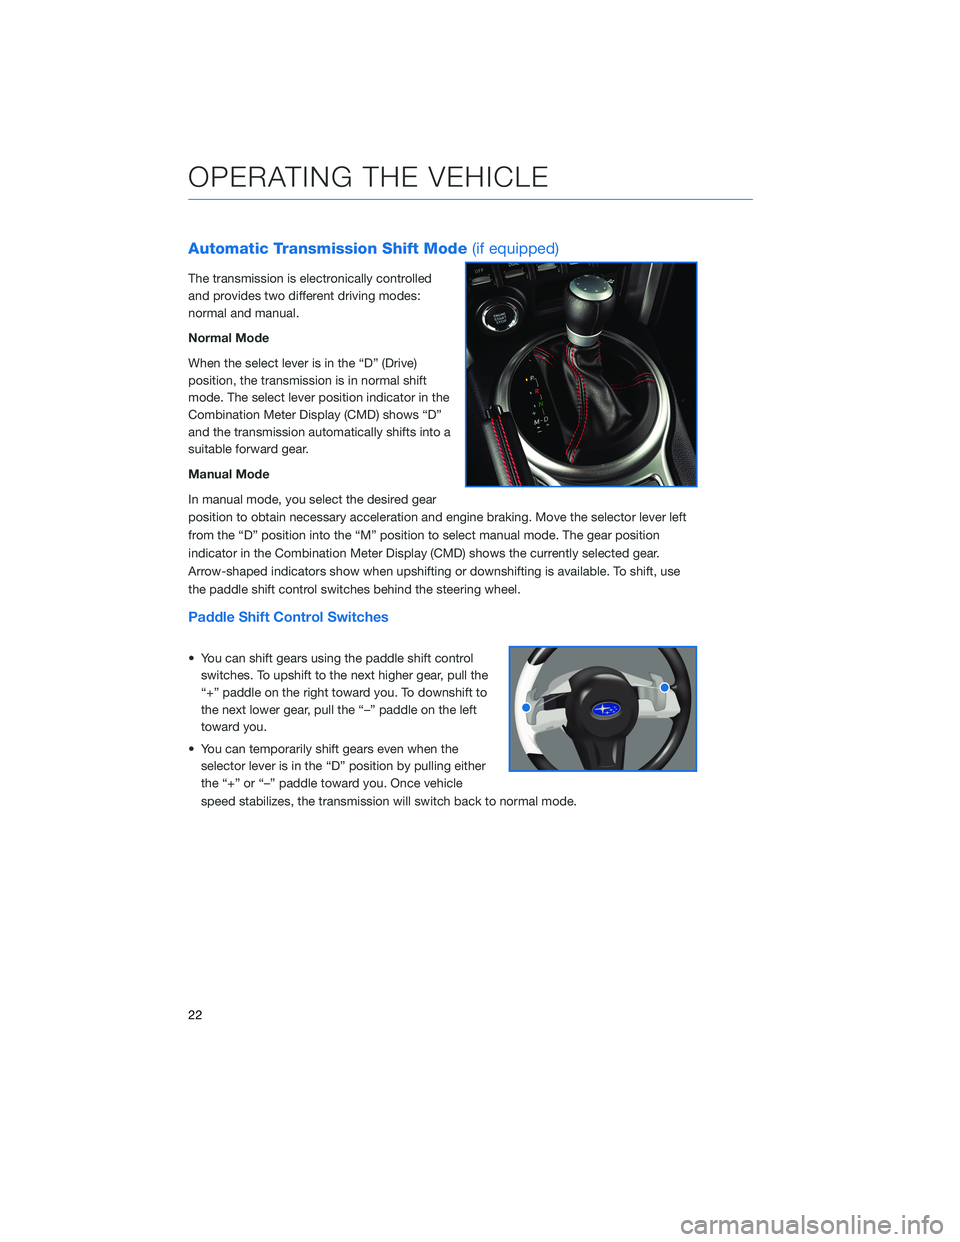
Automatic Transmission Shift Mode(if equipped)
The transmission is electronically controlled
and provides two different driving modes:
normal and manual.
Normal Mode
When the select lever is in the “D” (Drive)
position, the transmission is in normal shift
mode. The select lever position indicator in the
Combination Meter Display (CMD) shows “D”
and the transmission automatically shifts into a
suitable forward gear.
Manual Mode
In manual mode, you select the desired gear
position to obtain necessary acceleration and engine braking. Move the selector lever left
from the “D” position into the “M” position to select manual mode. The gear position
indicator in the Combination Meter Display (CMD) shows the currently selected gear.
Arrow-shaped indicators show when upshifting or downshifting is available. To shift, use
the paddle shift control switches behind the steering wheel.
Paddle Shift Control Switches
• You can shift gears using the paddle shift control
switches. To upshift to the next higher gear, pull the
“+” paddle on the right toward you. To downshift to
the next lower gear, pull the “–” paddle on the left
toward you.
• You can temporarily shift gears even when the
selector lever is in the “D” position by pulling either
the “+” or “–” paddle toward you. Once vehicle
speed stabilizes, the transmission will switch back to normal mode.
OPERATING THE VEHICLE
22
Page 25 of 36
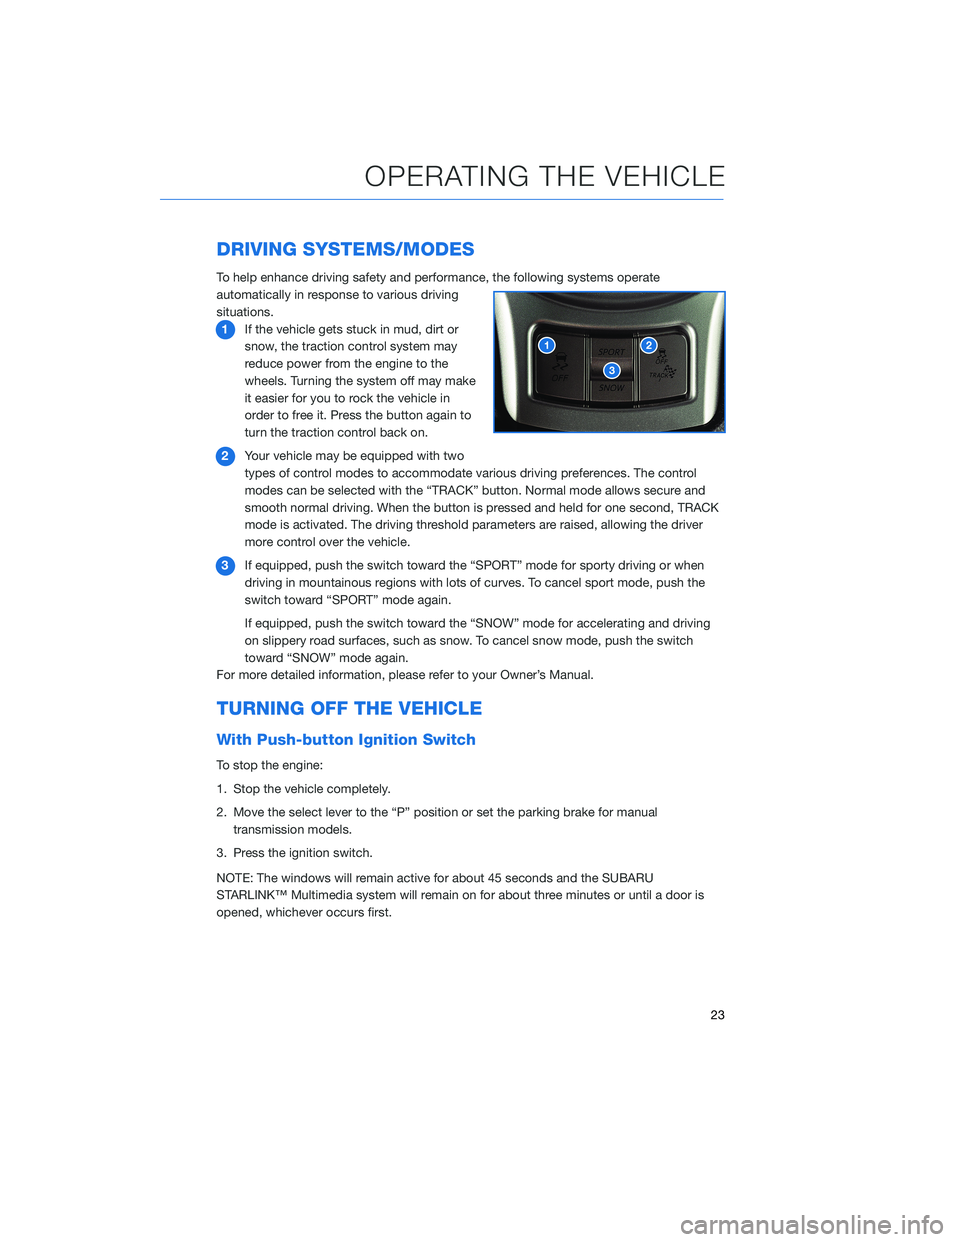
DRIVING SYSTEMS/MODES
To help enhance driving safety and performance, the following systems operate
automatically in response to various driving
situations.
1If the vehicle gets stuck in mud, dirt or
snow, the traction control system may
reduce power from the engine to the
wheels. Turning the system off may make
it easier for you to rock the vehicle in
order to free it. Press the button again to
turn the traction control back on.
2Your vehicle may be equipped with two
types of control modes to accommodate various driving preferences. The control
modes can be selected with the “TRACK” button. Normal mode allows secure and
smooth normal driving. When the button is pressed and held for one second, TRACK
mode is activated. The driving threshold parameters are raised, allowing the driver
more control over the vehicle.
3If equipped, push the switch toward the “SPORT” mode for sporty driving or when
driving in mountainous regions with lots of curves. To cancel sport mode, push the
switch toward “SPORT” mode again.
If equipped, push the switch toward the “SNOW” mode for accelerating and driving
on slippery road surfaces, such as snow. To cancel snow mode, push the switch
toward “SNOW” mode again.
For more detailed information, please refer to your Owner’s Manual.
TURNING OFF THE VEHICLE
With Push-button Ignition Switch
To stop the engine:
1. Stop the vehicle completely.
2. Move the select lever to the “P” position or set the parking brake for manual
transmission models.
3. Press the ignition switch.
NOTE: The windows will remain active for about 45 seconds and the SUBARU
STARLINK™ Multimedia system will remain on for about three minutes or until a door is
opened, whichever occurs first.
OPERATING THE VEHICLE
23
Page 26 of 36
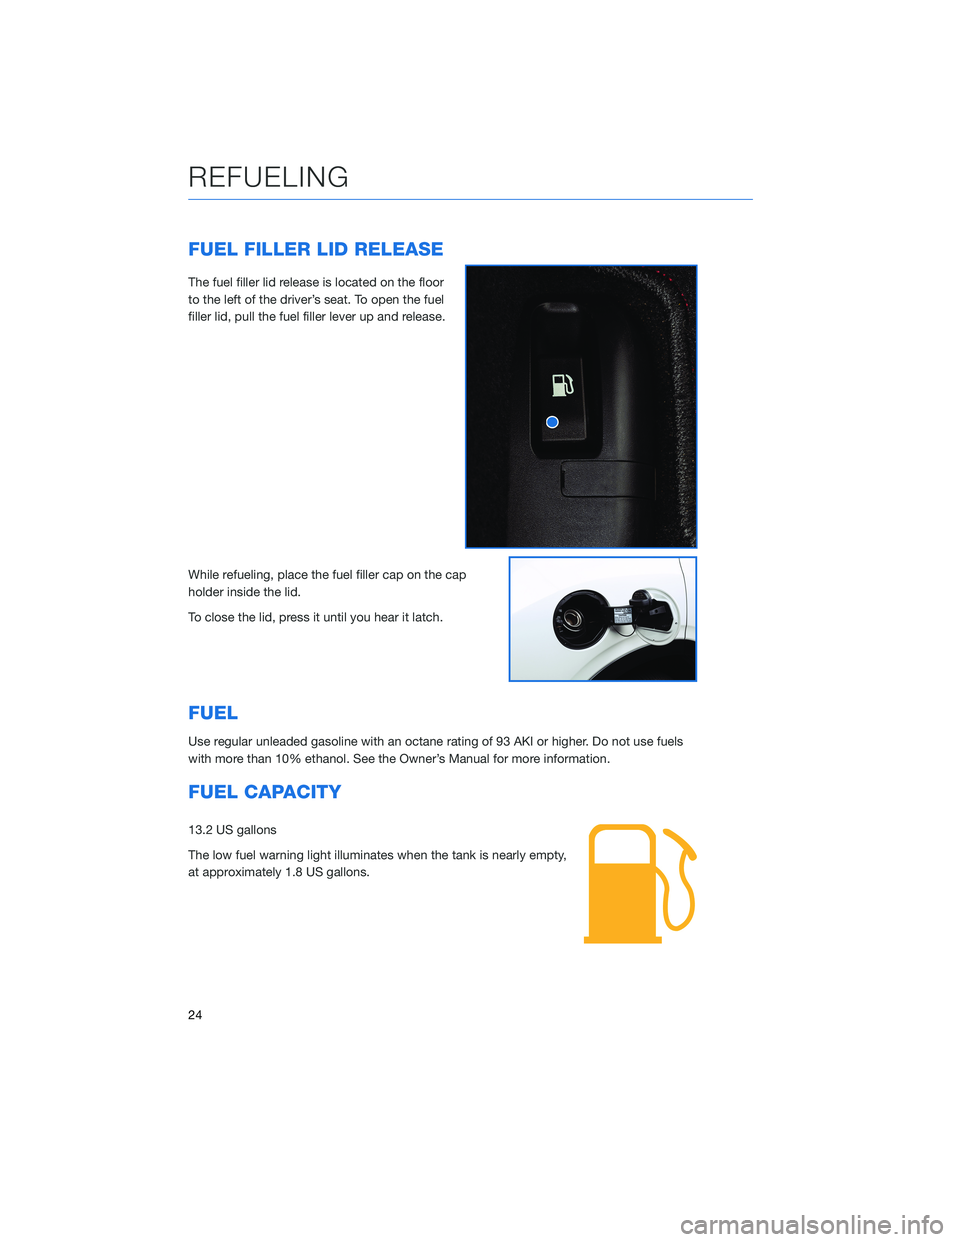
FUEL FILLER LID RELEASE
The fuel filler lid release is located on the floor
to the left of the driver’s seat. To open the fuel
filler lid, pull the fuel filler lever up and release.
While refueling, place the fuel filler cap on the cap
holder inside the lid.
To close the lid, press it until you hear it latch.
FUEL
Use regular unleaded gasoline with an octane rating of 93 AKI or higher. Do not use fuels
with more than 10% ethanol. See the Owner’s Manual for more information.
FUEL CAPACITY
13.2 US gallons
The low fuel warning light illuminates when the tank is nearly empty,
at approximately 1.8 US gallons.
REFUELING
24
Page 27 of 36
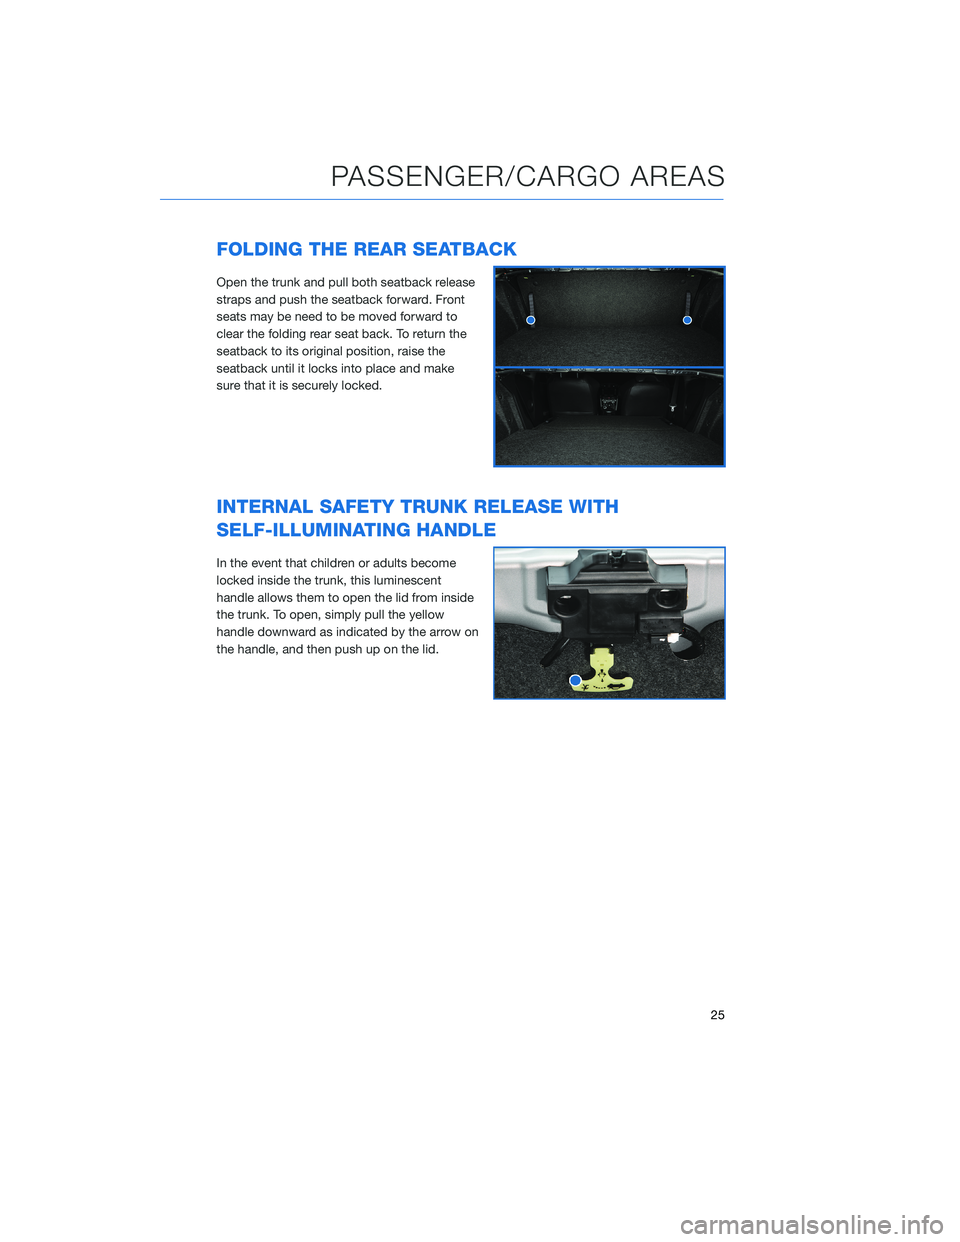
FOLDING THE REAR SEATBACK
Open the trunk and pull both seatback release
straps and push the seatback forward. Front
seats may be need to be moved forward to
clear the folding rear seat back. To return the
seatback to its original position, raise the
seatback until it locks into place and make
sure that it is securely locked.
INTERNAL SAFETY TRUNK RELEASE WITH
SELF-ILLUMINATING HANDLE
In the event that children or adults become
locked inside the trunk, this luminescent
handle allows them to open the lid from inside
the trunk. To open, simply pull the yellow
handle downward as indicated by the arrow on
the handle, and then push up on the lid.
PASSENGER/CARGO AREAS
25
Page 28 of 36
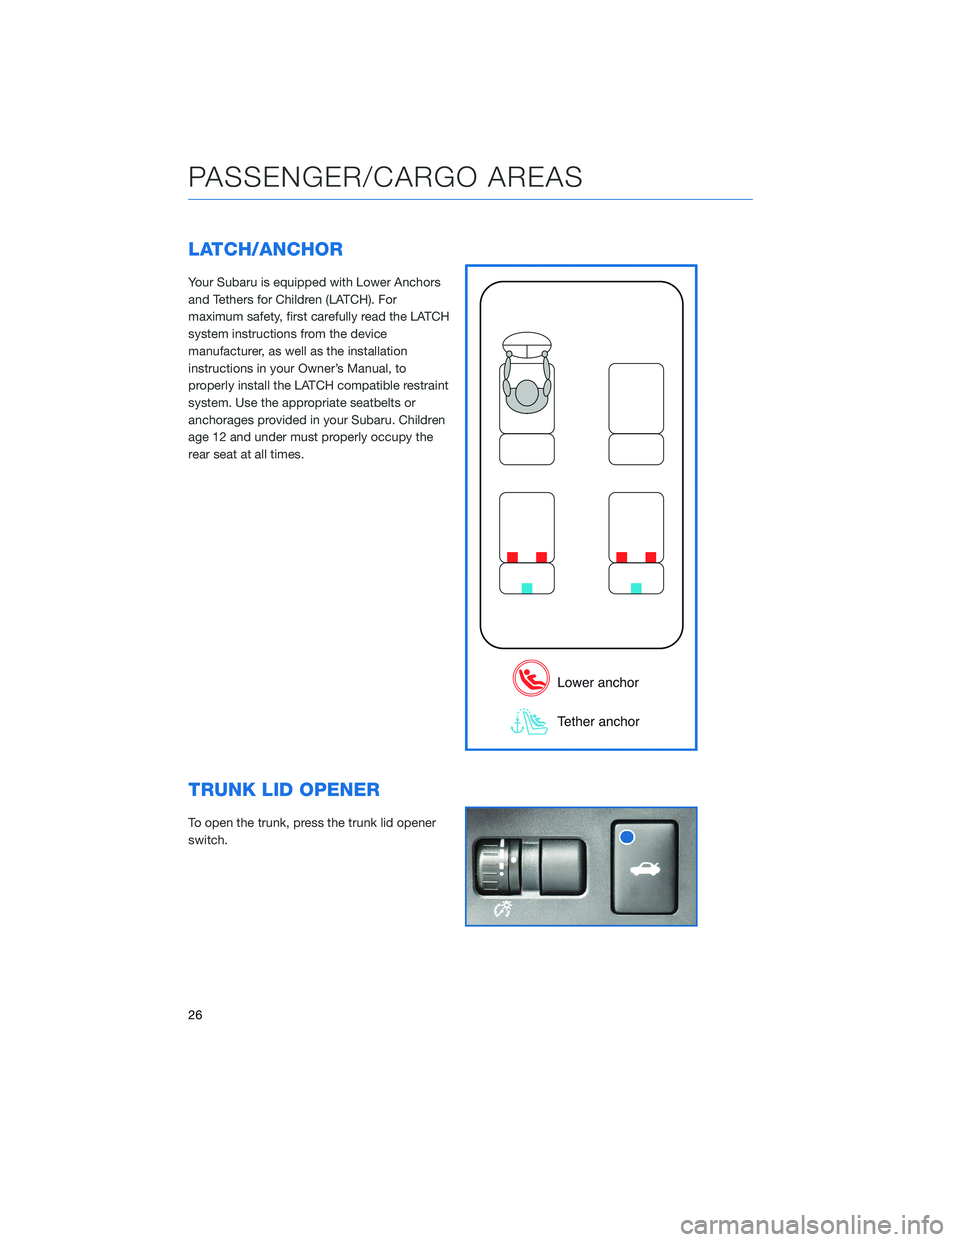
LATCH/ANCHOR
Your Subaru is equipped with Lower Anchors
and Tethers for Children (LATCH). For
maximum safety, first carefully read the LATCH
system instructions from the device
manufacturer, as well as the installation
instructions in your Owner’s Manual, to
properly install the LATCH compatible restraint
system. Use the appropriate seatbelts or
anchorages provided in your Subaru. Children
age 12 and under must properly occupy the
rear seat at all times.
TRUNK LID OPENER
To open the trunk, press the trunk lid opener
switch.
PASSENGER/CARGO AREAS
26
Page 29 of 36
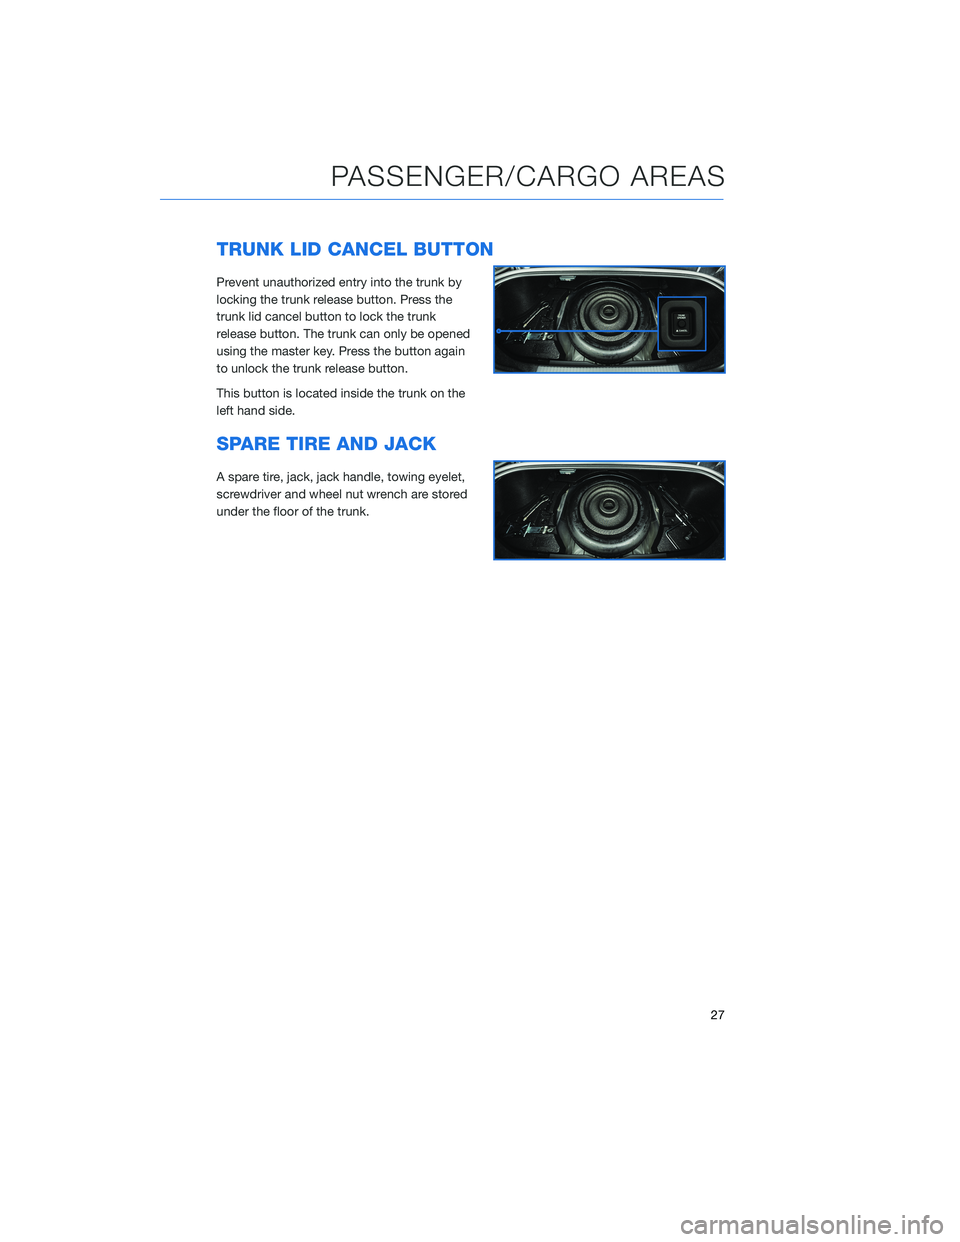
TRUNK LID CANCEL BUTTON
Prevent unauthorized entry into the trunk by
locking the trunk release button. Press the
trunk lid cancel button to lock the trunk
release button. The trunk can only be opened
using the master key. Press the button again
to unlock the trunk release button.
This button is located inside the trunk on the
left hand side.
SPARE TIRE AND JACK
A spare tire, jack, jack handle, towing eyelet,
screwdriver and wheel nut wrench are stored
under the floor of the trunk.
PASSENGER/CARGO AREAS
27
Page 30 of 36
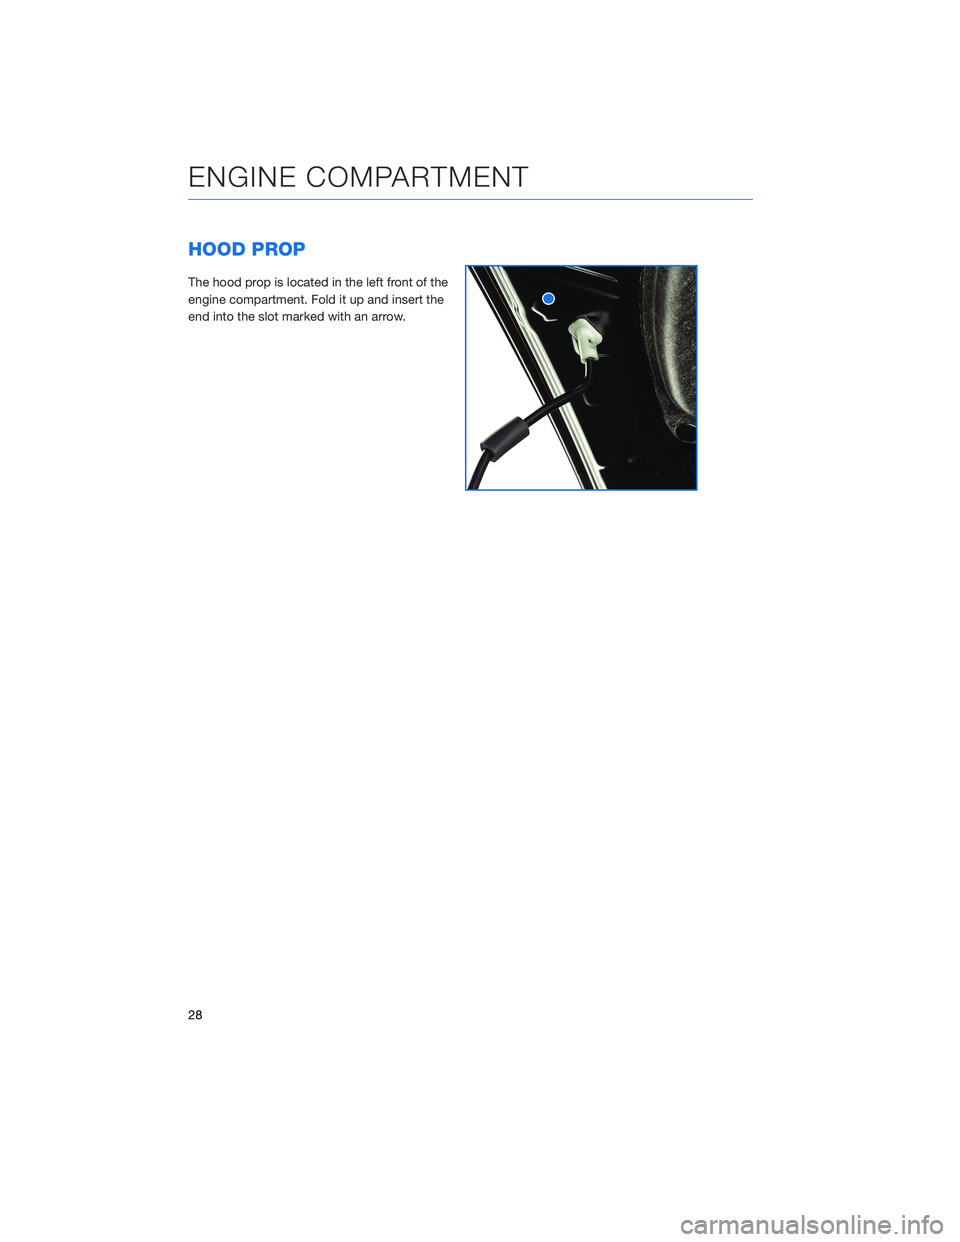
HOOD PROP
The hood prop is located in the left front of the
engine compartment. Fold it up and insert the
end into the slot marked with an arrow.
ENGINE COMPARTMENT
28