check engine SUBARU CROSSTREK 2018 Workshop Manual
[x] Cancel search | Manufacturer: SUBARU, Model Year: 2018, Model line: CROSSTREK, Model: SUBARU CROSSTREK 2018Pages: 474, PDF Size: 20.76 MB
Page 393 of 474
(406,1)
北米Model "A1320BE-C" EDITED: 2017/ 10/ 10
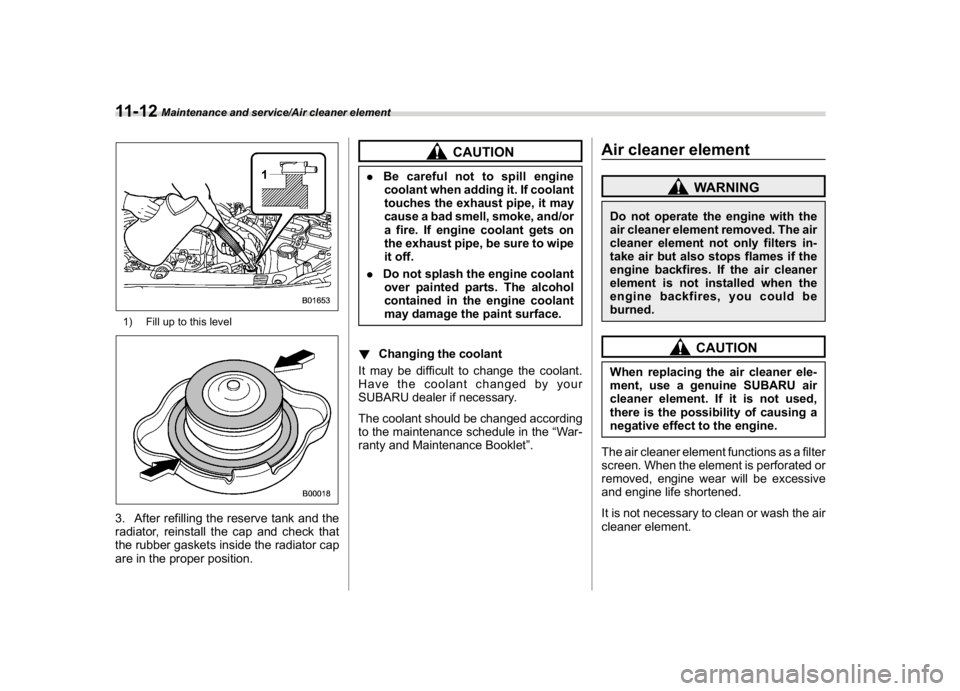
1) Fill up to this level3. After refilling the reserve tank and the
radiator, reinstall the cap and check that
the rubber gaskets inside the radiator cap
are in the proper position.
CAUTION
.Be careful not to spill engine
coolant when adding it. If coolant
touches the exhaust pipe, it may
cause a bad smell, smoke, and/or
a fire. If engine coolant gets on
the exhaust pipe, be sure to wipe
it off.
.Do not splash the engine coolant
over painted parts. The alcohol
contained in the engine coolant
may damage the paint surface.
!Changing the coolant
It may be difficult to change the coolant.
Have the coolant changed by your
SUBARU dealer if necessary.
The coolant should be changed according
to the maintenance schedule in the“War-
ranty and Maintenance Booklet”.
Air cleaner element
WARNING
Do not operate the engine with the
air cleaner element removed. The air
cleaner element not only filters in-
take air but also stops flames if the
engine backfires. If the air cleaner
element is not installed when the
engine backfires, you could be
burned.
CAUTION
When replacing the air cleaner ele-
ment, use a genuine SUBARU air
cleaner element. If it is not used,
there is the possibility of causing a
negative effect to the engine.
The air cleaner element functions as a filter
screen. When the element is perforated or
removed, engine wear will be excessive
and engine life shortened.
It is not necessary to clean or wash the air
cleaner element.
Maintenance and service/Air cleaner element
11-12
Page 395 of 474
(408,1)
北米Model "A1320BE-C" EDITED: 2017/ 10/ 10
Spark plugsIt may be difficult to replace the spark
plugs. It is recommended that you have the
spark plugs replaced by your SUBARU
dealer.
The spark plugs should be replaced
according to the maintenance schedule
in the“Warranty and Maintenance Book-
let”.
CAUTION
Make sure the cables are replaced in
the correct order.&Recommended spark plugsFor the recommended spark plugs, refer to
“Electrical system”F12-8.
Drive beltsIt is unnecessary to check the deflection of
the drive belt periodically because your
engine is equipped with an automatic belt
tension adjuster. However, replacement of
the belt should be done according to the
maintenance schedule in the“Warranty
and Maintenance Booklet”. Consult your
SUBARU dealer for replacement.
If the drive belt is loose, cracked or worn,
contact your SUBARU dealer.
Manual transmission oilIt is not necessary to check the transmis-
sion oil level. Check that there are no
cracks, damage or leakage. However, the
oil inspection should be performed accord-
ing to the maintenance schedule in the
“Warranty and Maintenance Booklet”.
Consult your SUBARU dealer for details.&Recommended grade and
viscosityEach oil manufacturer has its own base
oils and additives. Never use different
brands together. For details, refer to
“Manual transmission, front differential
and rear differential gear oil”F12-6.
Maintenance and service/Spark plugs
11-14
Page 398 of 474
(411,1)
北米Model "A1320BE-C" EDITED: 2017/ 10/ 10
Alcohol contained in the clutch
fluid may damage them.
.Be careful not to spill clutch fluid
when adding it. If clutch fluid
touches the exhaust pipe, it may
cause a bad smell, smoke, and/or
a fire. If clutch fluid gets on the
exhaust pipe, be sure to wipe it
off.
.The fluid level for the clutch
system must be checked at the
inboard side of the reservoir. It
cannot be checked at the out-
board side of the reservoir.
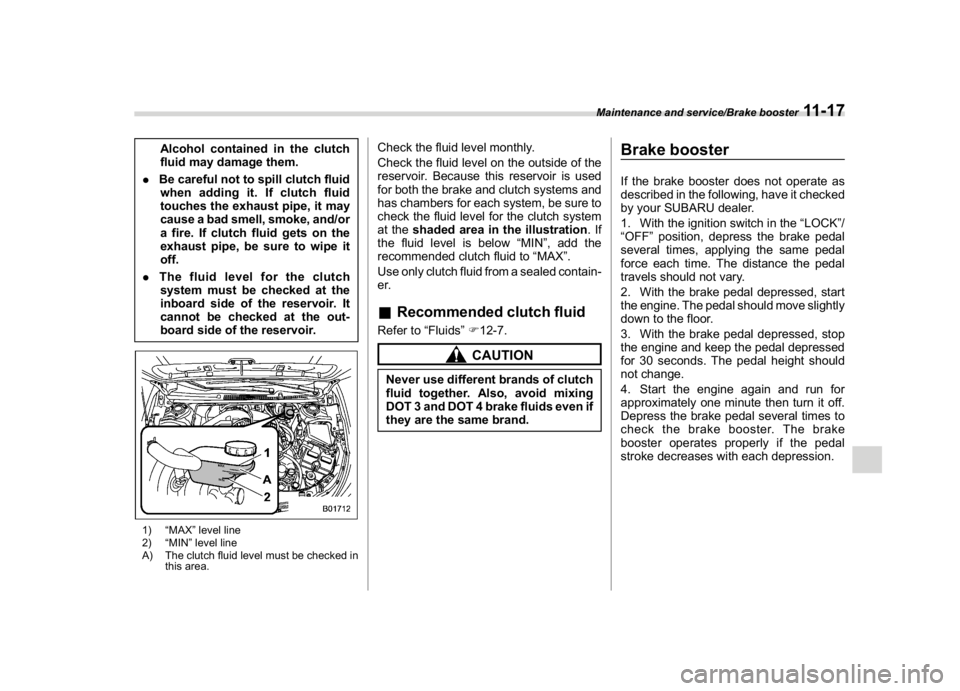
1)“MAX”level line
2)“MIN”level line
A) The clutch fluid level must be checked in
this area.
Check the fluid level monthly.
Check the fluid level on the outside of the
reservoir. Because this reservoir is used
for both the brake and clutch systems and
has chambers for each system, be sure to
check the fluid level for the clutch system
at theshaded area in the illustration.If
the fluid level is below“MIN”, add the
recommended clutch fluid to“MAX”.
Use only clutch fluid from a sealed contain-
er.&Recommended clutch fluidRefer to“Fluids”F12-7.
CAUTION
Never use different brands of clutch
fluid together. Also, avoid mixing
DOT 3 and DOT 4 brake fluids even if
they are the same brand.
Brake boosterIf the brake booster does not operate as
described in the following, have it checked
by your SUBARU dealer.
1. With the ignition switch in the“LOCK”/
“OFF”position, depress the brake pedal
several times, applying the same pedal
force each time. The distance the pedal
travels should not vary.
2. With the brake pedal depressed, start
the engine. The pedal should move slightly
down to the floor.
3. With the brake pedal depressed, stop
the engine and keep the pedal depressed
for 30 seconds. The pedal height should
not change.
4. Start the engine again and run for
approximately one minute then turn it off.
Depress the brake pedal several times to
check the brake booster. The brake
booster operates properly if the pedal
stroke decreases with each depression.
Maintenance and service/Brake booster
11-17
11
Page 399 of 474
(412,1)
北米Model "A1320BE-C" EDITED: 2017/ 10/ 10
Brake pedalCheck the brake pedal free play and
reserve distance according to the main-
tenance schedule in the“Warranty and
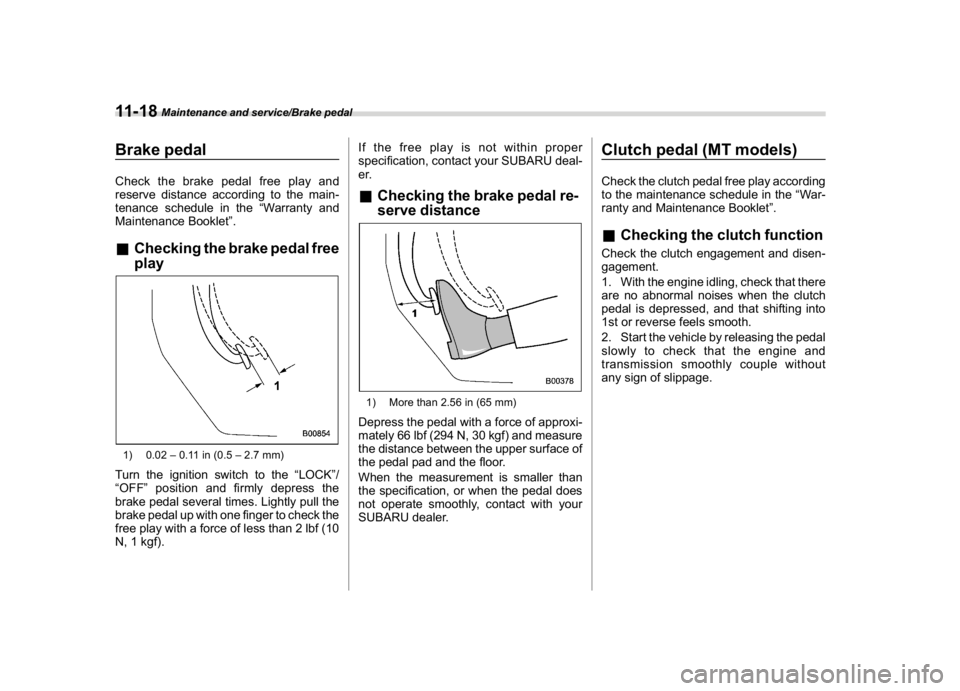
Maintenance Booklet”.&Checking the brake pedal free
play1) 0.02–0.11 in (0.5–2.7 mm)Turn the ignition switch to the“LOCK”/
“OFF”position and firmly depress the
brake pedal several times. Lightly pull the
brake pedal up with one finger to check the
free play with a force of less than 2 lbf (10
N, 1 kgf).If the free play is not within proper
specification, contact your SUBARU deal-
er.
&Checking the brake pedal re-
serve distance1) More than 2.56 in (65 mm)Depress the pedal with a force of approxi-
mately 66 lbf (294 N, 30 kgf) and measure
the distance between the upper surface of
the pedal pad and the floor.
When the measurement is smaller than
the specification, or when the pedal does
not operate smoothly, contact with your
SUBARU dealer.
Clutch pedal (MT models)Check the clutch pedal free play according
to the maintenance schedule in the“War-
ranty and Maintenance Booklet”.&Checking the clutch functionCheck the clutch engagement and disen-
gagement.
1. With the engine idling, check that there
are no abnormal noises when the clutch
pedal is depressed, and that shifting into
1st or reverse feels smooth.
2. Start the vehicle by releasing the pedal
slowly to check that the engine and
transmission smoothly couple without
any sign of slippage.
Maintenance and service/Brake pedal
11-18
Page 400 of 474
(413,1)
北米Model "A1320BE-C" EDITED: 2017/ 10/ 10
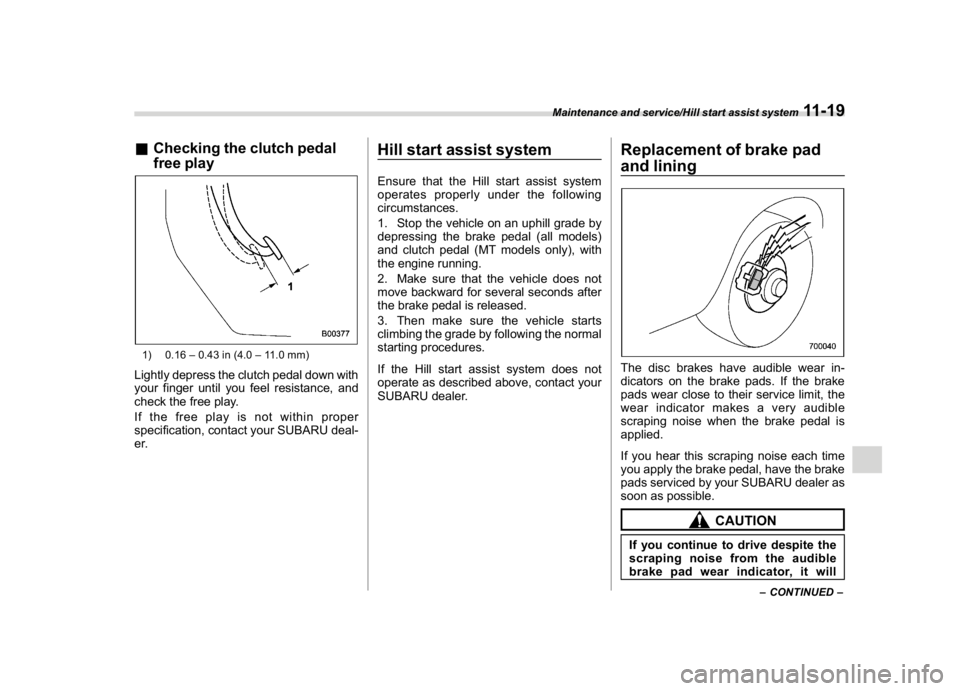
&Checking the clutch pedal
free play1) 0.16–0.43 in (4.0–11.0 mm)Lightly depress the clutch pedal down with
your finger until you feel resistance, and
check the free play.
If the free play is not within proper
specification, contact your SUBARU deal-
er.
Hill start assist systemEnsure that the Hill start assist system
operates properly under the following
circumstances.
1. Stop the vehicle on an uphill grade by
depressing the brake pedal (all models)
and clutch pedal (MT models only), with
the engine running.
2. Make sure that the vehicle does not
move backward for several seconds after
the brake pedal is released.
3. Then make sure the vehicle starts
climbing the grade by following the normal
starting procedures.
If the Hill start assist system does not
operate as described above, contact your
SUBARU dealer.
Replacement of brake pad
and liningThe disc brakes have audible wear in-
dicators on the brake pads. If the brake
pads wear close to their service limit, the
wear indicator makes a very audible
scraping noise when the brake pedal is
applied.
If you hear this scraping noise each time
you apply the brake pedal, have the brake
pads serviced by your SUBARU dealer as
soon as possible.
CAUTION
If you continue to drive despite the
scraping noise from the audible
brake pad wear indicator, it will
–CONTINUED–
Maintenance and service/Hill start assist system
11-19
11
Page 409 of 474
(422,1)
北米Model "A1320BE-C" EDITED: 2017/ 10/ 10
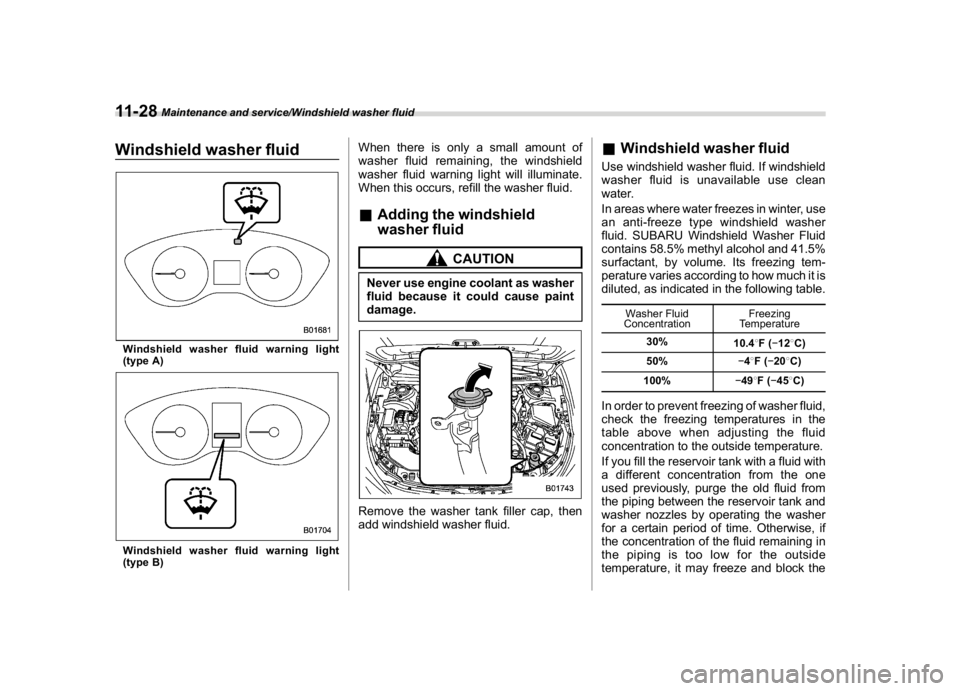
Windshield washer fluidWindshield washer fluid warning light
(type A)Windshield washer fluid warning light
(type B)
When there is only a small amount of
washer fluid remaining, the windshield
washer fluid warning light will illuminate.
When this occurs, refill the washer fluid.&Adding the windshield
washer fluid
CAUTION
Never use engine coolant as washer
fluid because it could cause paint
damage.Remove the washer tank filler cap, then
add windshield washer fluid.
&Windshield washer fluidUse windshield washer fluid. If windshield
washer fluid is unavailable use clean
water.
In areas where water freezes in winter, use
an anti-freeze type windshield washer
fluid. SUBARU Windshield Washer Fluid
contains 58.5% methyl alcohol and 41.5%
surfactant, by volume. Its freezing tem-
perature varies according to how much it is
diluted, as indicated in the following table.
Washer Fluid
ConcentrationFreezing
Temperature
30%
10.48F(�128C)
50%�48F(�208C)
100%�498F(�458C)
In order to prevent freezing of washer fluid,
check the freezing temperatures in the
table above when adjusting the fluid
concentration to the outside temperature.
If you fill the reservoir tank with a fluid with
a different concentration from the one
used previously, purge the old fluid from
the piping between the reservoir tank and
washer nozzles by operating the washer
for a certain period of time. Otherwise, if
the concentration of the fluid remaining in
the piping is too low for the outside
temperature, it may freeze and block the
Maintenance and service/Windshield washer fluid
11-28
Page 415 of 474
(428,1)
北米Model "A1320BE-C" EDITED: 2017/ 10/ 10
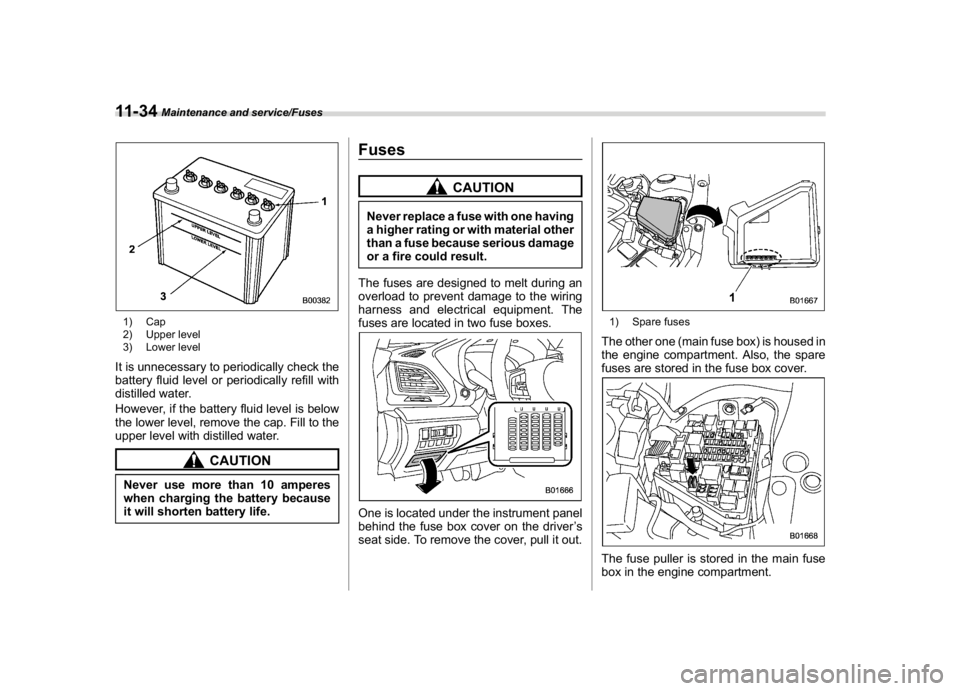
1) Cap
2) Upper level
3) Lower levelIt is unnecessary to periodically check the
battery fluid level or periodically refill with
distilled water.
However, if the battery fluid level is below
the lower level, remove the cap. Fill to the
upper level with distilled water.
CAUTION
Never use more than 10 amperes
when charging the battery because
it will shorten battery life.
Fuses
CAUTION
Never replace a fuse with one having
a higher rating or with material other
than a fuse because serious damage
or a fire could result.
The fuses are designed to melt during an
overload to prevent damage to the wiring
harness and electrical equipment. The
fuses are located in two fuse boxes.One is located under the instrument panel
behind the fuse box cover on the driver’s
seat side. To remove the cover, pull it out.
1) Spare fusesThe other one (main fuse box) is housed in
the engine compartment. Also, the spare
fuses are stored in the fuse box cover.The fuse puller is stored in the main fuse
box in the engine compartment.
Maintenance and service/Fuses
11-34
Page 429 of 474
(444,1)
北米Model "A1320BE-C" EDITED: 2017/ 10/ 10
&Engine oilFor the checking, adding and replacing procedure or other details, refer to“Engine oil”F11-8.NOTEThe procedure for changing the engine oil and oil filter should be performed by a properly-trained expert. It is recommended
that you have this service performed by your SUBARU dealer.
!Approved engine oil
Always use the SUBARU approved engine oil. For further details, please contact your SUBARU dealer.
If the approved engine oil is unavailable, use the alternative engine oil described on the next page.
Specifications/Specifications
12-4
Page 448 of 474
(465,1)
北米Model "A1320BE-C" EDITED: 2017/ 10/ 10
crease in temperature could cause
tread separation, and failure of the
tire(s). Possible resulting loss of
vehicle control could lead to an
accident.!Measuring and adjusting air
pressure to achieve proper in-
flationCheck and, if necessary, adjust the
pressure of each tire (including the
spare) at least once a month and
before any long journey. Check the
tire pressures when the tires are
cold. Use a pressure gauge to
adjust the tire pressures to the
specific values. Driving even a short
distance warms up the tires and
increases the tire pressures. Also,
the tire pressures are affected by
the outside temperature. It is best to
check tire pressure outdoors before
driving the vehicle. When a tire
becomes warm, the air inside it
expands, causing the tire pressure
to increase. Be careful not to mis-
takenly release air from a warm tire
to reduce its pressure.
&Glossary of tire terminology.
Accessory weight
The combined weight (in excess of
those standard items which may be
replaced) of automatic transmis-
sion, power steering, power brakes,
power windows, power seats, radio,
and heater, to the extent that these
items are available as factory-in-
stalled equipment (whether in-
stalled or not)..
Bead
The part of the tire that is made of
steel wires, wrapped or reinforced
by ply cords and that is shaped to fit
the rim..
Bead separation
A breakdown of the bond between
components in the bead..
Bias ply tire
A pneumatic tire in which the ply
cords that extend to the beads are
laid at alternate angles substantially
less than 90 degrees to the center-
line of the tread..
Carcass
The tire structure, except tread andsidewall rubber which, when in-
flated, bears the load.
.
Chunking
The breaking away of pieces of the
tread or sidewall..
Cold tire pressure
The pressure in a tire that has been
driven less than 1 mile or has been
standing for three hours or more..
Cord
The strands forming the plies in the
tire..
Cord separation
The parting of cords from adjacent
rubber compounds..
Cracking
Any parting within the tread, side-
wall, or inner liner of the tire
extending to cord material..
Curb weight
The weight of a motor vehicle with
standard equipment including the
maximum capacity of fuel, oil and
coolant, and if so equipped, air
conditioning and additional weight
optional engine.
–CONTINUED–
Consumer information and Reporting safety defects/Tire information
13-5
13