set clock SUBARU FORESTER 2003 SG / 2.G Owners Manual
[x] Cancel search | Manufacturer: SUBARU, Model Year: 2003, Model line: FORESTER, Model: SUBARU FORESTER 2003 SG / 2.GPages: 420, PDF Size: 4.4 MB
Page 135 of 420

3-16
Instruments and controls
Clock
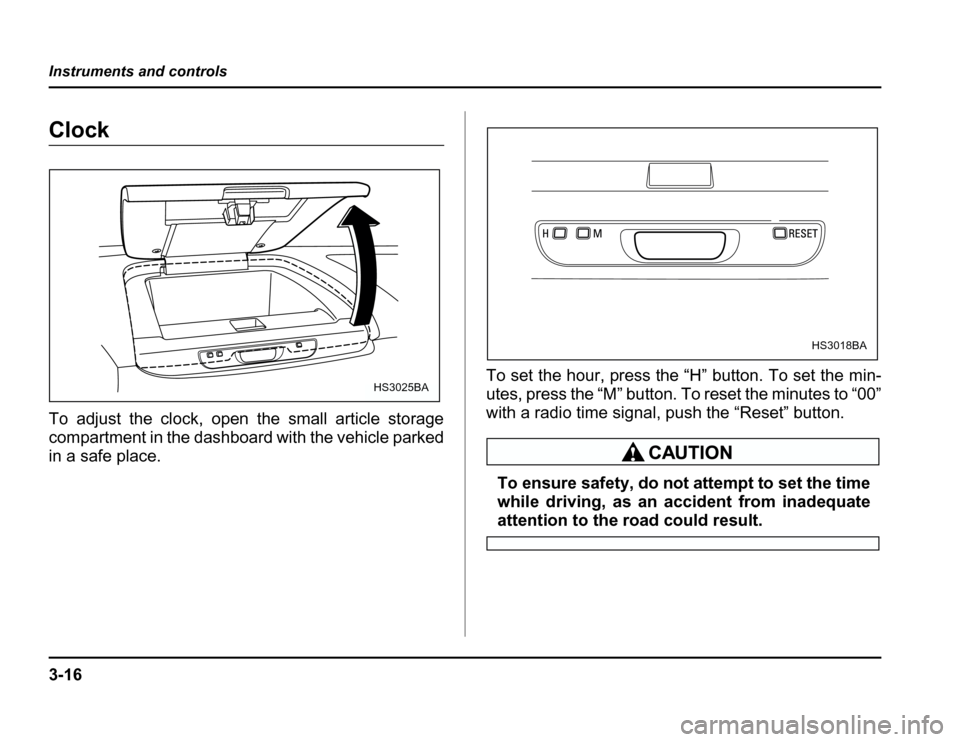
To adjust the clock, open the small article storage
compartment in the dashboard with the vehicle parked
inasafeplace.
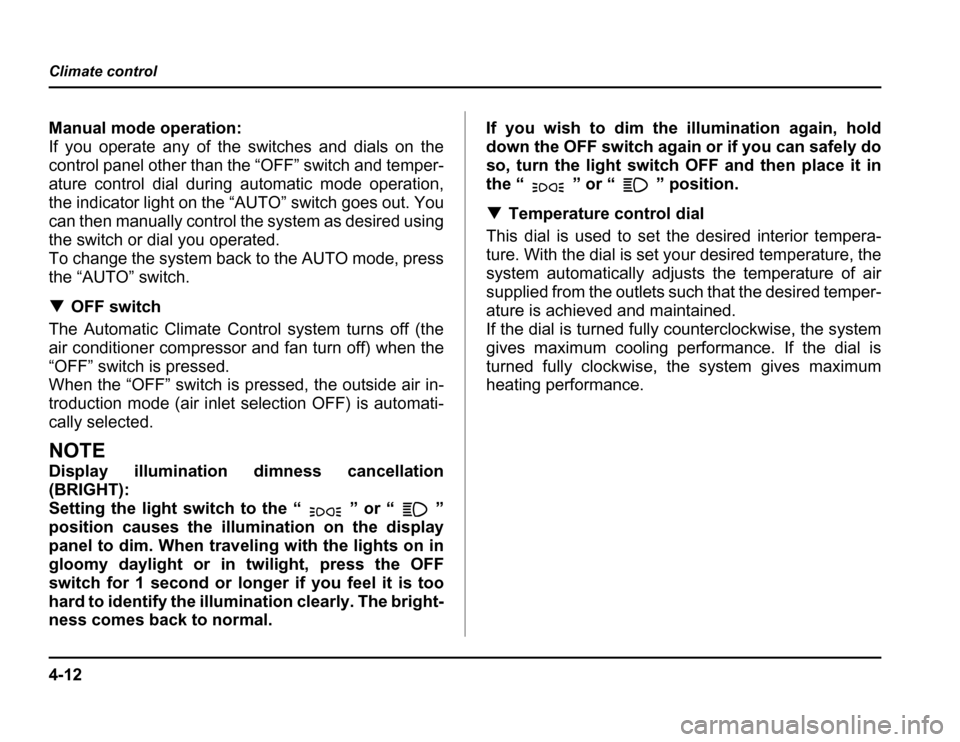
To set the hour, press the “H” button. To set the min-
utes, press the “M” button. To reset the minutes to “00”
with a radio time signal, push the “Reset” button.
To ensure safety, do not attempt to set the time
while driving, as an accident from inadequate
attention to the road could result.
HS3025BA
HS3018BA
Page 165 of 420

4-12
Climate control
Manual mode operation:
If you operate any of the switches and dials on the
control panel other than the “OFF” switch and temper-
ature control dial during automatic mode operation,
the indicator light on the “AUTO” switch goes out. You
can then manually control the system as desired using
the switch or dial you operated.
To change the system back to the AUTO mode, press
the “AUTO” switch. �
OFF switch
The Automatic Climate Control system turns off (the
air conditioner compressor and fan turn off) when the
“OFF” switch is pressed.
When the “OFF” switch is pressed, the outside air in-
troduction mode (air inlet selection OFF) is automati-
cally selected.
NOTE
Display illumination dimness cancellation (BRIGHT):
Setting the light switch to the “ ” or “ ”
position causes the illumination on the display
panel to dim. When traveling with the lights on in
gloomy daylight or in twilight, press the OFF
switch for 1 second or longer if you feel it is too
hard to identify the illumination clearly. The bright-
ness comes back to normal. If you wish to dim the illumination again, hold
down the OFF switch again or if you can safely do
so, turn the light switch OFF and then place it in
the “ ” or “ ” position. �
Temperature control dial
This dial is used to set the desired interior tempera-
ture. With the dial is set your desired temperature, the
system automatically adjusts the temperature of air
supplied from the outlets such that the desired temper-
ature is achieved and maintained.
If the dial is turned fully counterclockwise, the system
gives maximum cooling performance. If the dial is
turned fully clockwise, the system gives maximum
heating performance.
Page 392 of 420

11 -6 1
Maintenance and service
–CONTINUED –
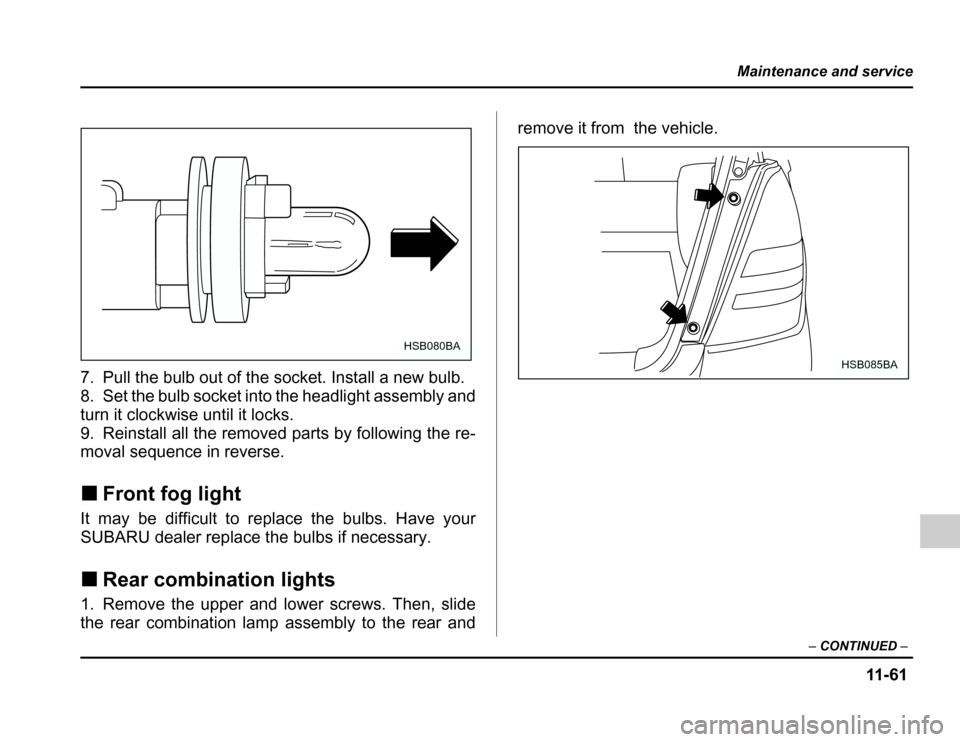
7. Pull the bulb out of the socket. Install a new bulb.
8. Set the bulb socket into the headlight assembly and
turn it clockwise until it locks.
9. Reinstall all the removed parts by following the re-
moval sequence in reverse. �Front fog light
It may be difficult to replace the bulbs. Have your
SUBARU dealer replace the bulbs if necessary. � Rear combination lights
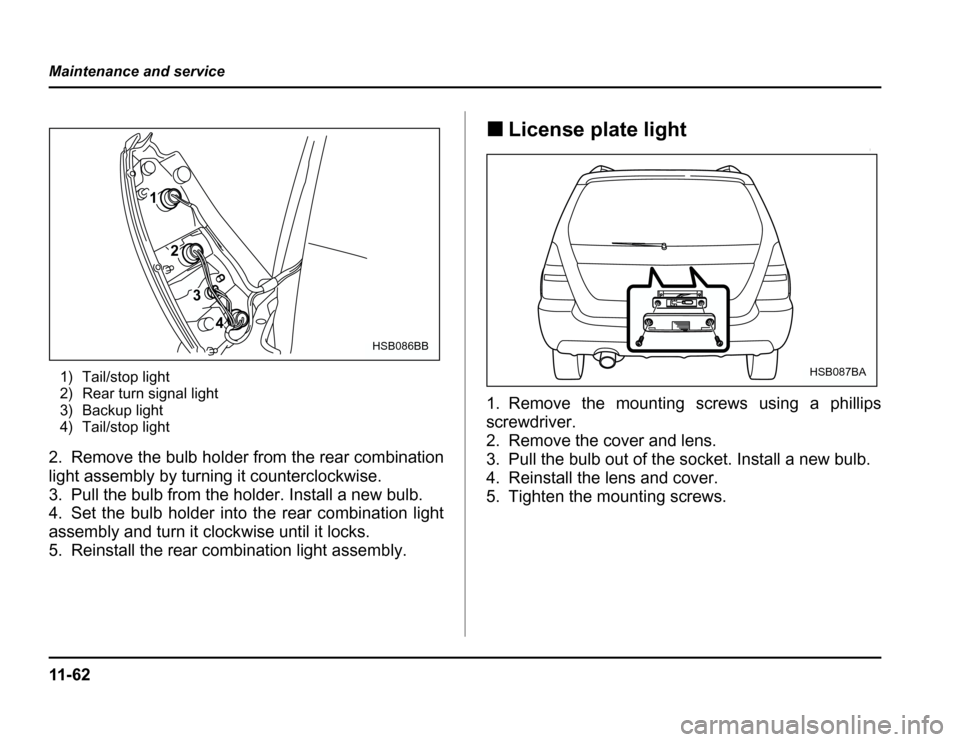
1. Remove the upper and lower screws. Then, slide
the rear combination lamp assembly to the rear and remove it from the vehicle.
HSB080BA
HSB085BA
Page 393 of 420

11 - 6 2
Maintenance and service
1) Tail/stop light
2) Rear turn signal light
3) Backup light
4) Tail/stop light
2. Remove the bulb holder from the rear combination
light assembly by turning it counterclockwise.
3. Pull the bulb from the holder. Install a new bulb.
4. Set the bulb holder into the rear combination light
assembly and turn it clockwise until it locks.
5. Reinstall the rear combination light assembly. �
License plate light
0
1. Remove the mounting screws using a phillipsscrewdriver.
2. Remove the cover and lens.
3. Pull the bulb out of the socket. Install a new bulb.
4. Reinstall the lens and cover.
5. Tighten the mounting screws.
3
2
1
4
HSB086BB
HSB087BA