roof SUBARU FORESTER 2010 SH / 3.G User Guide
[x] Cancel search | Manufacturer: SUBARU, Model Year: 2010, Model line: FORESTER, Model: SUBARU FORESTER 2010 SH / 3.GPages: 402, PDF Size: 14.36 MB
Page 108 of 402
procedure, refer to“Rear gate –if the
rear gate cannot be opened ”F 9-17. Moonroof (if equipped)
WARNING
Never let anyone ’s hands, arms,
head or any objects protrude from
the moonroof. A person could be
seriously injured if the vehicle stops
suddenly or turns sharply or if the
vehicle is involved in an accident.
To avoid serious personal injury
caused by entrapment, always con-
form to the following instructions
without exception. . Before closing the moonroof,
make sure that no one ’s hands,
arms, head or other objects will
be accidentally caught in themoonroof.
. Before leaving the vehicle, al-
ways remove the key from the
ignition switch for safety and
never allow an unattended child
to remain in the vehicle. Failure
to follow this procedure could
result in injury to a child operat-
ing the moonroof. .
Never try to check the anti-en-
trapment function by deliberately
placing part of your body in themoonroof.
CAUTION
. Do not sit on the edge of the open
moonroof.
. Do not operate the moonroof if
falling snow or extremely cold
conditions have caused it to
freeze shut.
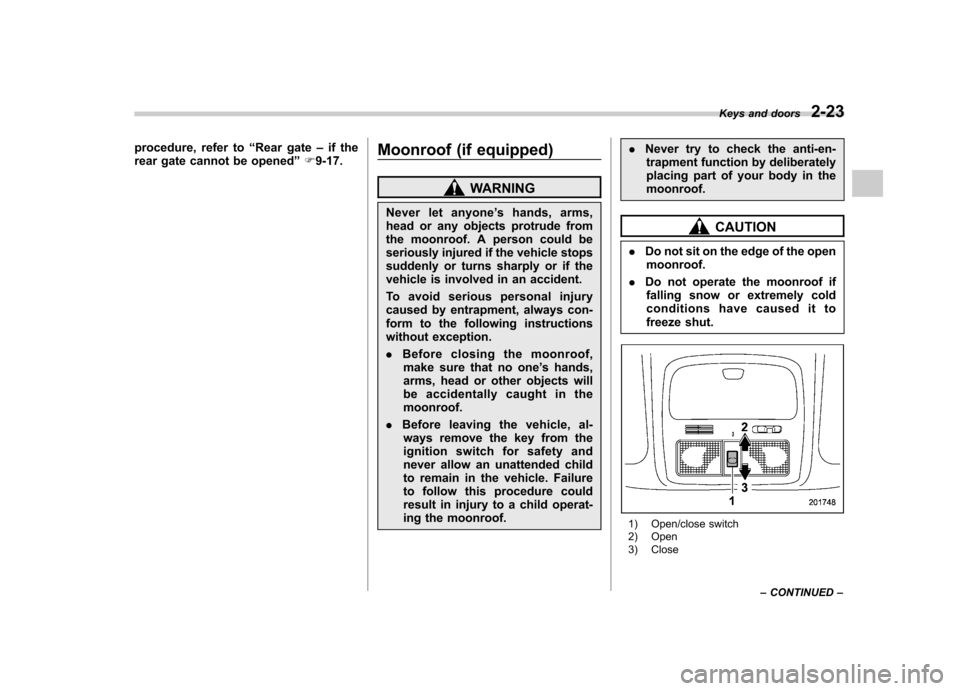
1) Open/close switch
2) Open
3) Close Keys and doors
2-23
– CONTINUED –
Page 109 of 402

2-24Keys and doors
The moonroof operates only when the
ignition switch is in the “ON ”position.
& To open the moonroof
Pull the switch to the “OPEN ”side and
quickly release it to open the moonroof.
The sun shade will also be opened
together with the moonroof. The moonroof
will stop at a position 20 in (50 cm) away
from the fully closed position. Pull the
switch again to open the moonroof com-
pletely.
To stop the moonroof at a desired position,
momentarily push the switch to the“ CLOSE ”or “OPEN ”side.
After washing the vehicle or after it rains,
wipe away water on the roof prior to
opening the moonroof to prevent drops
of water from falling into the passengercompartment.
& To close the moonroof
Push the switch to the “CLOSE ”side then
quickly release it to close the moonroof.
The moonroof will stop at a position 8 in
(20 cm) away from the fully closed
position. Push the switch again to close
the moonroof completely.
To stop the moonroof at a desired position,
momentarily push the switch to the “
CLOSE ”or “OPEN ”side.
& Anti-entrapment function
When the moonroof senses a substantial
enough object trapped between its glass
and the vehicle ’s roof during closure, it
automatically moves back by 6 in (15 cm)
from that point and then stops. The anti-
entrapment function may also be activated
by a strong shock on the moonroof even
when there is nothing trapped.
CAUTION
Never attempt to test this function
using fingers, hands or other parts
of your body.
NOTE . For the sake of safety, it is recom-
mended that you avoid driving with the
moonroof fully opened.. Driving with the moonroof fully open
can cause an annoying sound to gen-
erate at high speeds. If such a condi-
tion has been encountered, use the
moonroof at the initial stop position of
20 in (50 cm) away from the fully closedposition. .
If the moonroof cannot be closed
through switch operation because of
system failure, it can be closed manu-
ally using a hex-head wrench. For the
procedure, refer to “Moonroof –if the
moonroof cannot be closed ”F 9-17.
Page 110 of 402

&Sun shade
The sun shade can be slid forward or
backward by hand while the moonroof isclosed.
If the moonroof is opened, the sun shade
also moves back. Keys and doors
2-25
Page 114 of 402
Ignition switch
WARNING
. Never turn the ignition switch to
“ LOCK ”while the vehicle is
being driven or towed because
that will lock the steering wheel,
preventing steering control. And
when the engine is turned off, it
takes a much greater effort than
usual to steer.
. Before leaving the vehicle, al-
ways remove the key from the
ignition switch for safety and
never allow an unattended child
to remain in the vehicle. Failure
to follow this procedure could
result in injury to a child or
others. Children could operate
the power windows, the moon-
roof or other controls or even
make the vehicle move.
CAUTION
Do not attach a large key holder or
key case to either key. If it banged
against your knees or hands while
you are driving, it could turn the
ignition switch from the “ON ”posi- tion to the
“Acc ”or “LOCK ”posi-
tion, thereby stopping the engine.
Also, if the key is attached to a
keyholder or to a large bunch of
other keys, centrifugal force may act
on it as the vehicle moves, resulting
in unwanted turning of the ignitionswitch.
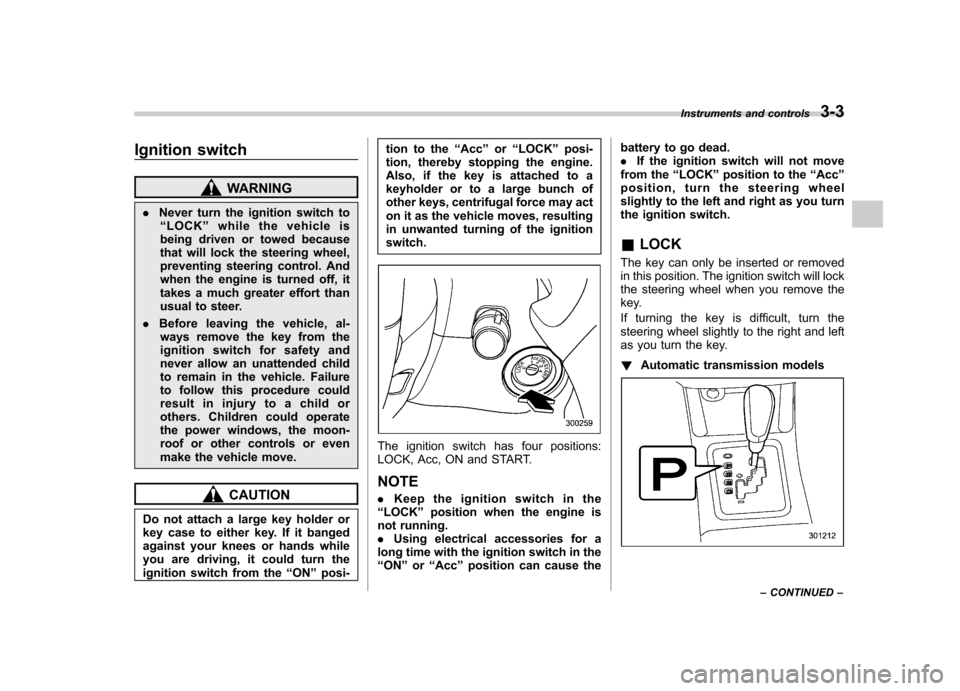
The ignition switch has four positions:
LOCK, Acc, ON and START. NOTE . Keep the ignition switch in the
“ LOCK ”position when the engine is
not running. . Using electrical accessories for a
long time with the ignition switch in the“ ON ”or “Acc ”position can cause the battery to go dead..
If the ignition switch will not move
from the “LOCK ”position to the “Acc ”
position, turn the steering wheel
slightly to the left and right as you turn
the ignition switch. & LOCK
The key can only be inserted or removed
in this position. The ignition switch will lock
the steering wheel when you remove the
key.
If turning the key is difficult, turn the
steering wheel slightly to the right and left
as you turn the key. ! Automatic transmission models
Instruments and controls 3-3
– CONTINUED –
Page 172 of 402
Antenna system.................................................. 5-2
Roof antenna ...................................................... 5-2
FM reception ....................................................... 5-2
XM
TMsatellite radio reception (if equipped) ...... 5-2
Installation of accessories .................................. 5-4
Audio set ............................................................. 5-4
Type A audio set (if equipped) ............................. 5-5
Type B audio set (if equipped) ............................. 5-6
Power and sound controls ................................. 5-7
Power switch and volume control ........................ 5-7
Sound control ..................................................... 5-7
Adjustable level of each mode ............................. 5-9
FM/AM radio operation ...................................... 5-10
FM/AM selection ................................................. 5-10
Tuning ............................................................... 5-10
Displaying radio PS (Program Service Name) and RT (Radio Text) ................................................ 5-12
Station preset .................................................... 5-12
Satellite radio operation (if equipped) .............. 5-13
XM
TMsatellite radio ............................................ 5-13
Sirius satellite radio ........................................... 5-13
Satellite radio reception ...................................... 5-13
Displaying satellite radio ID of tuner ................... 5-13Band selection
................................................... 5-14
Channel and category selection ......................... 5-14
Channel preset .................................................. 5-16
Display selection ............................................... 5-16
CD player operation .......................................... 5-17
How to insert a CD (type A) ................................ 5-17
How to insert a CD(s) (type B) .. .......................... 5-17
How to play back a CD ...................................... 5-19
To select a track from its beginning. ................... 5-19
Fast-forwarding and fast-reversing ..................... 5-20
Repeating .......................................................... 5-21
Random playback .............................................. 5-21
Scan ................................................................. 5-22
Display selection ............................................... 5-22
Folder selection ................................................. 5-23
How to eject a CD from the player (type A) .... ..... 5-23
How to eject CDs from the player (type B) ..... ..... 5-24
When the following messages are displayed. . ..... 5-25
Auxiliary input jack (if equipped). ..................... 5-25
Precautions to observe when handling a compact disc ................................................... 5-26
Audio control buttons (if equipped) ................. 5-28
MODE button ..................................................... 5-28 Audio
5
Page 173 of 402

5-2Audio
Antenna system &Roof antenna
CAUTION
. Be sure to lower the antenna rod
before entering garages, parking
towers and other locations with
low ceilings.
. Remove the antenna rod before
washing your car at a car wash. If
the antenna rod is left attached, it
may scratch the roof.
. When reinstalling the removed
antenna rod, be sure to fully
tighten it.
1) Unscrew
2) Remove
The roof antenna is installed in the center
at the rear part of the roof.
It is possible to remove the antenna rod by
unscrewing it from its base. & FM reception
Although FM is normally static free,
reception can be affected by the surround-
ing area, atmospheric conditions, station
strength and transmitter distance. Build-
ings or other obstructions may cause
momentary static, flutter or station inter-
ference. If reception continues to be
unsatisfactory, switch to a stronger station. XM
TMsatellite radio reception
(if equipped)
XM
TMis a continental U.S. based satellite
radio service, including music, news,
sports, talk and children ’s programming.
XM
TMprovides digital quality audio and
text information, including song title and
artist name. A service fee is required to
receive the XM
TMservice. For more
information, contact XMTMatwww.xmradio.com or call 1-800-XM-
RADIO (1-800-967-2346) for U.S.,
www.xmradio.ca or 1-877-GET-XMSR (1-
877-438-9677) for Canada.
The XM
TMsatellite radio receiver that is
fitted to your vehicle receives the neces-
sary signals from two specially designated
satellites that are in a geostationary orbit
over the equator. One satellite covers the
east coast and the other covers the west
coast. Both of them direct their signals
north. These signals are then relayed
throughout the USA by a network of
ground repeater stations. The satellite
radio signals are transmitted as “line of
sight ”signals. Line of sight signals can be
blocked by objects such as buildings, but
the network of repeater stations allows
signal coverage within urban areas such
as cities.
Page 256 of 402
New vehicle break-in driving–the first
1,000 miles (1,600 km) ..................................... 8-2
Fuel economy hints ............................................ 8-2
Engine exhaust gas (carbon monoxide) ............ 8-2
Catalytic converter .............................................. 8-3
Periodic inspections ........................................... 8-4
Driving in foreign countries ............................... 8-4
Driving tips for AWD models .............................. 8-5
On-pavement and off-road driving ..................... 8-6
Winter driving ...................................................... 8-8
Operation during cold weather ............................. 8-8
Driving on snowy and icy roads .......................... 8-9
Corrosion protection .......................................... 8-10
Snow tires ......................................................... 8-10
Tire chains ......................................................... 8-11
Rocking the vehicle ............................................ 8-11 Loading your vehicle
......................................... 8-12
Vehicle capacity weight ...................................... 8-12
GVWR and GAWR (Gross Vehicle Weight Rating and Gross Axle Weight Rating) ........................ 8-13
Roof rail (if equipped) ........................................ 8-14
Roof molding and crossbar (if equipped) ............ 8-14
Trailer hitch (dealer option) ............................... 8-16
Connecting a trailer ........................................... 8-16
When you do not tow a trailer .. .......................... 8-17
Trailer towing ..................................................... 8-18
Warranties and maintenance .............................. 8-18
Maximum load limits .......................................... 8-18
Trailer hitches .................................................... 8-21
Connecting a trailer ........................................... 8-22
Trailer towing tips .............................................. 8-23Driving tips
8
Page 262 of 402

crossing shallow streams, first check the
depth of the water and the bottom of the
stream bed for firmness and ensure that
the bed of the stream is flat. Drive slowly
and completely through the stream. The
water should be shallow enough that it
does not reach the vehicle’s undercar-
riage. Water entering the engine air intake
or the exhaust pipe or water splashing
onto electrical parts may damage your
vehicle and may cause it to stall. Never
attempt to drive through rushing water;
regardless of its depth, it can wash away
the ground from under your tires, resulting
in possible loss of traction and even
vehicle rollover. . Always check your brakes for effec-
tiveness immediately after driving in sand,
mud or water. Do this by driving slowly
and stepping on the brake pedal. Repeat
that process several times to dry out the
brake discs and brake pads. . Do not drive or park over or near
flammable materials such as dry grass or
fallen leaves, as they may burn easily. The
exhaust system is very hot while the
engine is running and right after engine
stops. This could create a fire hazard. . After driving through tall grass, mud,
rocks, sand, rivers, etc., check that there
is no grass, bush, paper, rags, stones,
sand, etc. adhering to or trapped on the underbody. Clear off any such matter from
the underbody. If the vehicle is used with
these materials trapped or adhering to the
underbody, a mechanical breakdown or
fire could occur. .
Secure all cargo carried inside the
vehicle and make certain that it is not
piled higher than the seatbacks. During
sudden stops or jolts, unsecured cargo
could be thrown around in the vehicle and
cause injury. Do not pile heavy loads on
the roof. Those loads raise the vehicle ’s
center of gravity and make it more prone
to tip over. . If you must rock the vehicle to free it
from sand or mud, depress the accelerator
pedal slightly and move the select lever
back and forth between “D ” and “R ”
repeatedly. Do not race the engine. For
the best possible traction, avoid spinning
the wheels when trying to free the vehicle. . When the road surface is extremely
slippery, you can obtain better traction by
starting the vehicle with the transmission
in 2nd than 1st. . Never equip your vehicle with tires
larger than those specified in this manual.. Wash the vehicle ’s underbody after off-
road driving. Suspension components are
particularly prone to dirt buildup, so they
need to be washed thoroughly. . Frequent driving of an AWD model under hard-driving conditions such as
rough roads or off roads will necessitate
more frequent replacement of engine oil,
brake fluid and transmission oil than that
specified in the maintenance schedule
described in the
“Warranty and Mainte-
nance Booklet ”.
Remember that damage done to your
SUBARU while operating it off-road and
not using common sense precautions
such as those listed above is not eligible
for warranty coverage. Driving tips
8-7
Page 267 of 402
8-12Driving tips
Loading your vehicle
WARNING
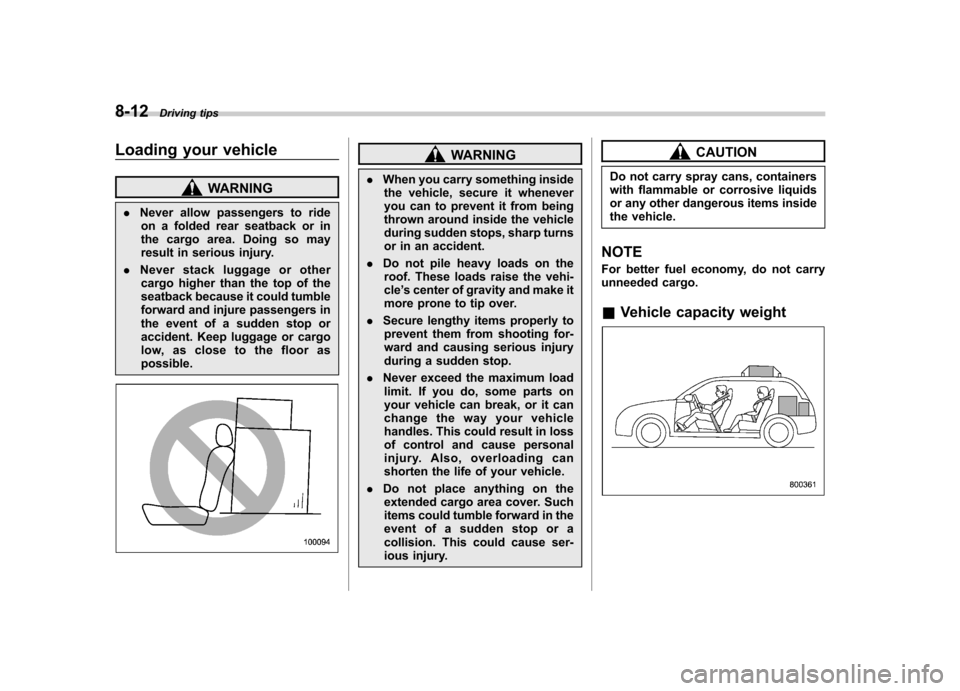
. Never allow passengers to ride
on a folded rear seatback or in
the cargo area. Doing so may
result in serious injury.
. Never stack luggage or other
cargo higher than the top of the
seatback because it could tumble
forward and injure passengers in
the event of a sudden stop or
accident. Keep luggage or cargo
low, as close to the floor aspossible.
WARNING
. When you carry something inside
the vehicle, secure it whenever
you can to prevent it from being
thrown around inside the vehicle
during sudden stops, sharp turns
or in an accident.
. Do not pile heavy loads on the
roof. These loads raise the vehi-cle ’s center of gravity and make it
more prone to tip over.
. Secure lengthy items properly to
prevent them from shooting for-
ward and causing serious injury
during a sudden stop.
. Never exceed the maximum load
limit. If you do, some parts on
your vehicle can break, or it can
change the way your vehicle
handles. This could result in loss
of control and cause personal
injury. Also, overloading can
shorten the life of your vehicle.
. Do not place anything on the
extended cargo area cover. Such
items could tumble forward in the
event of a sudden stop or a
collision. This could cause ser-
ious injury.CAUTION
Do not carry spray cans, containers
with flammable or corrosive liquids
or any other dangerous items inside
the vehicle.
NOTE
For better fuel economy, do not carry
unneeded cargo. & Vehicle capacity weight
Page 268 of 402
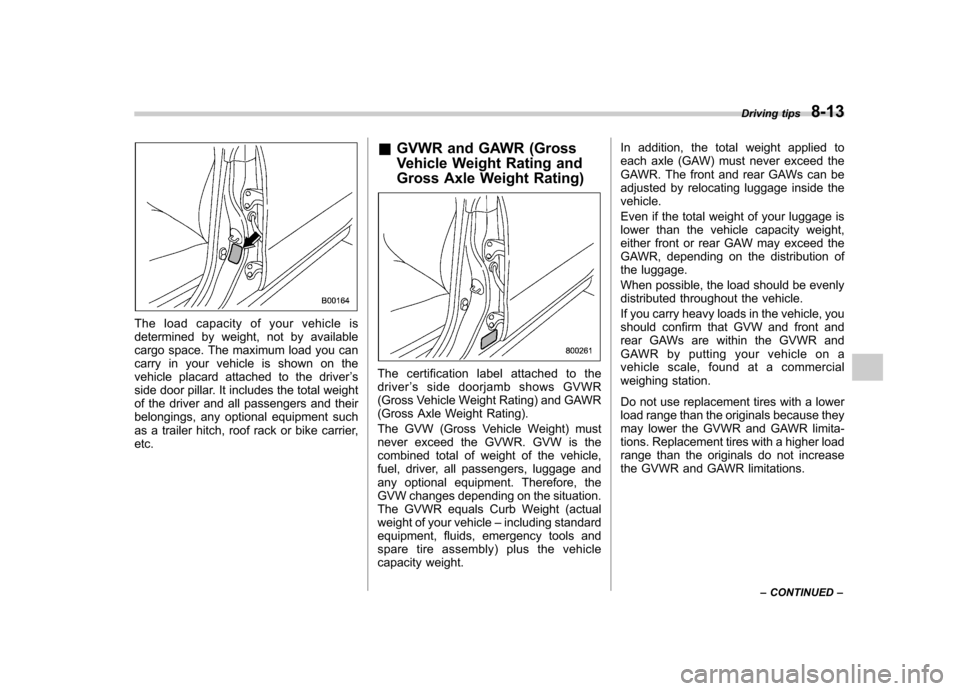
The load capacity of your vehicle is
determined by weight, not by available
cargo space. The maximum load you can
carry in your vehicle is shown on the
vehicle placard attached to the driver’s
side door pillar. It includes the total weight
of the driver and all passengers and their
belongings, any optional equipment such
as a trailer hitch, roof rack or bike carrier,etc. &
GVWR and GAWR (Gross
Vehicle Weight Rating and
Gross Axle Weight Rating)
The certification label attached to the
driver ’s side doorjamb shows GVWR
(Gross Vehicle Weight Rating) and GAWR
(Gross Axle Weight Rating).
The GVW (Gross Vehicle Weight) must
never exceed the GVWR. GVW is the
combined total of weight of the vehicle,
fuel, driver, all passengers, luggage and
any optional equipment. Therefore, the
GVW changes depending on the situation.
The GVWR equals Curb Weight (actual
weight of your vehicle –including standard
equipment, fluids, emergency tools and
spare tire assembly) plus the vehicle
capacity weight. In addition, the total weight applied to
each axle (GAW) must never exceed the
GAWR. The front and rear GAWs can be
adjusted by relocating luggage inside thevehicle.
Even if the total weight of your luggage is
lower than the vehicle capacity weight,
either front or rear GAW may exceed the
GAWR, depending on the distribution of
the luggage.
When possible, the load should be evenly
distributed throughout the vehicle.
If you carry heavy loads in the vehicle, you
should confirm that GVW and front and
rear GAWs are within the GVWR and
GAWR by putting your vehicle on a
vehicle scale, found at a commercial
weighing station.
Do not use replacement tires with a lower
load range than the originals because they
may lower the GVWR and GAWR limita-
tions. Replacement tires with a higher load
range than the originals do not increase
the GVWR and GAWR limitations.
Driving tips
8-13
– CONTINUED –