driver seat adjustment SUBARU FORESTER 2010 SH / 3.G Owners Manual
[x] Cancel search | Manufacturer: SUBARU, Model Year: 2010, Model line: FORESTER, Model: SUBARU FORESTER 2010 SH / 3.GPages: 402, PDF Size: 14.36 MB
Page 24 of 402

Front seats........................................................... 1-2
Manual seat ........................................................ 1-3
Power seat (driver ’s seat –if equipped) ... ............ 1-4
Head restraint adjustment .................................... 1-5
Active head restraint ........................................... 1-5
Seat heater (if equipped) .................................... 1-6
Rear seats ............................................................ 1-7
Armrest .............................................................. 1-7
Head restraint adjustment .................................... 1-8
Reclining the seatback (if equipped) .................... 1-9
Folding down the rear seatback .......................... 1-10
Seatbelts ............................................................. 1-11
Seatbelt safety tips ............................................. 1-11
Emergency Locking Retractor (ELR) ................... 1-12
Automatic/Emergency Locking Retractor (A/ELR) ............................................................ 1-12
Seatbelt warning light and chime ........................ 1-13
Fastening the seatbelt ........................................ 1-14
Seatbelt maintenance ......................................... 1-20
Front seatbelt pretensioners ............................. 1-20
System monitors ................................................ 1-21 System servicing
............................................... 1-22
Precautions against vehicle modification ............ 1-23
Child restraint systems ..................................... 1-23
Where to place a child restraint system .............. 1-24
Choosing a child restraint system ...................... 1-26
Installing child restraint systems with A/ELR seatbelt ........................................................... 1-26
Installing a booster seat ..................................... 1-29
Installation of child restraint systems by use of lower and tether anchorages (LATCH) .............. 1-30
Top tether anchorages ....................................... 1-33
*SRS airbag (Supplemental Restraint System airbag) ................................................ 1-35
Models with SRS airbags and lap/shoulder restraints for driver, front passenger, and
window-side rear passengers . .......................... 1-35
SUBARU advanced frontal airbag system ........... 1-39
SRS side airbag and SRS curtain airbag ............. 1-50
SRS airbag system monitors .............................. 1-60
SRS airbag system servicing ... .......................... 1-60
Precautions against vehicle modification ............ 1-61
Seat, seatbelt and SRS airbags1
Page 27 of 402

1-4Seat, seatbelt and SRS airbags
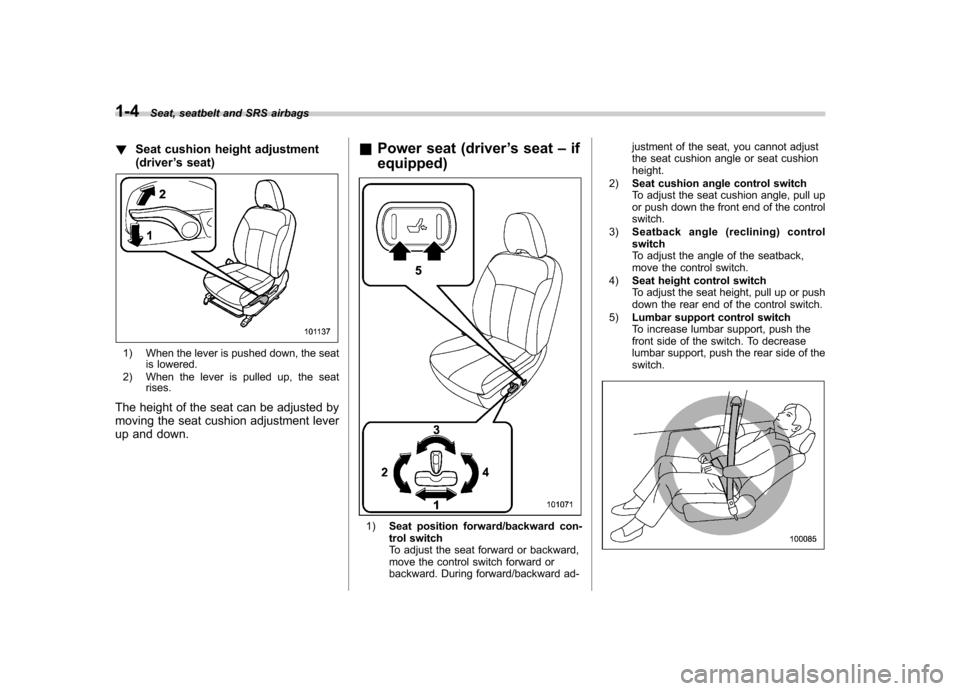
! Seat cushion height adjustment (driver ’s seat)
1) When the lever is pushed down, the seat
is lowered.
2) When the lever is pulled up, the seat rises.
The height of the seat can be adjusted by
moving the seat cushion adjustment lever
up and down. &
Power seat (driver ’s seat –if
equipped)
1) Seat position forward/backward con-
trol switch
To adjust the seat forward or backward,
move the control switch forward or
backward. During forward/backward ad- justment of the seat, you cannot adjust
the seat cushion angle or seat cushion height.
2) Seat cushion angle control switch
To adjust the seat cushion angle, pull up
or push down the front end of the control switch.
3) Seatback angle (r eclining) control
switch
To adjust the angle of the seatback,
move the control switch.
4) Seat height control switch
To adjust the seat height, pull up or push
down the rear end of the control switch.
5) Lumbar support control switch
To increase lumbar support, push the
front side of the switch. To decrease
lumbar support, push the rear side of the switch.
Page 28 of 402

WARNING
To prevent the passenger from slid-
ing under the seatbelt in the event of
a collision, always put the seatback
in the upright position while the
vehicle is in motion. Also, do not
place objects such as cushions
between the passenger and the
seatback. If you do so, the risk of
sliding under the lap belt and of the
lap belt sliding up over the abdomen
will increase, and both can result in
serious internal injury or death.
& Head restraint adjustment
1) Head restraint
2) Release button To raise the head restraint, pull it up.
To lower it, push the head restraint down
while pressing the release button on the
top of the seatback. .
To remove the head restraint
While pressing the release button, pull out
the head restraint. . To install the head restraint
Install the head restraint into the holes that
are located on the top of seatback until itlocks.
The head restraint should be adjusted so
that the center of the head restraint is
closest to the top of the occupant ’s ears.
WARNING
Never drive the vehicle with the
head restraints removed because
they are designed to reduce the risk
of serious neck injury in the event
that the vehicle is struck from the
rear. Therefore, when you remove
the head restraints, you must re-
install all of the head restraints to
protect vehicle occupants. &
Active head restraint
The front seats of your vehicle are
equipped with active head restraints. They
automatically tilt forward slightly in the
event the vehicle is struck from the rear,
decreasing the amount of rearward head
movement and thus reducing the risk of
whiplash. For maximum effectiveness, the
head restraint should be adjusted so that
the center of the head restraint is closest
to the top of the occupant ’s ears.
CAUTION
. Each active head restraint is
effective only when its height is
properly adjusted and driver/pas-
senger sits in the correct posi-
tion on the seat. Seat, seatbelt and SRS airbags
1-5
– CONTINUED –
Page 64 of 402

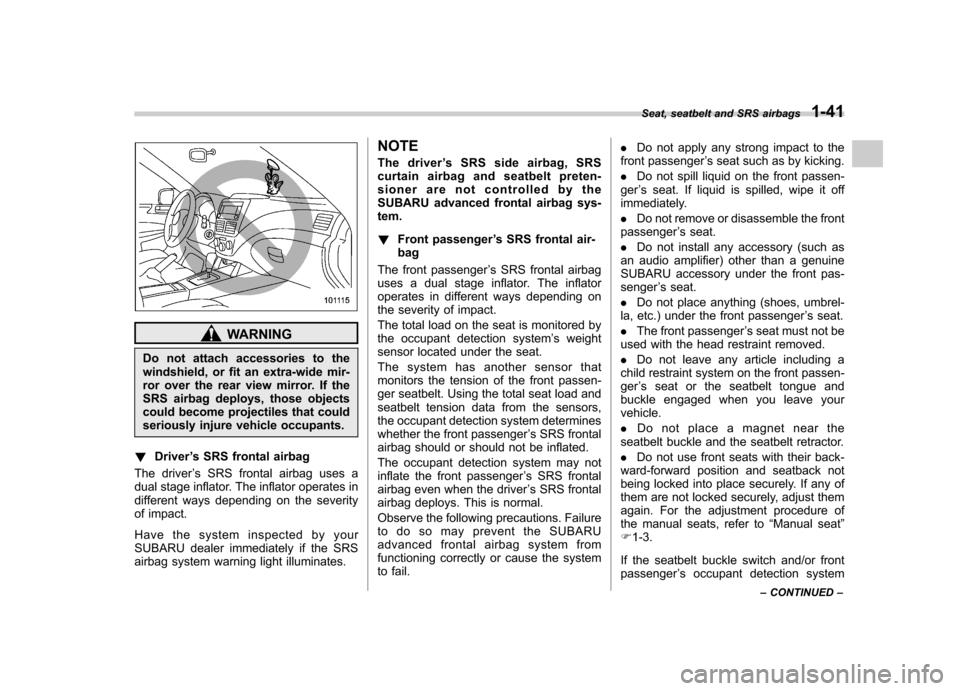
WARNING
Do not attach accessories to the
windshield, or fit an extra-wide mir-
ror over the rear view mirror. If the
SRS airbag deploys, those objects
could become projectiles that could
seriously injure vehicle occupants.
! Driver ’s SRS frontal airbag
The driver ’s SRS frontal airbag uses a
dual stage inflator. The inflator operates in
different ways depending on the severity
of impact.
Have the system inspected by your
SUBARU dealer immediately if the SRS
airbag system warning light illuminates. NOTE
The driver
’s SRS side airbag, SRS
curtain airbag and seatbelt preten-
sioner are not controlled by the
SUBARU advanced frontal airbag sys-tem. ! Front passenger ’s SRS frontal air-
bag
The front passenger ’s SRS frontal airbag
uses a dual stage inflator. The inflator
operates in different ways depending on
the severity of impact.
The total load on the seat is monitored by
the occupant detection system ’s weight
sensor located under the seat.
The system has another sensor that
monitors the tension of the front passen-
ger seatbelt. Using the total seat load and
seatbelt tension data from the sensors,
the occupant detection system determines
whether the front passenger ’s SRS frontal
airbag should or should not be inflated.
The occupant detection system may not
inflate the front passenger ’s SRS frontal
airbag even when the driver ’s SRS frontal
airbag deploys. This is normal.
Observe the following precautions. Failure
to do so may prevent the SUBARU
advanced frontal airbag system from
functioning correctly or cause the system
to fail. .
Do not apply any strong impact to the
front passenger ’s seat such as by kicking.
. Do not spill liquid on the front passen-
ger ’s seat. If liquid is spilled, wipe it off
immediately. . Do not remove or disassemble the front
passenger ’s seat.
. Do not install any accessory (such as
an audio amplifier) other than a genuine
SUBARU accessory under the front pas-senger ’s seat.
. Do not place anything (shoes, umbrel-
la, etc.) under the front passenger ’s seat.
. The front passenger ’s seat must not be
used with the head restraint removed. . Do not leave any article including a
child restraint system on the front passen- ger ’s seat or the seatbelt tongue and
buckle engaged when you leave yourvehicle. . Do not place a magnet near the
seatbelt buckle and the seatbelt retractor.. Do not use front seats with their back-
ward-forward position and seatback not
being locked into place securely. If any of
them are not locked securely, adjust them
again. For the adjustment procedure of
the manual seats, refer to “Manual seat ”
F 1-3.
If the seatbelt buckle switch and/or frontpassenger ’s occupant detection system
Seat, seatbelt and SRS airbags
1-41
– CONTINUED –
Page 394 of 402

Oil........................................................................ 11-8 Overheating.......................................................... 9-12
Starting ................................................................... 7-7
Stopping ................................................................. 7-9
Exterior care .............................................................. 10-2
F
Flat tires ..................................................................... 9-6
Floor mat .................................................................. 6-12
Fluid level
Automatic transmission .......................................... 11-20
Brake .................................................................. 11-24
Clutch .................................................................. 11-25
Power steering ..................................................... 11-23
Fog light Indicator light ......................................................... 3-21
Switch .................................................................. 3-28
Folding mirror switch .................................................. 3-40
Front
Differential gear oil ................................................ 11-21
Fog light ............................................................... 3-28
Fog light indicator light ............................................ 3-21
Seatbelt pretensioners ............................................ 1-20
Turn signal light .................................................... 11-49
Front seats .................................................................. 1-2
Forward and backward adjustment ............................. 1-3
Head restraint adjustment ......................................... 1-5
Power seat .............................................................. 1-4
Reclining ................................................................. 1-3
Seat height adjustment (driver ’s seat) ......................... 1-4 Fuel
........................................................................... 7-2
Consumption indicator ............................................. 3-22
Economy hints ........................................................ 8-2
Filler lid and cap ...................................................... 7-3
Gauge .................................................................... 3-8
Requirements ......................................................... 7-2
Fuses ..................................................................... 11-44
Main fuse ............................................................ 11-45
Fuses and circuits ...................................................... 12-6
G
GAWR (Gross Axle Weight Rating) .. ............................. 8-13
Glove box ................................................................... 6-5
GVWR (Gross Vehicle Weight Rating) ........................... 8-13
H
Hazard warning flasher .......................................... 3-5, 9-2
Head restraint adjustment
Front seat ............................................................... 1-5
Rear seat ............................................................... 1-8
Headlight
Beam lever ............................................................ 3-27
Bulb replacing ...................................................... 11-46
Bulb wattage ........................................................ 12-10
Control switch ........................................................ 3-25
Flasher .................................................................. 3-26
Indicator light ......................................................... 3-21
Heater operation (manual climate control system) ... ......... 4-5
High beam indicator light ............................................. 3-21
High/low beam change (dimmer) .................................. 3-26
Hill start assist (MT models) ............................... 7-33, 11-28Index
14-5