power SUBARU FORESTER 2012 SH / 3.G Owners Manual
[x] Cancel search | Manufacturer: SUBARU, Model Year: 2012, Model line: FORESTER, Model: SUBARU FORESTER 2012 SH / 3.GPages: 438, PDF Size: 15.31 MB
Page 6 of 438

&Abbreviation list
You will find several abbreviations in this
manual. The meanings of the abbrevia-
tions are shown in the following list.
Abbreviation Meaning
A/C Air conditioner A/ELR Automatic/Emergency locking retractor
ABS Anti-lock brake system
AKI Anti knock index
ALR Automatic locking retractor
AT Automatic transmission
ATF Automatic transmission fluid
AWD All-wheel drive
DRL Daytime running light EBD Electronic brake force distri- bution
ELR Emergency locking retractor
FWD Front-wheel drive
GAW Gross axle weight
GAWR Gross axle weight rating
GVW Gross vehicle weight
GVWR Gross vehicle weight rating
HID High intensity discharge
INT Intermittent Abbreviation Meaning
LATCH Lower anchors and tethers for
children
LED Light emitting diode
LSD Limited slip differential
MIL Malfunction indicator light MMT Methylcyclopentadienyl man-
ganese tricarbonyl
MT Manual transmission
OBD On-board diagnostics
RON Research octane number SRS Supplemental restraint sys- tem
TIN Tire identification number TPMS Tire pressure monitoring sys- tem
VDC Vehicle dynamics control Vehicle symbols
There are some of the symbols you may
see on your vehicle.
For warning and indicator lights, refer to “
Warning and indicator lights ”F 21.
Mark Name
WARNING
CAUTION
Power door lock
Power door unlock
Power window with automatic
open (all models) and close (if
equipped) function
Passengers ’windows lock
and unlock
Fuel
Front fog lights 3
– CONTINUED –
Page 9 of 438
6
The SRS airbag deploys with
considerable speed and force
and can injure or even kill chil-
dren, especially if they are 12
years of age and under and are
not restrained or improperly re-
strained. Because children are
lighter and weaker than adults,
their risk of being injured from
deployment is greater.
. NEVER INSTALL A REARWARD
FACING CHILD SEAT IN THE
FRONT SEAT. DOING SO RISKS
SERIOUS INJURY OR DEATH TO
THE CHILD BY PLACING THECHILD ’S HEAD TOO CLOSE TO
THE SRS AIRBAG.
. Always turn the child safety locks
to the “LOCK ”position when
children sit on the rear seat.
Serious injury could result if a
child accidentally opens the door
and falls out. Refer to “Child
safety locks ”F 2-19.
. Always lock the passenger ’s win-
dows using the lock switch when
children are riding in the vehicle.
Failure to follow this procedure
could result in injury to a child
operating the power window. Re-
fer to “Windows ”F 2-20. .
Never leave unattended children
in the vehicle. They could acci-
dentally injure themselves or
others through inadvertent op-
eration of the vehicle. Also, on
hot or sunny days, temperature
in a closed vehicle could quickly
become high enough to cause
severe or possibly fatal injuries
to them.
For instructions and precautions, carefully
read the following sections. . For the seatbelt system, refer to “Seat-
belts ”F 1-12.
. For the child restraint system, refer to
“ Child restraint systems ”F 1-22.
. For the SRS airbag system, refer to
“ *SRS airbag (Supplemental Restraint
System airbag) ”F 1-34.
& Engine exhaust gas (carbon monoxide)
WARNING
. Never inhale engine exhaust gas.
Engine exhaust gas contains
carbon monoxide, a colorless
and odorless gas which is dan-
gerous, or even lethal, if inhaled.
. Always properly maintain the en- gine exhaust system to prevent
engine exhaust gas from enter-
ing the vehicle.
. Never run the engine in a closed
space, such as a garage, except
for the brief time needed to drive
the vehicle in or out of it.
. Avoid remaining in a parked
vehicle for a lengthy time while
the engine is running. If that is
unavoidable, then use the venti-
lation fan to force fresh air into
the vehicle.
. Always keep the front ventilator
inlet grille free from snow, leaves
or other obstructions to ensure
that the ventilation system al-
ways works properly.
. If at any time you suspect that
exhaust fumes are entering the
vehicle, have the problem
checked and corrected as soon
as possible. If you must drive
under these conditions, drive
only with all windows fully open.
. Keep the rear gate closed while
driving to prevent exhaust gas
from entering the vehicle.
Page 18 of 438

1) Center console (page 6-5)
2) Cup holder (page 6-8)
3) Front power supply socket (page 6-9)
4) Glove box (page 6-5)15
– CONTINUED –
Page 19 of 438

16 &Instrument panel
1) Door locks (page 2-4)
2) Outside mirror switch (page 3-44)
3) Illumination brightness control
(page 3-32)
4) Light control lever (page 3-29)
5) Combination meter (page 3-6)
6) Wiper control lever (page 3-33)
7) Hazard warning flasher switch (page 3-5)
8) Audio (page 5-1)
9) Shift lever (MT) (page 7-13)/ Select lever (AT) (page 7-15)
10) Climate control (page 4-1)
11) Cruise control (page 7-32)
12) Horn (page 3-47)
13) SRS airbag (page 1-34)
14) Tilt/telescopic steering (page 3-47)
15) Hands-free switches (page 5-42)
16) Audio control buttons (page 5-37)
17) Fuse box (page 11-44)
18) Vehicle Dynamics Control OFF switch (page 7-27)
19) Hood lock release knob (page 11-5)
20) Power windows (page 2-20)
Page 26 of 438
Front seats........................................................... 1-2
Manual seat ........................................................ 1-3
Power seat (driver ’s seat –if equipped) ... ............ 1-4
Head restraint adjustment .................................... 1-5
Active head restraint ........................................... 1-6
Seat heater (if equipped) .................................... 1-6
Rear seats ............................................................ 1-7
Armrest .............................................................. 1-8
Head restraint adjustment .................................... 1-8
Reclining the seatback (if equipped) ................... 1-10
Folding down the rear seatback .......................... 1-11
Seatbelts ............................................................. 1-12
Seatbelt safety tips ............................................. 1-12
Emergency Locking Retractor (ELR) ................... 1-13
Automatic/Emergency Locking Retractor (A/ELR) ............................................................ 1-13
Seatbelt warning light and chime ........................ 1-14
Fastening the seatbelt ........................................ 1-14
Seatbelt maintenance ......................................... 1-20
Front seatbelt pretensioners ............................. 1-20
System monitors ................................................ 1-21 System servicing
............................................... 1-21
Precautions against vehicle modification ............ 1-22
Child restraint systems ..................................... 1-22
Where to place a child restraint system .............. 1-23
Choosing a child restraint system ...................... 1-25
Installing child restraint systems with A/ELR seatbelt ........................................................... 1-25
Installing a booster seat ..................................... 1-28
Installation of child restraint systems by use of lower and tether anchorages (LATCH) .............. 1-29
Top tether anchorages ....................................... 1-32
*SRS airbag (Supplemental Restraint System airbag) ................................................ 1-34
Models with SRS airbags and lap/shoulder restraints for driver, front passenger, and
window-side rear passengers . .......................... 1-34
SUBARU advanced frontal airbag system ........... 1-38
SRS side airbag and SRS curtain airbag ............. 1-48
SRS airbag system monitors .............................. 1-58
SRS airbag system servicing ... .......................... 1-59
Precautions against vehicle modification ............ 1-60
Seat, seatbelt and SRS airbags1
Page 29 of 438
1-4Seat, seatbelt and SRS airbags
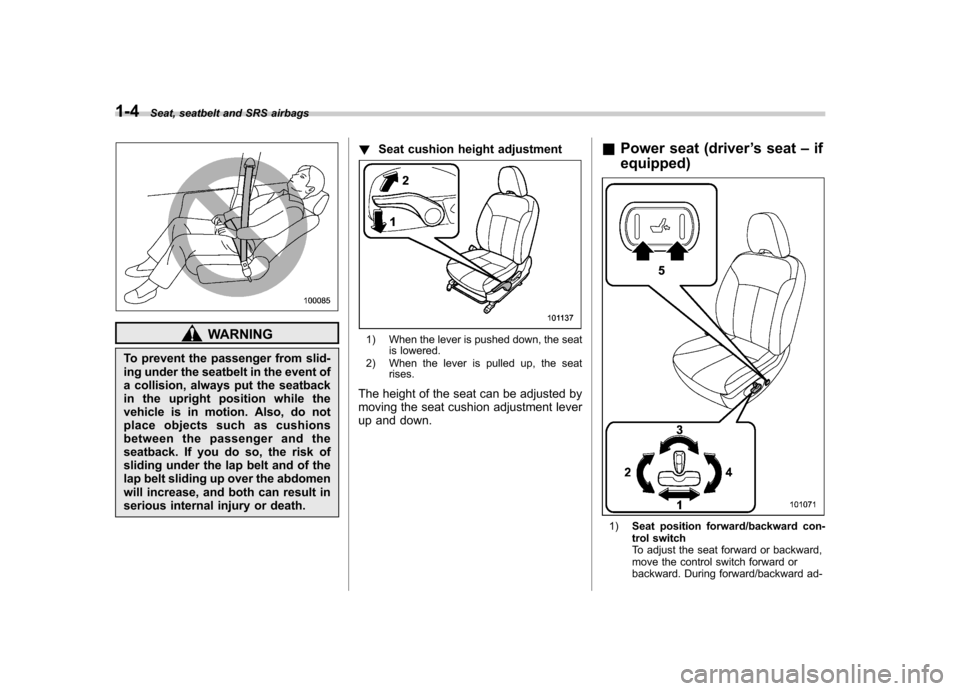
WARNING
To prevent the passenger from slid-
ing under the seatbelt in the event of
a collision, always put the seatback
in the upright position while the
vehicle is in motion. Also, do not
place objects such as cushions
between the passenger and the
seatback. If you do so, the risk of
sliding under the lap belt and of the
lap belt sliding up over the abdomen
will increase, and both can result in
serious internal injury or death. !
Seat cushion height adjustment1) When the lever is pushed down, the seat
is lowered.
2) When the lever is pulled up, the seat rises.
The height of the seat can be adjusted by
moving the seat cushion adjustment lever
up and down. &
Power seat (driver ’s seat –if
equipped)
1) Seat position forward/backward con-
trol switch
To adjust the seat forward or backward,
move the control switch forward or
backward. During forward/backward ad-
Page 86 of 438
Keys..................................................................... 2-2
Key number plate and security ID plate ................ 2-2
Immobilizer .......................................................... 2-3
Security indicator light ........................................ 2-3
Key replacement ................................................. 2-3
Door locks ........................................................... 2-4
Locking and unlocking from the outside .. ............ 2-4
Locking and unlocking from the inside ................ 2-5
Battery drainage prevention function ................... 2-5
Power door locking switches ............................. 2-6
Key lock-in prevention function ........................... 2-7
Remote keyless entry system ............................ 2-7
Locking the doors ............................................... 2-8
Unlocking the doors ............................................ 2-9
Unlocking the rear gate ....................................... 2-9
Illuminated entry ................................................. 2-9
Vehicle finder function ......................................... 2-9
Sounding a panic alarm ...................................... 2-10
Selecting turn signal lights operation .................. 2-10
Selecting audible signal operation ...................... 2-10
Replacing the battery ......................................... 2-10
Replacing lost transmitters ................................. 2-11 Alarm system
..................................................... 2-14
System operation ............................................... 2-14
Activating and deactivating the alarm system ..... 2-15
If you have accidentally triggered the alarm system ............................................................ 2-15
Arming the system ............................................ 2-15
Disarming the system ........................................ 2-17
Valet mode ........................................................ 2-17
Passive arming .................................................. 2-17
Tripped sensor identification .............................. 2-18
Shock sensors (dealer option).. .......................... 2-19
Child safety locks .............................................. 2-19
Windows ............................................................. 2-20
Power window operation by driver ..................... 2-20
Power window operation by passengers ............. 2-22
Initialization of power window (type A) ............... 2-23
Rear gate ............................................................ 2-23
Moonroof (if equipped) ...................................... 2-24
To open the moonroof ....................................... 2-25
To close the moonroof ....................................... 2-25
Anti-entrapment function .................................... 2-25
Sun shade ......................................................... 2-26 Keys and doors
2
Page 90 of 438
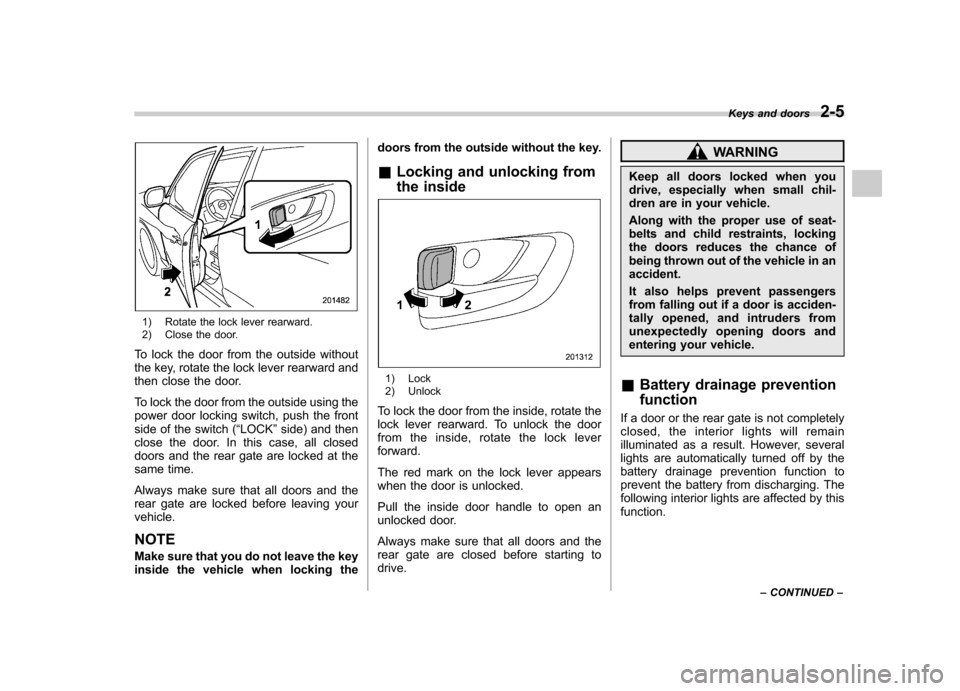
1) Rotate the lock lever rearward.
2) Close the door.
To lock the door from the outside without
the key, rotate the lock lever rearward and
then close the door.
To lock the door from the outside using the
power door locking switch, push the front
side of the switch ( “LOCK ”side) and then
close the door. In this case, all closed
doors and the rear gate are locked at the
same time.
Always make sure that all doors and the
rear gate are locked before leaving yourvehicle. NOTE
Make sure that you do not leave the key
inside the vehicle when locking the doors from the outside without the key.
& Locking and unlocking from
the inside
1) Lock
2) Unlock
To lock the door from the inside, rotate the
lock lever rearward. To unlock the door
from the inside, rotate the lock leverforward.
The red mark on the lock lever appears
when the door is unlocked.
Pull the inside door handle to open an
unlocked door.
Always make sure that all doors and the
rear gate are closed before starting todrive.
WARNING
Keep all doors locked when you
drive, especially when small chil-
dren are in your vehicle.
Along with the proper use of seat-
belts and child restraints, locking
the doors reduces the chance of
being thrown out of the vehicle in anaccident.
It also helps prevent passengers
from falling out if a door is acciden-
tally opened, and intruders from
unexpectedly opening doors and
entering your vehicle.
& Battery drainage prevention function
If a door or the rear gate is not completely
closed, the interior lights will remain
illuminated as a result. However, several
lights are automatically turned off by the
battery drainage prevention function to
prevent the battery from discharging. The
following interior lights are affected by thisfunction. Keys and doors
2-5
– CONTINUED –
Page 91 of 438

2-6Keys and doors
Item Switch
position Automatically turning
off
Map lights OFF
*1Approximately 20 minutes later
Dome light DOOR Approximately 20
minutes later
Ignition
switch light —Approximately 20
minutes later
Door steplights —
None
*2
Cargo arealightDOOR
None*2
*1: The map lights can be controlled by the
battery drainage prevention function only when
the map light switches are in the OFF position
and the door interlock switch is in the DOOR
position. For the switch positions, refer to
“Map
light ”F 6-3 .
*2: The door step lights and the cargo area light
are not affected by the battery drainage
prevention function, so the lights do not turn
off automatically. To turn off the lights, it is
necessary that each door and the rear gate are
completely closed.
The operational/non-operational setting of
this function can be changed by a
SUBARU dealer. Contact your SUBARU
dealer to change the setting. NOTE .
The factory setting (default setting)
for this function is set as “operational ”.
. When leaving the vehicle, please
make sure that all doors and the rear
gate are completely closed.. The battery drainage prevention
function does not operate while the
key is in the ignition switch. Power door locking switches
1) Lock
2) Unlock
All doors and the rear gate can be locked
and unlocked by the power door locking
switches located at the driver ’s side and
the front passenger ’s side doors.
To lock the doors, press the front side of
the switch.
To unlock the doors, press the rear side of
the switch.
If you press the front (lock) side of the
switch and then close the driver ’s door, all
the closed doors and the rear gate will belocked.
Page 92 of 438

NOTE
Make sure that you do not leave the key
inside the vehicle before locking the
doors from the outside using the power
door locking switches. &Key lock-in prevention func- tion
When the key is still in the ignition switch,
even if the front side of the power door
locking switch is pressed and then thedriver ’s door is closed, the doors will not
be locked to prevent the key from being
locked in the vehicle (Key lock-in preven-
tion function).
In the following cases, however, the key
may be locked in the vehicle. Be sure to
bring the key with you when getting out of
the vehicle. . If the driver ’s door is locked by turning
the lock lever to the rear ( “LOCK ”) position
and closing the door. If the spare key is used to lock the
driver ’s door from the outside of the
vehicle
The setting (operational/non-operational)
of this function can be changed by a
SUBARU dealer. Contact a SUBARU
dealer for details. NOTE
When leaving the vehicle, make sure
you are holding the key before locking
the doors.
Remote keyless entry system
CAUTION
. Do not expose the remote trans-
mitter to severe shocks, such as
those experienced as a result of
dropping or throwing.
. Do not take the remote transmit-
ter apart except when replacing
the battery.
. Do not get the remote transmitter
wet. If it gets wet, wipe it dry with
a cloth immediately.
. When you carry the remote trans-
mitteronanairplane,donot
press the button of the remote
transmitter while in the airplane.
When any button of the remote
transmitter is pressed, radio
waves are sent and may affect
the operation of the airplane.
When you carry the remote trans-
mitter in a bag on an airplane,
take measures to prevent the
buttons of the remote transmitter
from being pressed.
. FCC WARNING
Changes or modifications not
expressly approved by the party Keys and doors
2-7
– CONTINUED –