sound SUBARU FORESTER 2022 Getting Started Guide
[x] Cancel search | Manufacturer: SUBARU, Model Year: 2022, Model line: FORESTER, Model: SUBARU FORESTER 2022Pages: 156, PDF Size: 45.35 MB
Page 105 of 156

Lane Change Assist (LCA)
Lane Change Assist (LCA) provides an additional level of protection by warning you of
rapidly approaching vehicles in the neighboring lanes. If LCA detects a vehicle
approaching at a high speed in the neighboring lanes, the BSD/RCTA approach indicator
light in the corresponding side mirror frame illuminates. If you operate the turn signal lever
in the direction the BSD/RCTA approach indicator light is illuminated, the system rapidly
flashes the BSD/RCTA approach indicator light.
Rear Cross-Traffic Alert (RCTA)
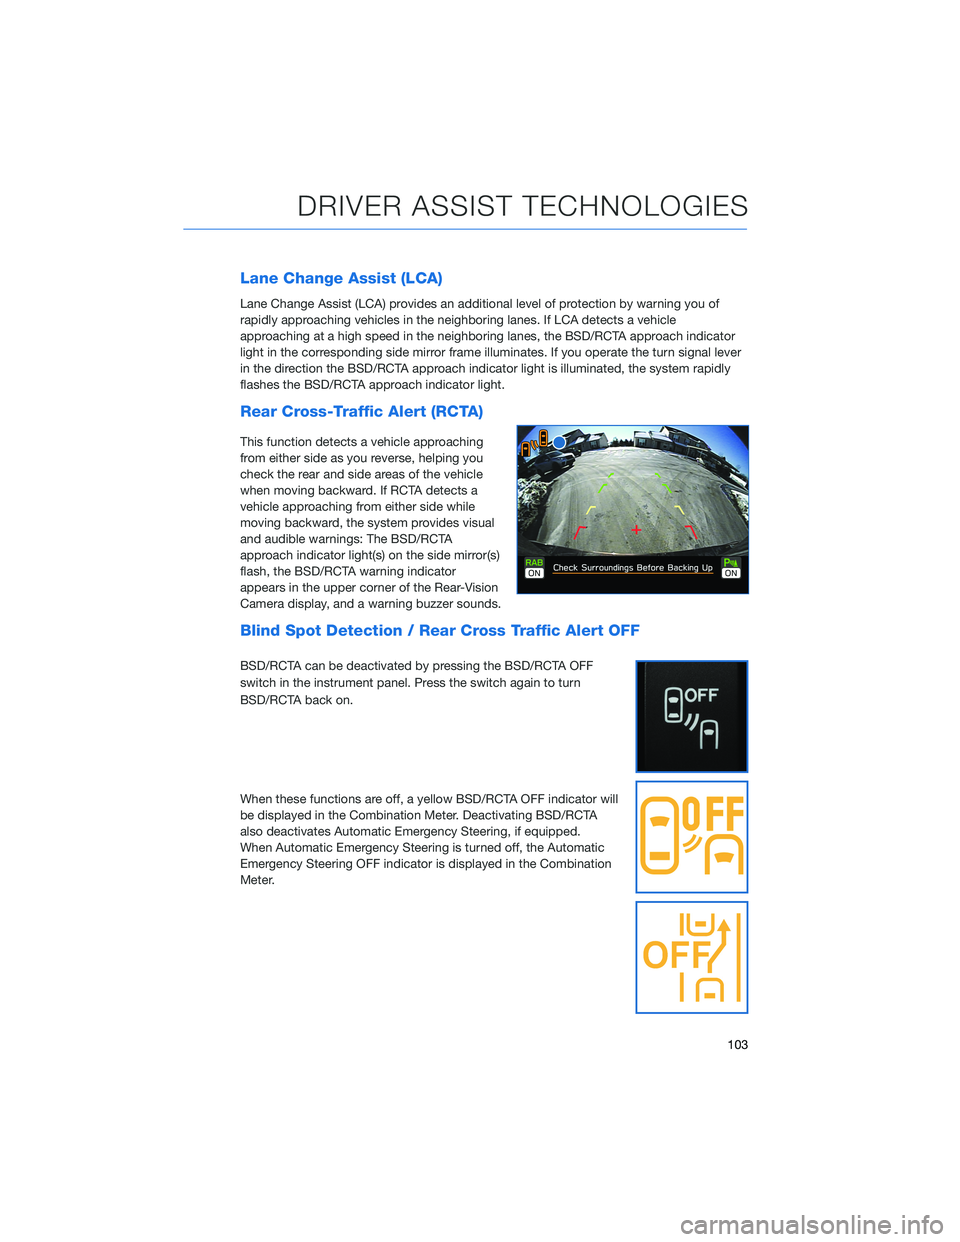
This function detects a vehicle approaching
from either side as you reverse, helping you
check the rear and side areas of the vehicle
when moving backward. If RCTA detects a
vehicle approaching from either side while
moving backward, the system provides visual
and audible warnings: The BSD/RCTA
approach indicator light(s) on the side mirror(s)
flash, the BSD/RCTA warning indicator
appears in the upper corner of the Rear-Vision
Camera display, and a warning buzzer sounds.
Blind Spot Detection / Rear Cross Traffic Alert OFF
BSD/RCTA can be deactivated by pressing the BSD/RCTA OFF
switch in the instrument panel. Press the switch again to turn
BSD/RCTA back on.
When these functions are off, a yellow BSD/RCTA OFF indicator will
be displayed in the Combination Meter. Deactivating BSD/RCTA
also deactivates Automatic Emergency Steering, if equipped.
When Automatic Emergency Steering is turned off, the Automatic
Emergency Steering OFF indicator is displayed in the Combination
Meter.
DRIVER ASSIST TECHNOLOGIES
103
Page 119 of 156

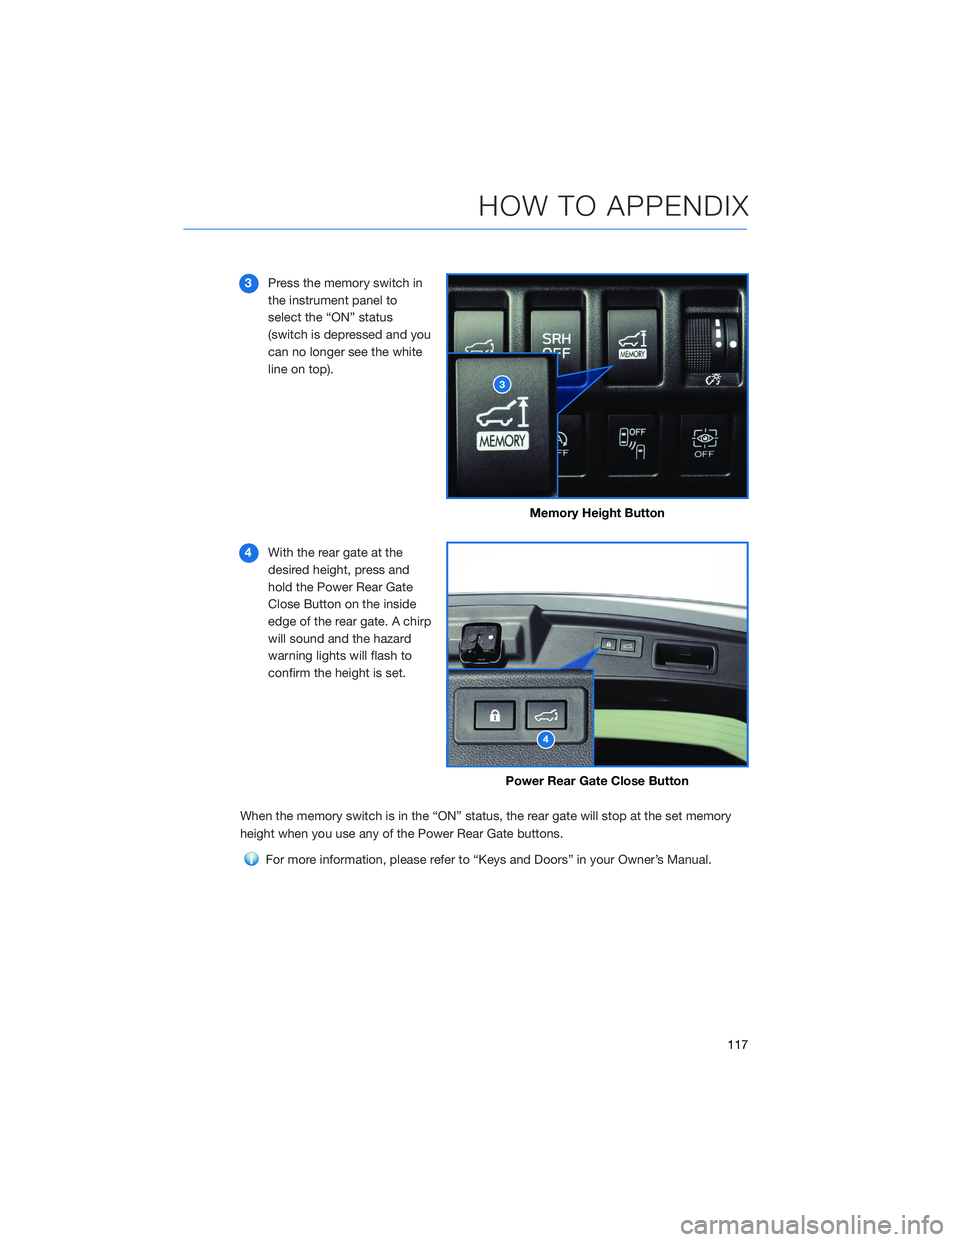
3Press the memory switch in
the instrument panel to
select the “ON” status
(switch is depressed and you
can no longer see the white
line on top).
4 With the rear gate at the
desired height, press and
hold the Power Rear Gate
Close Button on the inside
edge of the rear gate. A chirp
will sound and the hazard
warning lights will flash to
confirm the height is set.
When the memory switch is in the “ON” status, the rear gate will stop at the set memory
height when you use any of the Power Rear Gate buttons.
For more information, please refer to “Keys and Doors” in your Owner’s Manual.
Memory Height Button
Power Rear Gate Close Button
HOW TO APPENDIX
117
Page 120 of 156

MEMORY DRIVER’S SEAT(if equipped)
You can set the seat and outside mirror position and retrieve them
using the buttons on the driver’s door or the access key fob. You
can learn more about setting and retrieving your seat and mirror
positions from the how-to video linked in the QR code and the
steps listed below.
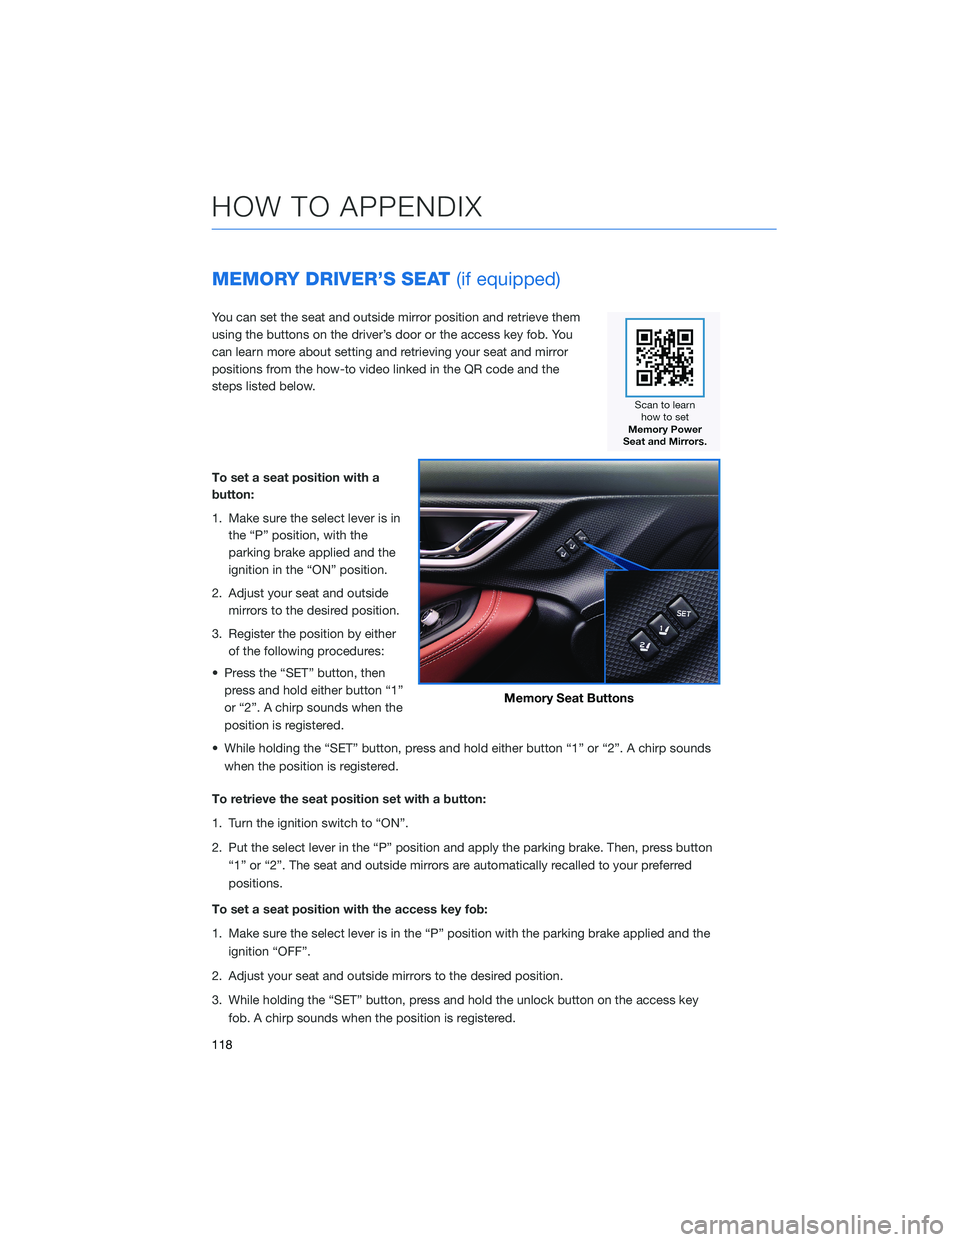
To set a seat position with a
button:
1. Make sure the select lever is in
the “P” position, with the
parking brake applied and the
ignition in the “ON” position.
2. Adjust your seat and outside mirrors to the desired position.
3. Register the position by either of the following procedures:
• Press the “SET” button, then press and hold either button “1”
or “2”. A chirp sounds when the
position is registered.
• While holding the “SET” button, press and hold either button “1” or “2”. A chirp sounds when the position is registered.
To retrieve the seat position set with a button:
1. Turn the ignition switch to “ON”.
2. Put the select lever in the “P” position and apply the parking brake. Then, press button “1” or “2”. The seat and outside mirrors are automatically recalled to your preferred
positions.
To set a seat position with the access key fob:
1. Make sure the select lever is in the “P” position with the parking brake applied and the ignition “OFF”.
2. Adjust your seat and outside mirrors to the desired position.
3. While holding the “SET” button, press and hold the unlock button on the access key fob. A chirp sounds when the position is registered.
Memory Seat Buttons
HOW TO APPENDIX
118
Page 148 of 156

S
SAFETY AND SECURITY OVERVIEW . . 80
SEATING . . . . . . . . . . . . ...... 25
Head Restraint Adjustment . . ....26
Manual Seats . . . . . .........25
Power Driver’s Seat (if equipped) . . . 25
Seatbelt Adjuster . . . . . . . . . . . . 27
SETTINGS AND UPDATES OVERVIEW . 83 Connect to Home Wi-Fi . .......83
Performing Software Updates .....83
SOUND ................... 84
SPARE TIRE AND JACK . . ....... 53
STARTING THE VEHICLE . . . . . .... 39
Without Push-button Ignition .....39
With Push-button Ignition .......39
STEERING RESPONSIVE HEADLIGHTS (SRH) .................. 104
STEERING WHEEL CONTROLS . . . . . 63 Advanced Adaptive Cruise Control . . 98
Customizing EyeSight
®Settings . . . 99
STEREO CAMERA PRECAUTIONS . . 112
SUBARU STARLINK
®IN-VEHICLE
APPS . . . . . . . . . . . . ...... 75
aha™ by HARMAN . . . . . . . ....75
Android Auto™ . . . . . . . . . . . . . 76
Apple CarPlay
®.............76
Pandora®................75
SiriusXM®Travel Link . . ........76
SUBARU STARLINK®MOBILE APP . . 77
SUBARU STARLINK®WI-FI HOTSPOT . 82
T
TEXT MESSAGES . . . . . . . . . . . . . 74
TILT AND TELESCOPIC STEERING COLUMN . . . . . . . . . . . . . . . . 27
TIRE PRESSURE MONITORING SYSTEM (TPMS) .................. 58
TOUCHSCREEN . . . . . . . ....... 62
TOWING YOUR ALL-WHEEL DRIVE SUBARU . . . . . . . . . . . . ..... 6TRAILER TOWING CAPACITY . . . . . . 57
TURNING OFF THE VEHICLE
...... 48
Without Push-button Ignition .....48
With Push-button Ignition . . .....48
TURN SIGNALS . . . . . . ........ 21
V
VOICE RECOGNITION . ......... 64
Common Commands . . . . . . . . . . 65
Tips ....................64
W
WARNING AND INDICATOR LIGHTS . . 17
WELCOME .................. 4
WI-FI .................... 131
Connecting to a Wi-Fi Network . . . 131
Wi-Fi Hotspot Subscription . . . . . 133
WINDSHIELD GLASS AND DASHBOARD . . . . . . . ...... 112
WINDSHIELD WIPERS . ......... 22
X
X-MODE
®................. 45
Hill Descent Control (HDC) .......48
X-MODE
®Dual Mode System . . . . . 47
X-MODE®Standard System ......46
INDEX
146