SUBARU IMPREZA 2001 2.G Owners Manual
Manufacturer: SUBARU, Model Year: 2001, Model line: IMPREZA, Model: SUBARU IMPREZA 2001 2.GPages: 316, PDF Size: 3.78 MB
Page 231 of 316
8-6mod erate sp eed . Then start the eng ine of the vehic l
e that has the d is-
c harg ed b attery.
6. When finished , c arefully d isc onnec t the c ab les in exac tly the re-
verse ord er.
Flat tires
WARNING
� Do not jack up the vehicle on an incline or a loose road sur-
face. The jack can come out of the jacking point or sink into theground and this can result in a severe accident.� Use only the jack provided with your vehicle. The jack sup-
plied with the vehicle is designed only for changing a tire. Neverget under the vehicle while supporting the vehicle with this jack.� Always turn the engine off before raising the flat tire off the
ground using the jack. Never swing or push the vehicle sup-ported with the jack. The jack can come out of the jacking pointdue to a jolt and this can result in a severe accident.� Do not use oil or grease on the wheel studs or nuts when the
spare tire is installed. This could cause the nuts to become looseand lead to an accident.� Never place a tire or tire changing tools in the passenger
compartment after changing wheels. In a sudden stop or colli-
sions, loose equipment could strike occupants and cause injury.Store the tire and all tools in the proper place.
If you have a flat tire while d riving , never b rake sud d enly; keep d riving
straig ht ahead while g rad ually red uc ing sp eed . Then slowly p ull off the
road to a safe p lac e.
1. Park on a hard , level surfac e, whenever p ossib le, then stop the en-
g ine.
2. Set the p arking b rake sec urely and shift a manual transmission ve-
hic le in reverse or an automatic transmission vehic le in the “P ” (Park)
p osition.
Page 232 of 316

In case of emergency8-7
–
CONTINUED –
3. Turn on the hazard warning flasher and have every
one g et out of the
vehic le.
4. Put wheel b loc ks at the front and rear of the tir e d iag onally op p osite
the flat tire.
OM-H0167
5. Take out the sp are tire, jac k, and wheel nut wren c h. See the “Tire
c hang ing tools ” in this c hap ter.
6. (If your vehic le has wheel c overs) Insert the whe el c over remover into
the notc h p rovid ed in the wheel c over, and p ry it o ff.
HGA012BA
Page 233 of 316

8-8
7. Loosen the wheel nuts using the wheel nut wrenc h
b ut d o not remove
the nuts.
OM-H0376
8. Plac e the jac k und er the sid e sill at the front o r rear jac k-up p oint c los-
est to the flat tire.
Turn the jac ksc rew b y hand until the jac k head eng a g es firmly into the
jac k-up p oint.
OM-H0170
9. Insert the jac k hand le into the jac ksc rew, and tu rn the hand le c loc k-
wise until the tire c lears the g round . Do not raise the vehic le hig her than
nec essary.
Page 234 of 316

In case of emergency8-9
–
CONTINUED –
OM-H0171
10. Remove the wheel nuts and the flat tire.
11. Before p utting the sp are tire on, c lean the moun ting surfac e of the
wheel and hub with a c loth.
HG0104OM-H0172
12. Put on the sp are tire. Rep lac e the wheel nuts. T ig hten them b y hand .
13. Turn the jac k hand le c ounterc loc kwise to lower t he vehic le.
14. Use the wheel nut wrenc h to sec urely tig hten the wheel nuts to the
sp ec ified torq ue, following the tig htening ord er in the illustration.
Page 235 of 316

8-10
OM-H0173
The torq ue for tig htening the nuts is 58 to 72 ft-lb (78 to 98 N-m, 8 to 10
kg -m). This torq ue is eq uivalent to ap p lying ab out 88 to 110 lb s (40 to 50
kg ) at the top of the wheel nut wrenc h. Never use y our foot on the wheel
nut wrenc h or a p ip e extension on the wrenc h b ec aus e you may exc eed
the sp ec ified torq ue. Have the wheel nut torq ue c he c ked at the nearest
automotive servic e fac ility.
15. Store the flat tire in the c omp ac t sp are tire c o mp artment.
When storing a c onventional tire, p ut the sp ac er up sid e d own and tig ht-
en the attac hing b olt firmly.
HS0153
Flat tire Attaching bolt
Spacer
Also store the jac k and wheel nut wrenc h in their s torag e loc ations. See
“ Tire c hang ing tools ” in this sec tion.
Page 236 of 316
In case of emergency8-11
–
CONTINUED –
�
Temporary spare tire
WARNING
Never tow a trailer when the temporary spare tire is used. The temporary spare tire is not designed to sustain the towing load.
Use of the temporary spare tire when towing can result in failureof the spare tire and/or less stability of the vehicle and may leadto an accident.
CAUTION
Never use any temporary spare tire other than the original. Usingother sizes may result in severe mechanical damage to the drivetrain of your vehicle.
Your vehic le has a temp orary sp are tire. This tire is smaller and lig hter
than a c onventional tire and is d esig ned for emerg e nc y use only. Re-
move the temp orary sp are tire and re-install the c o nventional tire as soon
as p ossib le b ec ause the sp are tire is d esig ned only for temp orary use.
Chec k the inflation p ressure of the temp orary sp are tire at 60 psi (420
kPa, 4.2 kg/cm 2
) p eriod ic ally to keep the tire read y for use.
When using the temp orary sp are tire, note the follo wing :
� Do not exc eed 50 mp h (80 km/h).
� Do not p ut a tire c hain on the temp orary sp are tire . Bec ause of the
smaller tire size, a tire c hain will not fit p rop er ly .
� Do not use two or more temp orary sp are tires at the same time.
� Do not d rive over ob stac les. This tire has a smalle r d iameter, so
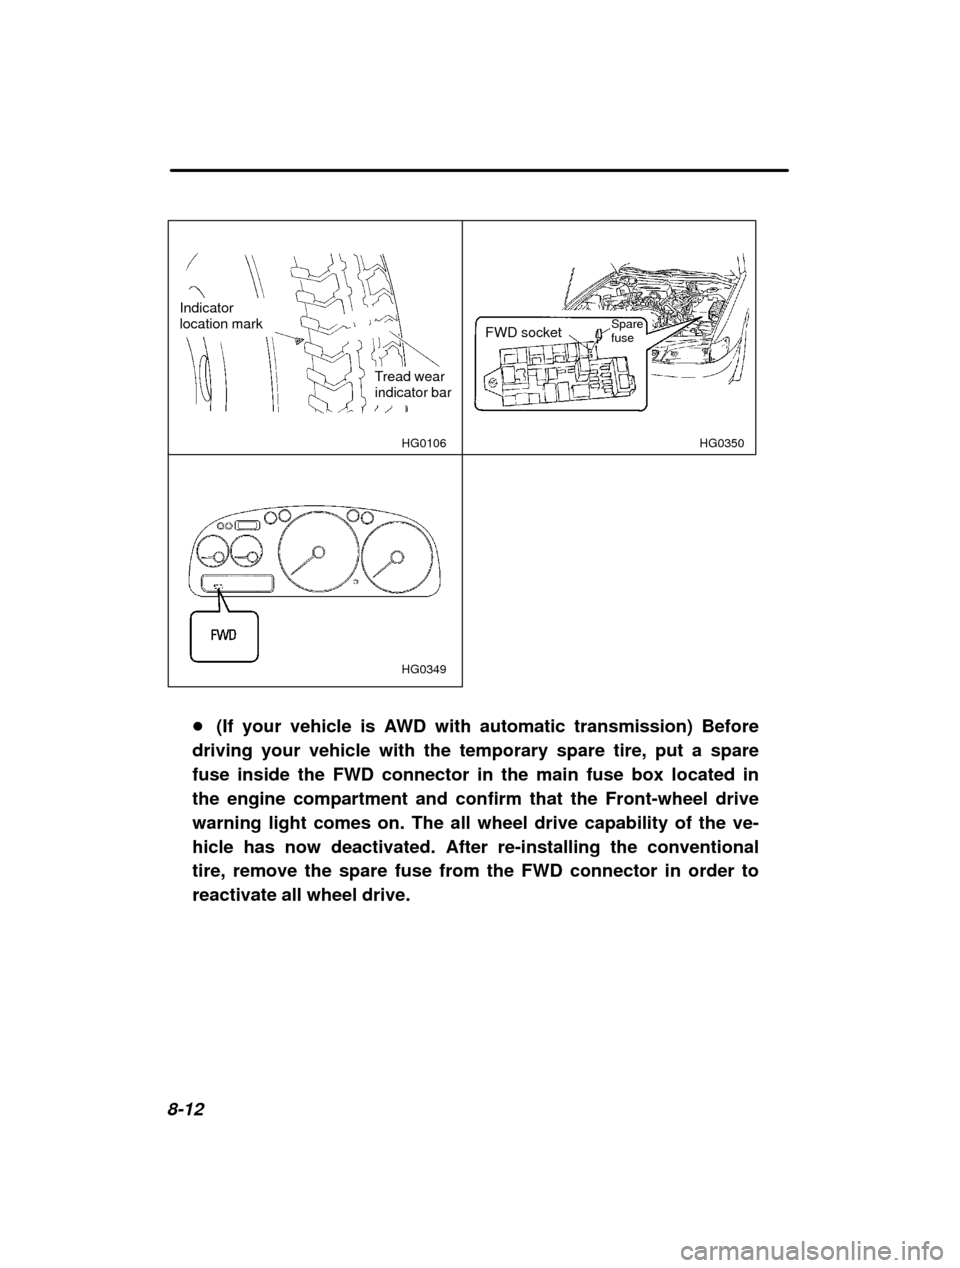
road c learanc e is red uc ed .� When the wear ind ic ator ap p ears on the tread , rep la c e the tire.
Page 237 of 316
8-12
HG0350
Indicator location mark
Tread wear indicator barHG0106
HG0349
FWD socket Spare fuse
� (If your vehicle is AWD with automatic transmission) Before
driving your vehicle with the temporary spare tire, put a spare fuse inside the FWD connector in the main fuse box located inthe engine compartment and confirm that the Front-wheel drivewarning light comes on. The all wheel drive capability of the ve-
hicle has now deactivated. After re-installing the conventionaltire, remove the spare fuse from the FWD connector in order to
reactivate all wheel drive.
Page 238 of 316
In case of emergency8-13
–
CONTINUED –
�
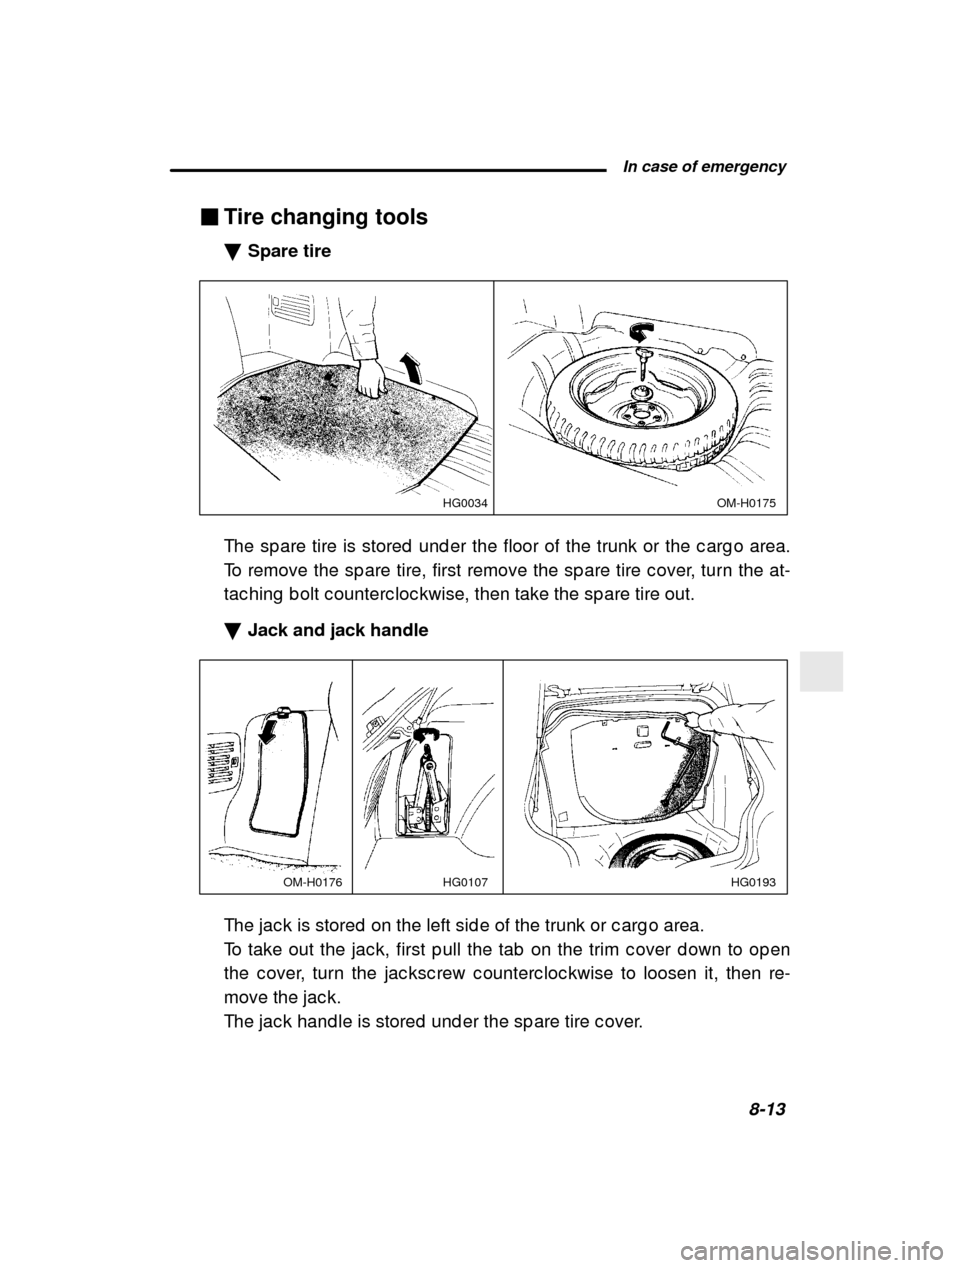
Tire changing tools �Spare tire
OM-H0175
HG0034
The sp are tire is stored und er the floor of the tru nk or the c arg o area.
To remove the sp are tire, first remove the sp are ti re c over, turn the at-
tac hing b olt c ounterc loc kwise, then take the sp are tire out.
� Jack and jack handle
HG0193
HG0107OM-H0176
The jac k is stored on the left sid e of the trunk or c arg o area.
To take out the jac k, first p ull the tab on the tri m c over d own to op en
the c over, turn the jac ksc rew c ounterc loc kwise to l oosen it, then re-
move the jac k.
The jac k hand le is stored und er the sp are tire c ove r.
Page 239 of 316
8-14Towing
If towing is nec essary, it is b est d one b y your SUB
ARU d ealer or a c om-
merc ial towing servic e. Ob serve the following p roc e d ures for safety.
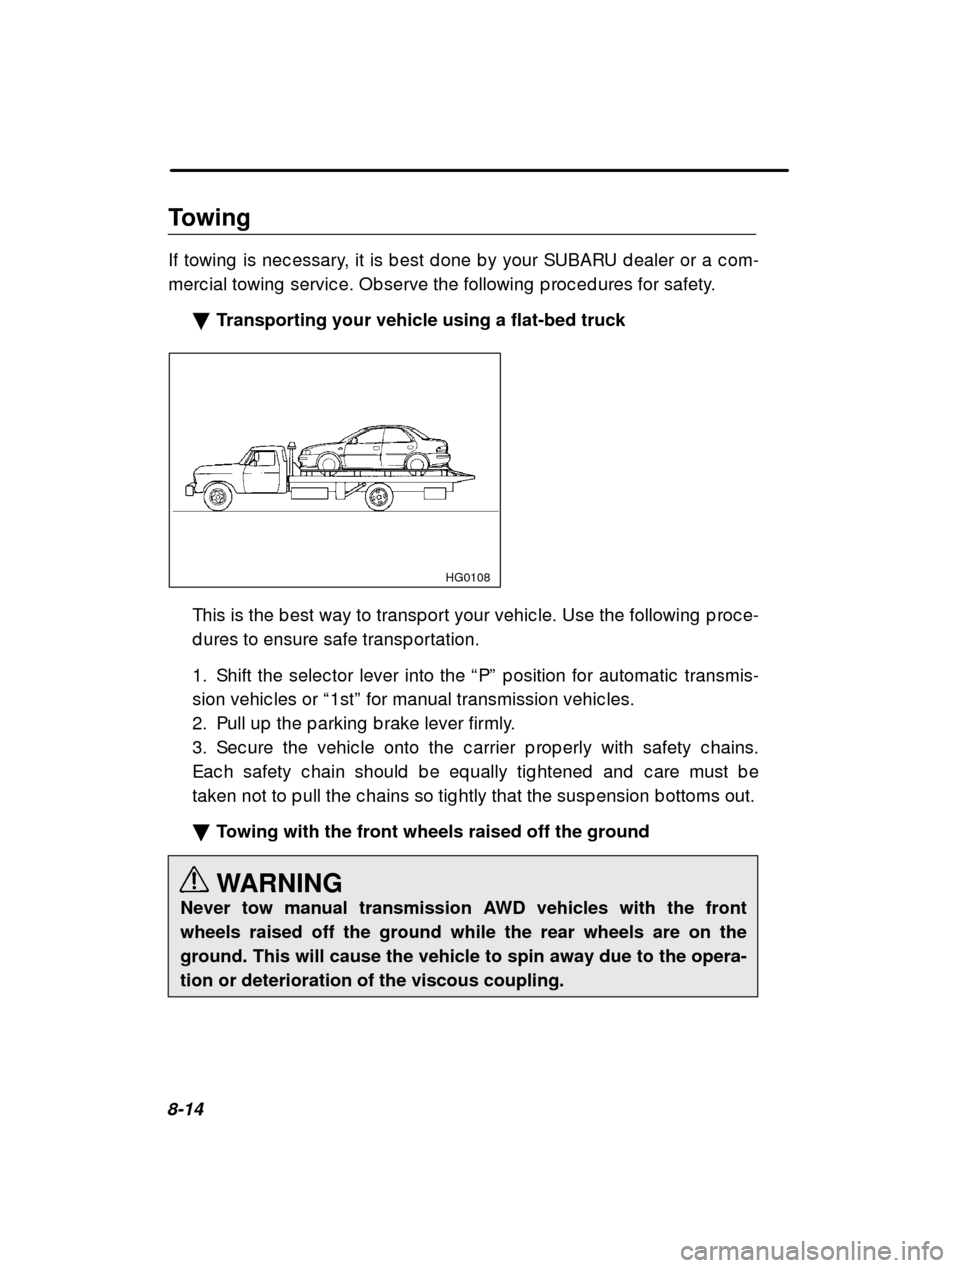
� Transporting your vehicle using a flat-bed truck
HG0108
This is the b est way to transp ort your vehic le. Use the following p roc e-
d ures to ensure safe transp ortation.
1. Shift the selec tor lever into the “P ” p osition for automatic transmis-
sion vehic les or “1st ” for manual transmission vehic les.
2. Pull up the p arking b rake lever firmly.
3. Sec ure the vehic le onto the c arrier p rop erly with safety c hains.
Eac h safety c hain should b e eq ually tig htened and c are must b e
taken not to p ull the c hains so tig htly that the su sp ension b ottoms out.
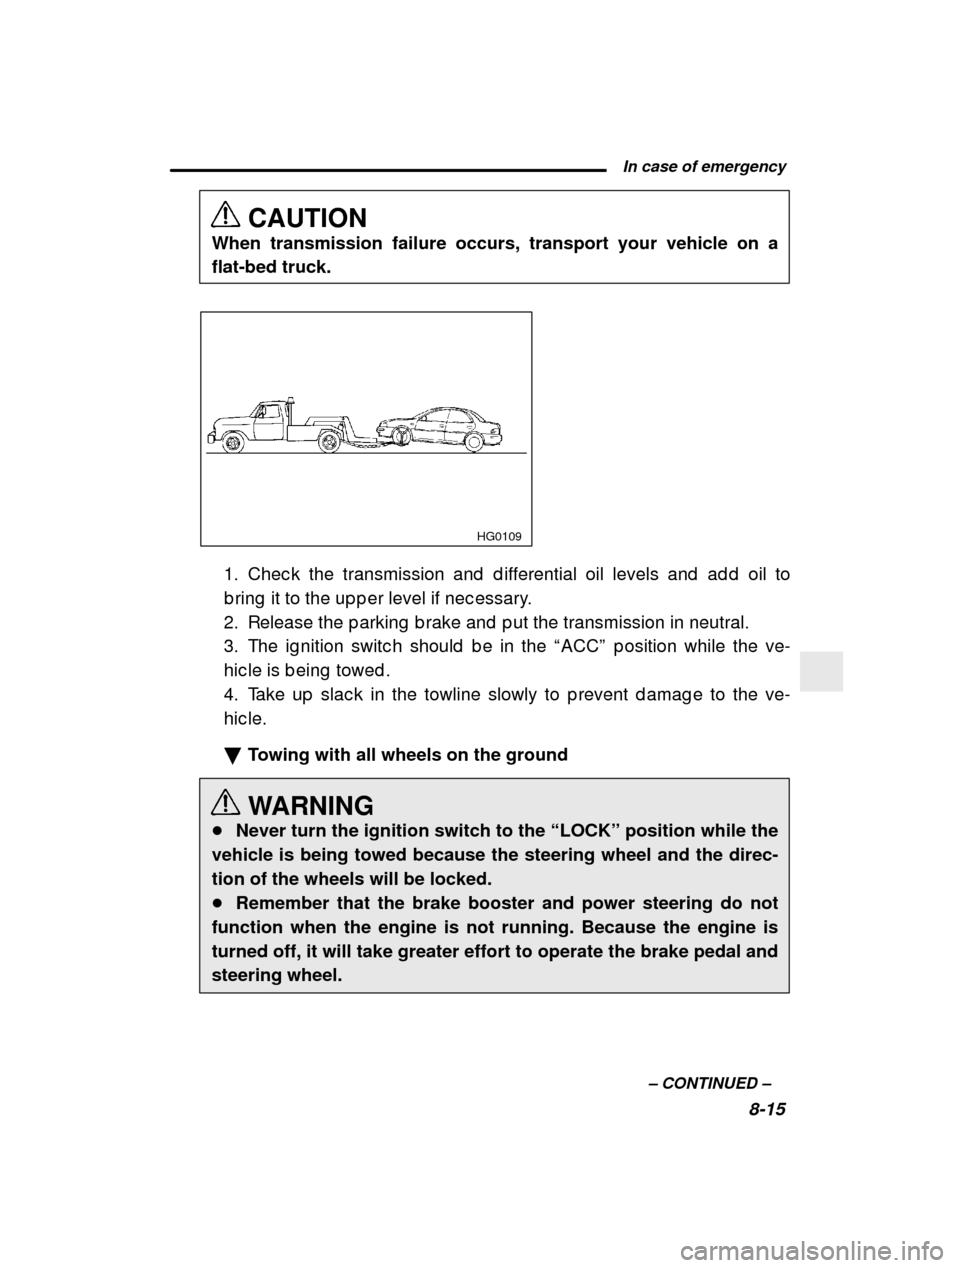
� Towing with the front wheels raised off the ground
WARNING
Never tow manual transmission AWD vehicles with the front wheels raised off the ground while the rear wheels are on theground. This will cause the vehicle to spin away due to the opera-tion or deterioration of the viscous coupling.
Page 240 of 316
In case of emergency8-15
–
CONTINUED –
CAUTION
When transmission failure occurs, transport your vehicle on a flat-bed truck.
HG0109
1. Chec k the transmission and d ifferential oil level s and ad d oil to
b ring it to the up p er level if nec essary.
2. Release the p arking b rake and p ut the transmissio n in neutral.
3. The ig nition switc h should b e in the “ACC ” p osition while the ve-
hic le is b eing towed .
4. Take up slac k in the towline slowly to p revent d a mag e to the ve-
hic le. � Towing with all wheels on the ground
WARNING
� Never turn the ignition switch to the “LOCK” position while the
vehicle is being towed because the steering wheel and the direc- tion of the wheels will be locked.� Remember that the brake booster and power steering do not
function when the engine is not running. Because the engine isturned off, it will take greater effort to operate the brake pedal andsteering wheel.