set clock SUBARU IMPREZA 2004 2.G User Guide
[x] Cancel search | Manufacturer: SUBARU, Model Year: 2004, Model line: IMPREZA, Model: SUBARU IMPREZA 2004 2.GPages: 491, PDF Size: 5.93 MB
Page 233 of 491
5-20
Audio
!
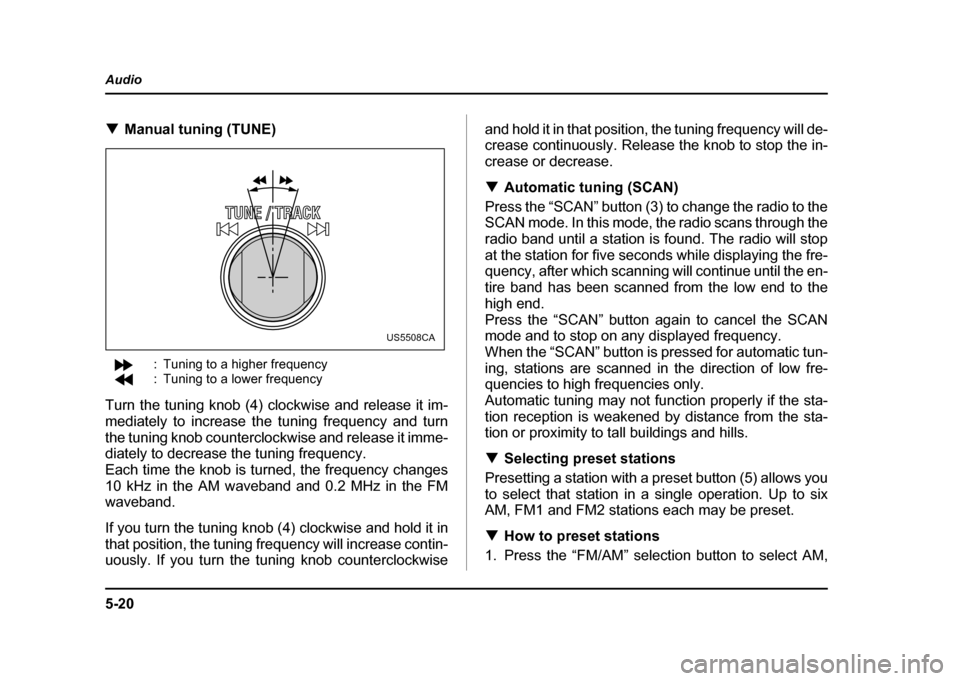
Manual tuning (TUNE)
: Tuning to a higher frequency
: Tuning to a lower frequency
Turn the tuning knob (4) clockwise and release it im-
mediately to increase the tuning frequency and turn
the tuning knob counterclockwise and release it imme-
diately to decrease the tuning frequency.
Each time the knob is turned, the frequency changes
10 kHz in the AM waveband and 0.2 MHz in the FM
waveband.
If you turn the tuning knob (4) clockwise and hold it in
that position, the tuning frequency will increase contin-
uously. If you turn the tuning knob counterclockwise and hold it in that position, the tuning frequency will de-
crease continuously. Release the knob to stop the in-
crease or decrease. !
Automatic tuning (SCAN)
Press the “SCAN” button (3) to change the radio to the
SCAN mode. In this mode, the radio scans through the
radio band until a station is found. The radio will stop
at the station for five seconds while displaying the fre-
quency, after which scanning will continue until the en-
tire band has been scanned from the low end to the
high end.
Press the “SCAN” button again to cancel the SCAN
mode and to stop on any displayed frequency.
When the “SCAN” button is pressed for automatic tun-
ing, stations are scanned in the direction of low fre-
quencies to high frequencies only.
Automatic tuning may not function properly if the sta-
tion reception is weakened by distance from the sta-
tion or proximity to tall buildings and hills. ! Selecting preset stations
Presetting a station with a preset button (5) allows you
to select that station in a single operation. Up to six
AM, FM1 and FM2 stations each may be preset. ! How to preset stations
1. Press the “FM/AM” selection button to select AM,
US5508CA
Page 452 of 491
11 -6 7
Maintenance and service
– CONTINUED –
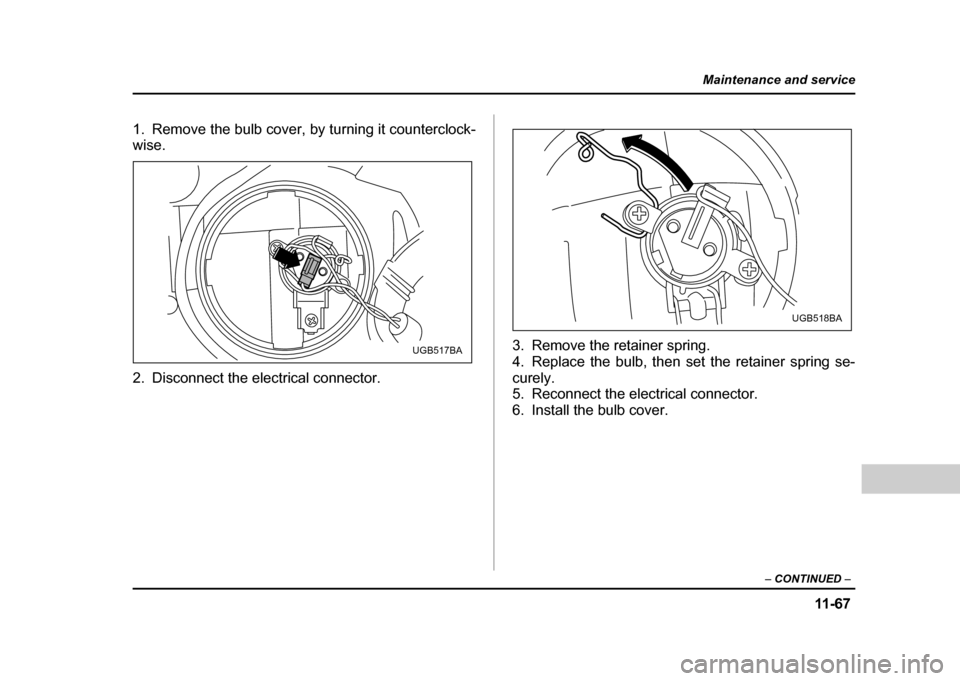
1. Remove the bulb cover, by turning it counterclock- wise.
2. Disconnect the electrical connector. 3. Remove the retainer spring.
4. Replace the bulb, then set the retainer spring se-curely.
5. Reconnect the electrical connector.
6. Install the bulb cover.
UGB517BA
UGB518BA
Page 454 of 491
11 -6 9
Maintenance and service
– CONTINUED –
!Front turn signal light bulbs
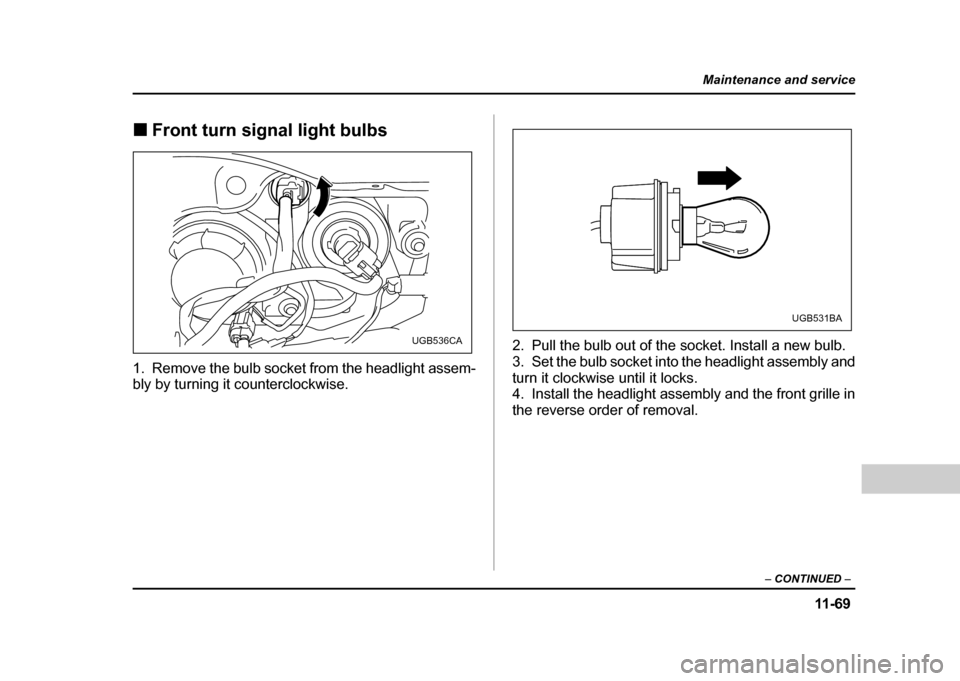
1. Remove the bulb socket from the headlight assem-
bly by turning it counterclockwise. 2. Pull the bulb out of the socket. Install a new bulb.
3. Set the bulb socket into the headlight assembly and
turn it clockwise until it locks.
4. Install the headlight assembly and the front grille in
the reverse order of removal.
UGB536CA
UGB531BA
Page 458 of 491
11 -7 3
Maintenance and service
– CONTINUED –
!Parking light bulbs
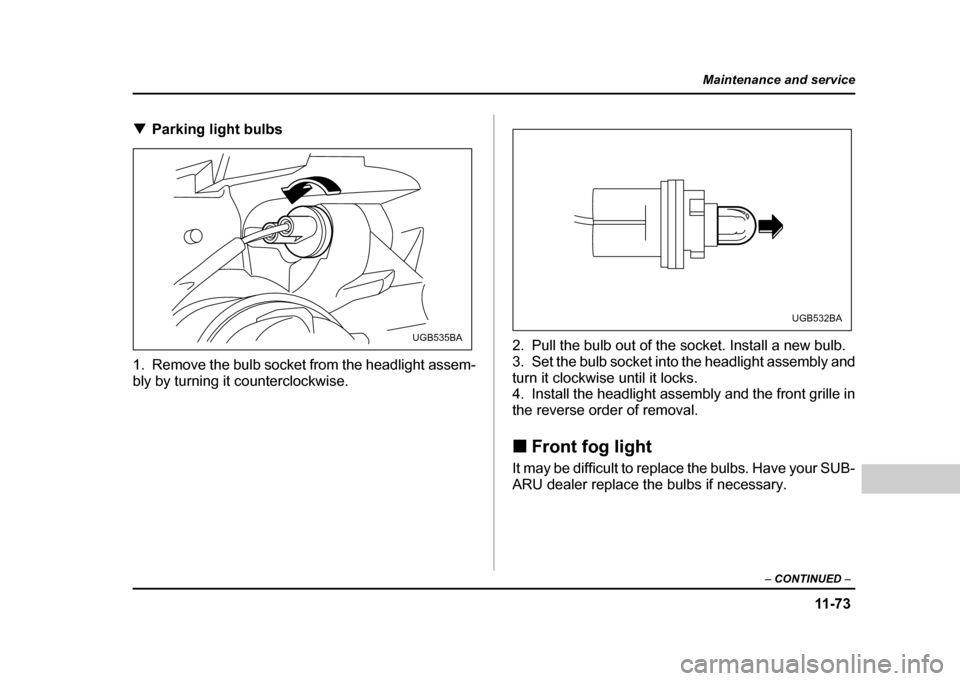
1. Remove the bulb socket from the headlight assem-
bly by turning it counterclockwise. 2. Pull the bulb out of the socket. Install a new bulb.
3. Set the bulb socket into the headlight assembly and
turn it clockwise until it locks.
4. Install the headlight assembly and the front grille in
the reverse order of removal. !
Front fog light
It may be difficult to replace the bulbs. Have your SUB-
ARU dealer replace the bulbs if necessary.
UGB535BA
UGB532BA
Page 459 of 491
11 - 7 4
Maintenance and service
!
Rear combination lights
! Sedan
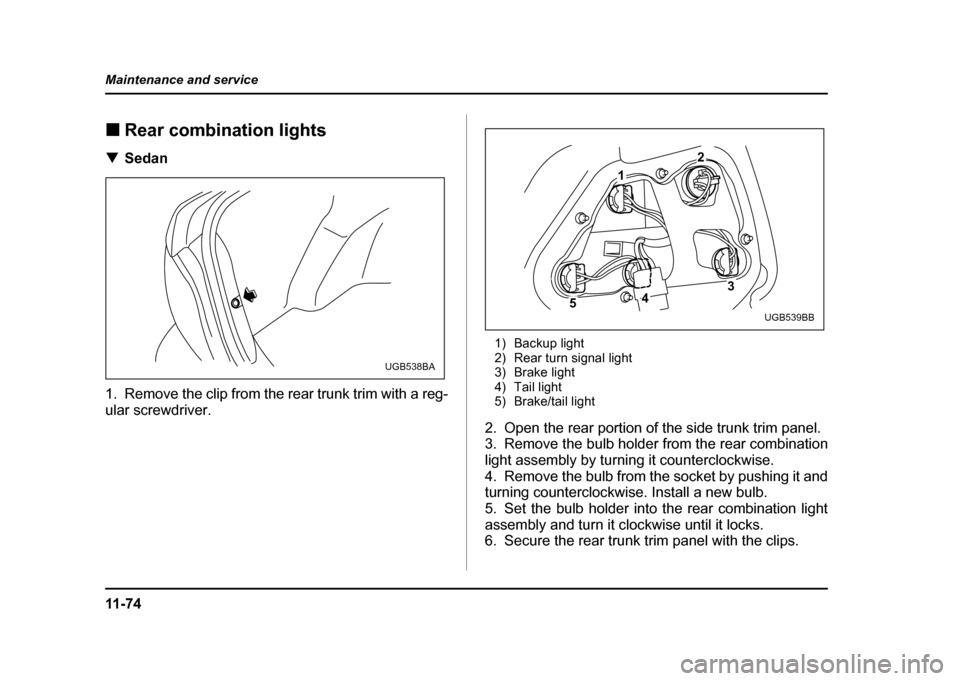
1. Remove the clip from the rear trunk trim with a reg-
ular screwdriver. 1) Backup light
2) Rear turn signal light
3) Brake light
4) Tail light
5) Brake/tail light
2. Open the rear portion of the side trunk trim panel.
3. Remove the bulb holder from the rear combination
light assembly by turning it counterclockwise.
4. Remove the bulb from the socket by pushing it and
turning counterclockwise. Install a new bulb.
5. Set the bulb holder into the rear combination light
assembly and turn it clockwise until it locks.
6. Secure the rear trunk trim panel with the clips.
UGB538BA
554
2
3
1
UGB539BB
Page 461 of 491
11 - 7 6
Maintenance and service
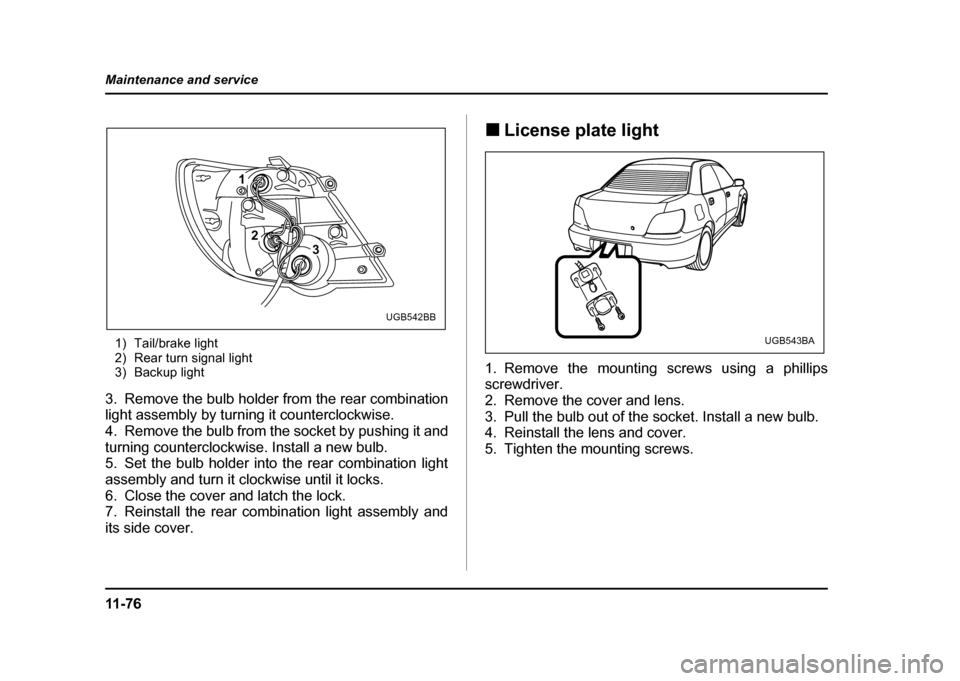
1) Tail/brake light
2) Rear turn signal light
3) Backup light
3. Remove the bulb holder from the rear combination
light assembly by turning it counterclockwise.
4. Remove the bulb from the socket by pushing it and
turning counterclockwise. Install a new bulb.
5. Set the bulb holder into the rear combination light
assembly and turn it clockwise until it locks.
6. Close the cover and latch the lock.
7. Reinstall the rear combination light assembly and
its side cover. !
License plate light
1. Remove the mounting screws using a phillips
screwdriver.
2. Remove the cover and lens.
3. Pull the bulb out of the socket. Install a new bulb.
4. Reinstall the lens and cover.
5. Tighten the mounting screws.
2
1
3
UGB542BB
UGB543BA
Page 482 of 491

14-3
Index
Cargo
Area cover ................................................................ 6-15
Area light ......................................................... 6-2, 11-77
Tie-down hooks ...................................................... 6-17
Catalytic converter ...................................................... 8-4
Center Console ..................................................................... 6-6
Ventilators ................................................................. 4-3
Visor ............................................................................ 6-4
Changing
Flat tire ....................................................................... 9-5
Oil and oil filter ........................................................ 11-12
Charge warning light .................................................. 3-21
CHECK ENGINE warning light/ Malfunction indicator lamp ..................................3-20
Checking
Brake pedal free play ........................................... 11-40
Brake pedal reserve distance ...........................11-41
Clutch function ........................................................ 11-41
Clutch pedal free play .......................................... 11-42
Engine oil level ....................................................... 11-11
Fluid level ....................... 11-31, 11-36, 11-37, 11-38
Gear oil level ................................ 11-28, 11-33, 11-34
Child restraint systems ............................................... 1-31
Installation with seatbelt .....................................1-35
Lower and tether anchorages ..........................1-42
Child safety .................................................................... 6Locks
.......................................................................... 2-21
Chime
Key .............................................................................. 3-4
Seatbelt ........................................................... 1-15, 3-19
Cigarette lighter socket ............................................. 6-10
Cleaning Aluminum wheels .................................................. 10-3
Interior ........................................................................ 10-6
Ventilator grille ........................................................ 4-19
Climate control system
Manual ....................................................................... 4-4
Semi-automatic ...................................................... 4-11
Clock ................................................................................. 3-28
Clutch fluid ...................................................................... 11-38
Clutch pedal ................................................................... 11-41
Coat hook ....................................................................... 6-14
Coin tray .......................................................................... 6-7
Cooling system ............................................................. 11-18
Corrosion protection ......................................... 8-14, 10-4
Cruise control ................................................................ 7-37
Indicator light ........................................................... 3-26
Set indicator light ................................................... 3-26
Cup holder ...................................................................... 6-7
D
Daytime running light system .................................3-31
Differential gear oil