door SUBARU IMPREZA 2007 3.G Owners Manual
[x] Cancel search | Manufacturer: SUBARU, Model Year: 2007, Model line: IMPREZA, Model: SUBARU IMPREZA 2007 3.GPages: 364, PDF Size: 11.91 MB
Page 3 of 364

Warranties &Warranties for U.S.A.
All SUBARU vehicles distributed by
Subaru of America, Inc. and sold at retail
by an authorized SUBARU dealer in the
United States come with the followingwarranties: . SUBARU Limited Warranty
. Emission Control Systems Warranty
. Emissions Performance Warranty
All warranty information, including details
of coverage and exclusions, is in the“ Warranty and Maintenance Booklet ”.
Please read these warranties carefully.
& Warranties for Canada
All SUBARU vehicles distributed by
Subaru Canada, Inc. and sold at retail by
an authorized SUBARU dealer in Canada
come with the following warranties: . SUBARU Limited Warranty
. Anti-Corrosion Warranty
. Emission Control Warranty
All warranty information, including details
of coverage and exclusions, is in the“ Warranty and Service Booklet ”. Please
read these warranties carefully. !
WRX-STI
CAUTION
WRX-STI models are equipped with
High Intensity Discharge (HID) head-
lights that contain mercury. For that
reason, it is necessary to remove
HID headlights before vehicle dis-
posal. Once removed, please reuse,
recycle or dispose of the HID head-
lights as hazardous waste.
! All models except WRX-STI
CAUTION
This vehicle does not contain mer-
cury devices or parts. How to use this Owner
’s
Manual & Using your Owner ’s Manual
Before you operate your vehicle, carefully
read this manual. To protect yourself and
extend the service life of your vehicle,
follow the instructions in this manual.
Failure to observe these instructions may
result in serious injury and damage to yourvehicle.
This manual is composed of fourteen
chapters. Each chapter begins with a brief
table of contents, so you can usually tell at
a glance if that chapter contains the
information you want.
Chapter 1: Seat, seatbelt and SRS airbags
This chapter informs you how to use the
seat and seatbelt and contains precau-
tions for the SRS airbags.
Chapter 2: Keys and doors
This chapter informs you how to operate
the keys, locks and windows.
Chapter 3: Instruments and controls
This chapter informs you about the opera-
tion of instrument panel indicators and
how to use the instruments and otherswitches. 1
– CONTINUED –
Page 5 of 364

Vehicle symbols
There are some of the symbols you may
see on your vehicle.Mark Name
WARNING
CAUTION
Power door lock and unlock
Passengers ’windows lock
and unlock
Fuel
Front fog lights
Parking lights
Hazard warning flasher
Engine hood Mark Name
Trunk lid (Sedan)
Seat heater
Child restraint top tether an- chorages
Child restraint lower an- chorages
Horn
Windshield wiper deicer
Wiper intermittent
Windshield wiper and washer
Rear window wiper
Rear window washer
LightsMark Name
Parking lights, tail lights, li-
cense plate light and instru-
ment panel illumination
Headlights
Headlight beam leveler
Illumination brightness
Fan speed
Instrument panel outlets
Instrument panel outlets and
foot outlets
Foot outlets
Windshield defroster and foot outlets
Windshield defroster
Rear window defogger/Out-
side mirror defogger3
– CONTINUED –
Page 6 of 364
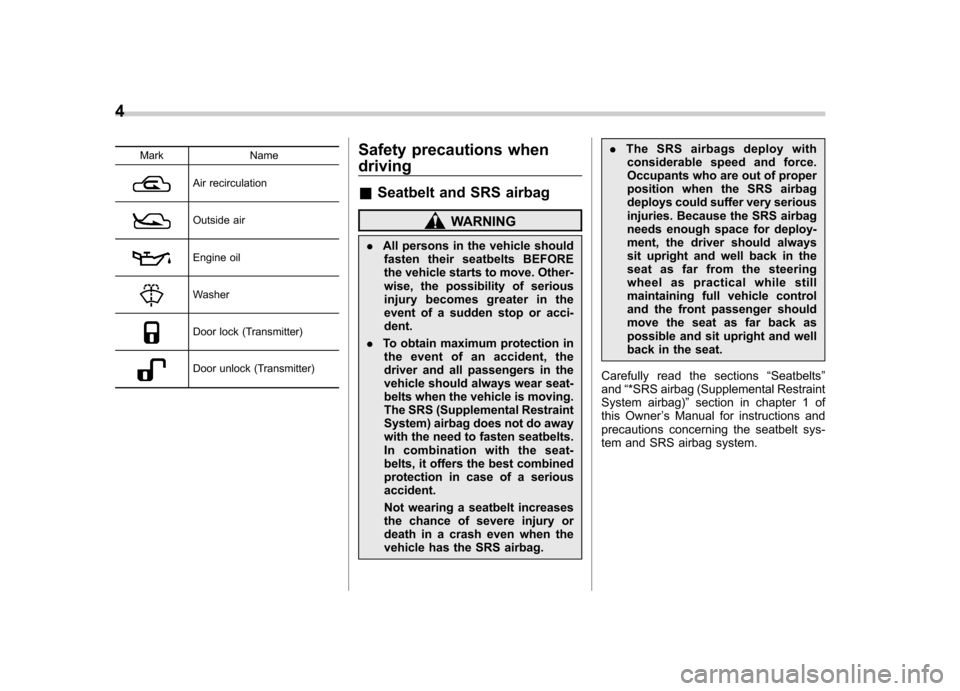
4
Mark Name
Air recirculation
Outside air
Engine oil
Washer
Door lock (Transmitter)
Door unlock (Transmitter)Safety precautions when driving &
Seatbelt and SRS airbag
WARNING
. All persons in the vehicle should
fasten their seatbelts BEFORE
the vehicle starts to move. Other-
wise, the possibility of serious
injury becomes greater in the
event of a sudden stop or acci-dent.
. To obtain maximum protection in
the event of an accident, the
driver and all passengers in the
vehicle should always wear seat-
belts when the vehicle is moving.
The SRS (Supplemental Restraint
System) airbag does not do away
with the need to fasten seatbelts.
In combination with the seat-
belts, it offers the best combined
protection in case of a seriousaccident.
Not wearing a seatbelt increases
the chance of severe injury or
death in a crash even when the
vehicle has the SRS airbag. .
The SRS airbags deploy with
considerable speed and force.
Occupants who are out of proper
position when the SRS airbag
deploys could suffer very serious
injuries. Because the SRS airbag
needs enough space for deploy-
ment, the driver should always
sit upright and well back in the
seat as far from the steering
wheel as practical while still
maintaining full vehicle control
and the front passenger should
move the seat as far back as
possible and sit upright and well
back in the seat.
Carefully read the sections “Seatbelts ”
and “*SRS airbag (Supplemental Restraint
System airbag) ”section in chapter 1 of
this Owner ’s Manual for instructions and
precautions concerning the seatbelt sys-
tem and SRS airbag system.
Page 7 of 364
&Child safety
WARNING
. Never hold a child on your lap or
in your arms while the vehicle is
moving. The passenger cannot
protect the child from injury in a
collision, because the child will
be caught between the passen-
ger and objects inside the vehi-cle.
. While riding in the vehicle, in-
fants and small children should
always be placed in the REAR
seat in an infant or child restraint
system which is appropriate for
the child ’s age, height and
weight. If a child is too big for a
child restraint system, the child
should sit in the REAR seat and
be restrained using the seatbelts.
According to accident statistics,
children are safer when properly
restrained in the rear seating
positions than in the front seat-
ing positions. Never allow a child
to stand up or kneel on the seat.
. Put children aged 12 and under in
the REAR seat properly re-
strained at all times in a child
restraint device or in a seatbelt. The SRS airbag deploys with
considerable speed and force
and can injure or even kill chil-
dren, especially if they are 12
years of age and under and are
not restrained or improperly re-
strained. Because children are
lighter and weaker than adults,
their risk of being injured from
deployment is greater.
. NEVER INSTALL A REARWARD
FACING CHILD SEAT IN THE
FRONT SEAT. DOING SO RISKS
SERIOUS INJURY OR DEATH TO
THE CHILD BY PLACING THECHILD ’S HEAD TOO CLOSE TO
THE SRS AIRBAG.
. Always use the child safety locks
whenever a child rides in the rear
seat. Serious injury could result
if a child accidentally opened the
door and fell out. Refer to the“ Child safety locks ”section in
chapter 2.
. Always lock the passenger ’s win-
dows using the lock switch when
children are riding in the vehicle.
Failure to follow this procedure
could result in injury to a child
operating the power window. Re-
fer to the “Windows ”section in
chapter 2. .
Never leave unattended children
in the vehicle. They could acci-
dentally injure themselves or
others through inadvertent op-
eration of the vehicle. Also, on
hot or sunny days, temperature
in a closed vehicle could quickly
become high enough to cause
severe or possibly fatal injuries
to them.
. Help prevent young children from
locking themselves in the trunk.
When leaving the vehicle, either
close all windows and lock all
doors or cancel the inside trunk
lid release. Also make certain
that the trunk is closed. On hot
or sunny days, the temperature
in a trunk could quickly become
high enough to cause death or
serious heat-related injuries in-
cluding brain damage to anyone
locked inside, p articularly for
small children.
Carefully read the sections “Child restraint
systems ”, “*SRS airbag (Supplemental
Restraint System airbag) ”, and “Seatbelts ”
section in chapter 1 of this Owner ’s
Manual for instructions and precautions
concerning the child restraint system,
seatbelt system and SRS airbag system. 5
– CONTINUED –
Page 11 of 364

Table of contents
Seat, seatbelt and SRS airbags1
Keys and doors2
Instruments and controls
Climate control4
Audio5
Interior equipment6
Starting and operating7
Driving tips8
In case of emergency9
Appearance care10
Maintenance and service11
Specifications12
Consumer information and Reporting safety defects13
Index14
3
Page 12 of 364

10
Illustrated index &Exterior1) Engine hood (page 11-4)
2) Headlight switch (page 3-22)
3) Replacing bulbs (page 11-45)
4) Wiper switch (page 3-27)
5) Moonroof (page 2-24)
6) Door locks (page 2-4)
7) Tire pressure (page 11-31)
8) Flat tires (page 9-4)
9) Tire chains (page 8-11)
10) Front fog light button (page 3-26)
11) Tie-down hooks (page 9-11)
12) Towing hook (page 9-11)
Page 16 of 364

14 &Instrument panel
1) Door locks (page 2-4)
2) Outside mirror switch (page 3-33)
3) Light control lever (page 3-22)
4) Combination meter (page 3-6)
5) Wiper control lever (page 3-26)
6) Hazard warning flasher switch (page 3-6)
7) Audio (page 5-1)
8) Gear shift lever (5MT) (page 7-11)/
Gear shift lever (6MT) (page 7-9)/
Selector lever (AT) (page 7-15)
9) Climate control (page 4-1)
10) Cruise control (page 7-26)
11) Horn (page 3-35)
12) SRS airbag (page 1-35)
13) Tilt steering (page 3-35)
14) Fuse box (page 11-42)
15) Hood lock release knob (page 11-4)
16) Power windows (page 2-18)
Page 24 of 364

22
&WARNING AND INDICATOR LIGHT
Mark Name Page
Seatbelt warning light 3-14
SRS airbag system
warning light 3-14
orPassenger airbag ON
indicator light3-15
orPassenger airbag OFF
indicator light3-15
CHECK ENGINE
warning light/Malfunction
indicator lamp3-16
Charge warning light 3-16
Oil pressure warning light
3-16
AT OIL temperature
warning light (if equipped)3-17Mark Name Page
orABS warning light 3-17
orBrake system warning light
3-18
Door open warning light 3-19
All-Wheel Drive warning
light (if equipped)3-19
Turn signal indicator lights3-20
High beam indicator light 3-20
Security indicator light
2-4,
2-13
Intercooler water spray
warning light (if
equipped) 3-19
Lights indicator light (if
equipped)
3-21
Cruise control indicator light3-20Mark Name Page
Cruise control set indi-
cator light
3-20
REV indicator light (if
equipped)3-21
Rear differential oil tem-
perature warning light (if
equipped)3-17
Driver
’s control center
differential auto indicator
light (if equipped) 3-20
Driver
’s control center
differential indicator light
(if equipped) 3-21
Driver
’s control center
differential indicator and
warning lights (if
equipped) 3-21
Page 38 of 364
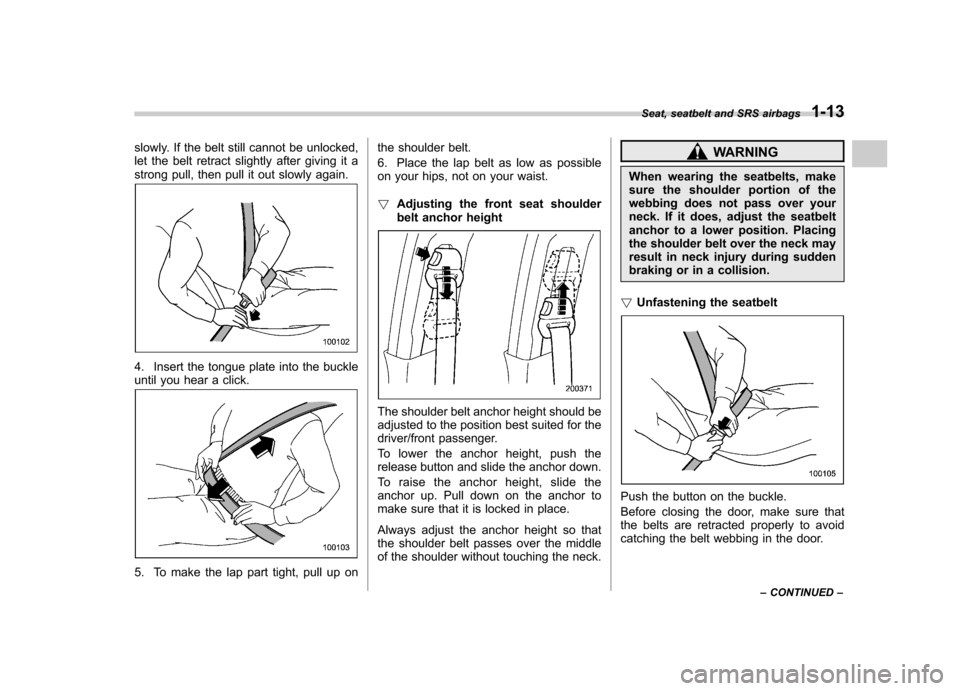
slowly. If the belt still cannot be unlocked,
let the belt retract slightly after giving it a
strong pull, then pull it out slowly again.
4. Insert the tongue plate into the buckle
until you hear a click.
5. To make the lap part tight, pull up onthe shoulder belt.
6. Place the lap belt as low as possible
on your hips, not on your waist. !
Adjusting the front seat shoulder
belt anchor height
The shoulder belt anchor height should be
adjusted to the position best suited for the
driver/front passenger.
To lower the anchor height, push the
release button and slide the anchor down.
To raise the anchor height, slide the
anchor up. Pull down on the anchor to
make sure that it is locked in place.
Always adjust the anchor height so that
the shoulder belt passes over the middle
of the shoulder without touching the neck.
WARNING
When wearing the seatbelts, make
sure the shoulder portion of the
webbing does not pass over your
neck. If it does, adjust the seatbelt
anchor to a lower position. Placing
the shoulder belt over the neck may
result in neck injury during sudden
braking or in a collision.
! Unfastening the seatbelt
Push the button on the buckle.
Before closing the door, make sure that
the belts are retracted properly to avoid
catching the belt webbing in the door. Seat, seatbelt and SRS airbags
1-13
– CONTINUED –
Page 40 of 364
WARNING
When wearing the seatbelts, make
sure the shoulder portion of the
webbing does not pass over your
neck. If it does, adjust the seatbelt
anchor to a lower position. Placing
the shoulder belt over the neck may
result in neck injury during sudden
braking or in a collision.
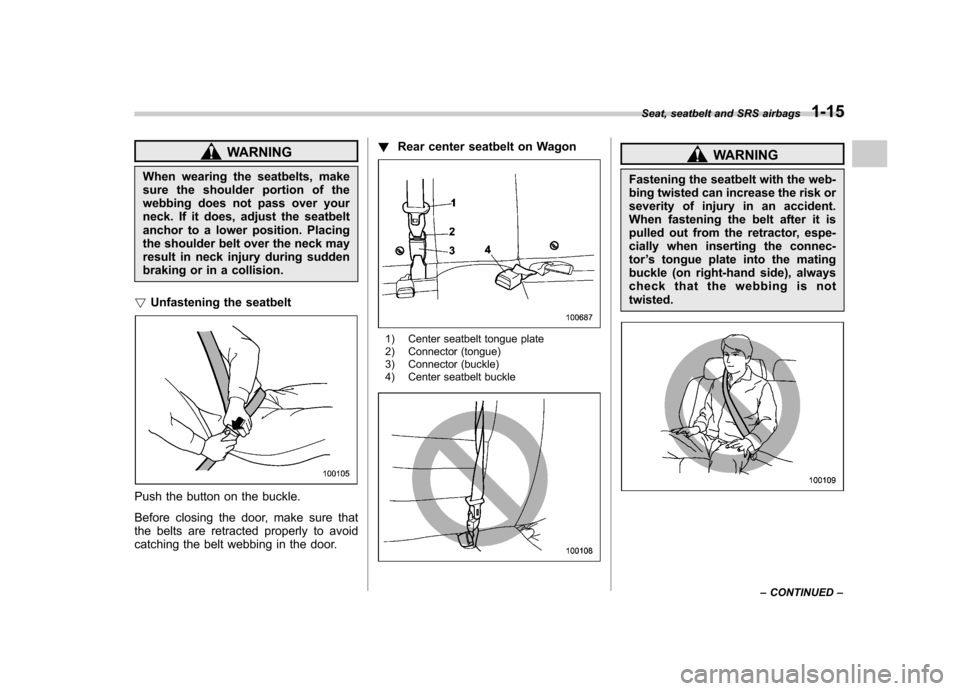
! Unfastening the seatbelt
Push the button on the buckle.
Before closing the door, make sure that
the belts are retracted properly to avoid
catching the belt webbing in the door. !
Rear center seatbelt on Wagon
1) Center seatbelt tongue plate
2) Connector (tongue)
3) Connector (buckle)
4) Center seatbelt buckle
WARNING
Fastening the seatbelt with the web-
bing twisted can increase the risk or
severity of injury in an accident.
When fastening the belt after it is
pulled out from the retractor, espe-
cially when inserting the connec-tor ’s tongue plate into the mating
buckle (on right-hand side), always
check that the webbing is nottwisted.
Seat, seatbelt and SRS airbags 1-15
– CONTINUED –