reverse SUBARU IMPREZA 2011 4.G Owners Manual
[x] Cancel search | Manufacturer: SUBARU, Model Year: 2011, Model line: IMPREZA, Model: SUBARU IMPREZA 2011 4.GPages: 458, PDF Size: 16.22 MB
Page 43 of 458
1-12Seat, seatbelt and SRS airbags
tions only) and then if necessary move the
child closer to the belt buckle to help
provide a good shoulder belt fit. Care must
be taken to securely place the lap belt as
low as possible on the hips and not on thechild’s waist. If the shoulder portion of the
belt cannot be properly positioned, a child
restraint system should be used. Never
place the shoulder belt under the child ’s
arm or behind the child ’s back.
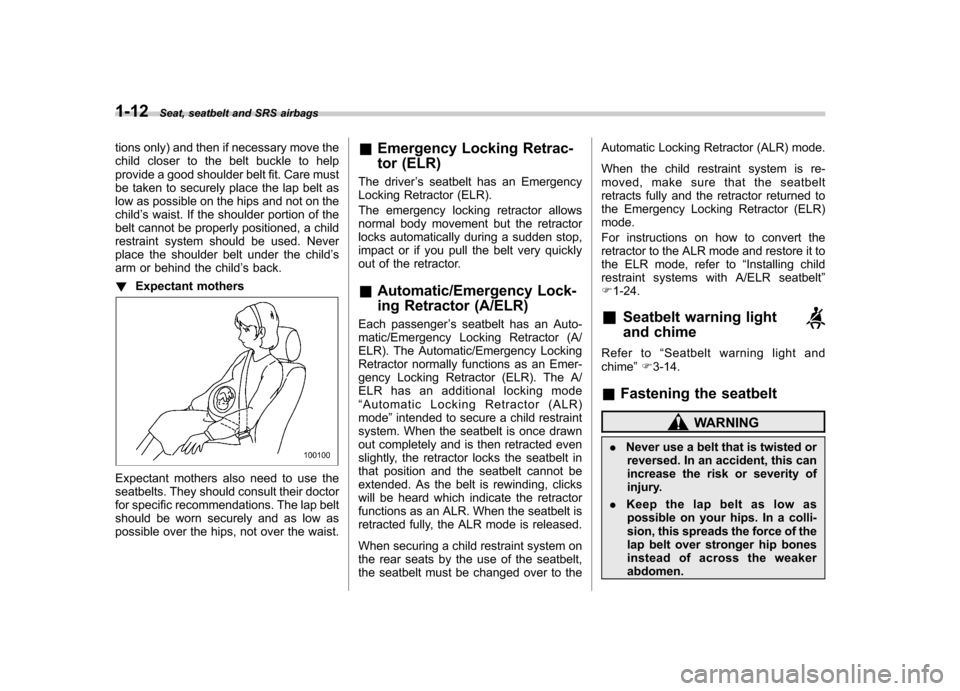
! Expectant mothers
Expectant mothers also need to use the
seatbelts. They should consult their doctor
for specific recommendations. The lap belt
should be worn securely and as low as
possible over the hips, not over the waist. &
Emergency Locking Retrac-
tor (ELR)
The driver ’s seatbelt has an Emergency
Locking Retractor (ELR).
The emergency locking retractor allows
normal body movement but the retractor
locks automatically during a sudden stop,
impact or if you pull the belt very quickly
out of the retractor. & Automatic/Emergency Lock-
ing Retractor (A/ELR)
Each passenger ’s seatbelt has an Auto-
matic/Emergency Locking Retractor (A/
ELR). The Automatic/Emergency Locking
Retractor normally functions as an Emer-
gency Locking Retractor (ELR). The A/
ELR has an additional locking mode“ Automatic Locking Retractor (ALR)
mode ”intended to secure a child restraint
system. When the seatbelt is once drawn
out completely and is then retracted even
slightly, the retractor locks the seatbelt in
that position and the seatbelt cannot be
extended. As the belt is rewinding, clicks
will be heard which indicate the retractor
functions as an ALR. When the seatbelt is
retracted fully, the ALR mode is released.
When securing a child restraint system on
the rear seats by the use of the seatbelt,
the seatbelt must be changed over to the Automatic Locking Retractor (ALR) mode.
When the child restraint system is re-
moved, make sure that the seatbelt
retracts fully and the retractor returned to
the Emergency Locking Retractor (ELR) mode.
For instructions on how to convert the
retractor to the ALR mode and restore it to
the ELR mode, refer to
“Installing child
restraint systems with A/ELR seatbelt ”
F 1-24.
& Seatbelt warning light
and chime
Refer to “Seatbelt warning light and
chime ”F 3-14.
& Fastening the seatbelt
WARNING
. Never use a belt that is twisted or
reversed. In an accident, this can
increase the risk or severity of
injury.
. Keep the lap belt as low as
possible on your hips. In a colli-
sion, this spreads the force of the
lap belt over stronger hip bones
instead of across the weakerabdomen.
Page 59 of 458
1-28Seat, seatbelt and SRS airbags
injuries or death to the child.
CAUTION
When you install a child restraint
system, follow the manufacturer ’s
instructions supplied with it. After
installing the child restraint system,
check to ensure that it is held
securely in position. If it is not held
tight and secure, the danger of your
child suffering personal injury in the
event of an accident may be in-creased.
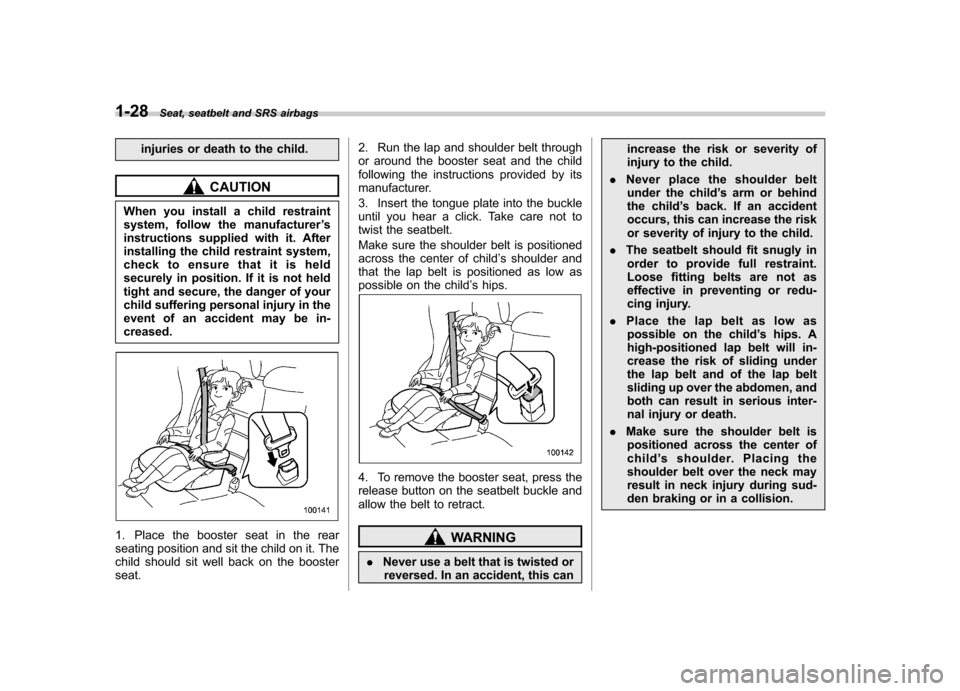
1. Place the booster seat in the rear
seating position and sit the child on it. The
child should sit well back on the boosterseat. 2. Run the lap and shoulder belt through
or around the booster seat and the child
following the instructions provided by its
manufacturer.
3. Insert the tongue plate into the buckle
until you hear a click. Take care not to
twist the seatbelt.
Make sure the shoulder belt is positioned
across the center of child
’s shoulder and
that the lap belt is positioned as low as
possible on the child ’s hips.
4. To remove the booster seat, press the
release button on the seatbelt buckle and
allow the belt to retract.
WARNING
. Never use a belt that is twisted or
reversed. In an accident, this can increase the risk or severity of
injury to the child.
. Never place the shoulder belt
under the child ’s arm or behind
the child ’s back. If an accident
occurs, this can increase the risk
or severity of injury to the child.
. The seatbelt should fit snugly in
order to provide full restraint.
Loose fitting belts are not as
effective in preventing or redu-
cing injury.
. Place the lap belt as low as
possible on the child ’s hips. A
high-positioned lap belt will in-
crease the risk of sliding under
the lap belt and of the lap belt
sliding up over the abdomen, and
both can result in serious inter-
nal injury or death.
. Make sure the shoulder belt is
positioned across the center ofchild ’s shoulder. Placing the
shoulder belt over the neck may
result in neck injury during sud-
den braking or in a collision.
Page 62 of 458
![SUBARU IMPREZA 2011 4.G Owners Manual 3. [If your child restraint system is of a
flexible attachment type (which uses
tether belts to connect the child restraint
system properly to the lower anchorages)]
While pushing the child restrain SUBARU IMPREZA 2011 4.G Owners Manual 3. [If your child restraint system is of a
flexible attachment type (which uses
tether belts to connect the child restraint
system properly to the lower anchorages)]
While pushing the child restrain](/img/17/7237/w960_7237-61.png)
3. [If your child restraint system is of a
flexible attachment type (which uses
tether belts to connect the child restraint
system properly to the lower anchorages)]
While pushing the child restraint into the
seat cushion, pull both left and right lower
tether belts up to secure the child restraint
system firmly by taking up the slack in thebelt.
4. Connect the top tether hook to the
tether anchorage and firmly tighten the
tether. For information on how to set the
top tether, refer to“Top tether anchorages ”
F 1-31.5. Before seating a child in the child
restraint system, try to move it back and
forth and right and left to verify that it is
held securely in position.
6. To remove the child restraint system,
follow the reverse procedures of installa-tion.
If you have any question concerning this
type of child restraint system, ask your
SUBARU dealer. &
Top tether anchorages
Your vehicle is equipped with two or three
top tether anchorages so that a child
restraint system having a top tether can
be installed in the rear seat. When
installing a child restraint system using
top tether, proceed as follows, while
observing the instructions by the child
restraint system manufacturer.
Since a top tether can provide additional
stability by offering another connection
between a child restraint system and the
vehicle, we recommend that you use a top
tether whenever one is required or avail-able. Seat, seatbelt and SRS airbags
1-31
– CONTINUED –
Page 158 of 458
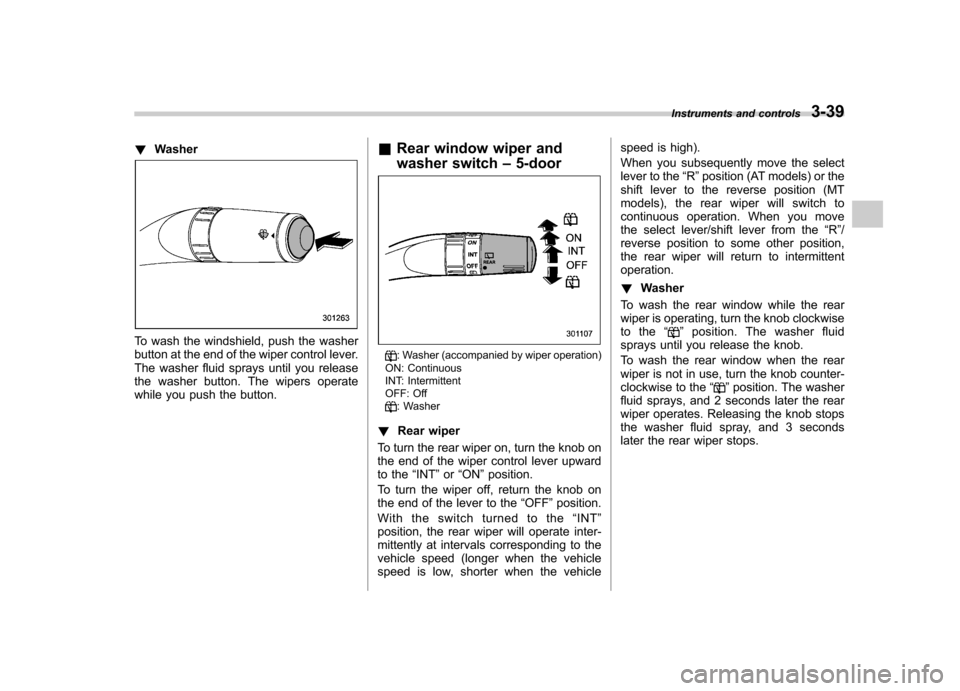
!Washer
To wash the windshield, push the washer
button at the end of the wiper control lever.
The washer fluid sprays until you release
the washer button. The wipers operate
while you push the button. &
Rear window wiper and
washer switch –5-door
: Washer (accompanied by wiper operation)
ON: Continuous
INT: Intermittent
OFF: Off
: Washer
! Rear wiper
To turn the rear wiper on, turn the knob on
the end of the wiper control lever upward
to the “INT ”or “ON ”position.
To turn the wiper off, return the knob on
the end of the lever to the “OFF ”position.
Withtheswitchturnedtothe “INT ”
position, the rear wiper will operate inter-
mittently at intervals corresponding to the
vehicle speed (longer when the vehicle
speed is low, shorter when the vehicle speed is high).
When you subsequently move the select
lever to the
“R ”position (AT models) or the
shift lever to the reverse position (MT
models), the rear wiper will switch to
continuous operation. When you move
the select lever/shift lever from the “R ”/
reverse position to some other position,
the rear wiper will return to intermittentoperation. ! Washer
To wash the rear window while the rear
wiper is operating, turn the knob clockwise
to the “
”position. The washer fluid
sprays until you release the knob.
To wash the rear window when the rear
wiper is not in use, turn the knob counter-
clockwise to the “
”position. The washer
fluid sprays, and 2 seconds later the rear
wiper operates. Releasing the knob stops
the washer fluid spray, and 3 seconds
later the rear wiper stops. Instruments and controls
3-39
Page 159 of 458
3-40Instruments and controls
Mirrors
Always check that the inside and outside
mirrors are properly adjusted before you
start driving. &Inside mirror
The inside mirror has a day and night
position. Pull the tab at the bottom of the
mirror toward you for the night position.
Push it away for the day position. The
night position reduces glare from head-lights. &
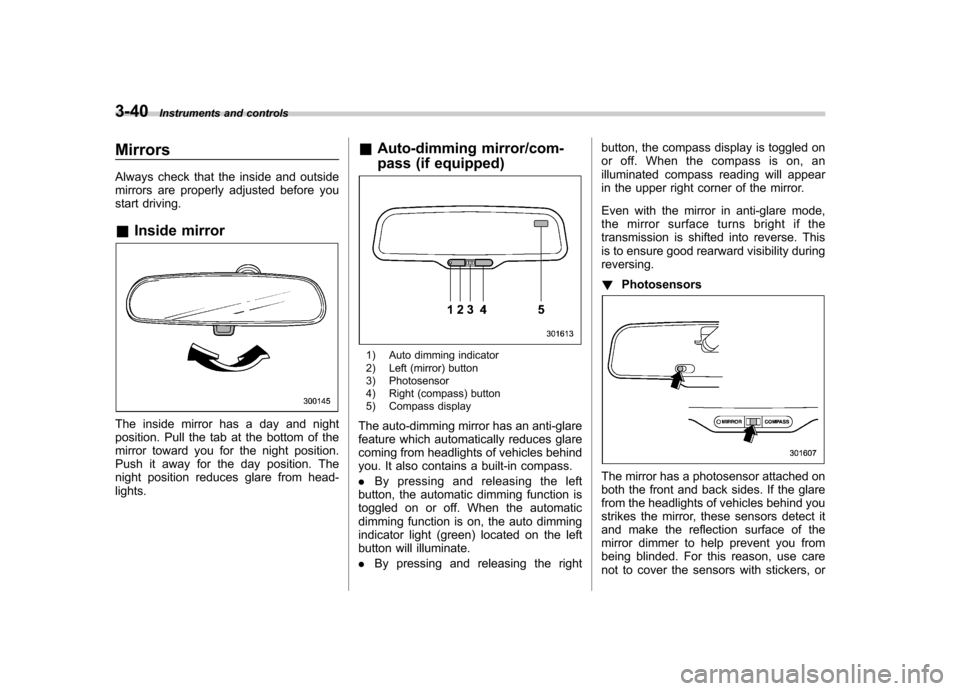
Auto-dimming mirror/com-
pass (if equipped)
1) Auto dimming indicator
2) Left (mirror) button
3) Photosensor
4) Right (compass) button
5) Compass display
The auto-dimming mirror has an anti-glare
feature which automatically reduces glare
coming from headlights of vehicles behind
you. It also contains a built-in compass. . By pressing and releasing the left
button, the automatic dimming function is
toggled on or off. When the automatic
dimming function is on, the auto dimming
indicator light (green) located on the left
button will illuminate. . By pressing and releasing the right button, the compass display is toggled on
or off. When the compass is on, an
illuminated compass reading will appear
in the upper right corner of the mirror.
Even with the mirror in anti-glare mode,
the mirror surface turns bright if the
transmission is shifted into reverse. This
is to ensure good rearward visibility duringreversing. !
Photosensors
The mirror has a photosensor attached on
both the front and back sides. If the glare
from the headlights of vehicles behind you
strikes the mirror, these sensors detect it
and make the reflection surface of the
mirror dimmer to help prevent you from
being blinded. For this reason, use care
not to cover the sensors with stickers, or
Page 161 of 458
3-42Instruments and controls
dimming function is on, the LED indicator
will illuminate.
Even with the mirror in the automatic
dimming mode, the mirror surface turns
bright if the transmission is shifted into
reverse. This is to ensure good rearward
visibility during reversing. . By pressing the compass display but-
ton, the compass display is toggled on or
off. When the compass is on, an illumi-
nated compass reading will appear in the
upper right corner of the mirror.
When cleaning the mirror, use a paper
towel or similar material dampened with
glass cleaner. Do not spray glass cleaner
directly on the mirror as that may cause
theliquidcleanertoenterthemirror
housing and damage the mirror. !
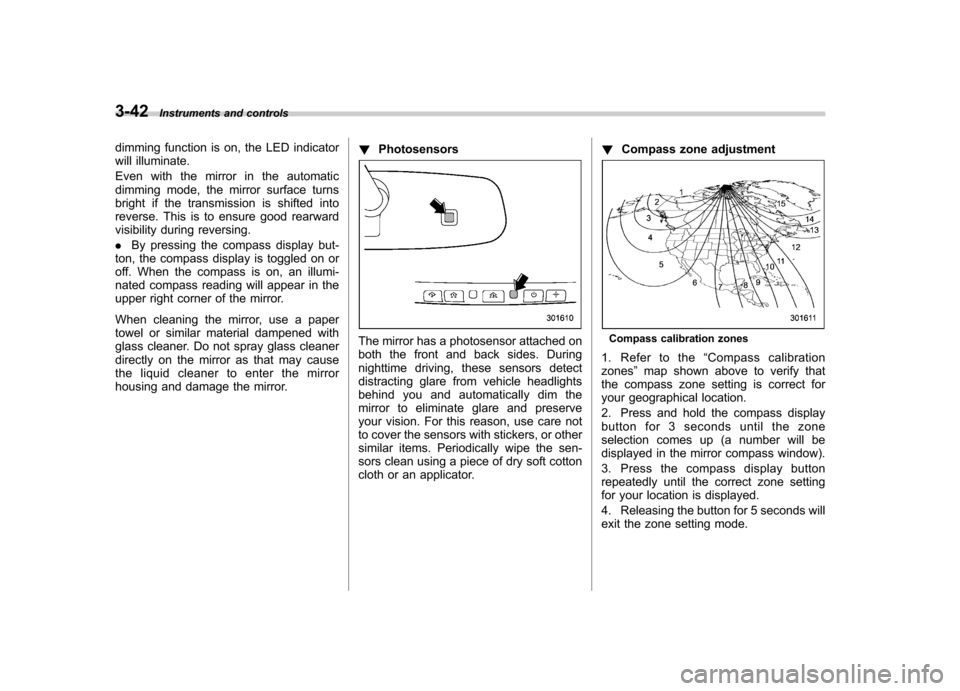
Photosensors
The mirror has a photosensor attached on
both the front and back sides. During
nighttime driving, these sensors detect
distracting glare from vehicle headlights
behind you and automatically dim the
mirror to eliminate glare and preserve
your vision. For this reason, use care not
to cover the sensors with stickers, or other
similar items. Periodically wipe the sen-
sors clean using a piece of dry soft cotton
cloth or an applicator. !
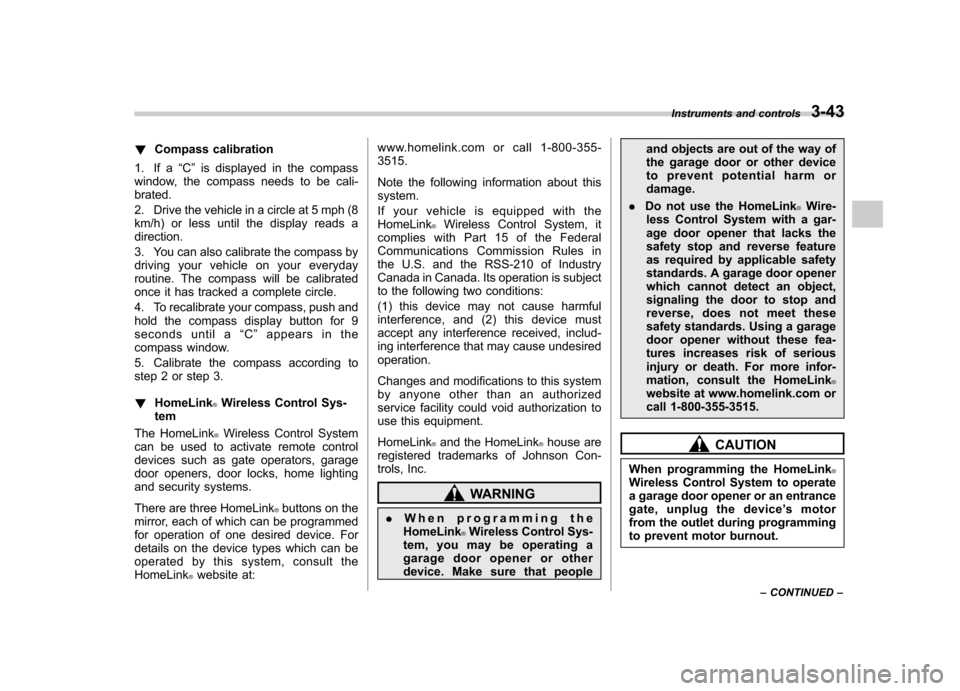
Compass zone adjustmentCompass calibration zones
1. Refer to the “Compass calibration
zones ”map shown above to verify that
the compass zone setting is correct for
your geographical location.
2. Press and hold the compass display
button for 3 seconds until the zone
selection comes up (a number will be
displayed in the mirror compass window).
3. Press the compass display button
repeatedly until the correct zone setting
for your location is displayed.
4. Releasing the button for 5 seconds will
exit the zone setting mode.
Page 162 of 458
!Compass calibration
1. If a “C ” is displayed in the compass
window, the compass needs to be cali- brated.
2. Drive the vehicle in a circle at 5 mph (8
km/h) or less until the display reads a direction.
3. You can also calibrate the compass by
driving your vehicle on your everyday
routine. The compass will be calibrated
once it has tracked a complete circle.
4. To recalibrate your compass, push and
hold the compass display button for 9
seconds until a “C ” appears in the
compass window.
5. Calibrate the compass according to
step 2 or step 3. ! HomeLink
®Wireless Control Sys-
tem
The HomeLink
®Wireless Control System
can be used to activate remote control
devices such as gate operators, garage
door openers, door locks, home lighting
and security systems.
There are three HomeLink
®buttons on the
mirror, each of which can be programmed
for operation of one desired device. For
details on the device types which can be
operated by this system, consult the HomeLink
®website at: www.homelink.com or call 1-800-355-3515.
Note the following information about this system.
Ifyourvehicleisequippedwiththe HomeLink
®Wireless Control System, it
complies with Part 15 of the Federal
Communications Commission Rules in
the U.S. and the RSS-210 of Industry
Canada in Canada. Its operation is subject
to the following two conditions:
(1) this device may not cause harmful
interference, and (2) this device must
accept any interference received, includ-
ing interference that may cause undesiredoperation.
Changes and modifications to this system
by anyone other than an authorized
service facility could void authorization to
use this equipment. HomeLink
®and the HomeLink®house are
registered trademarks of Johnson Con-
trols, Inc.
WARNING
. When programming the
HomeLink
®Wireless Control Sys-
tem, you may be operating a
garage door opener or other
device. Make sure that people and objects are out of the way of
the garage door or other device
to prevent potential harm ordamage.
. Do not use the HomeLink
®Wire-
less Control System with a gar-
age door opener that lacks the
safety stop and reverse feature
as required by applicable safety
standards. A garage door opener
which cannot detect an object,
signaling the door to stop and
reverse, does not meet these
safety standards. Using a garage
door opener without these fea-
tures increases risk of serious
injury or death. For more infor-
mation, consult the HomeLink
®website at www.homelink.com or
call 1-800-355-3515.
CAUTION
When programming the HomeLink
®Wireless Control System to operate
a garage door opener or an entrance
gate, unplug the device ’s motor
from the outlet during programming
to prevent motor burnout. Instruments and controls
3-43
– CONTINUED –
Page 214 of 458
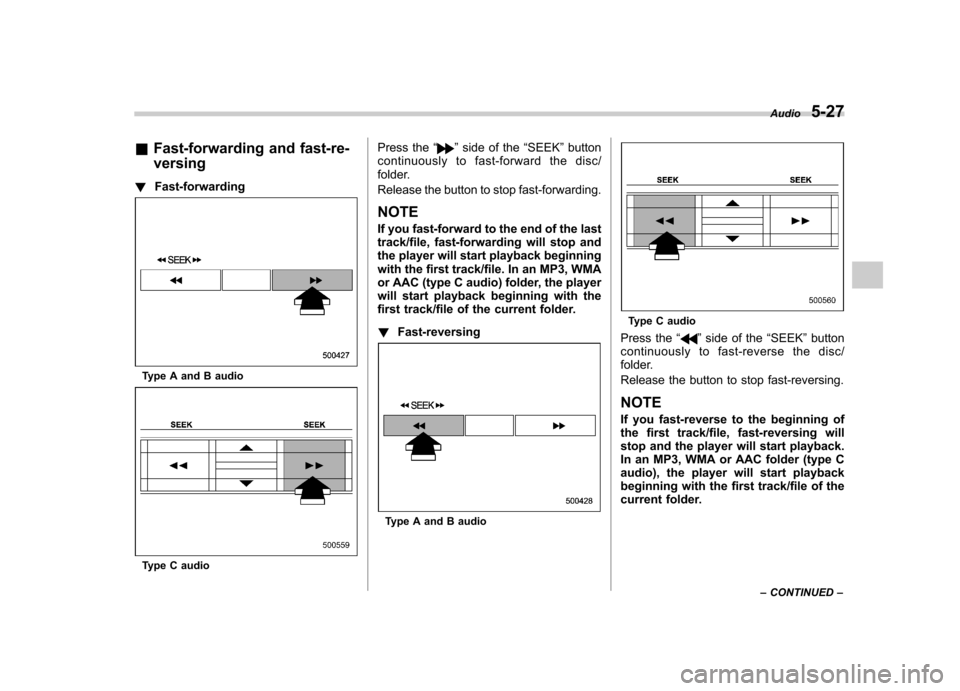
&Fast-forwarding and fast-re- versing
! Fast-forwarding
Type A and B audio
Type C audio Press the
“
”side of the “SEEK ”button
continuously to fast-forward the disc/
folder.
Release the button to stop fast-forwarding.
NOTE
If you fast-forward to the end of the last
track/file, fast-forwarding will stop and
the player will start playback beginning
with the first track/file. In an MP3, WMA
or AAC (type C audio) folder, the player
will start playback beginning with the
first track/file of the current folder. ! Fast-reversing
Type A and B audio
Type C audio
Press the “
”side of the “SEEK ”button
continuously to fast- reverse the disc/
folder.
Release the button to stop fast-reversing. NOTE
If you fast-reverse to the beginning of
the first track/file, fast-reversing will
stop and the player will start playback.
In an MP3, WMA or AAC folder (type C
audio), the player will start playback
beginning with the first track/file of the
current folder. Audio
5-27
– CONTINUED –
Page 227 of 458
5-40Audio
version, the iPod
®may not activate
smoothly after operation or not work
properly.. Do not disconnect the connector
from an iPod
®during iPod®operation.
& To select a track/index from
its beginning
Select a track/index in the same way that
a track is selected when a CD is played.
For details, refer to “To select a track from
its beginning ”F 5-26.
& To select a chapter from its
beginning when connectingiPod
®
While podcasts or audiobooks are playing,
select a chapter in the same way that a
track is selected when a CD is played. For
details, refer to “To select a track from its
beginning ”F 5-26.
& Fast-forwarding and fast-re- versing
Fast forward or reverse is operated in the
same way a CD is played. For details,
refer to “Fast-forwarding and fast-rever-
sing ”F 5-27. NOTE
When connecting iPod
®:
. When the end of an index is reached
while fast forwarding, fast forwarding
ends and play begins from the begin-
ning of the next index.. When the beginning of an index is
reached while rewin ding, rewinding
ends and play begins from the begin-
ning of the index. & Repeating
! When connecting USB storage de- vice
Repeating is operated in the same way a
CD is played. For details, refer to “Re-
peating ”F 5-28. !
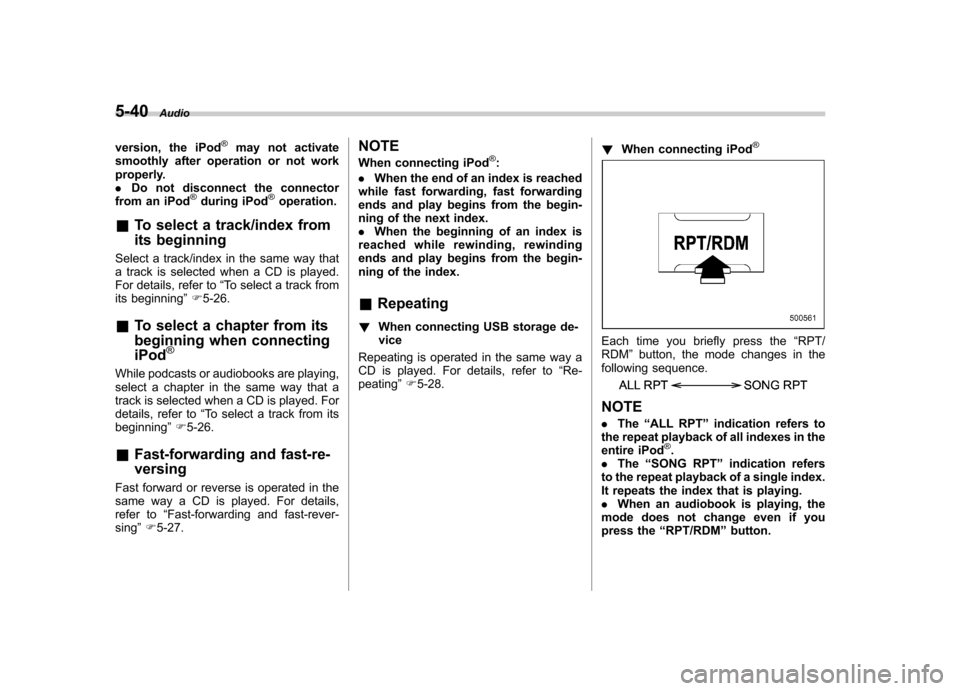
When connecting iPod
®
Each time you briefly press the “RPT/
RDM ”button, the mode changes in the
following sequence.
NOTE . The “ALL RPT ”indication refers to
the repeat playback of all indexes in the
entire iPod
®.
. The “SONG RPT ”indication refers
to the repeat playback of a single index.
It repeats the index that is playing.. When an audiobook is playing, the
mode does not change even if you
press the “RPT/RDM ”button.
Page 264 of 458
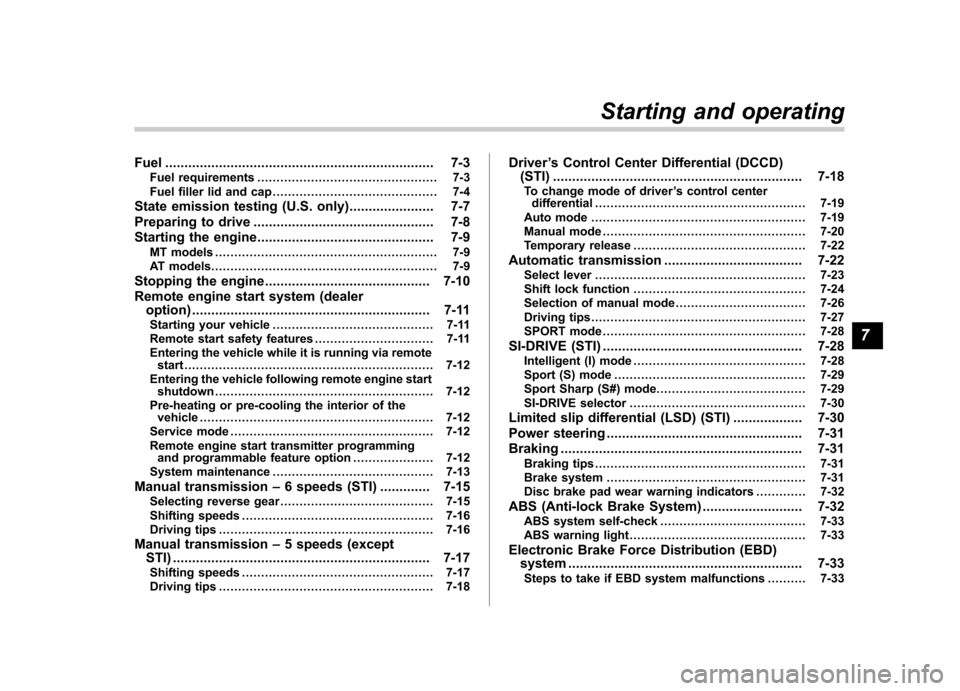
Fuel...................................................................... 7-3
Fuel requirements ............................................... 7-3
Fuel filler lid and cap ........................................... 7-4
State emission testing (U.S. only) ...................... 7-7
Preparing to drive ............................................... 7-8
Starting the engine .............................................. 7-9
MT models .......................................................... 7-9
AT models ........................................................... 7-9
Stopping the engine ........................................... 7-10
Remote engine start system (dealer option) .............................................................. 7-11
Starting your vehicle .......................................... 7-11
Remote start safety features ............................... 7-11
Entering the vehicle while it is running via remote start ................................................................. 7-12
Entering the vehicle following remote engine start shutdown ......................................................... 7-12
Pre-heating or pre-cooling the interior of the vehicle ............................................................. 7-12
Service mode ..................................................... 7-12
Remote engine start transmitter programming and programmable feature option ..................... 7-12
System maintenance .......................................... 7-13
Manual transmission –6 speeds (STI) ............. 7-15
Selecting reverse gear ........................................ 7-15
Shifting speeds .................................................. 7-16
Driving tips ........................................................ 7-16
Manual transmission –5 speeds (except
STI) ................................................................... 7-17
Shifting speeds .................................................. 7-17
Driving tips ........................................................ 7-18 Driver
’s Control Center Differential (DCCD)
(STI) ................................................................. 7-18
To change mode of driver ’s control center
differential ....................................................... 7-19
Auto mode ........................................................ 7-19
Manual mode ..................................................... 7-20
Temporary release ............................................. 7-22
Automatic transmission .................................... 7-22
Select lever ....................................................... 7-23
Shift lock function ............................................. 7-24
Selection of manual mode .................................. 7-26
Driving tips ........................................................ 7-27
SPORT mode ..................................................... 7-28
SI-DRIVE (STI) .................................................... 7-28
Intelligent (I) mode ............................................. 7-28
Sport (S) mode .................................................. 7-29
Sport Sharp (S#) mode. ...................................... 7-29
SI-DRIVE selector .............................................. 7-30
Limited slip differential (LSD) (STI) .................. 7-30
Power steering ................................................... 7-31
Braking ............................................................... 7-31
Braking tips ....................................................... 7-31
Brake system .................................................... 7-31
Disc brake pad wear warning indicators ............. 7-32
ABS (Anti-lock Brake System) .......................... 7-32
ABS system self-check ...................................... 7-33
ABS warning light .............................................. 7-33
Electronic Brake Force Distribution (EBD) system ............................................................. 7-33
Steps to take if EBD system malfunctions ..... ..... 7-33
Starting and operating
7