fuel consumption SUBARU IMPREZA 2016 5.G Owners Manual
[x] Cancel search | Manufacturer: SUBARU, Model Year: 2016, Model line: IMPREZA, Model: SUBARU IMPREZA 2016 5.GPages: 594, PDF Size: 5.36 MB
Page 158 of 594
efficiency.
NOTE
.The ECO gauge shows only an
approximate indication of fuel effi-
ciency.
. After resetting the trip meter, the
average rate of fuel consumption is not
shown until driving 0.6 mile (1 km).
Before that time, the ECO gauge does
not operate.
Warning and indicator lights
& Initial illumination for system
check
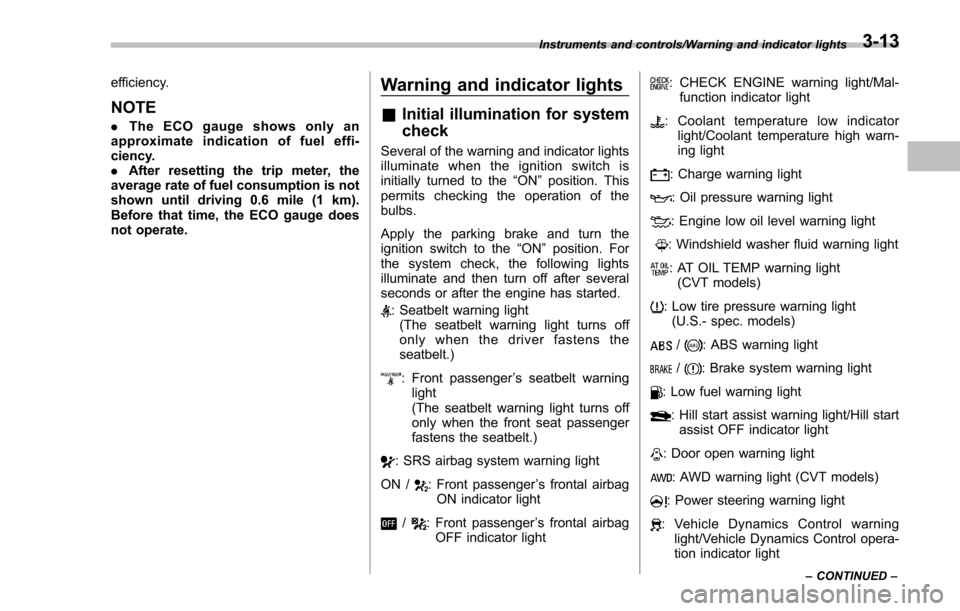
Several of the warning and indicator lights
illuminate when the ignition switch is
initially turned to the “ON ”position. This
permits checking the operation of the
bulbs.
Apply the parking brake and turn the
ignition switch to the “ON”position. For
the system check, the following lights
illuminate and then turn off after several
seconds or after the engine has started.
: Seatbelt warning light (The seatbelt warning light turns off
only when the driver fastens the
seatbelt.)
: Front passenger ’s seatbelt warning
light
(The seatbelt warning light turns off
only when the front seat passenger
fastens the seatbelt.)
: SRS airbag system warning light
ON /
: Front passenger ’s frontal airbag
ON indicator light
/: Front passenger ’s frontal airbag
OFF indicator light
: CHECK ENGINE warning light/Mal- function indicator light
: Coolant temperature low indicator light/Coolant temperature high warn-
ing light
: Charge warning light
: Oil pressure warning light
: Engine low oil level warning light
: Windshield washer fluid warning light
: AT OIL TEMP warning light(CVT models)
: Low tire pressure warning light(U.S.- spec. models)
/: ABS warning light
/: Brake system warning light
: Low fuel warning light
: Hill start assist warning light/Hill startassist OFF indicator light
: Door open warning light
: AWD warning light (CVT models)
: Power steering warning light
: Vehicle Dynamics Control warning light/Vehicle Dynamics Control opera-
tion indicator light
Instruments and controls/Warning and indicator lights
–CONTINUED –3-13
Page 179 of 594
Instruments and controls/Information display
sequence.!Driving range on remaining fuel
1) U.S.-spec. models
2) Except U.S.-spec. models
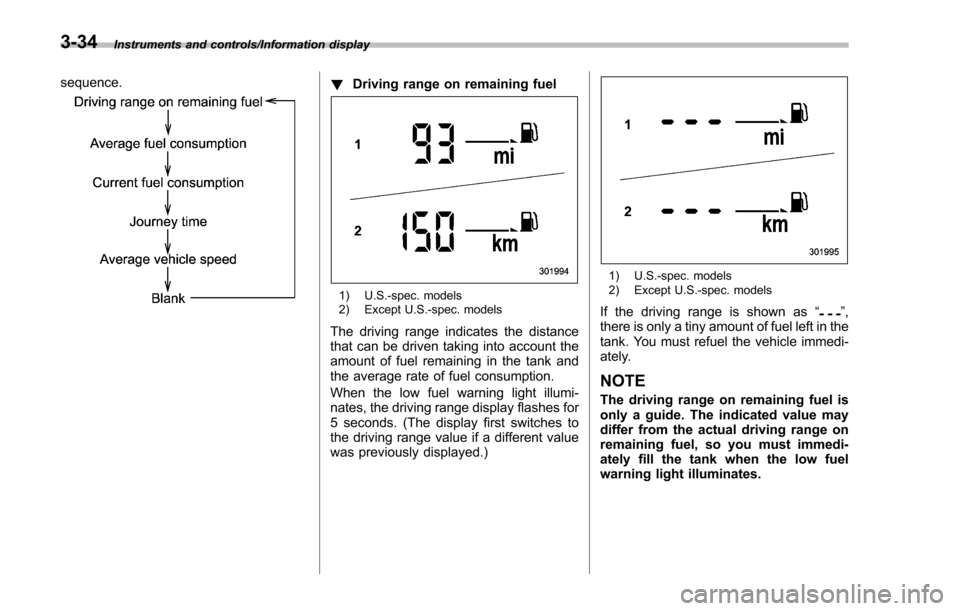
The driving range indicates the distance
that can be driven taking into account the
amount of fuel remaining in the tank and
the average rate of fuel consumption.
When the low fuel warning light illumi-
nates, the driving range display flashes for
5 seconds. (The display first switches to
the driving range value if a different value
was previously displayed.)
1) U.S.-spec. models
2) Except U.S.-spec. models
If the driving range is shown as “”,
there is only a tiny amount of fuel left in the
tank. You must refuel the vehicle immedi-
ately.
NOTE
The driving range on remaining fuel is
only a guide. The indicated value may
differ from the actual driving range on
remaining fuel, so you must immedi-
ately fill the tank when the low fuel
warning light illuminates.
3-34
Page 180 of 594
!Average fuel consumption
1) U.S.-spec. models
2) Except U.S.-spec. models
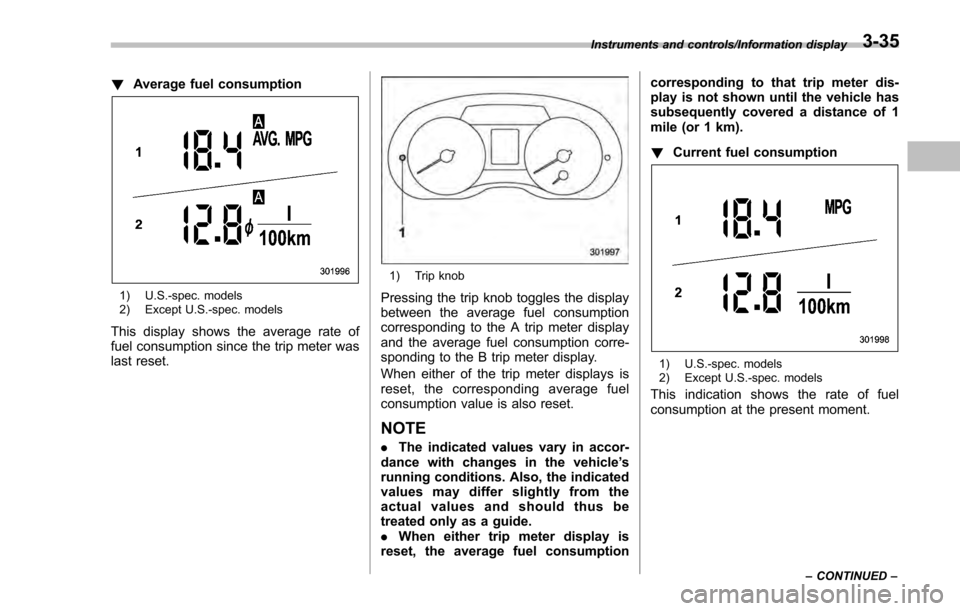
This display shows the average rate of
fuel consumption since the trip meter was
last reset.
1) Trip knob
Pressing the trip knob toggles the display
between the average fuel consumption
corresponding to the A trip meter display
and the average fuel consumption corre-
sponding to the B trip meter display.
When either of the trip meter displays is
reset, the correspon ding average fuel
consumption value is also reset.
NOTE
. The indicated values vary in accor-
dance with changes in the vehicle ’s
running conditions. Also, the indicated
values may differ slightly from the
actual values and should thus be
treated only as a guide.
. When either trip meter display is
reset, the average fuel consumption corresponding to that trip meter dis-
play is not shown until the vehicle has
subsequently covered a distance of 1
mile (or 1 km).
!
Current fuel consumption
1) U.S.-spec. models
2) Except U.S.-spec. models
This indication shows the rate of fuel
consumption at the present moment.
Instruments and controls/Information display
–CONTINUED –3-35
Page 182 of 594
!Turn off display of driving informa-
tion display
The driving information display can be
turned off.
To turn off the display, turn the ignition
switch to the “LOCK”/“OFF ”position and
press the “+ ” button adjacent to the clock
display for approximately 5 seconds.
Then, the driving information display and
the clock display will blink for 3 seconds to
notify you that the driving information
display has been turned off.
To restore the driving information display,
once again press the “+ ” button for
approximately 5 seconds.
NOTE
. The initial display setting of the
driving information display has been
set to operational at the time of ship-
ment from the factory.
. The average fuel consumption and
average vehicle speed are calculated
even while the driving information dis-
play is not displayed.
. Evenifyouturnoffthedriving
information display, the display will
automatically turn on when the battery
voltage is disconnected and then re-
connected for battery replacement or
fuse replacement.
& Clock
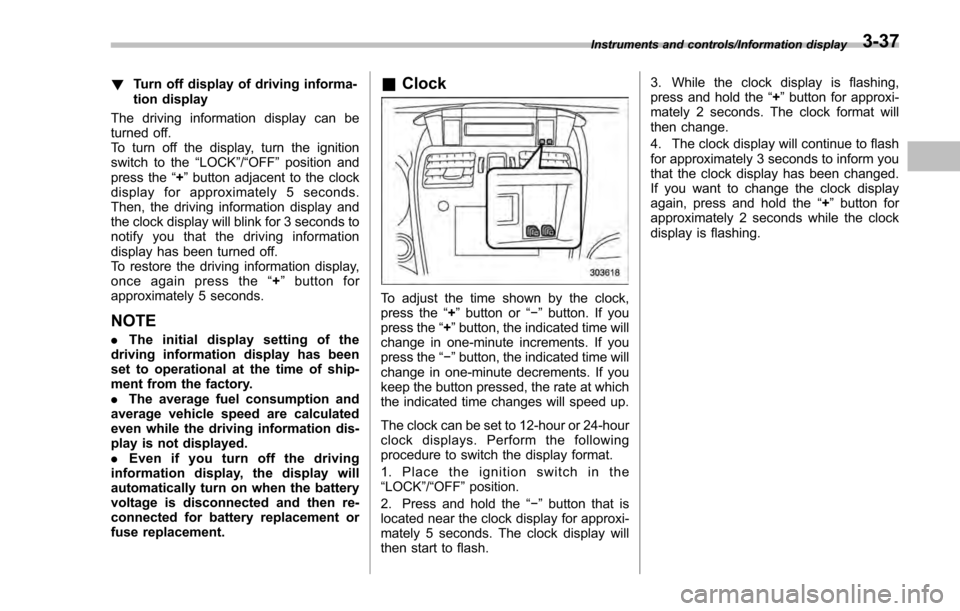
To adjust the time shown by the clock,
press the “+”button or “−”button. If you
press the “+”button, the indicated time will
change in one-minute increments. If you
press the “−”button, the indicated time will
change in one-minute decrements. If you
keep the button pressed, the rate at which
the indicated time changes will speed up.
The clock can be set to 12-hour or 24-hour
clock displays. Perform the following
procedure to switch the display format.
1. Place the ignition switch in the
“LOCK”/ “OFF ”position.
2. Press and hold the “−”button that is
located near the clock display for approxi-
mately 5 seconds. The clock display will
then start to flash. 3. While the clock display is flashing,
press and hold the
“+”button for approxi-
mately 2 seconds. The clock format will
then change.
4. The clock display will continue to flash
for approximately 3 seconds to inform you
that the clock display has been changed.
If you want to change the clock display
again, press and hold the “+”button for
approximately 2 seconds while the clock
display is flashing.
Instruments and controls/Information display3-37
Page 188 of 594
&Safety precautions
WARNING
Always pay adequate attention to
safe driving when operating the
multi function display while the
vehicle is in motion. When operation
of the multi function display is
disturbing your awareness and abil-
ity to concentrate on driving, stop
the vehicle in a safe place before
performing operations on the
screen. Also, do not concentrate
on the display while driving. Doing
so may cause you to look away from
the road and could result in an
accident.
&Features
The multi function display has the follow-
ing functions.
Description Page
Displays useful messages, such
as warning information, etc. 3-46
Displays basic screens (e.g. fuel
consumption screen, etc.) 3-47
Sets and adjusts maintenance
notification 3-74
Registers driving history 3-77
Sets and customizes car opera-
tion 3-78
Also, the multi function display can also be
used to set and initialize the multi function
display itself.
NOTE
When the vehicle is in motion, certain
functions and selections may not be
available.
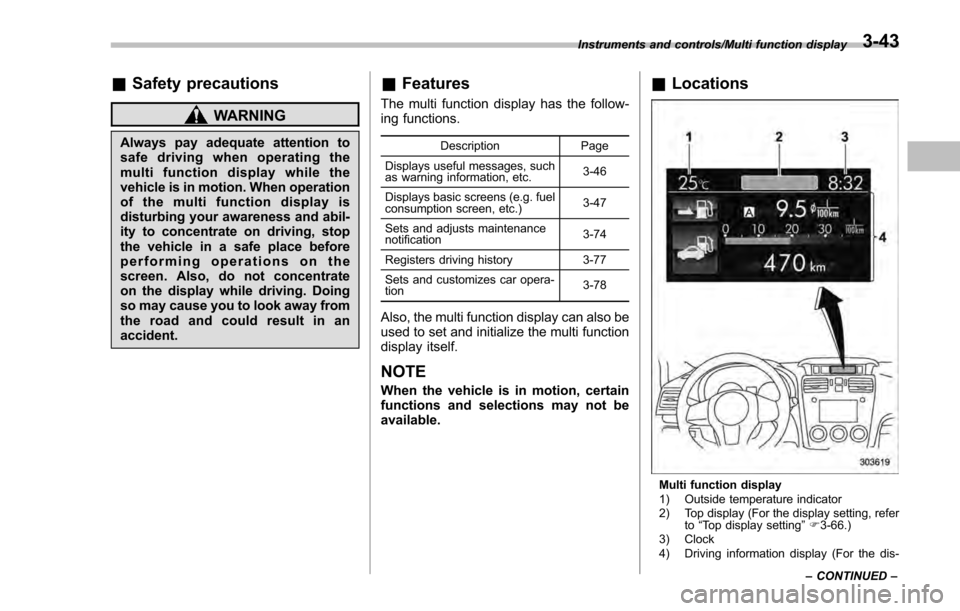
&
Locations
Multi function display
1) Outside temperature indicator
2) Top display (For the display setting, refer
to“Top display setting ”F 3-66.)
3) Clock
4) Driving information display (For the dis-
Instruments and controls/Multi function display
–CONTINUED –
3-43
Page 190 of 594
NOTE
.Displaying the birthday/anniversary
screen can be set to on or off. Refer to
“Bypass screen setting” F3-72.
. Up to five items can be set for
birthdays and anniversaries respec-
tively. Refer to “Selection screen ”F 3-
54.
& Ending screen
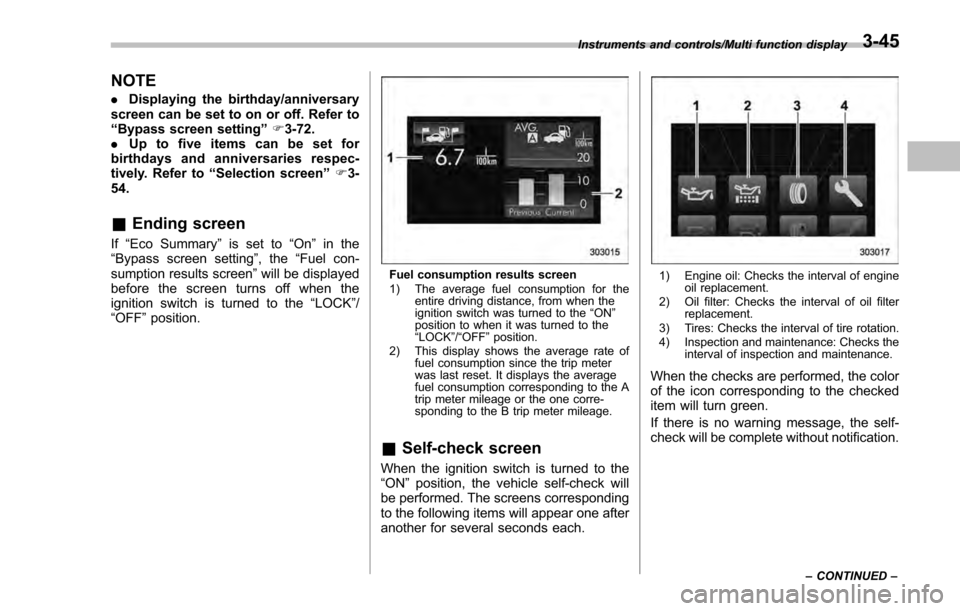
If“Eco Summary ”is set to “On”in the
“Bypass screen setting ”, the“Fuel con-
sumption results screen” will be displayed
before the screen turns off when the
ignition switch is turned to the “LOCK” /
“ OFF ”position.
Fuel consumption results screen
1) The average fuel consumption for the
entire driving distance, from when the
ignition switch was turned to the “ON ”
position to when it was turned to the
“ LOCK ”/“ OFF ”position.
2) This display shows the average rate of fuel consumption since the trip meter
was last reset. It displays the average
fuel consumption corresponding to the A
trip meter mileage or the one corre-
sponding to the B trip meter mileage.
&Self-check screen
When the ignition switch is turned to the
“ON ”position, the vehicle self-check will
be performed. The screens corresponding
to the following items will appear one after
another for several seconds each.
1) Engine oil: Checks the interval of engine oil replacement.
2) Oil filter: Checks the interval of oil filter replacement.
3) Tires: Checks the interval of tire rotation.
4) Inspection and maintenance: Checks the interval of inspection and maintenance.
When the checks are performed, the color
of the icon corresponding to the checked
item will turn green.
If there is no warning message, the self-
check will be complete without notification.
Instruments and controls/Multi function display
–CONTINUED –3-45
Page 192 of 594
&Basic screens
! Basic screen items
These are the basic screens of the multi
function display.
Item Page
Information bar 3-47
Fuel consumption screen 3-48
ECO gauge screen (if
equipped) 3-49
ECO history screen 3-49
Vehicle activation status
screen 3-50
EyeSight screen (models with
the EyeSight system) 3-51
Triple meter screen 3-51
Guidance screen 3-52
Clock/calendar screen 3-52
By operating the
“”or “”switch on the
steering wheel, you can switch the screen
that is always displayed. Also, when the
button is pressed and held, the
selection screen can be displayed. For
details about the selection screen, refer to
“Selection screen ”F 3-54. !
Information bar
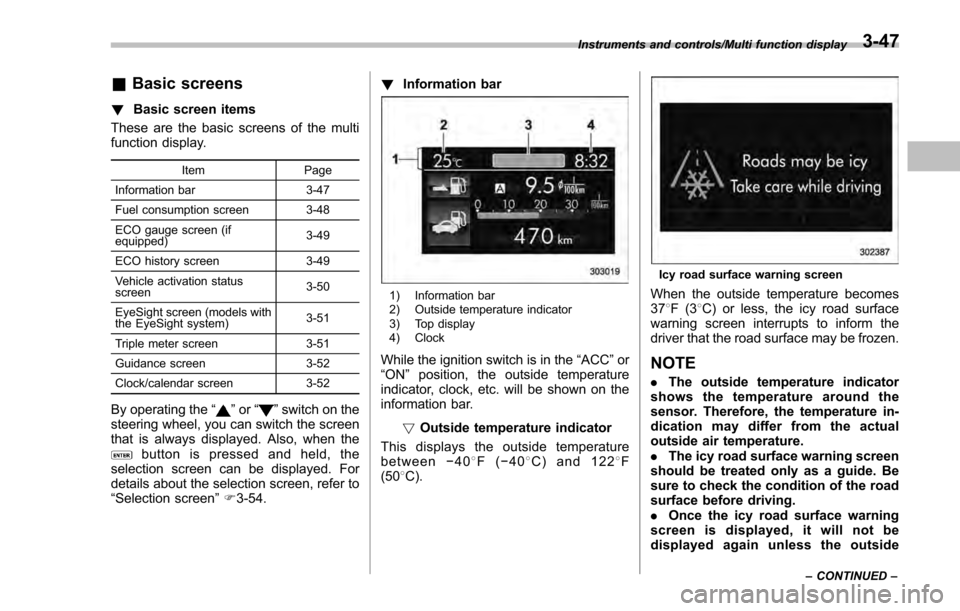
1) Information bar
2) Outside temperature indicator
3) Top display
4) Clock
While the ignition switch is in the “ACC ”or
“ON ”position, the outside temperature
indicator, clock, etc. will be shown on the
information bar.
!Outside temperature indicator
This displays the outside temperature
between −40 8F( −408 C) and 122 8F
(50 8C).
Icy road surface warning screen
When the outside temperature becomes
37 8F(3 8C) or less, the icy road surface
warning screen interrupts to inform the
driver that the road surface may be frozen.
NOTE
. The outside temperature indicator
shows the temperature around the
sensor. Therefore, the temperature in-
dication may differ from the actual
outside air temperature.
. The icy road surface warning screen
should be treated only as a guide. Be
sure to check the condition of the road
surface before driving.
. Once the icy road surface warning
screen is displayed, it will not be
displayed again unless the outside
Instruments and controls/Multi function display
–CONTINUED –3-47
Page 193 of 594
Instruments and controls/Multi function display
temperature has increased to 418F
(5 8C) or higher.
! Top display
One of the following items can be dis-
played on the top display.
. Average fuel consumption correspond-
ing to the driving distance of each trip
meter
. Current fuel consumption (This may
not be displayed when driving at a low
speed.)
. Driving range on remaining fuel
For details about the setting of the top
display, refer to “Top display setting ”F 3-
66.
NOTE
The driving range on the remaining fuel
is calculated using the average fuel
consumption of the last 19 miles (30
km) driven. This value may be different
from the values calculated using the
average fuel consumption correspond-
ing to the driving distance of each trip
meter or the current fuel consumption. !
Clock
The clock can be displayed in either 12-
hour display or 24-hour display. For details
about the setting, refer to “Current date
and time setting ”F 3-57.
NOTE
If the vehicle battery is disconnected,
the clock shown in the information bar
will be reset. Set the time again after
the vehicle battery is connected. For
details about the setting, refer to “To p
display setting ”F 3-66. !
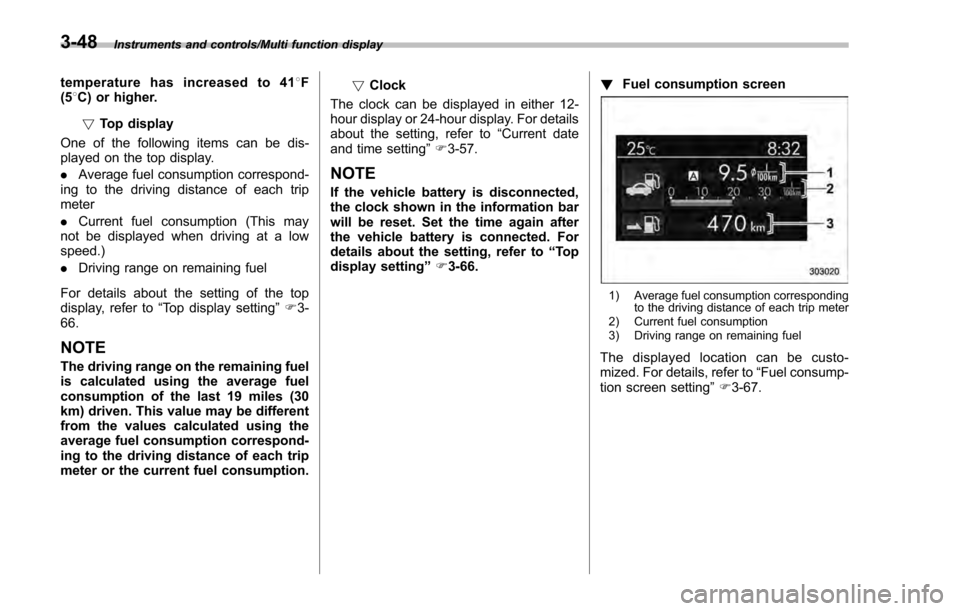
Fuel consumption screen
1) Average fuel consumption corresponding
to the driving distance of each trip meter
2) Current fuel consumption
3) Driving range on remaining fuel
The displayed location can be custo-
mized. For details, refer to “Fuel consump-
tion screen setting ”F 3-67.
3-48
Page 194 of 594
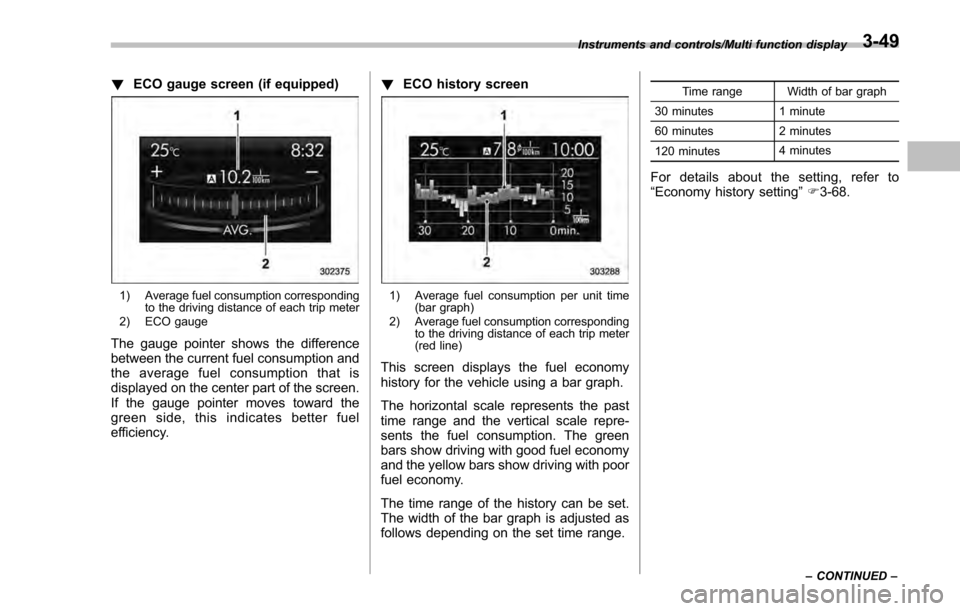
!ECO gauge screen (if equipped)
1) Average fuel consumption corresponding
to the driving distance of each trip meter
2) ECO gauge
The gauge pointer shows the difference
between the current fuel consumption and
the average fuel consumption that is
displayed on the center part of the screen.
If the gauge pointer moves toward the
green side, this indicates better fuel
efficiency. !
ECO history screen
1) Average fuel consumption per unit time
(bar graph)
2) Average fuel consumption corresponding to the driving distance of each trip meter
(red line)
This screen displays the fuel economy
history for the vehicle using a bar graph.
The horizontal scale represents the past
time range and the vertical scale repre-
sents the fuel consumption. The green
bars show driving with good fuel economy
and the yellow bars show driving with poor
fuel economy.
The time range of the history can be set.
The width of the bar graph is adjusted as
follows depending on the set time range.
Time range Width of bar graph
30 minutes 1 minute
60 minutes 2 minutes
120 minutes 4 minutes
For details about the setting, refer to
“
Economy history setting ”F 3-68.
Instruments and controls/Multi function display
–CONTINUED –3-49
Page 197 of 594
Instruments and controls/Multi function display
ItemDetails
Average vehicle speed (Average
vehicle speed for the entire driving
time from when the trip meter was
reset)
Lifetime fuel consumption
Engine oil temperature
Accelerator opening ratio
Journey time (the time that has
elapsed since the ignition switch
was turned to the“ON ”position) (if
equipped)
Journey distance (the distance
that has been driven since the
ignition switch was turned to the
“ ON ”position)
Average fuel consumption for the
entire driving distance from when
the ignition switch was turned to
the “ON ”position
Boost pressure
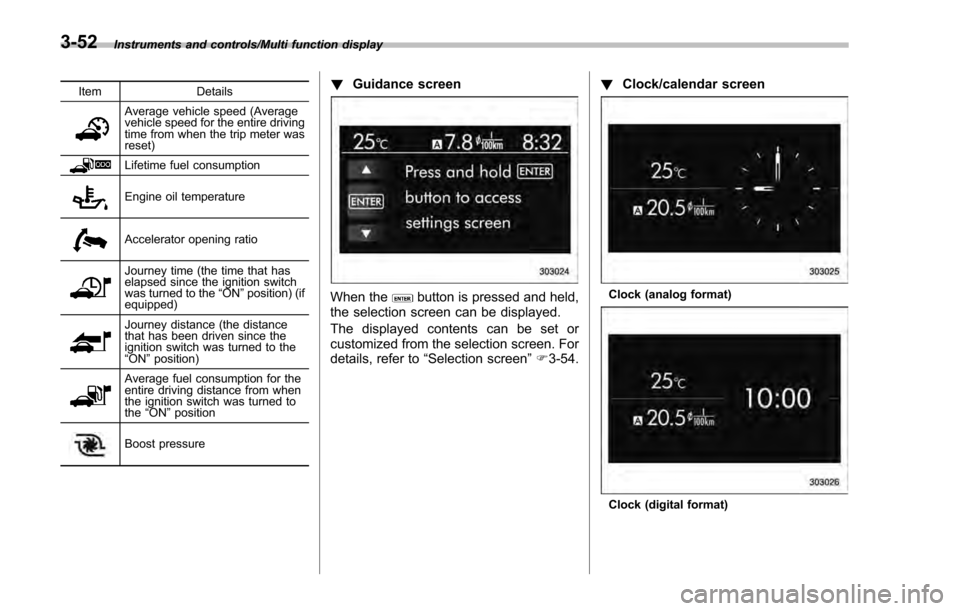
! Guidance screen
When thebutton is pressed and held,
the selection screen can be displayed.
The displayed contents can be set or
customized from the selection screen. For
details, refer to “Selection screen” F3-54. !
Clock/calendar screenClock (analog format)
Clock (digital format)
3-52