navigation system SUBARU IMPREZA 2022 Getting Started Guide
[x] Cancel search | Manufacturer: SUBARU, Model Year: 2022, Model line: IMPREZA, Model: SUBARU IMPREZA 2022Pages: 124, PDF Size: 33.04 MB
Page 78 of 124
Updating Maps Using Your PC/MAC
Maps can also be updated using a USB memory device, which will
allow the entire map program to be updated at one time. This is a
great option if you are going to take a cross-country trip and your
maps have not been updated in a while.
To update the map using a USB memory device, start by going to
www.subaru-maps.com.
CLOCK
You can adjust the clock manually or set the clock to update
automatically. When set to “Auto,” the clock automatically adjusts
when a Bluetooth
®connected phone is paired (vehicles without
navigation), or through the GPS signal (vehicles with navigation
system).
The following sections contain step-by-step instructions for setting
the clock, and you can scan the QR codes for a helpful “how to”
video. Choose the appropriate QR code based on your
Multi-Function Display (Color LCD or Black and White LCD).
SETTINGS AND UPDATES
76
Page 80 of 124
Automatically
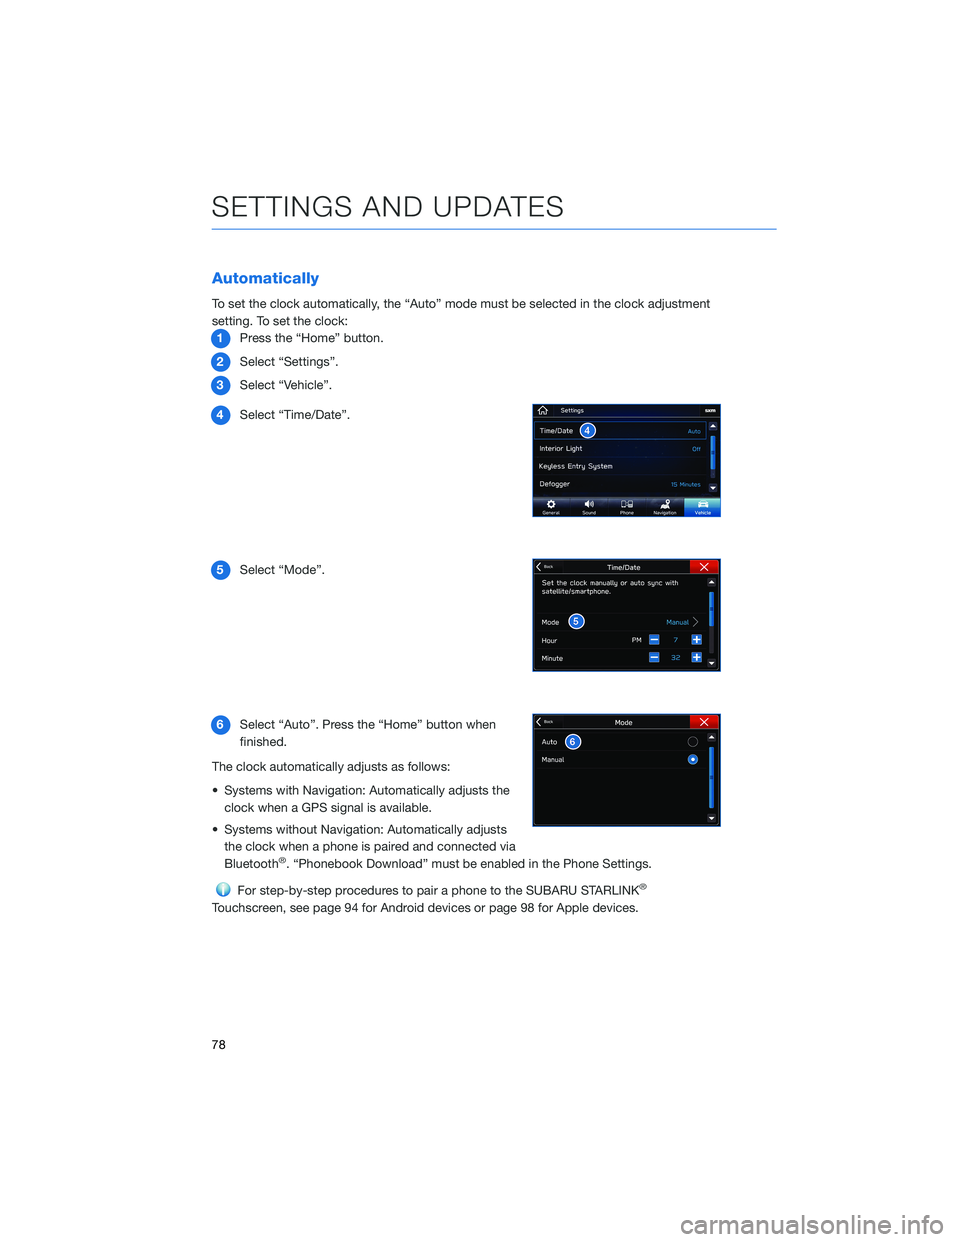
To set the clock automatically, the “Auto” mode must be selected in the clock adjustment
setting. To set the clock:1 Press the “Home” button.
2 Select “Settings”.
3 Select “Vehicle”.
4 Select “Time/Date”.
5 Select “Mode”.
6 Select “Auto”. Press the “Home” button when
finished.
The clock automatically adjusts as follows:
• Systems with Navigation: Automatically adjusts the clock when a GPS signal is available.
• Systems without Navigation: Automatically adjusts the clock when a phone is paired and connected via
Bluetooth
®. “Phonebook Download” must be enabled in the Phone Settings.
For step-by-step procedures to pair a phone to the SUBARU STARLINK®
Touchscreen, see page 94 for Android devices or page 98 for Apple devices.
SETTINGS AND UPDATES
78
Page 112 of 124
Route Options
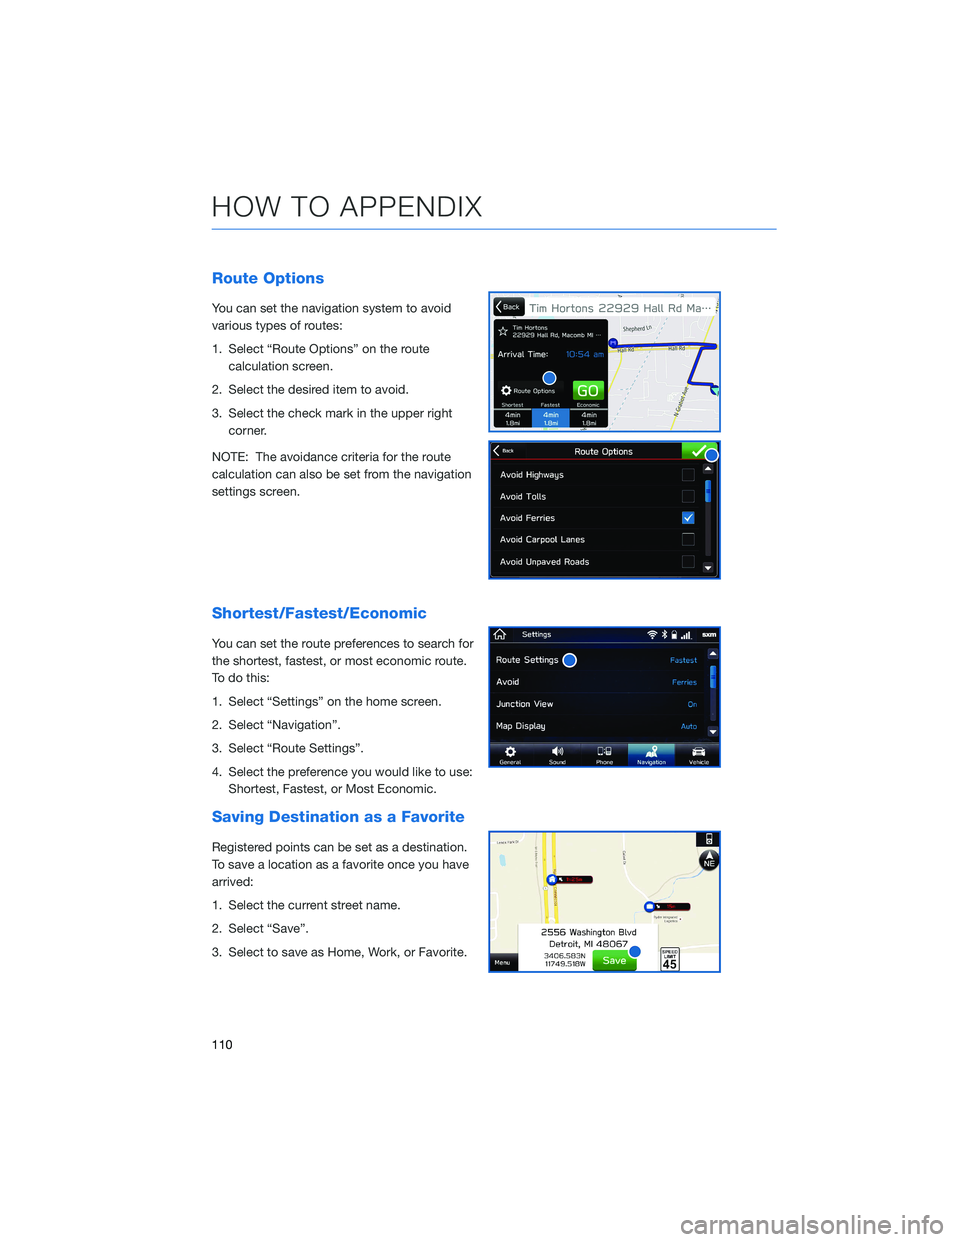
You can set the navigation system to avoid
various types of routes:
1. Select “Route Options” on the routecalculation screen.
2. Select the desired item to avoid.
3. Select the check mark in the upper right corner.
NOTE: The avoidance criteria for the route
calculation can also be set from the navigation
settings screen.
Shortest/Fastest/Economic
You can set the route preferences to search for
the shortest, fastest, or most economic route.
To do this:
1. Select “Settings” on the home screen.
2. Select “Navigation”.
3. Select “Route Settings”.
4. Select the preference you would like to use: Shortest, Fastest, or Most Economic.
Saving Destination as a Favorite
Registered points can be set as a destination.
To save a location as a favorite once you have
arrived:
1. Select the current street name.
2. Select “Save”.
3. Select to save as Home, Work, or Favorite.
HOW TO APPENDIX
110
Page 118 of 124
FIRMWARE AND SOFTWARE UPDATES
For 8.0–inch Multimedia Plus and 8.0–inch Multimedia Navigation systems, you can
update the system software via a Wi-Fi connection or the aha™ application on your
smartphone (depending on your smartphone communication and transfer speed).
To accurately check for updates, make sure the clock is set to “Auto” with a GPS signal
available (system with navigation) or a phone paired via Bluetooth
®(system without
navigation). See page 76 for step by step directions on setting the clock. System
functionality will be restricted during installation.
1. Connect to a Wi-Fi network or start the aha application on your smartphone (see page 106).
2. Return to the general settings screen (if needed, press the “Home” button, select “Settings”, and then select “General”).
3. Select “Check for Updates”. • If “Automatically Check for Updates” is turned on at the general settings screen, anupdate check will be performed automatically before proceeding to the next step.
• If “Automatically Download Updates” is turned on at the general settings screen, the software update will be downloaded automatically before proceeding to “Update
Installation”.
4. If the “Software Update Ready to Download” pop-up is displayed, select “Download Now” to begin the download. The download status progress is displayed in the upper
right of the screen.
5. Select “Install Now” to start the installation process. The installation process will take several minutes to complete. If you need to stop the installation process, press
“Cancel”.
6. When the installation is complete, select “I Agree” on the confirmation message to complete the update process. By selecting “I Agree”, the system will restart
automatically.
HOW TO APPENDIX
116
Page 120 of 124
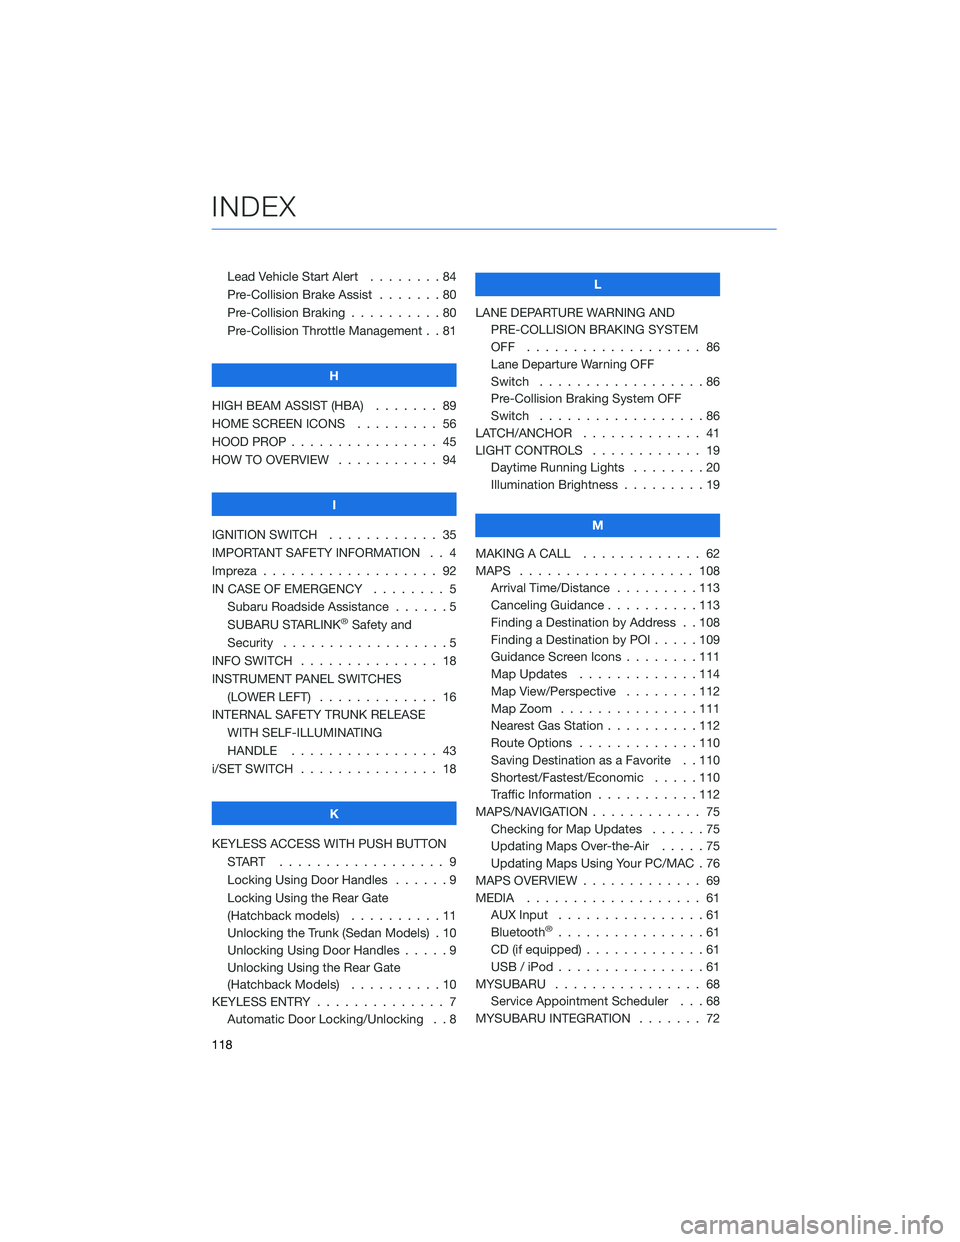
Lead Vehicle Start Alert........84
Pre-Collision Brake Assist . . . ....80
Pre-Collision Braking . .........80
Pre-Collision Throttle Management . . 81
H
HIGH BEAM ASSIST (HBA) ....... 89
HOME SCREEN ICONS . ........ 56
HOOD PROP . . . . . . . . . ....... 45
HOW TO OVERVIEW . . ......... 94
I
IGNITION SWITCH . . . ......... 35
IMPORTANT SAFETY INFORMATION . . 4
Impreza . . . . . . . . . . . . ....... 92
IN CASE OF EMERGENCY . . . . . . . . 5 Subaru Roadside Assistance . . . . . . 5
SUBARU STARLINK
®Safety and
Security . . . . . . . . . .........5
INFO SWITCH . . . . . . . . . . . . . . . 18
INSTRUMENT PANEL SWITCHES (LOWER LEFT) . . . . . . . . . . . . . 16
INTERNAL SAFETY TRUNK RELEASE WITH SELF-ILLUMINATING
HANDLE . . . . . . . . . ....... 43
i/SET SWITCH . . . . . . . ........ 18
K
KEYLESS ACCESS WITH PUSH BUTTON START .................. 9
Locking Using Door Handles ......9
Locking Using the Rear Gate
(Hatchback models) . . . . ......11
Unlocking the Trunk (Sedan Models) . 10
Unlocking Using Door Handles . . . . . 9
Unlocking Using the Rear Gate
(Hatchback Models) . . . . . .....10
KEYLESS ENTRY . . . . . . . ....... 7
Automatic Door Locking/Unlocking . . 8 L
LANE DEPARTURE WARNING AND PRE-COLLISION BRAKING SYSTEM
OFF ................... 86
Lane Departure Warning OFF
Switch . . . . ..............86
Pre-Collision Braking System OFF
Switch . . . . ..............86
LATCH/ANCHOR . . . . ......... 41
LIGHT CONTROLS . . .......... 19
Daytime Running Lights . . . . . . . . 20
Illumination Brightness . . . . . . . . . 19
M
MAKING A CALL . . . . . . . . ..... 62
MAPS . . . . . . . . . . . . ....... 108
Arrival Time/Distance . . . . . . . . . 113
Canceling Guidance ..........113
Finding a Destination by Address . . 108
Finding a Destination by POI . ....109
Guidance Screen Icons . . . . . . . . 111
Map Updates . . . . . . . . .....114
Map View/Perspective . . . . . . . . 112
Map Zoom . . . . . . . ........111
Nearest Gas Station . . . . . .....112
Route Options . . . . . . . ......110
Saving Destination as a Favorite . . 110
Shortest/Fastest/Economic . . . . . 110
Traffic Information . . . . . . .....112
MAPS/NAVIGATION . . . . . . . . . . . . 75 Checking for Map Updates . .....75
Updating Maps Over-the-Air . . . . . 75
Updating Maps Using Your PC/MAC . 76
MAPS OVERVIEW . . . .......... 69
MEDIA ................... 61
AUX Input . . . .............61
Bluetooth
®................61
CD (if equipped) . . . . . . . ......61
USB / iPod . . . . . . . . ........61
MYSUBARU . . . . . . . . . . . . . . . . 68 Service Appointment Scheduler . . . 68
MYSUBARU INTEGRATION ....... 72
INDEX
118