height adjustment SUBARU IMPREZA WRX 2004 2.G Owners Manual
[x] Cancel search | Manufacturer: SUBARU, Model Year: 2004, Model line: IMPREZA WRX, Model: SUBARU IMPREZA WRX 2004 2.GPages: 491, PDF Size: 5.93 MB
Page 28 of 491

1-1
1
Seat, seatbelt and SRS airbags
Front seats .................................................... 1-2 Fore and aft adjustment ................................... 1-3
Reclining the seatback ..................................... 1-4
Seat cushion height adjustment (driver’s seat) 1-5
Head restraint adjustment (if equipped) ......... 1-5
Active head restraint (if equipped) .................. 1-6
Seat heater (if equipped) .............................. 1-7
Rear seats ..................................................... 1-8 Armrest (if equipped) ........................................ 1-9
Headrest adjustment – Wagon ........................ 1-11
Folding down the rear seat – Wagon .............. 1-12
Seatbelts ....................................................... 1-13 Seatbelt safety tips ........................................... 1-13
Emergency Locking Retractor (ELR) .............. 1-14
Automatic/Emergency Locking Retractor (A/ELR) ............................................................ 1-15
Seatbelt warning light and chime ............... 1-15
Fastening the seatbelt ...................................... 1-15
Seatbelt maintenance ....................................... 1-27
Front seatbelt pretensioners ....................... 1-27 System monitors ............................................... 1-29
System servicing .............................................. 1-29
Precautions against vehicle modification ...... 1-30
Child restraint systems ................................ 1-31 Where to place a child restraint system ......... 1-33
Choosing a child restraint system .................. 1-34
Installing child restraint systems with A/ELR seatbelt ............................................................ 1-35
Installing a booster seat ................................... 1-40
Installation of child restraint systems by use of lower and tether anchorages (LATCH) 1-42 Top tether anchorages ..................................... 1-46
SRS airbag (Supplemental Restraint System airbag) 1-52Vehicle with driver’s and front passenger’s SRS airbags and lap/shoulder restraints ..... 1-52
SRS frontal airbag ............................................ 1-56
SRS side airbag (if equipped) .......................... 1-64
SRS airbag system monitors ........................... 1-72
SRS airbag system servicing .......................... 1-73
Precautions against vehicle modification ...... 1-74
Page 30 of 491

1-3
Seat, seatbelt and SRS airbags
– CONTINUED –
restrained at all times in a child restraint device
or in a seatbelt, whichever is appropriate for the
child’s age, height and weight. Secure ALL
types of child restraint devices (including for-
ward facing child seat) in the REAR seats at all times.
NEVER INSTALL A REARWARD FACING CHILD SEAT IN THE FRONT SEAT. DOING SO RISKS
SERIOUS INJURY OR DEATH TO THE CHILD
BY PLACING THE CHILD’S HEAD TOO CLOSE
TO THE SRS AIRBAG.
According to accident statistics, children are
safer when properly restrained in the rear seat-
ing positions than in the front seating posi-
tions. For instructions and precautions con-
cerning child restraint systems, see the “Child
restraint systems” section in this chapter. !
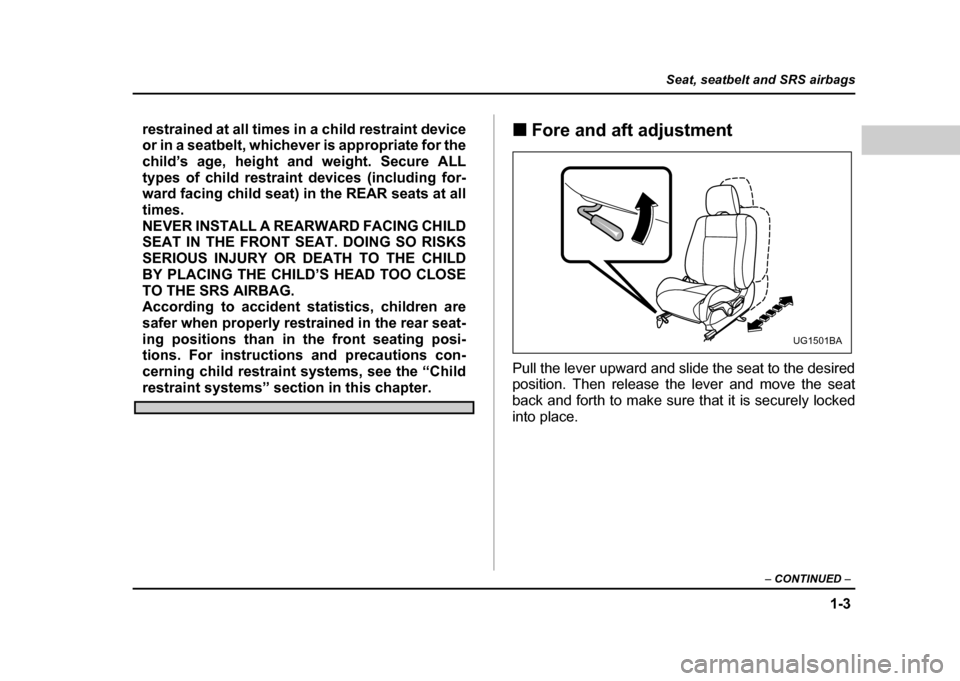
Fore and aft adjustment
Pull the lever upward and slide the seat to the desired
position. Then release the lever and move the seat
back and forth to make sure that it is securely locked
into place.
UG1501BA
Page 32 of 491

1-5
Seat, seatbelt and SRS airbags
– CONTINUED –
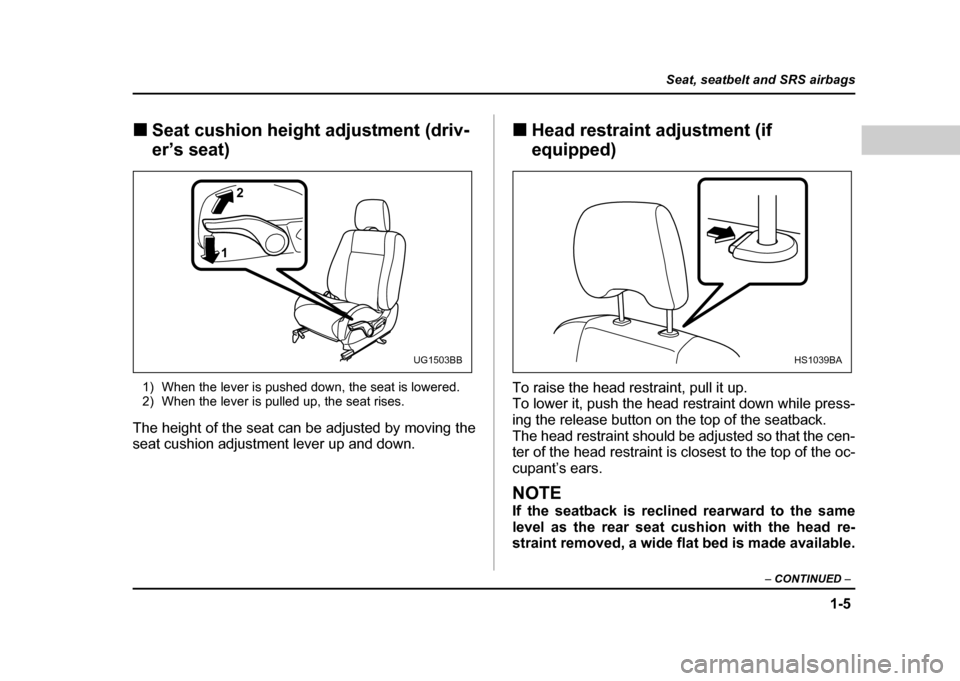
!Seat cushion height adjustment (driv- er’s seat)
1) When the lever is pushed down, the seat is lowered.
2) When the lever is pulled up, the seat rises.
The height of the seat can be adjusted by moving the
seat cushion adjustment lever up and down. !
Head restraint adjustment (if
equipped)
To raise the head restraint, pull it up.
To lower it, push the head restraint down while press-
ing the release button on the top of the seatback.
The head restraint should be adjusted so that the cen-
ter of the head restraint is closest to the top of the oc-
cupant’s ears.
NOTE
If the seatback is reclined rearward to the same
level as the rear seat cushion with the head re-
straint removed, a wide flat bed is made available.
2
1
UG1503BBHS1039BA
Page 170 of 491

3-33
Instruments and controls
– CONTINUED –
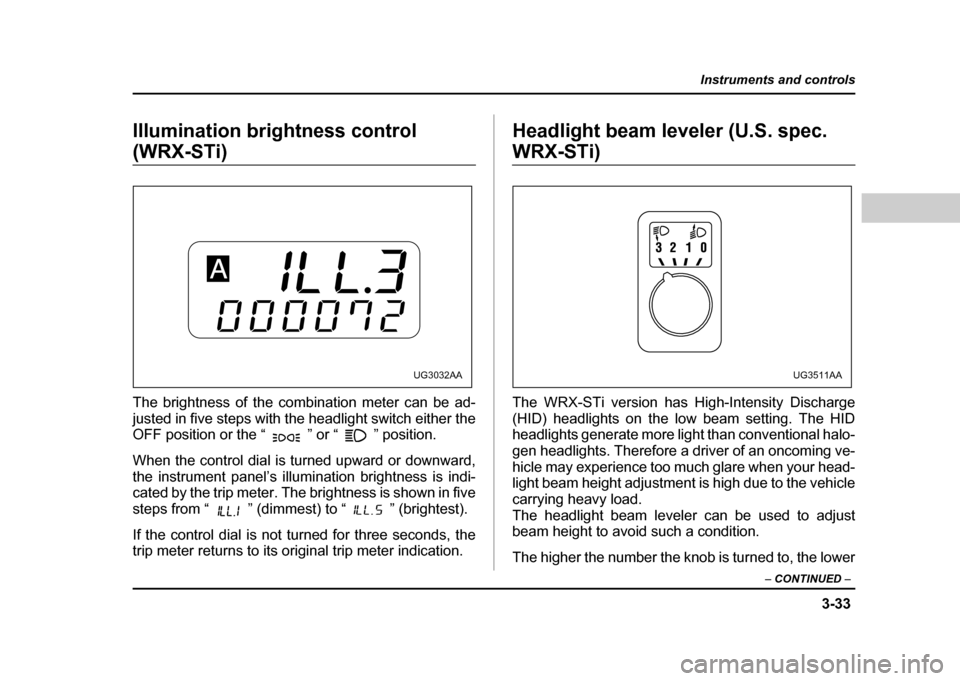
Illumination brightness control
(WRX-STi)
The brightness of the combination meter can be ad-
justed in five steps with the headlight switch either the
OFF position or the “ ” or “ ” position.
When the control dial is turned upward or downward,
the instrument panel’s illumination brightness is indi-
cated by the trip meter. The brightness is shown in five
steps from “ ” (dimmest) to “ ” (brightest).
If the control dial is not turned for three seconds, the
trip meter returns to its original trip meter indication. Headlight beam leveler (U.S. spec. WRX-STi)
The WRX-STi version has High-Intensity Discharge
(HID) headlights on the low beam setting. The HID
headlights generate more light than conventional halo-
gen headlights. Therefore a driver of an oncoming ve-
hicle may experience too much glare when your head-
light beam height adjustment is high due to the vehicle
carrying heavy load.
The headlight beam leveler can be used to adjust
beam height to avoid such a condition.
The higher the number the knob is turned to, the lower
UG3032AAUG3511AA