SUBARU LEGACY 2000 3.G Owners Manual
LEGACY 2000 3.G
SUBARU
SUBARU
https://www.carmanualsonline.info/img/17/7264/w960_7264-0.png
SUBARU LEGACY 2000 3.G Owners Manual
Trending: oil filter, fuse chart, open gas tank, check engine light, steering, ESP, key battery
Page 151 of 413

3-30struc tures and make c ertain the ig nition switc h is
in the “ON ” p osition.
3. Press and hold the left b utton for 3 sec ond s then release, and the
c omp ass will enter the c alib ration mod e. “CAL ” and d irec tion will b e
d isp layed .
4. Drive slowly in a c irc le until “CAL ” d isap p ears from the d isp lay
(ab out two or three c irc les).
5. The c omp ass is now c alib rated . Further c alib ratio n is not req uired .
The c omp ass will automatic ally c alib rate from this p oint forward .
n Compass zone adjustment
HB6021AB
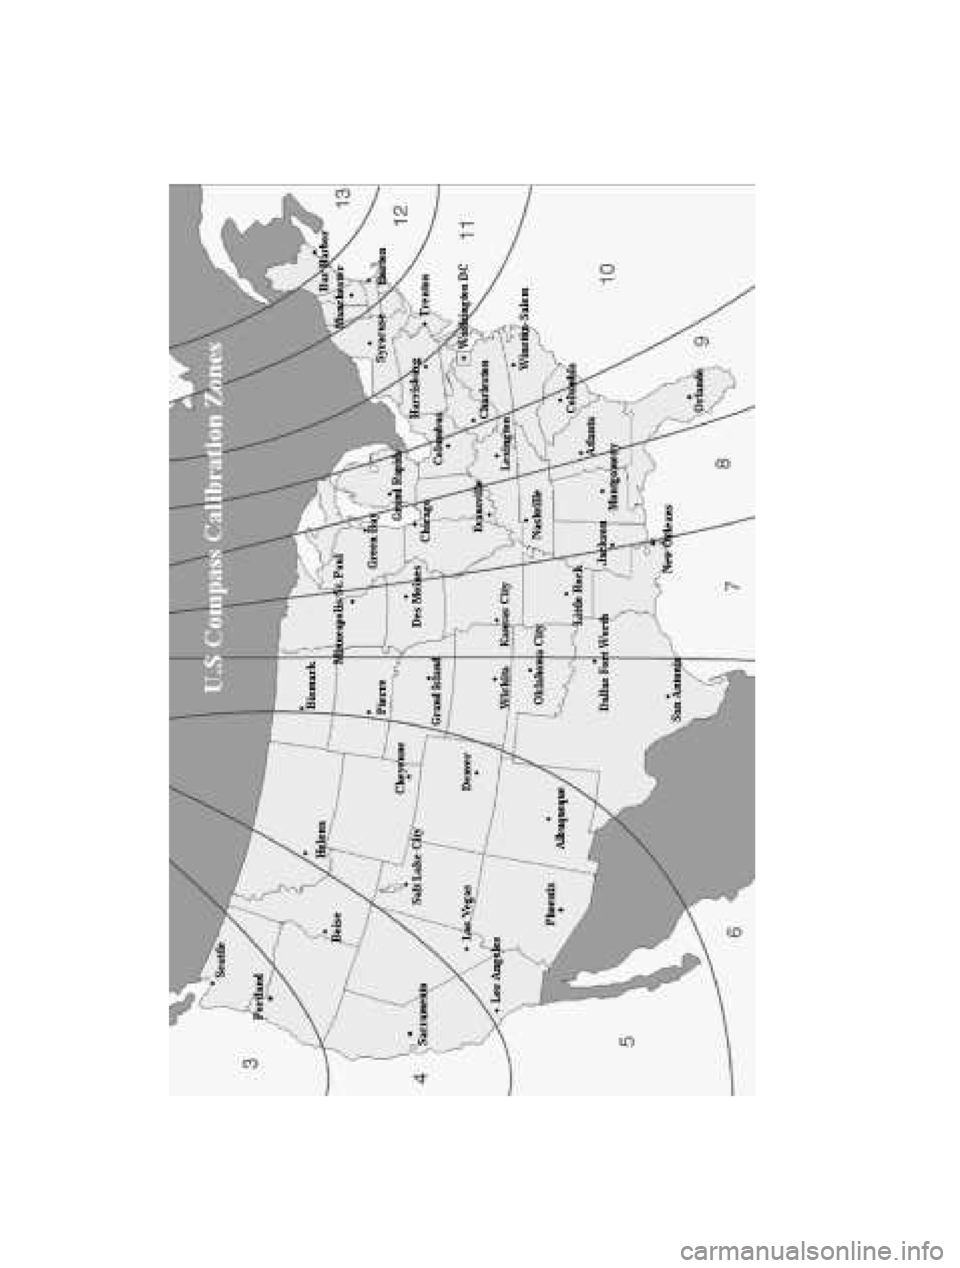
1. The zone setting is fac tory p reset to Zone 8. Ref er to the “Com-
p ass c alib ration zone ” map shown ab ove or one attac hed to the
next p ag e to verify that the c omp ass zone setting i s c orrec t for
your g eog rap hic al loc ation.
2. Press and hold the rig ht b utton for 3 sec ond s the n release, and the
word “ZONE ” will b riefly ap p ear and then the zone numb er will b e d is-
p layed .
3. Press the rig ht hand b utton rep eated ly to c yc le t he d isp lay throug h
all p ossib le zone setting s. Stop c yc ling when the c orrec t zone setting
for your loc ation is d isp layed .
4. Releasing the b utton for 3 sec ond s will exit the zone setting mod e.
Page 152 of 413
Page 153 of 413
Instruments and controls3-31
–
CONTINUED –
�
Outside mirrors �Convex mirror (Passenger side)
WARNING
Objects look smaller in a convex mirror and farther away than
when viewed in a flat mirror. Do not use the convex mirror tojudge the distance of vehicles behind you when changing lanes.
Use the inside mirror (or glance backwards) to determine theactual size and distance of objects that you view in convex mir-
ror.
� Adjusting mirrors
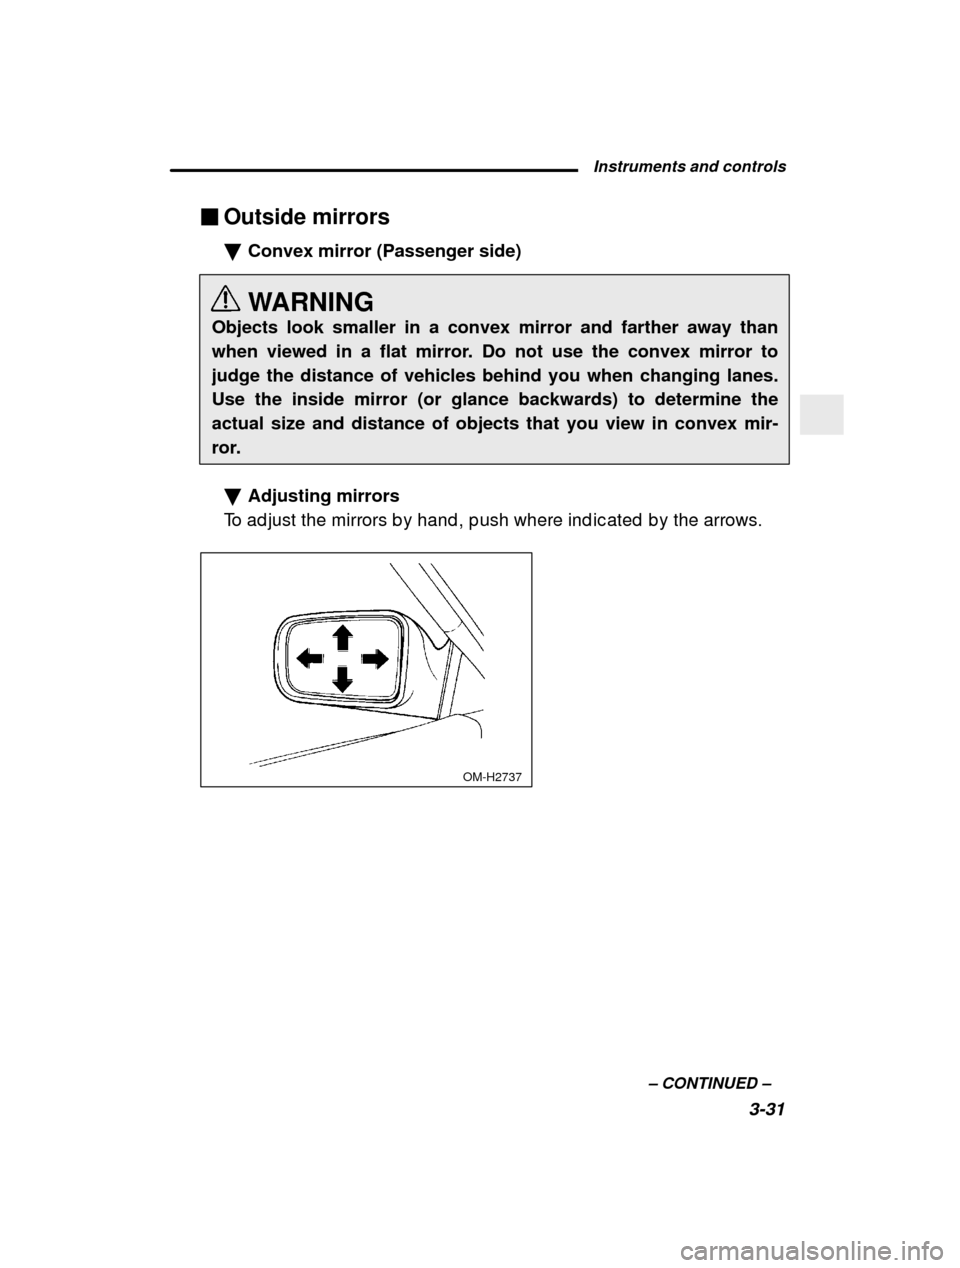
To ad just the mirrors b y hand , p ush where ind ic ated b y the arrows.
OM-H2737
Page 154 of 413
3-32�
Remote control mirror switch (if equipped)
The remote c ontrol mirrors op erate only when the ig nition switc h is in
the “ON ” or “ACC ” p osition.
HB4004BB
1. Press either end of the selec tion switc h, “L ” for the left, “R ” for the
rig ht.
2. Move the d irec tion c ontrol switc h in the d irec tio n you want to move
the mirror.
3. Return the selec tion switc h to the neutral p ositi on to p revent
unintentional op eration.
The mirrors c an also b e ad justed manually. � Outside mirror defogger (if equipped)
CAUTION
To prevent the battery from being discharged, do not operate the
defogger continuously for any longer than necessary.
The outsid e mirror d efog g er op erates only when the ig nition switc h is
in the “ON ” or “ACC ” p osition.
Page 155 of 413
Instruments and controls3-33
–
CONTINUED –
HB4004CB
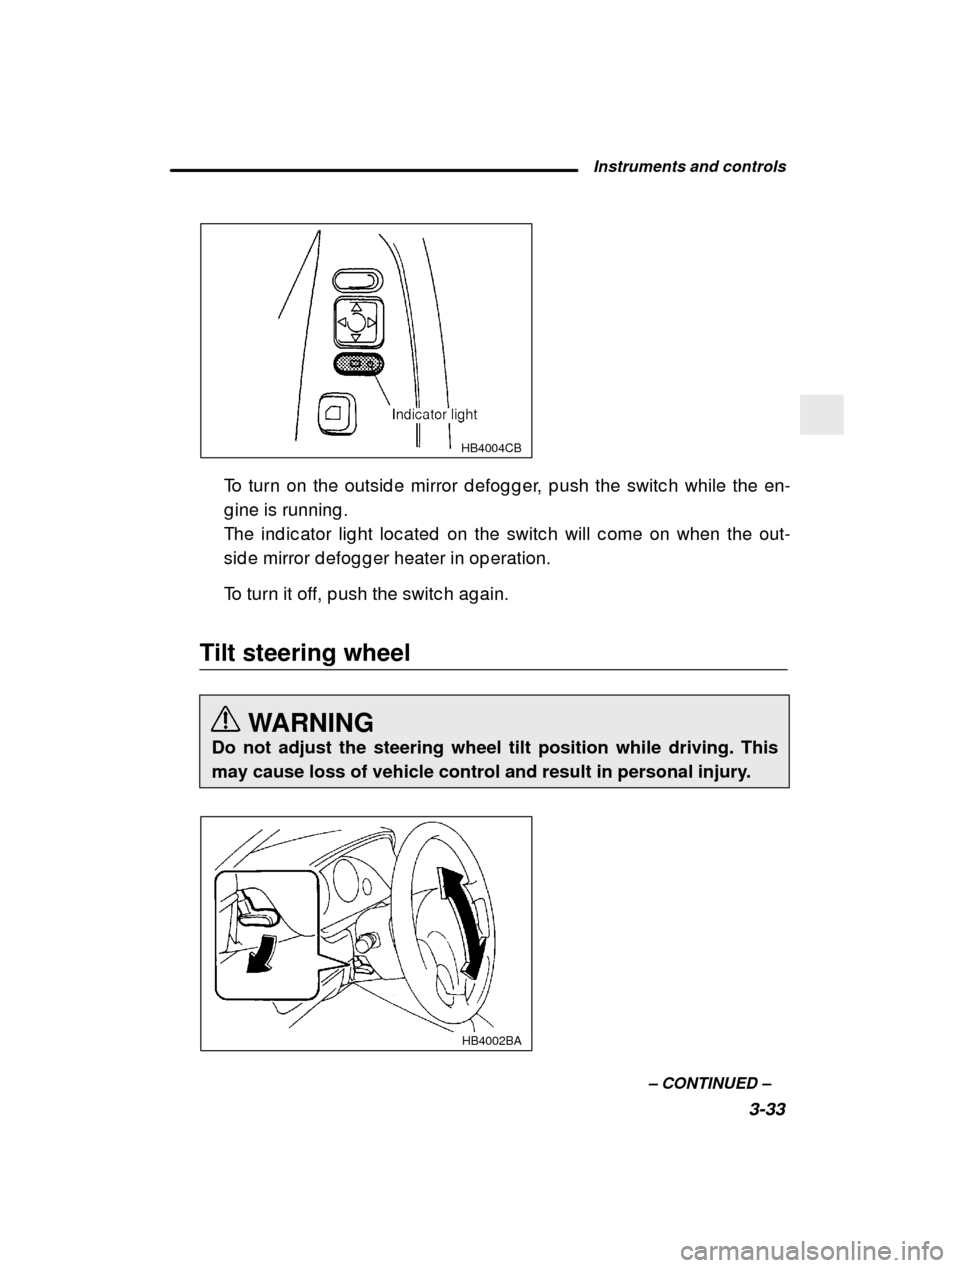
To turn on the outsid e mirror d efog g er, p ush the sw itc h while the en-
g ine is running .
The ind ic ator lig ht loc ated on the switc h will c ome on when the out-
sid e mirror d efog g er heater in op eration.
To turn it off, p ush the switc h ag ain.
Tilt steering wheel
WARNING
Do not adjust the steering wheel tilt position while driving. This
may cause loss of vehicle control and result in personal injury.
HB4002BA
Page 156 of 413
3-341. Ad just the seat p osition. Refer to the
“Front seat ” sec tion (c hap ter 1).
2. Pull the tilt loc k lever d own.
3. Move the steering wheel to the d esired level.
4. Push the lever up to loc k the steering wheel in p lac e.
5. Make sure that the steering wheel is sec urely loc ked b y moving it up
and d own.
Horn
OM-H0440
To sound the horn, p ush the horn p ad .
Page 157 of 413
4
Climate control
Ventilator4-2
. . . . . . . . . . . . . . . . . . . . . . . . . . . . . . . . . . . . . . . . . . . . . . . . . . . . . . . . . . . . . . . . . . . .
Heating and air conditioning system 4-4 . . . . . . . . . . . . . . . . . . . . . . . . . . . . . .
Heater operation 4-6
. . . . . . . . . . . . . . . . . . . . . . . . . . . . . . . . . . . . . . . . . . . . . . . . . . . . . . . . .
Air conditioner operation 4-10
. . . . . . . . . . . . . . . . . . . . . . . . . . . . . . . . . . . . . . . . . . . . . .
Operating tips for heater and air conditioner 4-11 . . . . . . . . . . . . . . . . . . .
Air filtration system (if equipped) 4-13 . . . . . . . . . . . . . . . . . . . . . . . . . . . . . . . . . . .
Page 158 of 413
4-2
Ventilator
�Center and side ventilators
HB5001BB
�Adjustable side defroster grille (for driver ’s side only)
HB5003BB
HB5002BB
Normal position
Side defroster grilleFin
Windshield defrost assist position
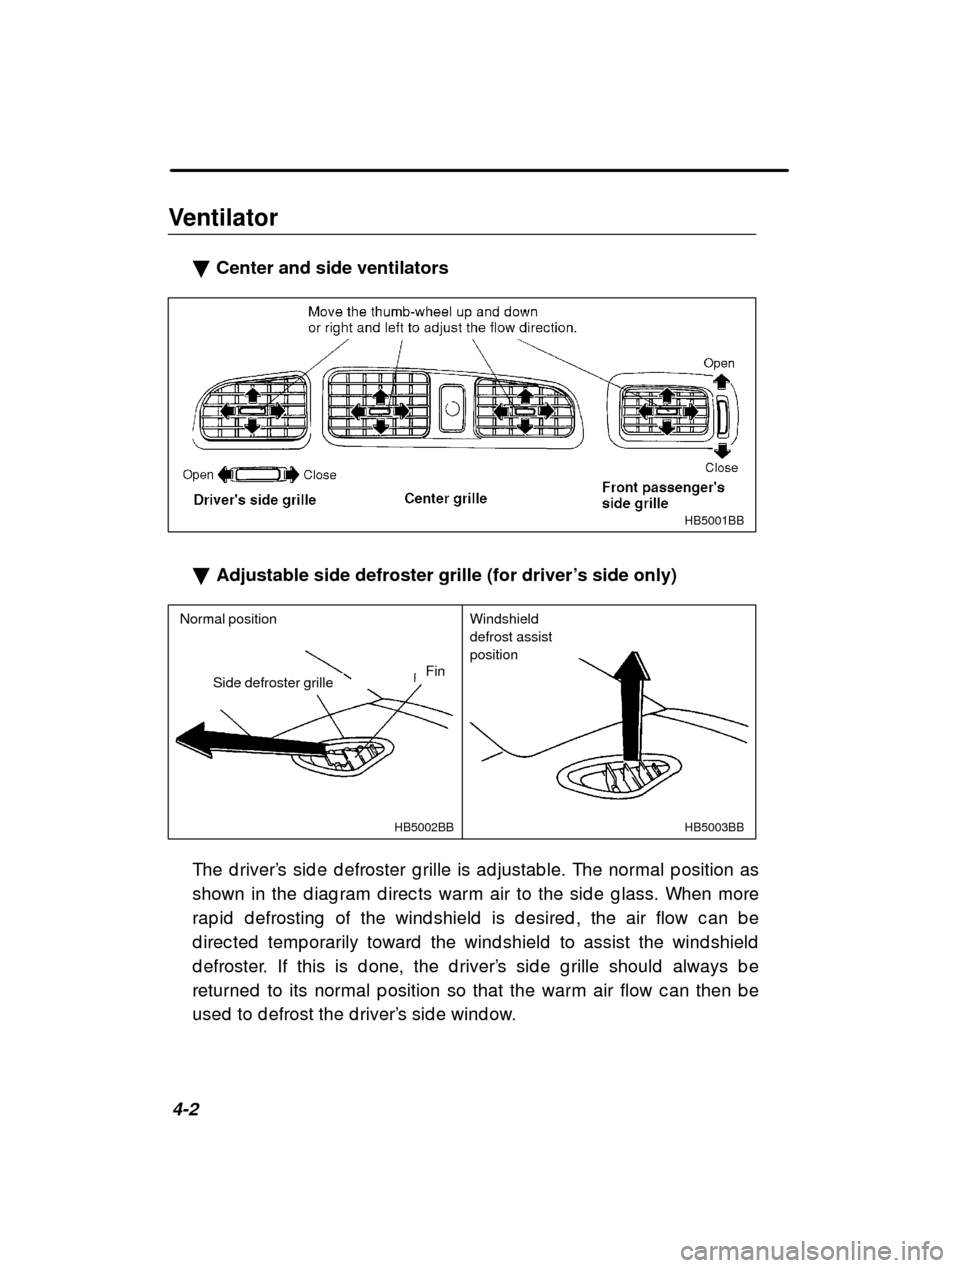
The d river ’s sid e d efroster g rille is ad justab le. The normal p osition as
shown in the d iag ram d irec ts warm air to the sid e g lass. When more
rap id d efrosting of the wind shield is d esired , the air flow c an b e
d irec ted temp orarily toward the wind shield to assis t the wind shield
d efroster. If this is d one, the d river ’s sid e g rille should always b e
returned to its normal p osition so that the warm ai r flow c an then b e
used to d efrost the d river ’s sid e wind ow.
Page 159 of 413
Climate control4-3
–
CONTINUED –
�
Air flow section
HB5006CA
HB5006BA
HB5006EA
HB5006DA
HB5006FA
Page 160 of 413
4-4
Heating and air conditioning system
�Control panel
HB5004BC
1. Temp erature c ontrol d ial
2. Fan sp eed c ontrol d ial
3. Air flow c ontrol d ial
4. Air c ond itioner b utton (if eq uip p ed )
5. Air inlet selec tion b utton
6. Rear wind ow d efog g er b utton (Refer to “Rear wind ow d efog g er ” in
c hap ter 3.) n Temperature control dial
This d ial reg ulates the temp erature of air flow fro m the air outlets over
a rang e from the b lue area (c ool) to red area (warm ).
n Fan speed control dial
The fan op erates only when the ig nition switc h is t urned to the “ON ”
p osition. The fan sp eed c ontrol d ial is used to sel ec t four fan sp eed s.
n Air flow control dial
This d ial has the following five p ositions:
: Air flows throug h the instrument p anel outlets.
: Air flows throug h the instrument p anel outlets and the foot
outlets.
Trending: heater, gas type, power steering, set clock, brake fluid, fuel, manual transmission


