engine SUBARU LEGACY 2005 4.G Owners Manual
[x] Cancel search | Manufacturer: SUBARU, Model Year: 2005, Model line: LEGACY, Model: SUBARU LEGACY 2005 4.GPages: 627, PDF Size: 6.42 MB
Page 425 of 627
8-12
Driving tips
Winter driving !
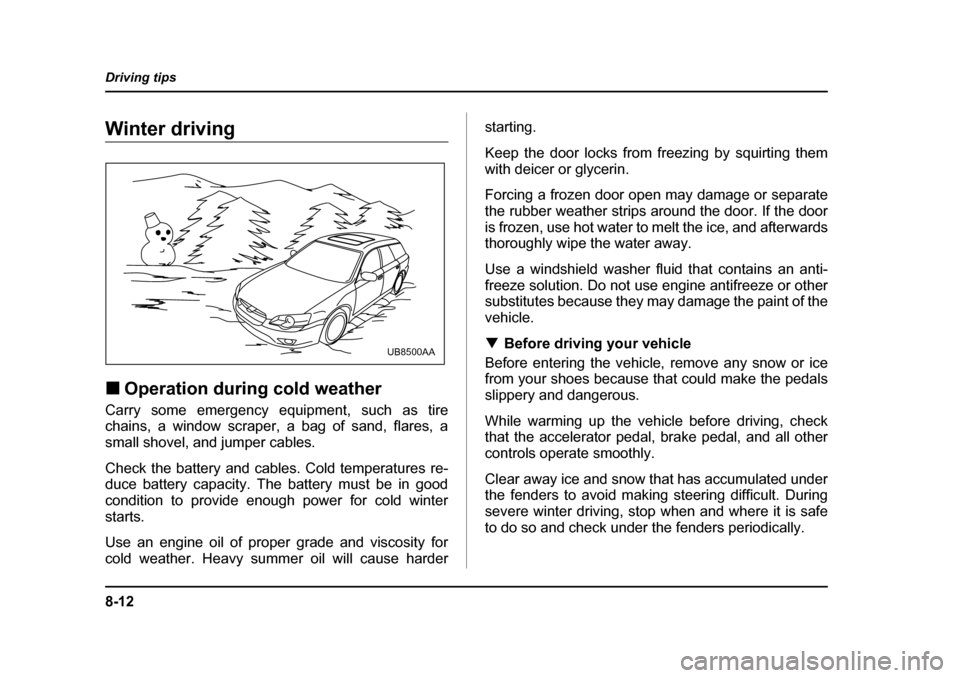
Operation during cold weather
Carry some emergency equipment, such as tire
chains, a window scraper, a bag of sand, flares, a
small shovel, and jumper cables.
Check the battery and cables. Cold temperatures re-
duce battery capacity. The battery must be in good
condition to provide enough power for cold winterstarts.
Use an engine oil of proper grade and viscosity for
cold weather. Heavy summer oil will cause harder starting.
Keep the door locks from freezing by squirting them
with deicer or glycerin.
Forcing a frozen door open may damage or separate
the rubber weather strips around the door. If the door
is frozen, use hot water to melt the ice, and afterwards
thoroughly wipe the water away.
Use a windshield washer fluid that contains an anti-
freeze solution. Do not use engine antifreeze or other
substitutes because they may damage the paint of the vehicle. !
Before driving your vehicle
Before entering the vehicle, remove any snow or ice
from your shoes because that could make the pedals
slippery and dangerous.
While warming up the vehicle before driving, check
that the accelerator pedal, brake pedal, and all other
controls operate smoothly.
Clear away ice and snow that has accumulated under
the fenders to avoid making steering difficult. During
severe winter driving, stop when and where it is safe
to do so and check under the fenders periodically.
UB8500AA
Page 426 of 627
8-13
Driving tips
– CONTINUED –
!Parking in cold weather
Snow can trap dangerous exhaust gases under
your vehicle. Keep snow clear of the exhaust
pipe and from around your vehicle if you park
the vehicle in snow with the engine running.
Do not use the parking brake when parking for long
periods in cold weather since it could freeze in that po-
sition. Instead, observe the following:
1. Place the shift lever in “1” or “R” for manual trans-
mission vehicles, and in “P” for automatic transmissionvehicles.
2. Use tire stops under the tires to prevent the vehicle
from moving.
When the vehicle is parked in snow or when it snows,
raise the wiper blades off the glass to prevent damage to them.
When the vehicle has been left parked after use on
roads heavily covered with snow, or has been left
parked during a snowstorm, icing may develop on the
brake system, which could cause poor braking action.
Check for snow or ice buildup on the suspension, disc
brakes and brake hoses underneath the vehicle. If there is caked snow or ice, remove it, being careful
not to damage the disc brakes and brake hoses andABS harness. !
Refueling in cold weather
To help prevent moisture from forming in the fuel sys-
tem and the risk of its freezing, use of an antifreeze ad-
ditive in the fuel tank is recommended during cold
weather.
Use only additives that are specifically designed for
this purpose. When an antifreeze additive is used, its
effect lasts longer if the tank is refilled whenever the
fuel level reaches half empty.
If your SUBARU is not going to be used for an extend-
ed period, it is best to have the fuel tank filled to capac- ity. ! Driving on snowy and icy roads
Do not use the cruise control on slippery roads
such as snowy or icy roads. This may cause
loss of vehicle control.
To prevent skidding and slipping, avoid sudden brak-
Page 427 of 627

8-14
Driving tips
ing, abrupt acceleration, high-speed driving, and
sharp turning when driving on snowy or icy roads.
Always maintain ample distance between your vehicle
and the vehicle ahead of you to avoid the need for sud-
den braking.
To supplement the foot brake, use the engine brake
effectively to control the vehicle speed. (Shift into a
lower gear when necessary.)
Avoid shifting down abruptly. Such behavior can
cause the wheels to lock, possibly leading to loss of
vehicle control.
An anti-lock brake system (ABS) enhances your vehi-
cle’s braking performance on snowy and icy roads.
Refer to the “ABS (Anti-lock Brake System)” and “Ve-
hicle Dynamics Control system (if equipped)” section
in chapter 7 for information on braking on slippery sur- faces. !
Wiper operation when snowing
Before driving in cold weather, make sure the wiper
blades are not frozen to the windshield or rear window.
If the wiper blades are frozen to the windshield or rear
window, use the defroster with the airflow control but-
ton/dial in the “ ” position and the temperature
control dial set for maximum warmth until the wiper
blades are completely thawed out. If your vehicle is
equipped with a wiper deicer, it is helpful to thaw the windshield wiper blades. To thaw out the rear wiper
blade, use the rear window defogger.
When driving in snow, if frozen snow starts to stick on
the surface of the windshield despite wiper operation,
use the defroster with the airflow control button/dial in
“ ” and the temperature control dial set for maxi-
mum warmth. After the windshield gets warmed
enough to melt the frozen snow on it, wash it away us-
ing the windshield washer.
Snow stuck on the wiper arm prevents the wiper from
working effectively. If snow is stuck on the wiper arm,
pull off the road to a safe place, then remove it. If you
stop the vehicle at road side, use the hazard warning
flasher to alert other drivers.
We recommend use of non-freezing type wiper blades
(winter blades) during the seasons you could have
snow and sub-zero temperatures. Blades of this type
give superior wiping performance in snowy conditions.
Be sure to use blades that are suitable for your vehi- cle. !
Corrosion protection
Refer to the “Corrosion protection” section (chapter
10).
Page 430 of 627
8-17
Driving tips
– CONTINUED –
!Tire chains
Tire chains cannot be used on tires listed below
because of lack of clearance between the tires
and vehicle body. "2.5-liter non-turbo models (except OUT-
BACK): P205/55R16 tires " 2.5-liter turbo models (except OUTBACK):
215/45ZR17 tires " 2.5-liter non-turbo models (OUTBACK): P225/
60R16 tires" 2.5-liter turbo and 3.0-liter models (OUT-
BACK): P225/55R17 tires " 2.5-liter non-turbo and 3.0-liter models (OUT-
BACK): P225/60R16 winter (snow) tires " 2.5-liter non-turbo and 3.0-liter models (OUT-
BACK): P215/60R16 winter (snow) tires " 2.5-liter turbo and 3.0-liter models (OUT-
BACK): P215/55R17 winter (snow) tires
Driving on snowy grades or icy roads may require the
use of tire chains, in which case put the chains on the
front wheels only. Use only SAE class S type chains
that are of the correct size for your tires so as not to
damage the vehicle body or suspension. When driving with tire chains, drive at speeds below
19 mph (30 km/h). When a temporary spare tire is on
a front wheel, replace the temporary spare tire with the
rear tire on the same side of the vehicle, and then fit
chains on the front tires.
Always use the utmost care when driving with tire
chains – overconfidence because you are driving with
tire chains could easily lead to a serious accident. !
Rocking the vehicle
If you must rock the vehicle to free it from snow, sand,
or mud, depress the accelerator pedal slightly and
move the selector lever back and forth between “D”
and “R” repeatedly. Do not race the engine. For the
best possible traction, avoid spinning the wheels when
trying to free the vehicle.
When the road surface is extremely slippery, you can
obtain better traction by starting the vehicle with the
transmission in 2nd than 1st (both for MT and AT).
Refer to the “Automatic transmission” section in chap-
ter 7 for information on holding the transmission in 2nd
position.
Page 444 of 627
8-31
Driving tips
– CONTINUED –
Trailer towing
Your vehicle is designed and intended to be used pri-
marily as a passenger-carrying vehicle. Towing a trail-
er puts additional loads on your vehicle’s engine, driv-
etrain, brakes, tires and suspension and has an ad-
verse effect on fuel economy.
If you do decide to tow a trailer, your safety and satis-
faction depend upon proper use of correct equipment
and cautious operation of your vehicle. Seek the ad-
vice of your SUBARU dealer to assist you in purchas-
ing a hitch and other necessary towing equipment ap-
propriate for your vehicle. In addition, be sure to follow
the instructions on correct installation and use provid-
ed by the trailer and other towing equipment manufac-
turers.
SUBARU assumes no responsibility for injuries or ve-
hicle damage that result from trailer towing equipment,
or from any errors or omissions in the instructions ac-
companying such equipment or for your failure to fol-
low the proper instructions. !Warranties and maintenance
SUBARU warranties do not apply to vehicle damage
or malfunction caused by trailer towing. If you use your
vehicle to tow a trailer, more frequent maintenance will
be required due to the additional load. (Refer to “Main- tenance schedule under severe driving conditions” in
the “Warranty and Maintenance Booklet”.)
Under no circumstances should a trailer be towed with
a new vehicle or a vehicle with any new powertrain
component (engine, transmission, differential, wheel
bearings, etc.) for the first 1,000 miles (1,600 km) of
driving. !
Maximum load limits
Never exceed the maximum load limits ex-
plained below. Exceeding the maximum load
limits could cause personal injury and/or vehi-
cle damage.
"Adequate size trailer brakes are required
when the trailer and its cargo exceed 1,000 lbs
(453 kg) total weight. " Before towing a trailer, check the trailer total
weight, GVW, GAWs and tongue load. Make
sure the load and its distribution in your vehicle
Page 455 of 627

8-42
Driving tips
!
Driving on grades
" Before going down a steep hill, slow down and shift
into lower gear (if necessary, use 1st gear) in order to
utilize the engine braking effect and prevent overheat-
ing of your vehicle’s brakes. Do not make sudden
downshifts." When driving uphill in hot weather, the air condition-
er may turn off automatically to protect the engine from
overheating." When driving uphill in hot weather, pay attention to
the water temperature gauge pointer (for all vehicles)
and AT OIL TEMP warning light (for AT vehicles) since
the engine and transmission are relatively prone to
overheating under these conditions. If the water tem-
perature gauge pointer approaches the OVERHEAT
zone or the AT OIL TEMP warning light illuminates,
immediately switch off the air conditioner and stop the
vehicle at the nearest safe place. Refer to the “Engine
overheating” section in chapter 9, and “Warning and
indicator lights” section in chapter 3.
NOTE
With AT vehicles, the temperature of engine cool-
ant is less likely to rise to the OVERHEAT zone in
the “D” position than in the manual mode position. " If your vehicle has an automatic transmission, avoid
using the accelerator pedal to stay stationary on an uphill slope instead of using the parking brake or foot
brake. That may cause the transmission fluid to over-
heat. !
Parking on a grade
Always block the wheels under both vehicle and trailer
when parking. Apply the parking brake firmly. You
should not park on a hill or slope. But if parking on a
hill or slope cannot be avoided, you should take the
following steps:
1. Apply the brakes and hold the pedal down.
2. Have someone place wheel blocks under both the
vehicle and trailer wheels.
3. When the wheel blocks are in place, release the
regular brakes slowly until the blocks absorb the load.
4. Apply the regular brakes and then apply the park-
ing brake; slowly release the regular brakes.
5. Shift into 1st or reverse gear (manual transmission)
or “P” (automatic transmission) and shut off the en-
gine.
Page 456 of 627

9-1
9
In case of emergency
If you park your vehicle in an emergency .. 9-2
Temporary spare tire .................................... 9-3
Flat tires ......................................................... 9-5 Changing a flat tire ........................................... 9-5
Tire pressure monitoring system (TPMS) (if equipped) .................................................... 9-16
Jump starting ................................................ 9-17 How to jump start ............................................. 9-18
Engine overheating ....................................... 9-20 If steam is coming from the engine compartment .................................................. 9-20
If no steam is coming from the engine compartment .................................................. 9-20
Towing ........................................................... 9-21 Towing and tie-down hooks ............................ 9-22
Using a flat-bed truck ....................................... 9-27
Towing with all wheels on the ground ............ 9-28
Rear gate – if the rear gate cannot be unlocked ..................................................... 9-29
Moonroof – if the moonroof cannot be closed ......................................................... 9-30
Maintenance tools ......................................... 9-33 Jack .................................................................... 9-33
Jack handle ....................................................... 9-34
Other maintenance tools .................................. 9-35
Page 459 of 627
9-4
In case of emergency
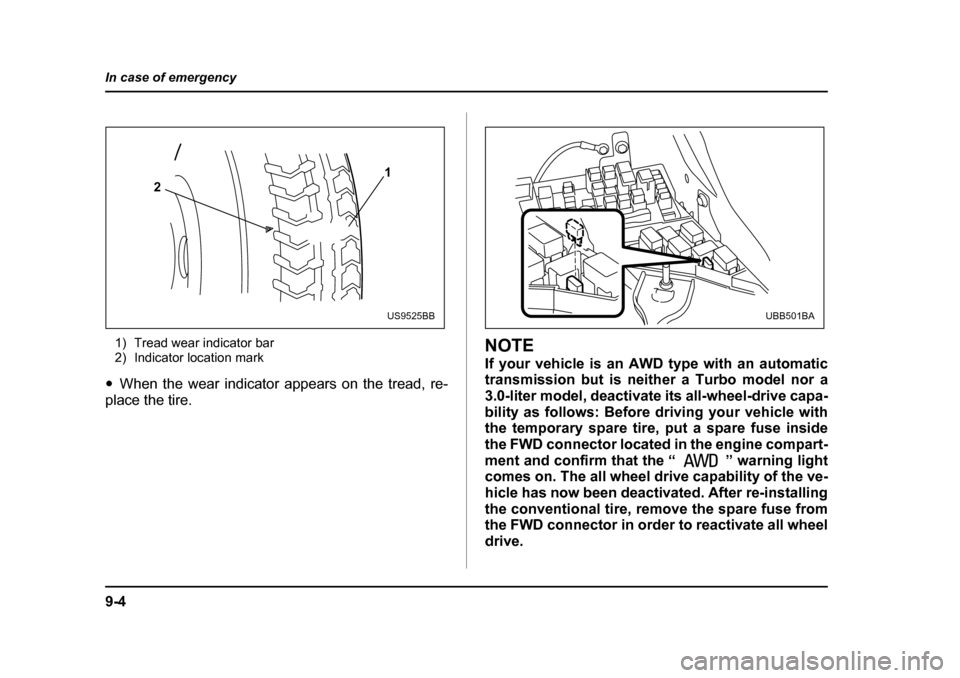
1) Tread wear indicator bar
2) Indicator location mark
" When the wear indicator appears on the tread, re-
place the tire.NOTE
If your vehicle is an AWD type with an automatic
transmission but is neither a Turbo model nor a
3.0-liter model, deactivate its all-wheel-drive capa-
bility as follows: Before driving your vehicle with
the temporary spare tire, put a spare fuse inside
the FWD connector located in the engine compart-
ment and confirm that the “ ” warning light
comes on. The all wheel drive capability of the ve-
hicle has now been deactivated. After re-installing
the conventional tire, remove the spare fuse from
the FWD connector in order to reactivate all wheel
drive.
1
2
US9525BBUBB501BA
Page 460 of 627
9-5
In case of emergency
– CONTINUED –
Flat tires
If you have a flat tire while driving, never brake sud-
denly; keep driving straight ahead while gradually re-
ducing speed. Then slowly pull off the road to a safe
place. !Changing a flat tire
"Do not jack up the vehicle on an incline or a
loose road surface. The jack can come out of
the jacking point or sink into the ground and
this can result in a severe accident." Use only the jack provided with your vehicle.
The jack supplied with the vehicle is designed
only for changing a tire. Never get under the ve-
hicle while supporting the vehicle with this jack. " Always turn the engine off before raising the
flat tire off the ground using the jack. Never
swing or push the vehicle supported with the
jack. The jack can come out of the jacking point
due to a jolt and this can result in a severe acci-
dent. 1. Park on a hard, level surface, whenever possible,
then stop the engine.
2. Set the parking brake securely and shift a manual
transmission vehicle in reverse or an automatic trans-
mission vehicle in the “P” (Park) position.
3. Turn on the hazard warning flasher and have ev-
eryone get out of the vehicle.
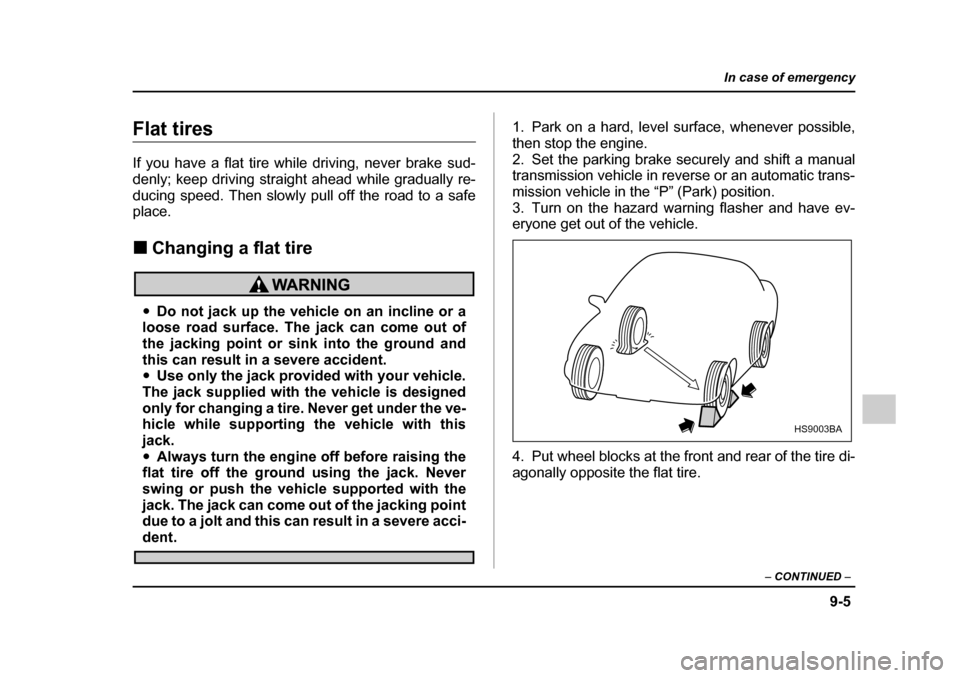
4. Put wheel blocks at the front and rear of the tire di-
agonally opposite the flat tire.
HS9003BA
Page 473 of 627

9-18
In case of emergency
Do not jump start unless cables in suitable con-
dition are available."
A running engine can be dangerous. Keep
your fingers, hands, clothing, hair and tools
away from the cooling fan, belts and any other
moving engine parts. Removing rings, watches
and ties is advisable. " Jump starting is dangerous if it is done incor-
rectly. If you are unsure about the proper proce-
dure for jump starting, consult a competent me-
chanic.
When your vehicle does not start due to a run down
(discharged) battery, the vehicle may be jump started
by connecting your battery to another battery (called
the booster battery) with jumper cables. ! How to jump start
1. Make sure the booster battery is 12 volts and the
negative terminal is grounded.
2. If the booster battery is in another vehicle, do not let
the two vehicles touch.
3. Turn off all unnecessary lights and accessories.
4. Connect the jumper cables exactly in the sequence
illustrated.